
TrueDialog Portal
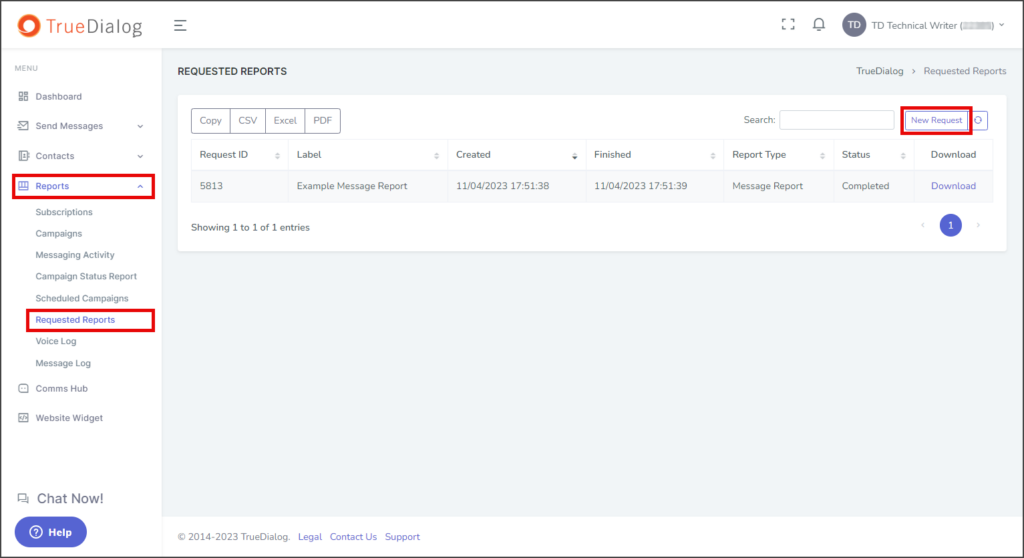
Reports > Requested Reports
This article will show you how to create and download a custom report. There are several types of reports, each with a specific set of fields and filters corresponding to the data type. All the reports are saved in CSV format.
Create New Report
- Expand Reports in the left sidebar and select Requested Reports.
- Click New Request to open a dialog to request a new report.

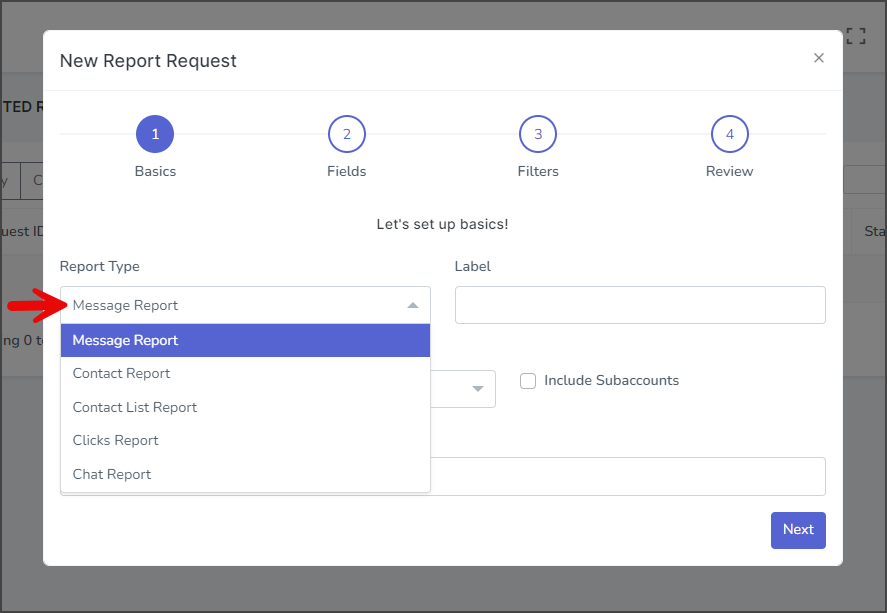
Basics Page
| Report Type | Description |
|---|---|
| Message Report | This report provides information on messages sent from the selected account. |
| Contact Report | This report provides information about all the contacts the selected account created. You can choose any contact attributes, including custom attributes, to be in the report. |
| Contact List Report | This report provides information about all contacts in a selected contact list. You can choose any contact attributes, including custom attributes, to be in the report. |
| Clicks Report | This report provides information about clicks on links sent to contacts using the TrueDialog link tracking. |
| Chat Report | This report provides information about chats with your contacts. |
- Click Report Type and select the type of report to create.
- Enter a name for the report in the Label textbox.
- Click Account to select the account to use for generating the report.
- Check Include Subaccounts to include any activity from subaccounts of the selected account.
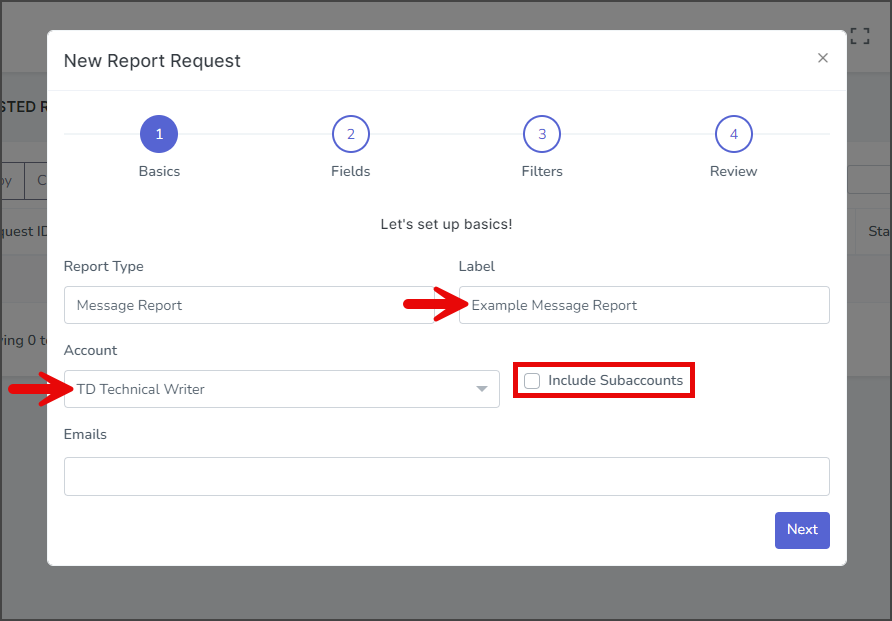
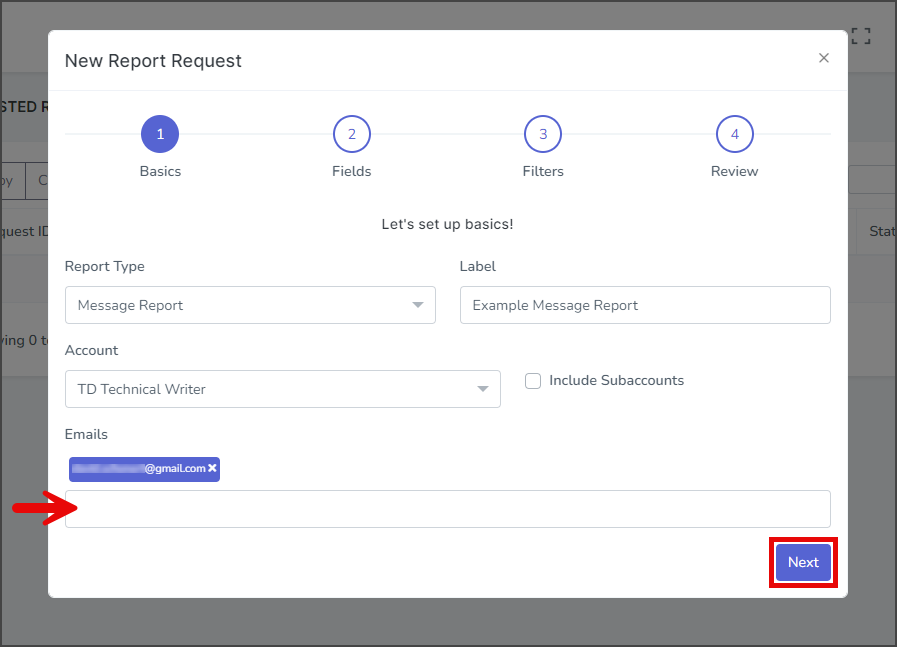
- Enter one or more email addresses in the Emails textbox to receive notification once the report has been generated. If the requested report is extensive, creating it may take some time.
- Click Next.
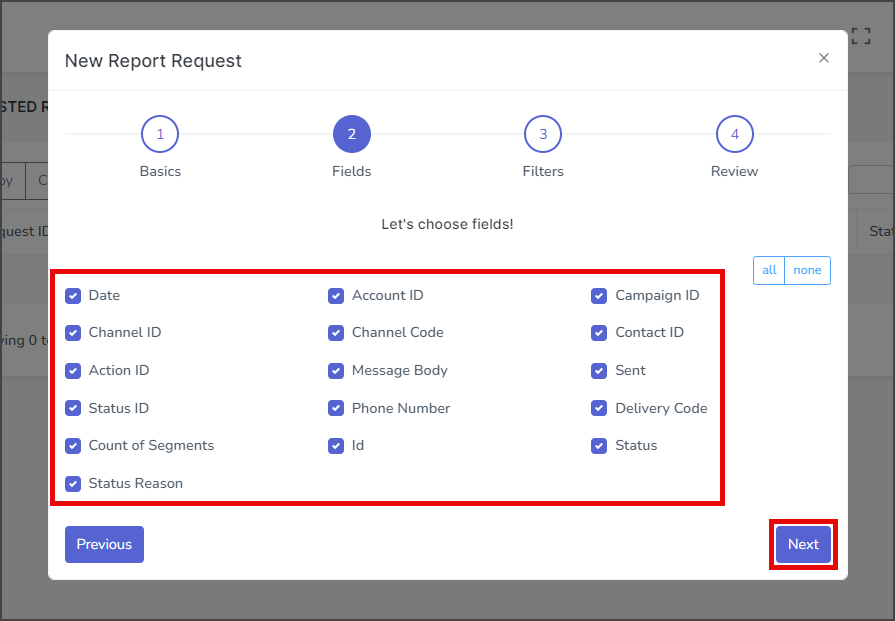
Fields Page
- On the Fields page, select any of the fields to be included in the report. Each type of report has a different set of fields to include that are specific to the kind of data in the report.
- Click Next.
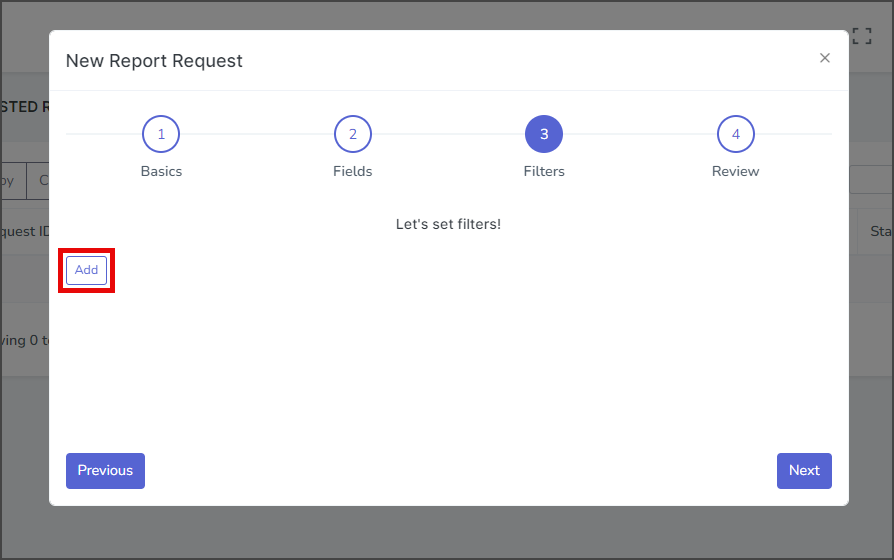
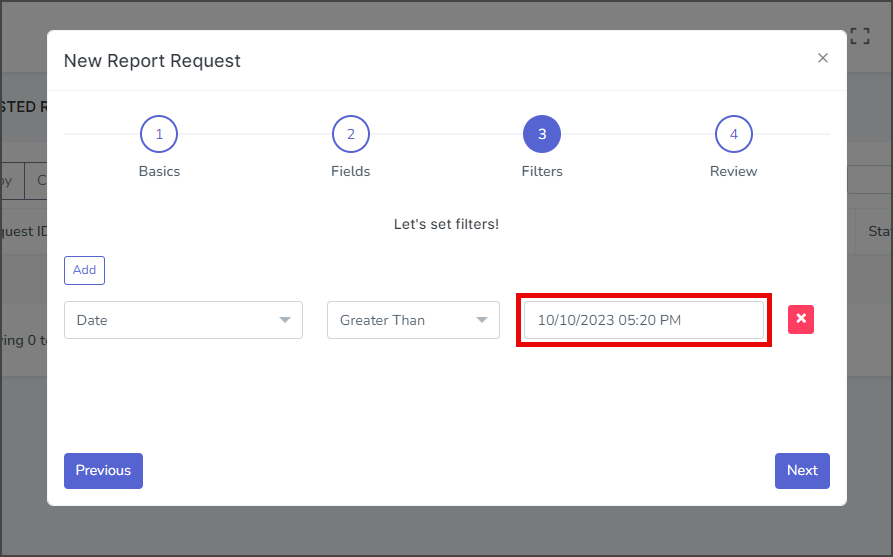
Filters Page
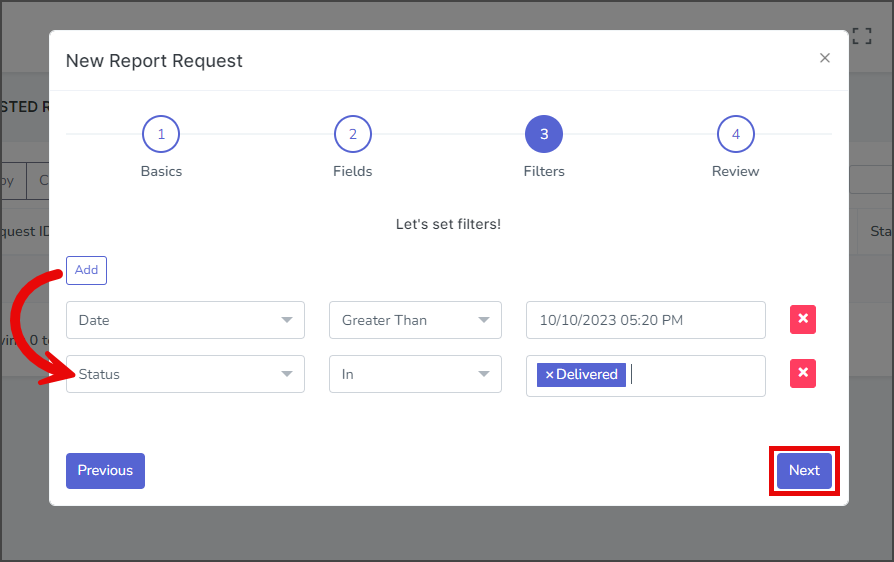
- To apply one or more filters to the information included in the report, click Add.
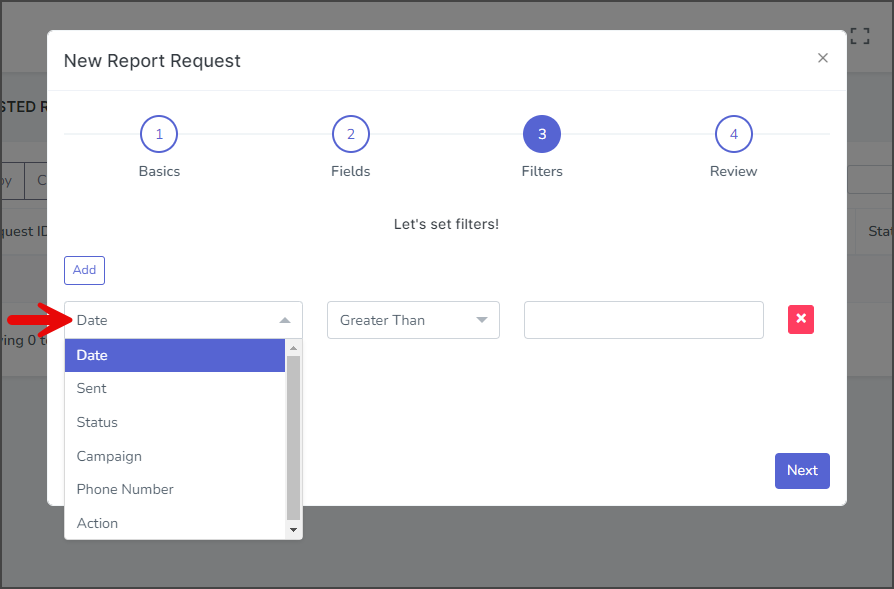
- In the first dropdown box, select the type of data to filter. Each type has its own set of operations and valid inputs.
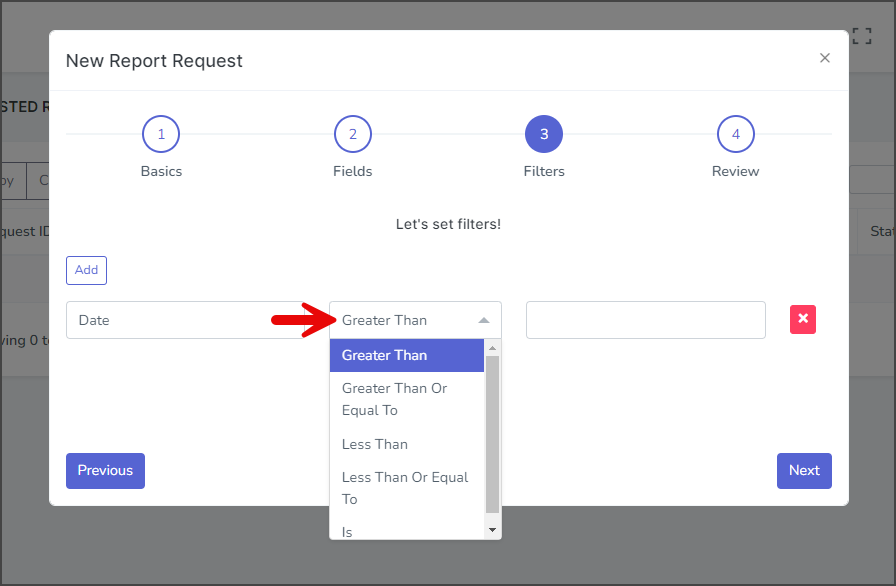
- In the second dropdown box, select the operation. Some data types only have one operation available.
- In the last box, enter the value to filter. Some data types provide a guide for entering valid values.
- These steps can be repeated to add as many filters as needed.
- In the first dropdown box, select the type of data to filter. Each type has its own set of operations and valid inputs.
- (Optional) Click Add to and another filter. Fill out the filter following the steps above.
- Click Next.
Review Page
- Verify that the report information is correct.
- Click Submit.
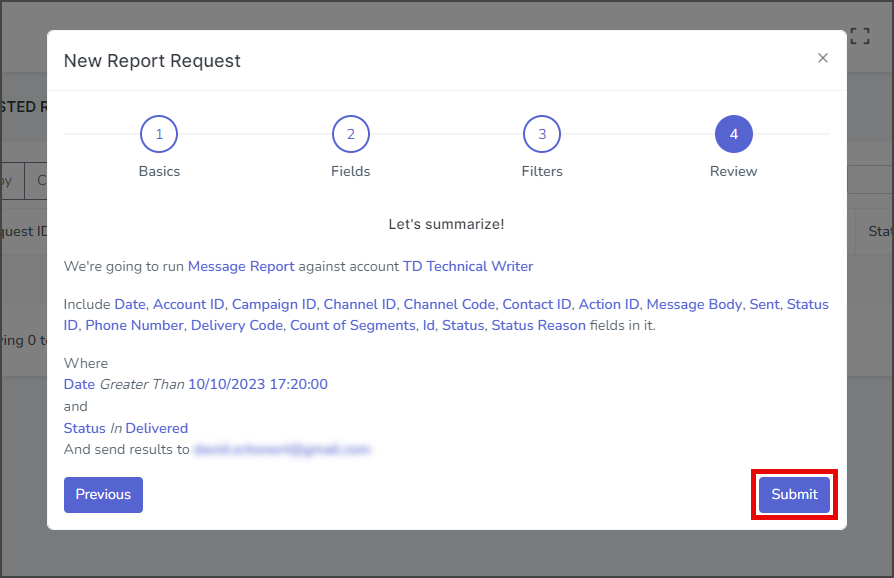
- After submitting the report, a success message will appear in the upper right corner.

Download Report
- After submission, the report Status will show Processing.
- Wait a moment, then press the Refresh icon to see if the Status has changed to Complete. For extensive reports, you can wait for an email to be sent when the report is ready.
- Once the report is Complete, click the Download link to download it.
- The report is delivered as a CSV file inside a zip file.
- Extract the report and open it with Microsoft Excel or the program of your choice.