TrueDialog Portal
Sending Messages > Campaigns
Once you have created a campaign, the next step is to send it out to a list of contacts, referred to here as pushing the campaign. There are three different timing options for pushing the campaign: Immediate, Scheduled, and Recurring. In this article, we will show you how to do a Scheduled push of a campaign. See the following articles for instructions on Immediate and Recurring pushes.
Aborting a scheduled push is done from the Reports > Scheduled Campaigns page. See the following article for instructions on aborting a scheduled campaign.
The instructions in this article apply to SMS, MMS, Survey, and Two-Way campaigns. See the instructions in the following articles for pushing Email, Text and Email, and Voice campaigns.
Create Push
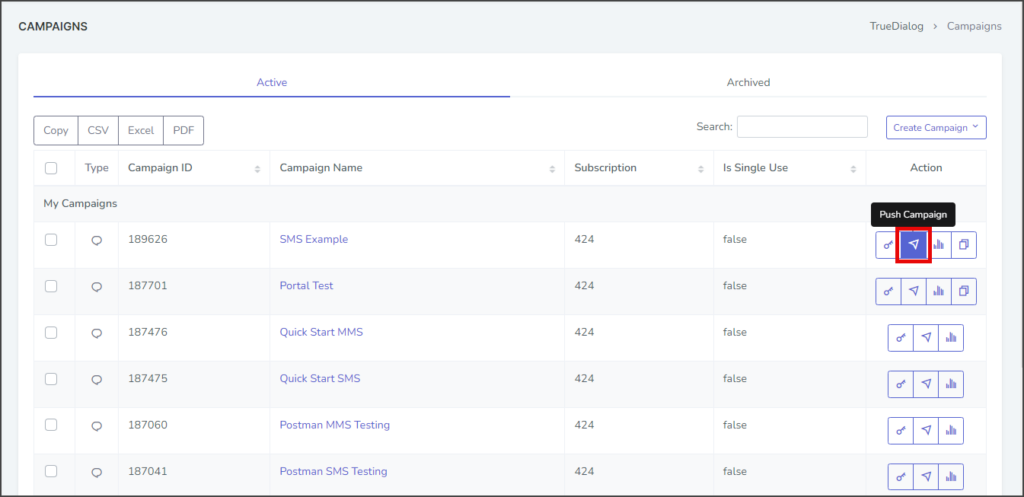
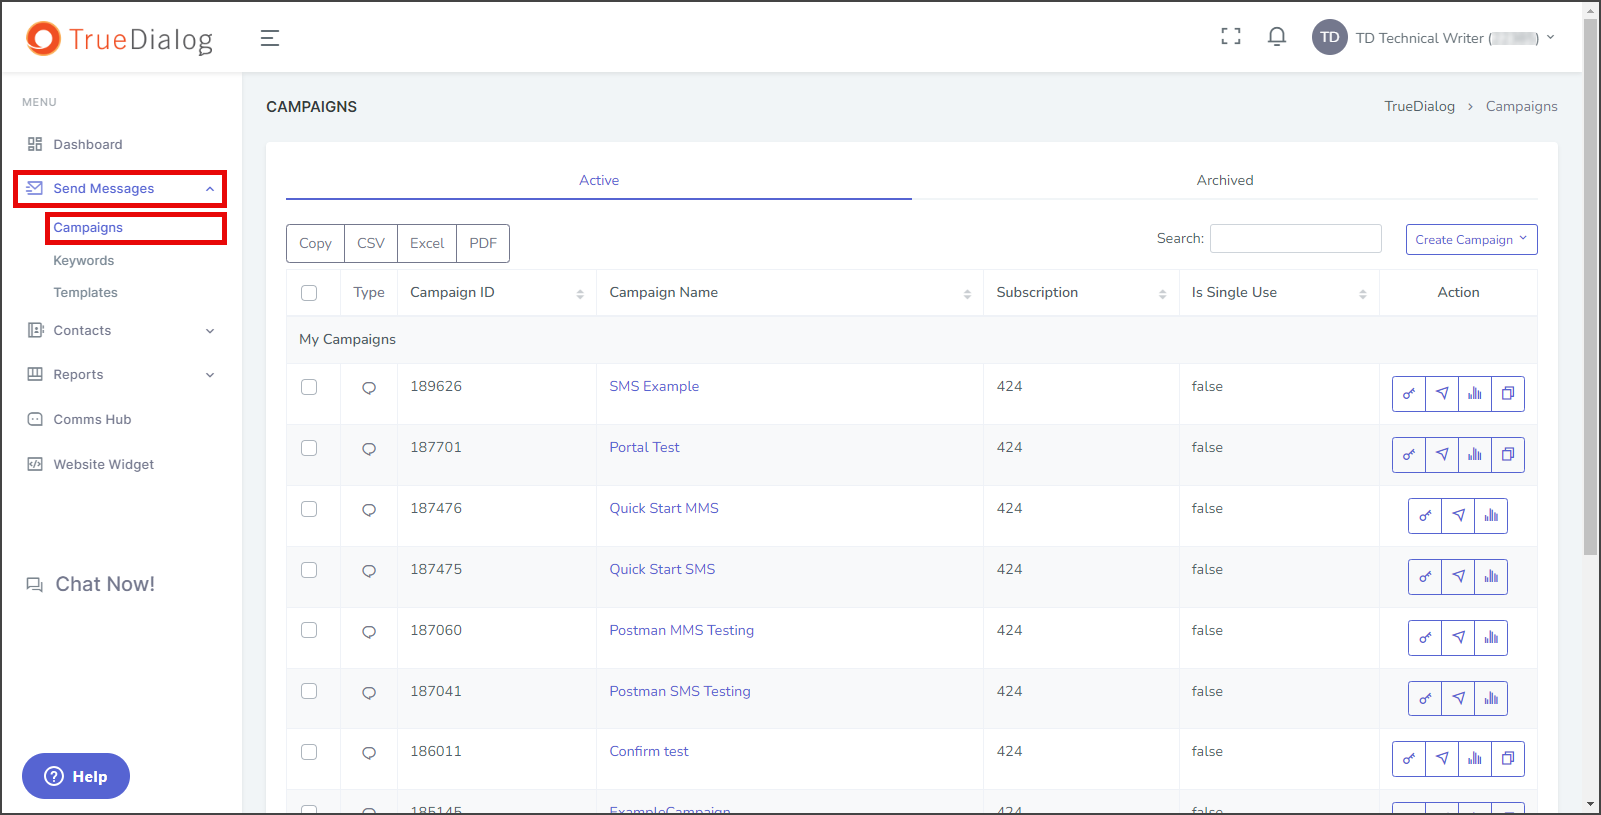
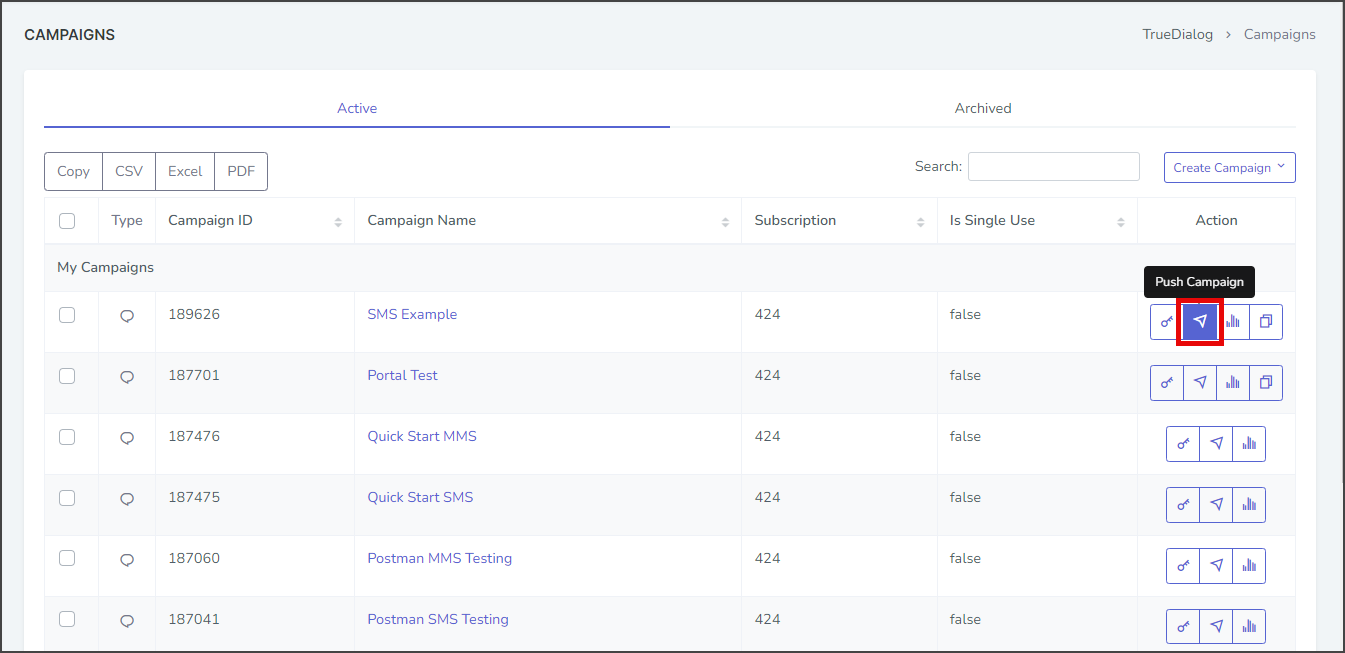
- Expand Send Messages in the left sidebar and select Campaigns.

- Click the arrow icon found in the action column of the campaign to open the dialog window for pushing the campaign.
Create Schedule
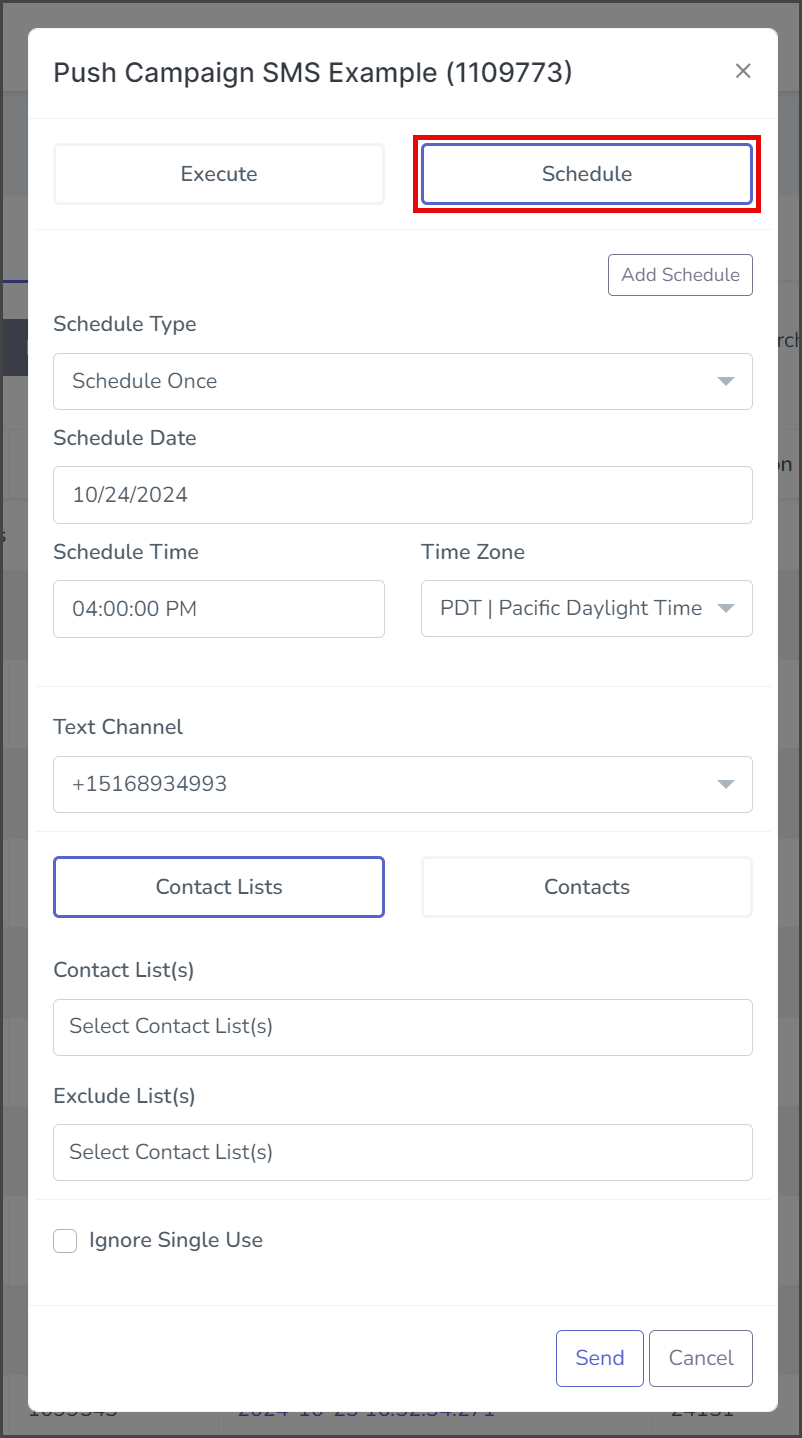
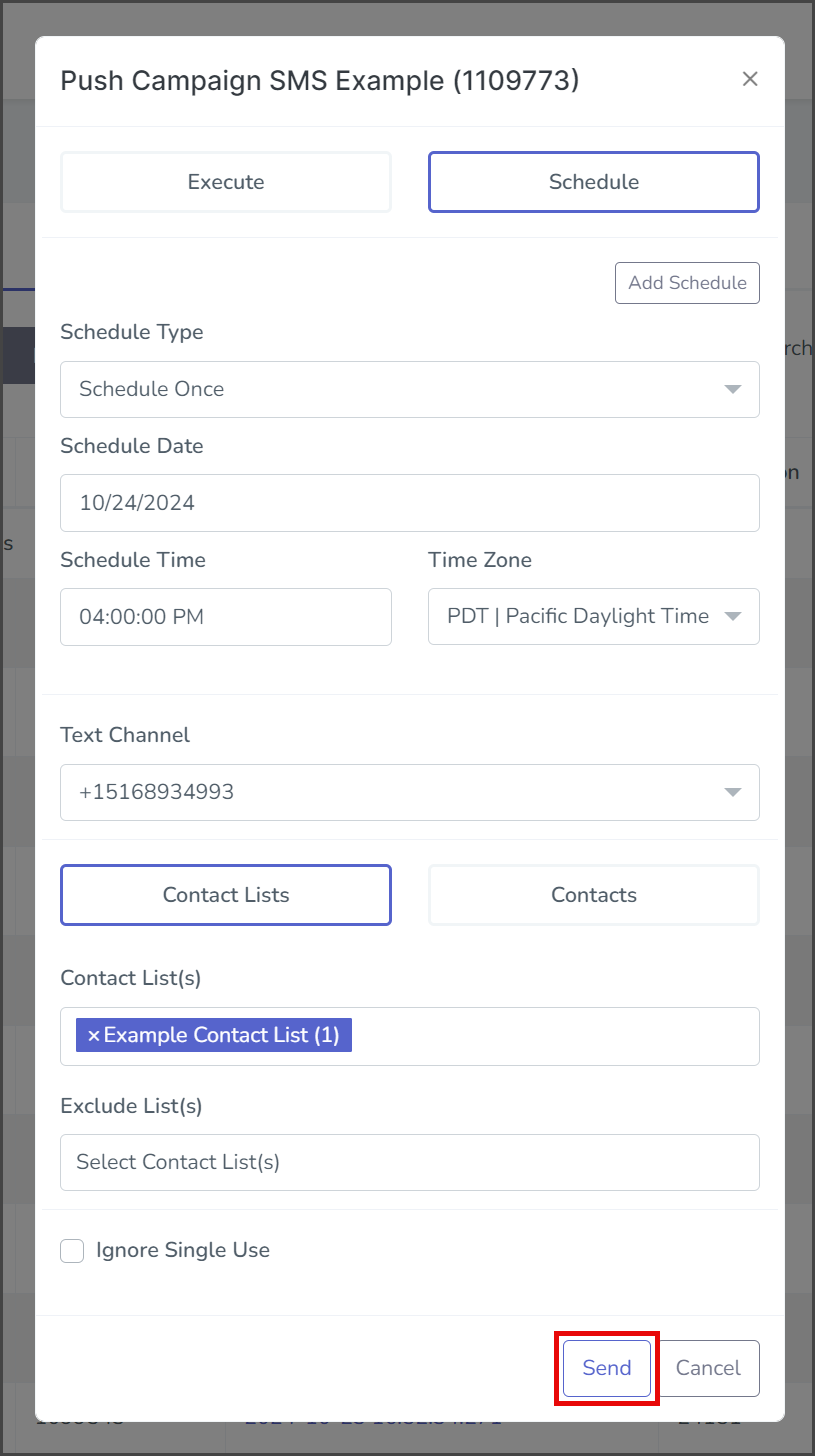
- Select Schedule.
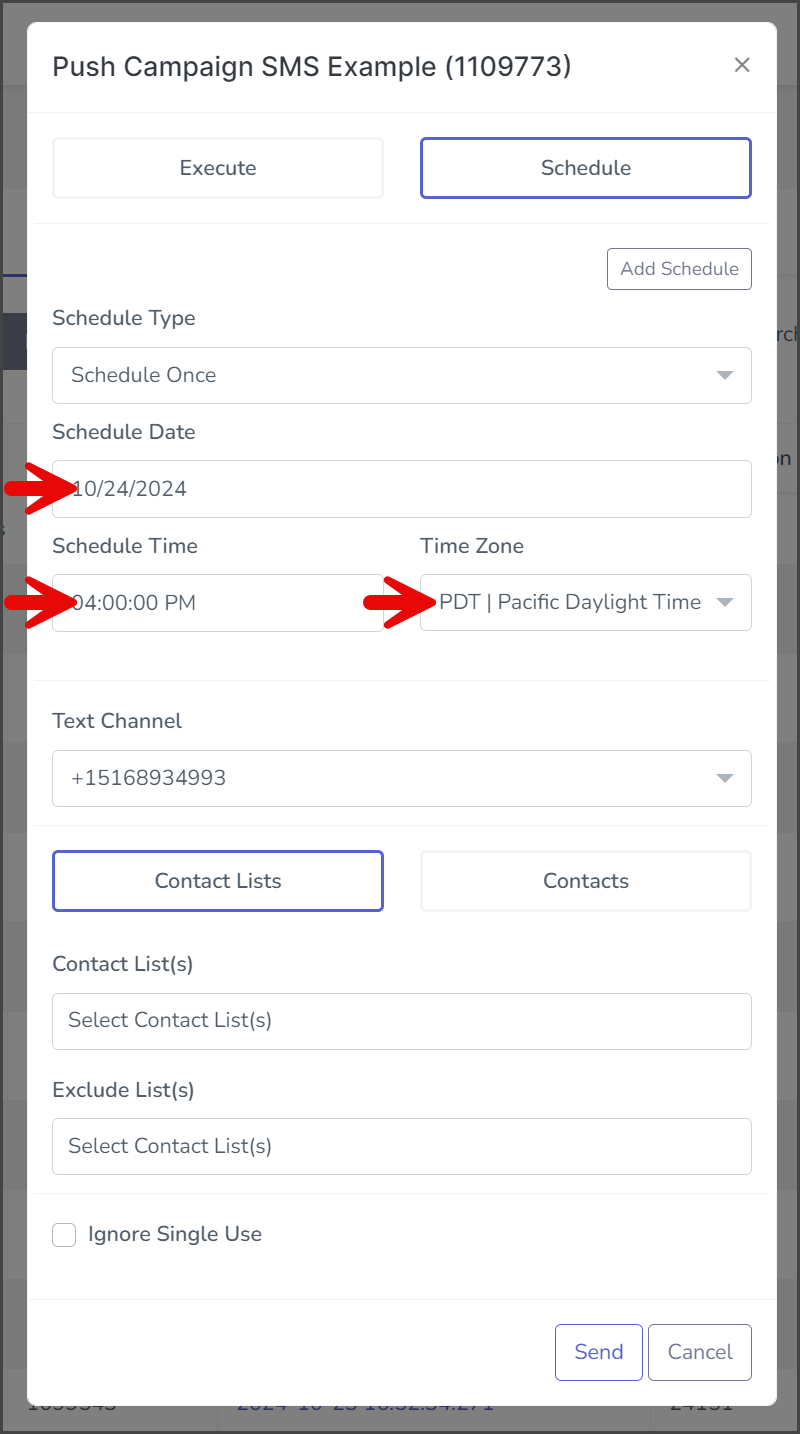
- Select Schedule Once from the Schedule Type dropdown. The campaign will be pushed only once at the scheduled date and time.

- Click the Schedule Date box and select a date from the calendar widget. This is the date when the campaign will be pushed.
- Click the Schedule Time box and select a time from the displayed time widget. This is the time on the scheduled date when the campaign will be sent.
- Click the Time Zone dropdown and select the time zone for this schedule.
- (Optional) Click the Add Schedule button to add as many schedules as needed for your campaign.
Text Channel
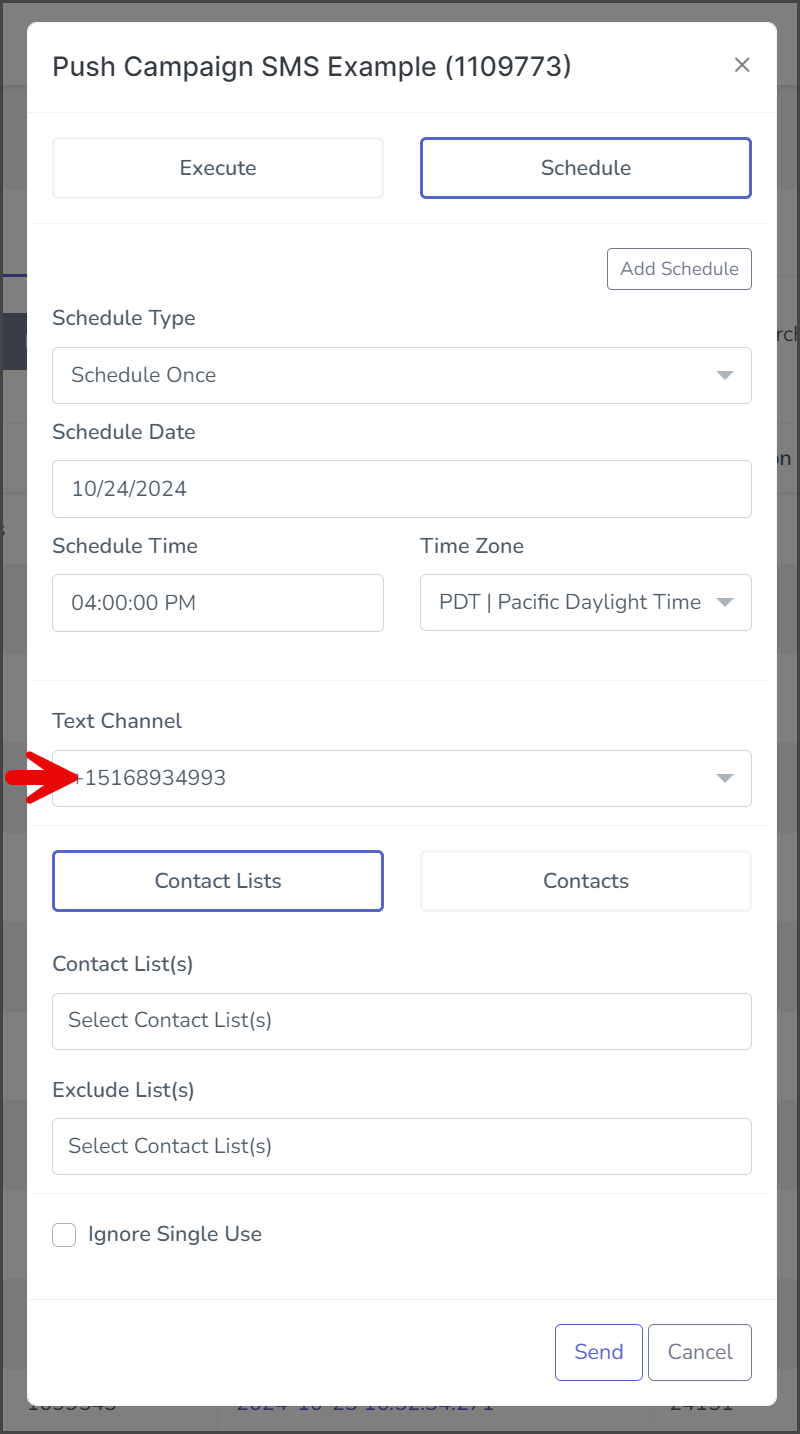
- Click the Text Channel dropdown and select the phone number from which the messages will be sent. The phone number can be a long code or a short code. You can use Round Robin or Round Robin by ID if sending from lower-level accounts. Round Robin by ID will be sent from a long code based on the contact record Assigned ID value.
Contacts
Select Contact Lists or Contacts to specify who will receive the message from the campaign. Expand the sections below for instructions specific to each option.
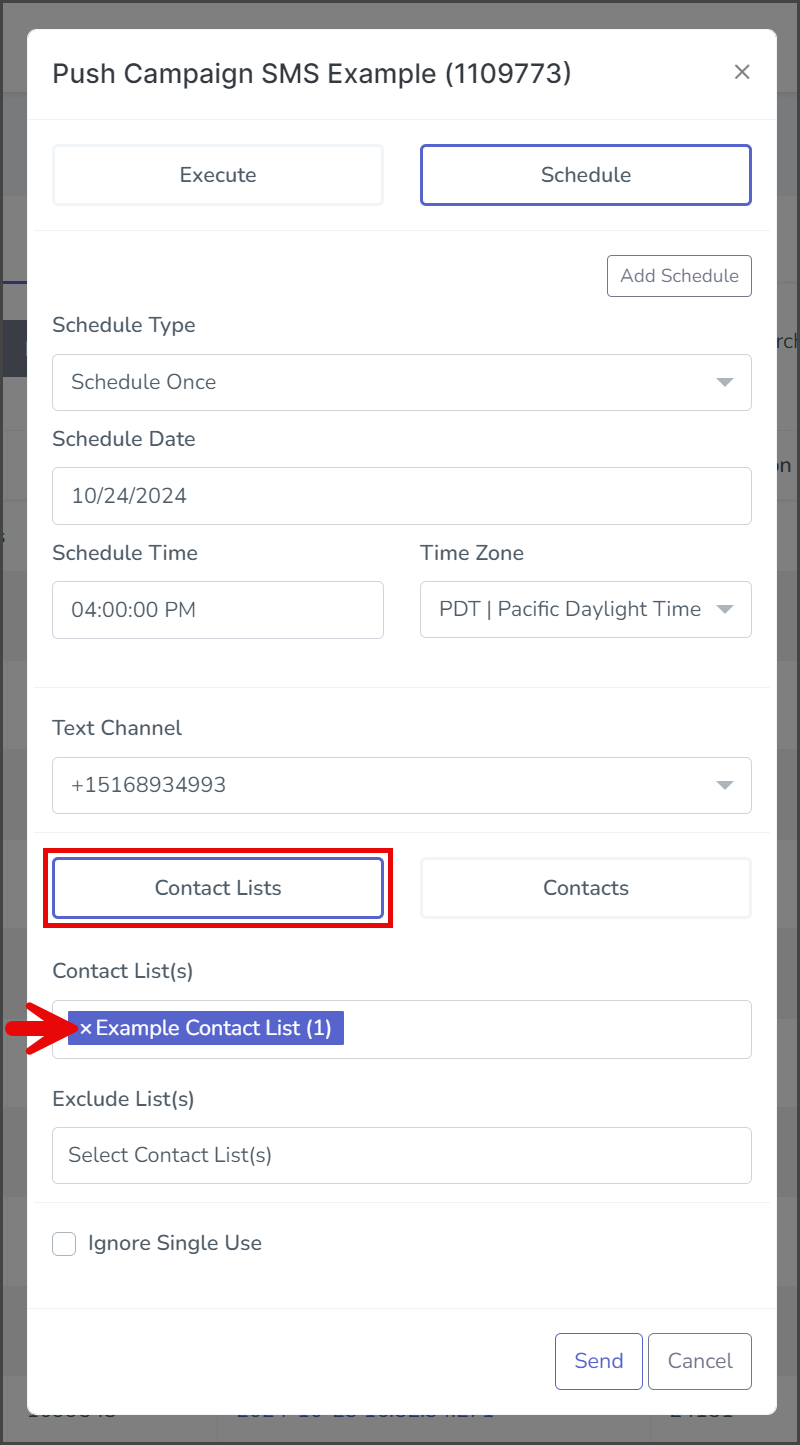
Contact Lists
- Click the Contact List(s) box to get a list of the available contact lists.
- Select one of the contact lists to add. Repeat these steps to add as many contact lists as required. Note: If a contact is in multiple lists, the system will only send a message to the contact once.
- If you want to exclude specific contacts, click the Exclude List(s) box to get a list of the available contact lists.
- Select one of the contact lists to add. These steps can be repeated to add as many contact lists as required.
Contacts
- To add a phone number to receive the message, enter the phone number into the Contacts textbox. Once a valid number is entered, it will automatically be added to the list on Contacts. You can enter as many numbers as required.

Send
- (Optional) Select Ignore Single Use if you wish to send a single-use campaign message to contacts that have already received the campaign.
- Click Send.
Confirm Push
- Review the details of the push.
- Enter the confirmation code on the left in the box on the right.
- Click Confirm.
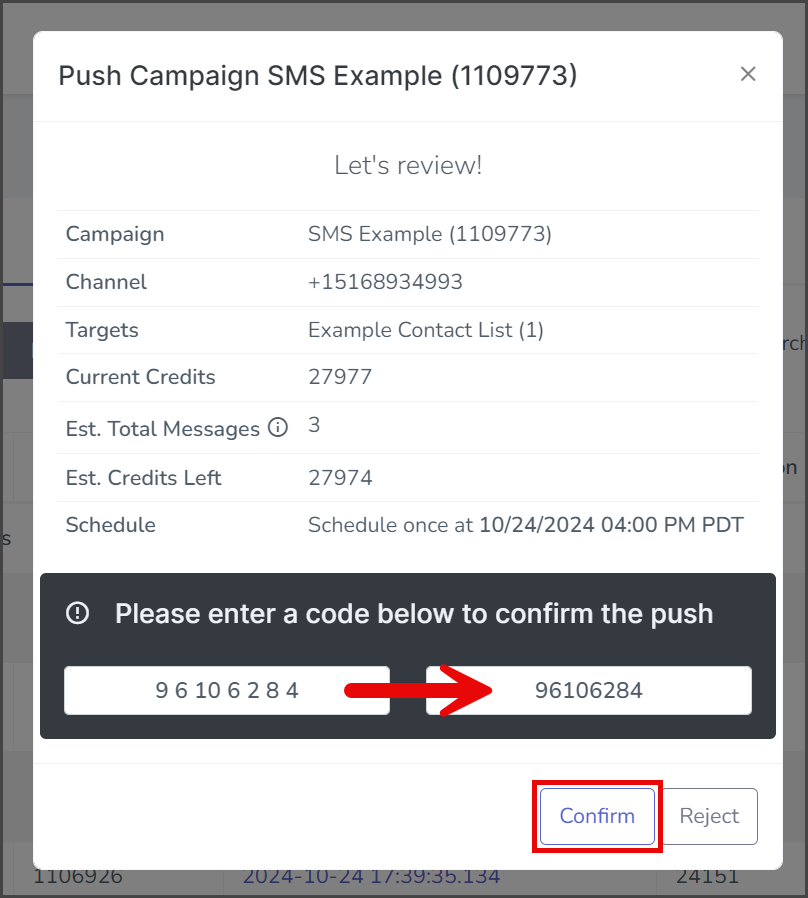
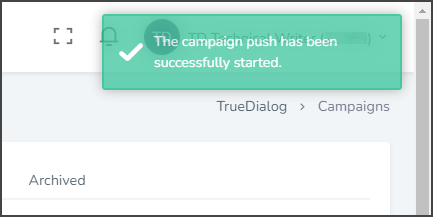
- After starting the campaign push, a success message will appear in the upper right corner.