TrueDialog Portal
Administration > Campaign Registry
This article will show you how to register your brand and campaign using TrueDialog’s Campaign Registry system. TrueDialog registers your brand and campaign information, giving you access to the 10 Digit Long Code (10DLC) network. The 10DLC network provides high-volume and high-deliverability messaging over long codes. Once you have registered your campaign, any numbers attached to it will send messages using your Campaign ID token, which informs the carriers the message is coming from an organization approved for the 10DLC network.
For help with the Campaign Registry process, contact TrueDialog’s knowledgeable support team: email support@truedialog.com or call 1-877-501-4276.
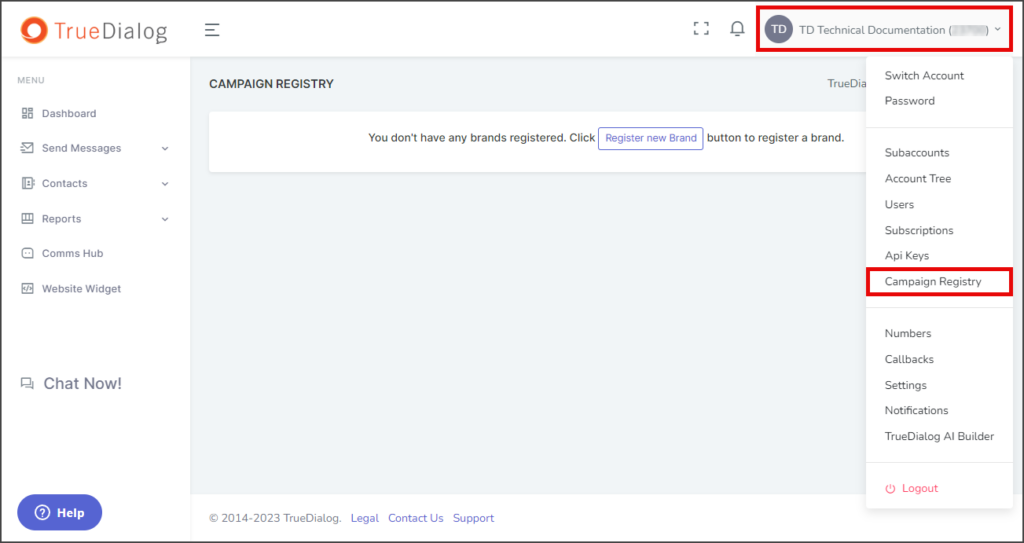
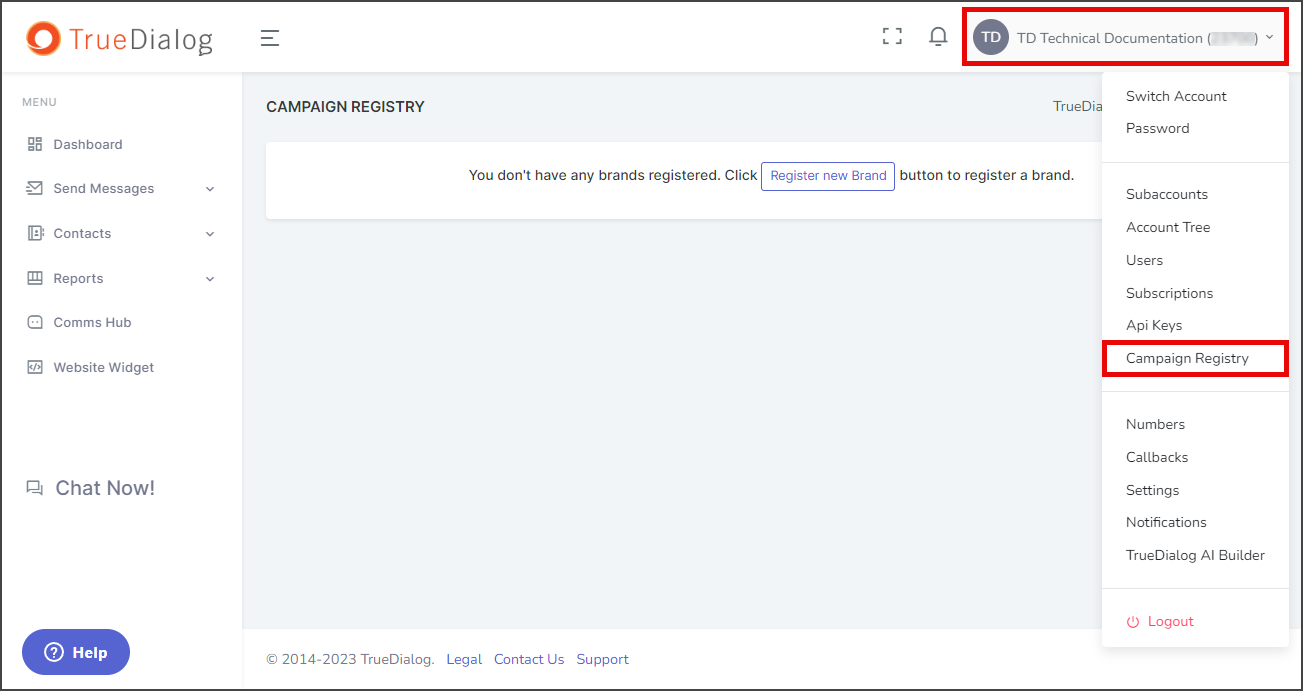
- Click your Account Name in the upper right corner.
- In the dropdown, select Campaign Registry.
Register New Brand
- The Register new Brand window will open.
- Select the type of organization from the Organization Legal Form dropdown.
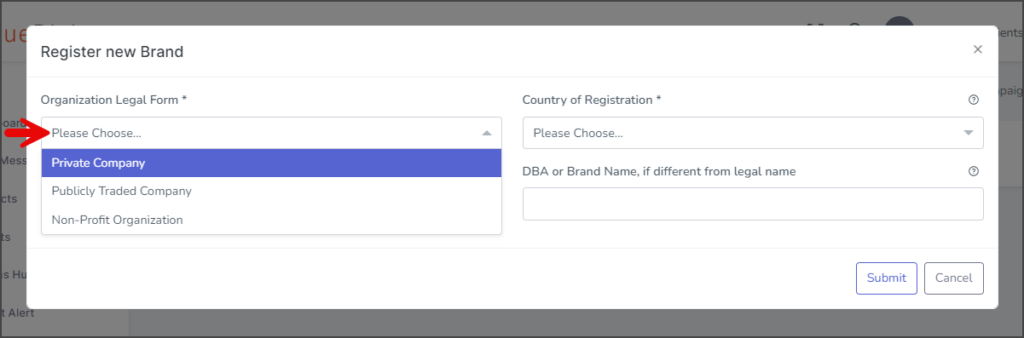
- Select the country your organization is registered in from the Country of Registration dropdown.
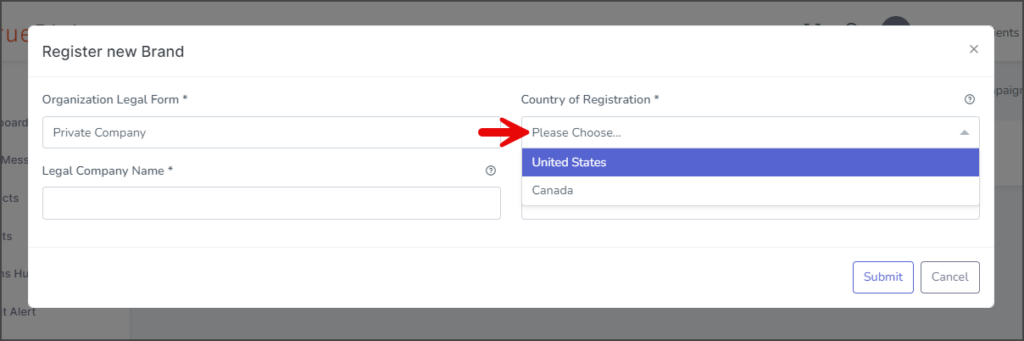
- The form will adjust based on your selections for the first two answers. For this example, a fictitious Private Company in the United States is used.
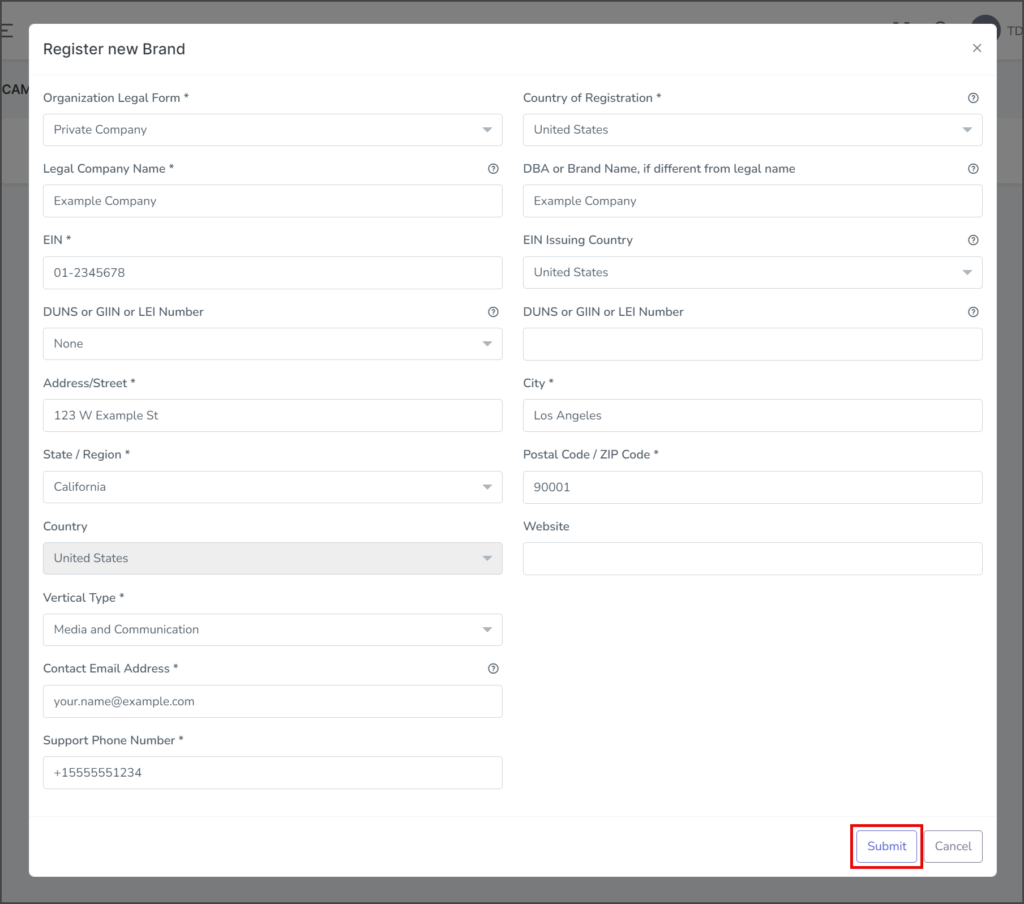
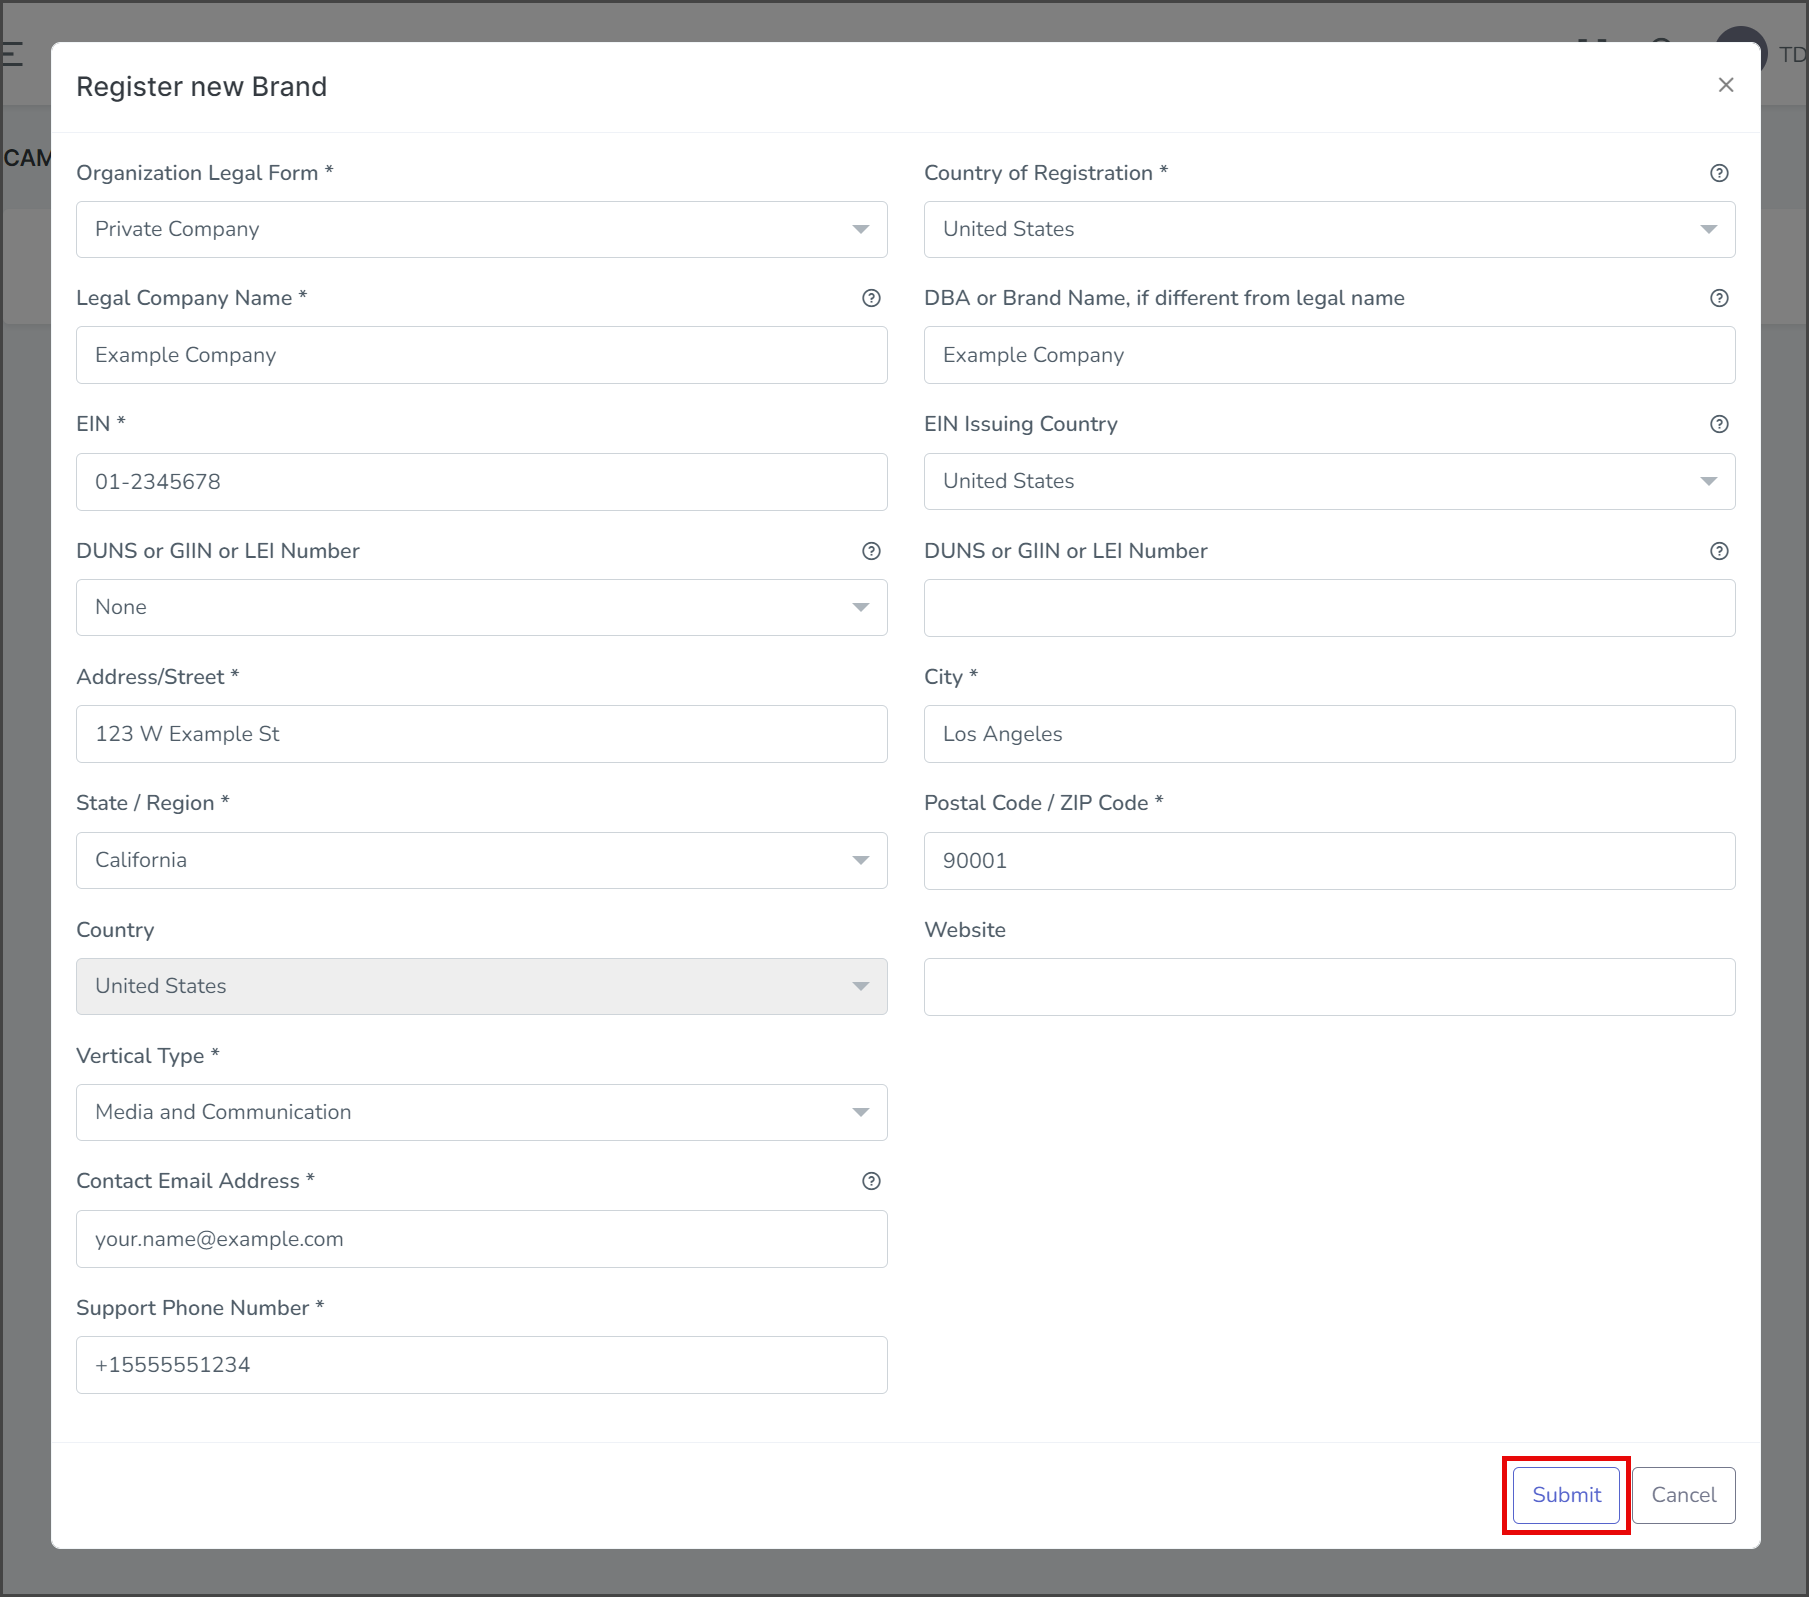
- Fill out the form with your company information. All * fields are required.
- Click Submit.
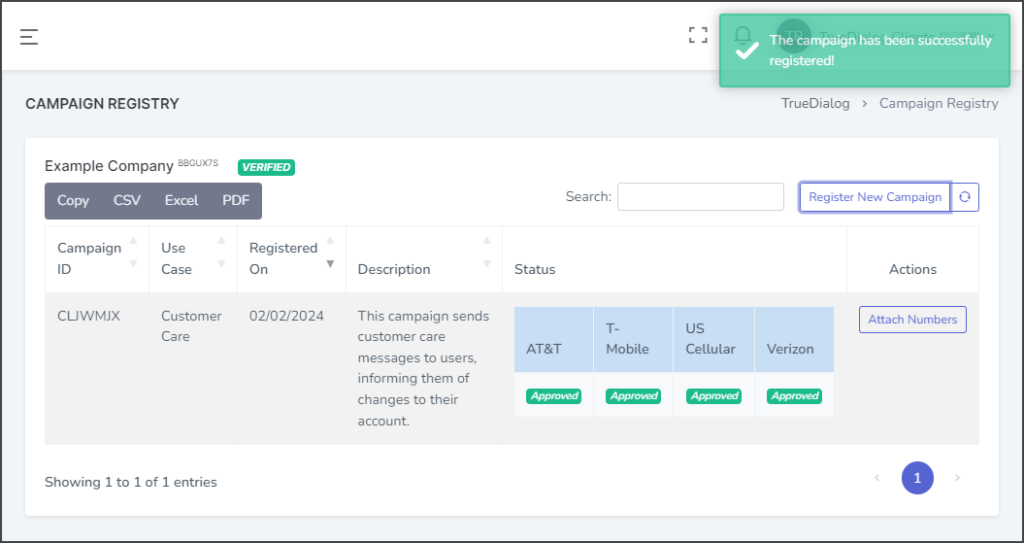
- After registering the brand, a success message will appear in the upper right corner.


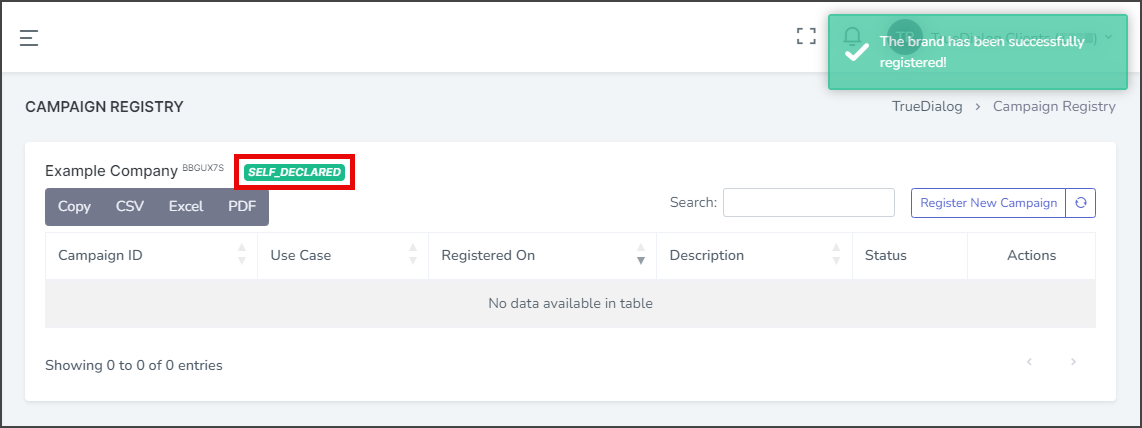
Brand Status
When you create a new brand, the status will first show as SELF_DECLARED. After The Campaign Registry has confirmed your brand information, your brand’s status will change to VERIFIED. Becoming verified can take anywhere from 30 seconds to 5 minutes to complete.
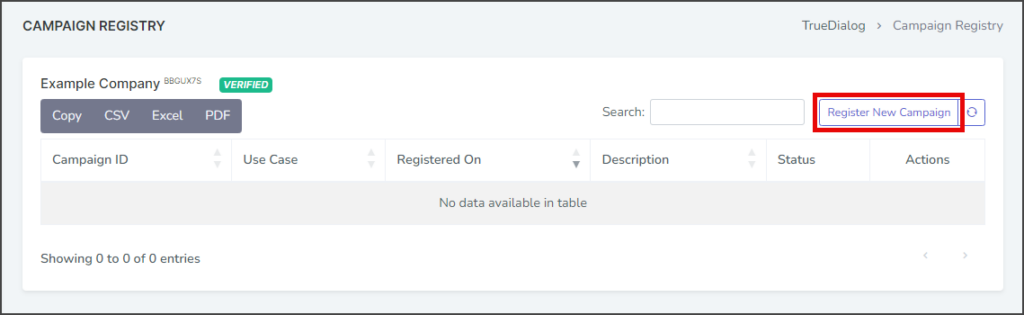
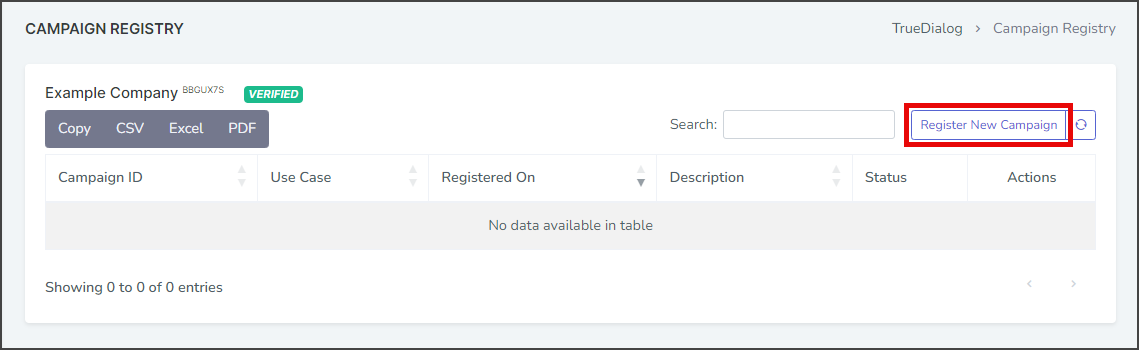
Register New Campaign
Once your brand is VERIFIED, you can register a campaign.
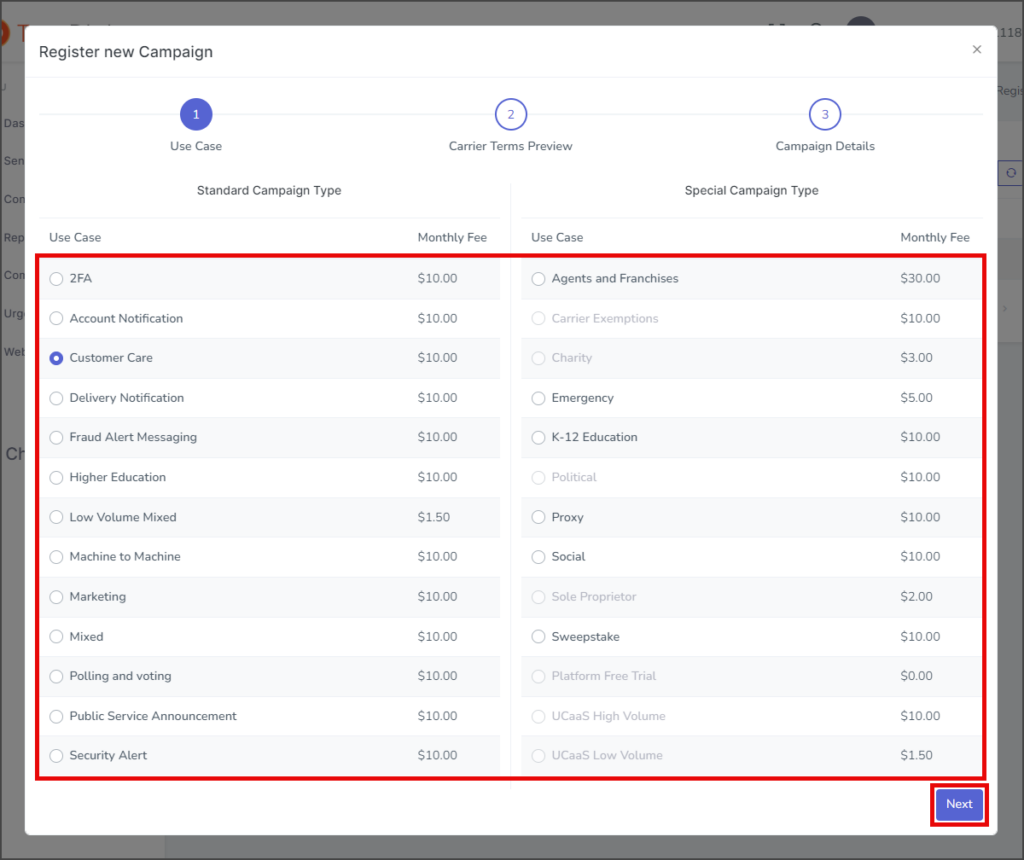
- Click Register New Campaign.
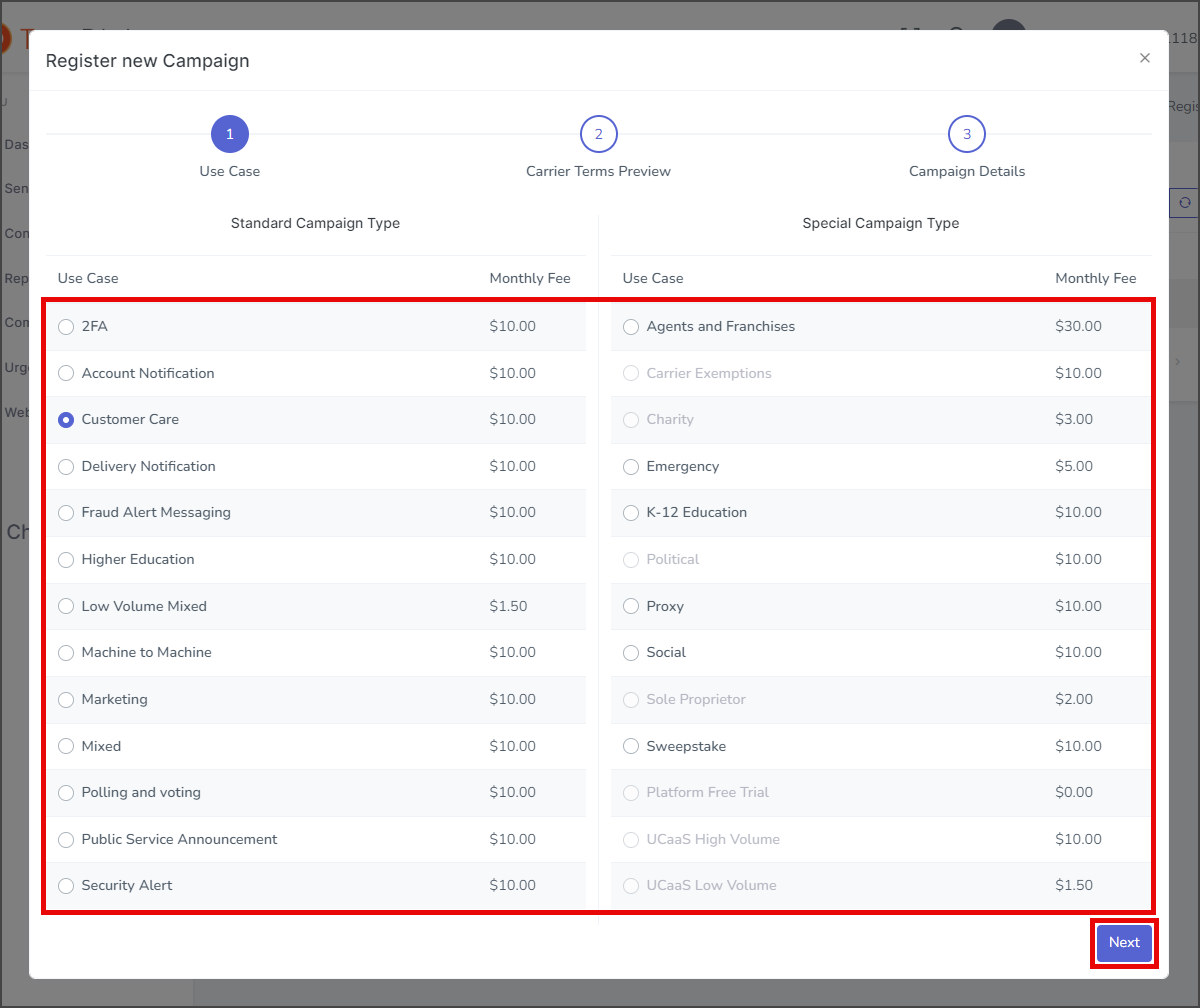
- Select one of the Campaign Types from the list that describes the messages your campaign will send.
- Click Next.
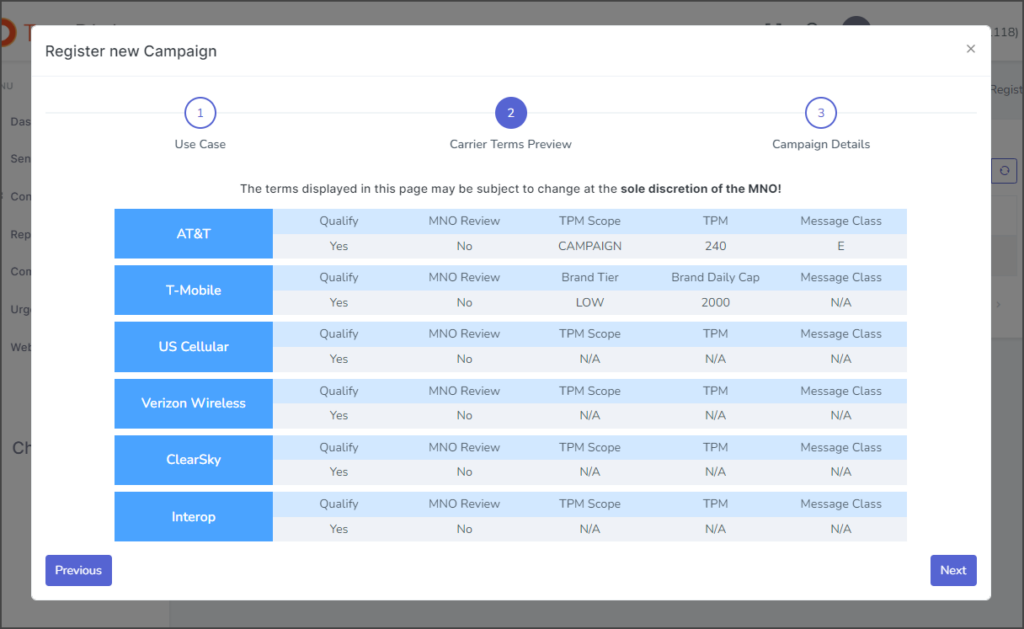
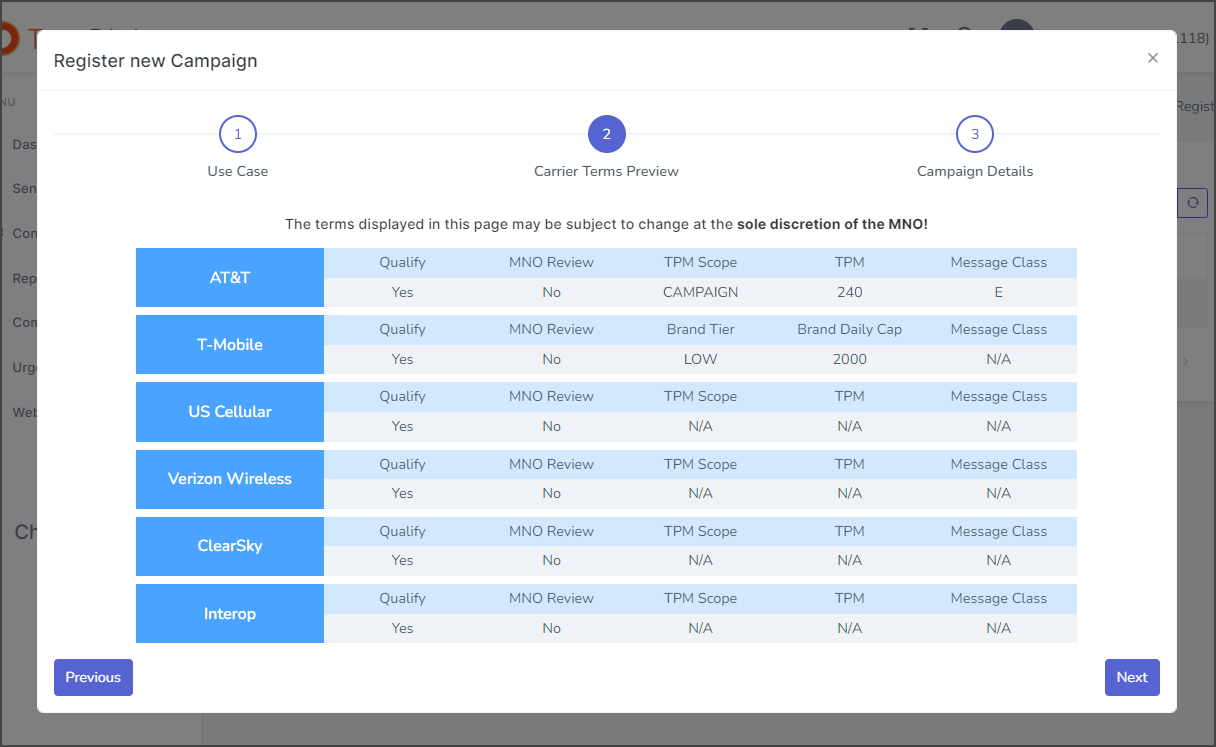
- The Carrier Terms Preview gives you a table with the major Mobile Network Operators (MNOs) and what terms they provide for your campaign. Note: The MNOs can change their terms at any time.
- Click Next.
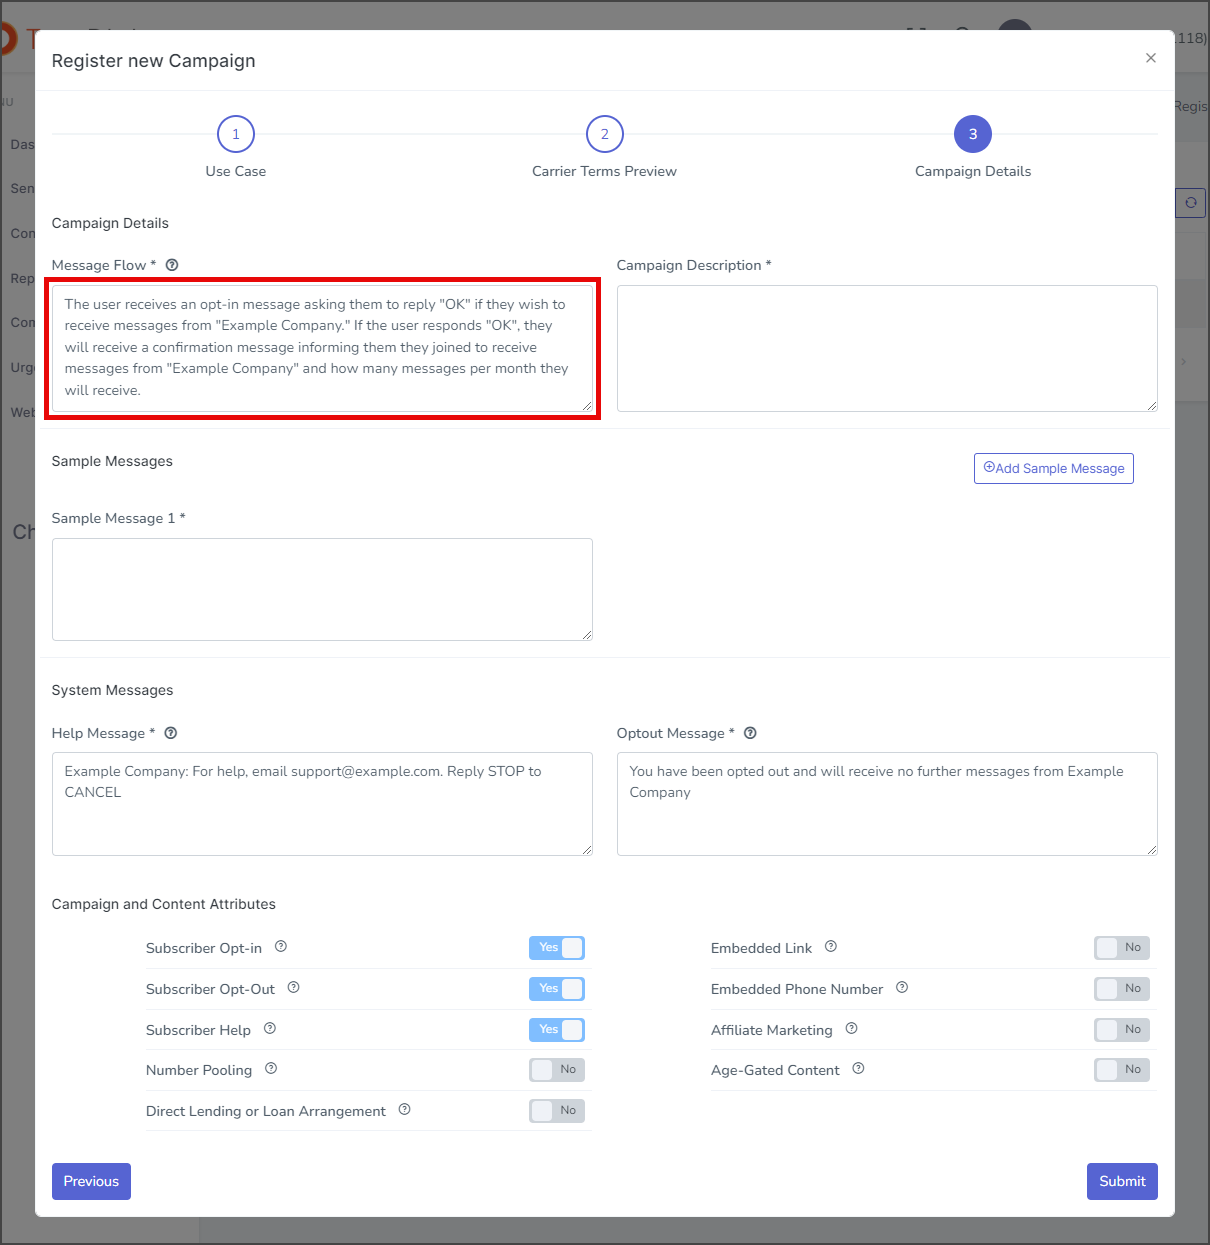
- In the Message Flow textbox, explain how the user is opted in to receive messages from your campaign. Each campaign and situation is unique, and the example given will not apply to all situations. Your Message Flow must show that you have one of three approved methods of opting contacts into the campaign. The methods are:
- Web – A web page informing users they are opting into receiving text messages. Users must click some form of acknowledgment like “I agree.”
- SMS – The user texts a specific opt-in keyword to your campaign, agreeing to receive messages.
- Written – The user agrees to receive messages in writing. A sample of the written opt-in form must be emailed to TrueDialog’s customer support at support@truedialog.com to include it with your application.
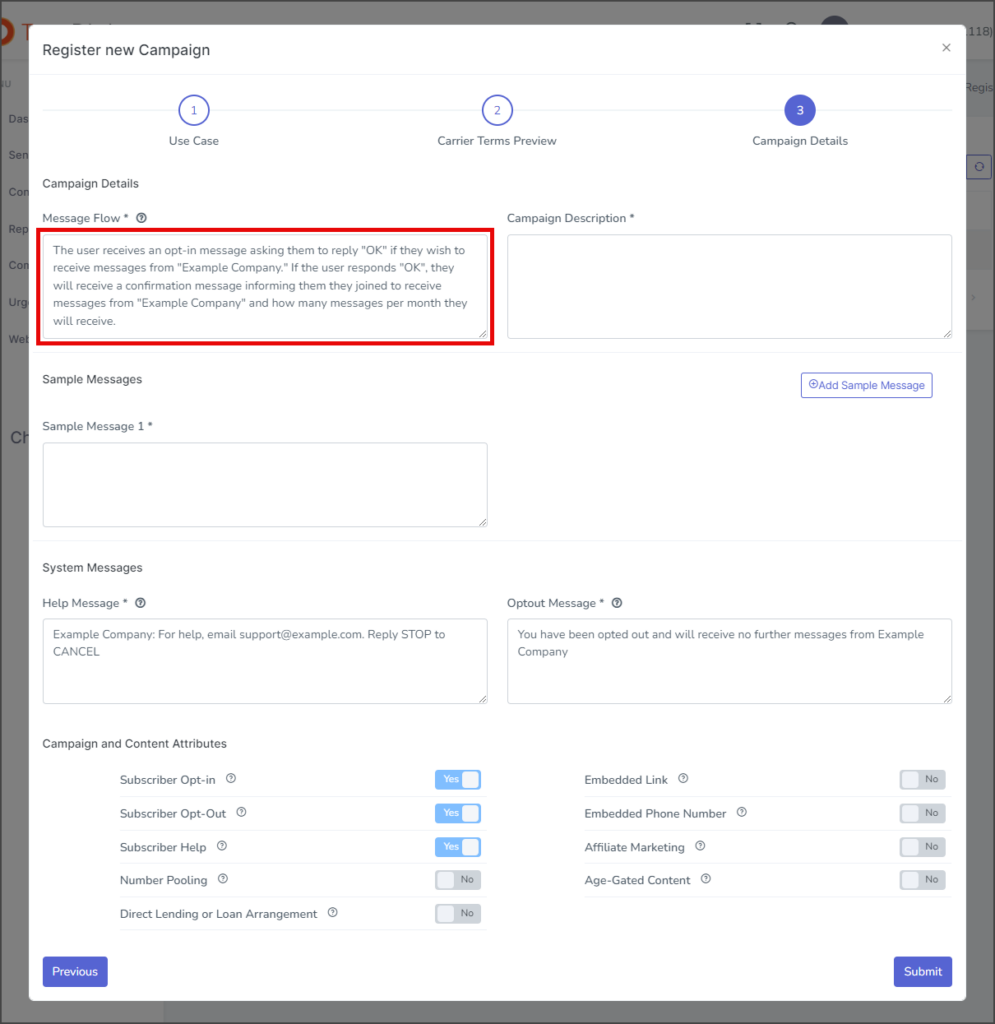
- Enter a description of what your campaign is for in the Campaign Description textbox.
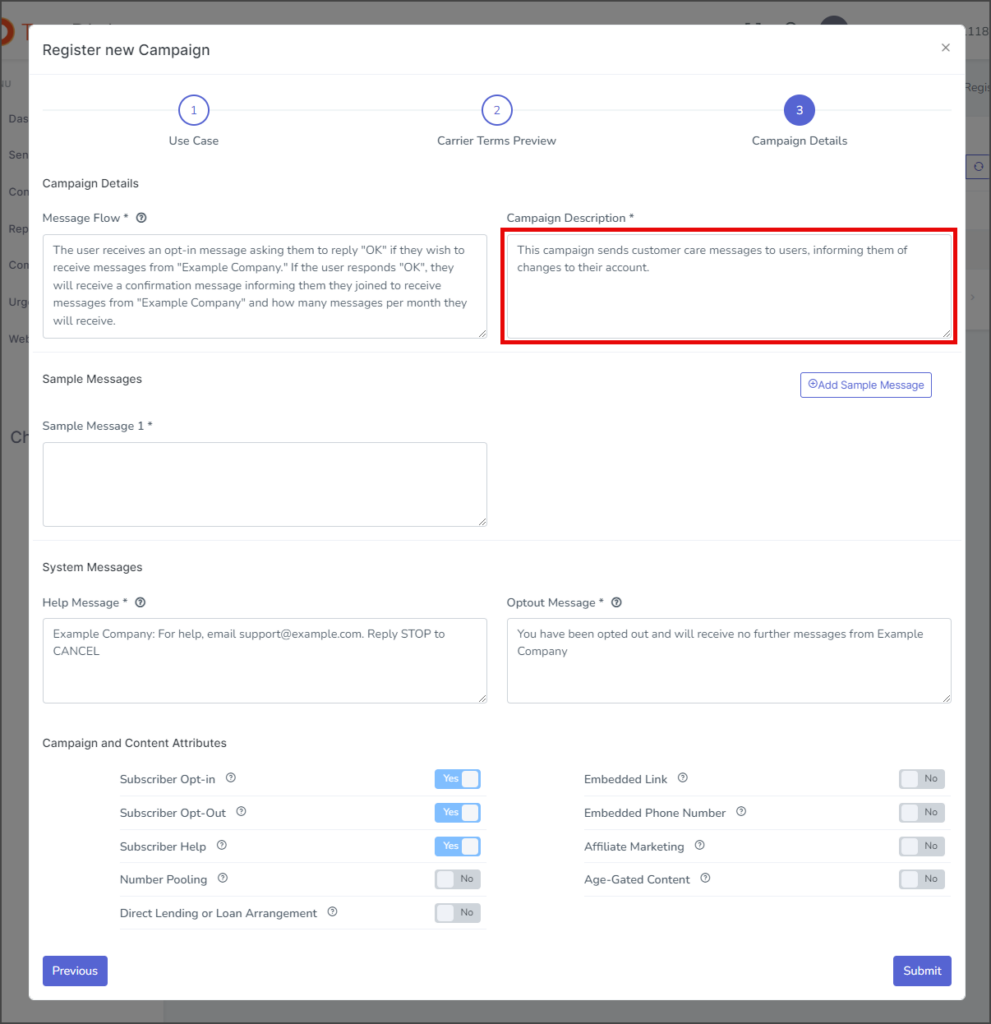
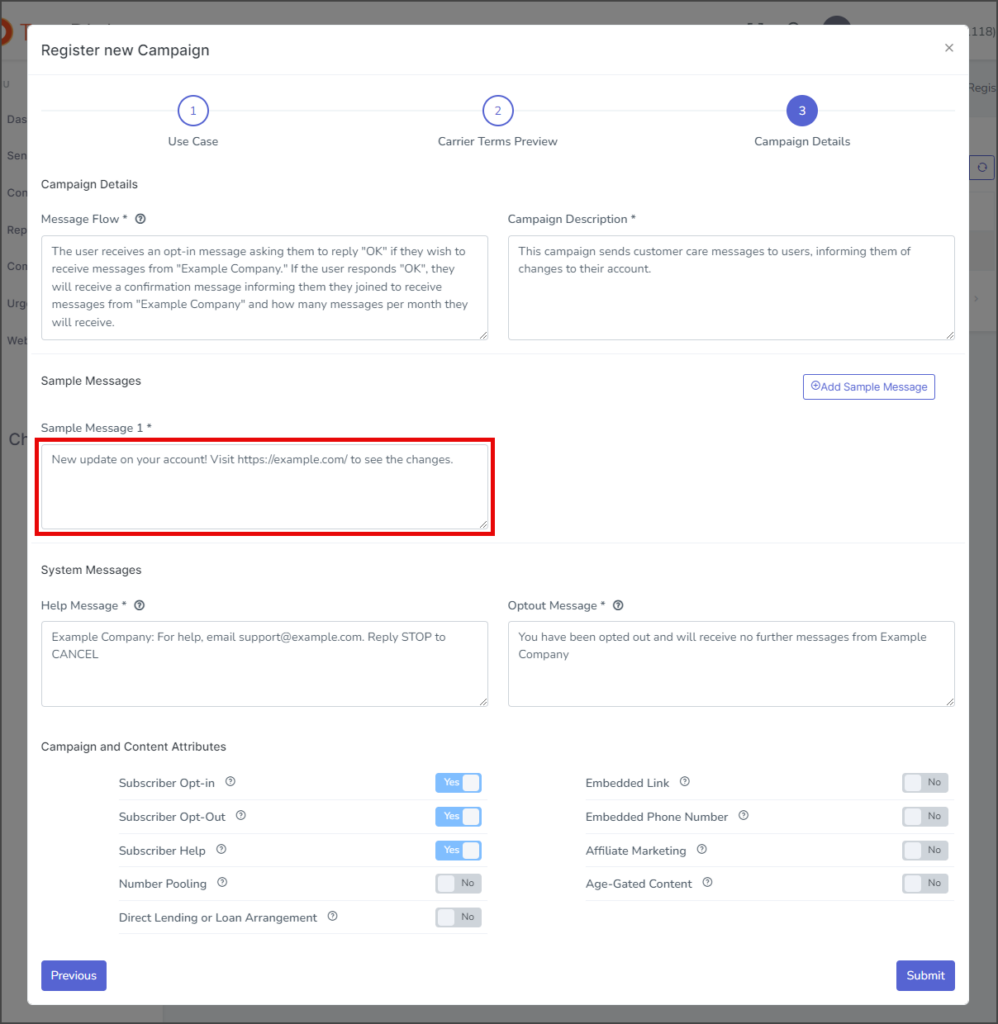
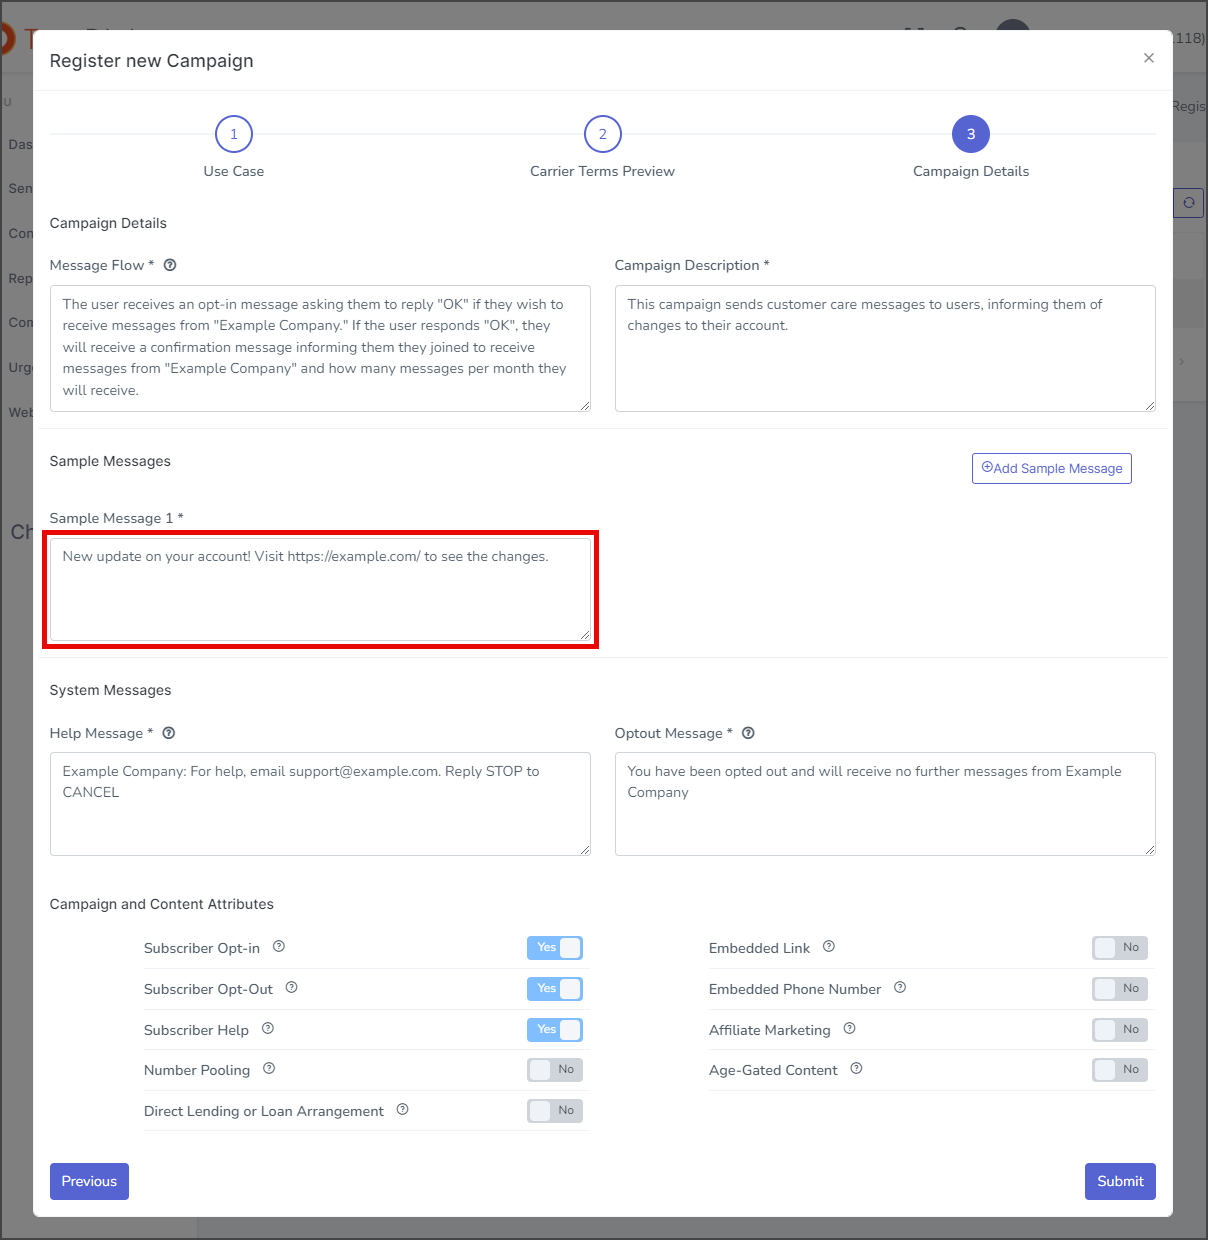
- Enter an example of your campaign message in the Sample Message 1 textbox.
- (Optional) Click Add Sample Message to create another Sample Message textbox for you to enter another sample message.
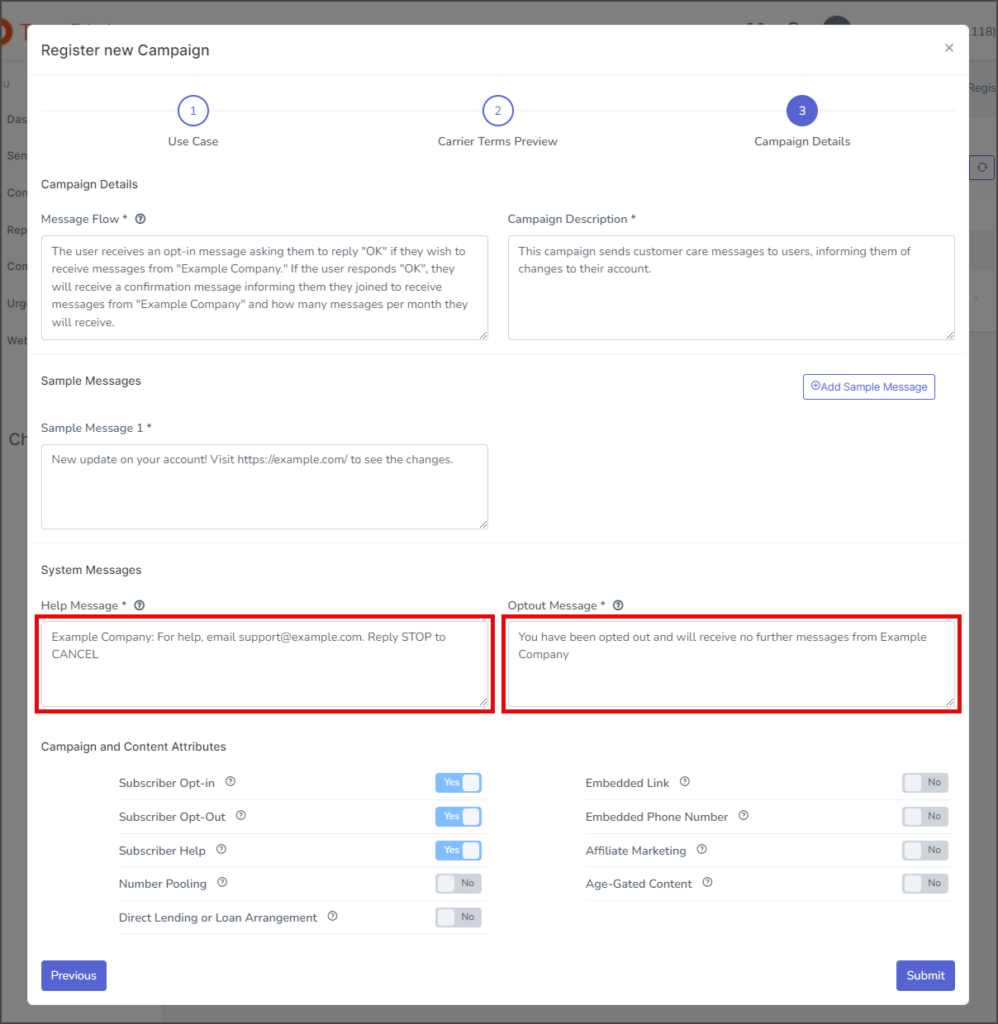
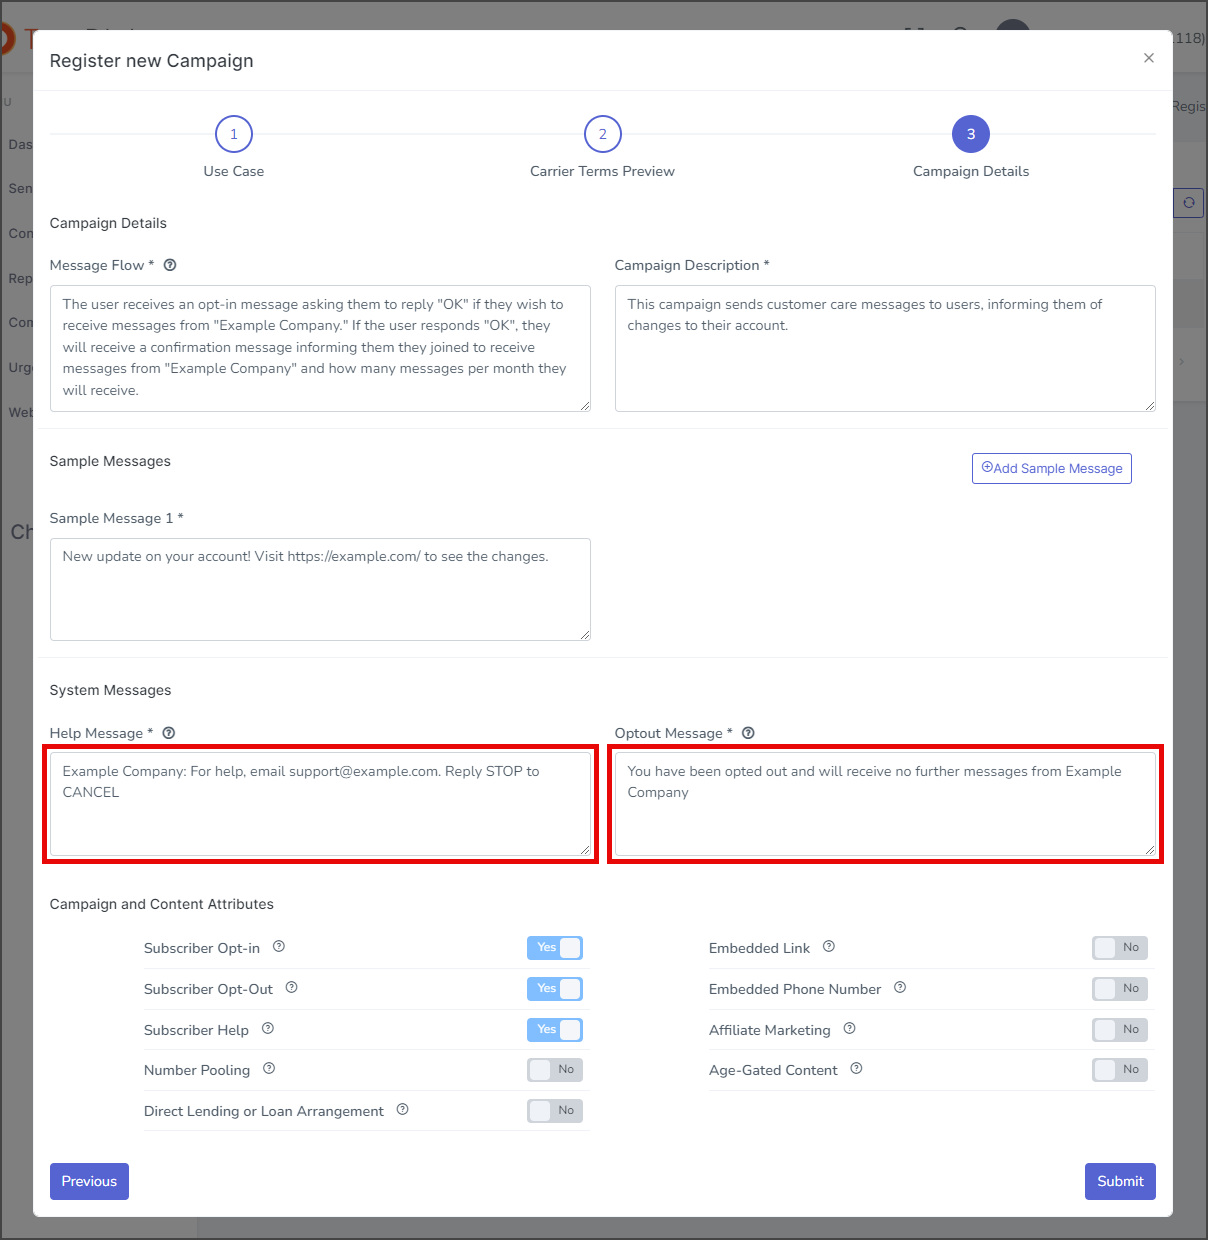
- The Help Message and Optout Message are already filled in with default messages. Edit them if they differ from your response to HELP and STOP messages. Make sure to update your support email address if necessary.
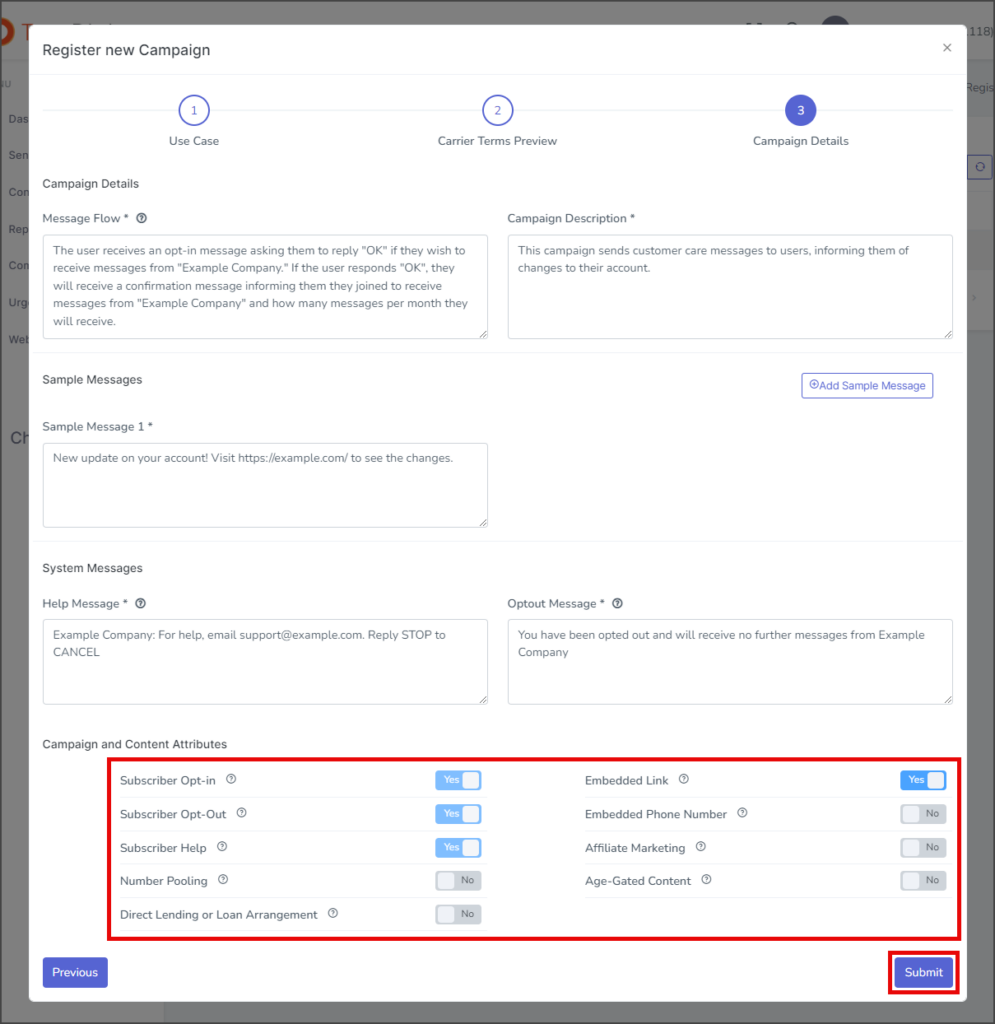
- Select any of the Campaignand Content Attributes that apply to your campaign.
- In this example, the campaign includes a link to the company’s website, so Embedded Link is set to Yes.
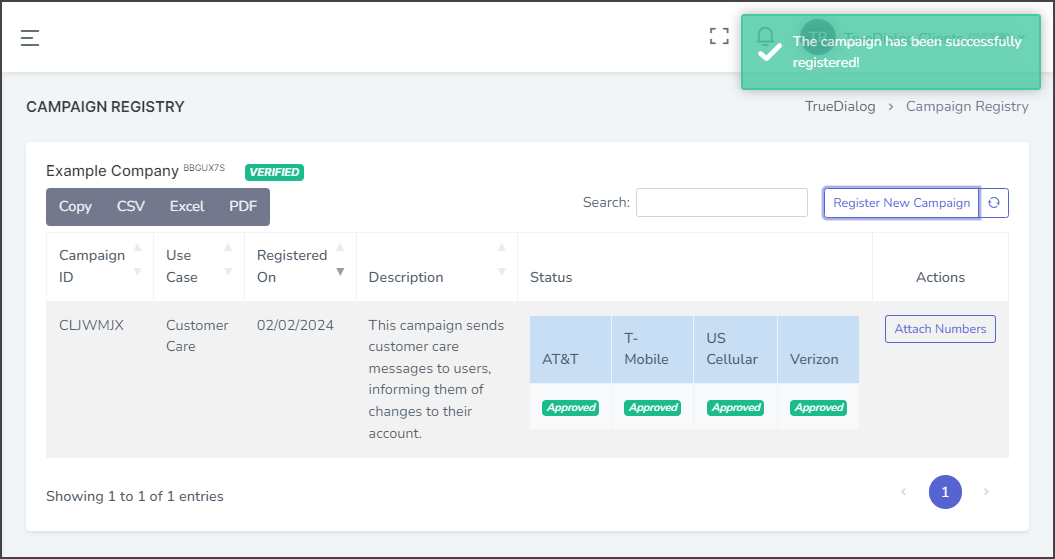
- Click Submit.
- After registering the campaign, a success message will appear in the upper right corner.
- If you get an error message when registering your campaign, contact TrueDialog’s knowledgeable support team: email support@truedialog.com or call 1-877-501-4276 to help you find the source of your error.


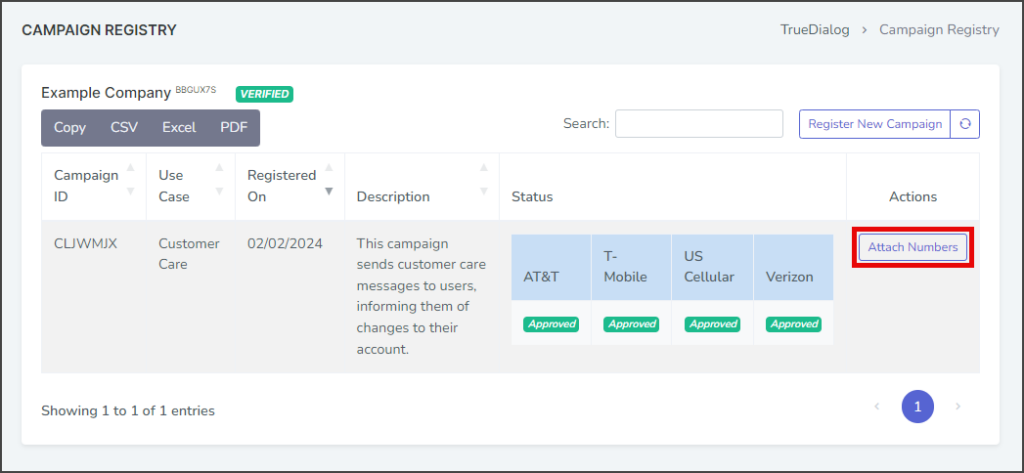
Attach Numbers to Registered Campaign
- Click Attach Numbers.
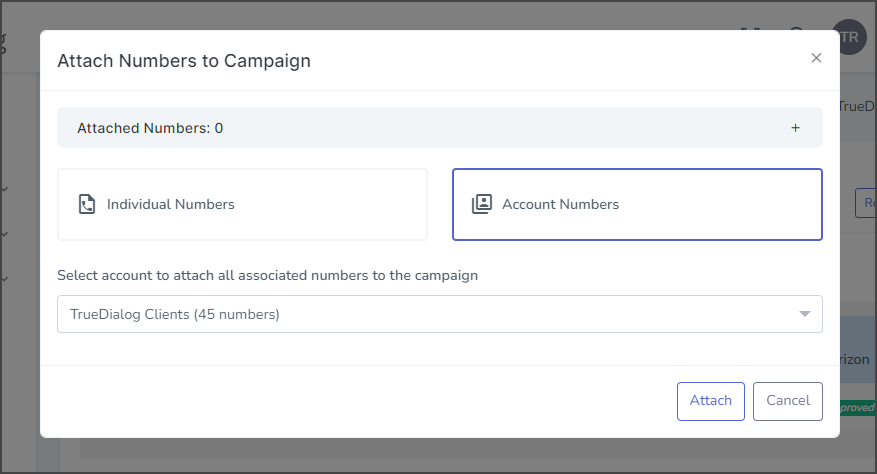
- Select how to attach numbers: Individual Numbers or Account Numbers.
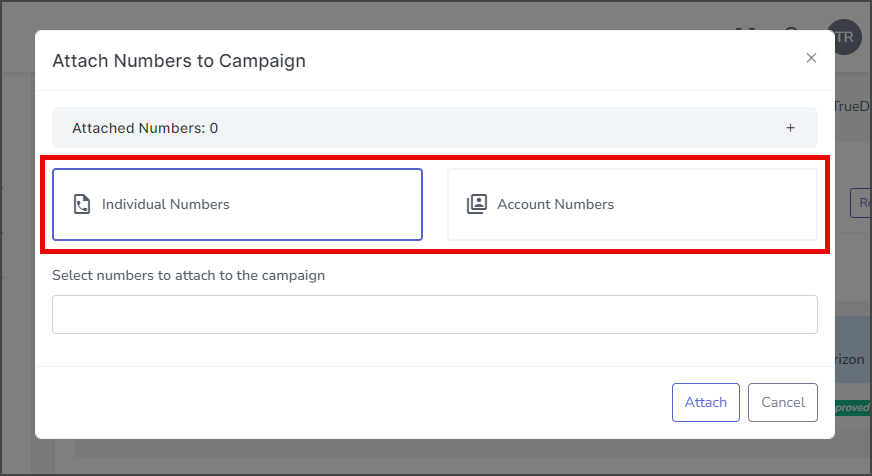
Individual Numbers
Select each number registered to your account one at a time.
- Click the Select numbers to attach to the campaign textbox to open a list of available numbers to attach.
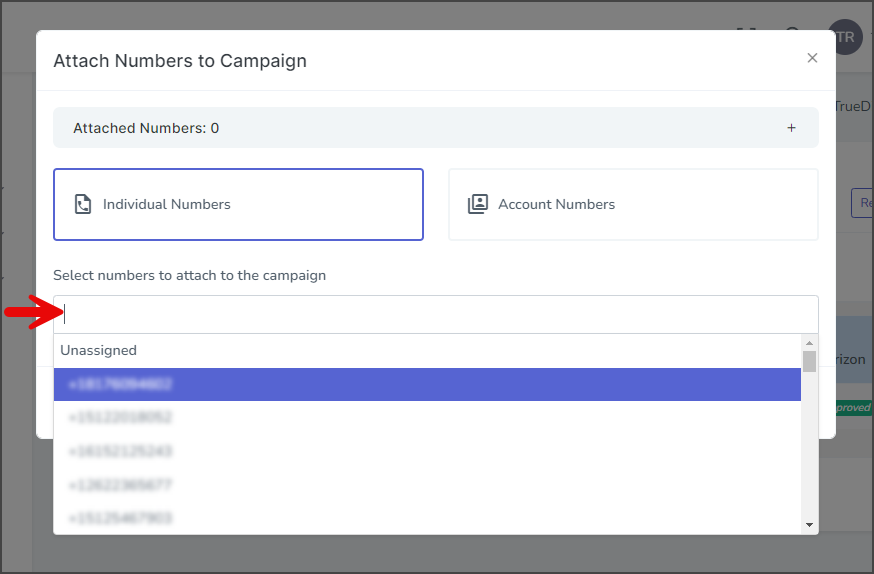
- Select the number to attach.
- The selected number will appear in the list.
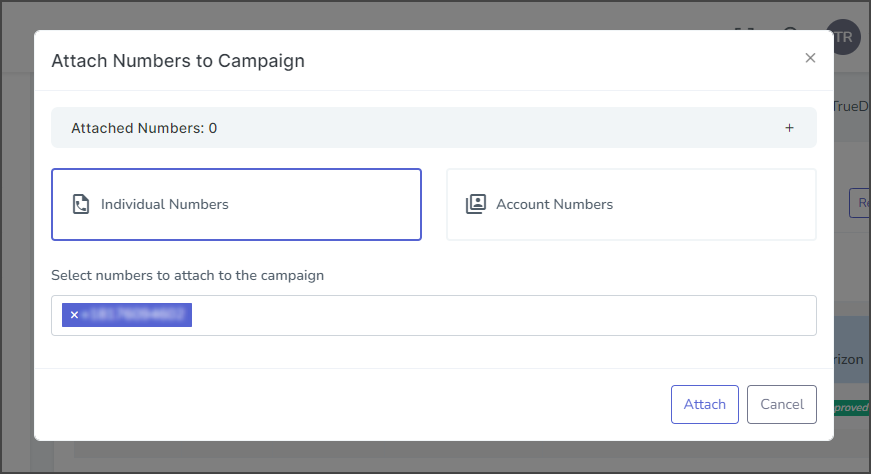
- Add more numbers using the same process.
- Remove a number by clicking the x in front of the number.
Account Numbers
Select an account to add all of the numbers registered to that account.
- Click the Select account to attach all associated numbers to the campaign dropdown.

- Select the account to add all numbers. The number of phone numbers associated with the account is listed in parentheses.
Attach
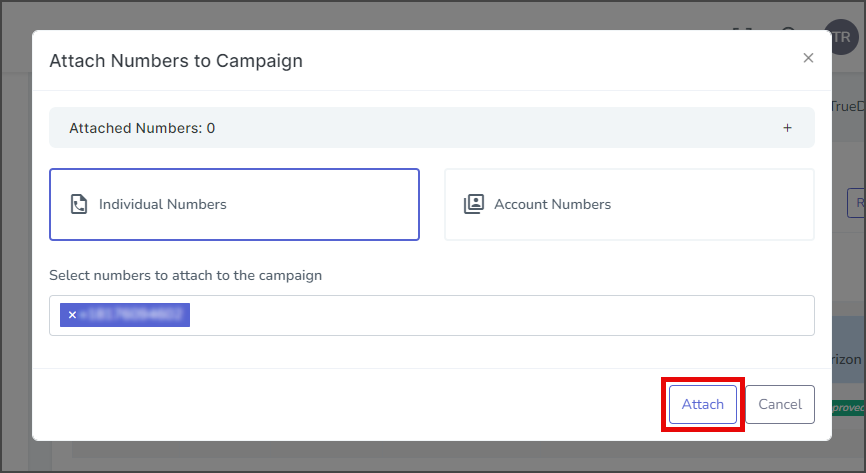
- Click Attach.
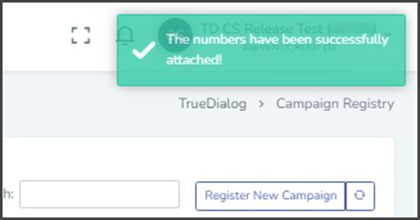
- After attaching the numbers, a success message will appear in the upper right corner.
- If you receive an error message, your campaign may still be pending final approval, which can take 3-5 business days. Try again after five business days from when your campaign was registered. If you still receive an error, open a support ticket with TrueDialog’s support team at support@truedialog.com to help resolve the issue.

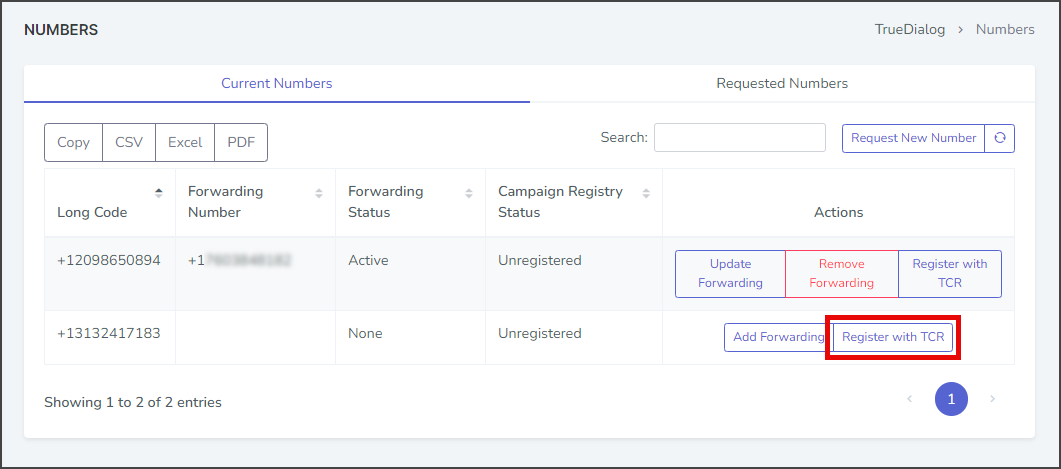
Numbers Page – Register with TCR
- Please note the number you want to register so you can select it when attaching the number.
- Click the Register with TCR button for the number you wish to register.

- You will be taken to the Campaign Registry page.
- Follow the instructions in the Attach Numbers to Registered Campaign section to attach the number to your campaign.