TrueDialog Portal
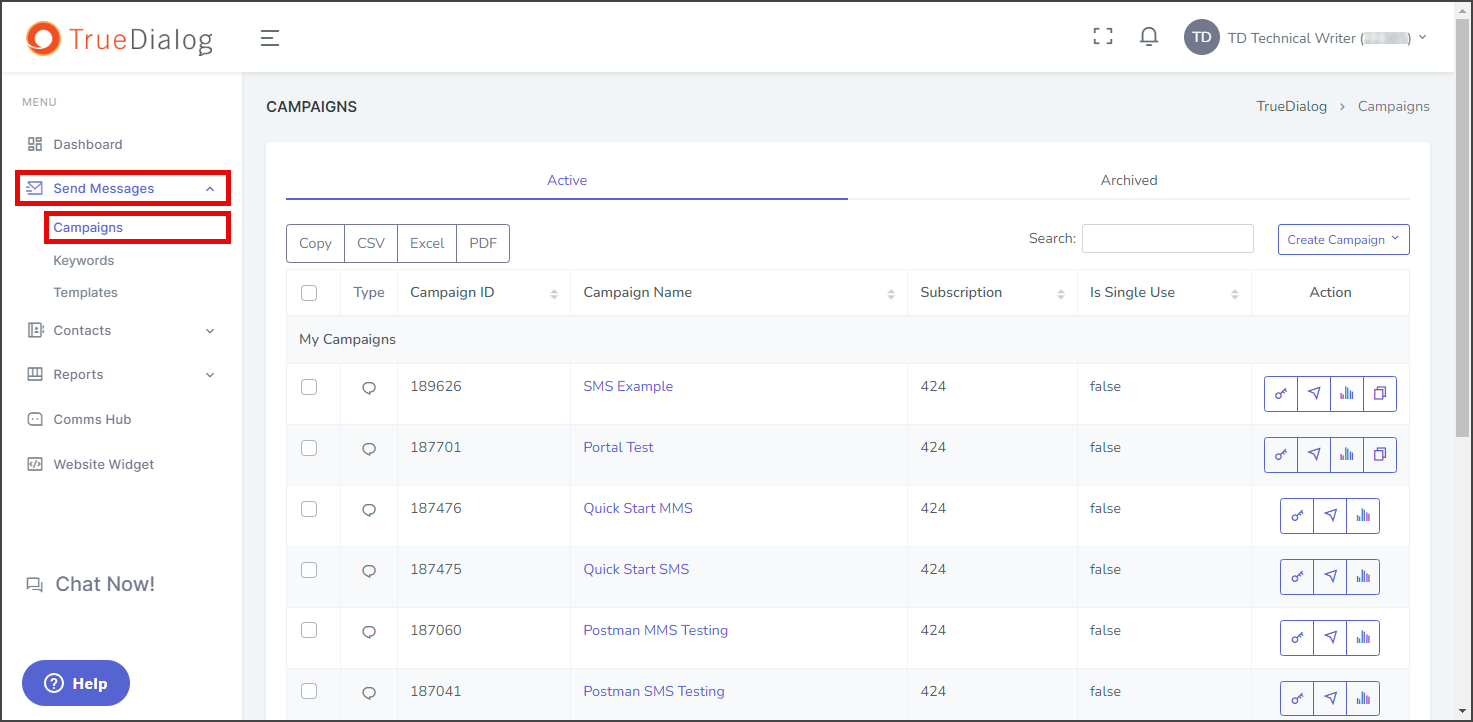
Sending Messages > Campaigns
This guide covers creating a Yes/No Survey. A Survey is an automated campaign that asks a question and responds to the user’s answer. The Yes/No survey is the simplest type of survey campaign; it consists of a question with only a Yes or No answer. For more information about survey campaigns and creating other types of surveys, see the Creating a Campaign – Survey Overview article.
Create a Survey Campaign
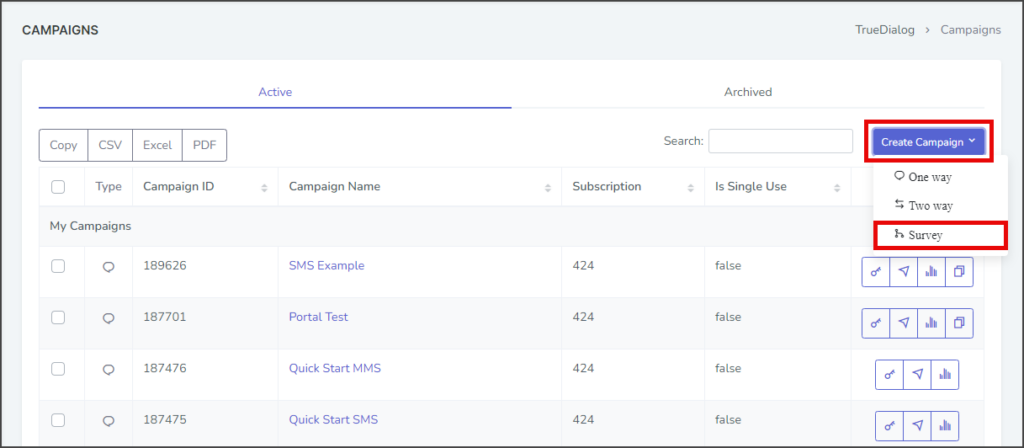
- Expand Send Messages in the left sidebar and select Campaigns.

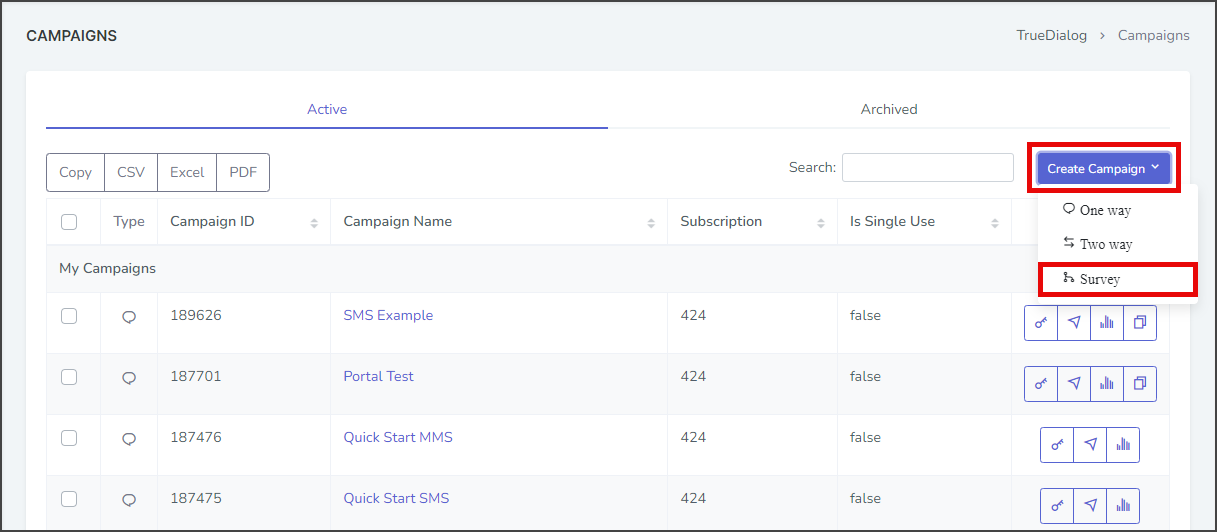
- Click the Create Campaign dropdown and select Survey to open the New Survey Campaign window.
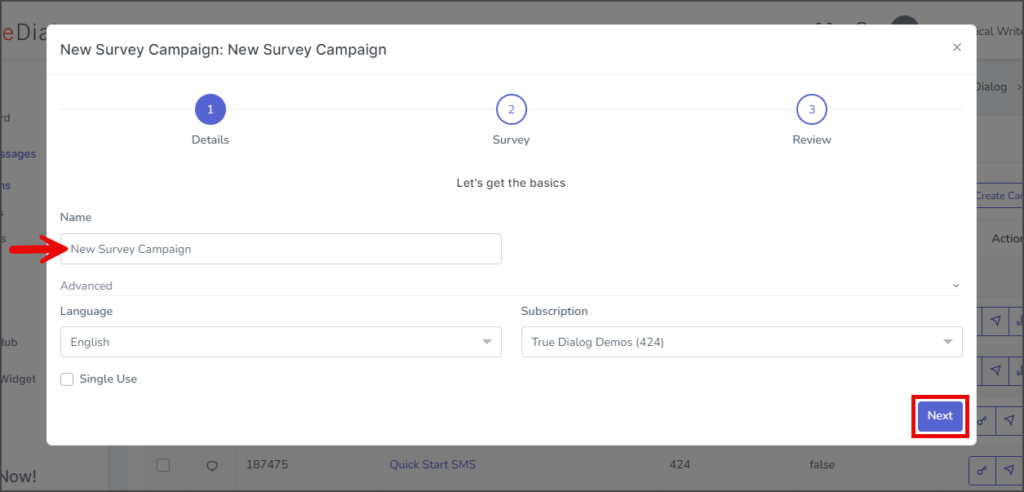
- Enter your campaign’s name in the Name textbox.
- (Optional) Expand the Advanced section.
- Language – Select the language to use for the campaign. Survey campaigns only support a single language.
- Subscription – Select the subscription to use for this campaign. The default subscription will be selected.
- Single Use – If checked, the end-user will receive a message from this campaign only once. Note: Don’t set it to Single Use until testing is complete.
- Click Next to go to the survey page.

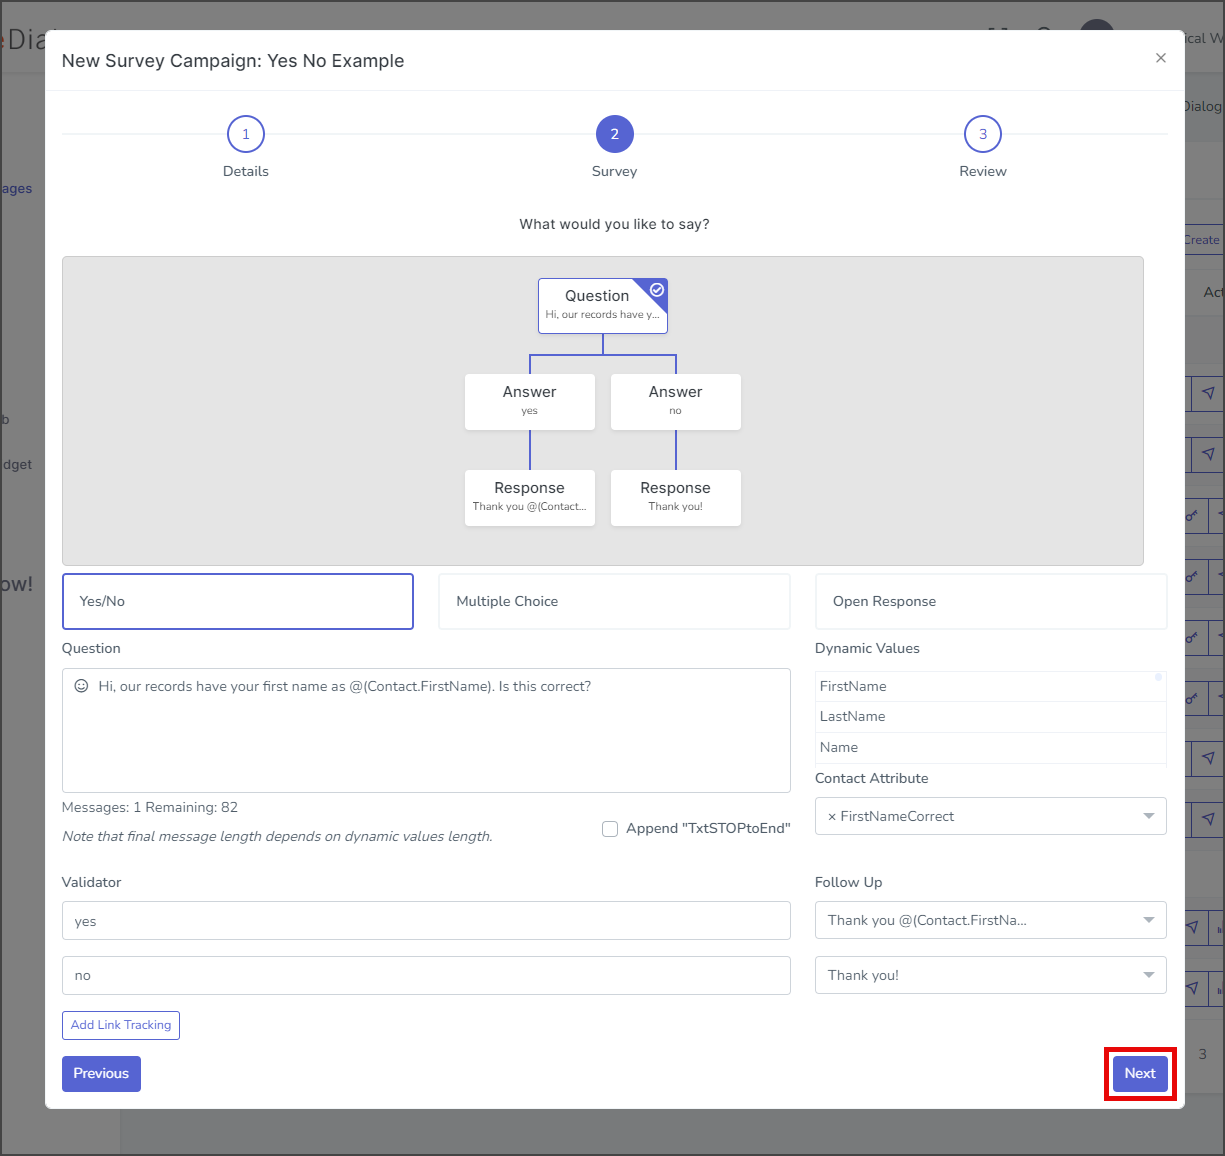
Survey Page
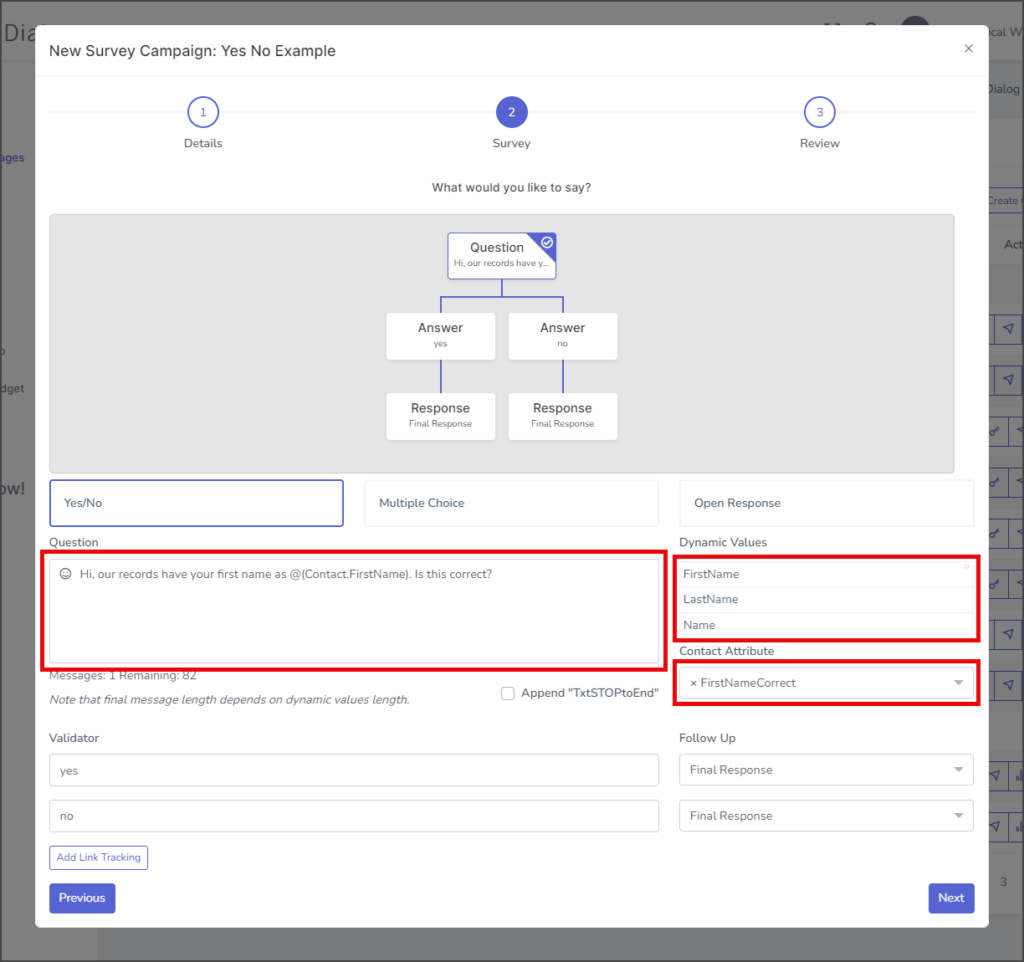
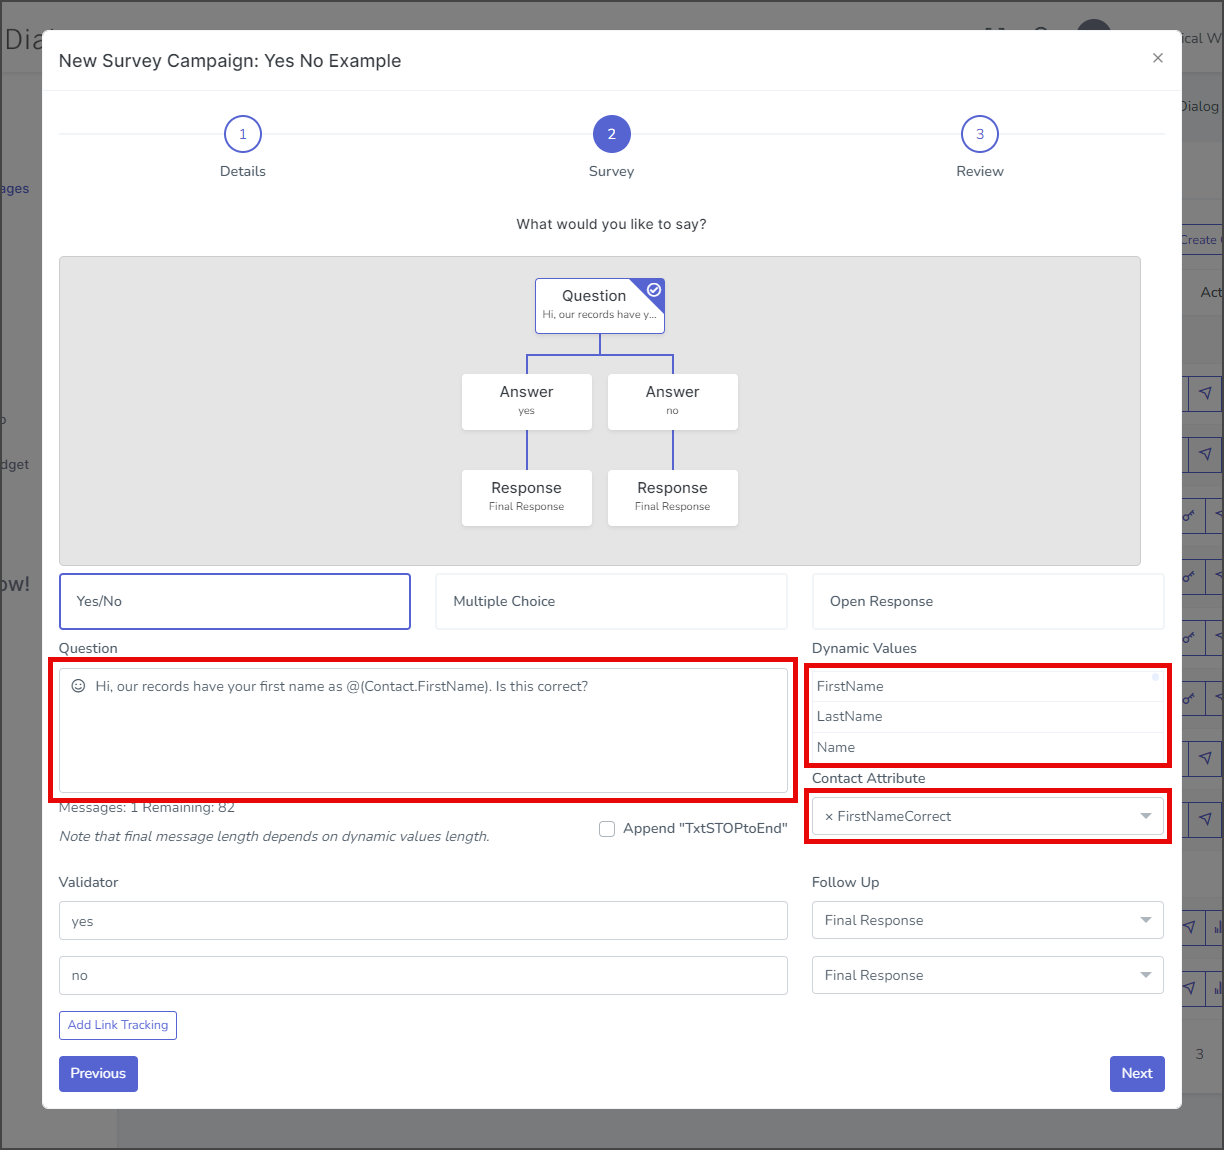
- Select Yes/No.
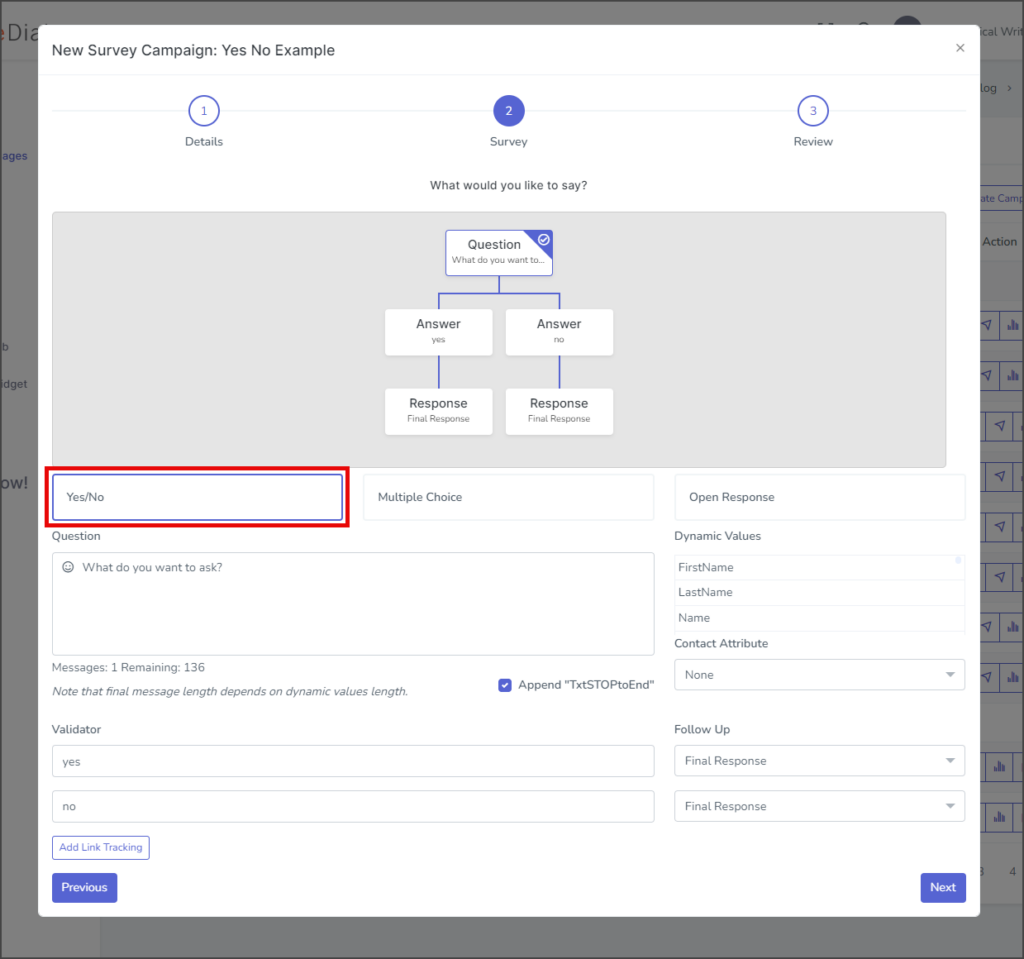
- Enter your initial message in the Question textbox.
- (Optional) Drag Dynamic Values into the message to use. This example asks the user to verify their first name using the FirstName dynamic value.
- (Optional) The response from the contact can be stored as an attribute. To do this, click the Contact Attribute dropdown and select the attribute to store the response.
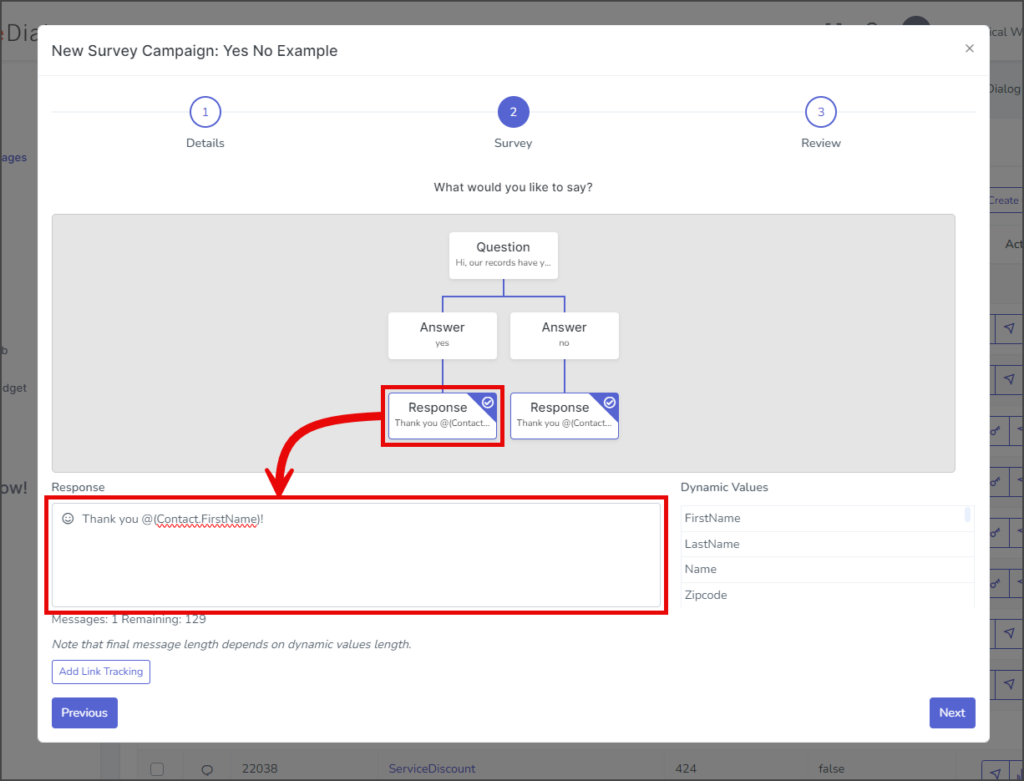
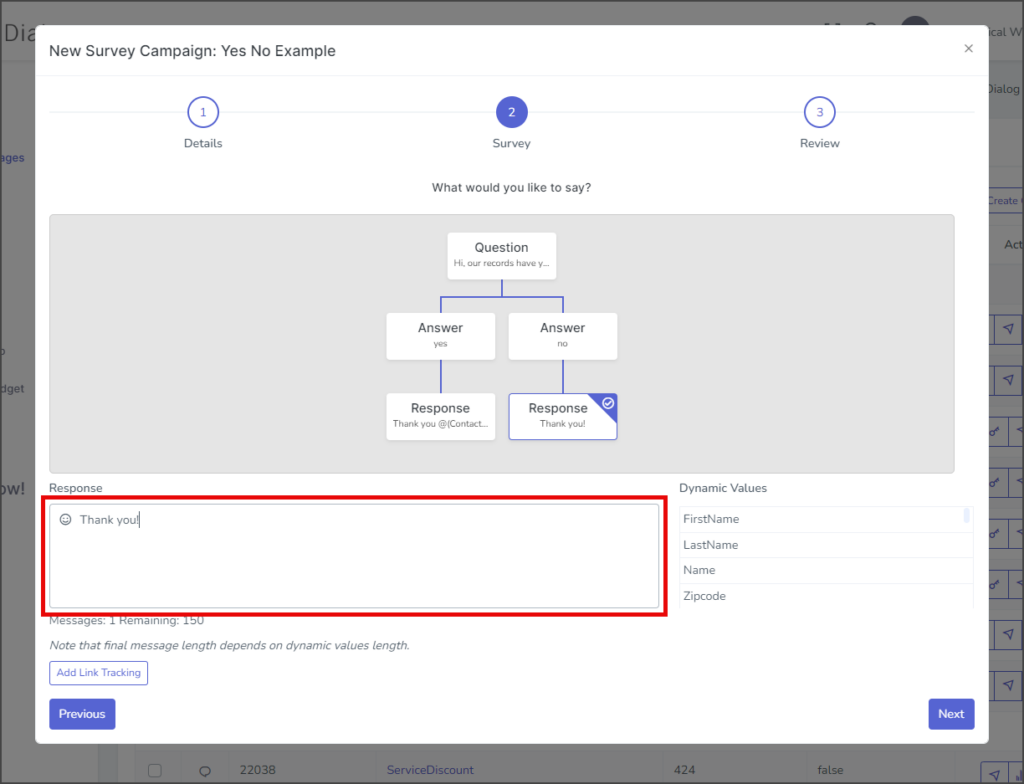
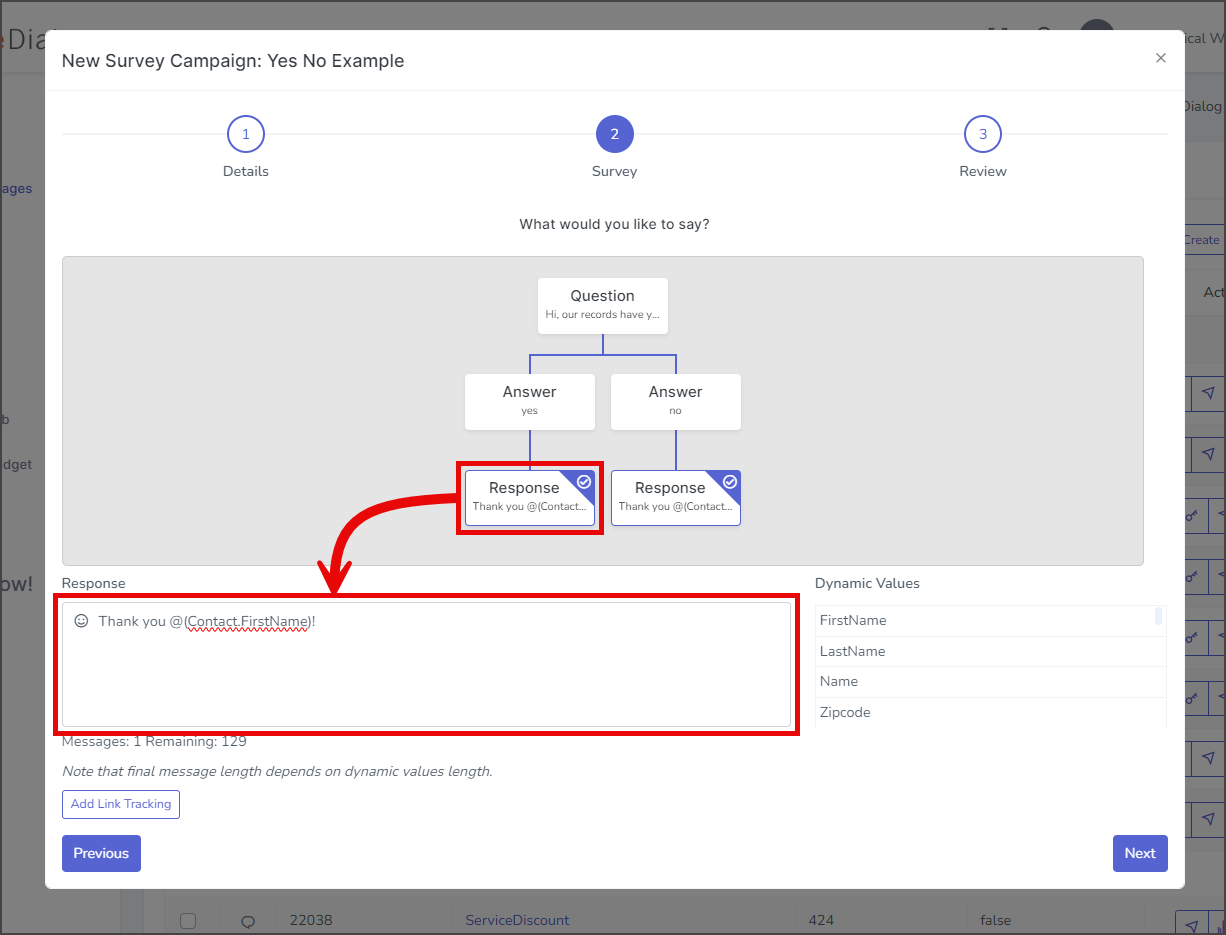
- To edit the response to each answer, click the Response box under the Answer box in the flow chart.
- Enter your message in the Response textbox.
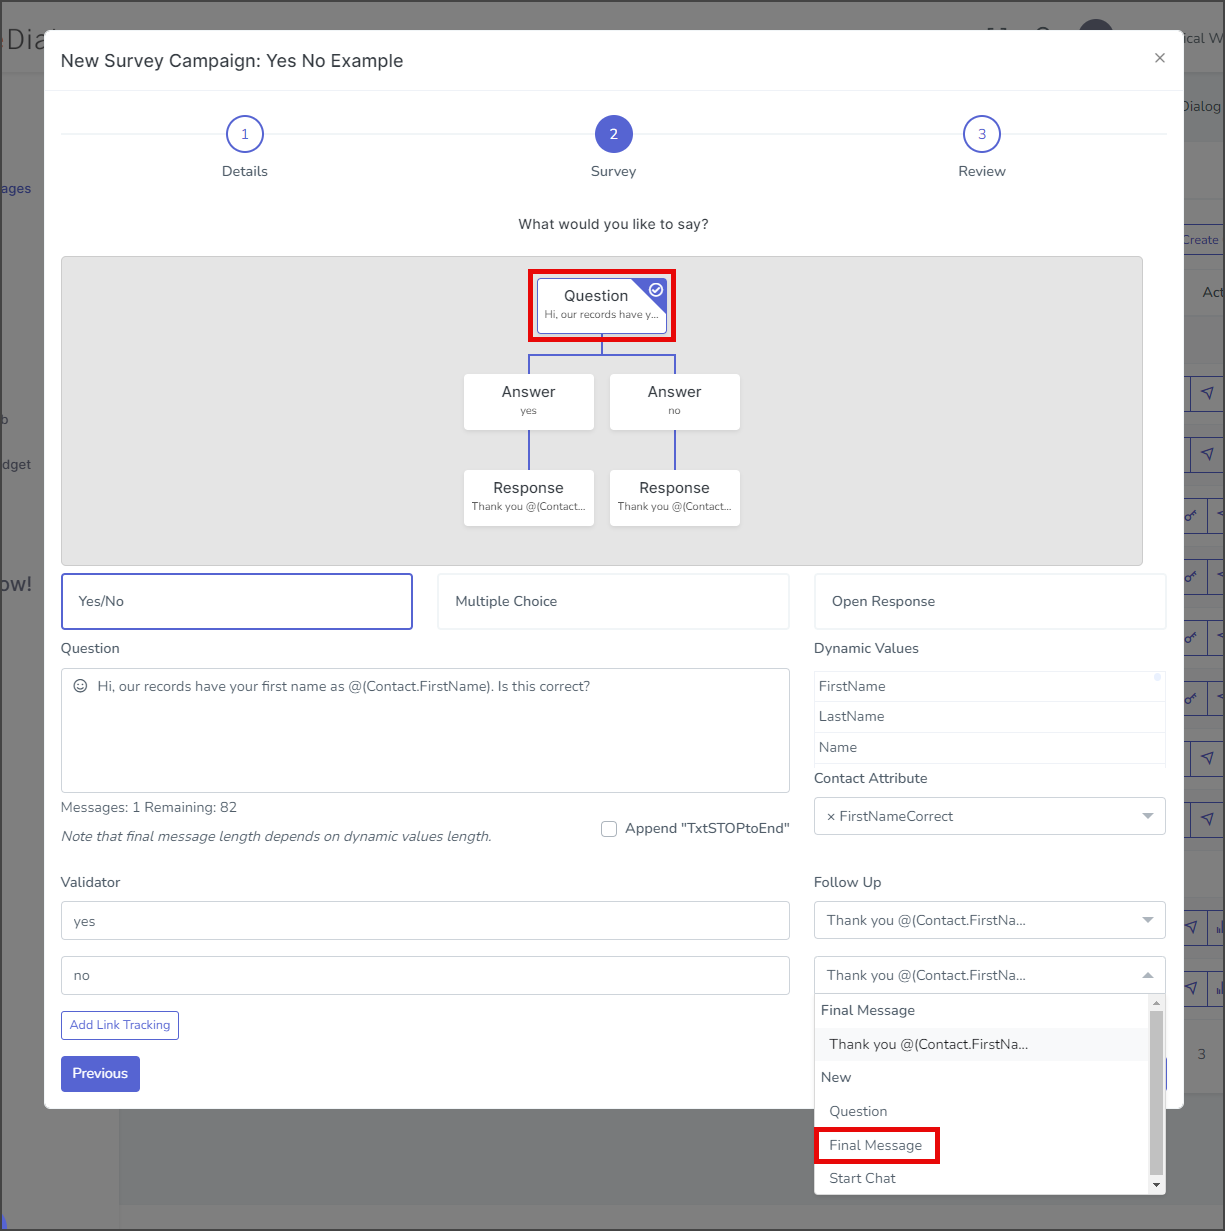
- To use a different response for each answer:
- Select the Question box in the flow chart.
- Click the Follow Up dropdown and select New → Final Message.

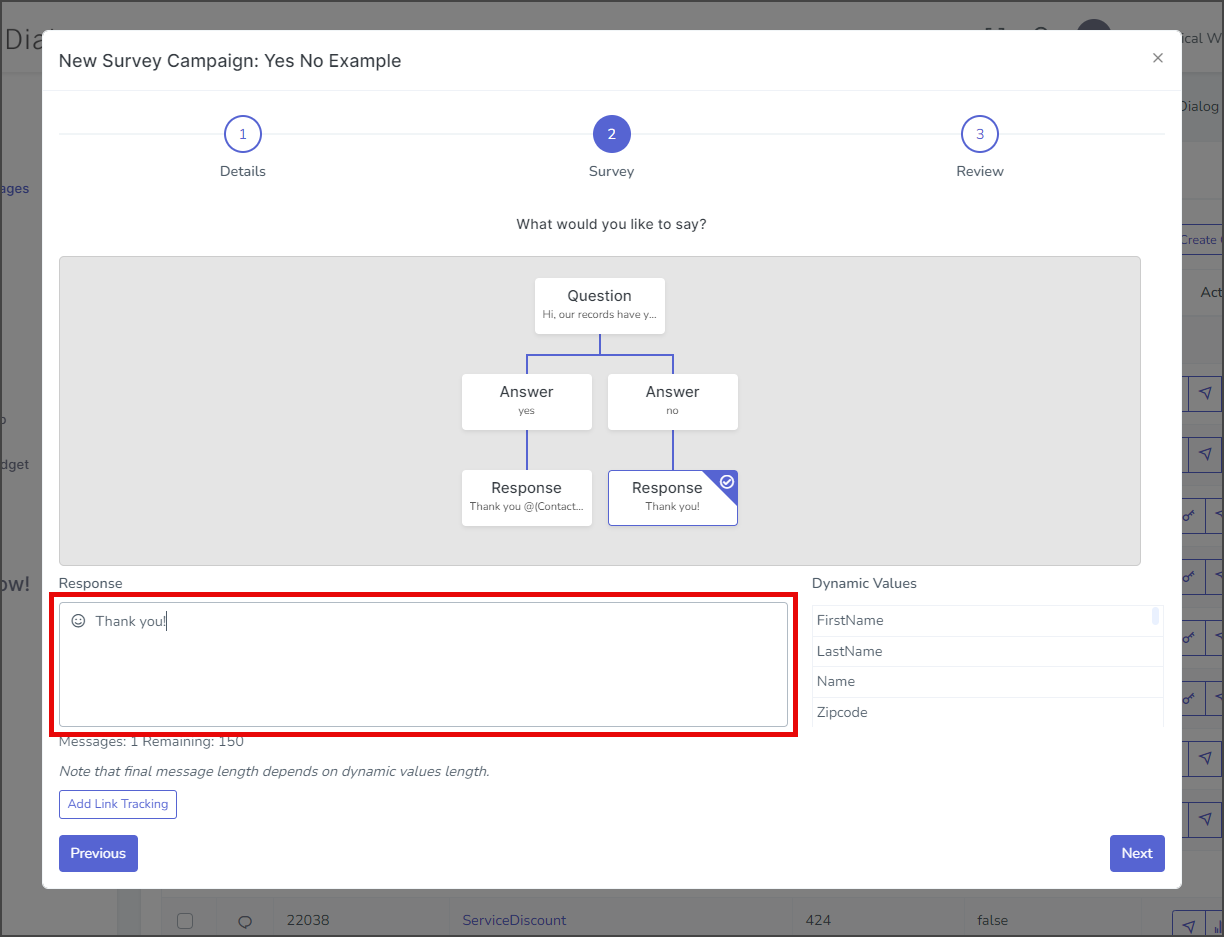
- Enter your message in the Response textbox.
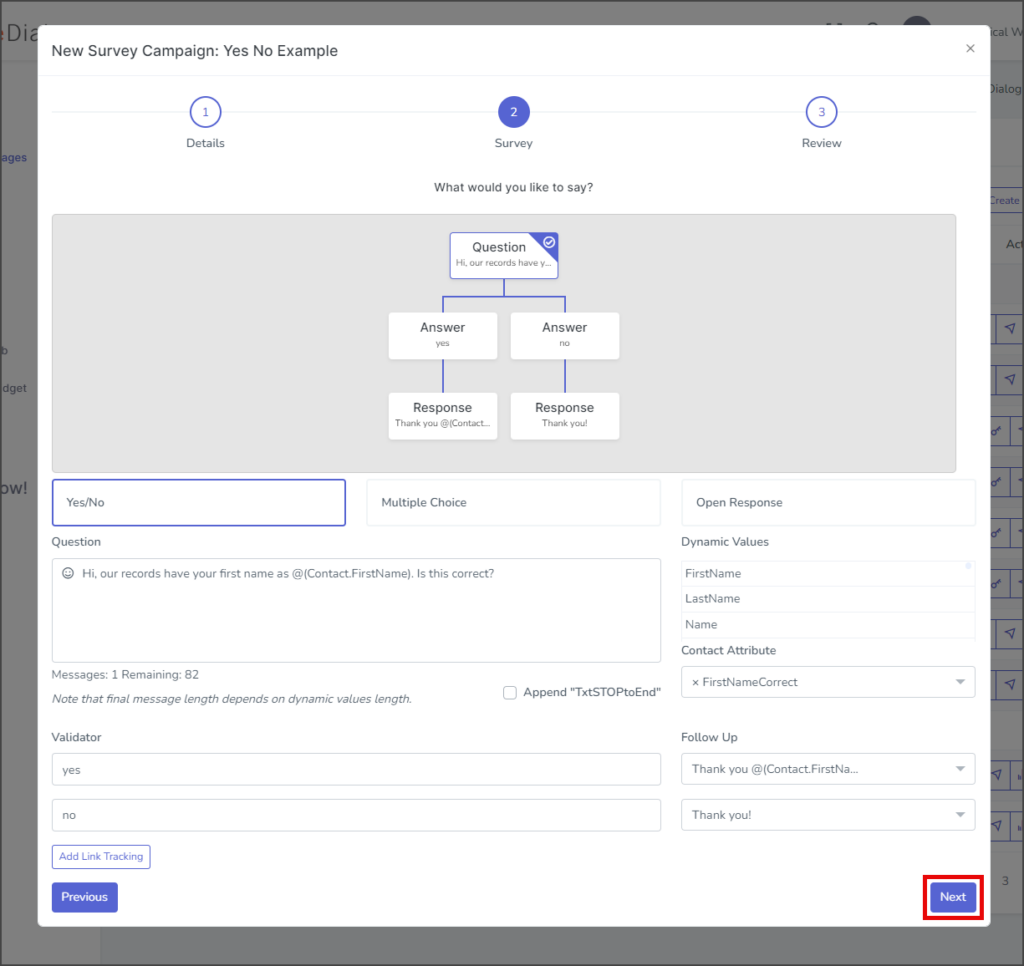
- Return to the Question box in the flow chart and ensure everything is correct.
- Click Next.

Review Page
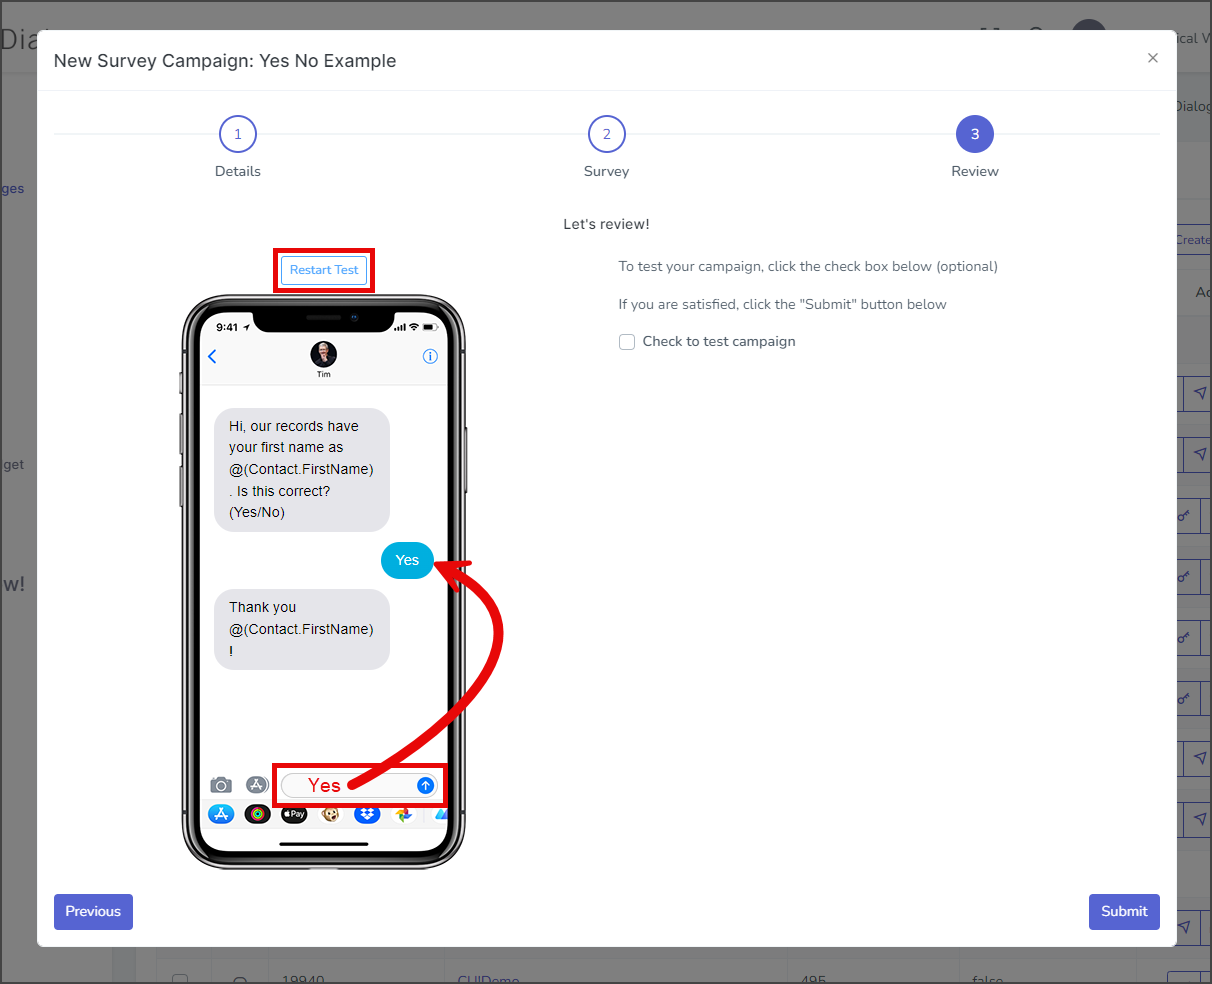
- The Review page features an emulated phone that allows you to test your survey by sending messages and receiving replies.
- Click Restart Test to clear the message thread on the emulated phone and start over with the initial message.

- Click Restart Test to clear the message thread on the emulated phone and start over with the initial message.
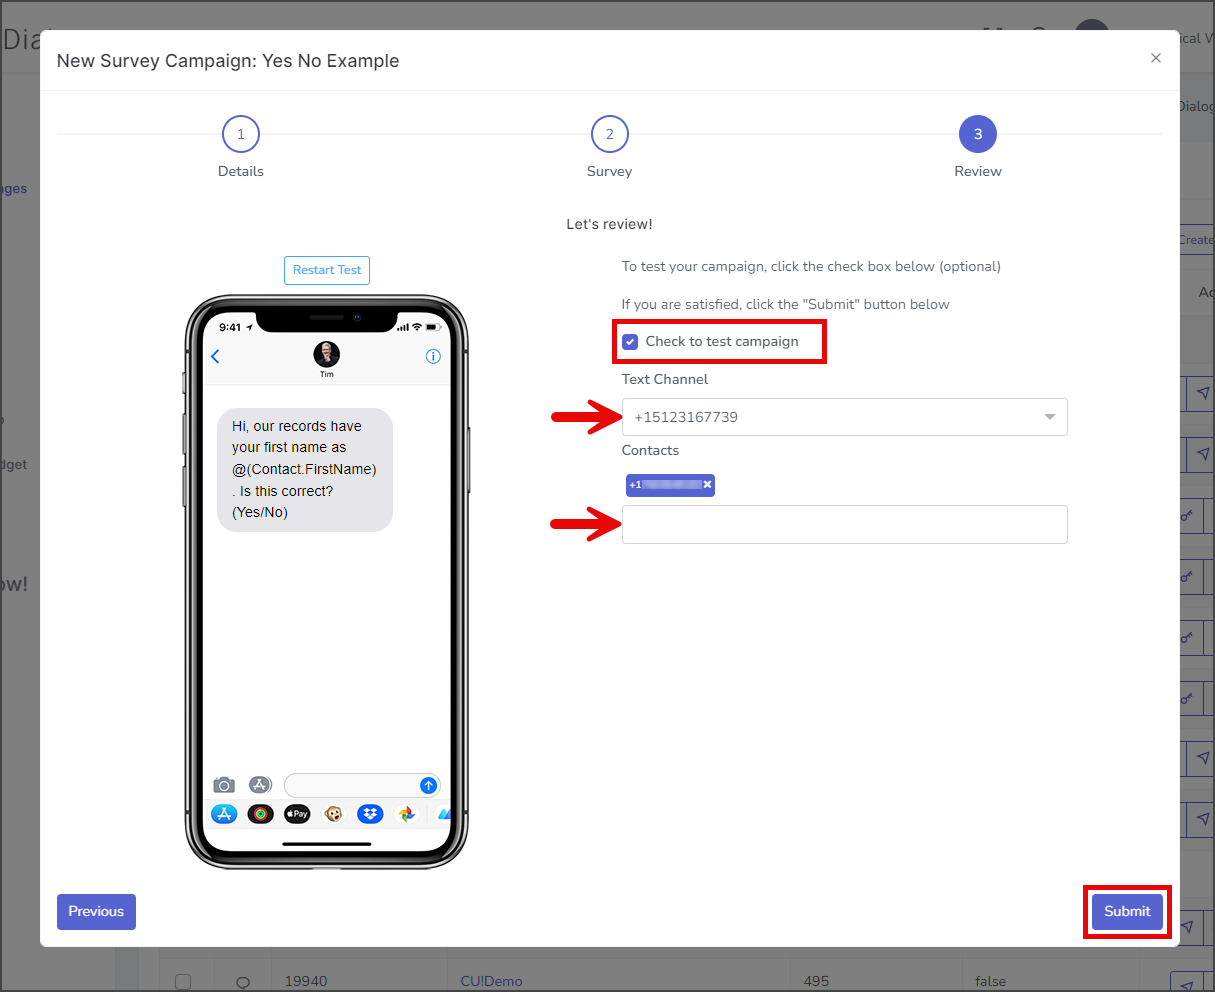
- (Optional) Check to test campaign – If checked, the campaign message will be sent to the specified contact once the campaign is created.
- Note: It is strongly recommended that you test all campaigns before making them live.
- Click the Text Channel dropdown and select the channel to send the test message. This should be the same channel you will use to send your campaign.
- In the Contacts textbox, enter the phone numbers to receive the test message. To enter multiple phone numbers, type a comma after the number, and the number will automatically be added to the list of contacts.
- Click Submit to create the campaign. The campaign message will be sent to the listed contacts if the Check to test campaign checkbox is checked.

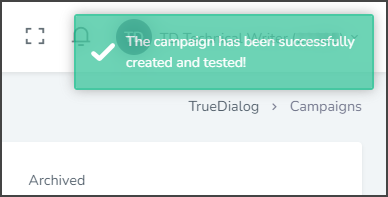
- After creating the campaign, a success message will appear in the upper right corner.