TrueDialog Portal
Comms Hub > Channels
This guide will show you how to manage your Facebook Messenger connections. You can change the TrueDialog account your Facebook Account is connected to, disconnect and reconnect your Facebook Account connection, and Remove and Delete all your Facebook Messenger connection data.
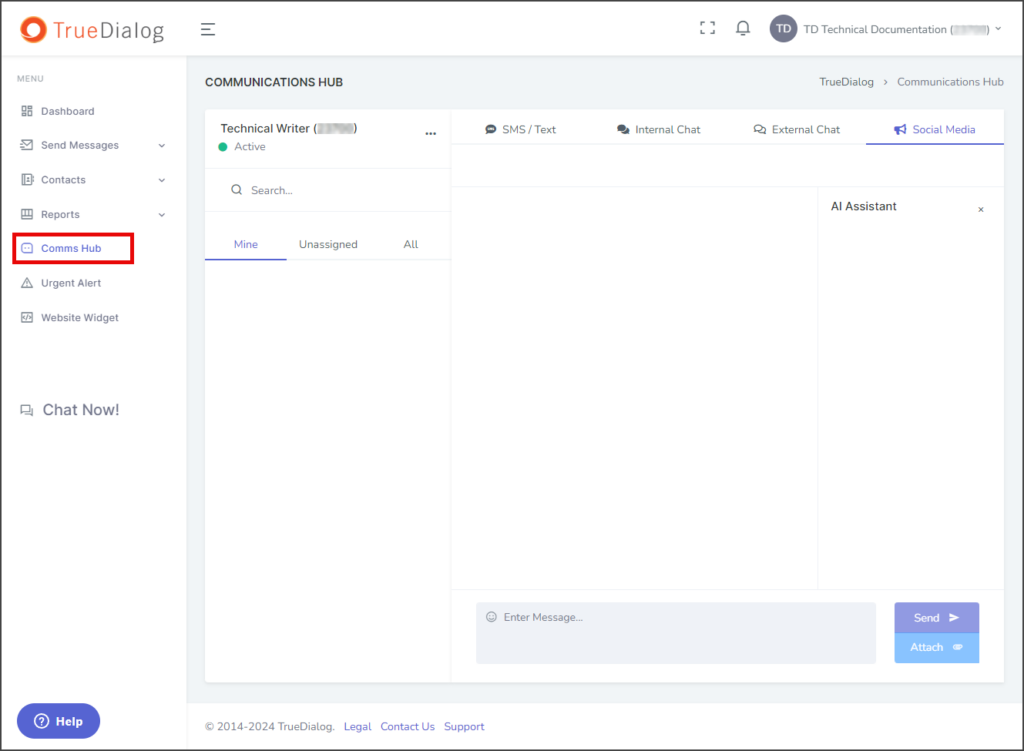
- Access the Communication Hub page by clicking Comms Hub in the left sidebar.
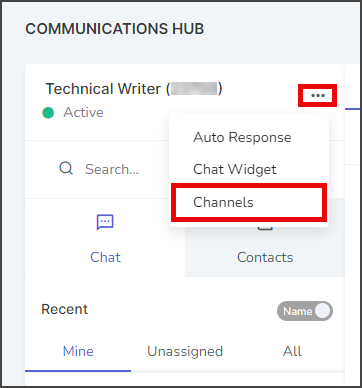
- Click the horizontal line of three dots to the right of the user name and select Channels.
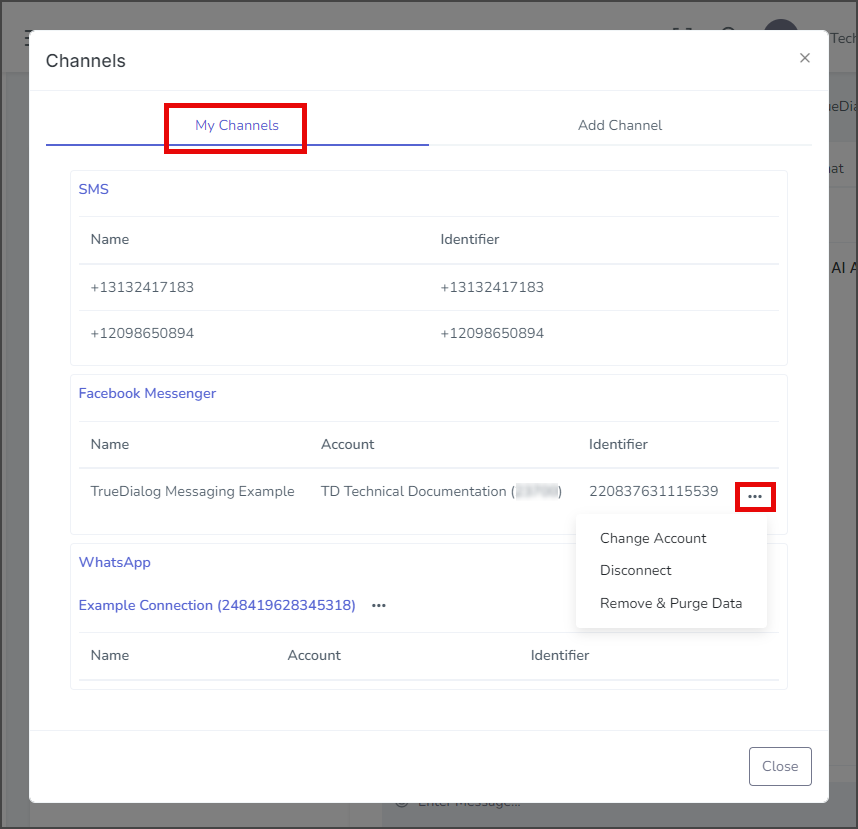
- Click the My Channels tab.
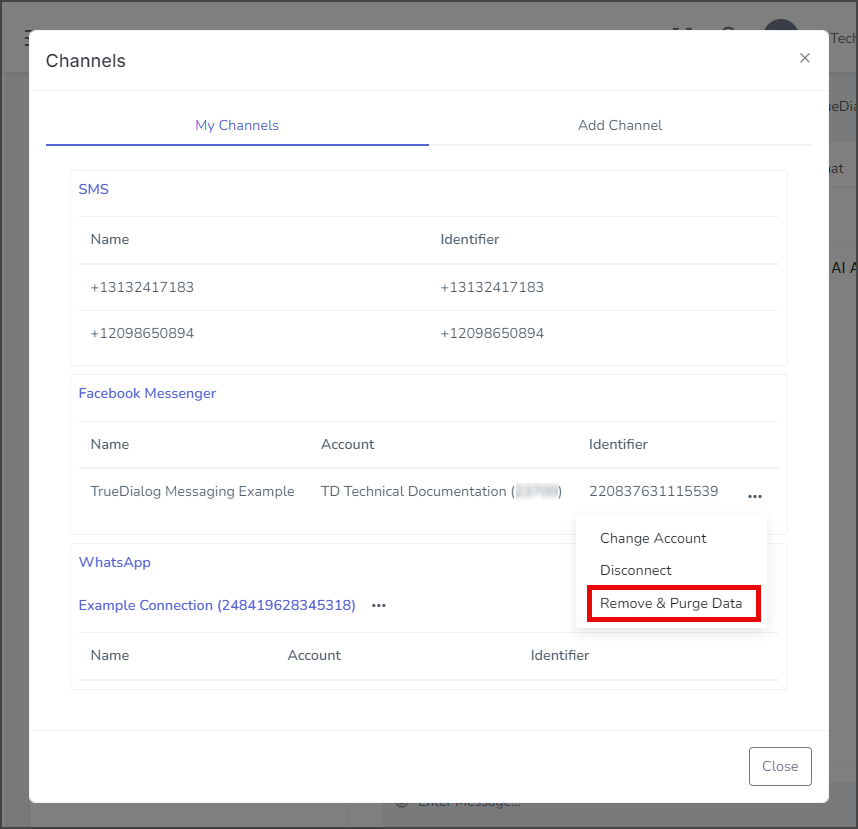
- Click the Three Dots on the right side of the Facebook Messenger connection you want to manage.
Change Account
Messages from new users will show up as unassigned. These messages must be assigned to an account before you can send a reply. You can find the account that manages the assignment of unassigned messages in the Account column of the Facebook connection. If you need to change the managing account, follow the instructions below.
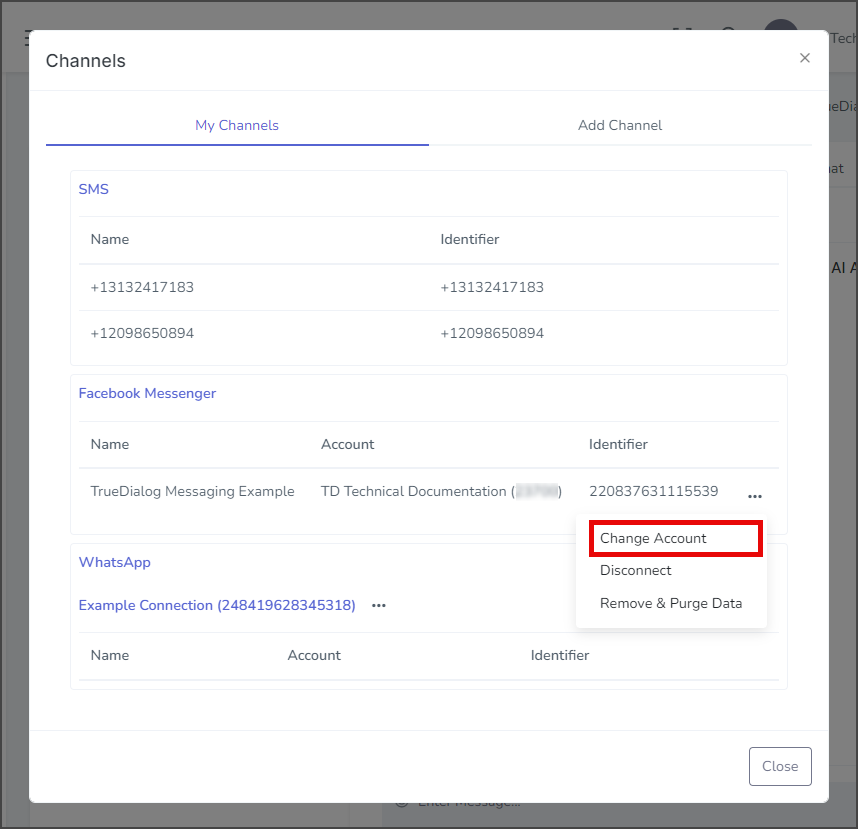
- View the managing account in the Account column.

- Click Change Account.
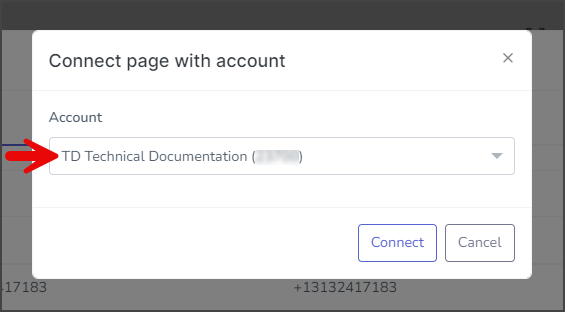
- Click the Account dropdown and select the account to connect to.
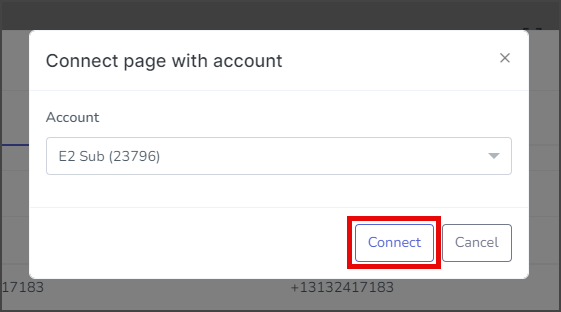
- Click Connect.
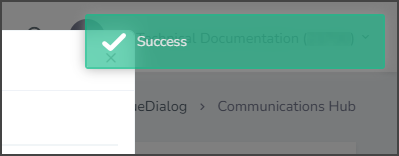
- After changing accounts, a success message will appear in the upper right corner.
Disconnect/Reconnect
You can disconnect and reconnect your Facebook Account at any time. When your Facebook Account is disconnected, your Comms Hub cannot send or receive any Facebook Messenger messages.
- Click Disconnect.
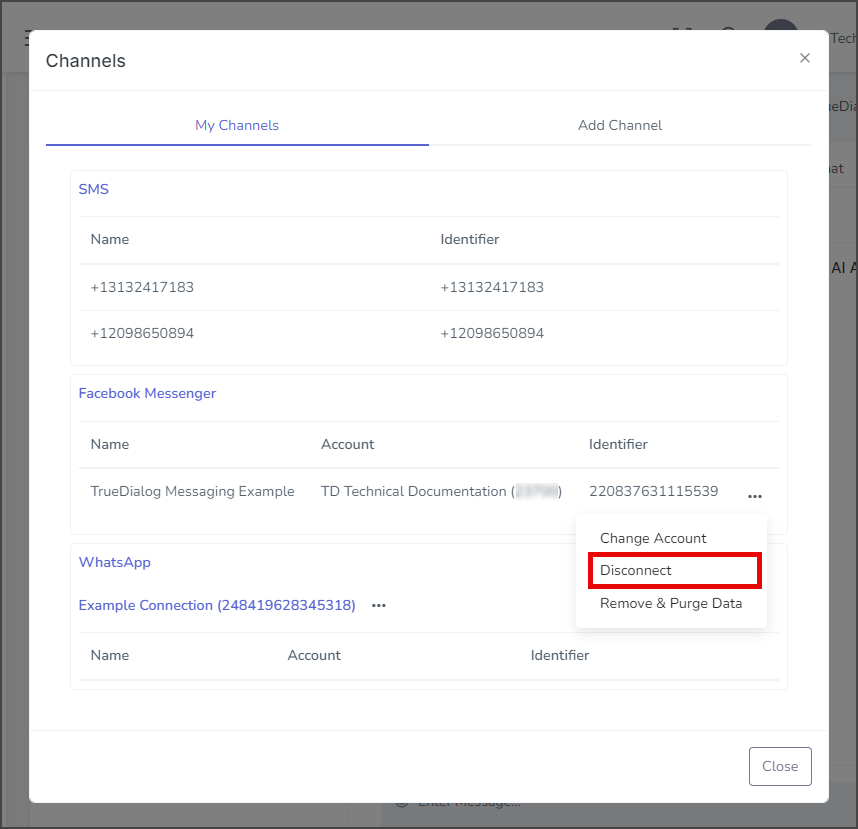
- After disconnecting your Facebook Account, a success message will appear in the upper right corner.

- Click the Three Dots on the right of the Facebook connection you want to reconnect.
- Click Reconnect.
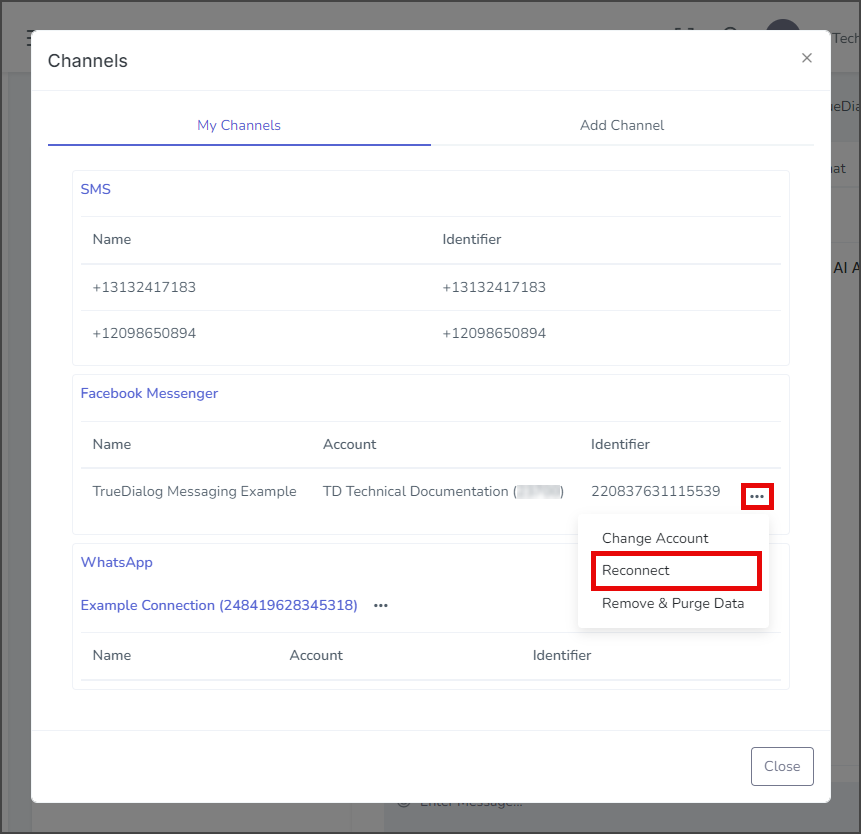
- After reconnecting your Facebook Account, a success message will appear in the upper right corner.

Remove & Purge Data
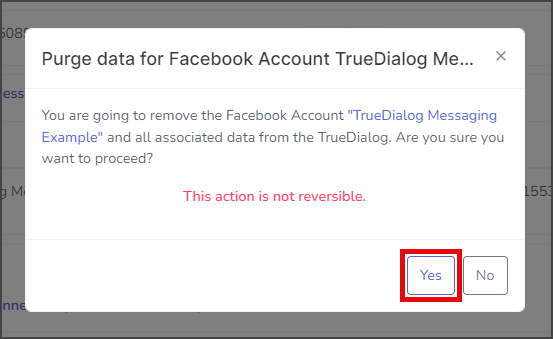
This operation will disconnect your Facebook Account from TrueDialog’s system and delete all associated data from TrueDialog. No changes will be made to your Facebook Account on Facebook’s servers.
