
TrueDialog Portal
Administration > Account Tree
This guide shows you how to use the features on the Account Tree page. The Account Tree displays the account hierarchy in a tree graph and allows you to manage the accounts.
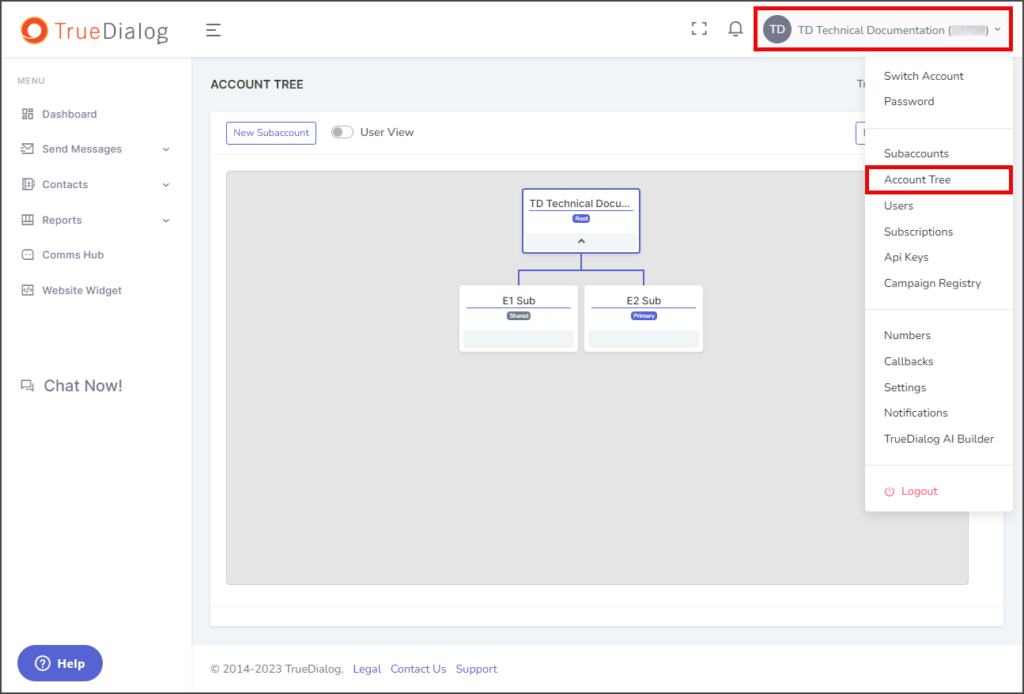
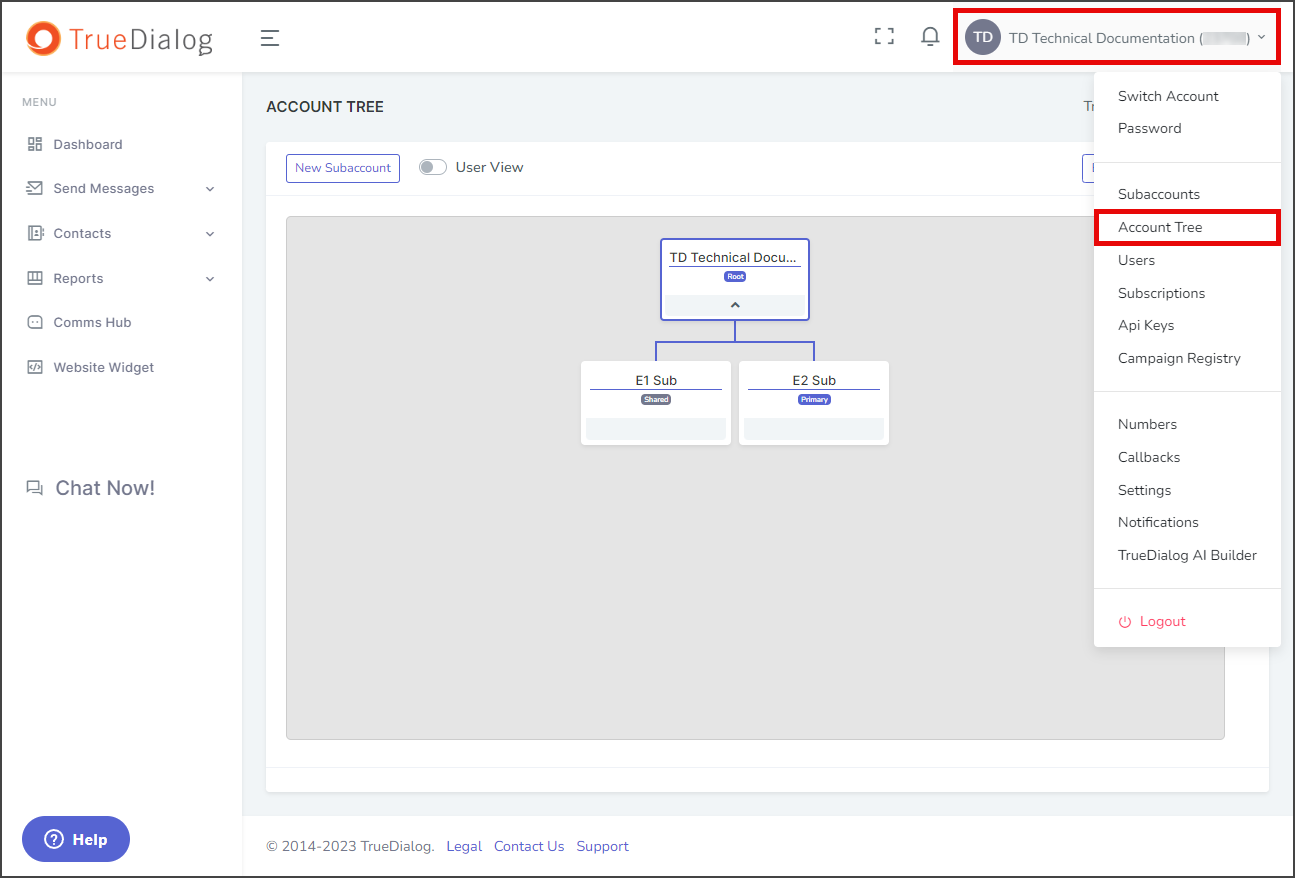
- Click your Account Name in the upper right corner.
- In the dropdown, select Account Tree.
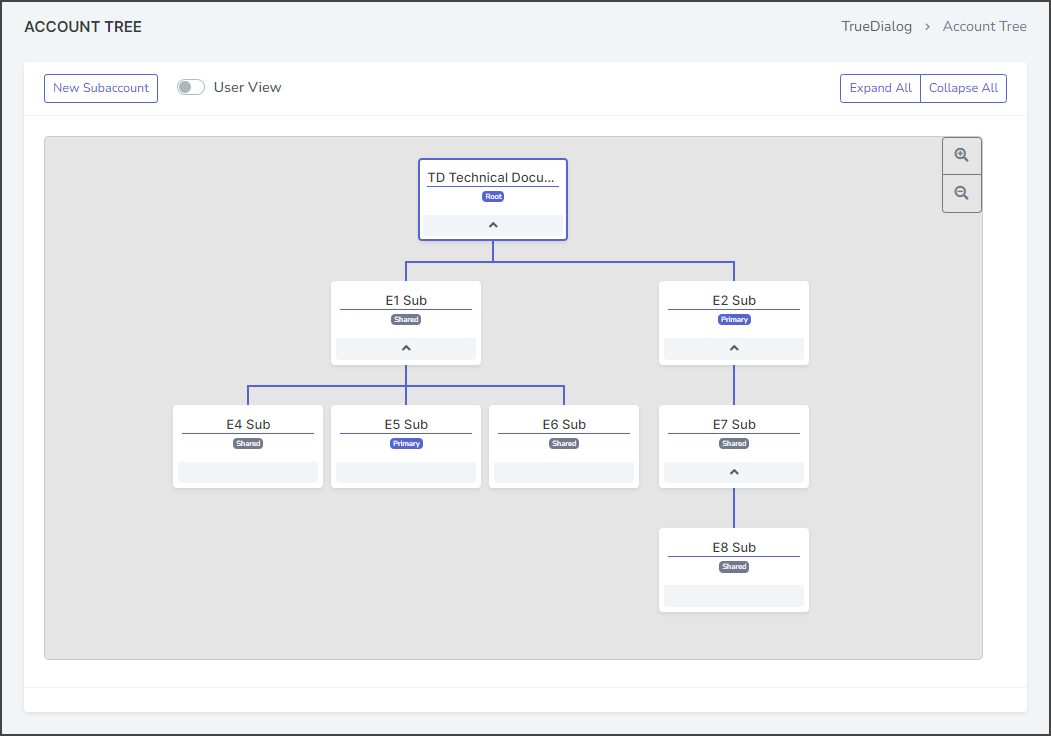
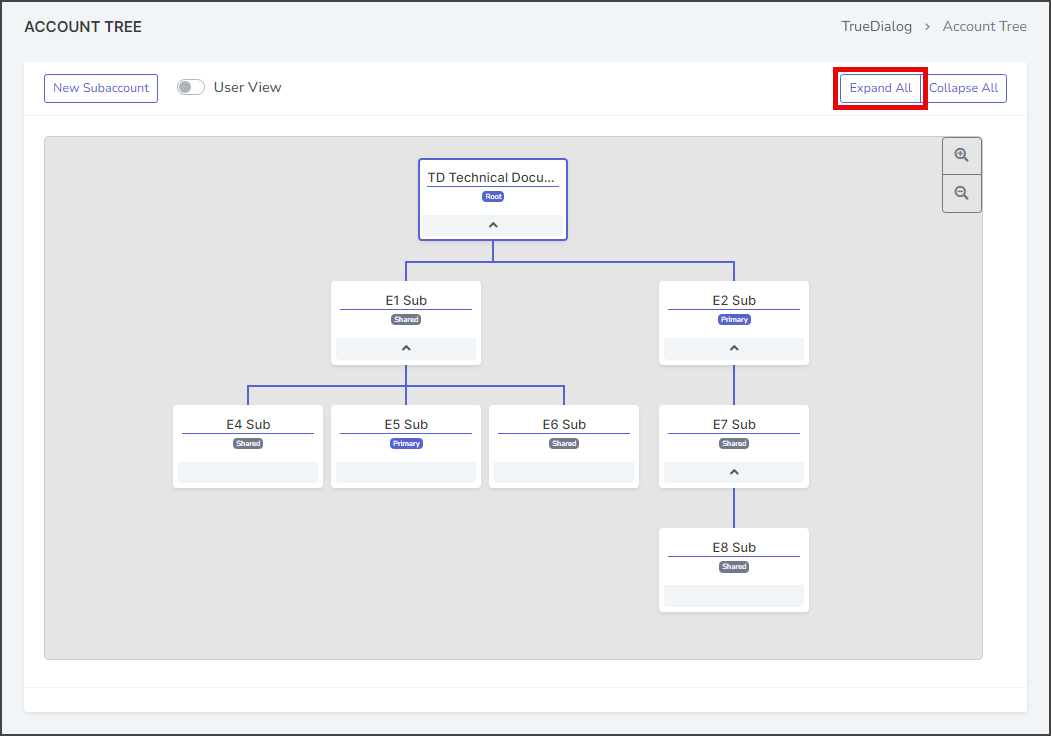
Tree Graph
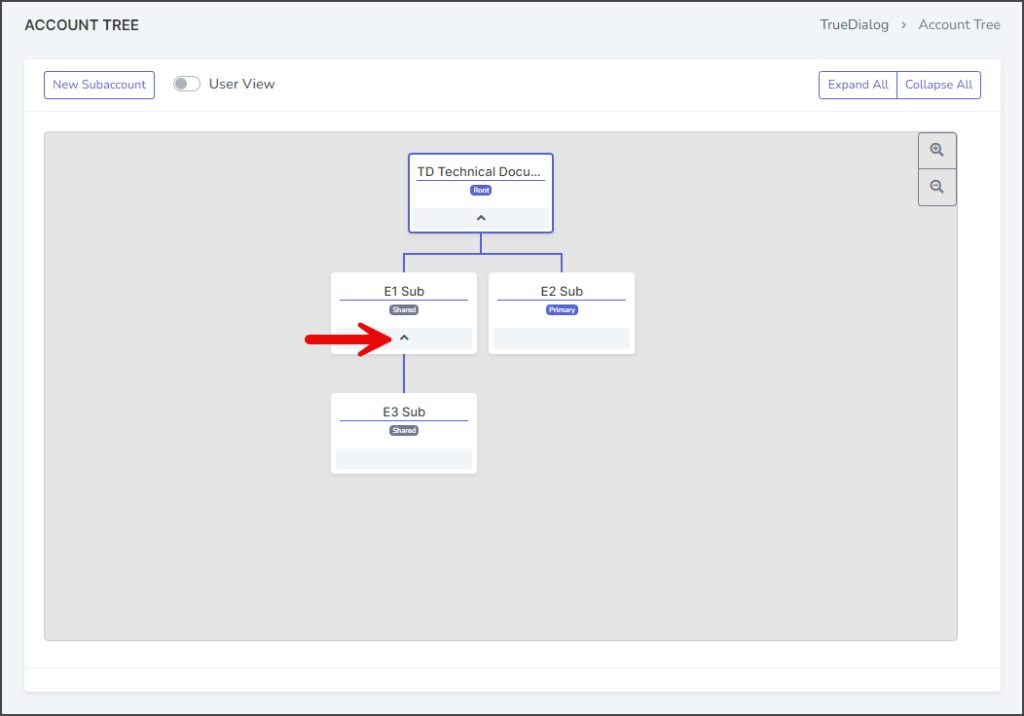
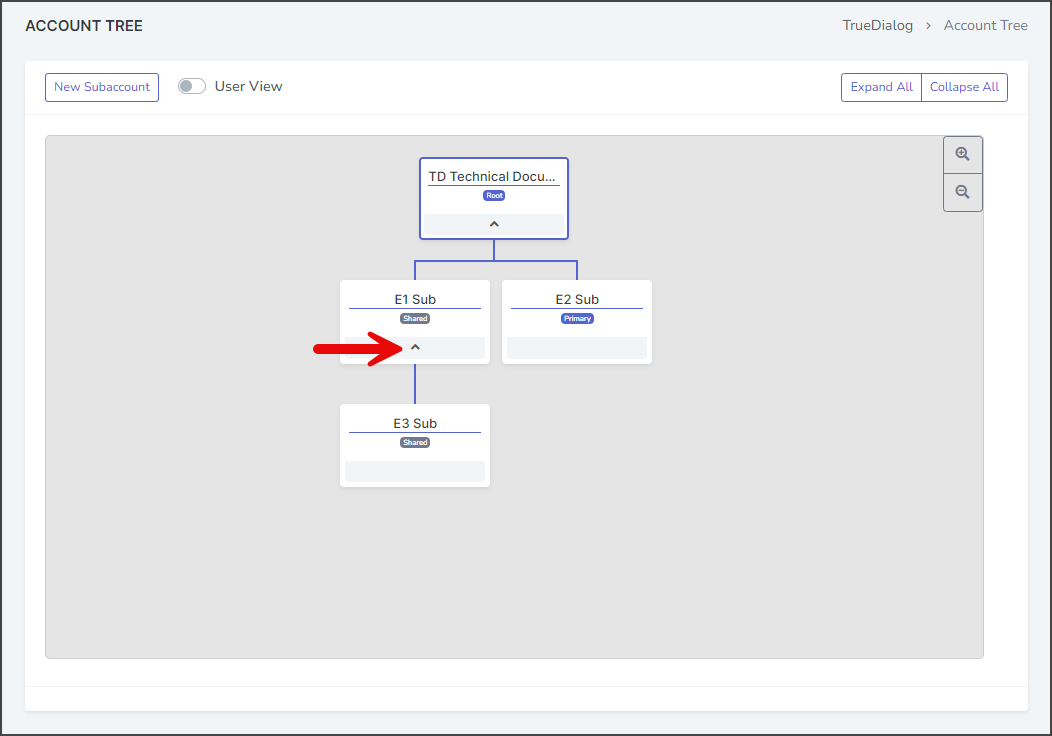
The tree graph visually shows the parent-child relationship of each subaccount. Each account shows its Name, Account Type, and Child Connections.
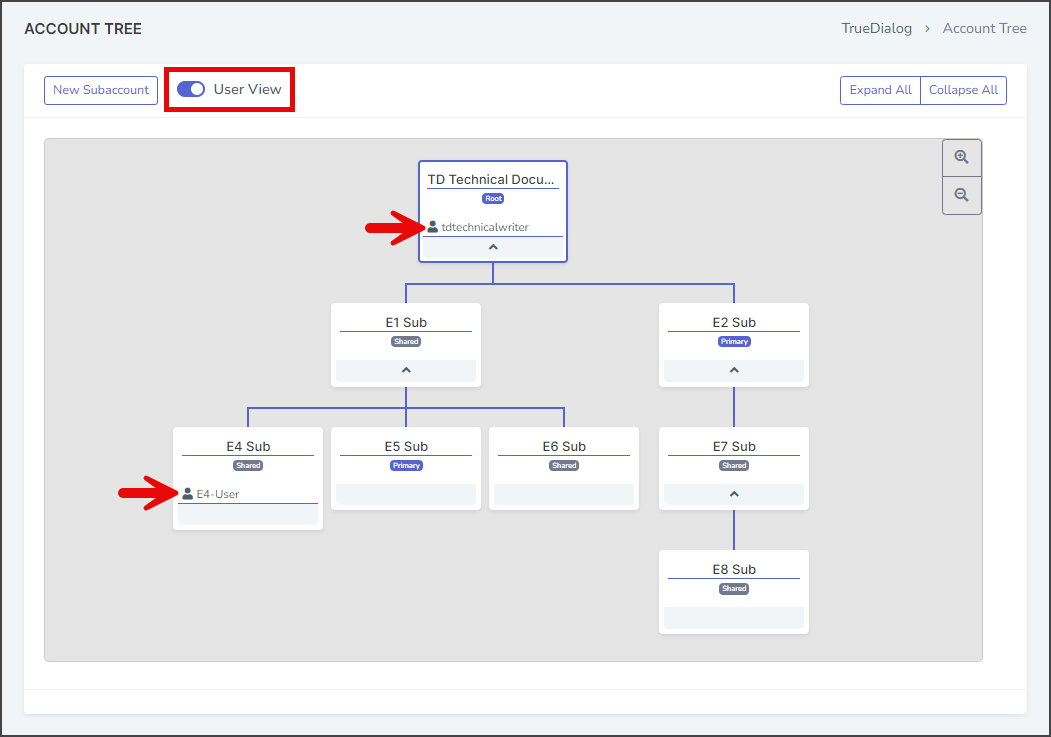
User View
Toggle the User View to see the user or users for each account.
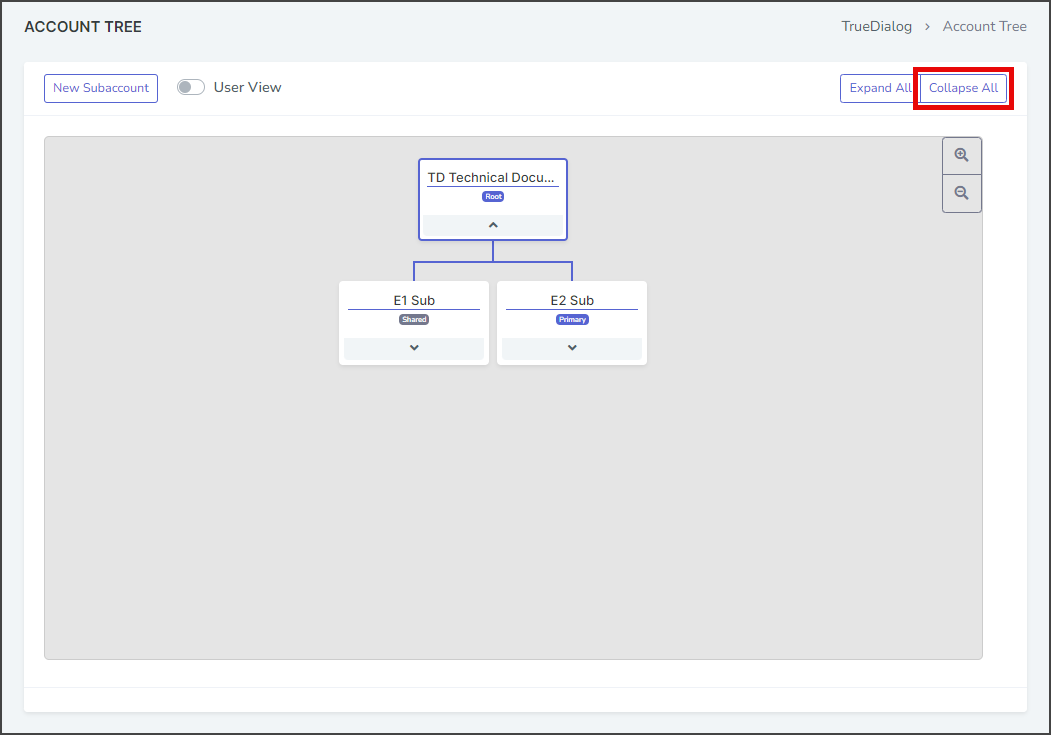
Expand/Collapse
Click Expand All or Collapse All to expand the tree to show all accounts or collapse the tree to show only the direct children of the current account.
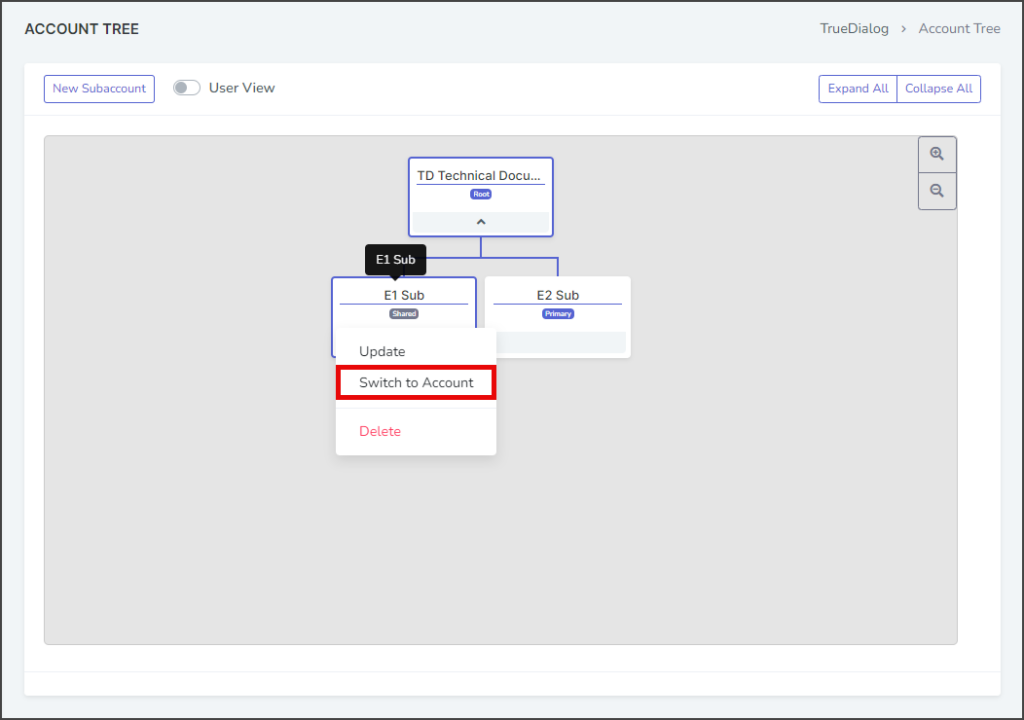
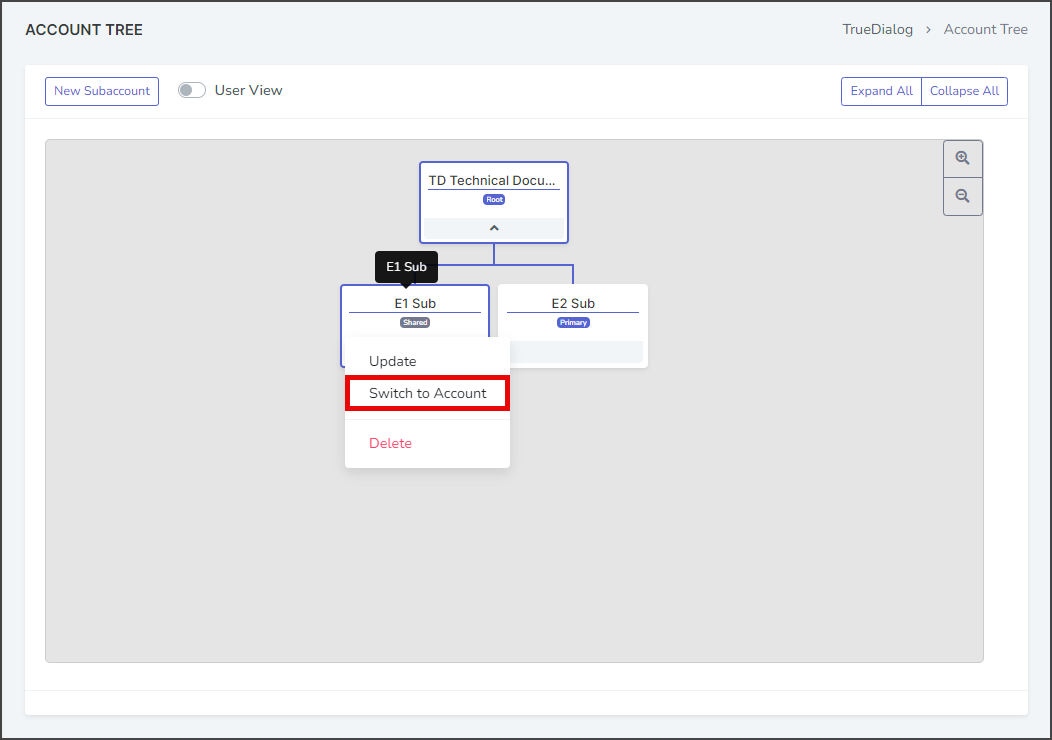
Switch Accounts
- Click on the Account to switch to.
- In the options menu that opens, select Switch to Account.
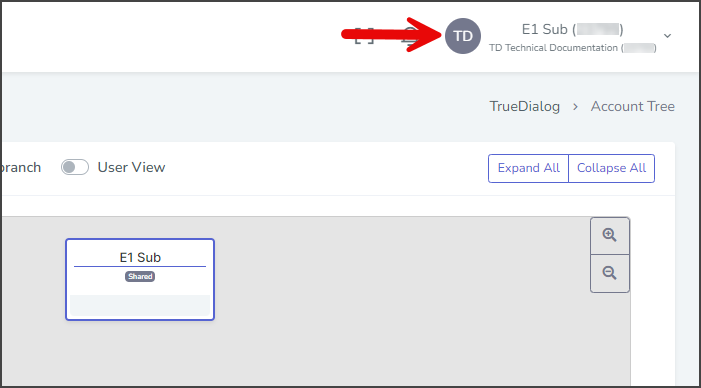
- Check the Account Name in the upper right corner to see the account you are now logged into. Your root account will also be shown here as well. The Account Tree will be updated to reflect the current account.
- To switch back to your account:
- Click your Account Name in the upper right corner.
- In the dropdown, select Switch Account.

- Click the Switch to dropdown and select your account in the My Account group.
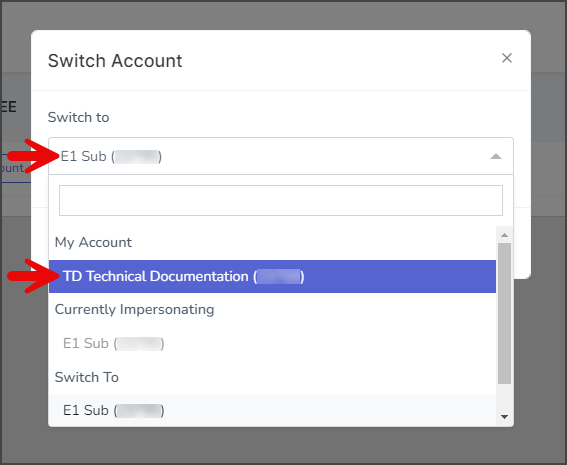
- Click Switch to switch back to your account.
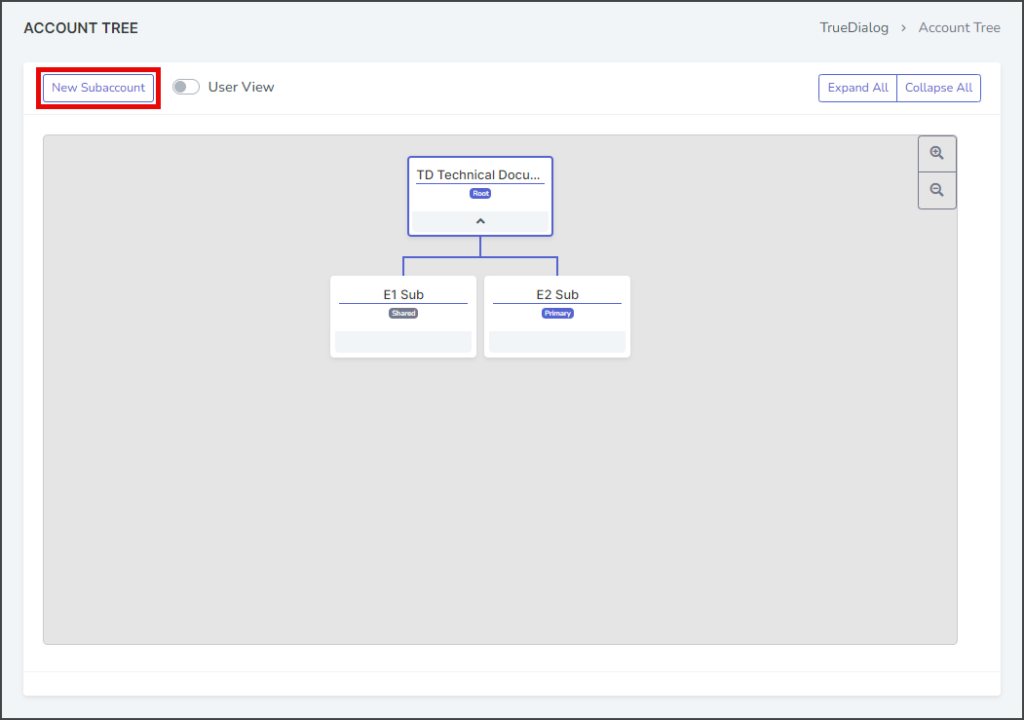
New Subaccount
- Click New Subaccount to open the New Subaccount form.
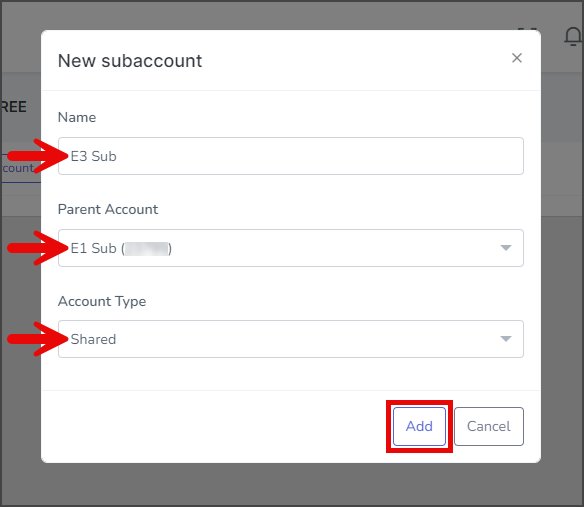
- Fill out the form.
- Name – Your subaccount name. It is recommended to have consistent naming with your other subaccounts.
- Parent Account – Select from the dropdown the account that will be the immediate parent.
- Account Type
- Primary – These accounts will have standalone subscriptions and databases separate from the parent account. This separation can be useful for agency partners creating accounts for their clients.
- Shared (Default) – These accounts will use subscriptions controlled by the parent account.
- Click Save to create the subaccount.
- After creating the subaccount, a success message will appear in the upper right corner.
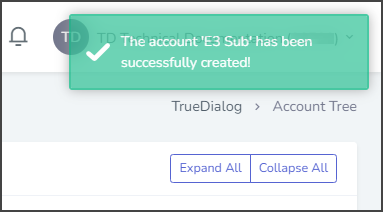
- To view the new subaccount in the tree, click the down arrow at the bottom of the subaccount that is the parent of the new subaccount. (Alternately) Click Expand All and then find the new subaccount.

Update Account
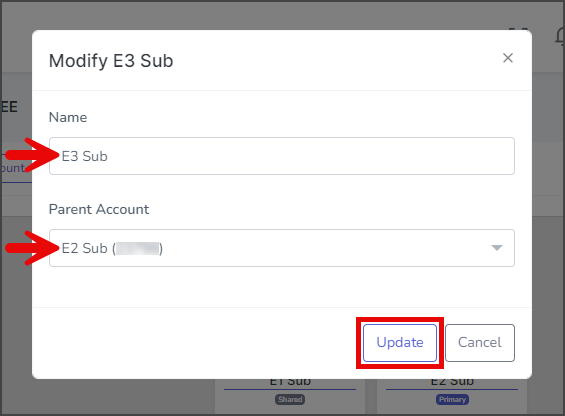
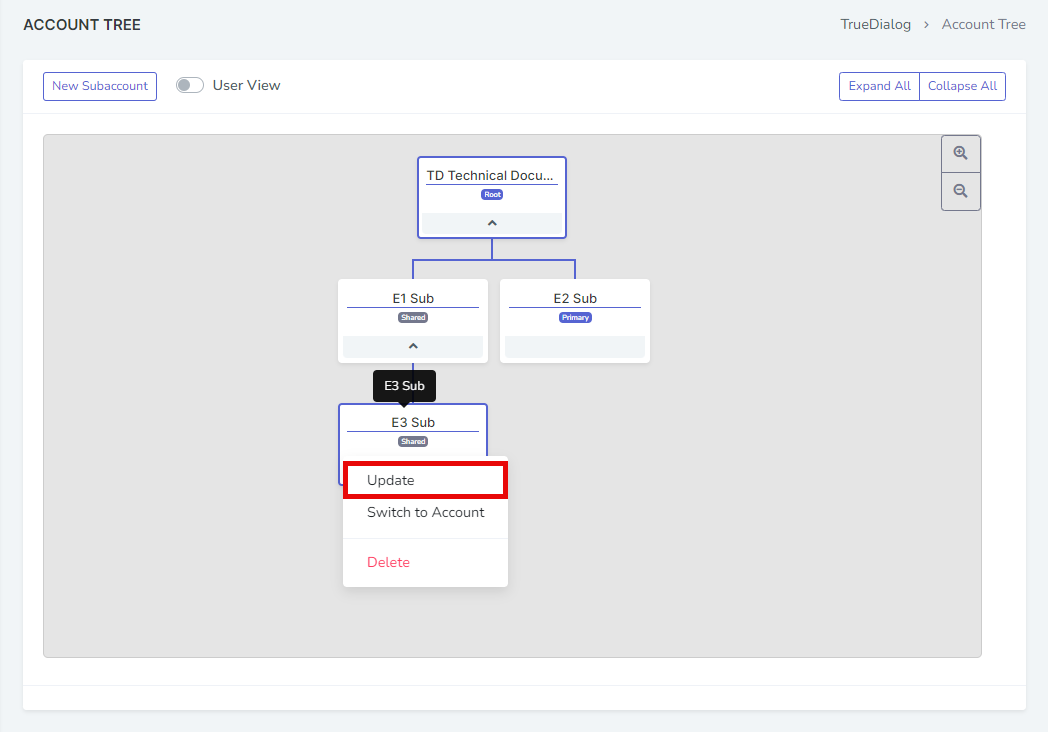
- Click on the Account to update.
- In the options menu that opens, select Update.
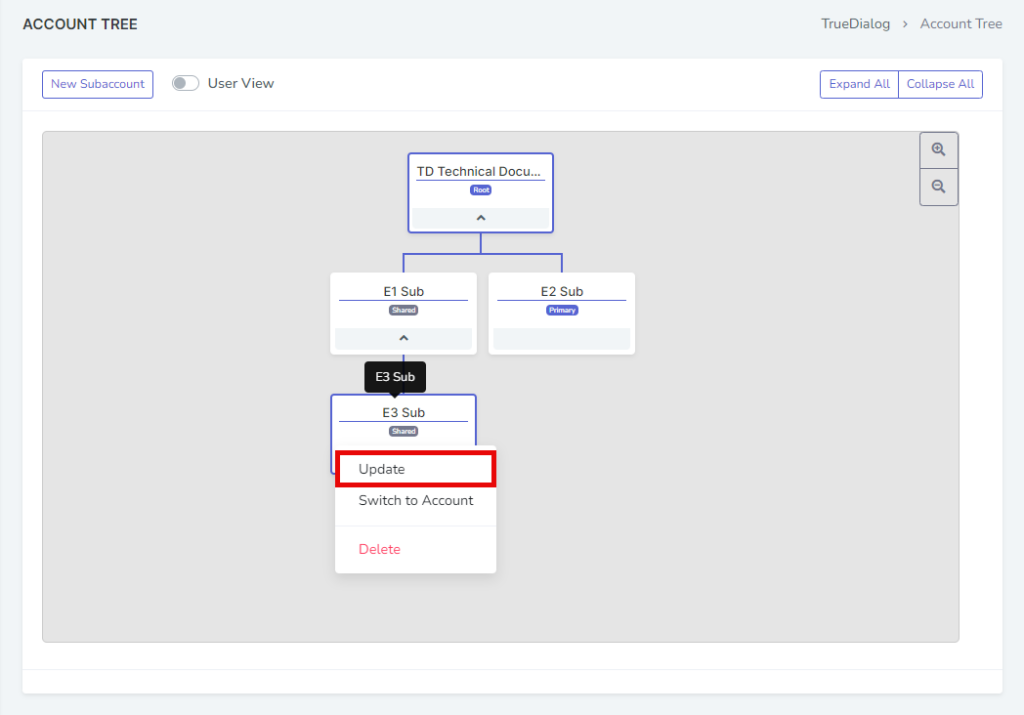
- Make the desired changes to the Name and Parent Account fields in the Modify Account form.
- Click Update.
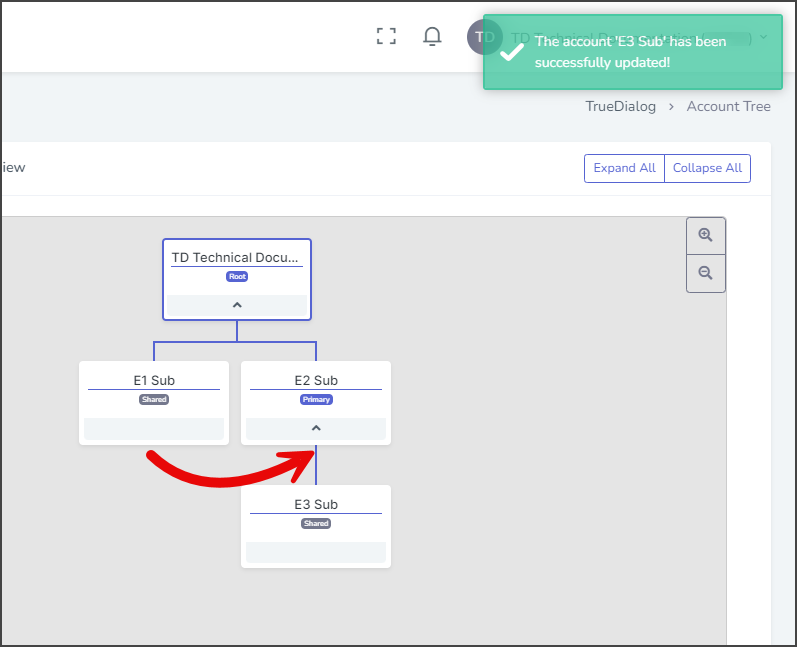
- After updating the account, a success message will appear in the upper right corner.
- The Account Tree will be updated with the changes you made. In this example, the Parent Account of E3 Sub was changed from E1 Sub to E2 Sub.
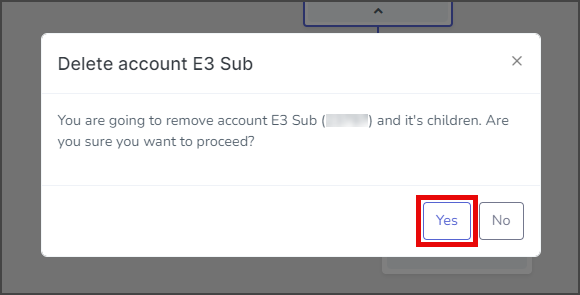
Delete Account
- Click on the Account to delete.
- In the options menu that opens, select Delete.
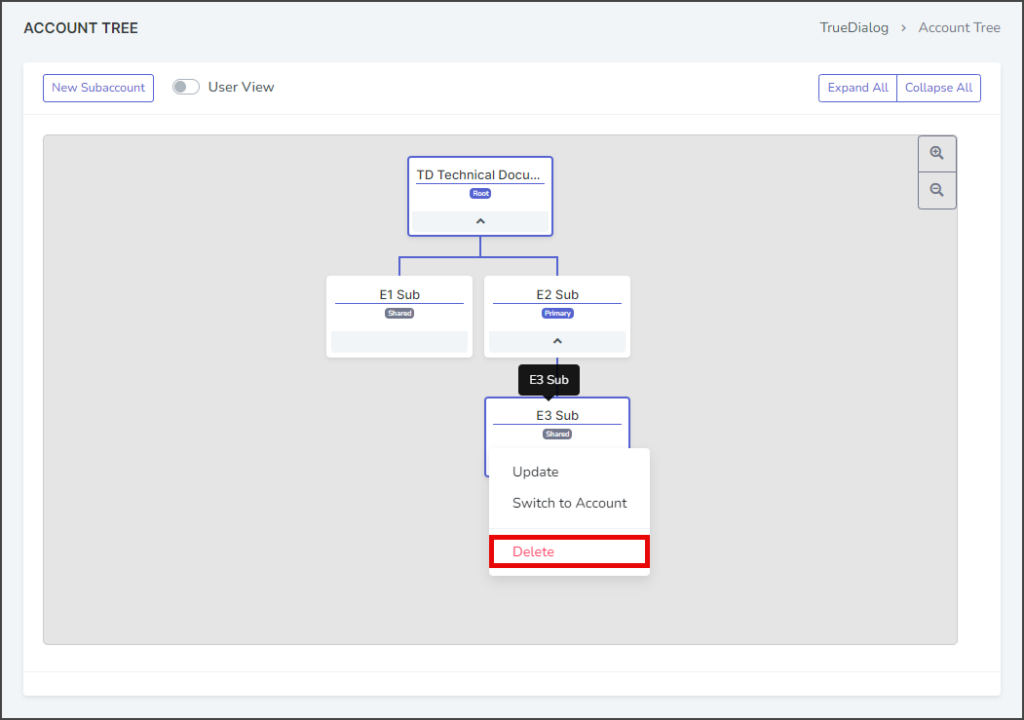
- In the Delete account confirmation window, click Yes to delete the account.
- After deleting the account, a success message will appear in the upper right corner.
- The Account Tree will be updated with the changes you made.

