Salesforce Marketing Cloud
TrueDialog Integration
This guide will show you how to create a Data Extension, add contacts, and sync them with TrueDialog. A Data Extension is a table that stores your contacts and their information. Before sending messages to these contacts, they need to be synced with the contacts in your TrueDialog account.
Create Data Extension
- From the Salesforce Marketing Cloud Home Page.
- Click Audience Builder, and in the dropdown menu, click Contact Builder.
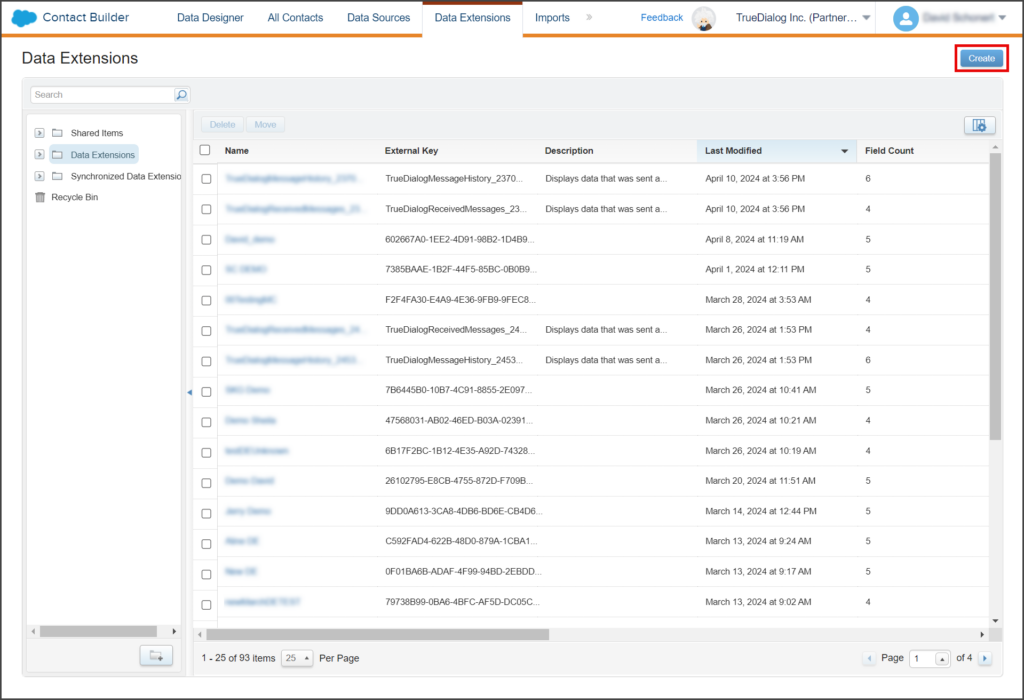
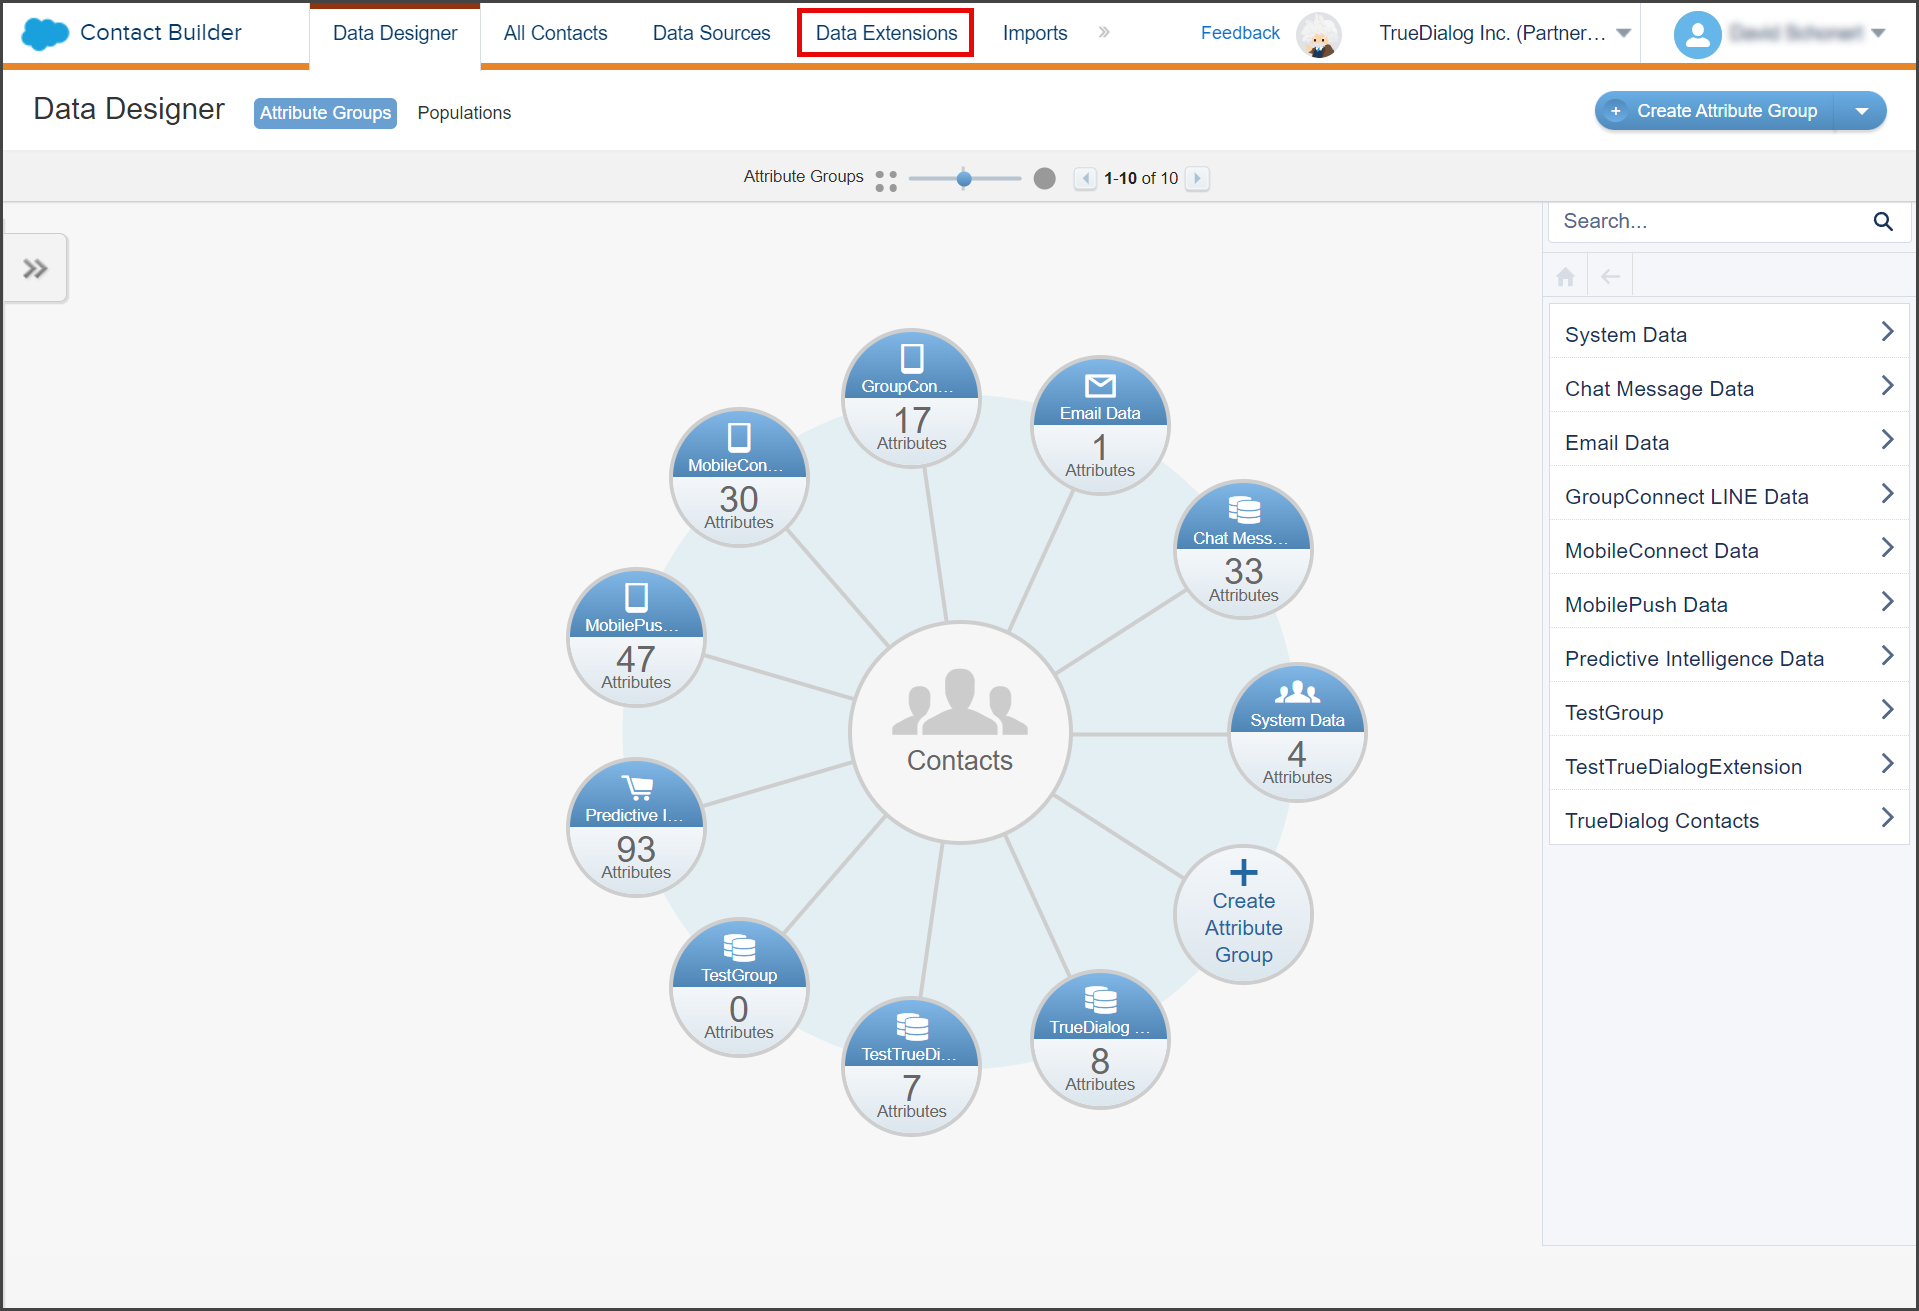
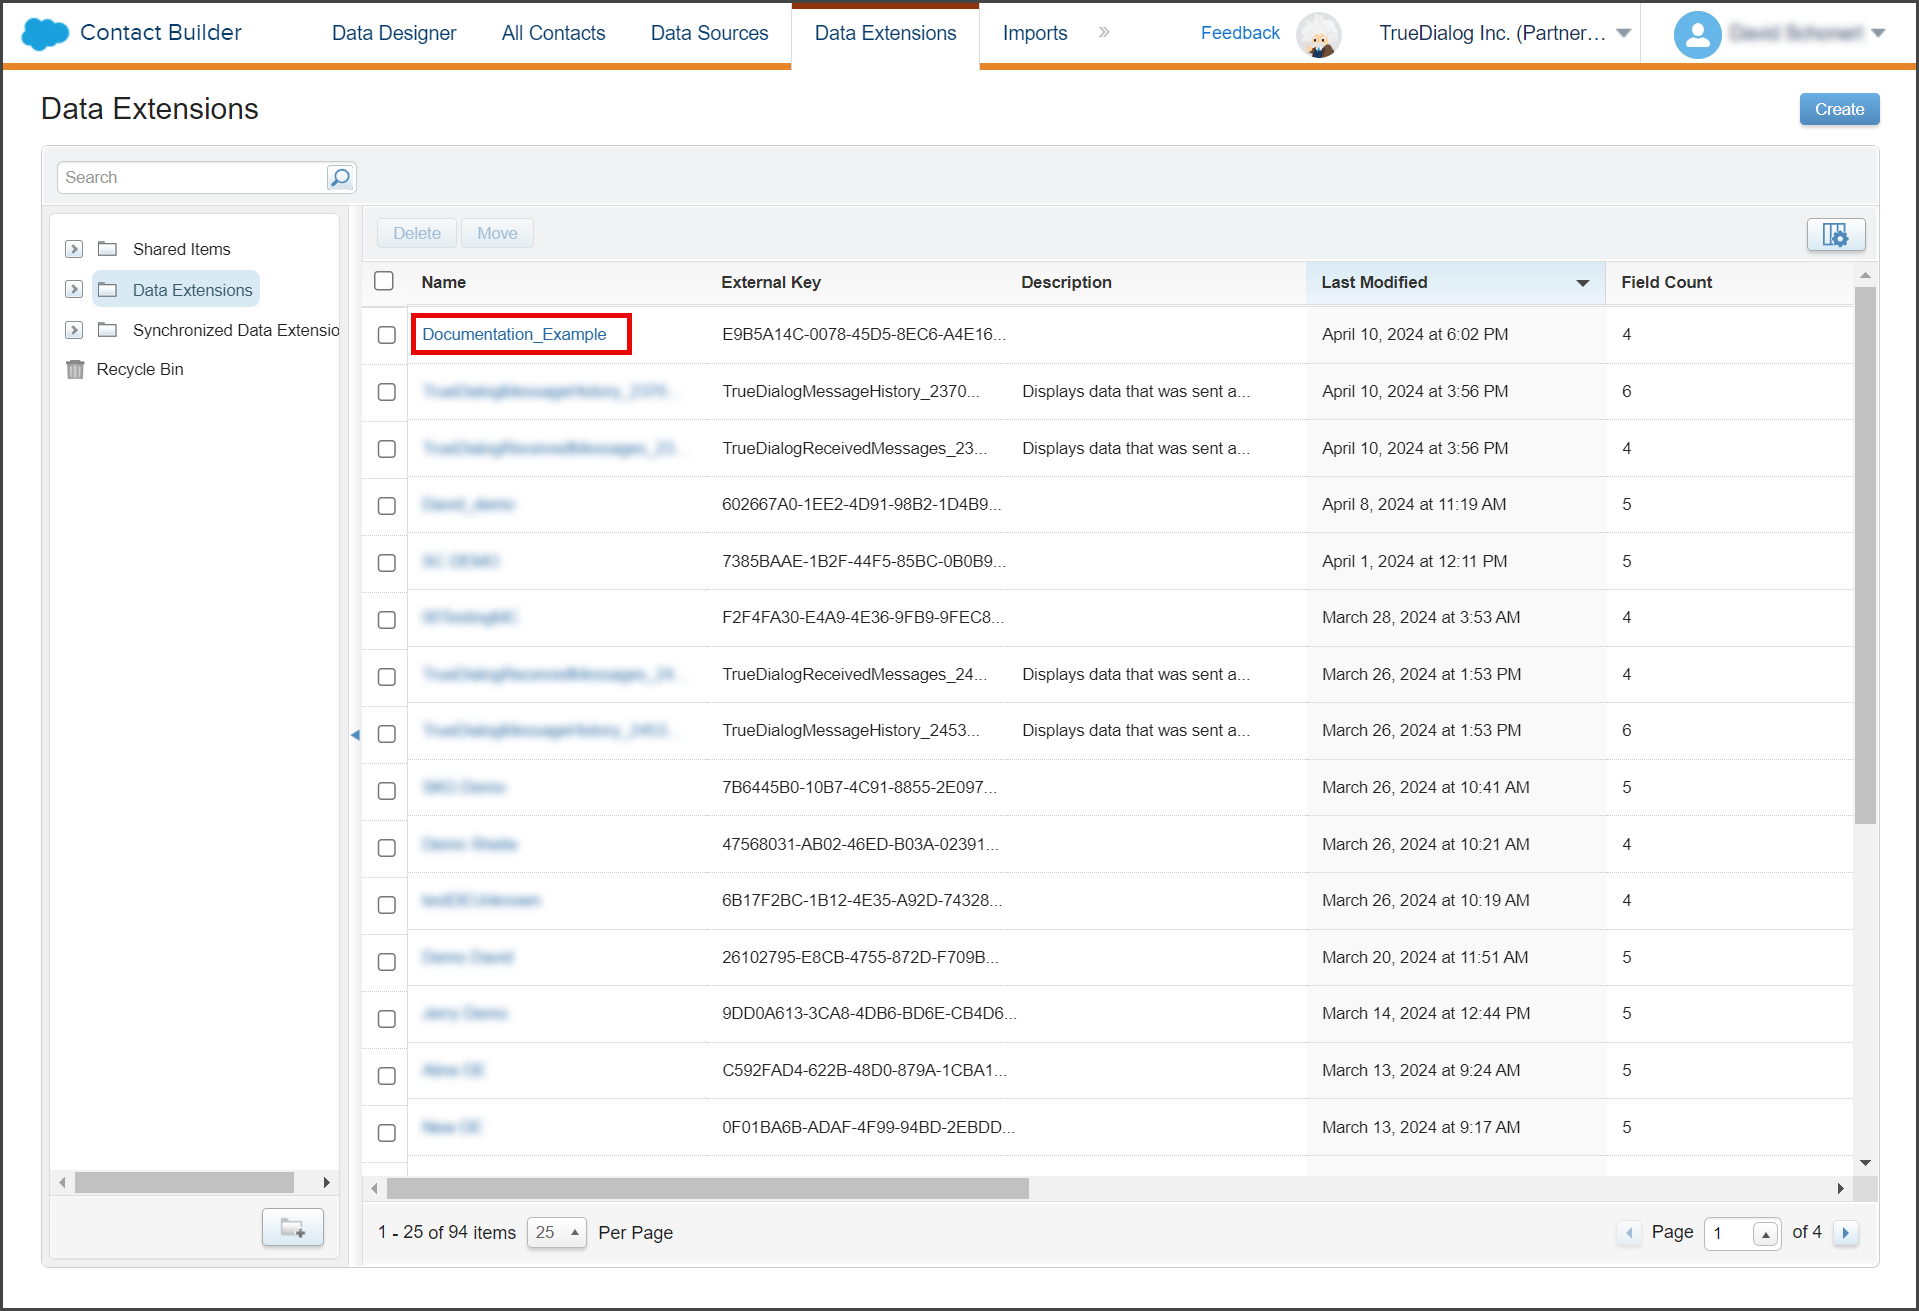
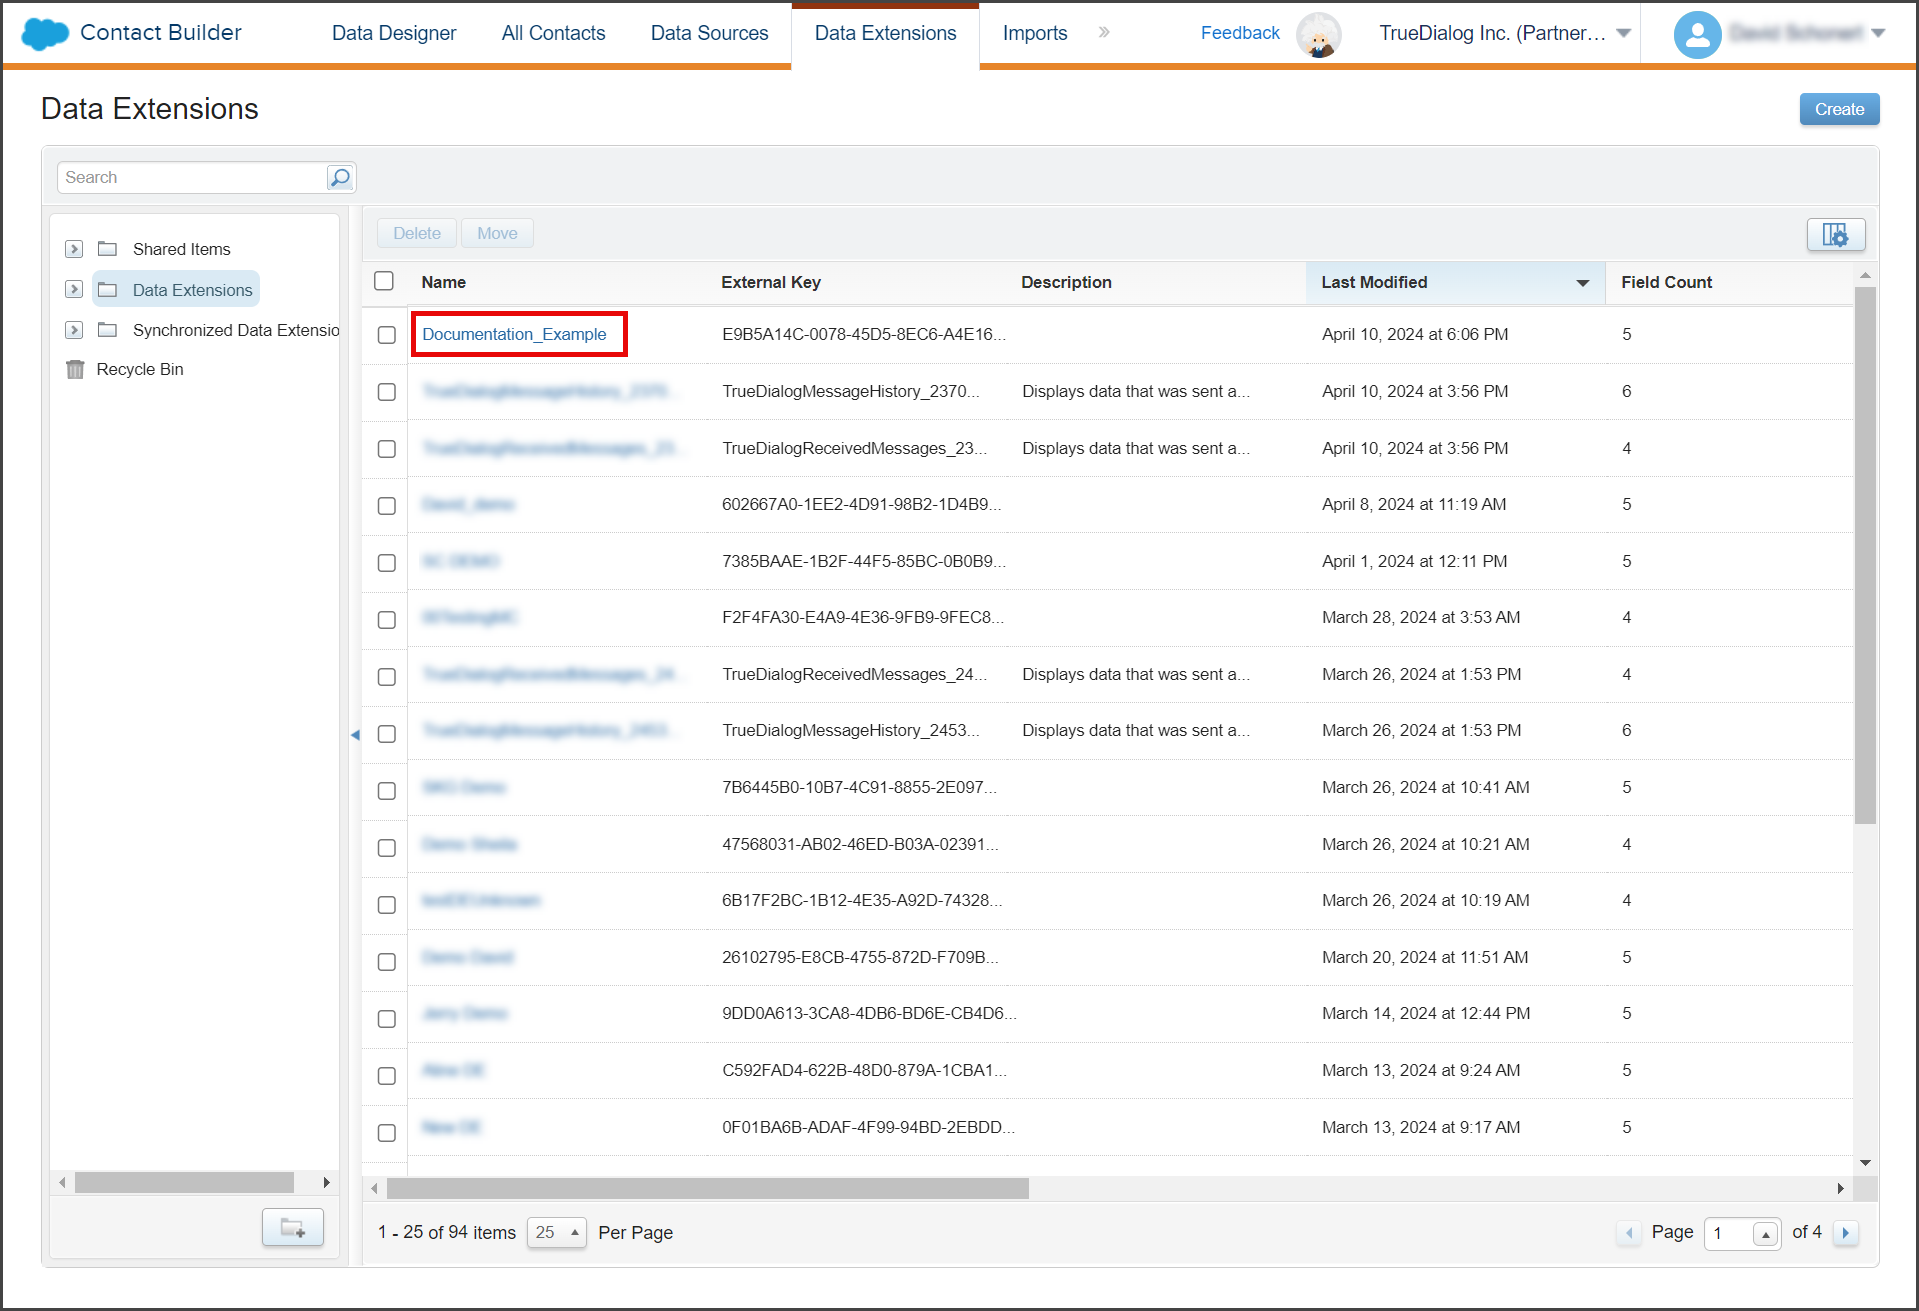
- From the Contact Builder page, click the Data Extensions tab.

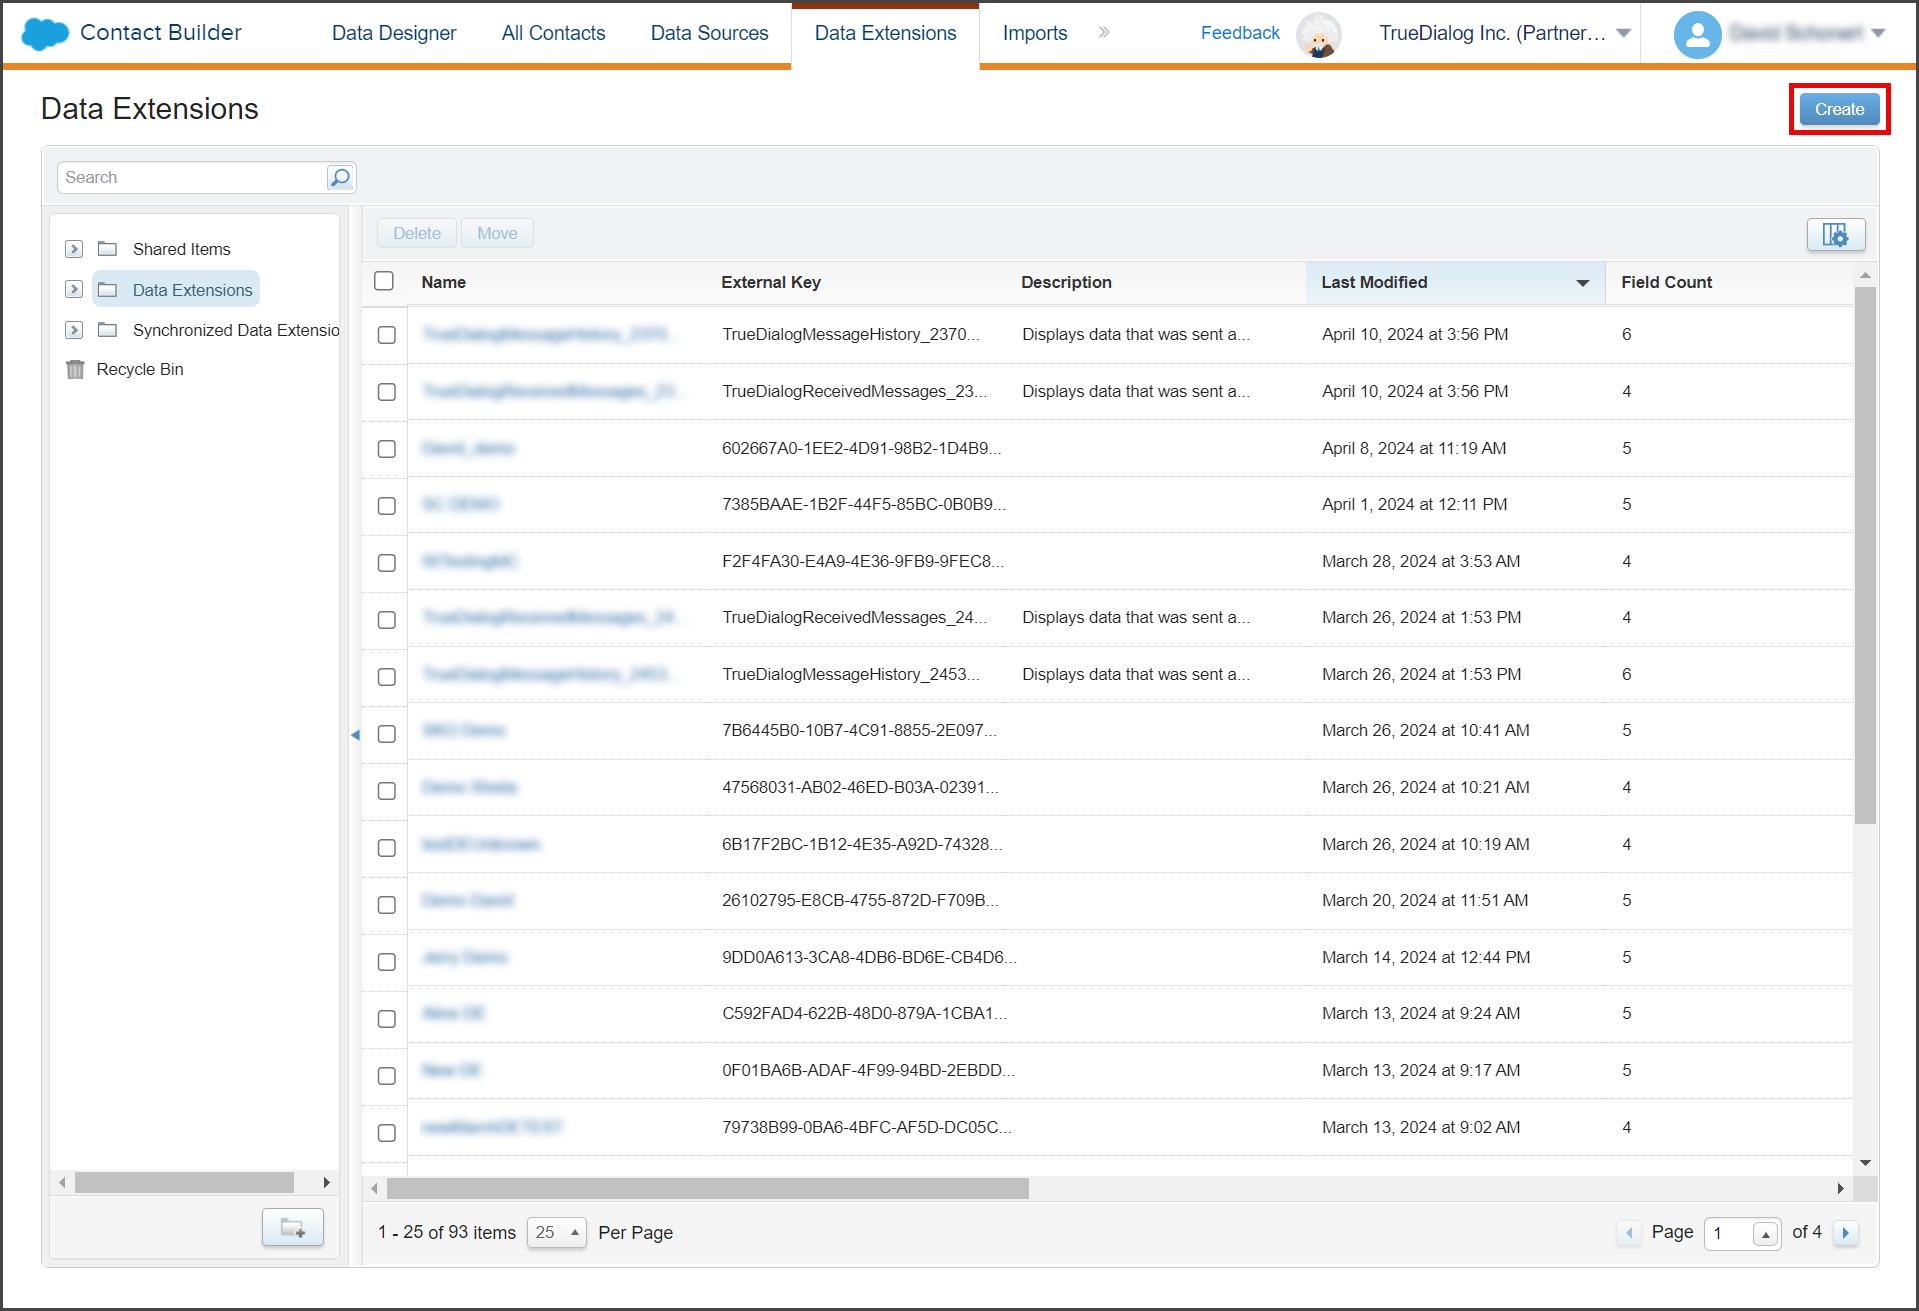
- Click Create to open the Create New Data Extension form on the Data Extensions page.
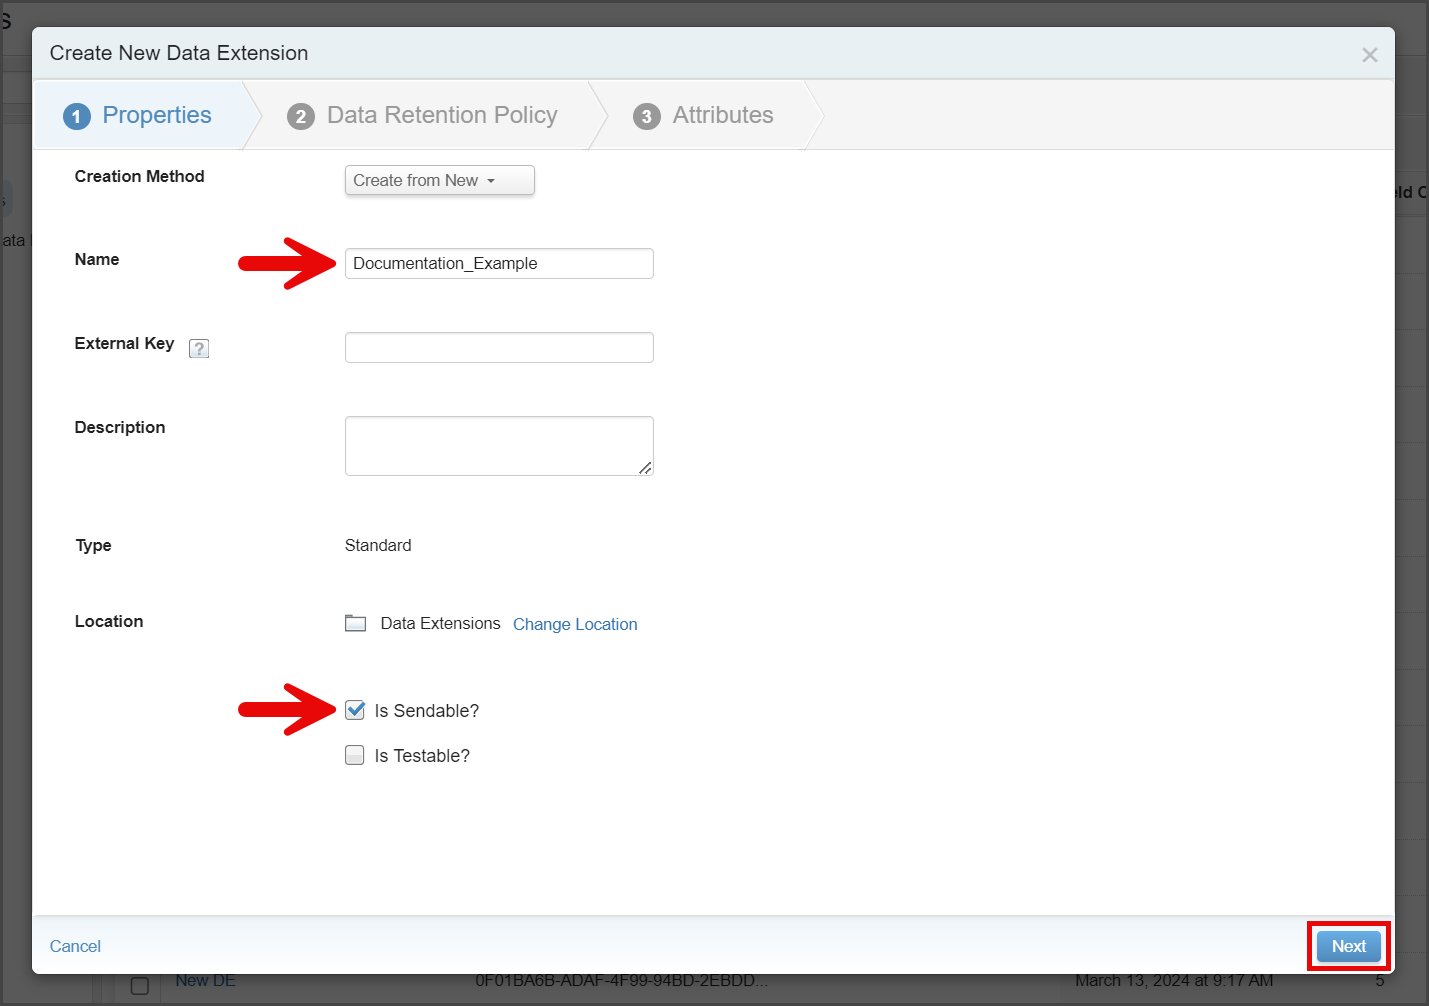
- Enter the name of your Data Extension in the Name textbox. Note: Spaces and numbers are valid for the Name field.
- Check the Is Sendable? checkbox.
- (Optional) Explain in the Description textbox what this Data Extension is used for.
- Click Next.

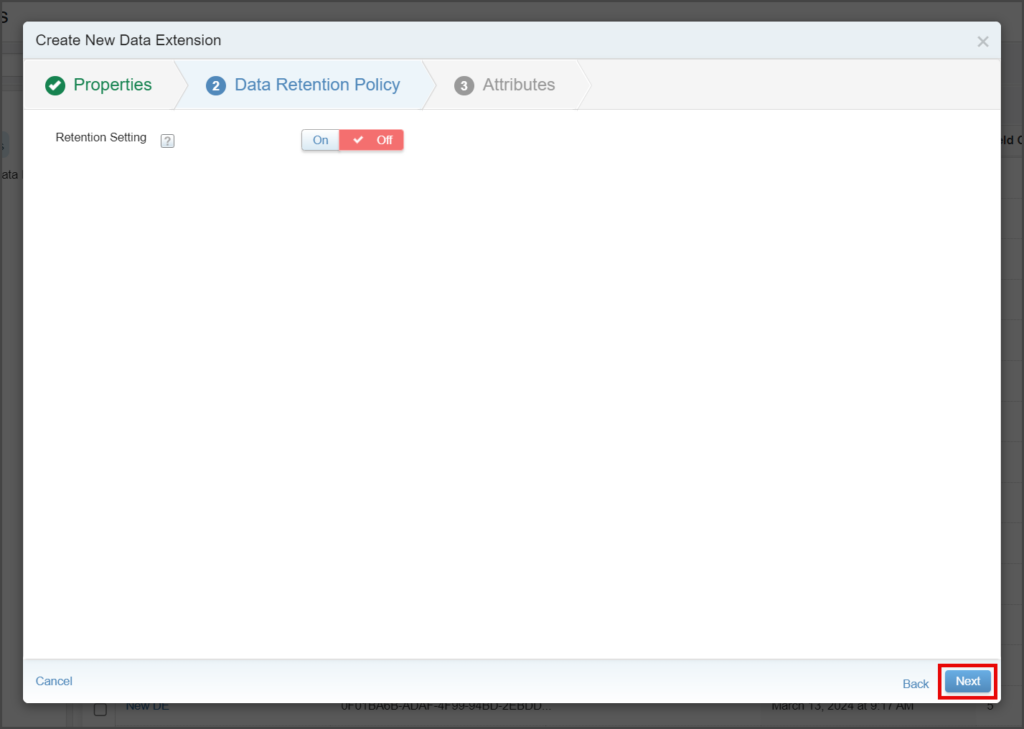
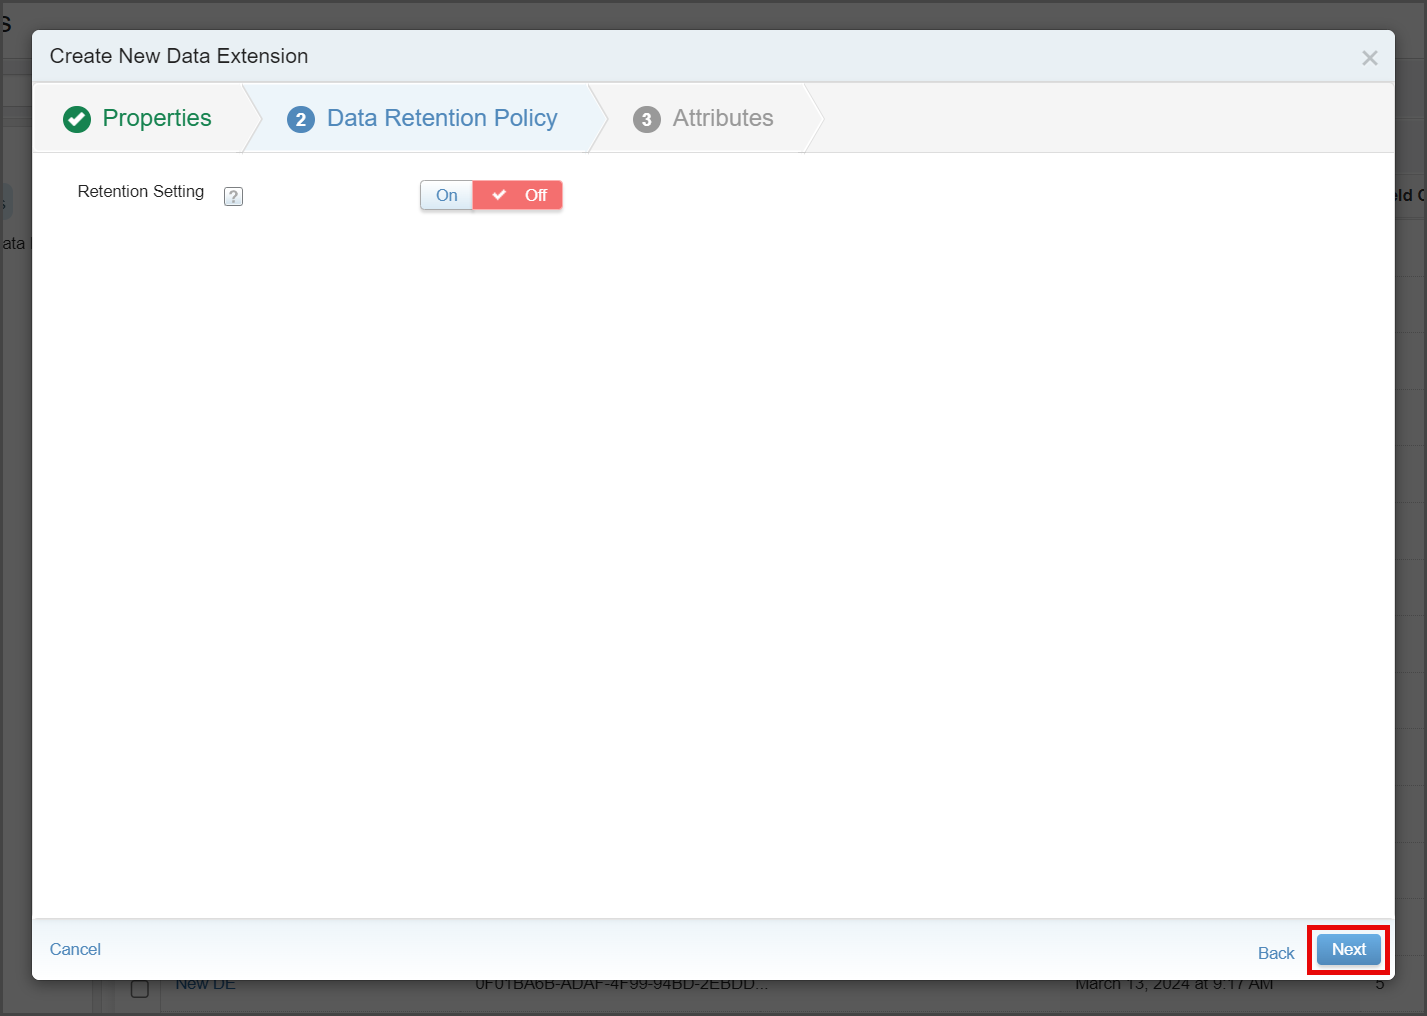
- Make no changes to the Data Retention Policy page.
- Click Next.
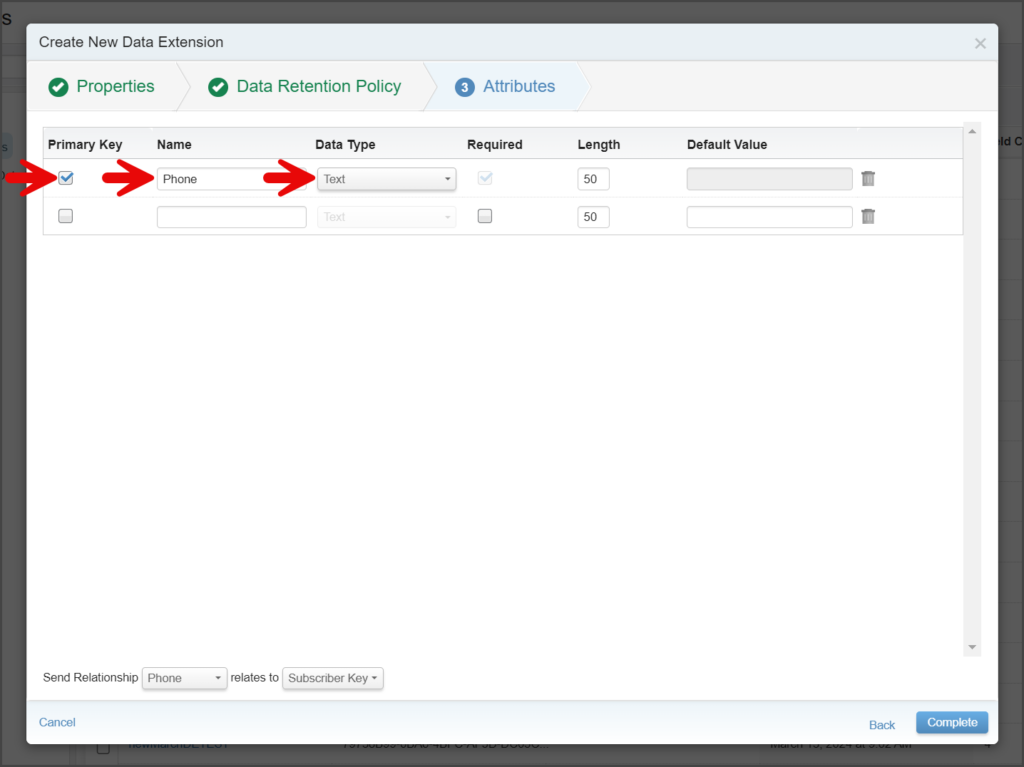
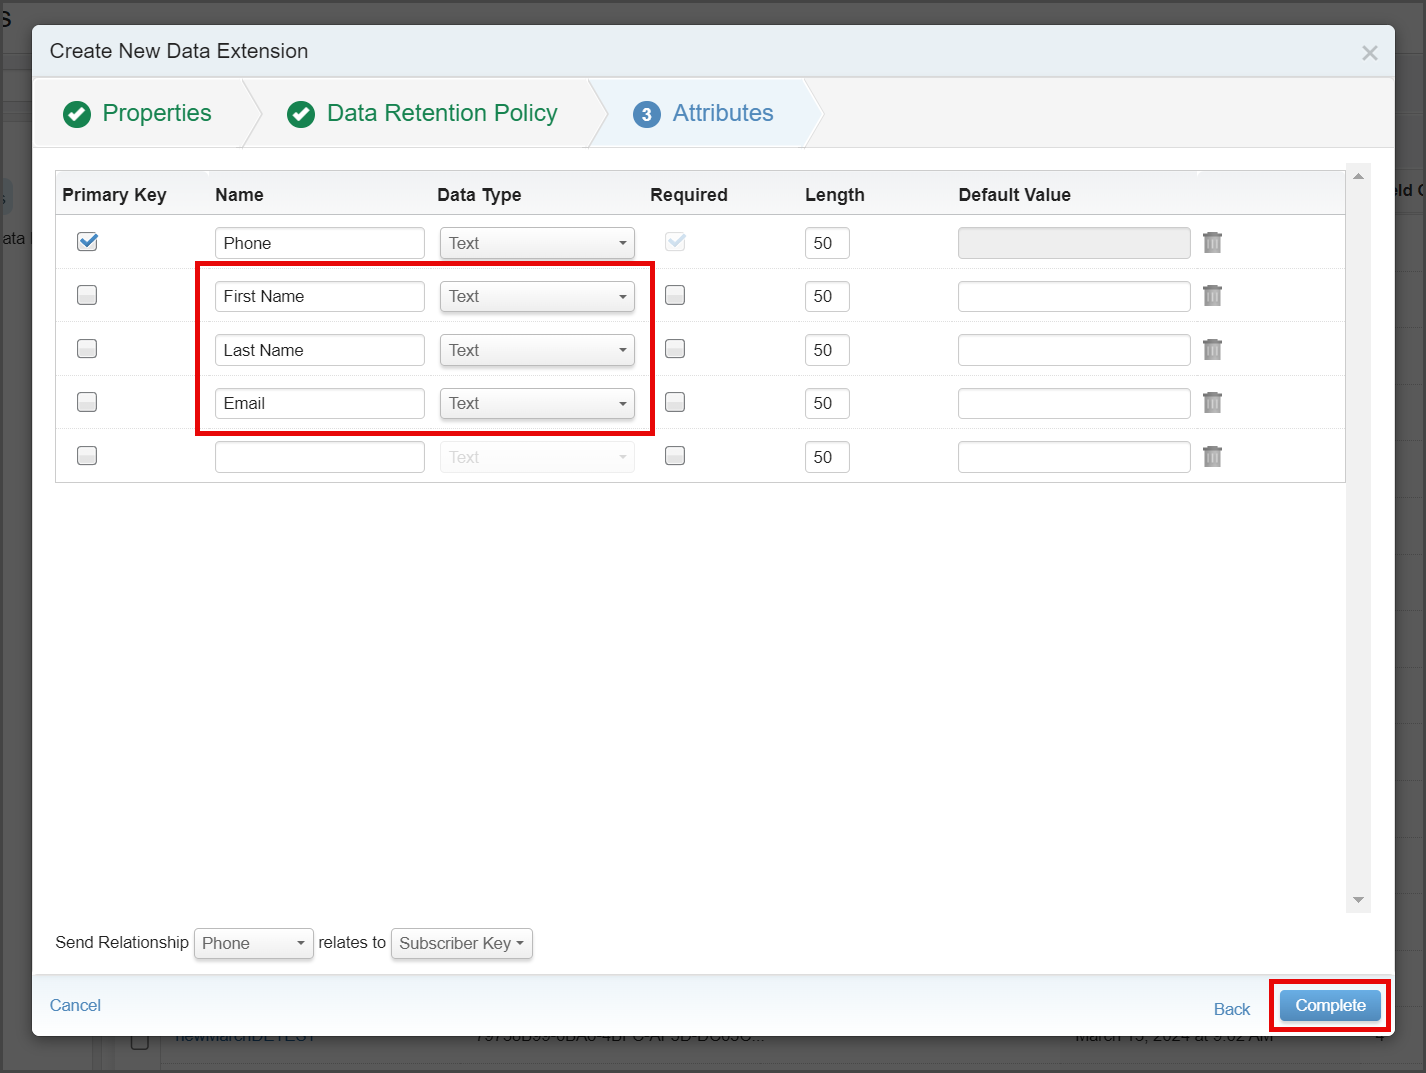
- Create the Phone field.
- Check Primary Key.
- Enter Phone in the Name column.
- Keep Data Type as Text.
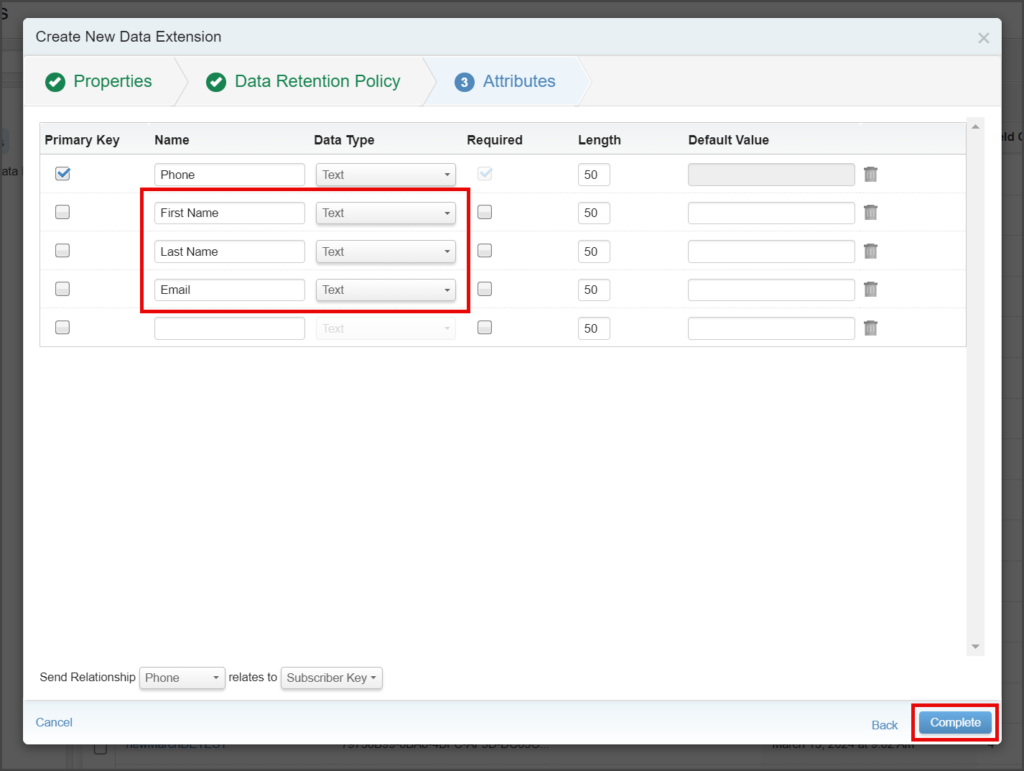
- Create any other fields you want for your contacts.
- The Data Type column must be Text for all fields you create.
- The Name column can have spaces and numbers.
- Once you are done adding fields, click Complete.
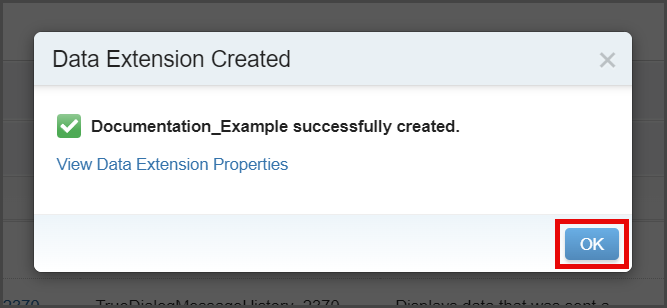
- Click OK to close the Data Extension Created window.


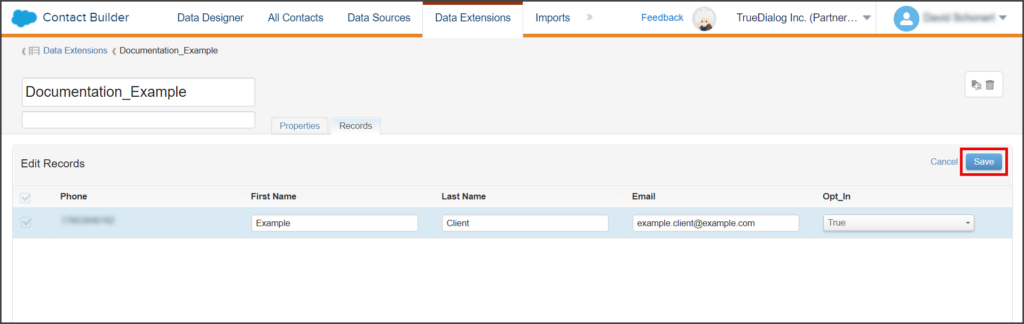
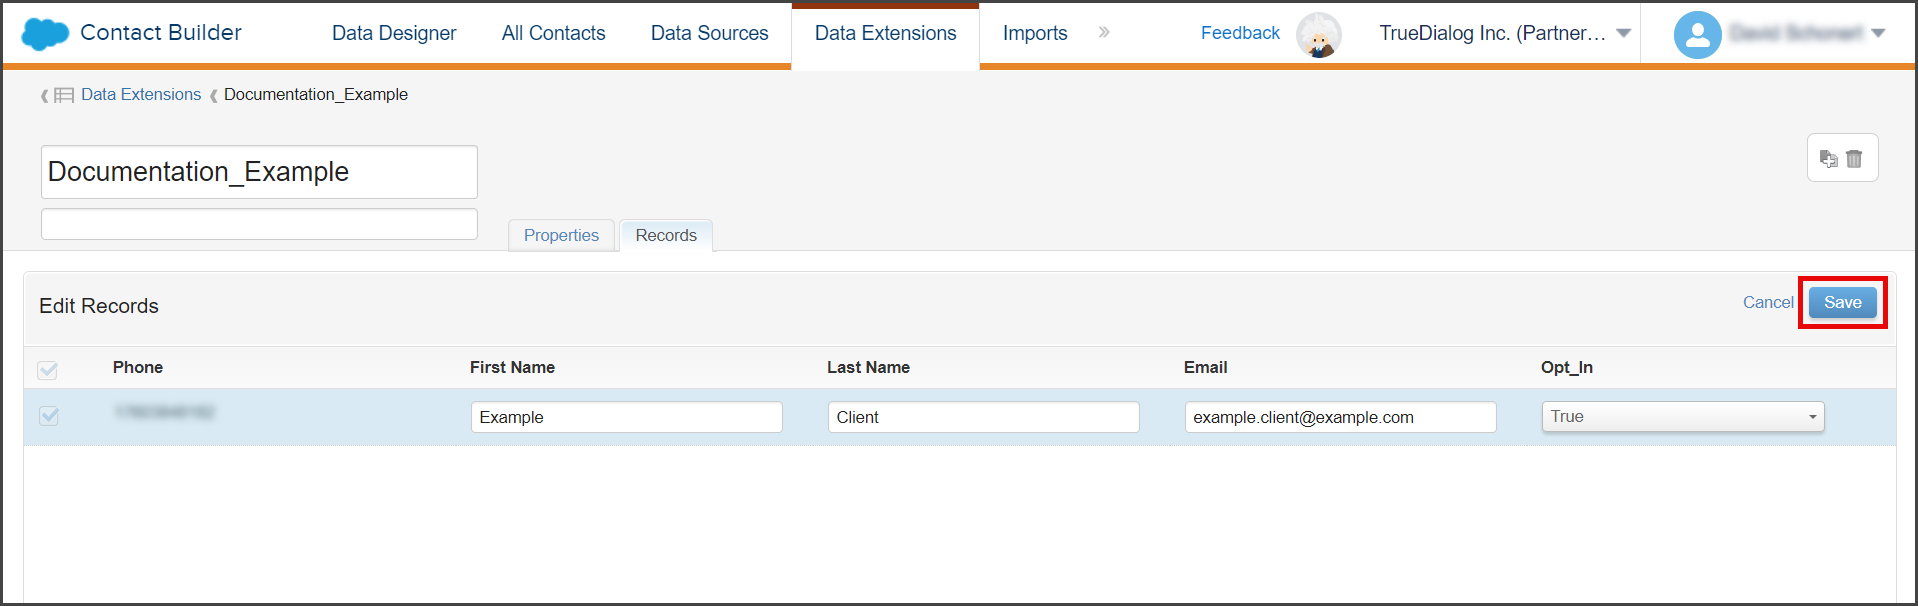
Add Records
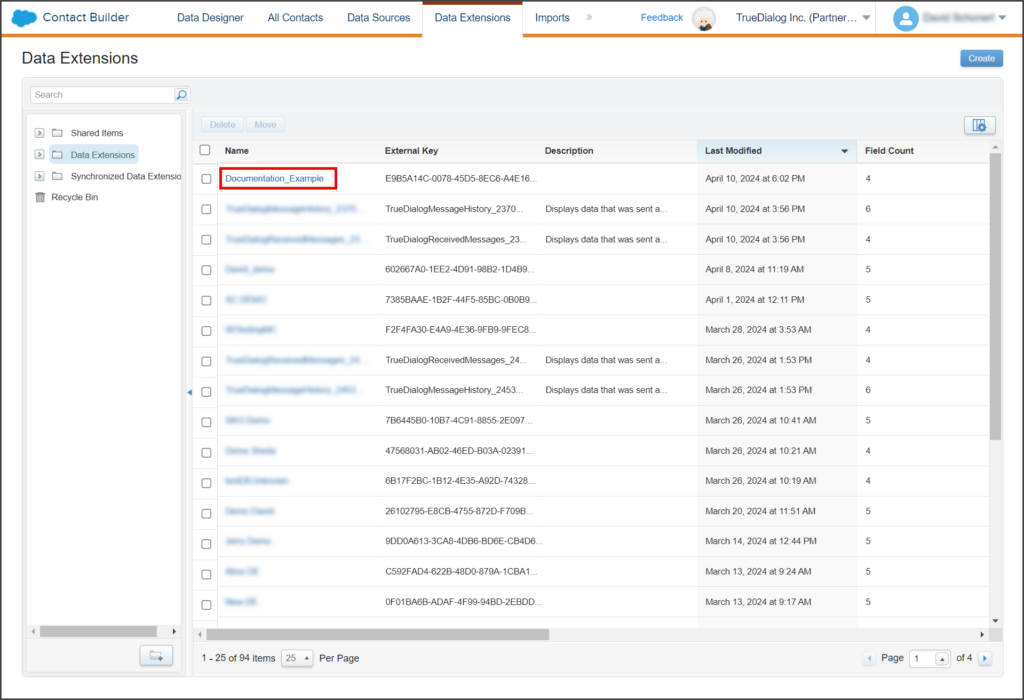
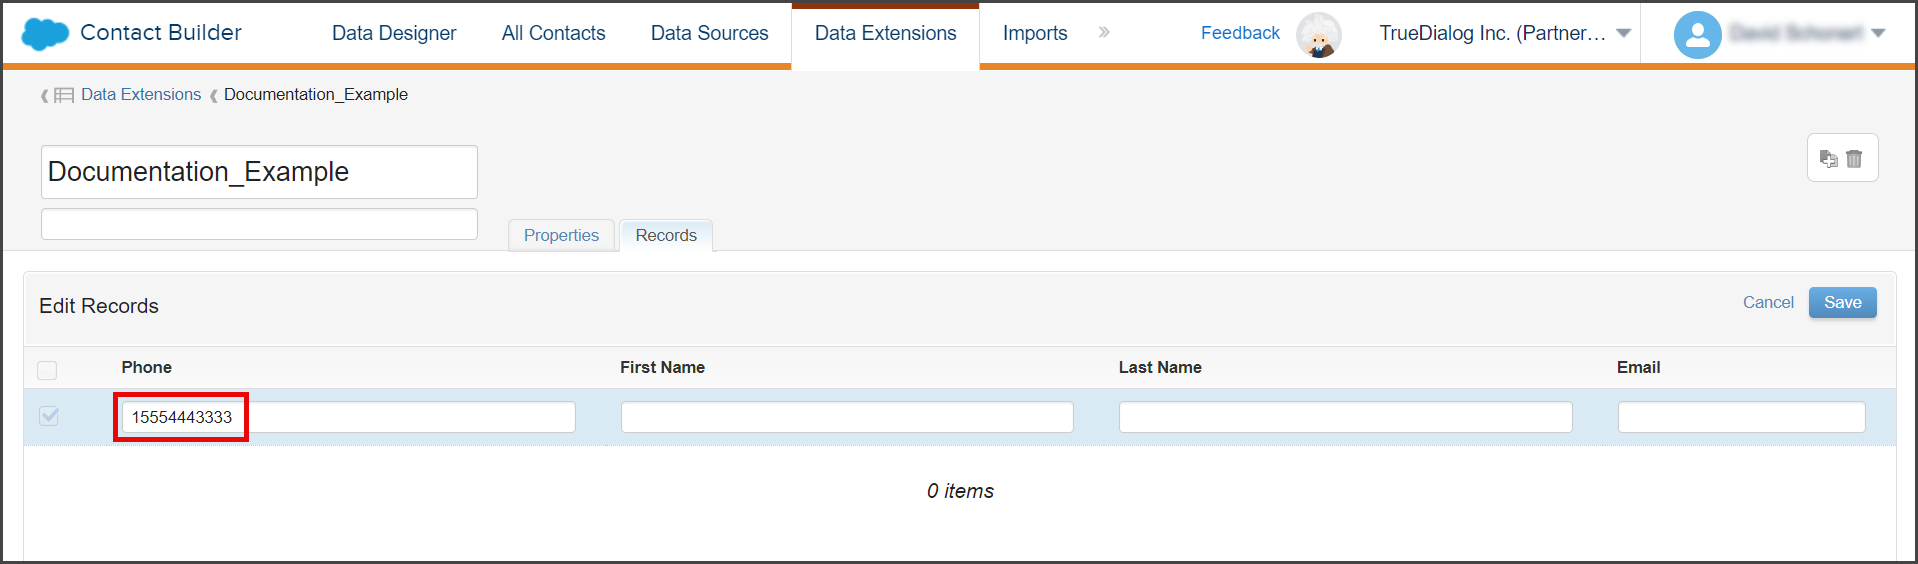
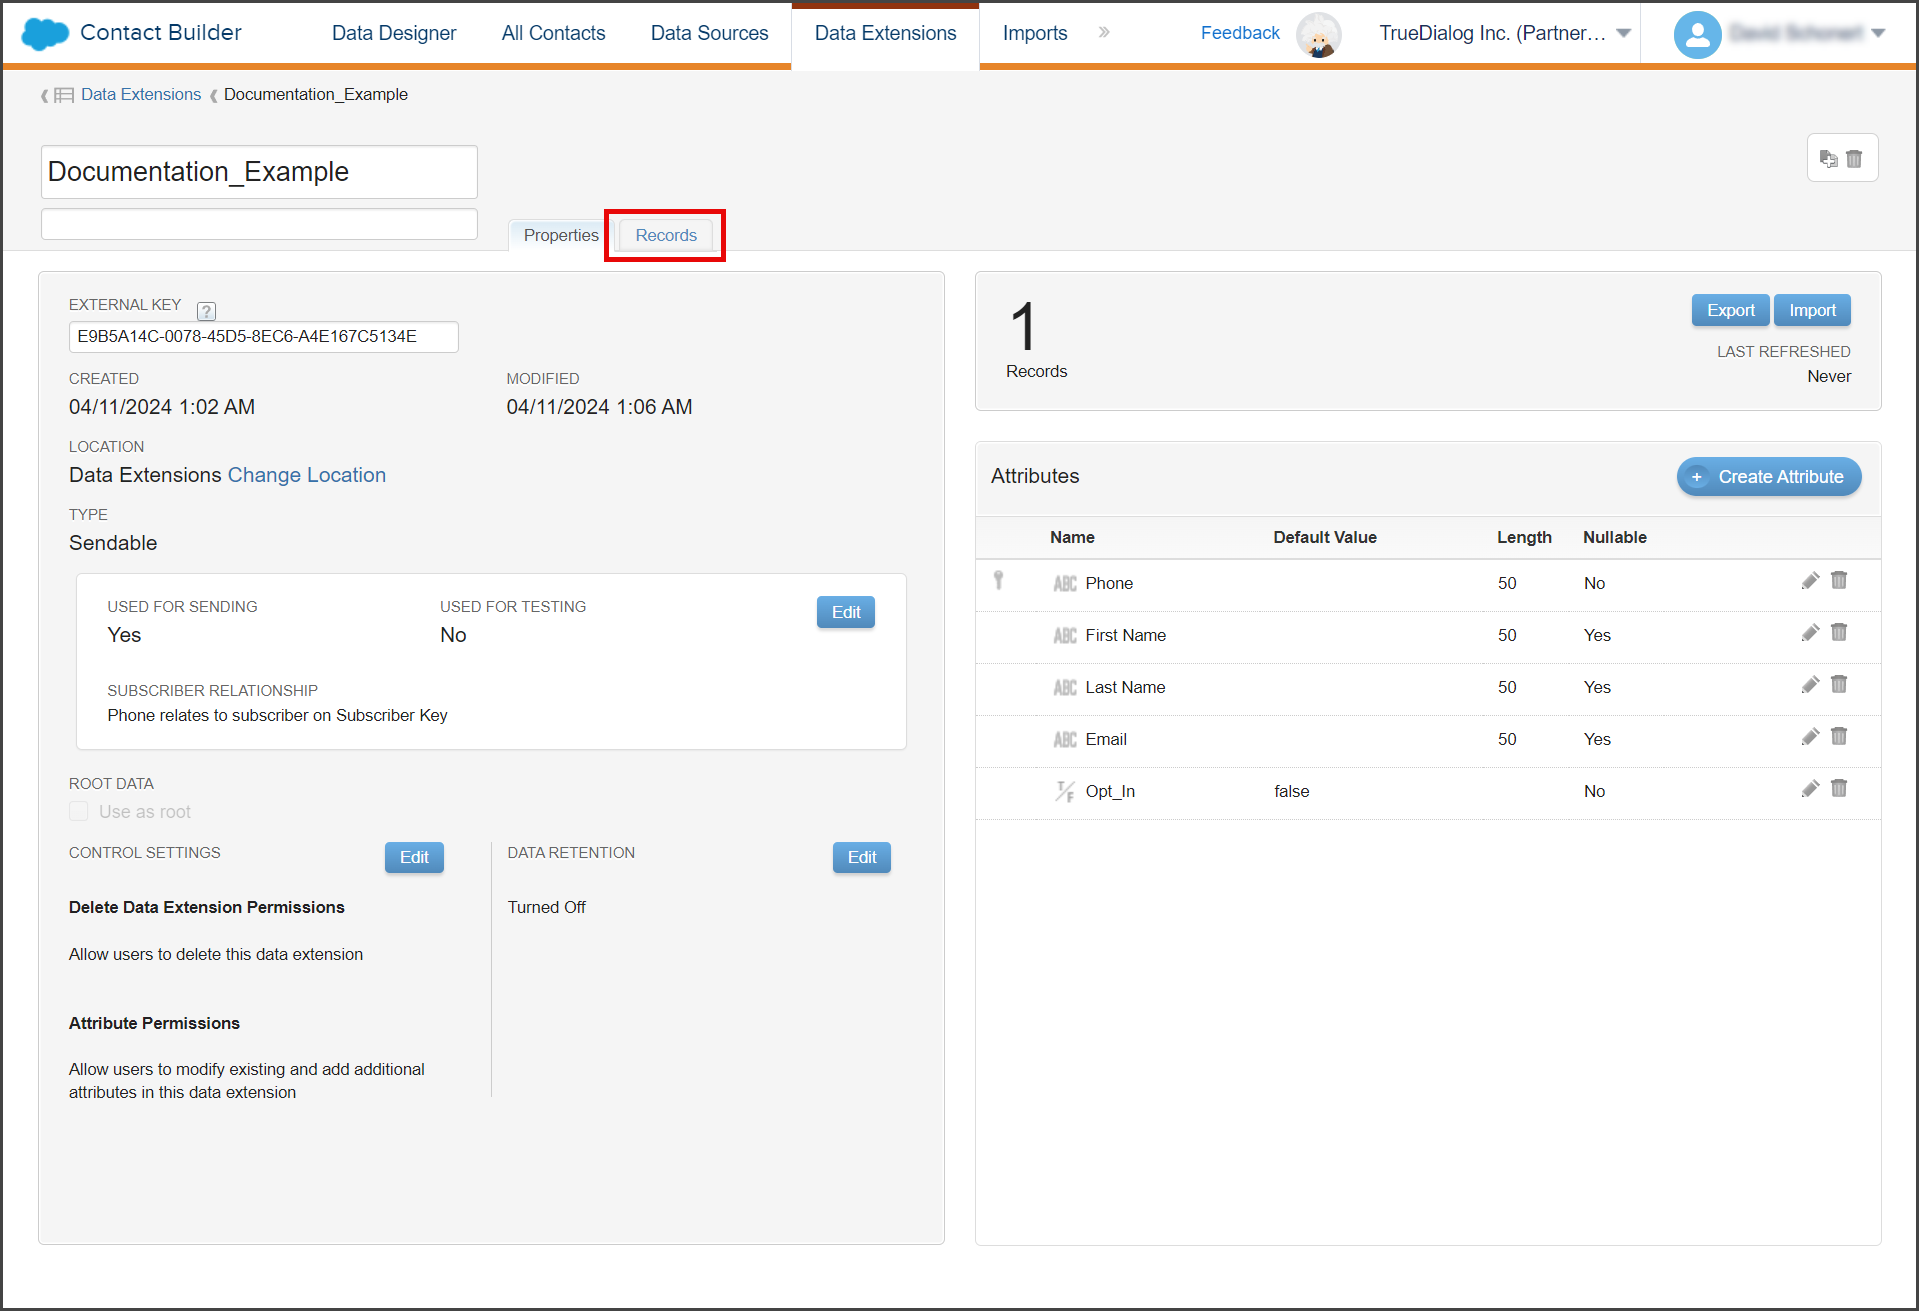
- On the Data Extensions page, click the Data Extension you just created.
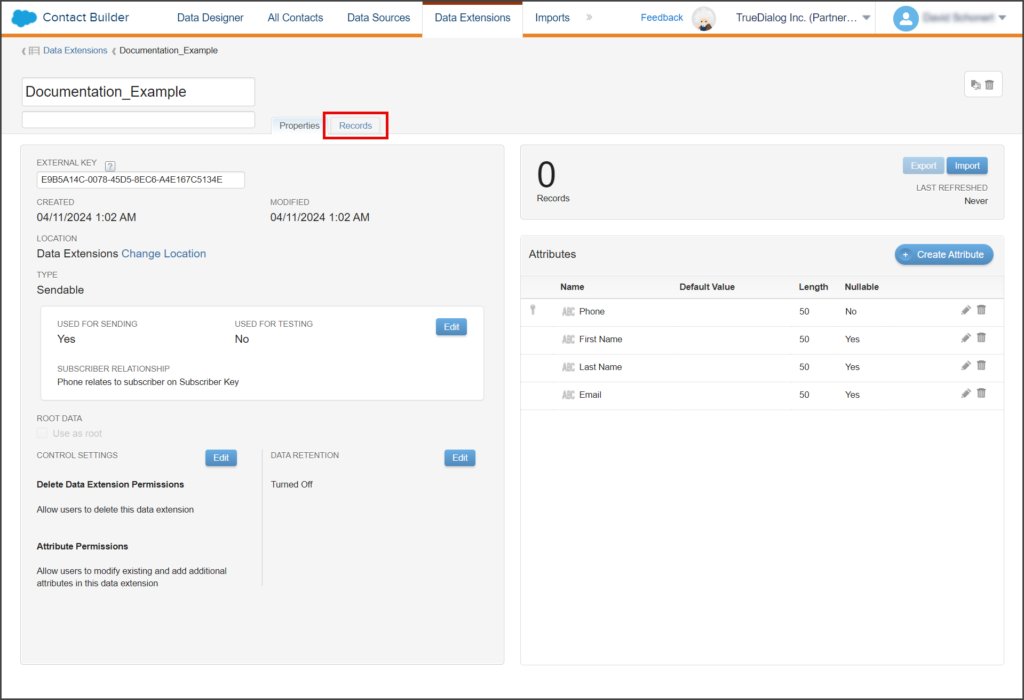
- Click the Records tab.
- Enter the phone number of your first contact in the Phone textbox.
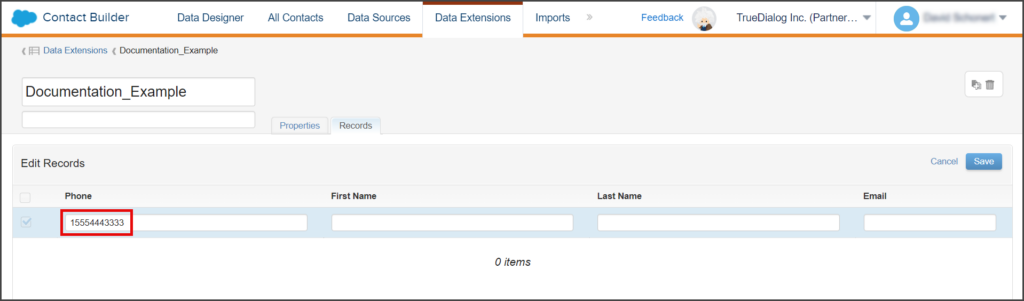
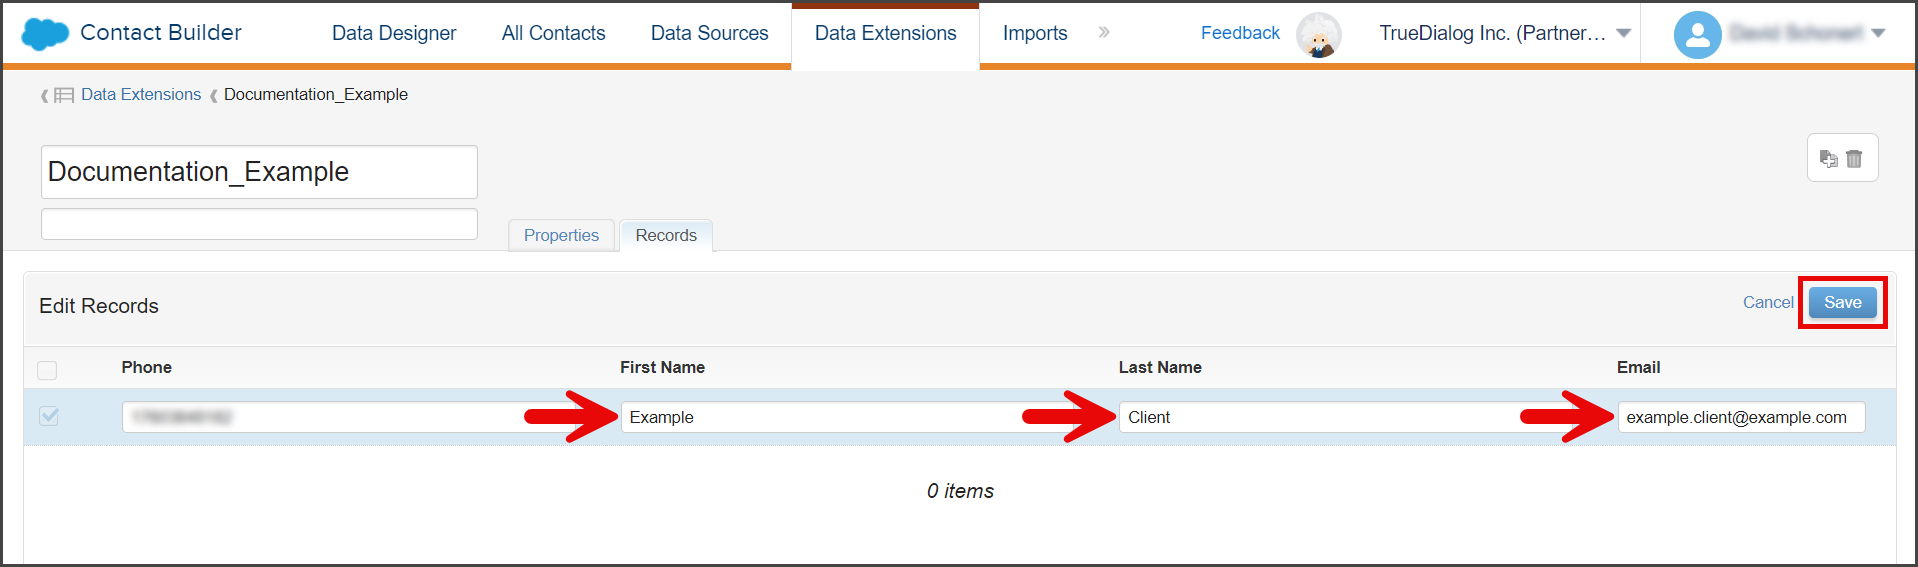
- (Optional) Enter the rest of your contact information in the other text boxes.
- Click Save.


Sync Data Extension with TrueDialog
A newly created Data Extension needs to be synced with TrueDialog to get the Opt_In status for each contact. This process will create a new column in your Data Extension called Opt_In.
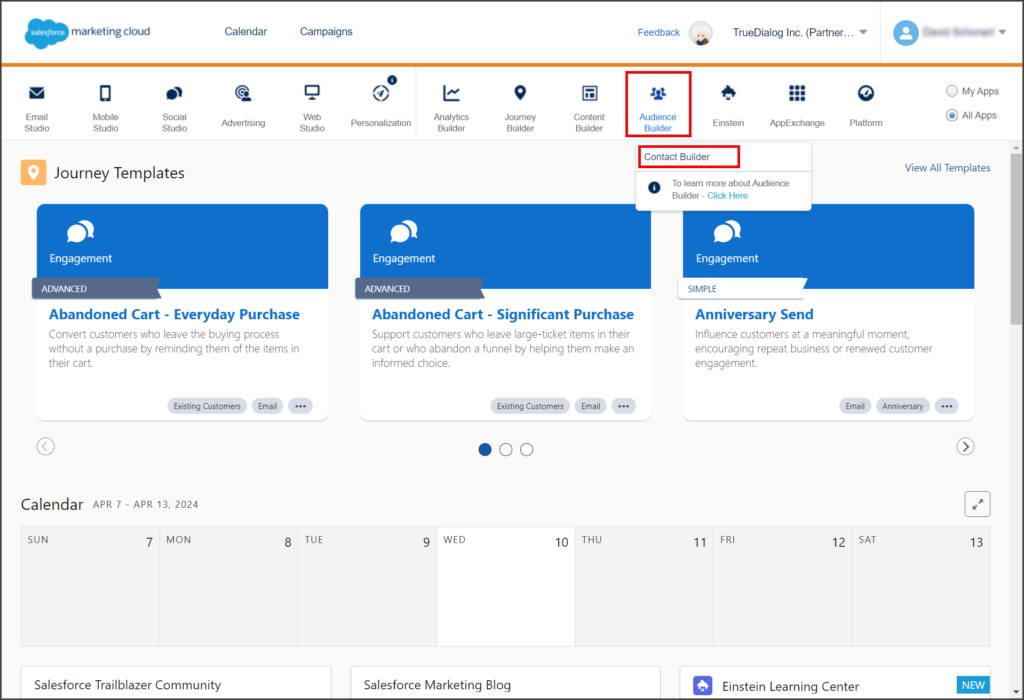
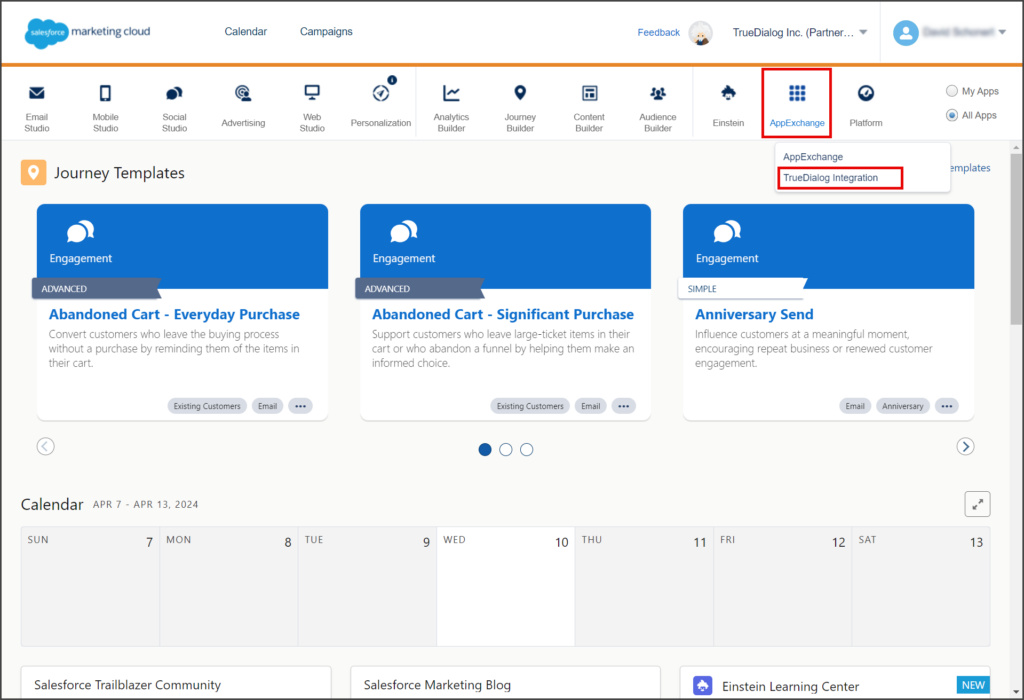
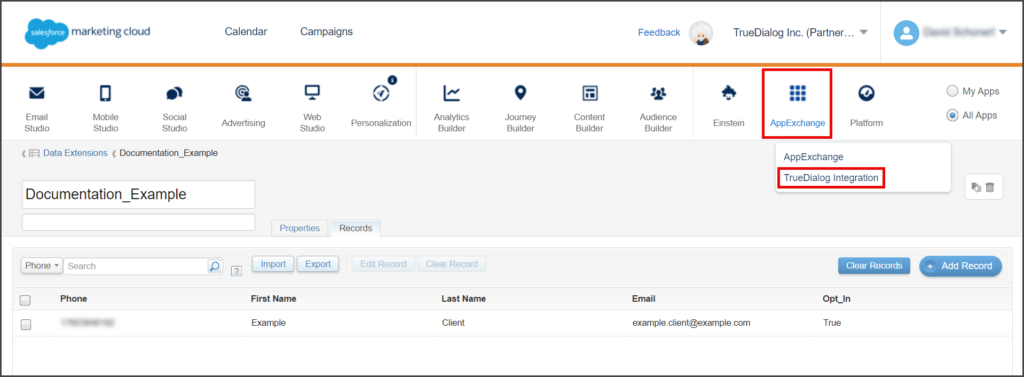
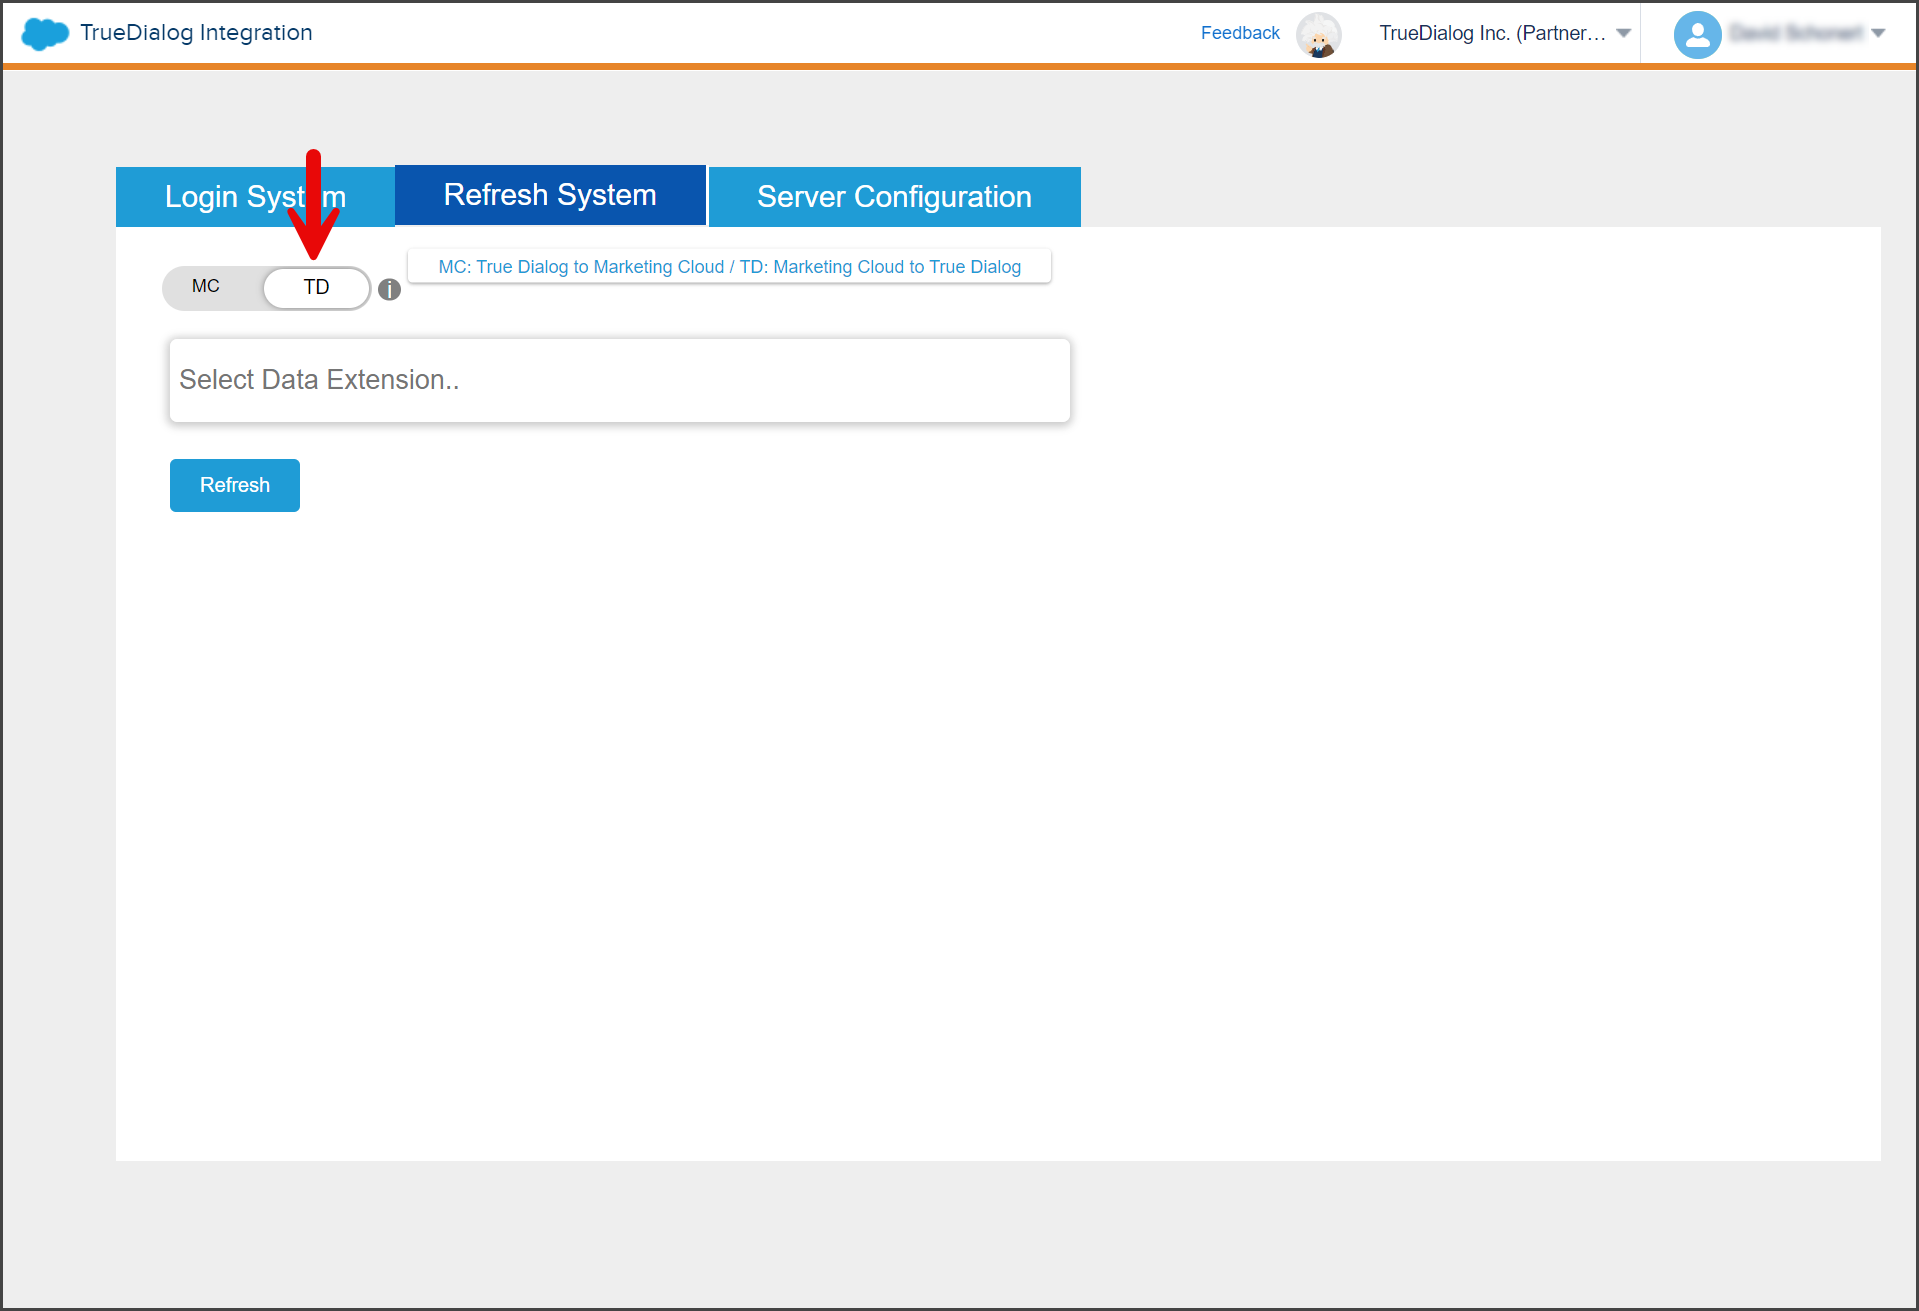
- From the Salesforce Marketing Cloud Home Page.
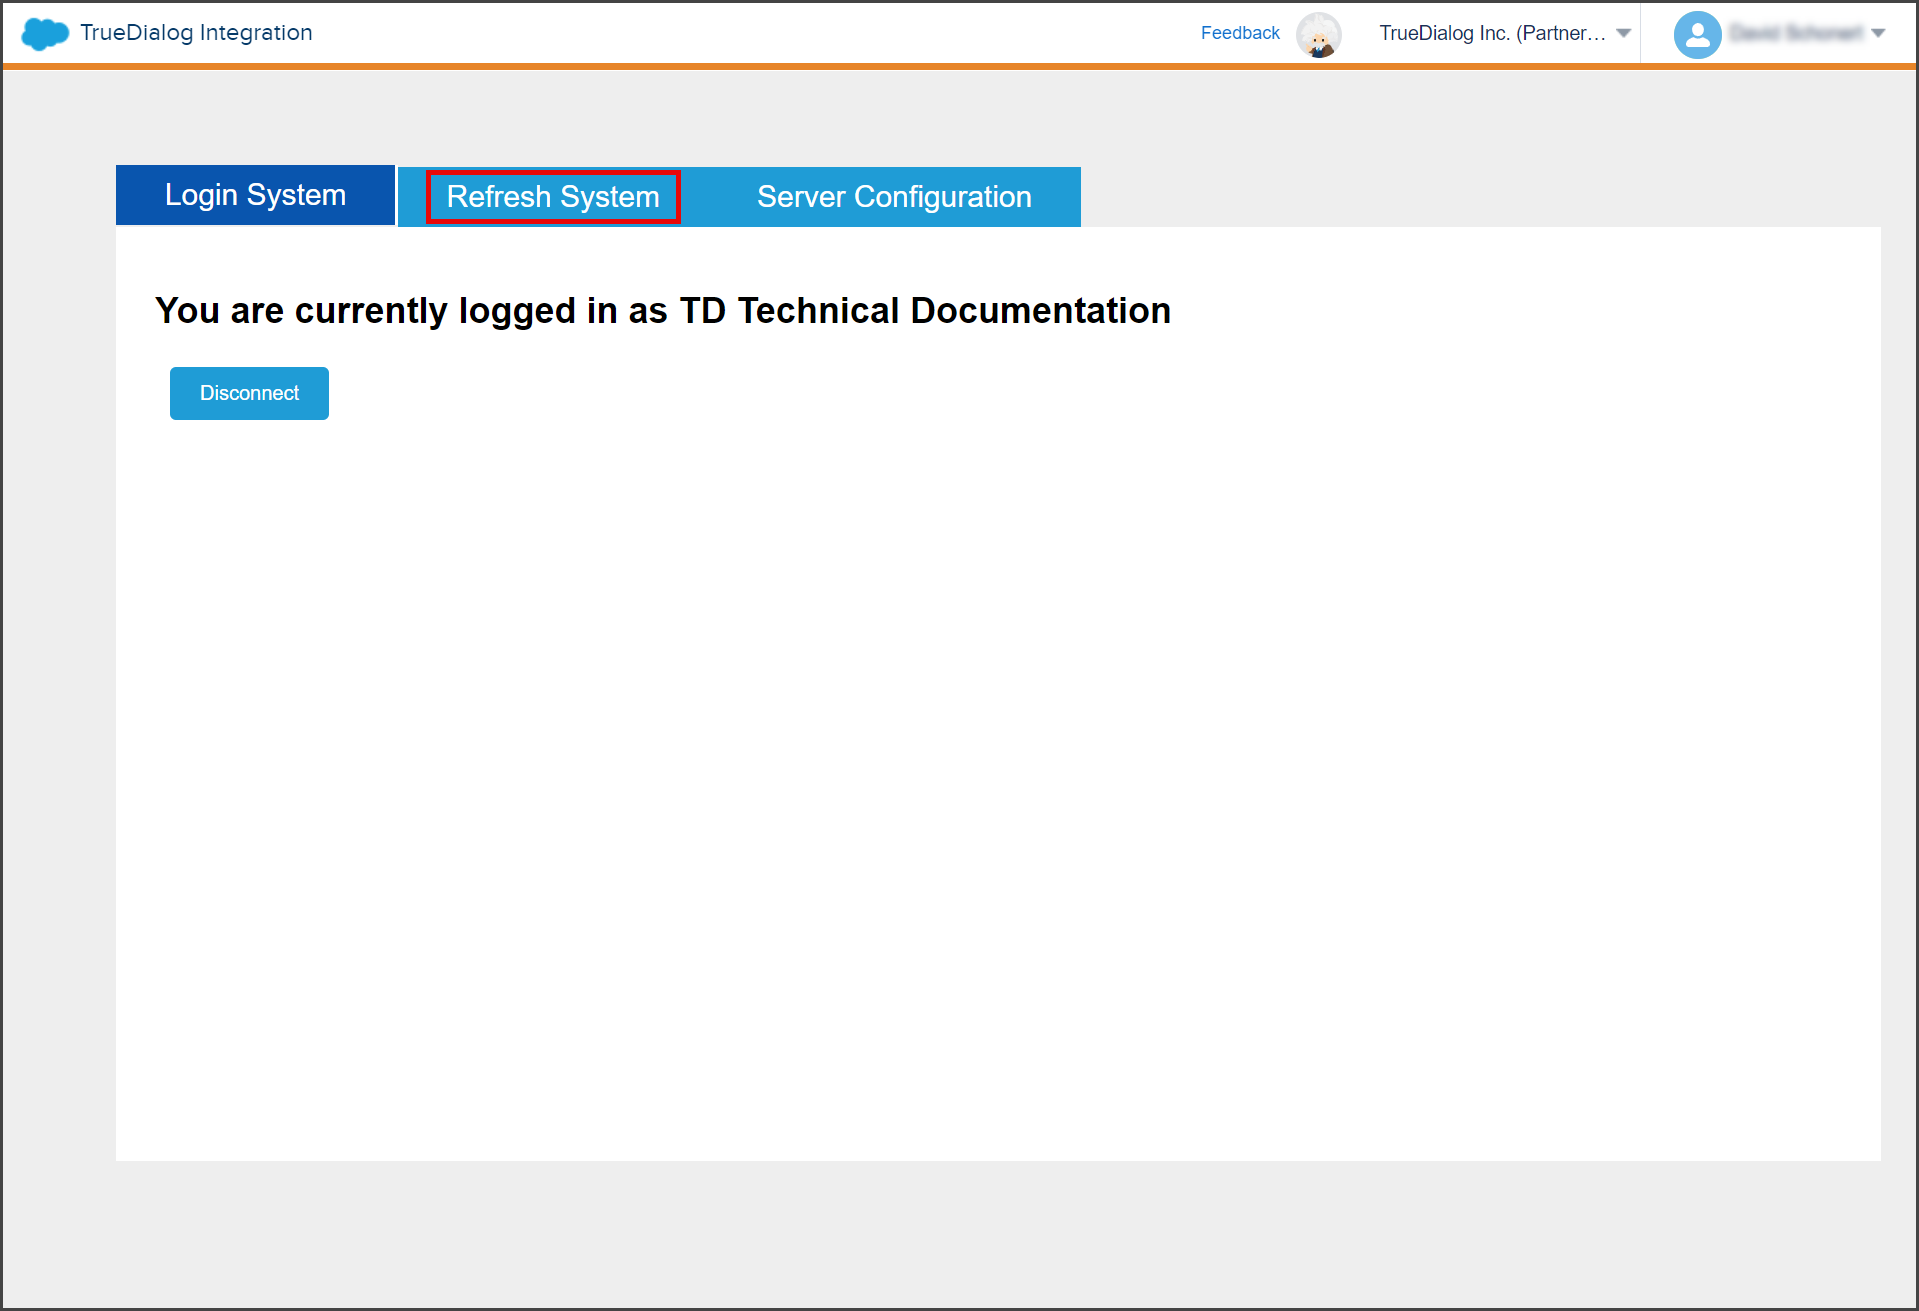
- Click AppExchange, and in the dropdown menu, click TrueDialog Integration.
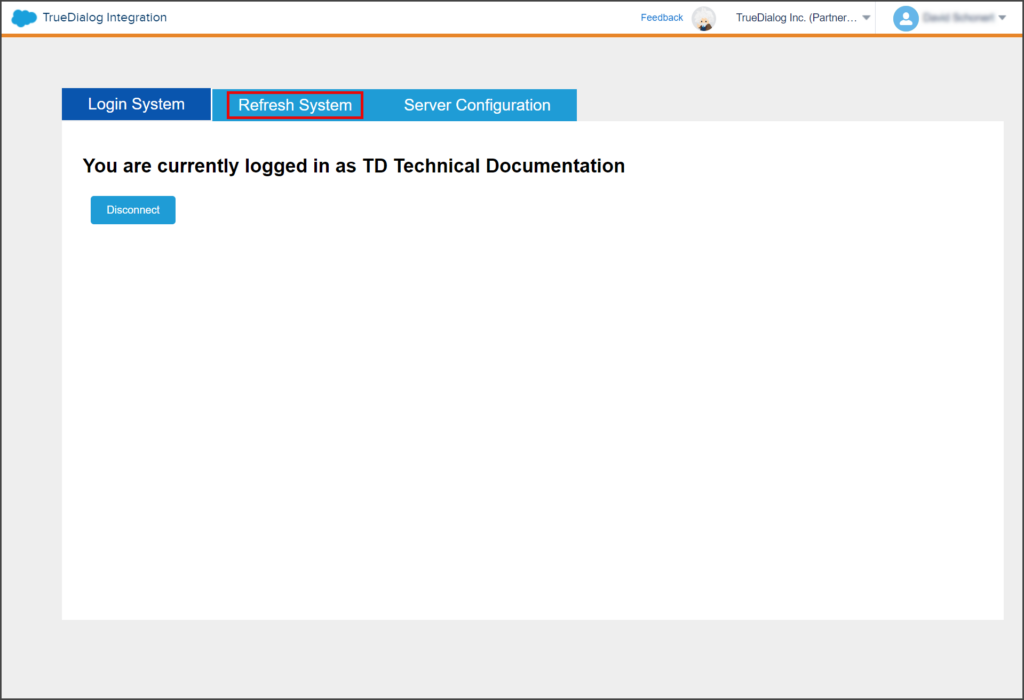
- Click the Refresh System tab.

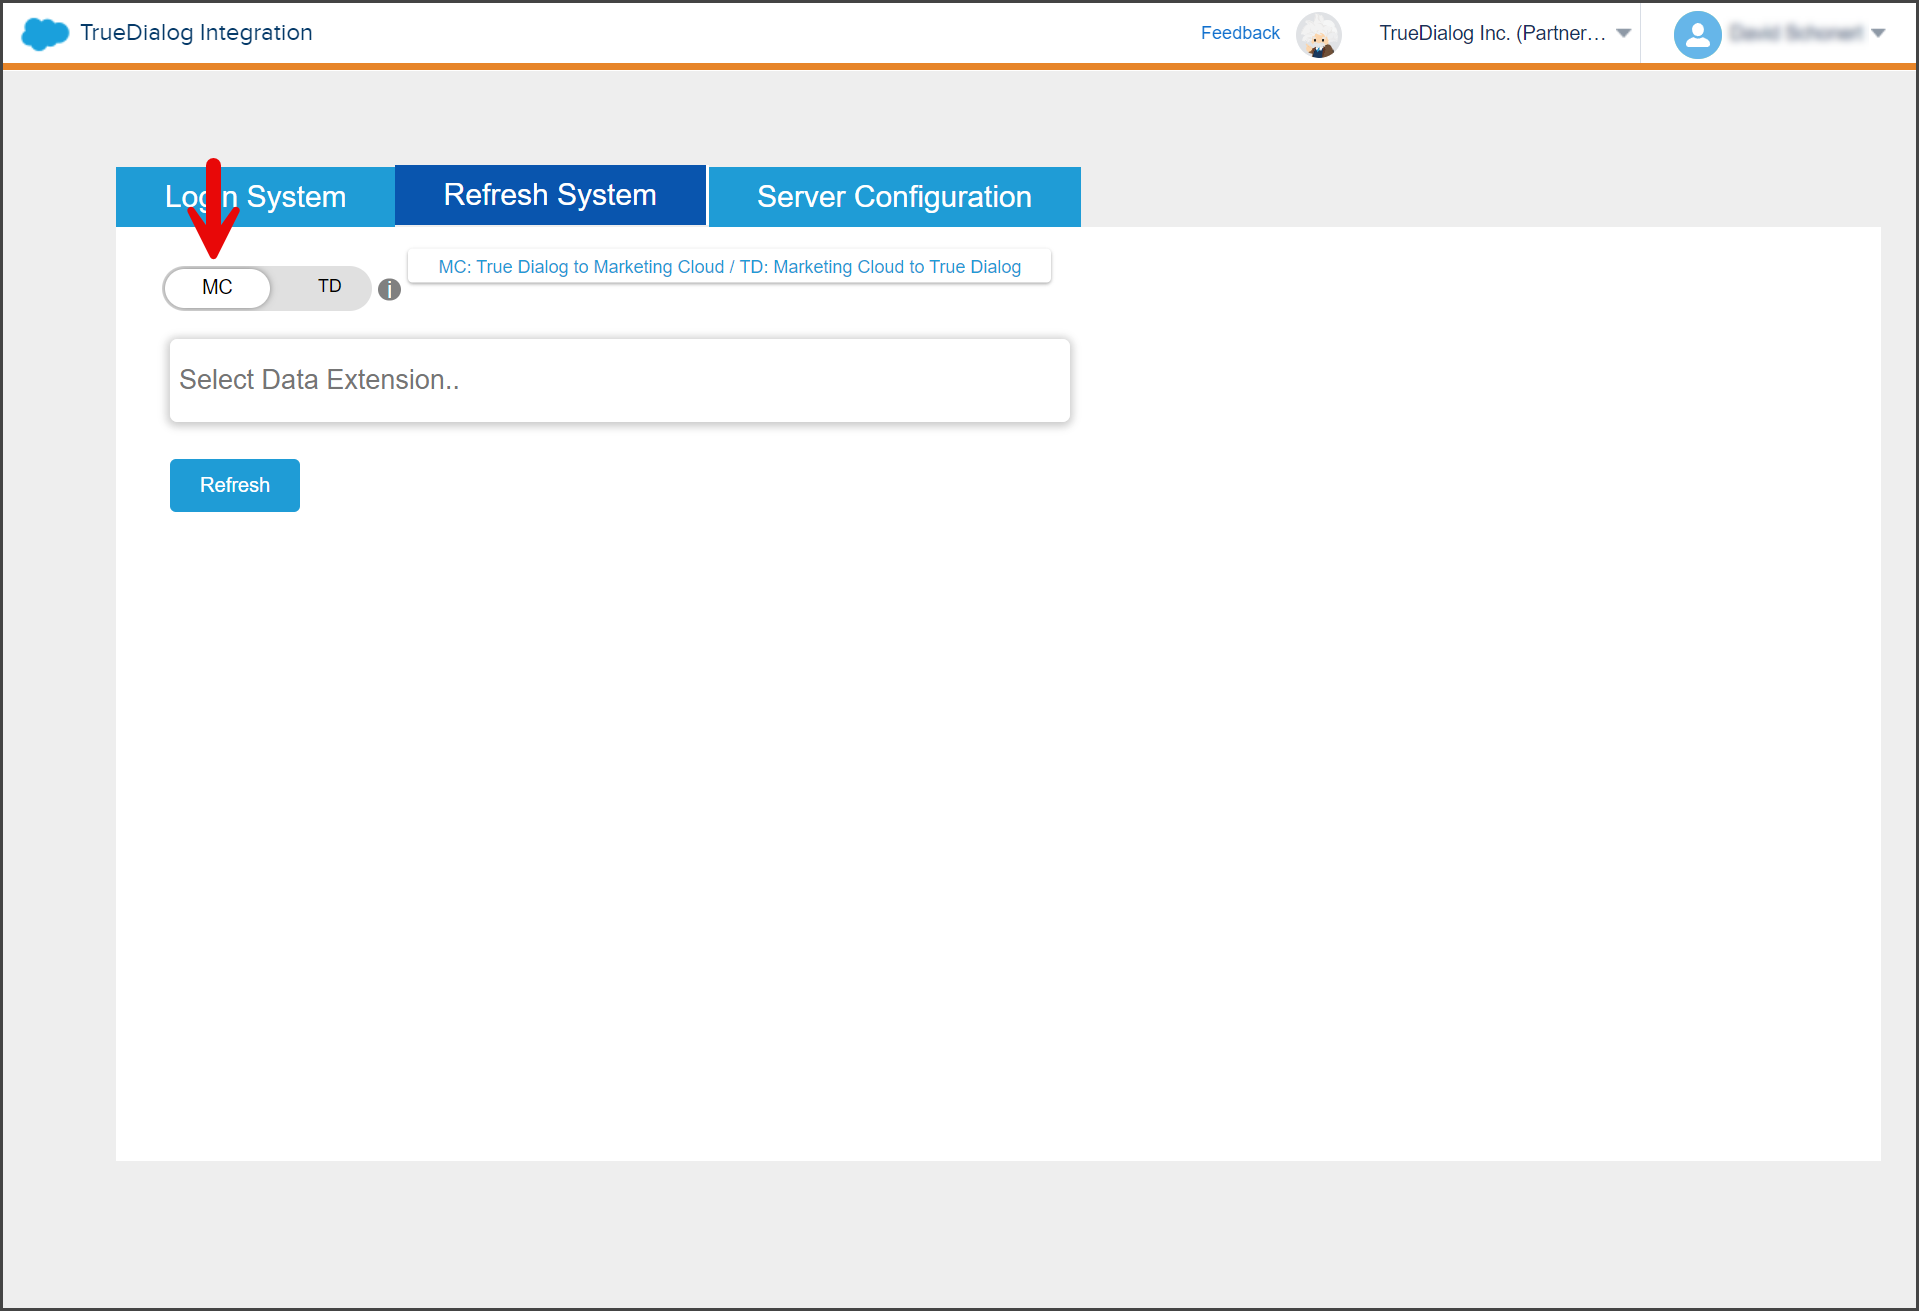
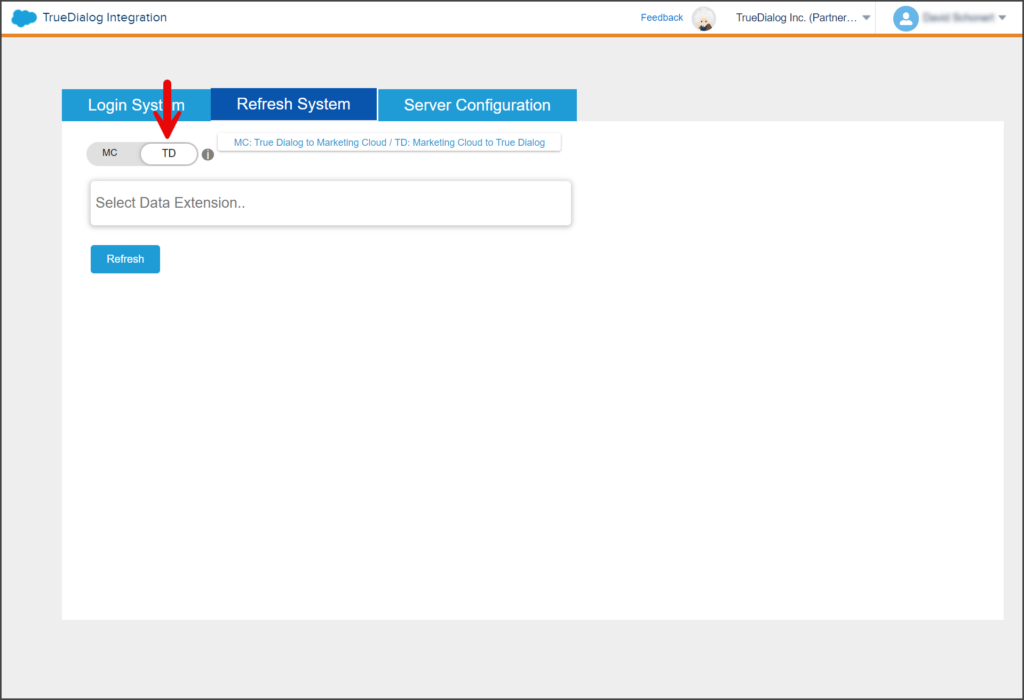
- Set the MC/TD toggle to MC.
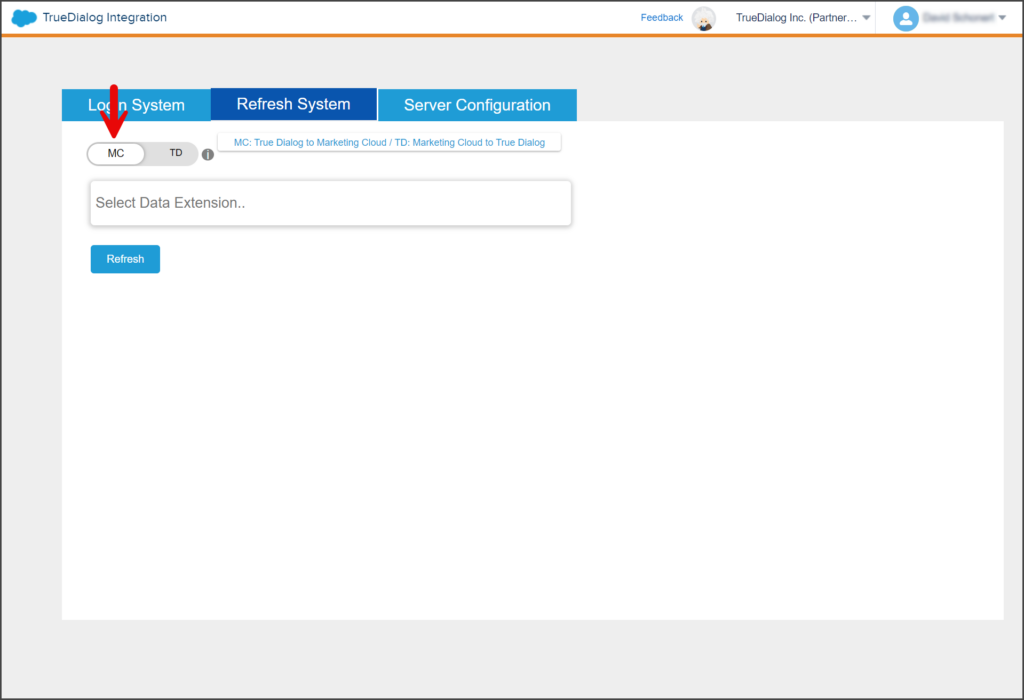
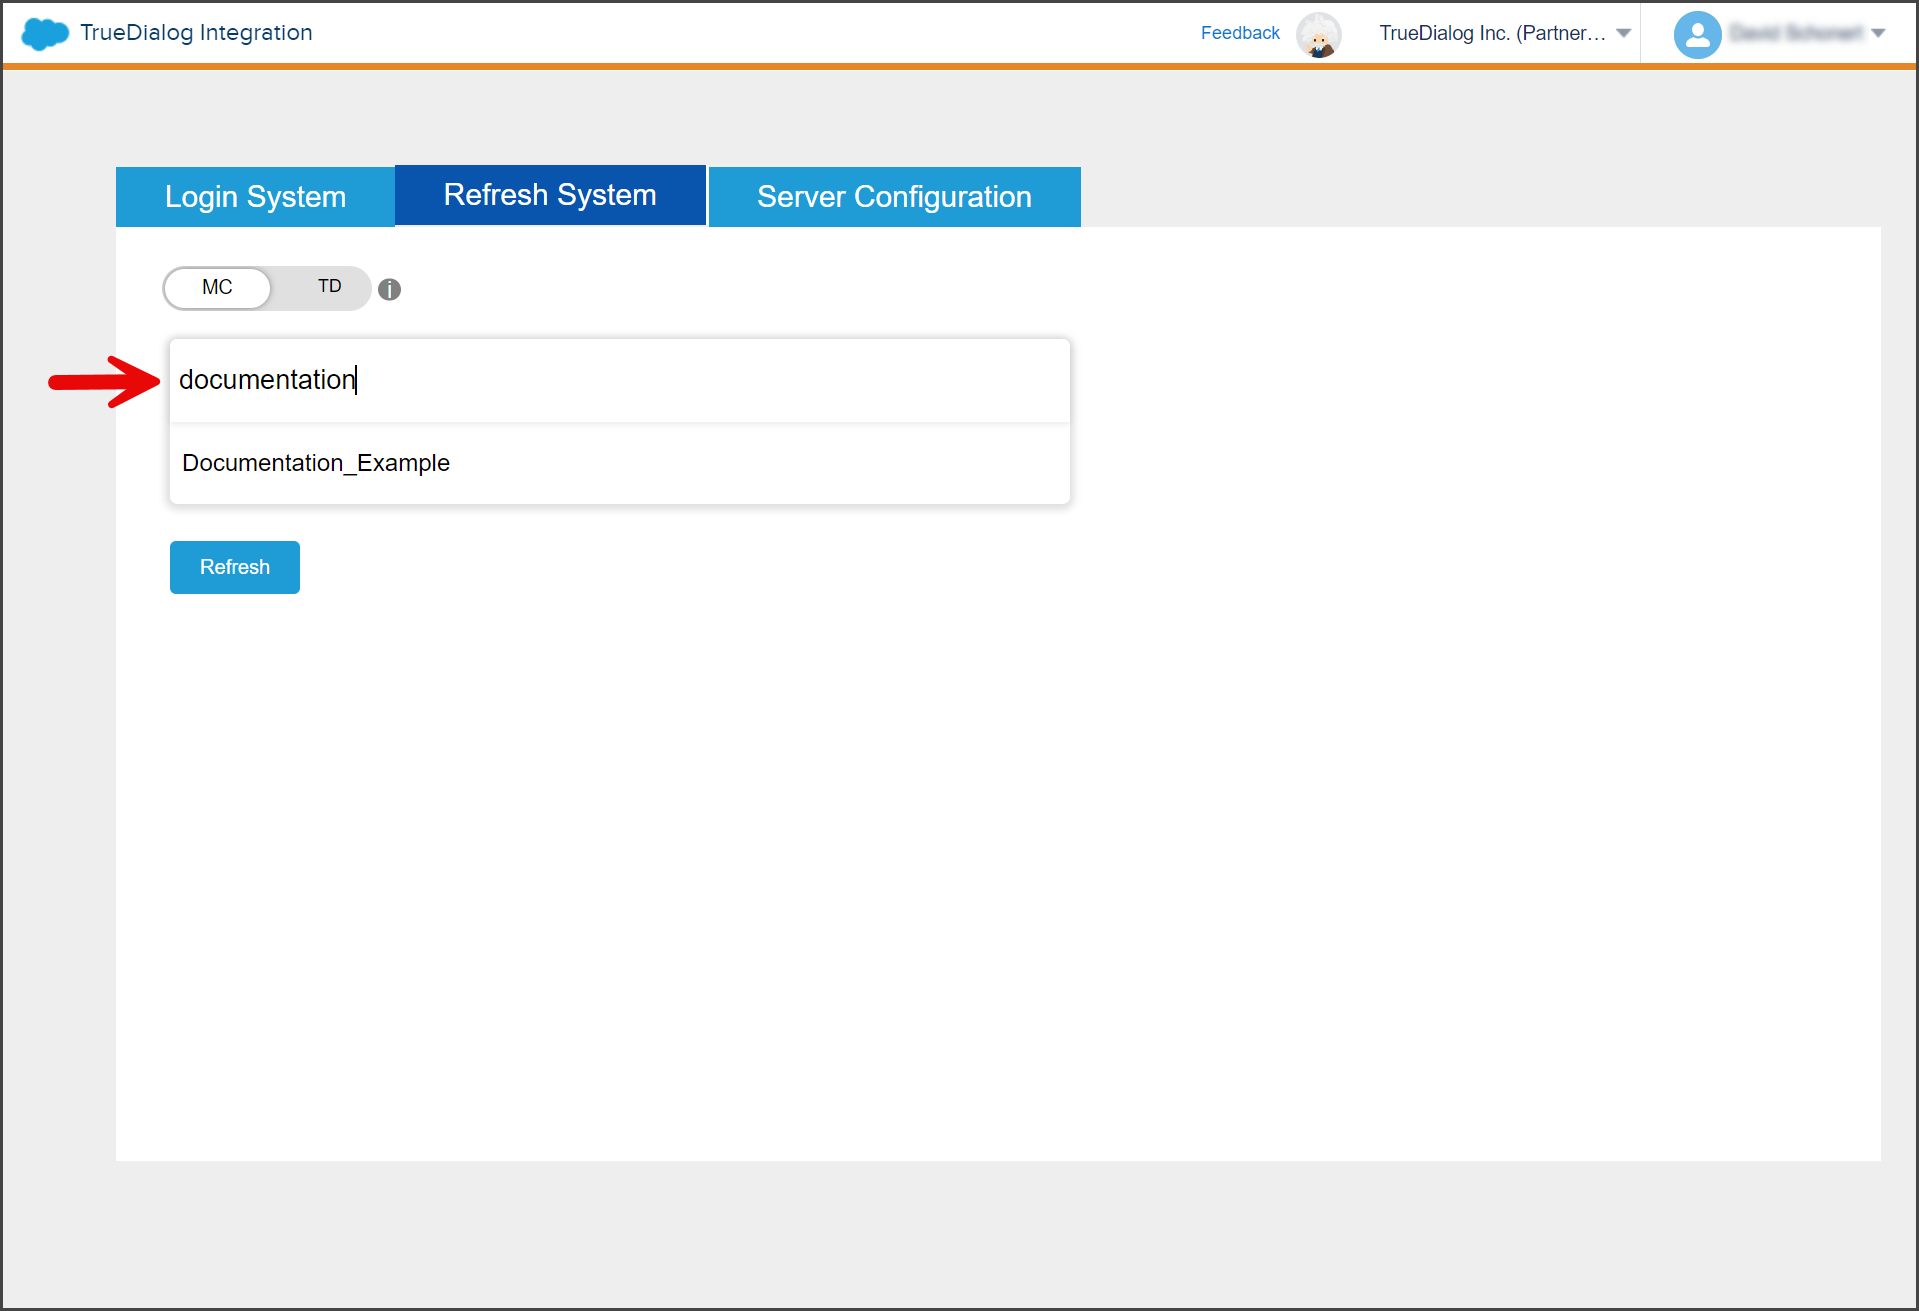
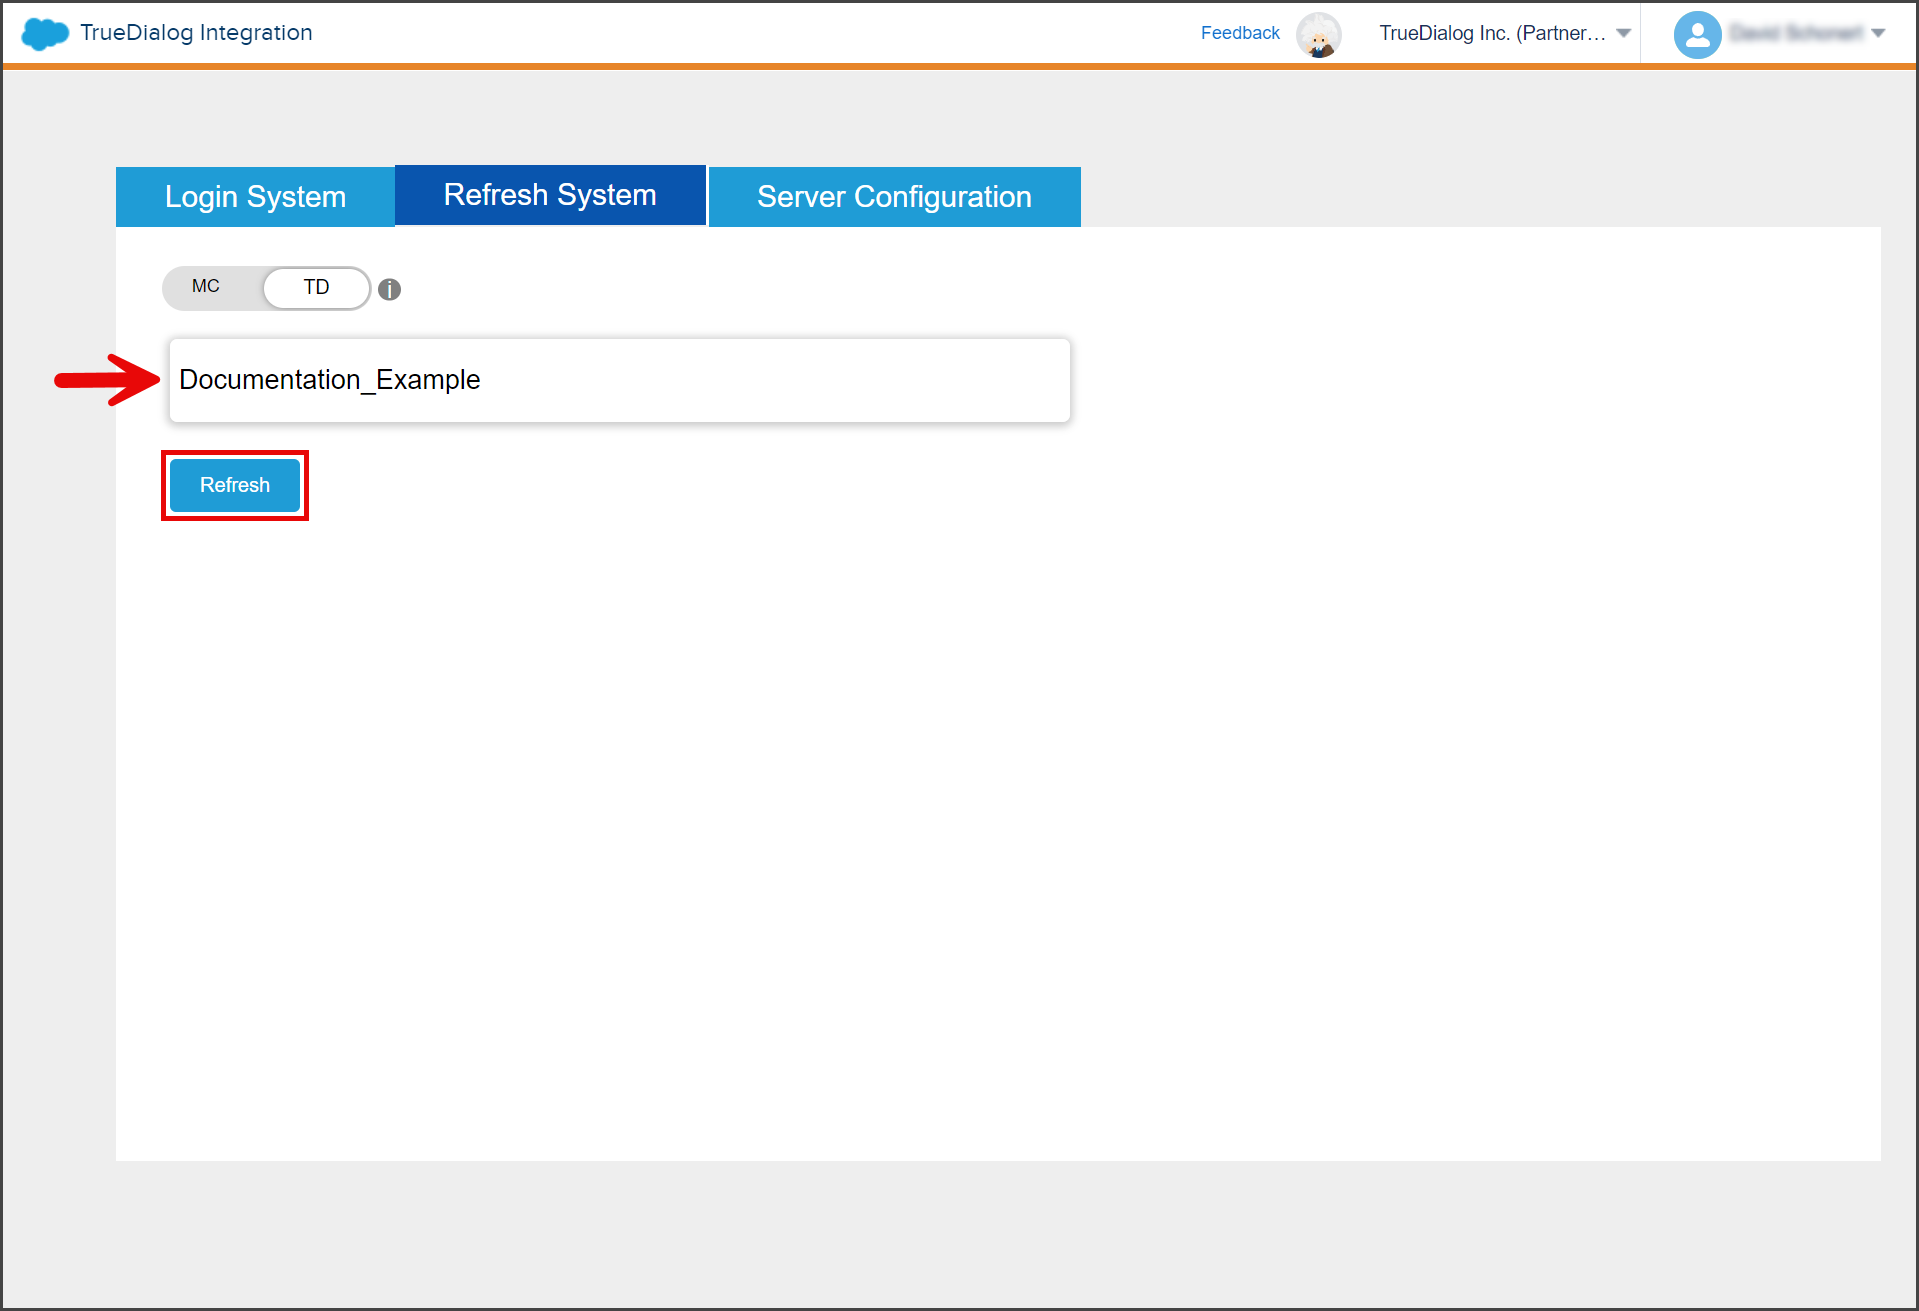
- To select your Data Extension, enter its name in the Select Data Extension textbox. A list of Data Extensions will appear as you type.

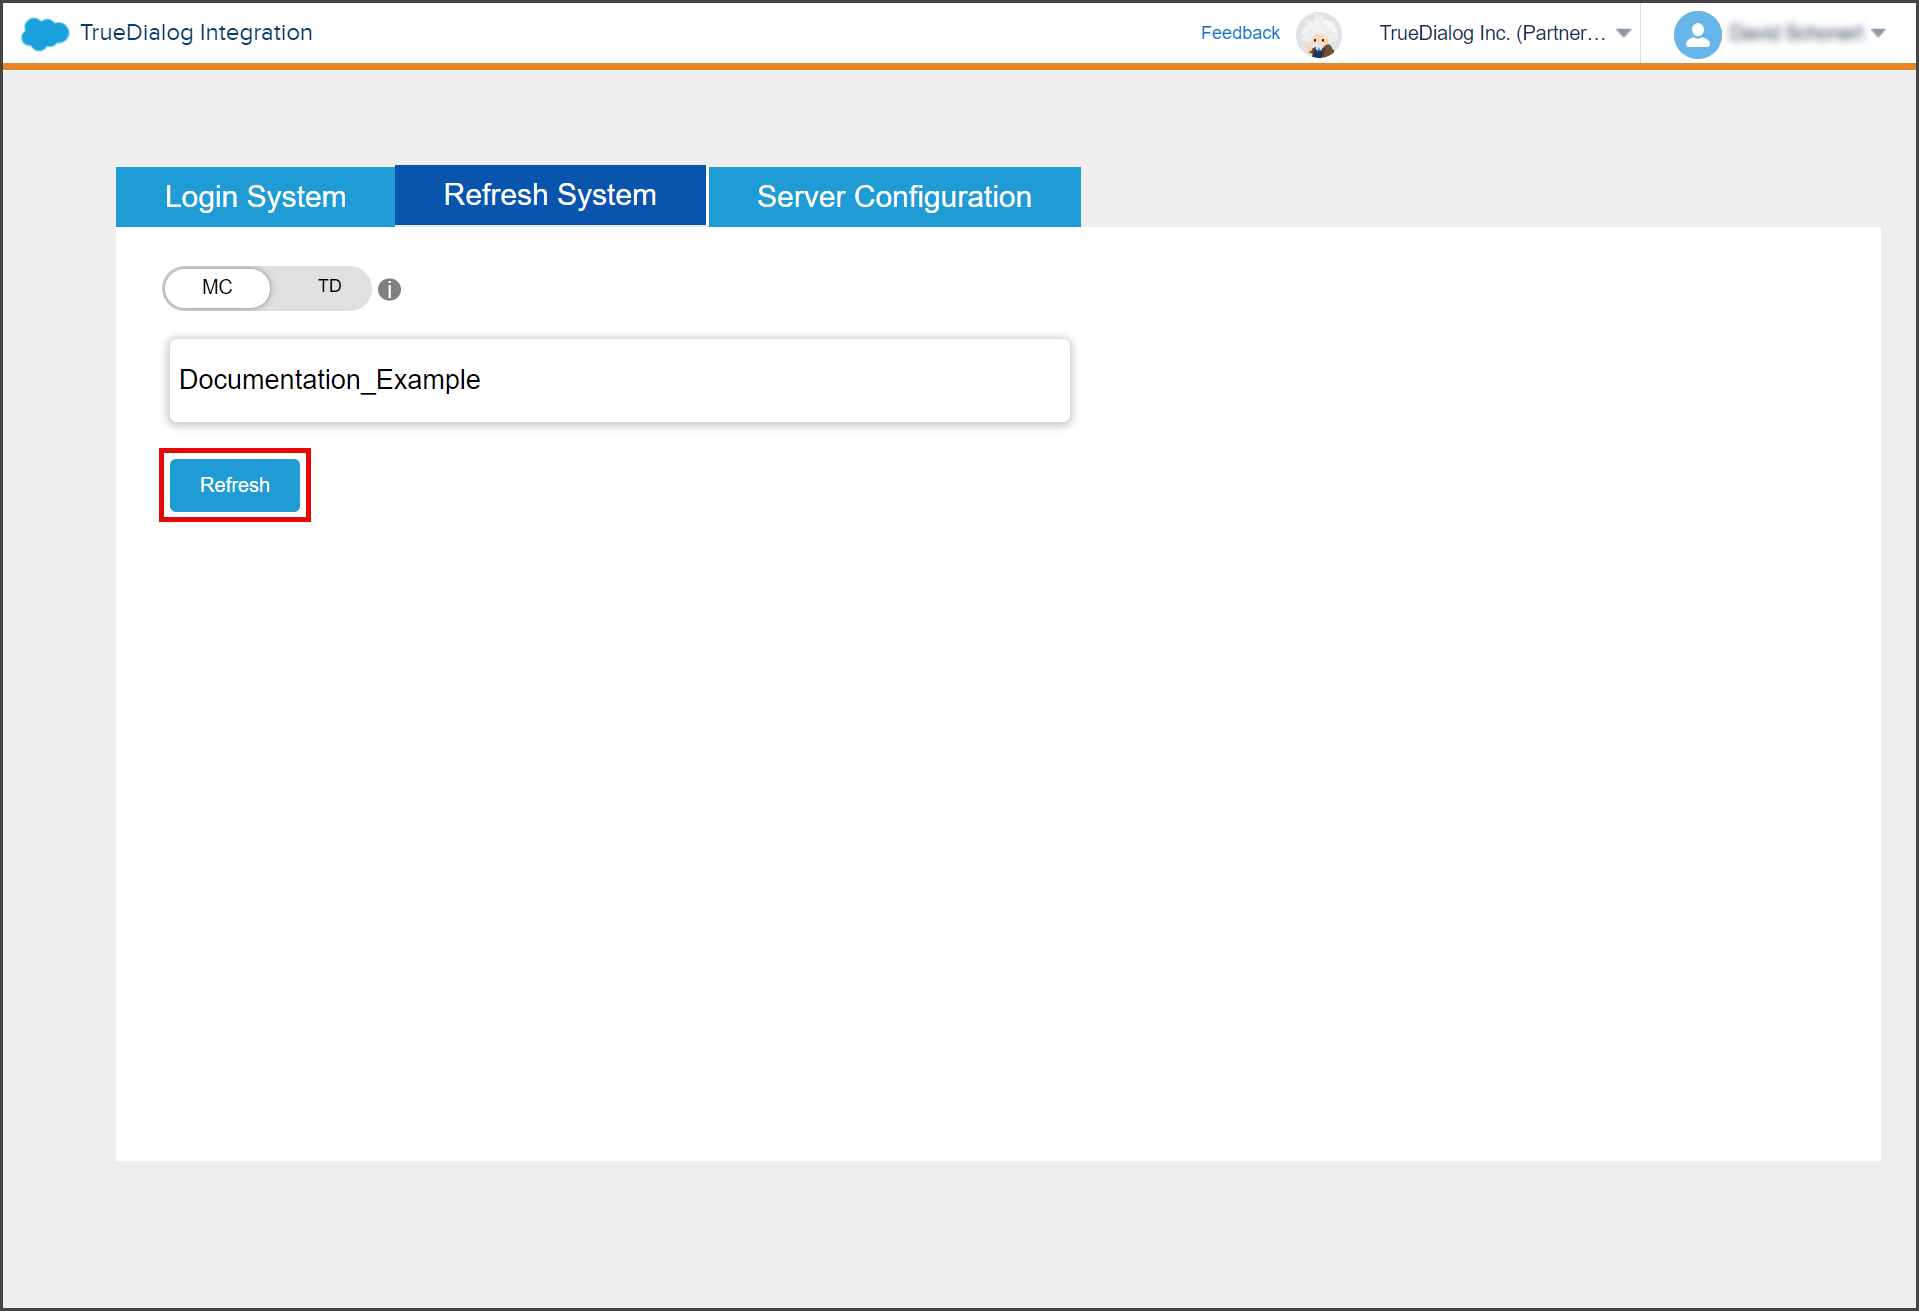
- Select your Data Extension from the list.
- Click Refresh.

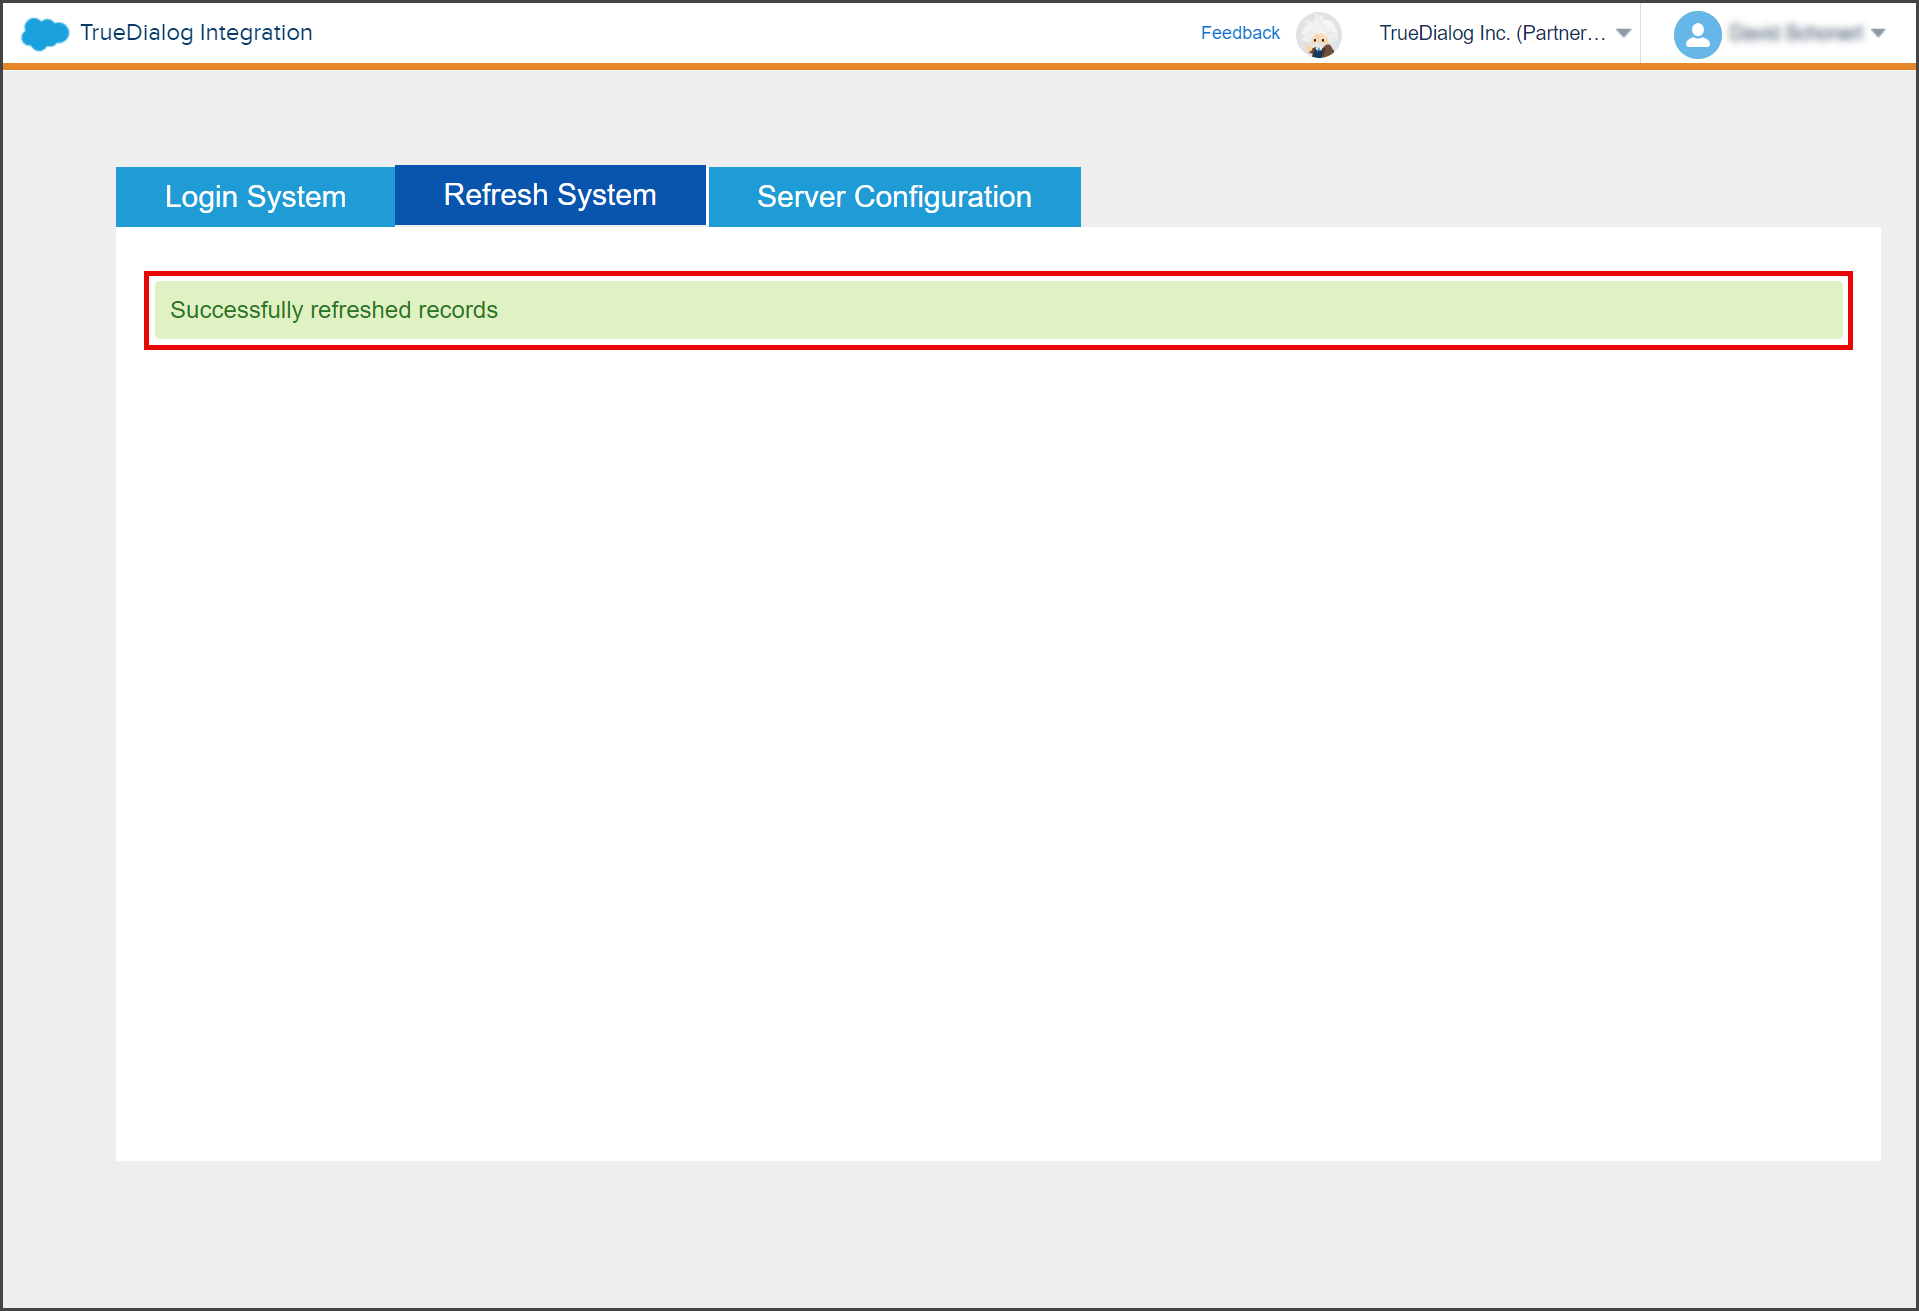
- Wait for the Success message to be displayed.
- From the navigation menu, click Audience Builder, and in the dropdown menu, click Contact Builder.
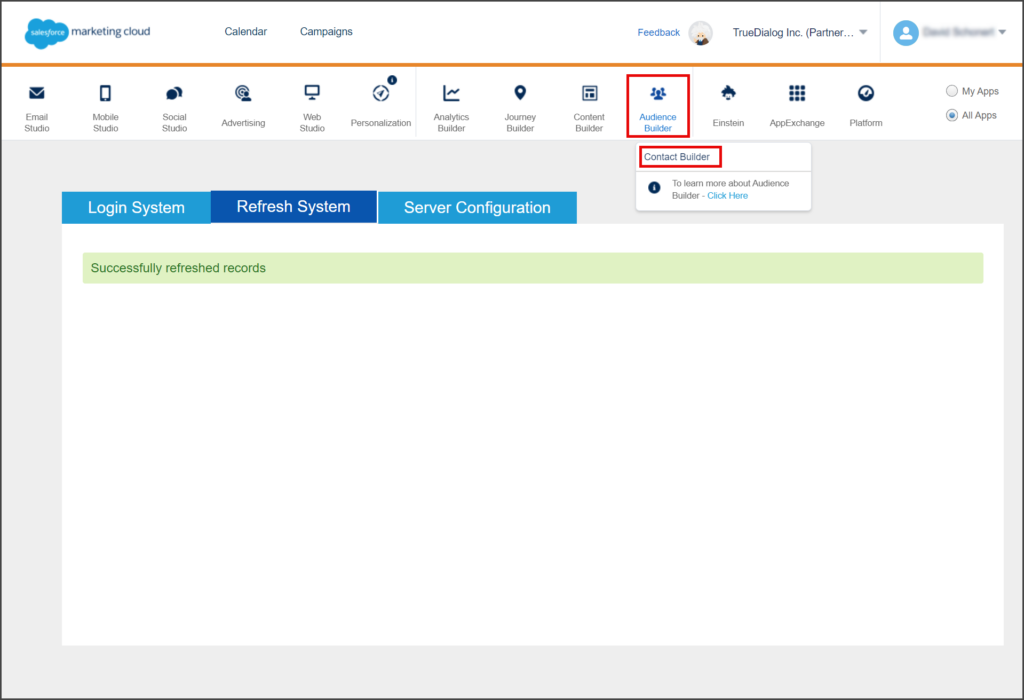
- From the Contact Builder page, click the Data Extensions tab.
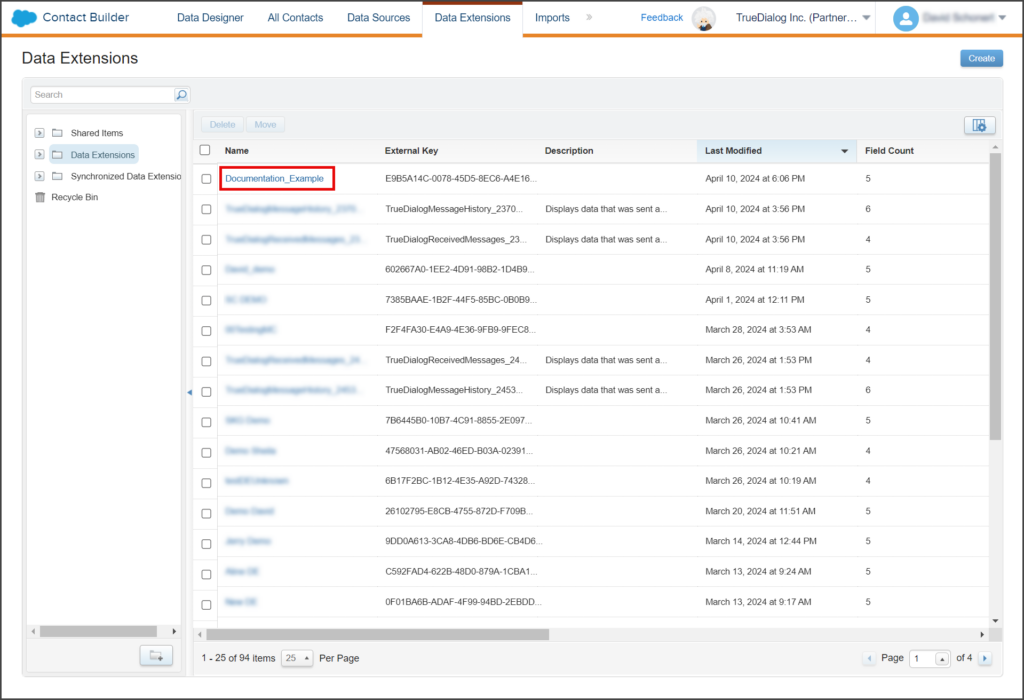
- On the Data Extensions page, click your Data Extension.
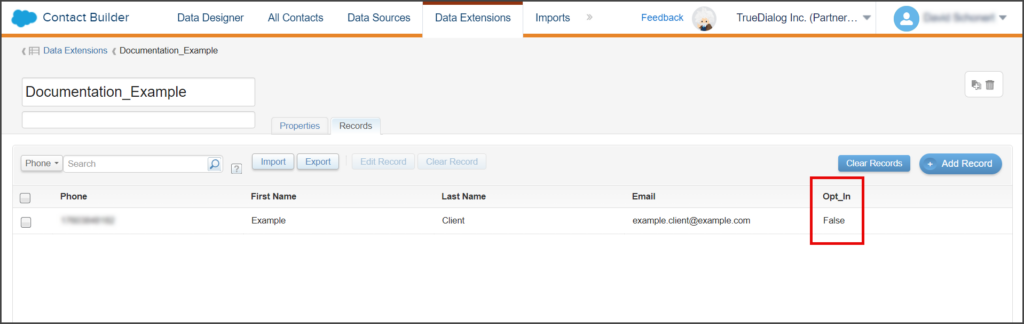
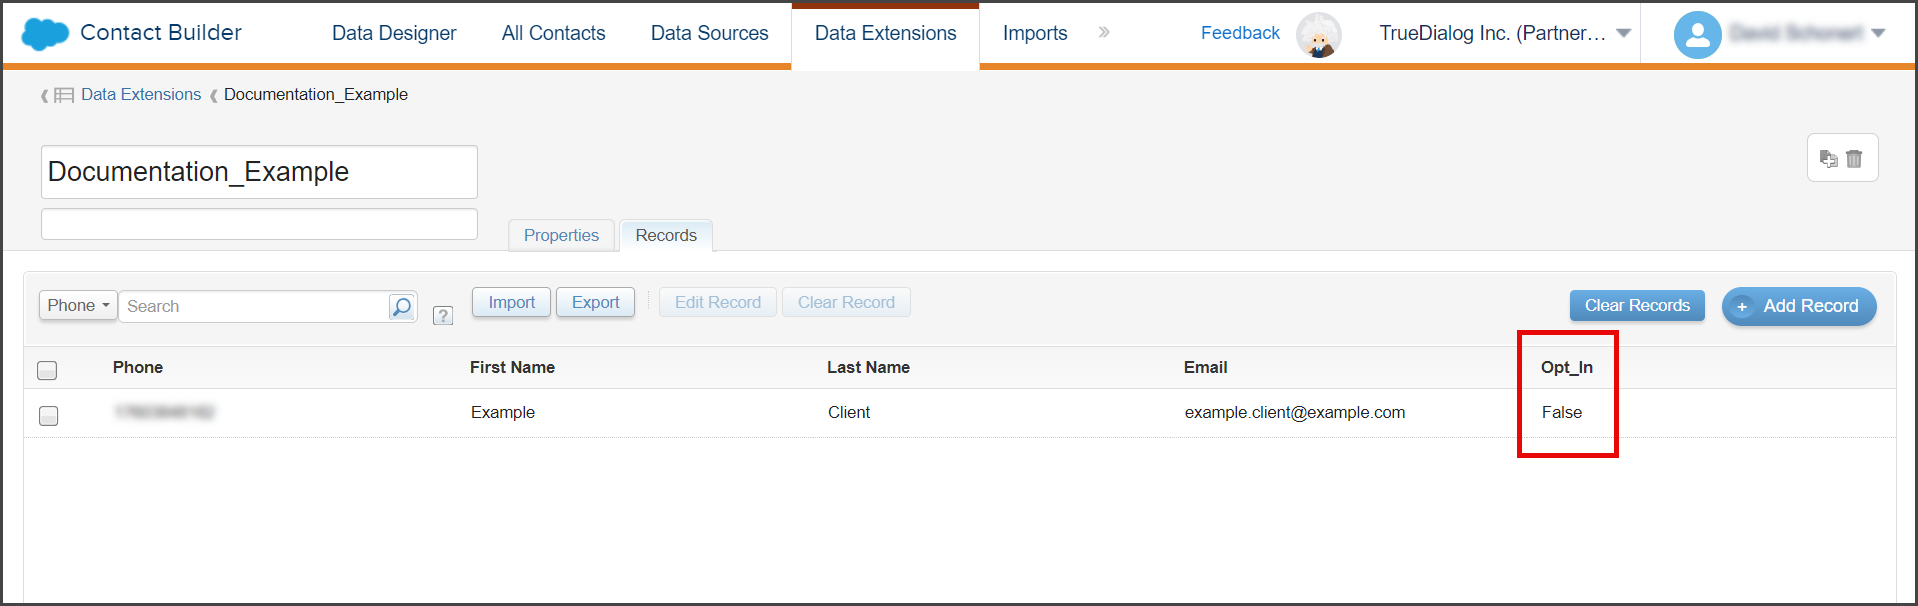
- Click the Records tab.

- Verify that the column Opt_In has been added to your Data Extension. This column and its values were added when Salesforce Marketing Cloud was synced with your TrueDialog account.


Update Opt_In Status
For a contact to receive a message, its Opt_In status must be True. If you update a contact’s Opt_In status in your Data Extension, you must sync the changes with your TrueDialog account. The following instructions show you how to change your Opt_In status from False to True and then sync the changes with TrueDialog.
- From the Records page of your Data Extension.
- Select the record to edit.
- Click Edit Record.
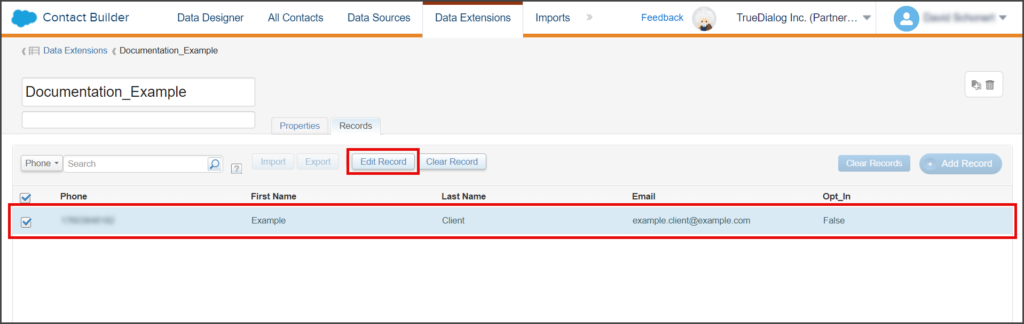
- Click the Opt_In dropdown and select True.

- Click Save.
- From the navigation menu, click AppExchange, and in the dropdown menu, click TrueDialog Integration.
- Click the Refresh System tab.
- Set the MC/TD toggle to TD.
- To select your Data Extension, enter its name in the Select Data Extension textbox. A list of Data Extensions will appear as you type.
- Select your Data Extension from the list.
- Click Refresh.

- Wait for the Success message to be displayed.


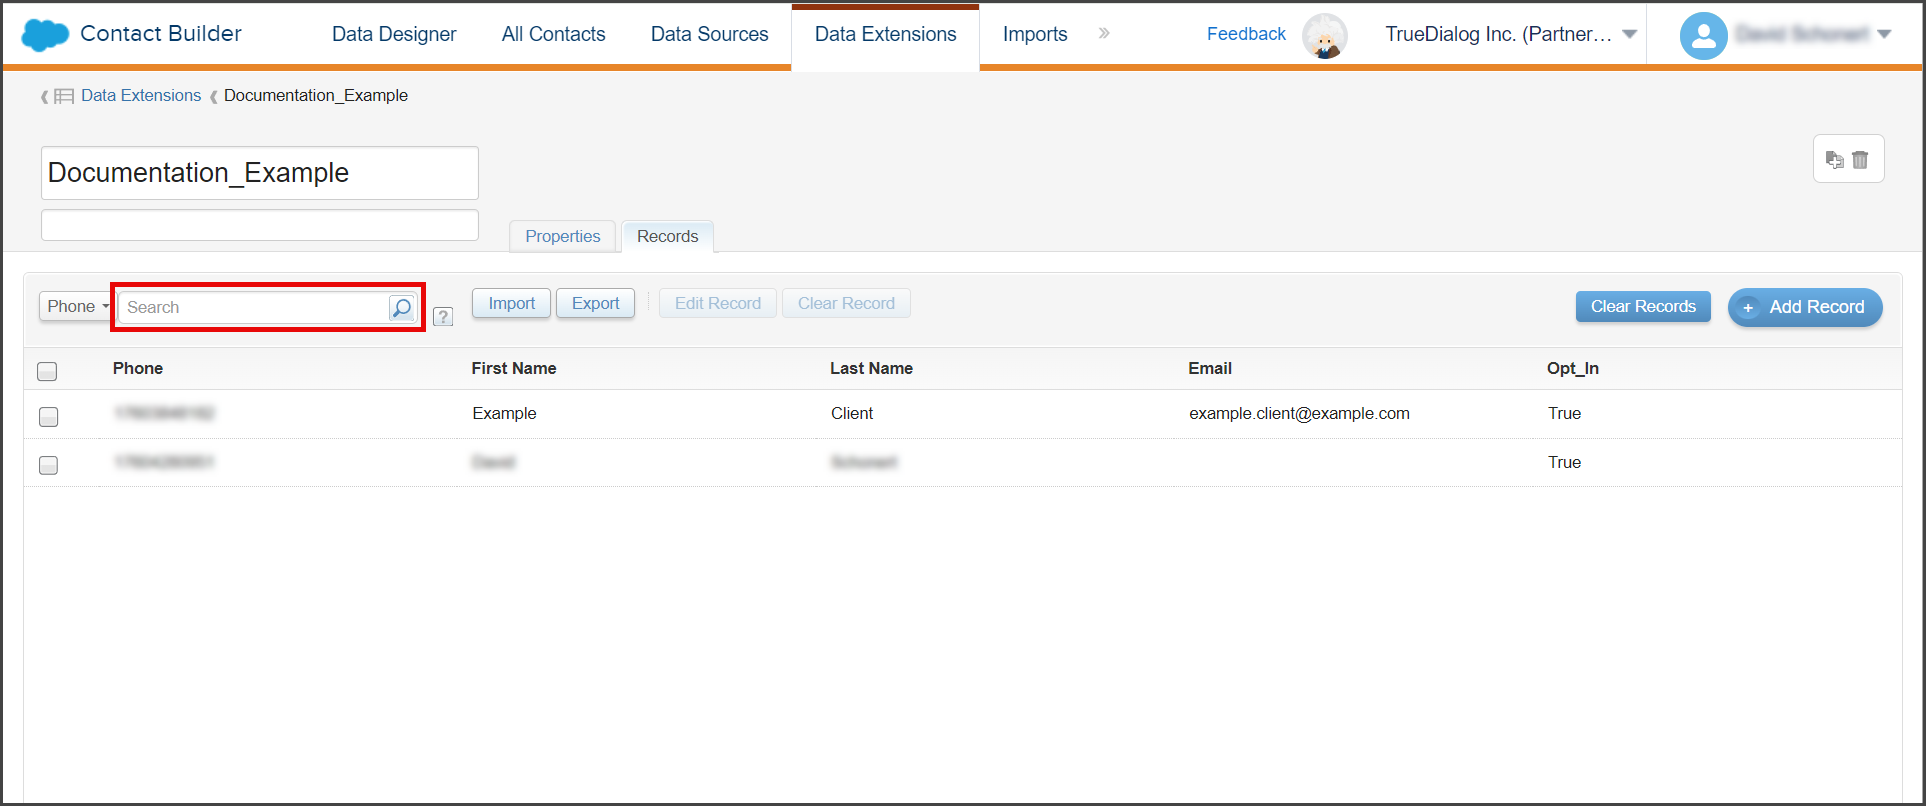
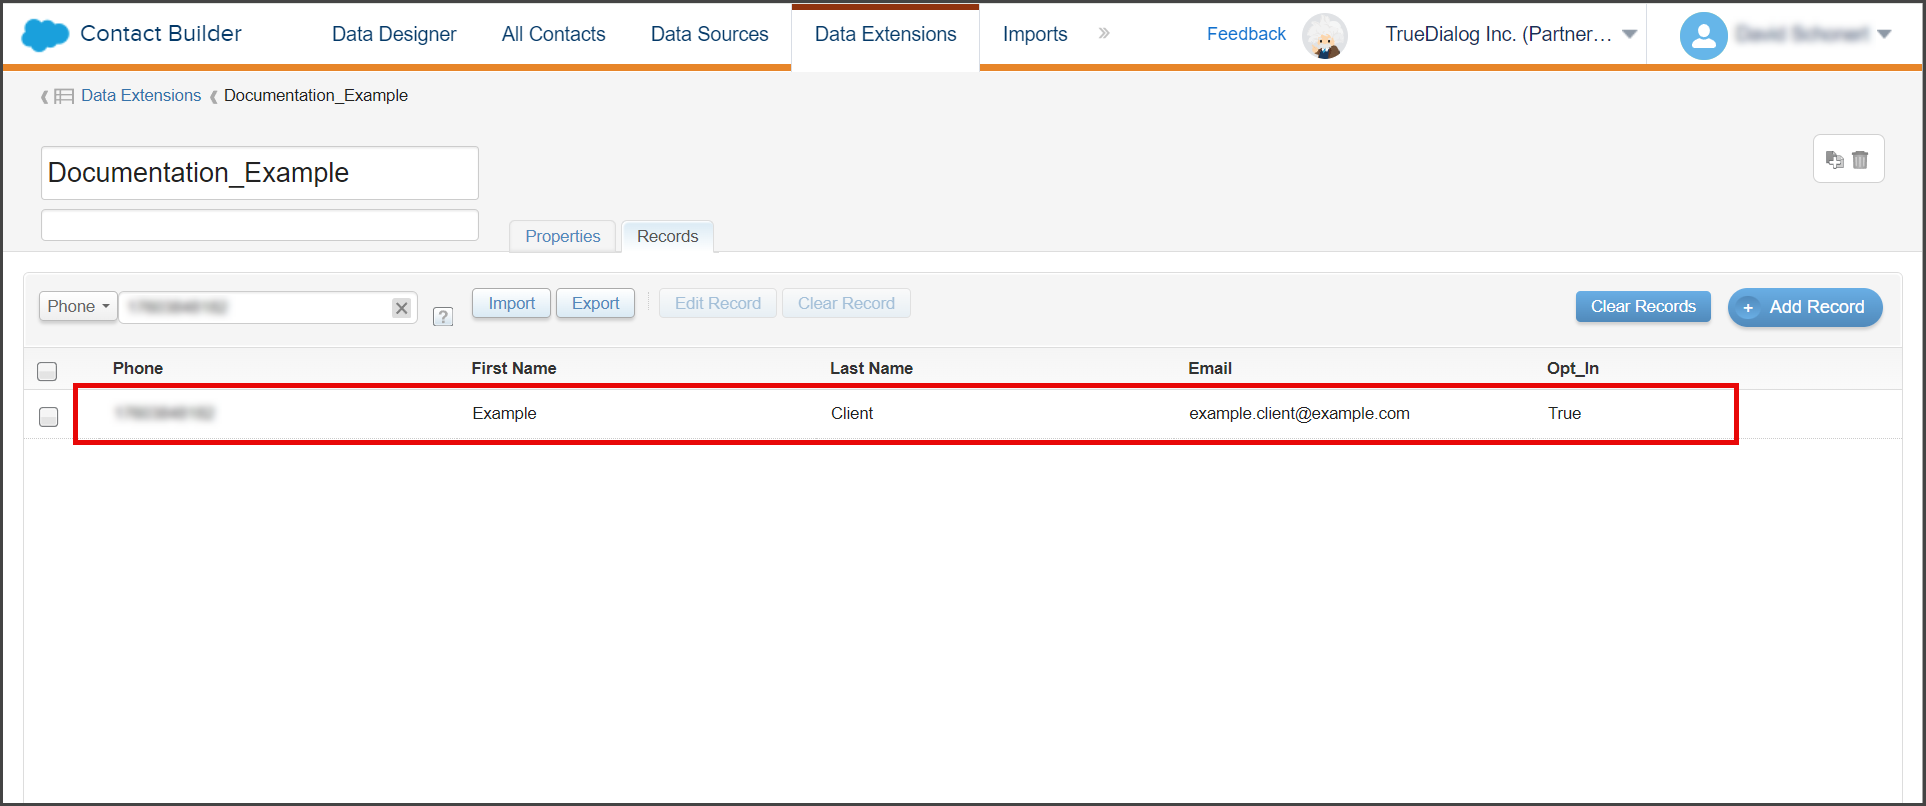
Search Phone Numbers
Once you have entered your contacts into the Data Extension, you can search for a specific contact by entering their phone number. Salesforce only supports searching the Phone field; you must export the Data Extension and search using your preferred spreadsheet to search other fields.
- From the Records tab of the Data Extension.
- Enter your phone number to search for. Remember to start with 1.

- Click the Magnifying Glass icon or press Enter.
- The search results will now be displayed in the table.