Microsoft Dynamics
TrueDialog Integration
This article shows you how to change and set many of the available options in the TrueDialog integration.
Submit Recipient Information to TrueDialog
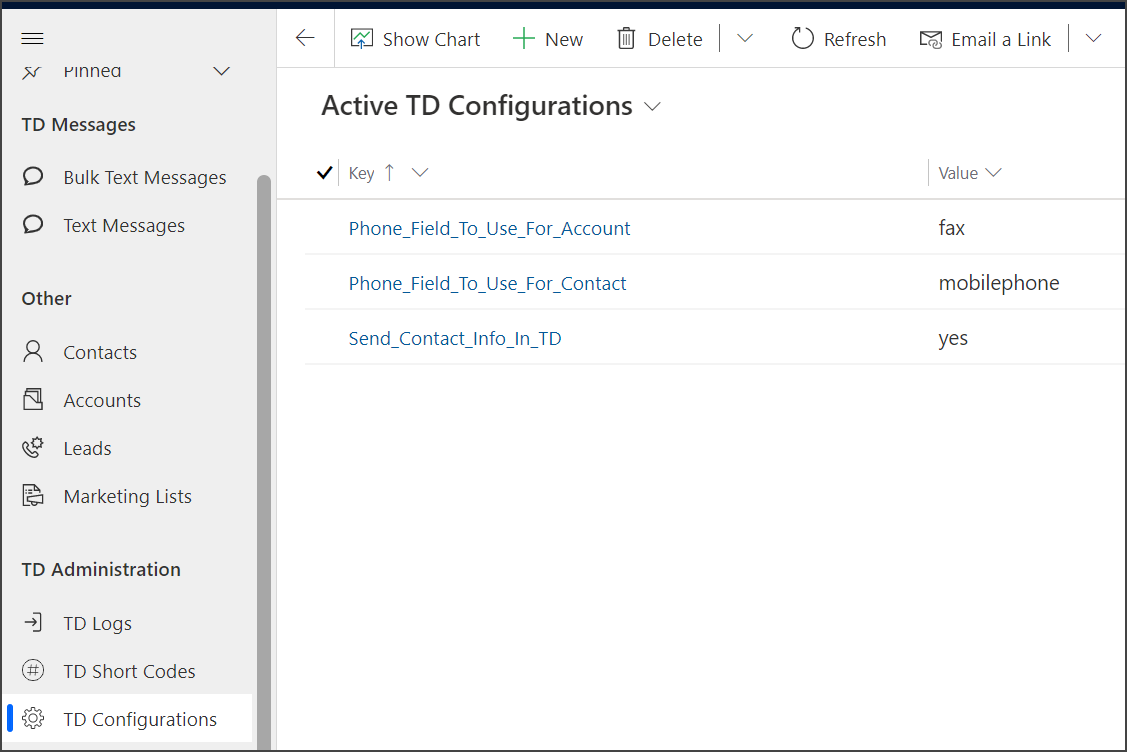
Key:   Send_Contact_Info_In_TD
Value: yes or no
This flag is responsible for turning on/off the functionality that sends information about the SMS recipient to TrueDialog. Once the information is sent to TrueDialog, it is stored in the Contact area of the user’s TrueDialog account. Later, this information is included in email notifications about incoming messages.
If the functionality is turned on, the following mapping is used.
| Table Name | FirstName | LastName | |
|---|---|---|---|
| Contact | firstname | lastname | emailaddress1 |
| Account | accountnumber | name | emailaddress1 |
| Lead | firstname | lastname + subject | emailaddress1 |
As a result, the following fields will be updated on the TrueDialog Portal.
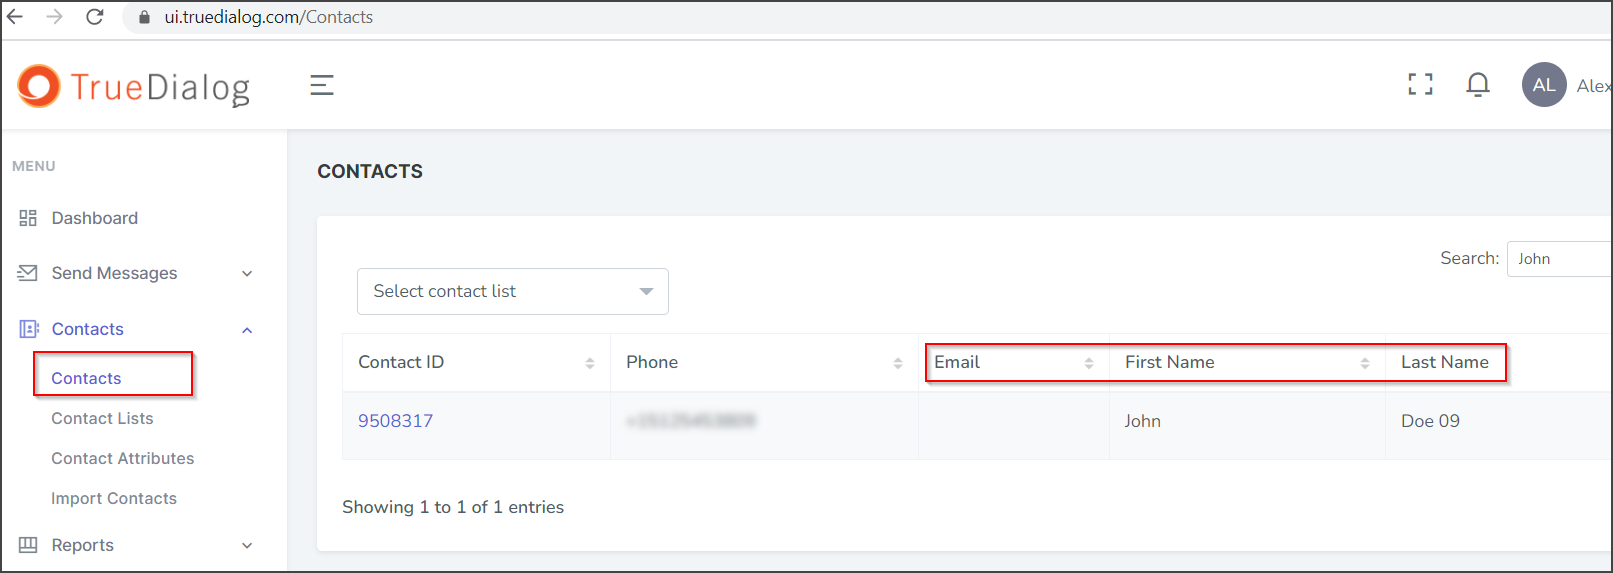
Change Default Phone Field
By default, the integration sends SMS messages to the phone number in the standard phone field (see table below). If you need to change the field for any reason, you must change the appropriate configuration value by putting in the schema name of the field that has to be used. The field can be both a standard and custom text field. There are no requirements regarding formatting; it just must contain a valid phone number.
| Table Name | Standard Field | Settings Key to Change |
|---|---|---|
| Account | telephone1 | Phone_Field_To_Use_For_Account |
| Contact | mobilephone | Phone_Field_To_Use_For_Contact |
| Lead | mobilephone | Phone_Field_To_Use_For_Lead |
| Systemuser | mobilephone | Phone_Field_To_Use_For_SystemUser |
Turn On In-App Notifications
To start using In-App Notifications, the administrator must ensure that the following two steps are completed.
- Turn on notifications for a Model-driven App.
- Turn on notifications for incoming messages.
Turn on notifications for a Model-driven App.
In-app notifications are a Microsoft feature that must be turned on by the system administrator for each Model-driven app where you’d like to see notifications. Our solution comes with this option turned on for the TrueDialog Integration app. Instructions on how to turn it on can be found here: https://docs.microsoft.com/en-us/power-apps/developer/model-driven-apps/clientapi/send-in-app-notifications. Contact support if you need assistance.
Turn on notifications for incoming messages.
To turn on/off notifications about incoming messages, navigate to the configuration section and set the appropriate value to the following key.
Key:   InApp_Notification_TurnOn
Value: yes – Turn On Notifications
       no  – Turn Off Notifications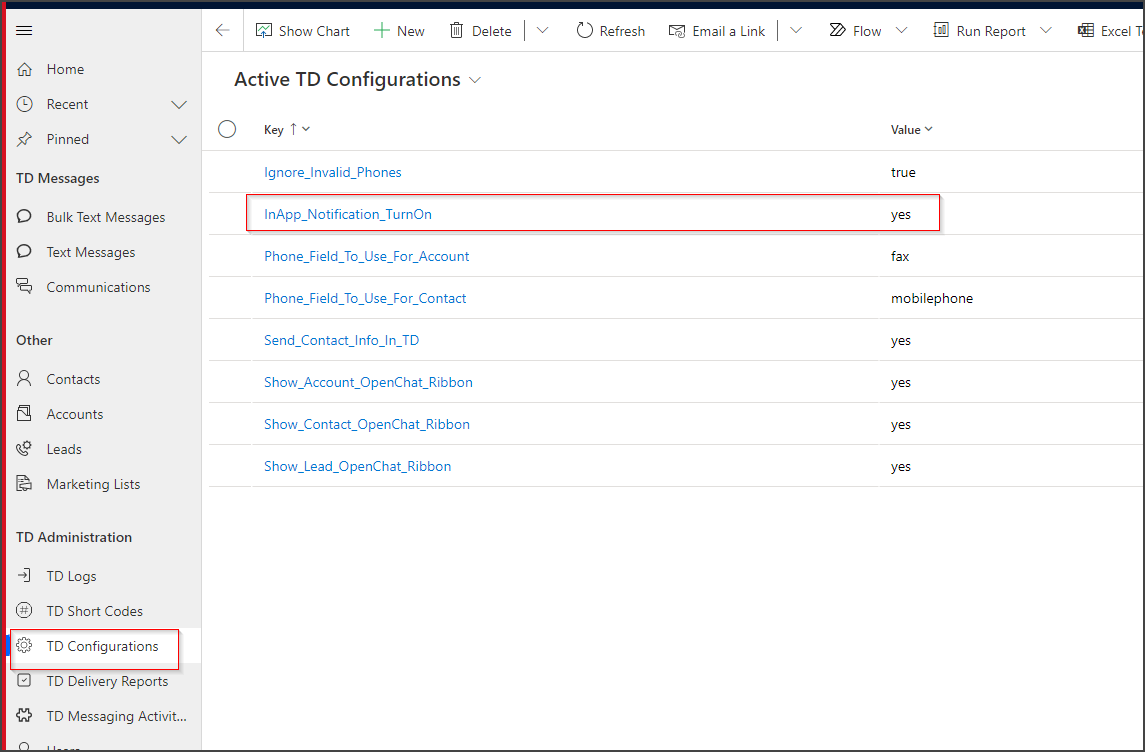
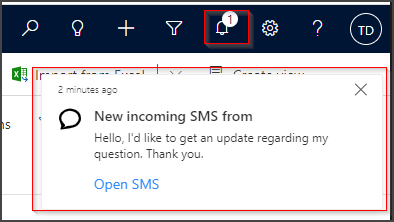
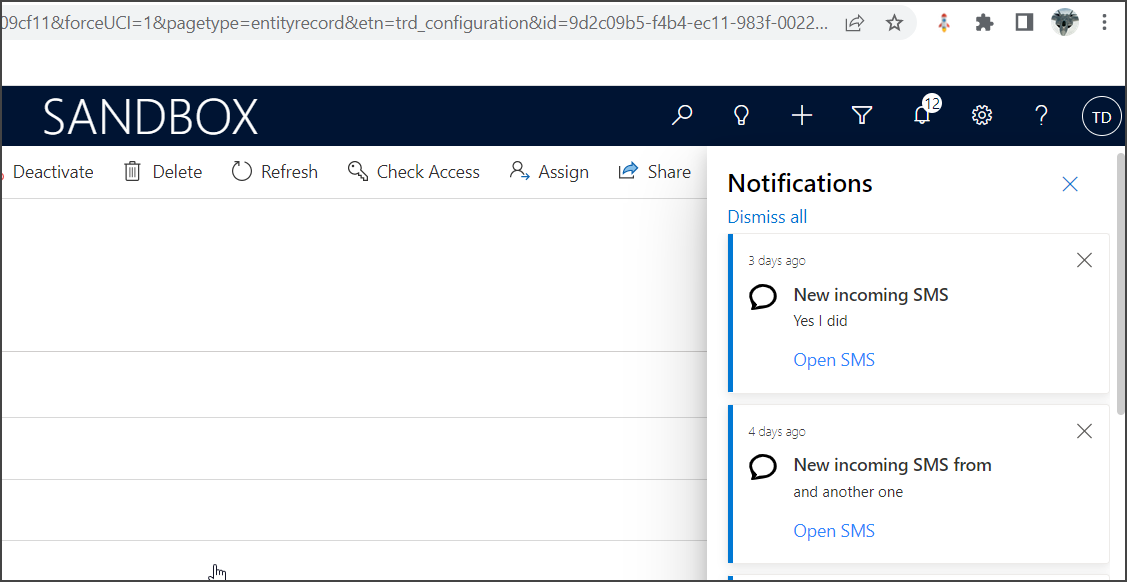
Notifications Turned On
Once both actions are completed, your users can see notifications about new incoming messages in the notifications pane.
Ignore Invalid Phones for Bulk Send
Generally, if an Invalid or SMS Opted Out phone number is included in a Marketing List used to send a Bulk Message, the whole Bulk Send will be canceled because of this invalid number. In the exception details, the user can see which number is causing the issue and exclude it from the Marketing List.
The integration now includes an Ignore Invalid Phones feature that allows users to skip invalid phone numbers and continue processing the rest of the Marketing List. This prevents the frustrating and time-consuming process of manually removing invalid records.
Key:   Ignore_Invalid_Phones
Value: yes
Send Bulk SMS to Custom Entities
To use the Bulk SMS Message with custom entities, the administrator must perform several configuration steps and create the proper config record.
In the following example, we will configure sending a message to a custom entity labeled Football Player (new_FootballPlayer). This entity has a Phone field (new_Phone) to store the players’ mobile phone numbers.
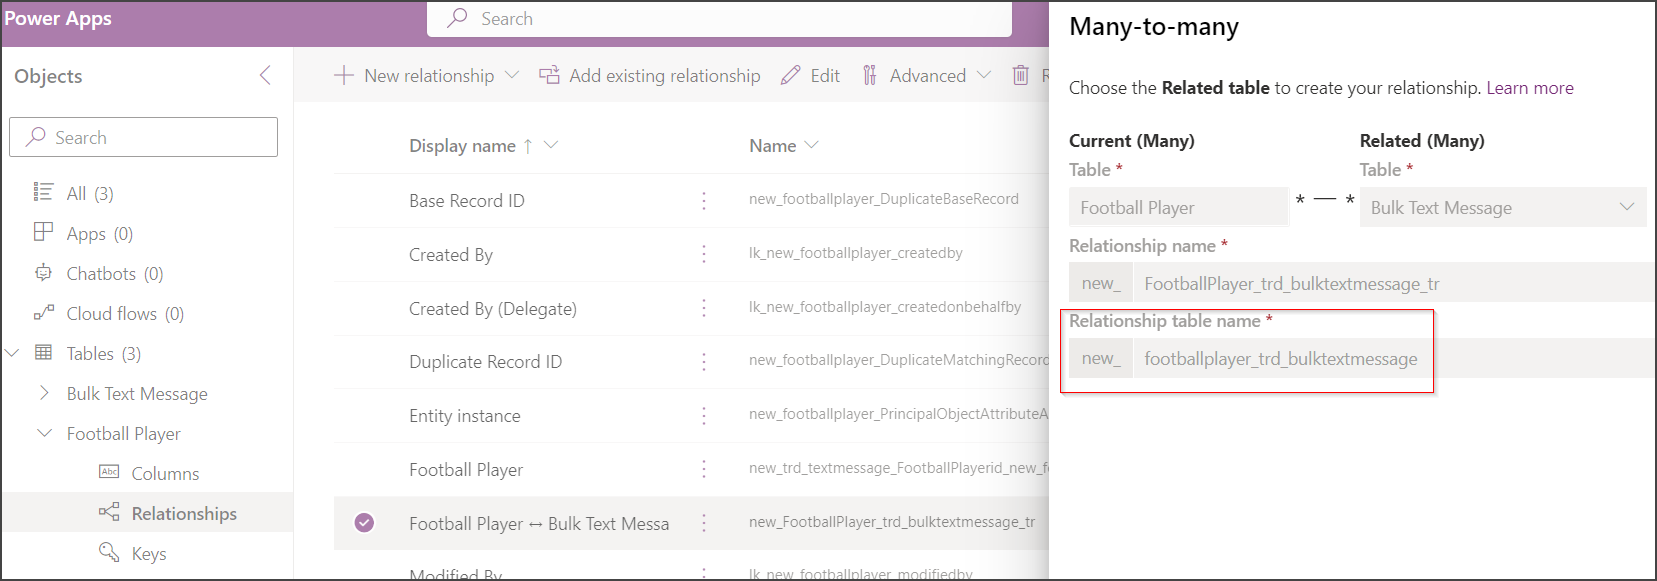
First, a new connection must be created between the Bulk SMS and Football Player entities. The name of the created connection will be used in the ConnectionTableName parameter of the configuration.
The second step is optional but recommended. Go to the Text Message table and create a lookup for your custom table. Copy the schema name of the created field to the TargetEntityLookupNameInSms in the configuration record. In this example, it’s new_FootballPlayerid.
Leave this option blank if you don’t need to generate SMS records in the system.

Key: InApp_Notification_TurnOn
Example Value:
[
  {
    "ConnectionTableName":
        "new_FootballPlayer_trd_bulktextmessage",
    "TargetEntityName": "new_FootballPlayer",
    "PhoneFieldName": "new_Phone",
    "TargetEntityLookupNameInSms":
        "new_FootballPlayerid"
  }
]
Allow/Block Incoming SMS from Unknown Numbers
By default, the integration allows incoming SMS from unknown numbers. To block Unknown Numbers instead, change the following key.
Key:   Block_Sms_From_Unkonown_Number
Value: yes – Block Unknown Number
       no  – Allow Unknow Number
Create Contact/Account/Lead from SMS with Unknown Sender
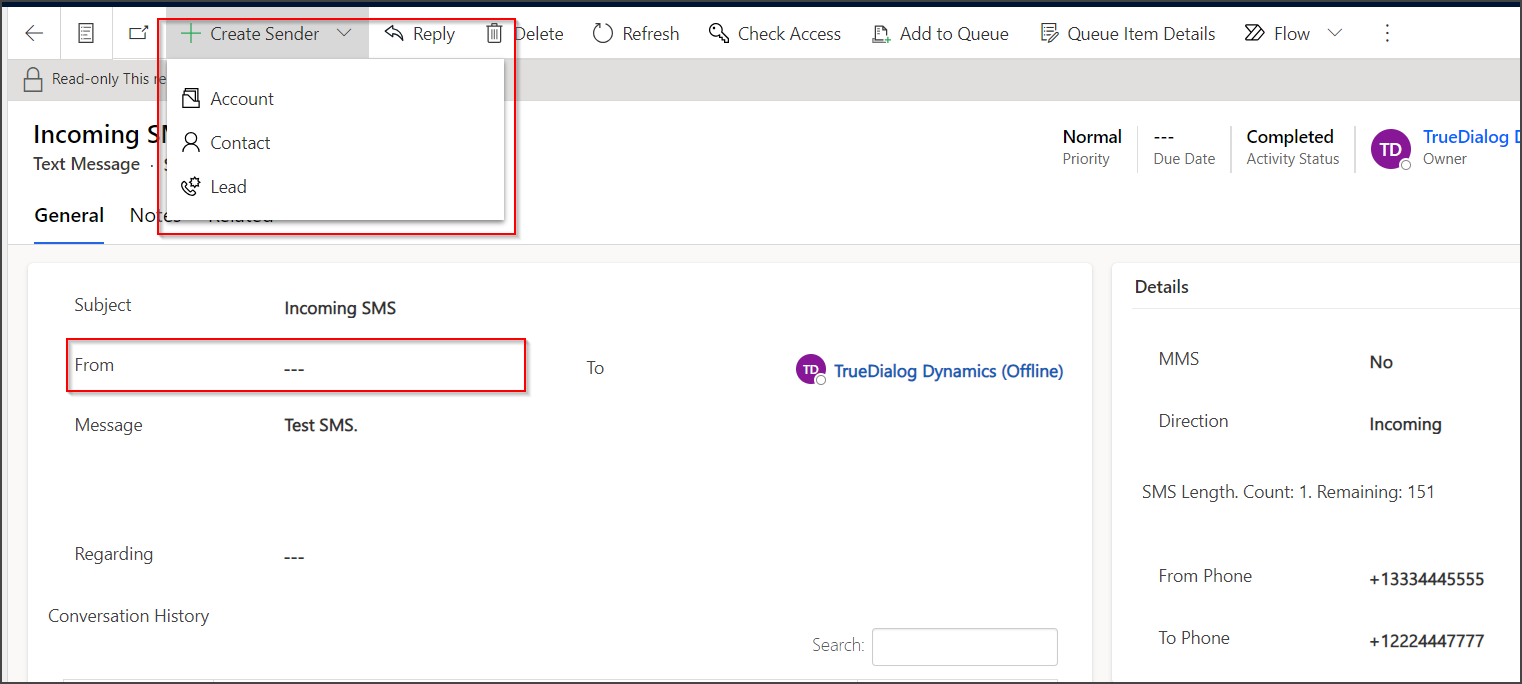
This feature is related to the feature described above. If the user gets an SMS from an unknown sender, this feature adds the option to create a new Contact/Account/Lead record from the SMS (specific fields are prepopulated).
Key:   Show_RecordCreation_FromSms
Value: yes – Show Create Sender Button
       no  – Hide Create Sender Button
If yes is selected, users can see the Create Sender button on incoming SMS records where the sender was not found in the system.
Mark Incoming SMS as Complete
By default, all incoming SMS messages are marked closed with Status Reason Received. However, incoming SMS messages can be kept open instead of automatically closed. We don’t currently have a flag in CRM responsible for this functionality, but it can be easily achieved via an internal configuration. Contact our support team at support@truedialog.com if you need to configure this feature.
Enabling SMS for Opportunity
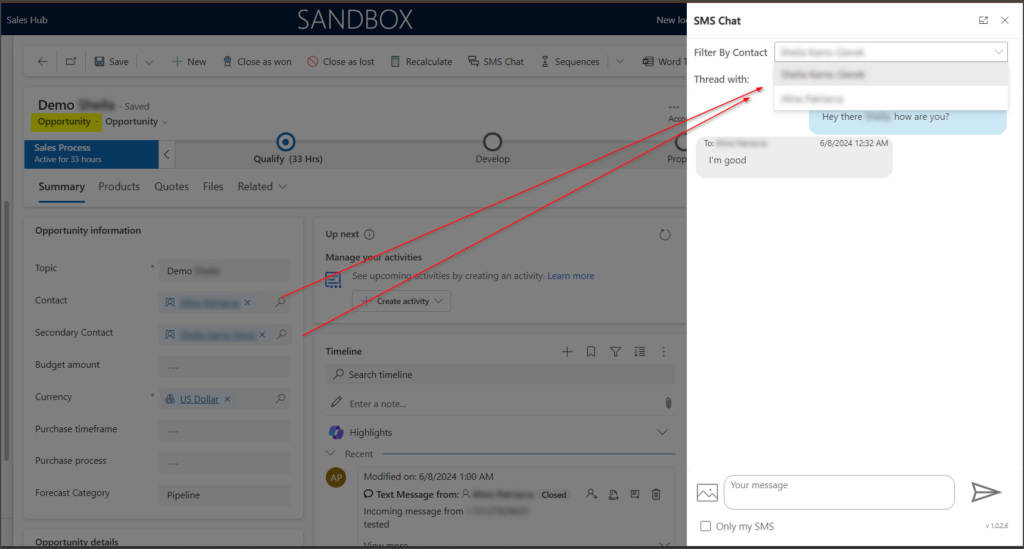
SMS chat functionality can be enabled for the Opportunity table. Once enabled, users can send SMS messages to the records associated with the opportunity record right from the Opportunity. SMS records will be associated with the selected Opportunity.
When a user gets an incoming message and the Opportunity functionality is enabled, the code tries to find a matching Open record to which the sender participated in sending a message. If more than one active Opportunity is found, the newest one will be used for SMS association.
In the SMS Chat window, the user can select a conversation with a specific contact and filter by the Dynamics user if necessary.
To enable this functionality, the administrator must add the keys below and the Page to the Model-driven Application. See the MS Dynamics – Adding Other SMS Messengers – SMS Chat in Model-driven Apps article for instructions on model-driven apps.
Key:         Show_OpenChat_Ribbon_Opportunity
Value:       yes – Show
             no  – Hide
Description: This key is responsible for showing the SMS
             Chat button at the Opportunity ribbon.
Key: Opportunity_References_Columns
Example Value: trd_SecondaryContactid;parentcontactid
Description: Use ";" to separate the list of lookup
fields on the opportunity table that must
be used in this functionality.Key: Show_OpenChat_SidePane_Opportunity
Value: yes
Description: To display the chat button on the right
panel side.Survey to Case
To receive the results of TD SMS Surveys in TrueDialog in your Dynamics instance, contact our support team for help configuring the Survey callback for your account. Once enabled, you can configure Case creation based on the Survey answer by adding the following two keys.
Key:           Survey_Answer_CaseCreation_Allowed_Phones
Example Value: +15121234567;+15122345678
Description:   Use ";" to separate phone numbers allowed
               for creating Cases. If empty, no Cases will
               be created.
Key: Survey_Answer_Case_Mapping_Configuration
Example Value:
[
{
"QuestionLabel": "Case Name",
"AttributeSchemaName": "title",
"AttributeType": "String"
},
{
"QuestionLabel": "Case Description",
"AttributeSchemaName": "description",
"AttributeType": "String"
},
{
"QuestionLabel": "Contact Email",
"AttributeSchemaName": "trd_OtherContactId",
"AttributeType": "Lookup",
"TargetTable": "contact",
"SearchByAttribute": "emailaddress1"
},
{
"QuestionLabel": "First Response Sent",
"AttributeSchemaName": "firstresponsesent",
"AttributeType": "boolean"
}
]
Description:
QuestionLabel -
This must be the same as the Question Label in
Survey Editor at the TD Portal.
AttributeSchemaName -
This must be the schema name of the field in the
Case (incident) table.
AttributeType –
This is the type of attribute. The following
attribute types are supported: string, integer,
decimal, double, money, dateTime, boolean, and
lookup.
Note: For the lookup type, additional properties
must be set:
TargetTable –
This is the table where the lookup field points
to.
SearchByAttribute -
The schema name of the attribute in the target
table by which the search should be done. If more
than one record matches the condition, the first
one returned by the query will be used.