
TrueDialog Portal
Comms Hub > Auto Response
This guide will show you how to schedule and enable the Comms Hub Auto Response feature. The Comms Hub has an Auto Response feature that lets you create a pre-written message to respond to any incoming messages automatically.
Enable Auto Response
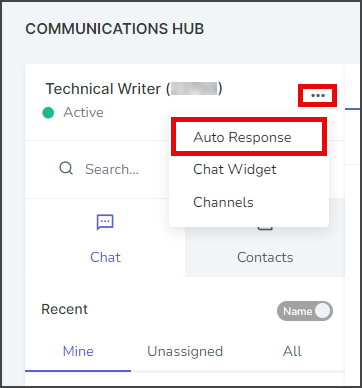
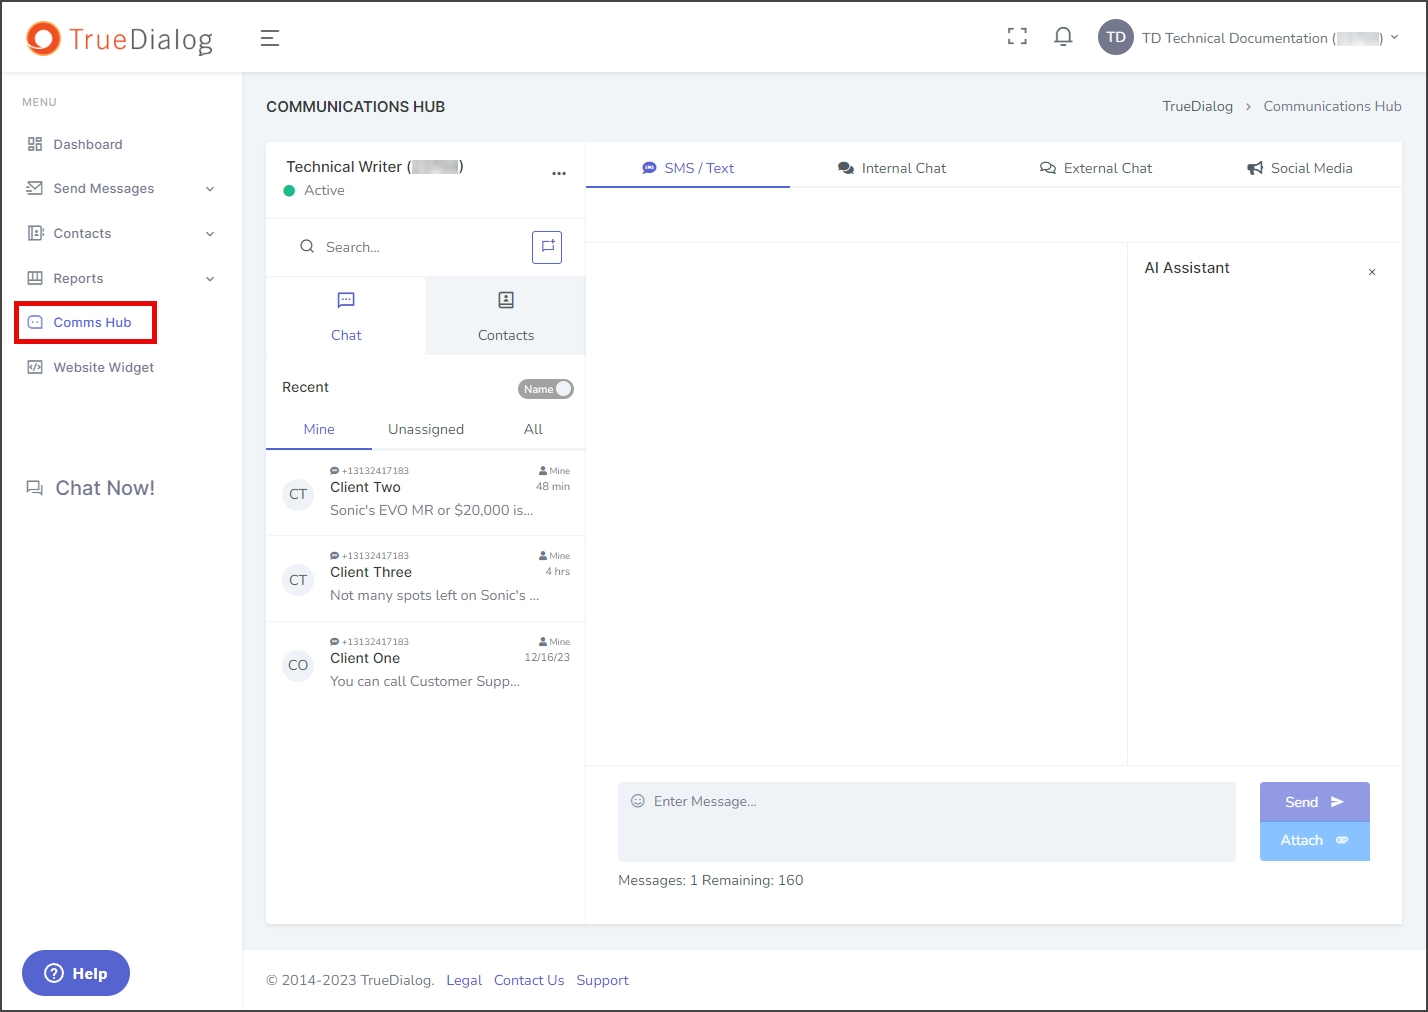
- Access the Communication Hub page by clicking Comms Hub in the left sidebar.

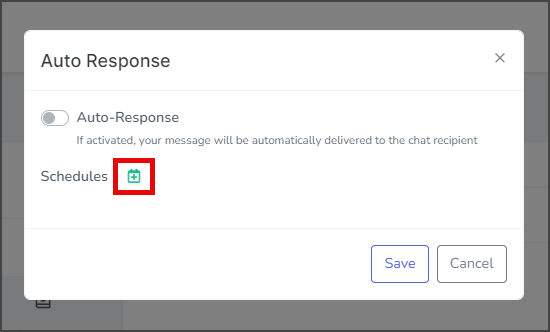
- Click the horizontal line of three dots to the right of the user name and select Auto Response.
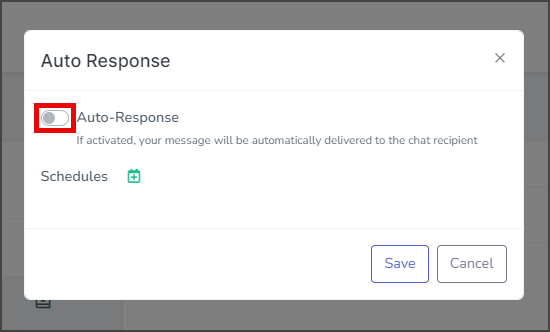
- Click the Auto-Response toggle to enable Auto Response.
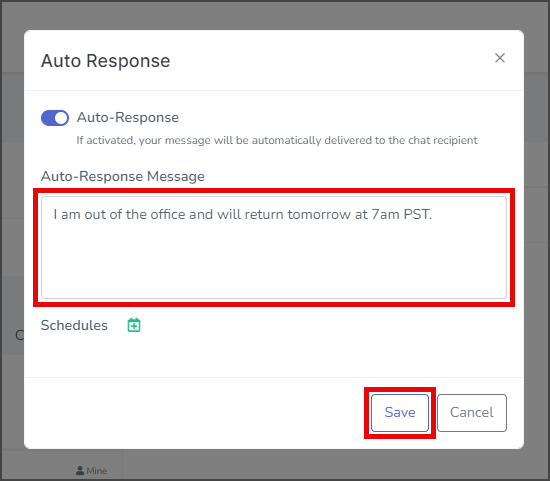
- Enter your message in the Auto-Response Message textbox.
- Click Save to save your Auto Response settings.
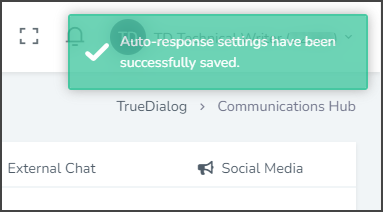
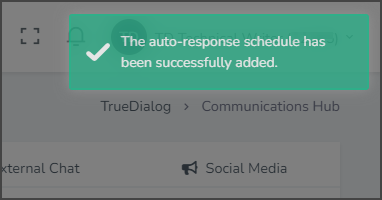
- After saving the Auto Response, a success message will appear in the upper right corner.
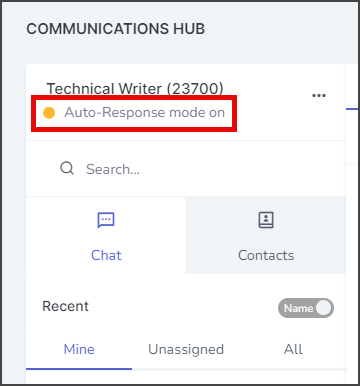
- When Auto-Response is enabled, the user status will change from Active to Auto-Response mode on.
Schedule Auto Response
An Auto Response message can be scheduled to start and end at a specified time and date.
- Click the horizontal line of three dots to the right of the user name and select Auto Response.
- Click the green calendar icon to the right of Schedules.
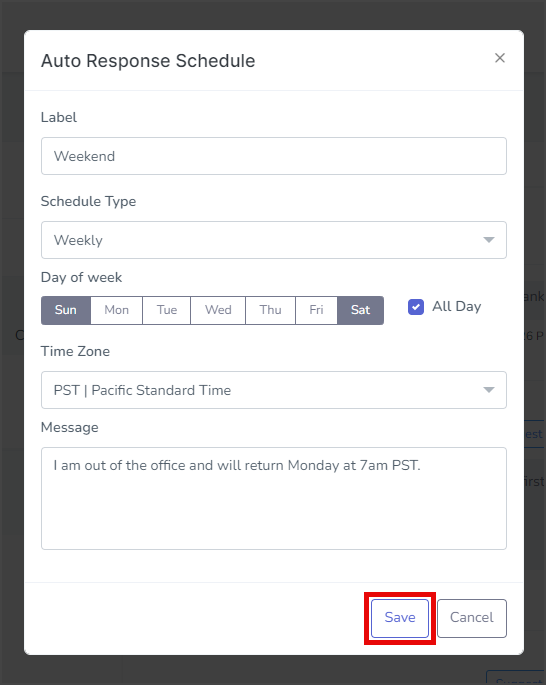
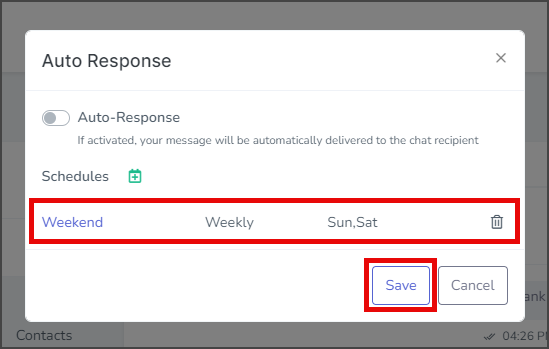
- Fill out the Auto Response Schedule form.
- Each Schedule Type has different fields that are displayed on the form.
- The example in the image below creates a scheduled Auto Response for every weekend.
- Click Save.
- After saving the schedule, the new schedule will be shown on the Auto Response window, and a success message will appear in the upper right corner.
- Click Save on the Auto Response window.
- After saving the Auto Response, a success message will appear in the upper right corner.