TrueDialog Portal
Sending Messages > Campaigns
The guide shows you how to use the TrueDialog link shortener to add a shortened and tracked link to your campaign message. Links can be added to any campaign type, but a one-way SMS campaign is used for this example. Follow the instructions below to create a one-way SMS message campaign with a shortened and tracked link.
TrueDialog campaigns support two different types of links: Static and Dynamic. Both link types create a redirect URL that allows TrueDialog to capture information about link clicks before redirecting to your target URL.
Static
A Static link generates a shortened URL that is the same for all contacts that receive the campaign message. Since all contacts receive the same link, TrueDialog can create a link several characters shorter than if a Dynamic link were used. However, with Static links, there is no method for determining which contacts clicked the link.
Dynamic
A Dynamic link generates a unique URL for each contact, making it longer than Static links. TrueDialog can track which contacts clicked on the link and offer options for requesting location data, removing URL parameters from reports, and changing the value of an attribute for any contacts who click the link.
Once your campaign is sent, see the Viewing Clicks Report article for instructions on viewing information on link clicks.
Create a One Way Campaign
- Expand Send Messages in the left sidebar and select Campaigns.
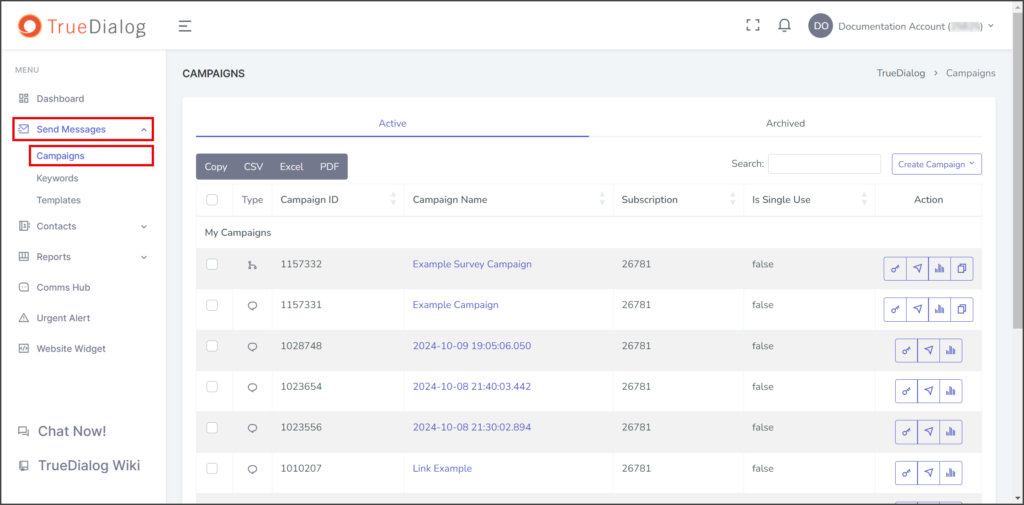
- Click the Create Campaign dropdown and select One way to open the New One-Way Campaign window.

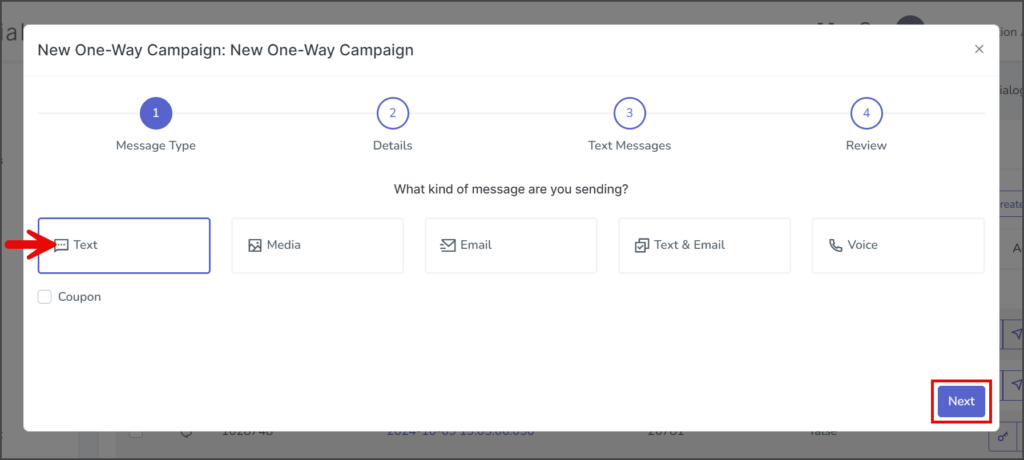
- Select Text for the message type.
- Click Next to go to the Details page.
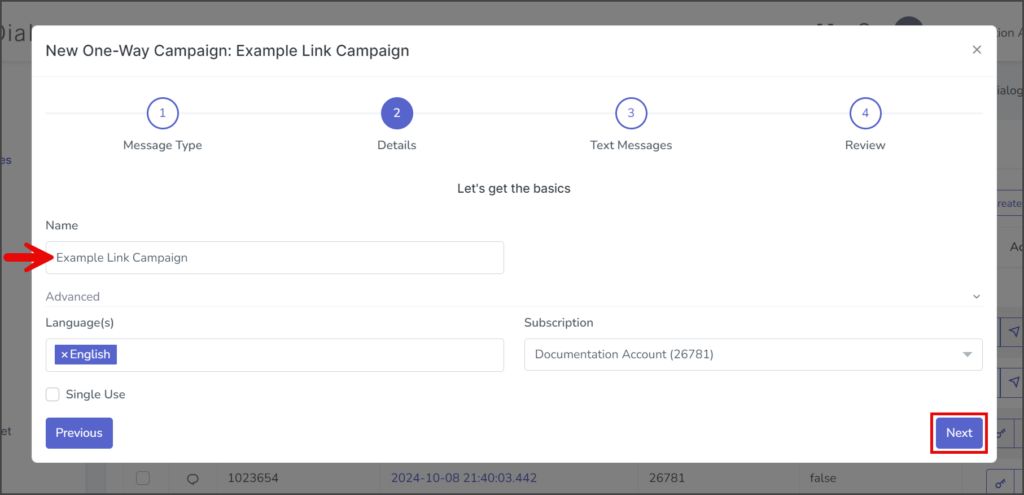
- Enter your campaign’s name in the Name textbox.
- (Optional) Expand the Advanced section.
- Language(s) – Add or remove any of the supported languages. If multiple languages are selected, the Text Messages page will have a Message Content box for each language.
- Subscription – Select the subscription to use for this campaign. The default subscription will be selected.
- Single Use – If checked, the end-user will receive a message from this campaign only once. Note: Don’t set it to single use until testing is complete.
- Click Next to go to the Text Messages page.
Text Messages Page
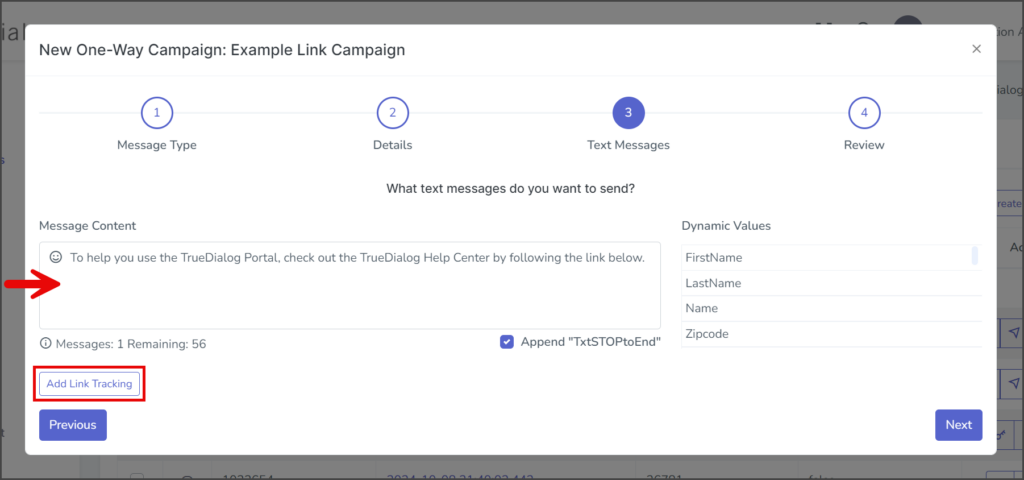
- Enter your message in the Message Content textbox.
- If the Append “TxtSTOPtoEnd” checkbox is checked, TxtSTOPtoEnd will be appended to the end of your message once the campaign is created. You can remove this later by editing your campaign.
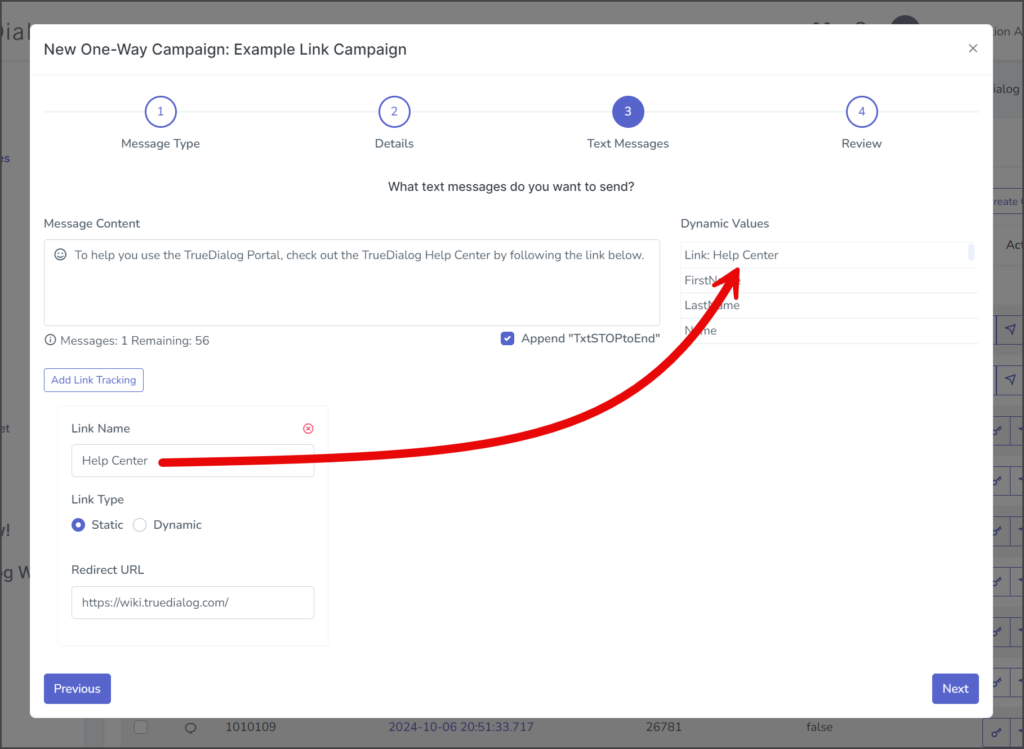
- Click Add Link Tracking.
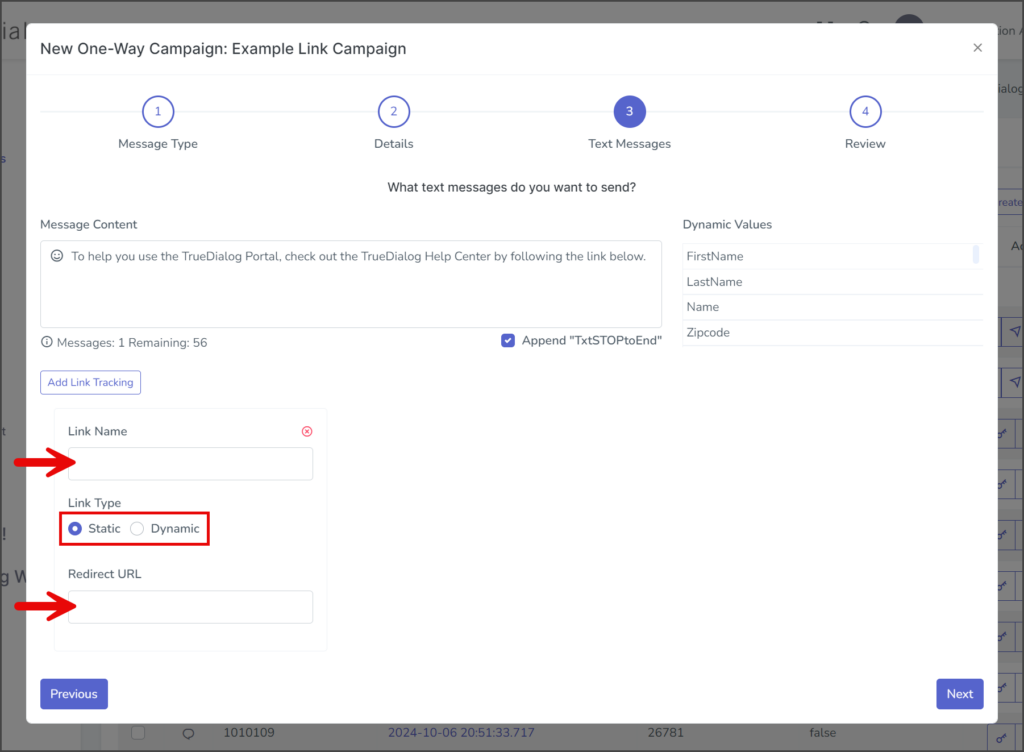
- Enter a name for the link in the Link Name textbox.
- Select the Link Type. The Dynamic Link Options section below shows you how to configure the optional settings for a Dynamic Link.
- In the Redirect URL textbox, enter the full URL of the destination for the link.
Dynamic Link Options
If Dynamic is selected, extra link settings are available, but each is optional. Refer to the sections below to understand what each option does.
Remove URL Parameters
Details coming soon…
Update Contact Attribute
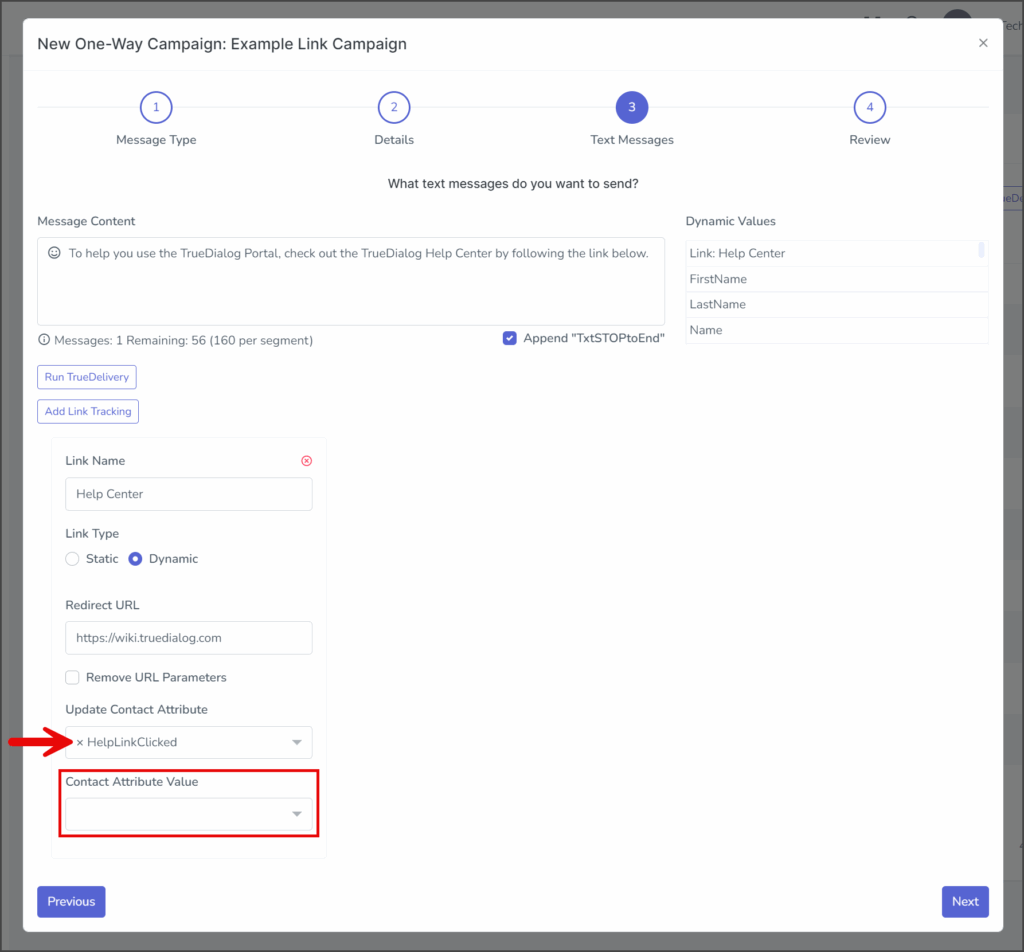
This option allows you to overwrite an attribute for any contact that clicks the link.
If a contact’s smartphone loads a preview of the link, TrueDialog will see that the link has been accessed and update the attribute for that contact. Due to the potential for the link to be accessed automatically, you cannot assume that if the attribute is updated, the user clicked the link themselves. For more information about Link Previews, read the What do Clicks mean? sections in the Viewing Clicks Report article.
- Select an attribute from the Update Contact Attribute dropdown.
- Once an attribute is selected, the Contact Attribute Value box will appear.
- Enter or select a value in the Contact Attribute Value box. This value will overwrite the attribute specified in the Update Contact Attribute field for any contact who clicks the link in the message.
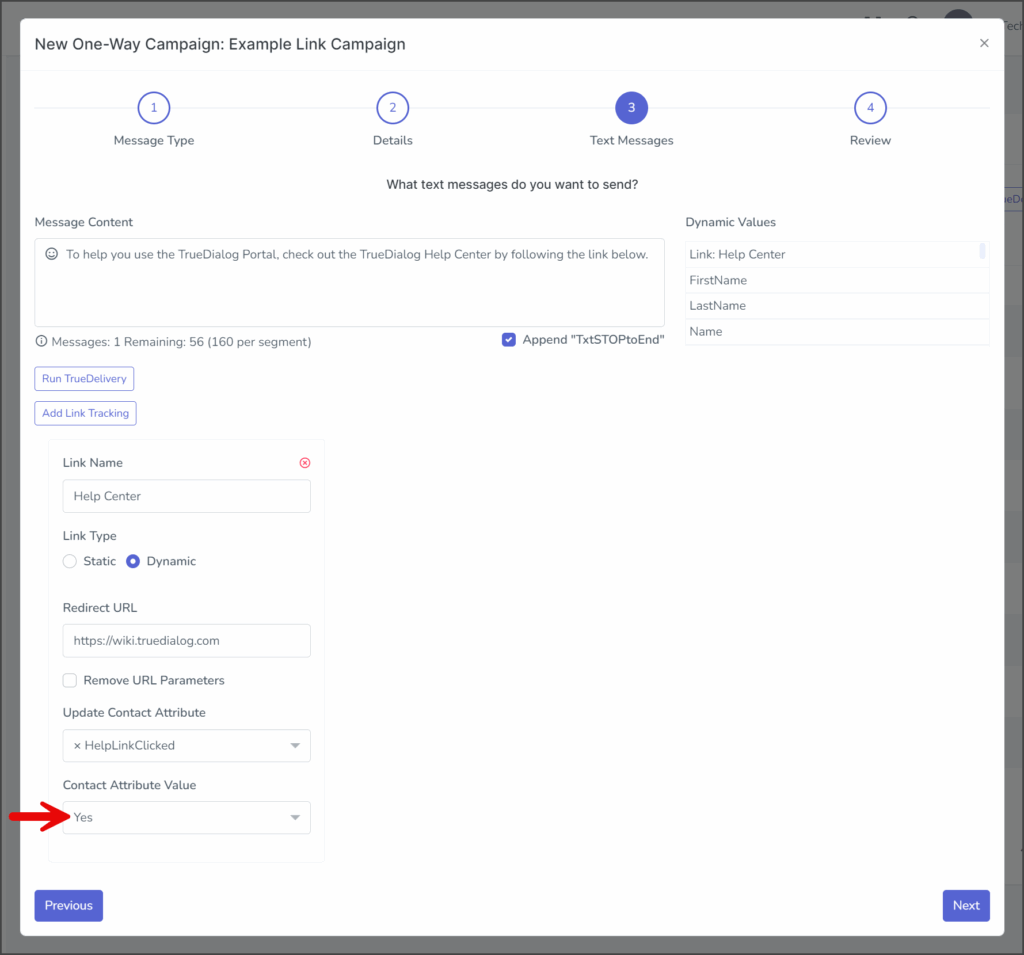
- Once the link has a name, it will appear at the top of the Dynamic Values list. In this example, the link’s dynamic value is Link: Help Center.
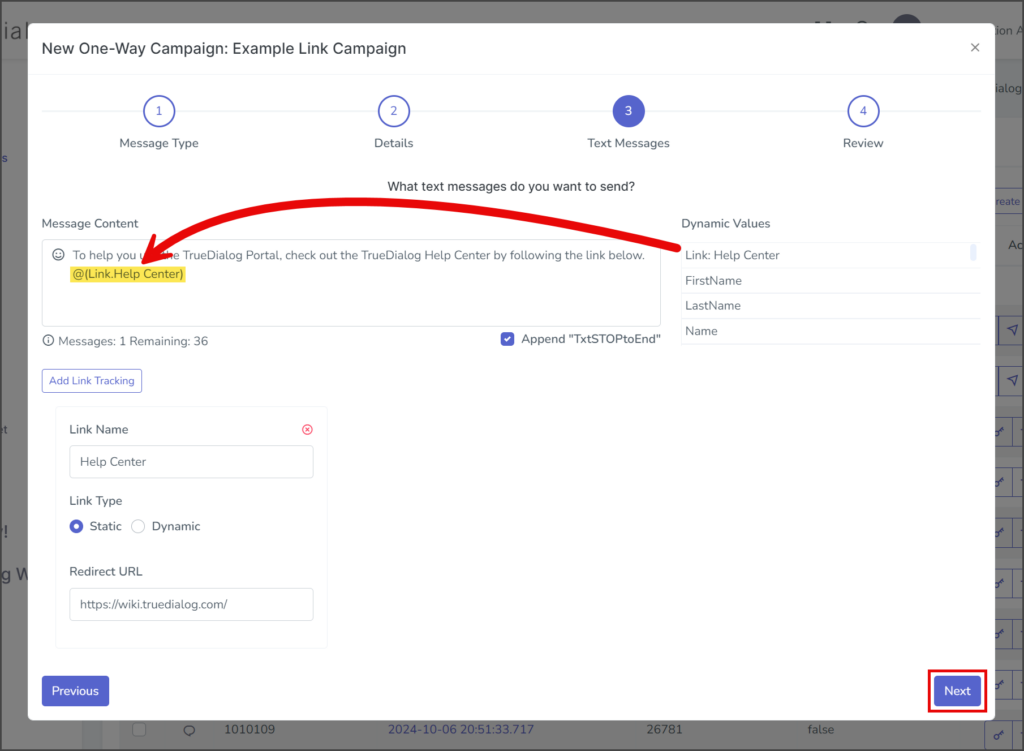
- Drag and drop the link Dynamic Value to the location in your message where you wish the link to appear. Note: You can also add links by entering
@(Link.Link Name)in your message. - Click Next to go to the Review page.
Review Page
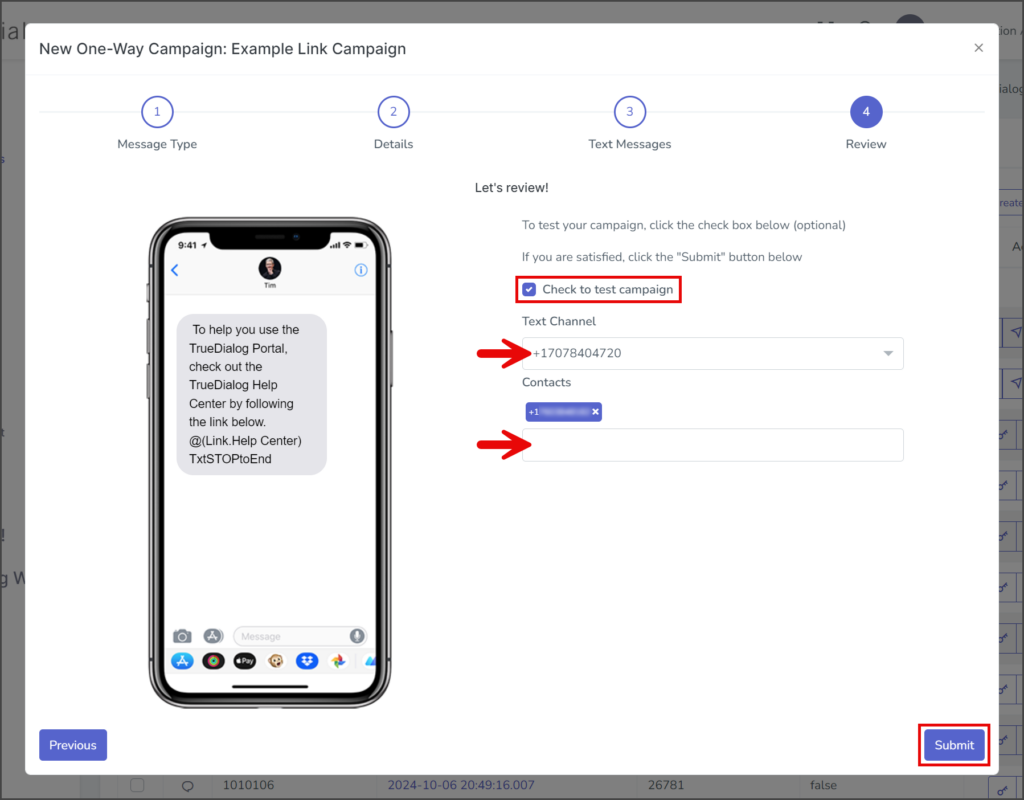
- Review the message in the mockup phone to ensure everything is as expected.
- (Optional) Check to test campaign – If checked, the campaign will be tested by sending the campaign message to the specified contact once it is created.
- Click the Text Channel dropdown and select the channel to send the test message. You should test with the channel you will use to send your campaign.
- In the Contacts textbox, enter the phone numbers to receive the test message. To enter multiple phone numbers, type a comma after the number, and the number will automatically be added to the list of contacts.
- Click Submit to create the campaign. The campaign message will be sent to the listed contacts if the Check to test campaign checkbox is checked.
- After creating the campaign, a success message will appear in the upper right corner.