TrueDialog Portal
Sending Messages > Campaigns
This guide covers creating an Open Response Survey. A Survey is an automated campaign that asks a question and responds to the user’s answer. The Open Response Survey consists of a question with one or more responses to the answer. The complexity of your response depends on the number of validators you add and their follow-up actions. For more information about survey campaigns and creating other types of surveys, see the Creating a Campaign – Survey Overview article.
Create a Survey Campaign
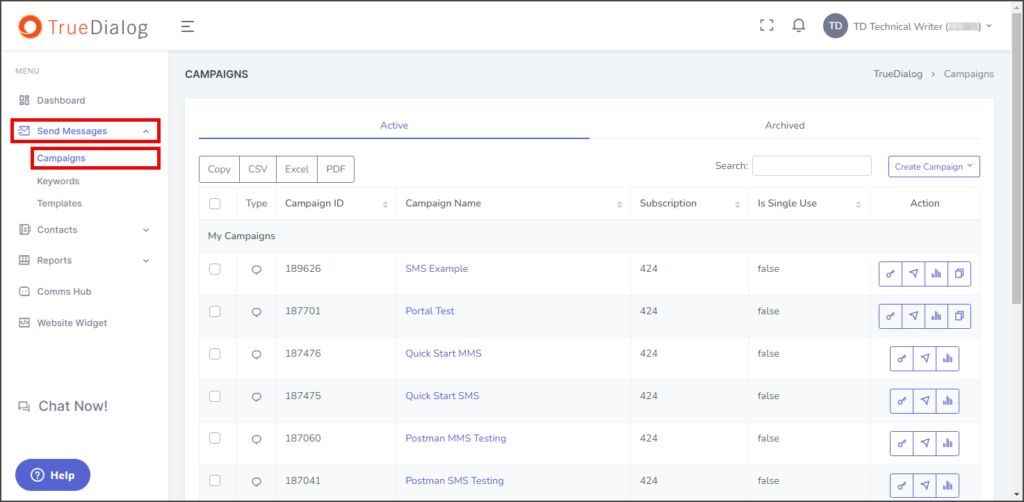
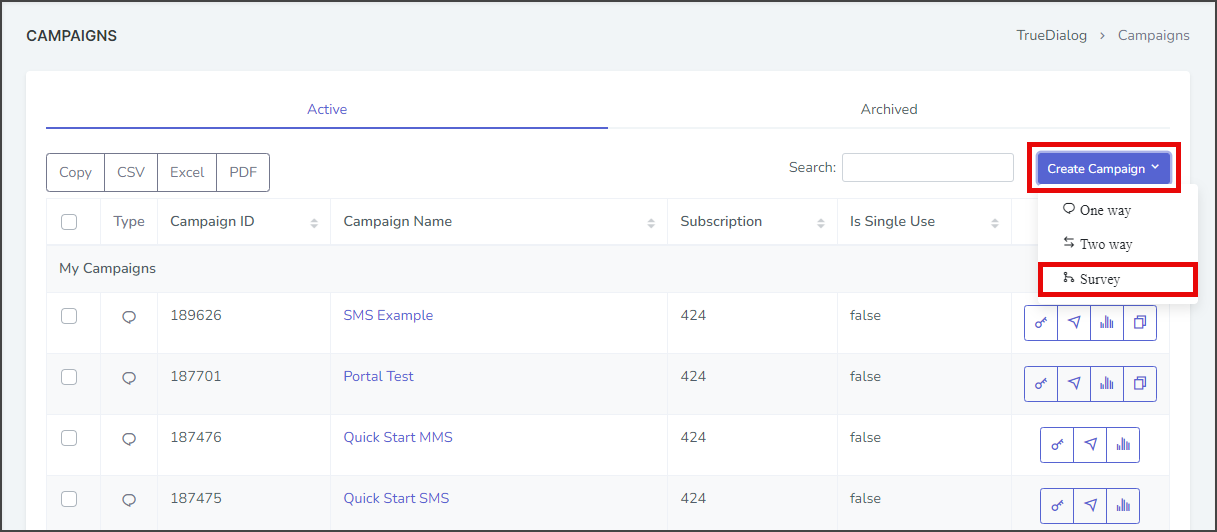
- Expand Send Messages in the left sidebar and select Campaigns.
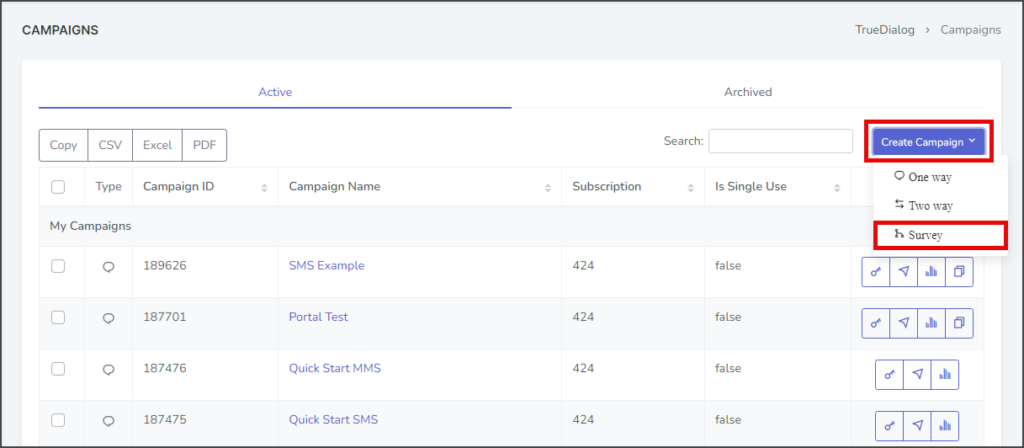
- Click the Create Campaign dropdown and select Survey to open the New Survey Campaign window.
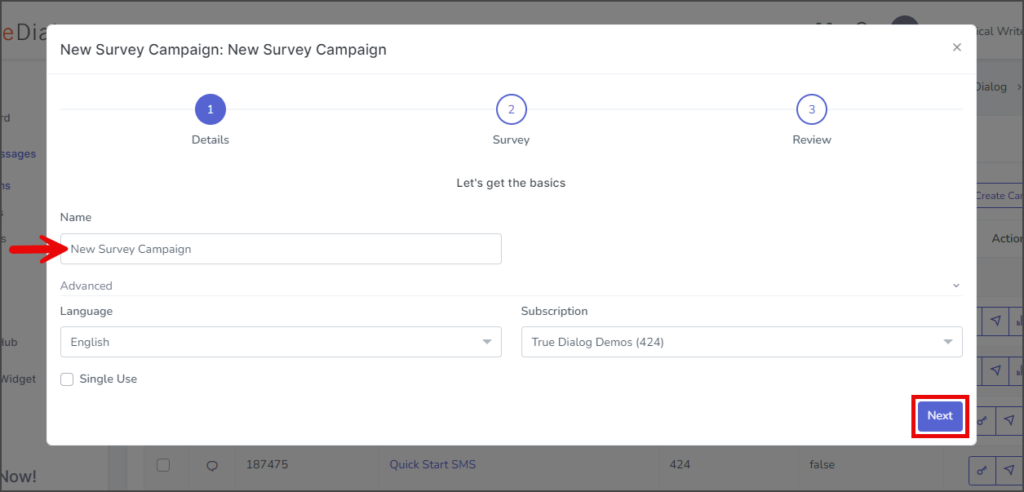
- Enter your campaign’s name in the Name textbox.
- (Optional) Expand the Advanced section.
- Language – Select the language to use for the campaign. Survey campaigns only support a single language.
- Subscription – Select the subscription to use for this campaign. The default subscription will be selected.
- Single Use – If checked, the end-user will receive a message from this campaign only once. Note: Don’t set it to Single Use until testing is complete.
- Click Next to go to the survey page.


Survey Page
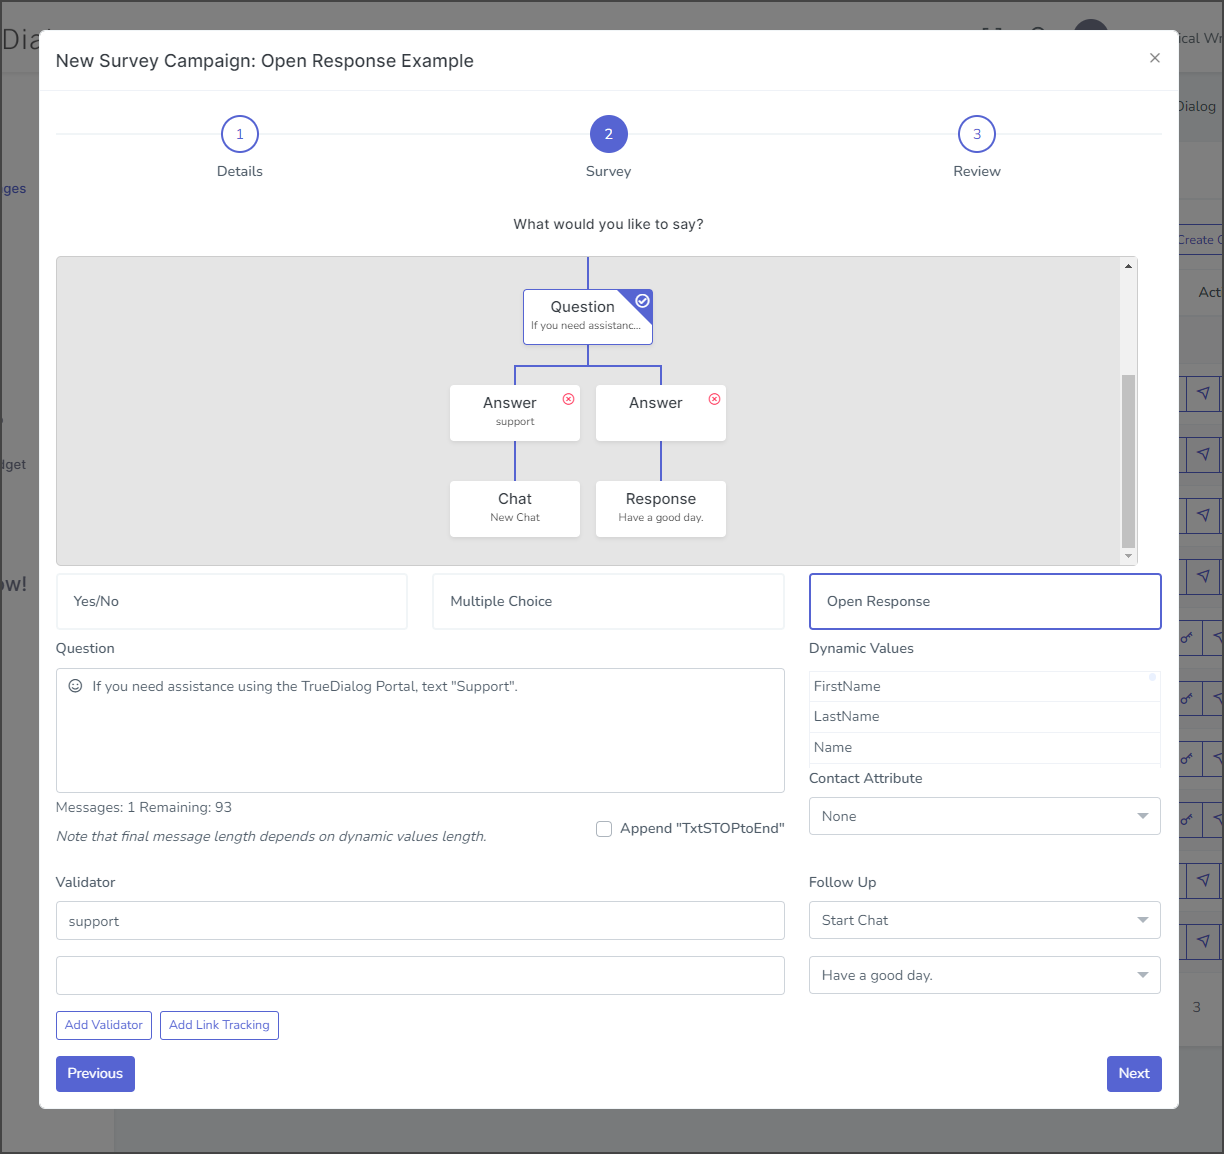
This survey example has two Open Response questions. The first question requests the end user’s first name and stores the answer as a Contact Attribute. The second question instructs the end user to text “support” if they need assistance. A Validator is utilized to check the end user’s reply, and if the word “support” is detected, a Chat is initiated.
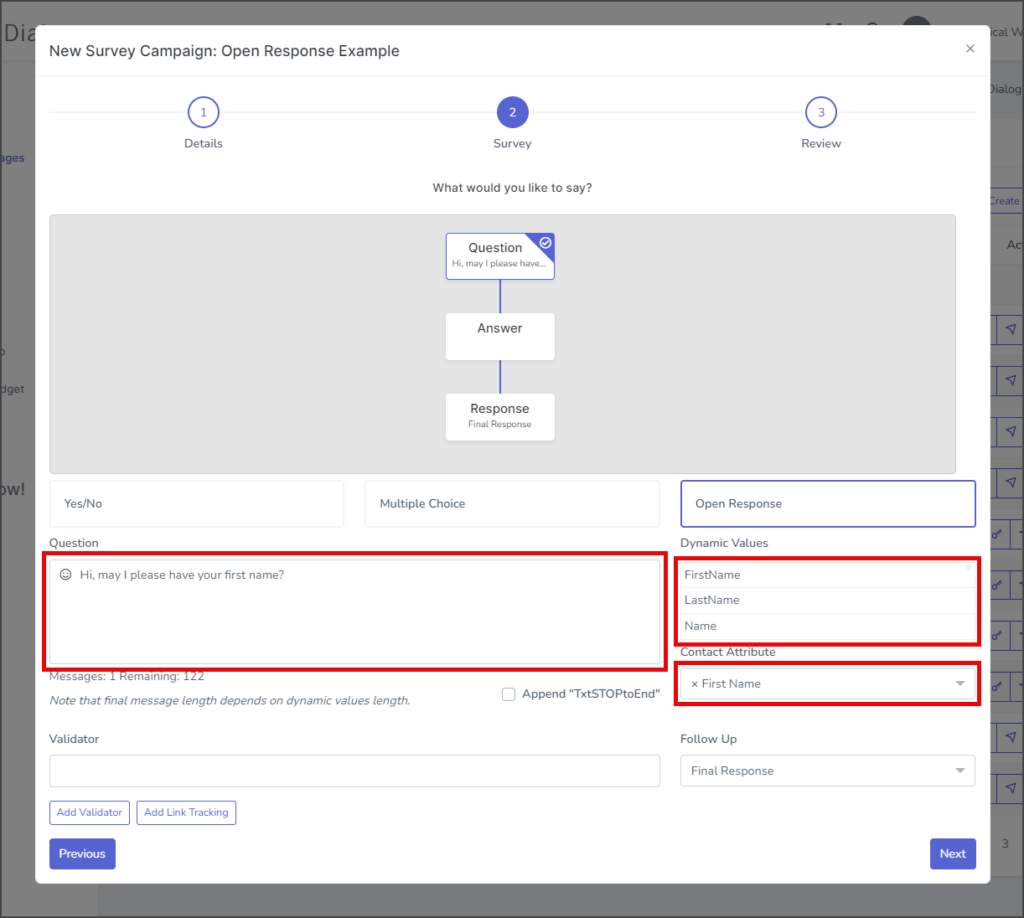
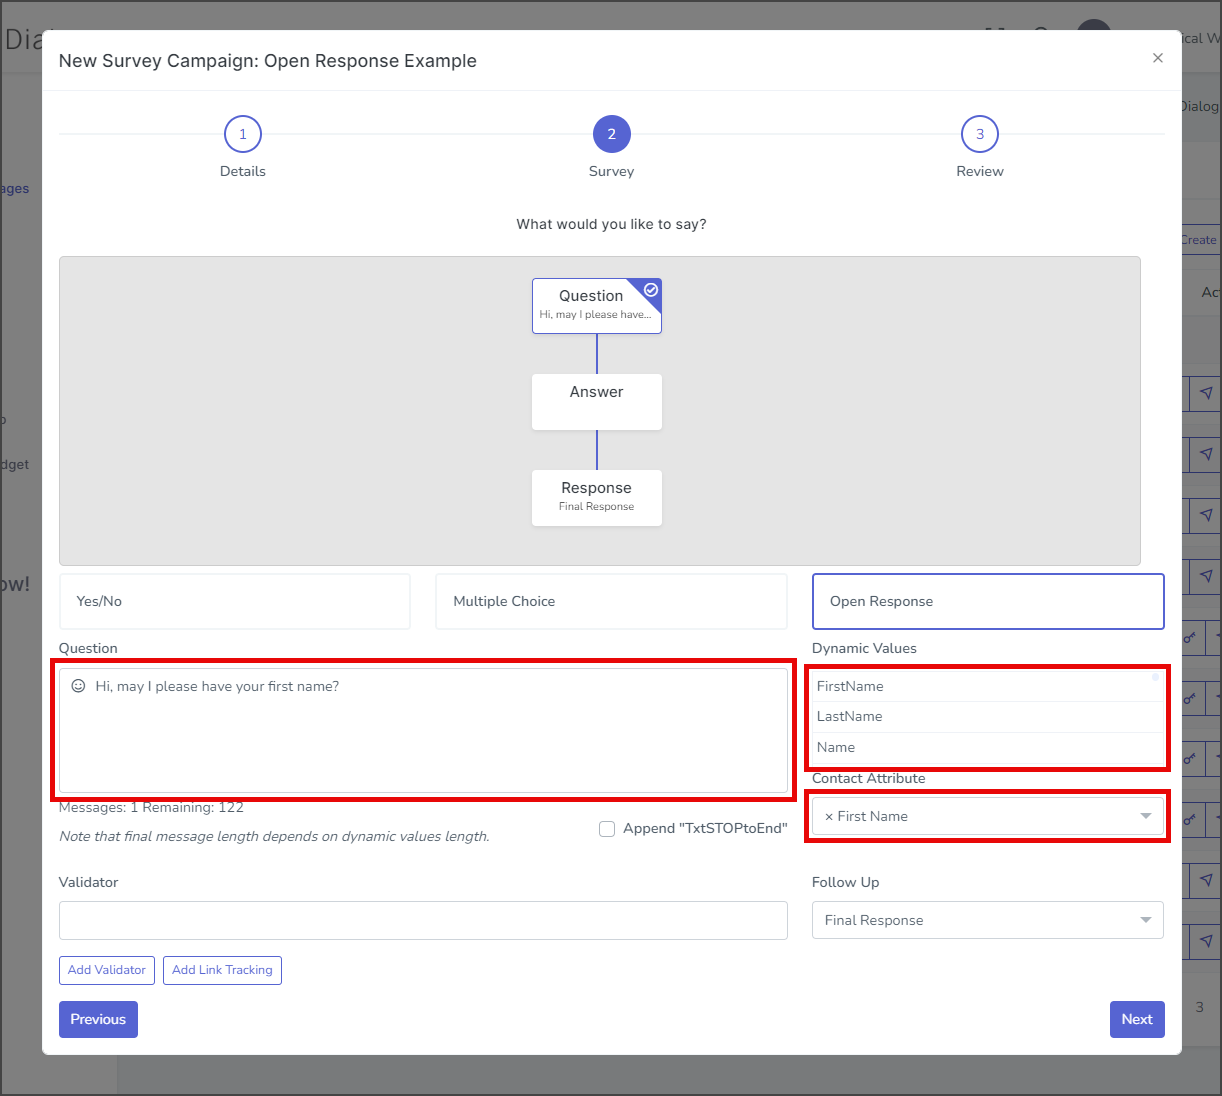
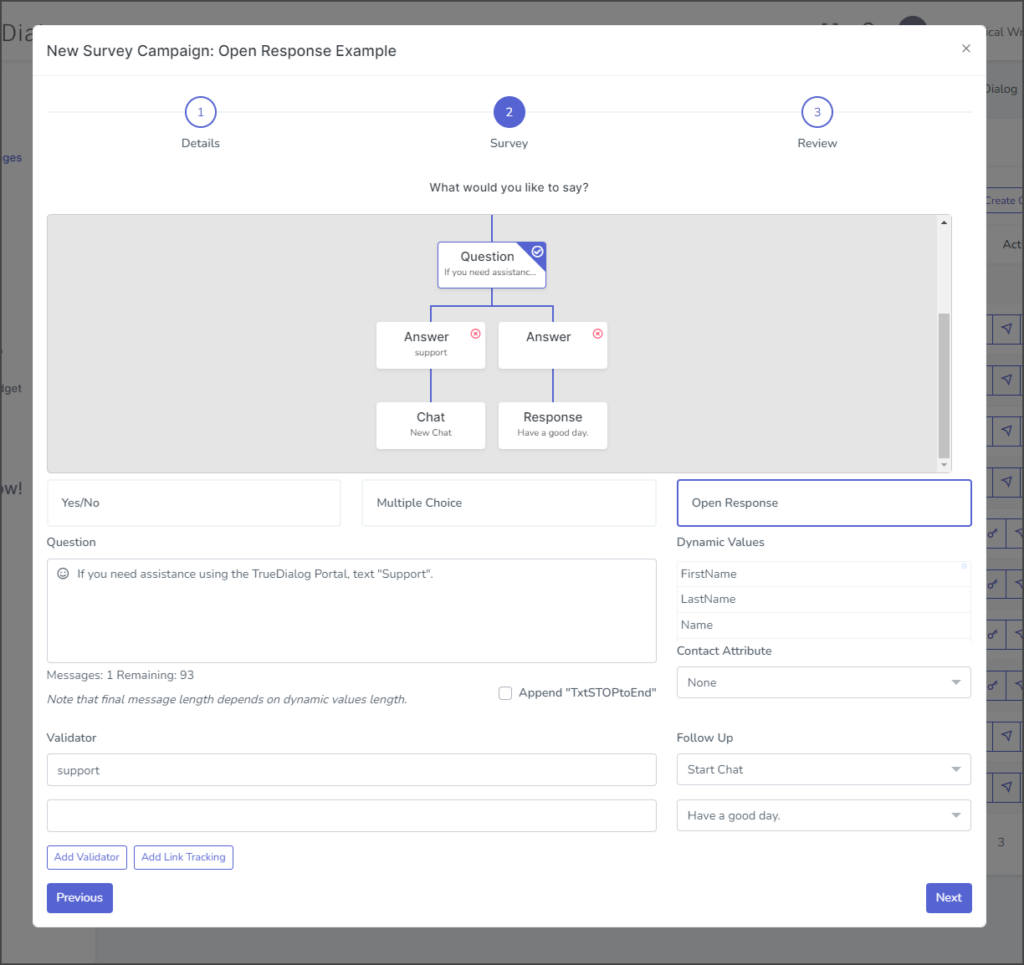
- Select Open Response.


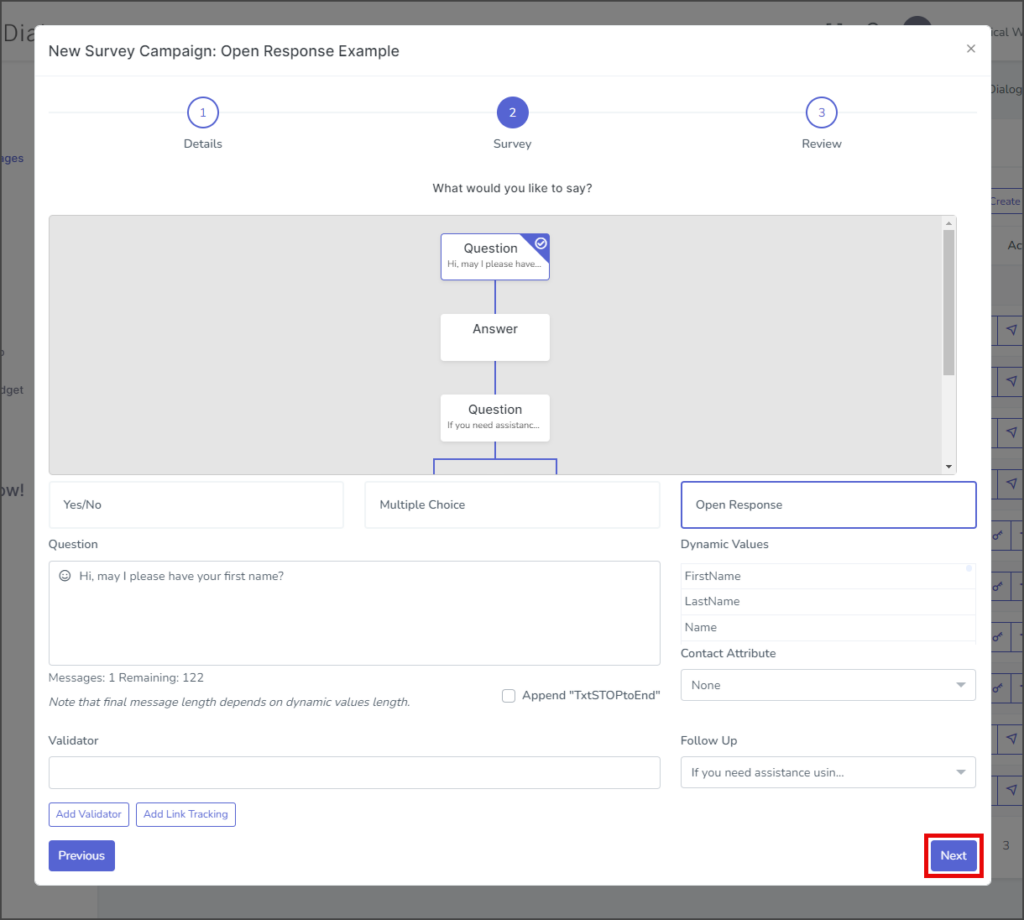
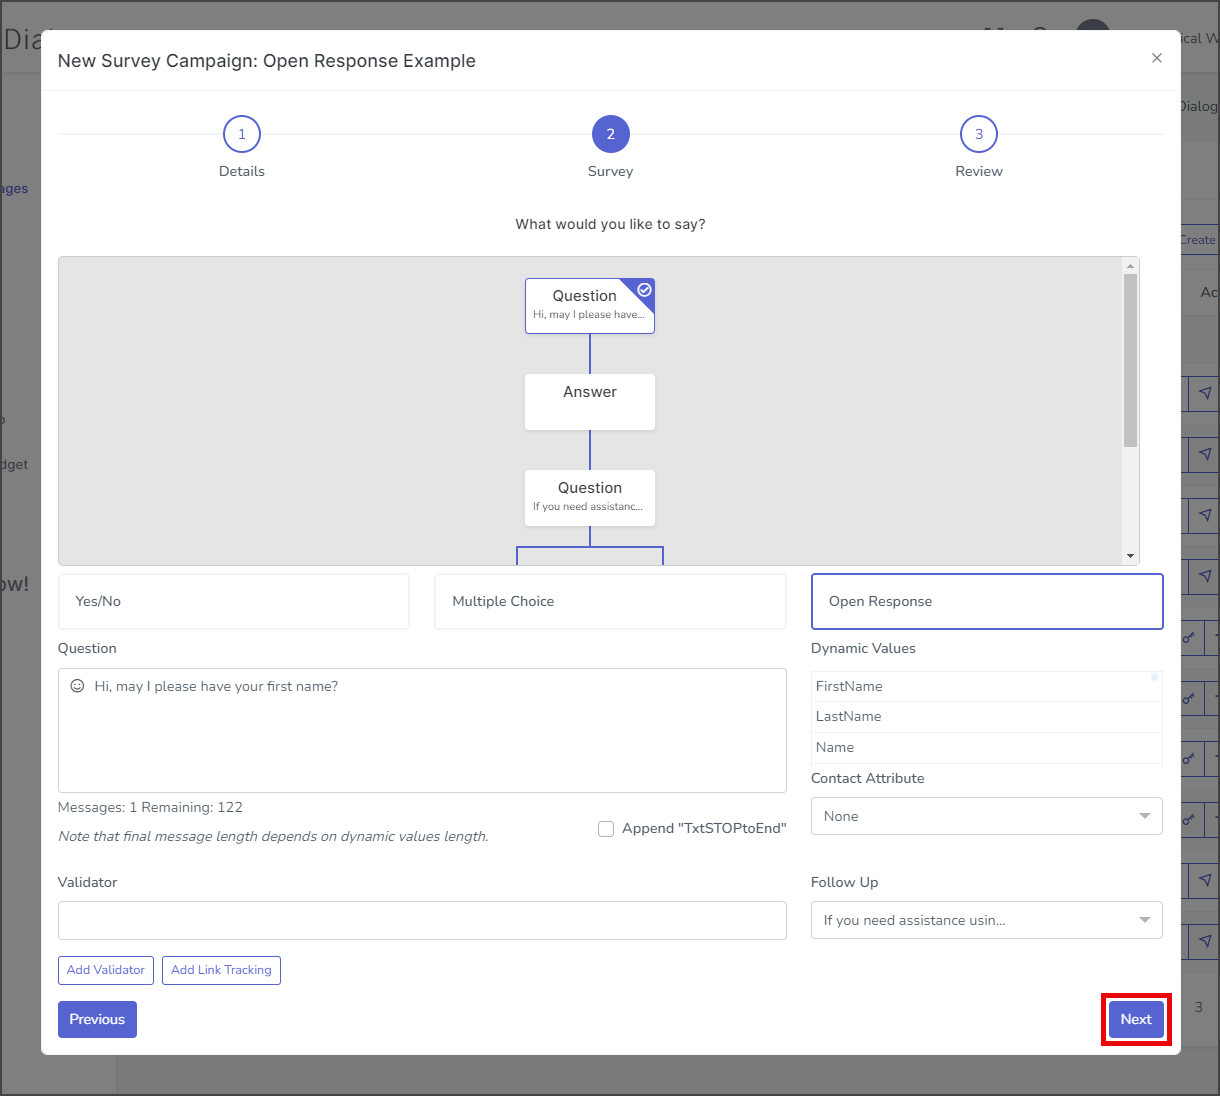
First Question
- Enter your initial message in the Question textbox.
- (Optional) Drag Dynamic Values into the message to use.
- (Optional) The response from the end user can be stored as an attribute. To do this, click the Contact Attribute dropdown and select the attribute to store the response. See the info section above for more details about storing a Contact Attribute.
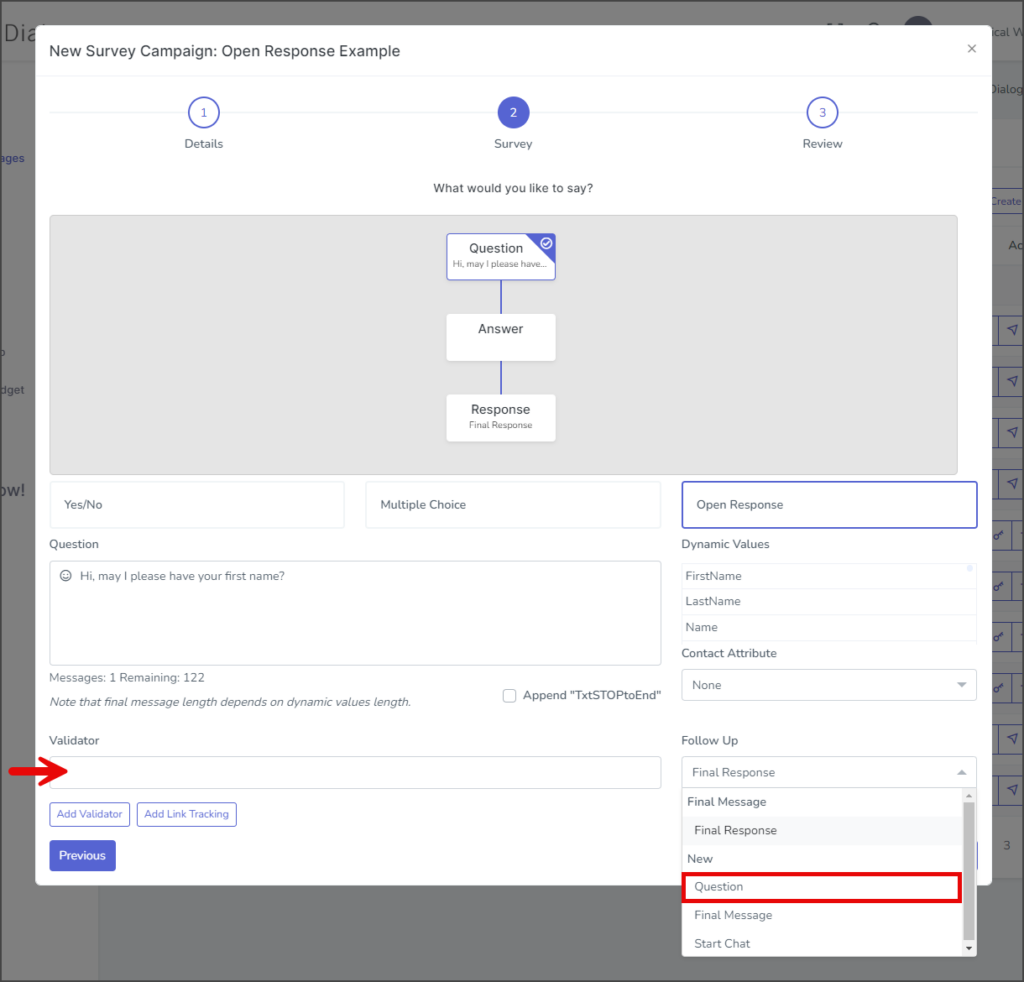
- (Optional) The Validator textbox will match the end-user’s response with its value and perform the selected Follow Up action. See the info section above for more details about using validators.
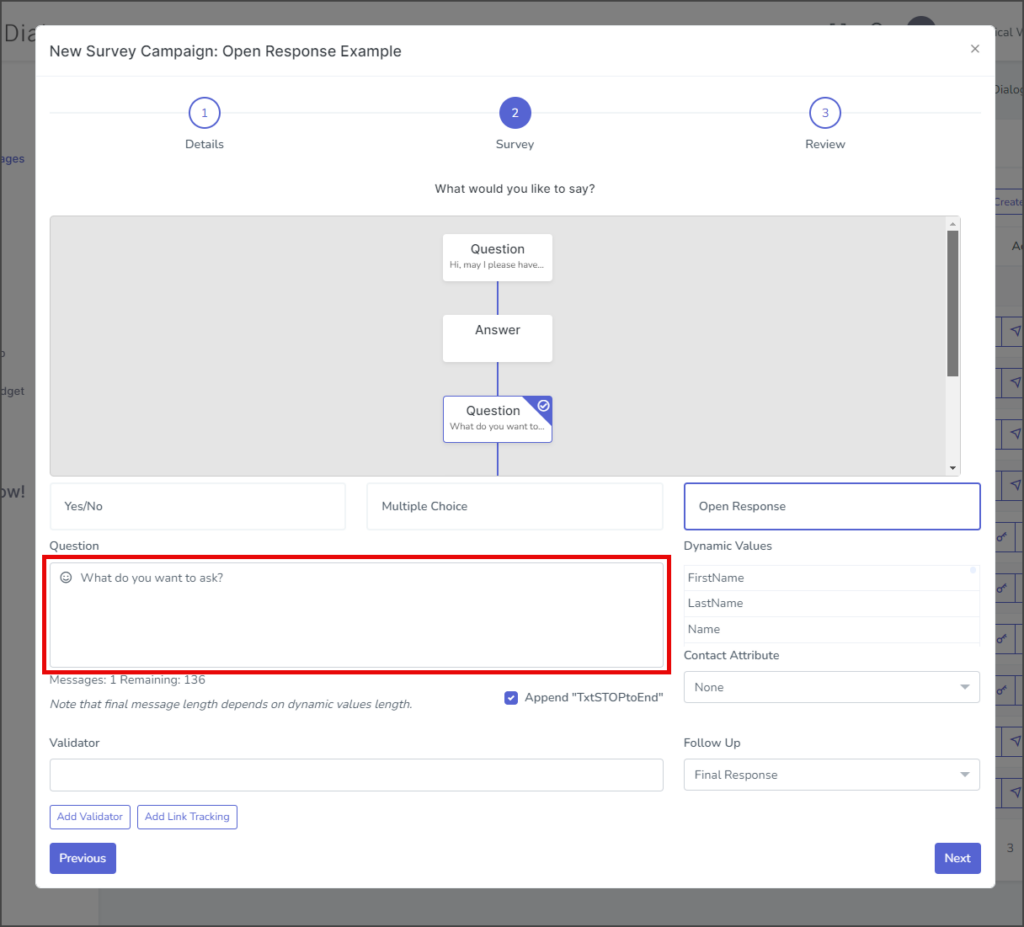
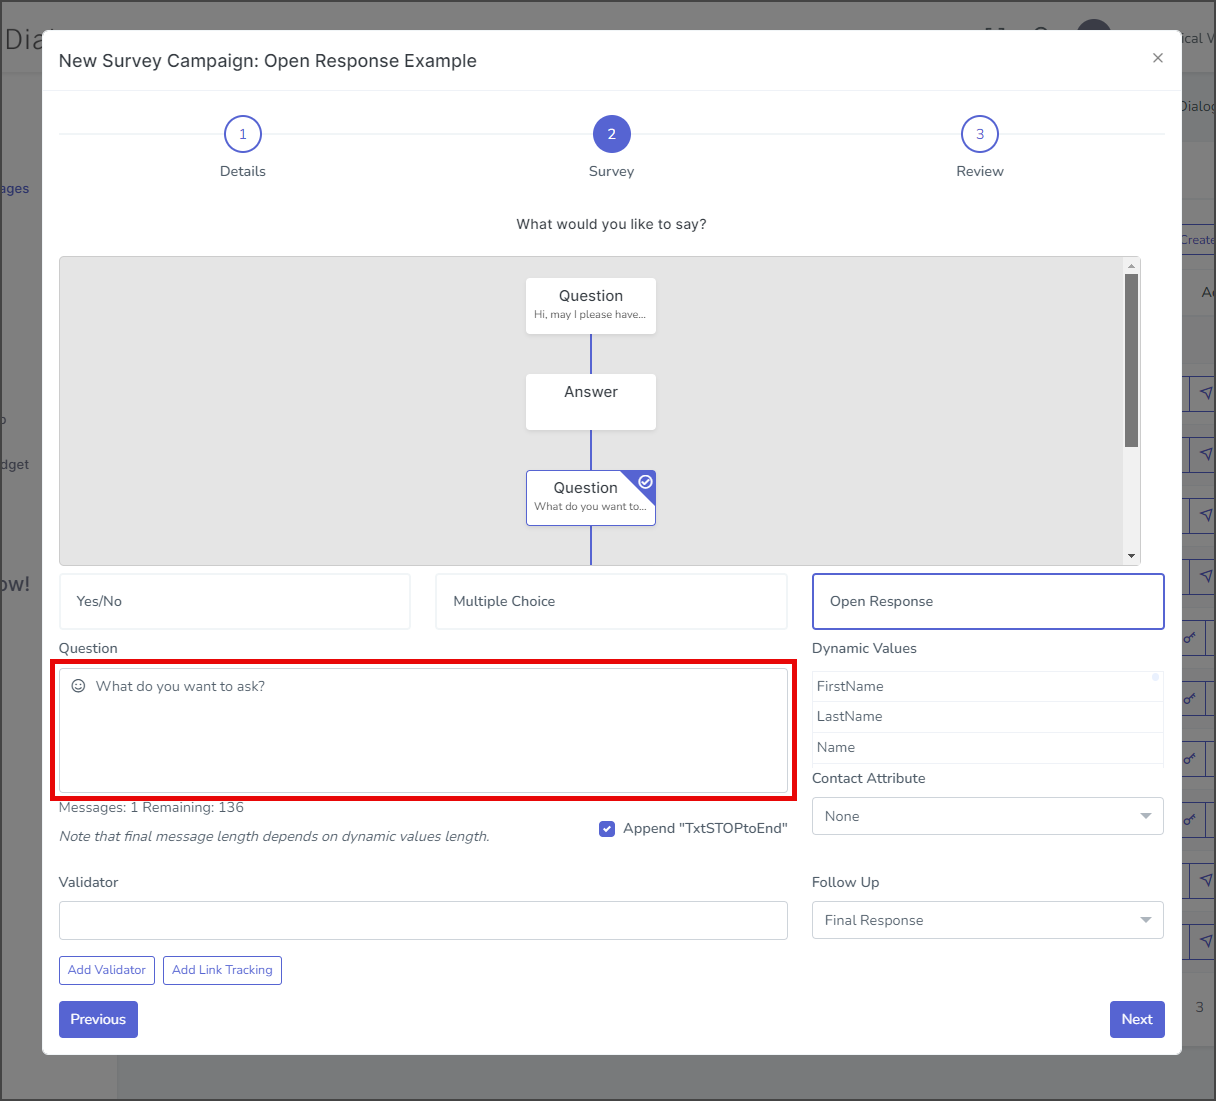
- To add a follow-up question after the response from the end-user, click the Follow Up dropdown and select New → Question.

Second Question
- Enter your message in the Question textbox.
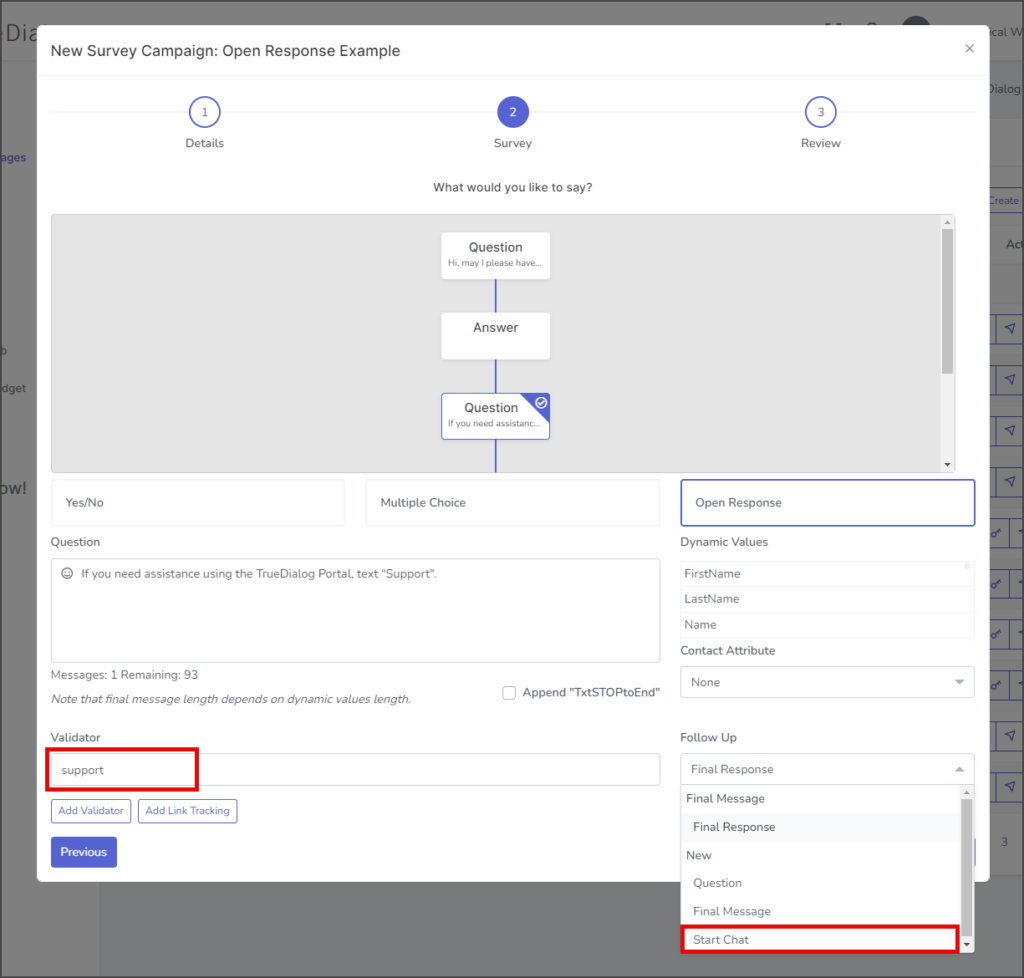
Validator – “support”
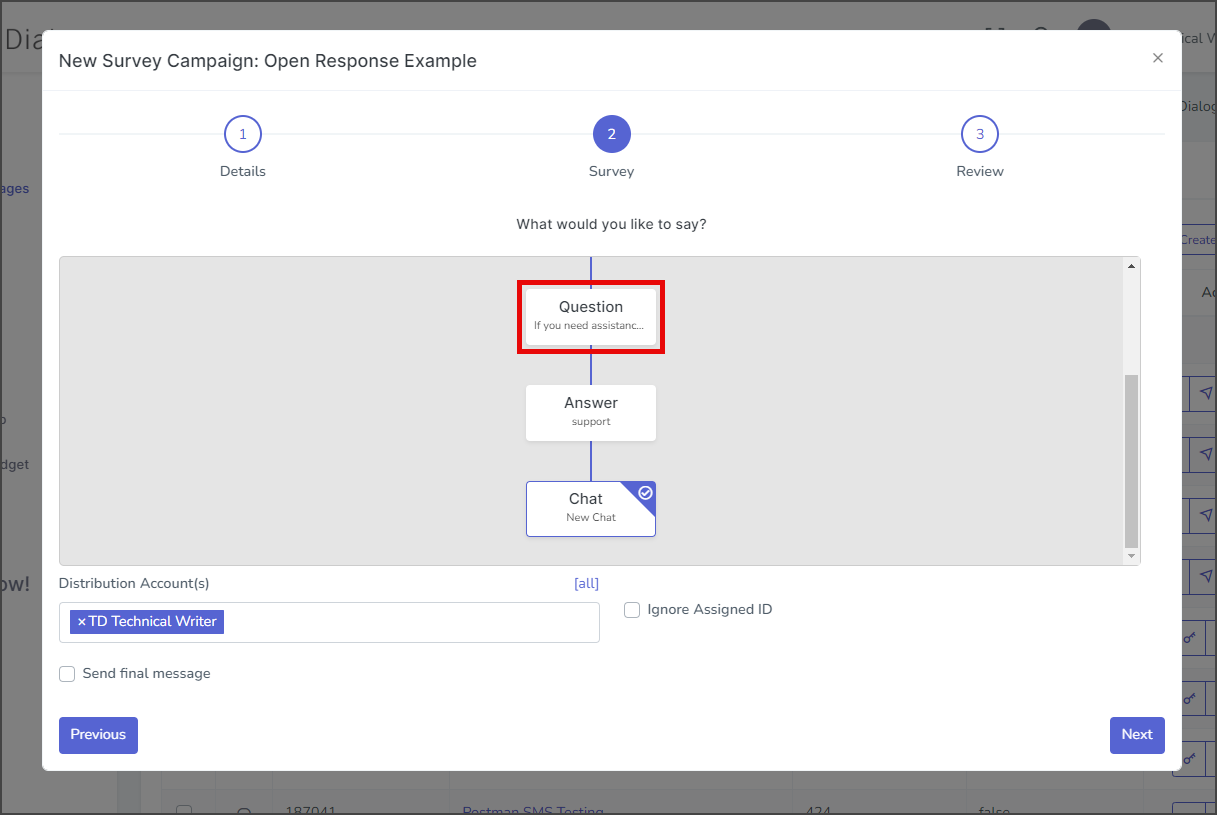
- For this example, we will start a Communication Hub Chat if the end-user replies with the word support.
- Enter support in the Validator textbox. Note: Validators are not case-sensitive.
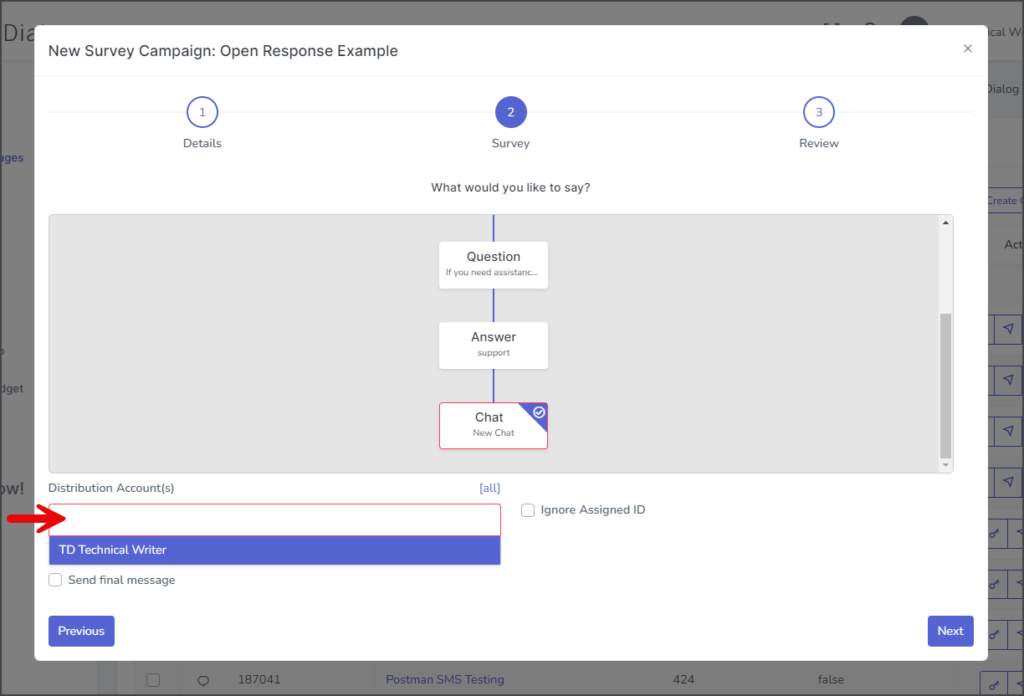
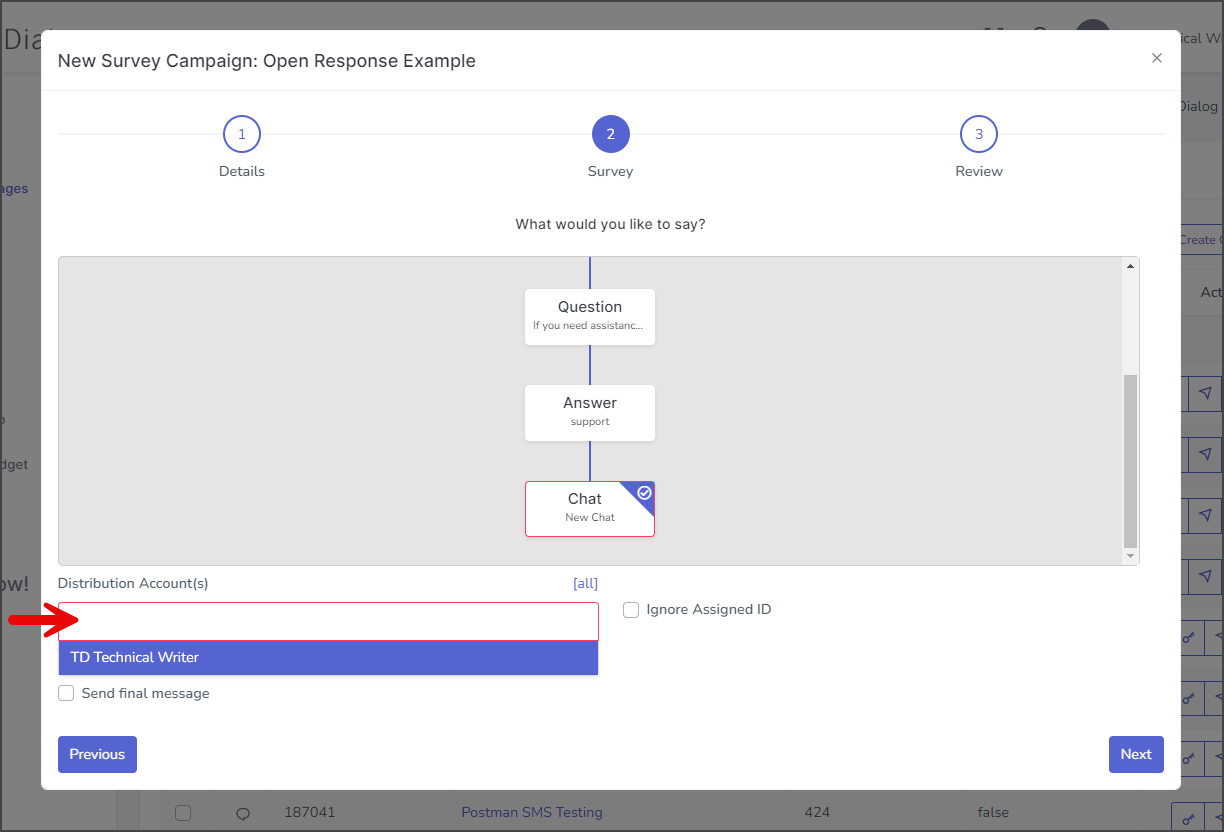
- Click the Follow Up dropdown and select New → Start Chat.
- Click the Distribution Account(s) box and select the account or accounts that will receive this message thread in their Communication Hub.

Validator – Blank
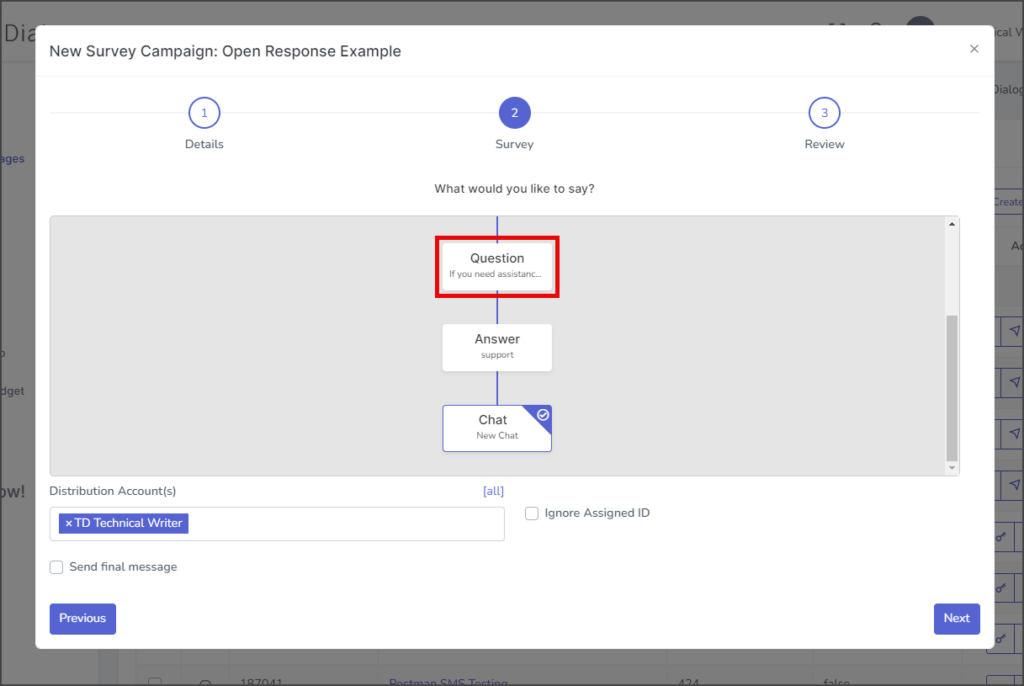
- Click the Question box in the flow chart to return to the question building section.
- Click Add Validator to add a blank validator. The black validator will respond to anything other than support sent by the end user.
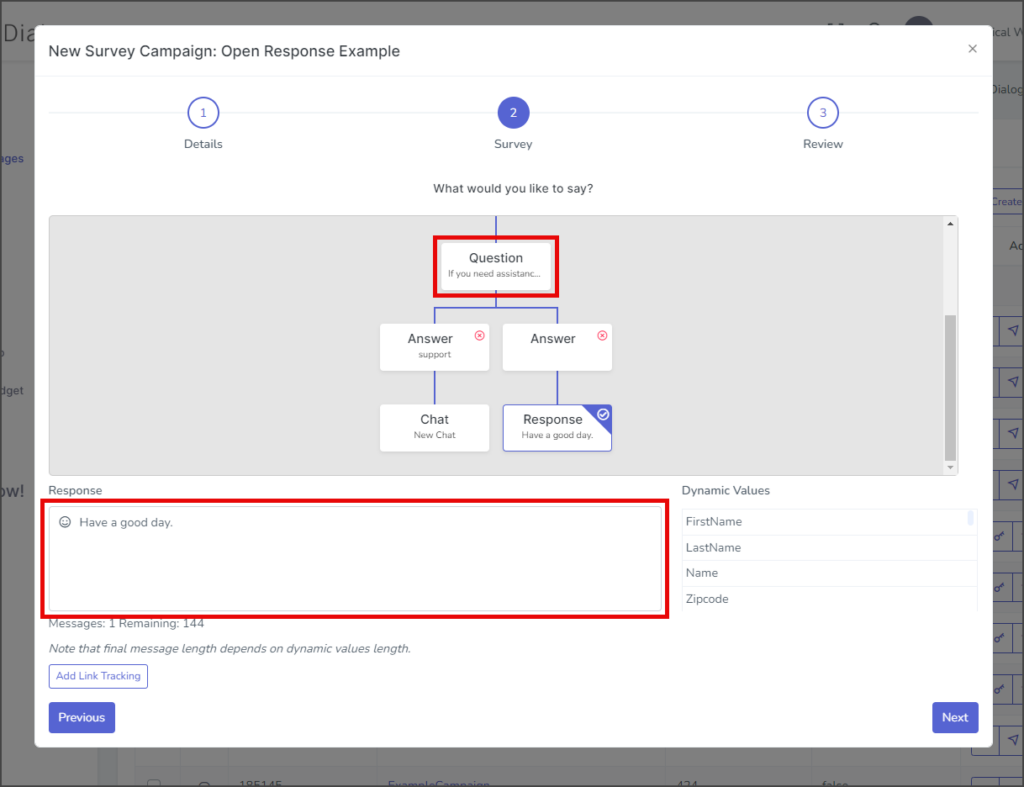
- Click the Response box in the flow chart.
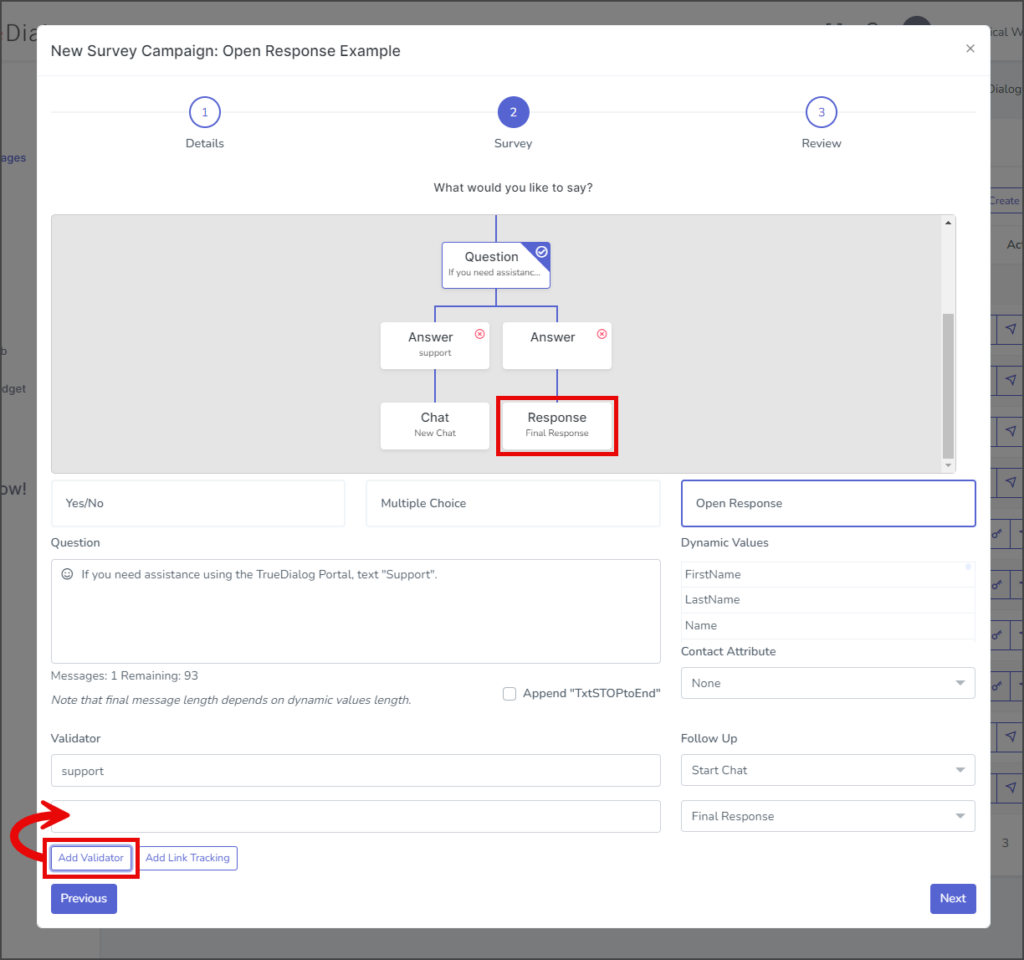
- Enter your message in the Response textbox.
- Return by clicking the Question box in the flow chart.


Finish Survey
- Verify that this level of Question/Answer/Response is correct.
- Scroll to the top of the flow chart, click the top Question box, and ensure everything is correct.
- Click Next.
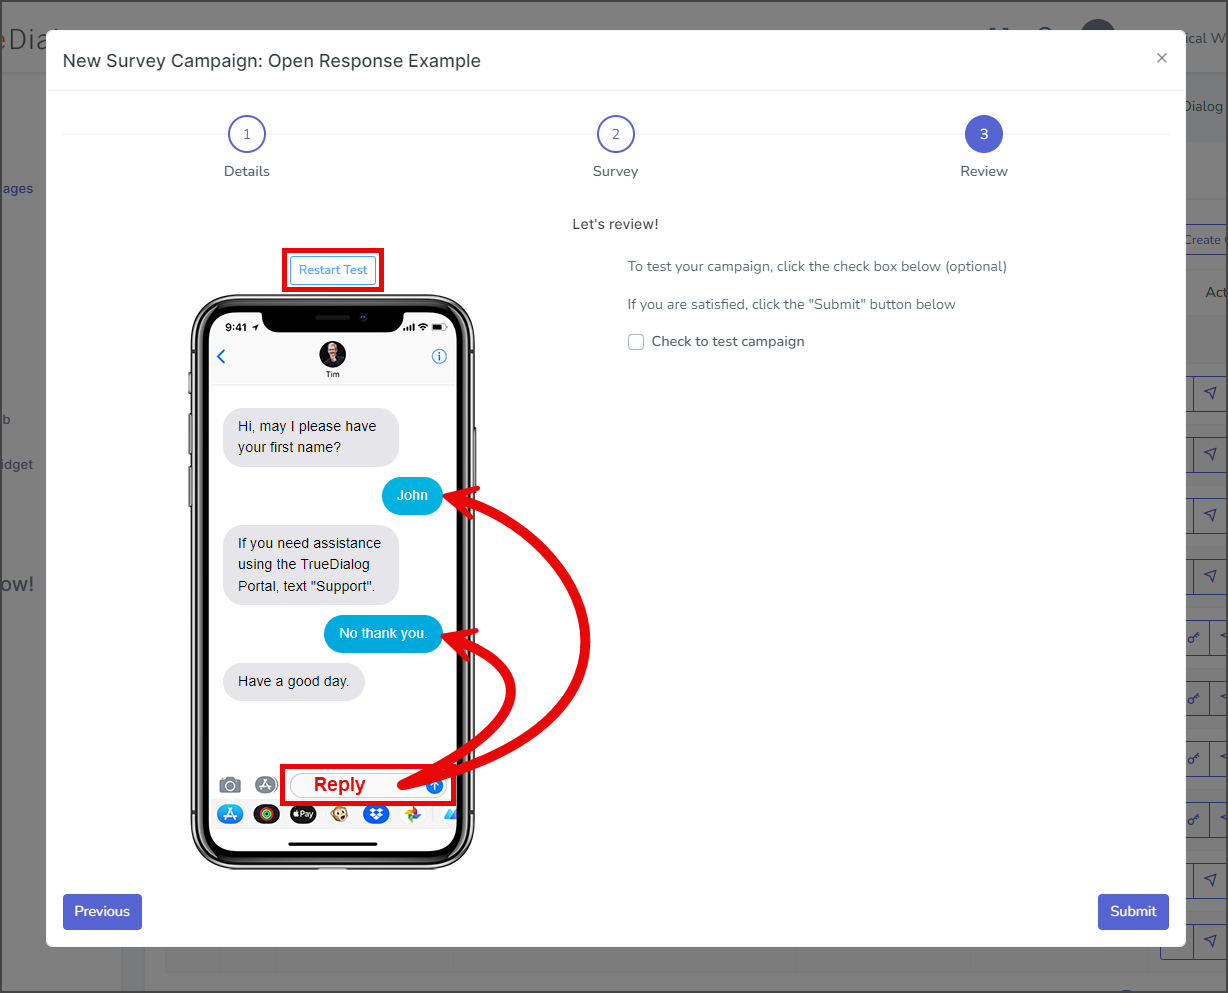
Review Page
- The Review page features an emulated phone that allows you to test your survey by sending messages and receiving replies.
- Click Restart Test to clear the message thread on the emulated phone and start over with the initial message.
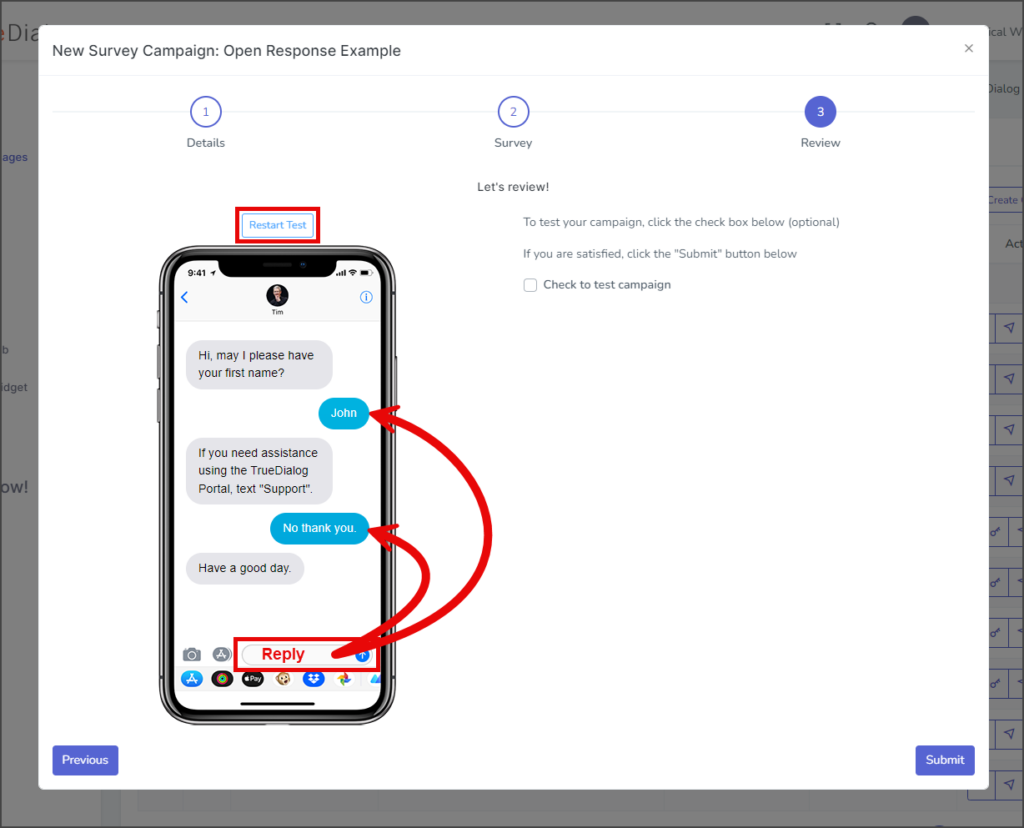
- Click Restart Test to clear the message thread on the emulated phone and start over with the initial message.
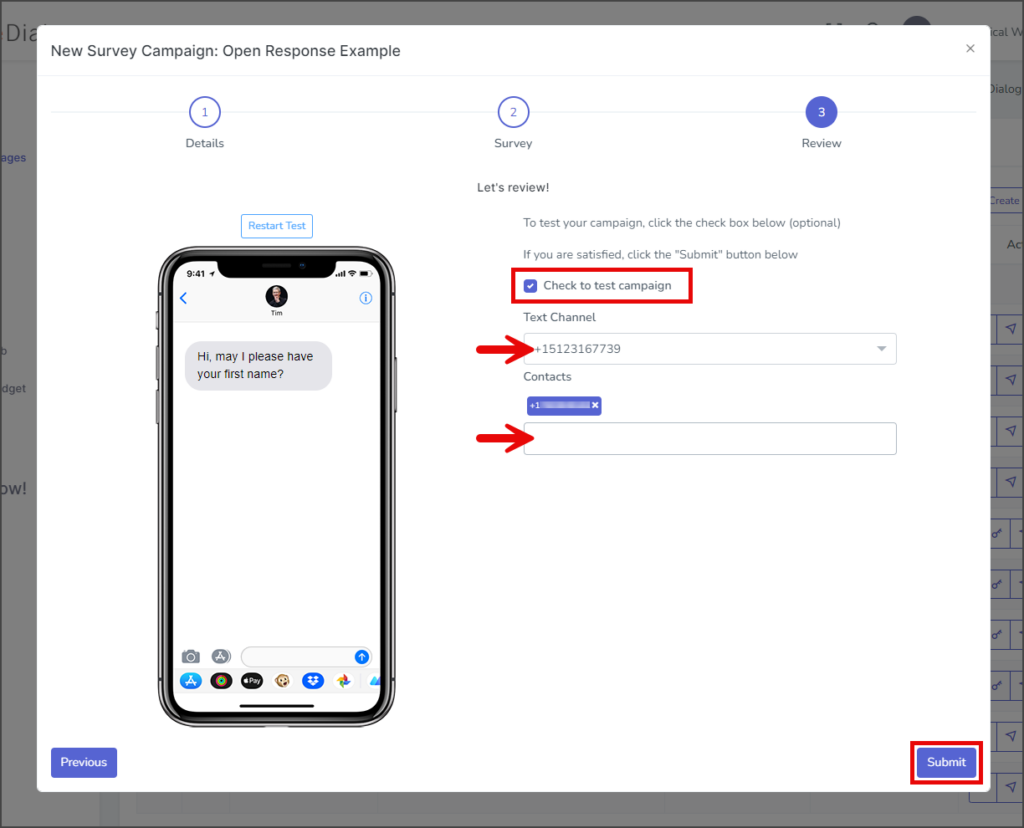
- (Optional) Check to test campaign – If checked, the campaign message will be sent to the specified contact once the campaign is created.
- Note: It is strongly recommended that you test all campaigns before making them live.
- Click the Text Channel dropdown and select the channel to send the test message. This should be the same channel you will use to send your campaign.
- In the Contacts textbox, enter the phone numbers to receive the test message. To enter multiple phone numbers, type a comma after the number, and the number will automatically be added to the list of contacts.
- Click Submit to create the campaign. The campaign message will be sent to the listed contacts if the Check to test campaign checkbox is checked.
- After creating the campaign, a success message will appear in the upper right corner.