TrueDialog Portal
Sending Messages > Campaigns
The guide covers creating a Text & Email campaign. A campaign holds the message to send to end-users. Follow the instructions below to create a one-way text and email message campaign. When pushing the campaign, both a text and an email will be sent to the end user. If the contact lacks a phone number or email, they will receive a message only for the available contact information.
This guide assumes you are familiar with creating a One Way SMS Campaign and an Email Campaign; if not, see the following articles: Creating a Campaign – One Way SMS and Creating a Campaign – Email.
Create an Email Campaign
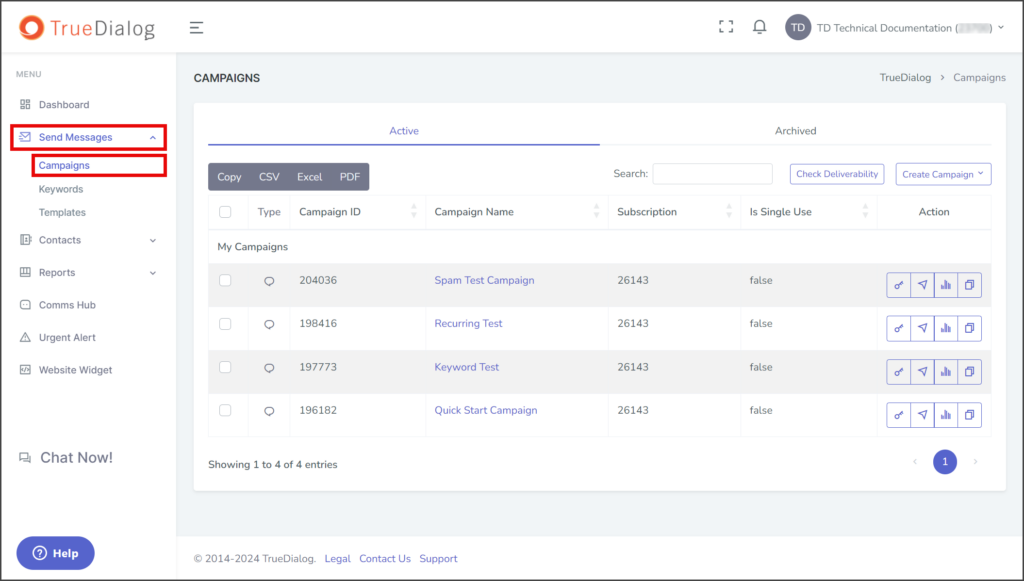
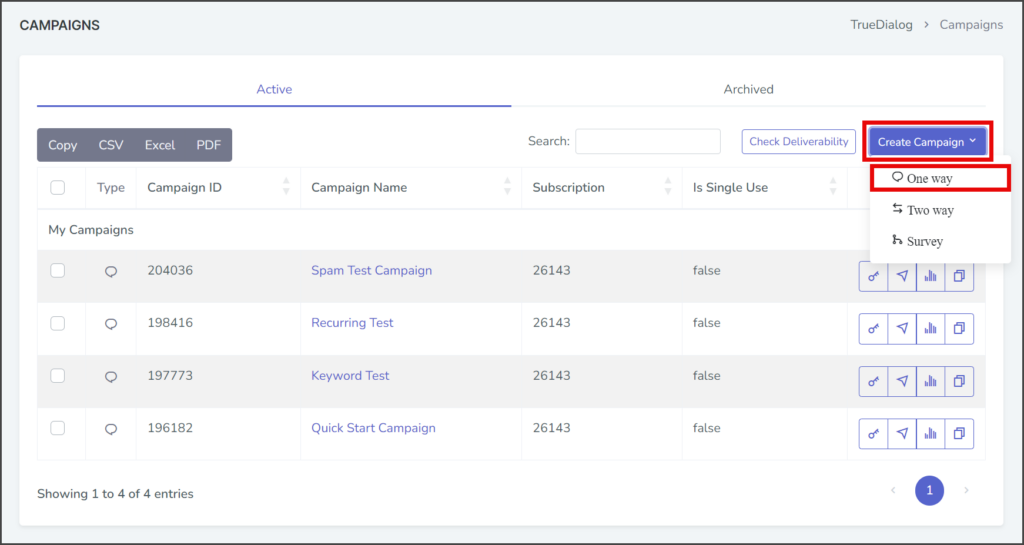
- Expand Send Messages in the left sidebar and select Campaigns.
- Click the Create Campaign dropdown and select One way to open the New One-Way Campaign window.
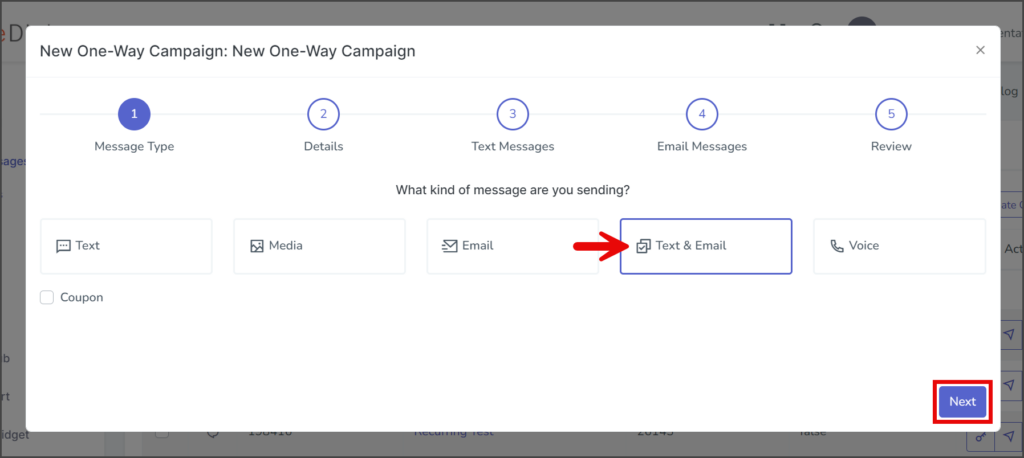
- Select Text & Email for the message type.
- Click Next to go to the Details page.
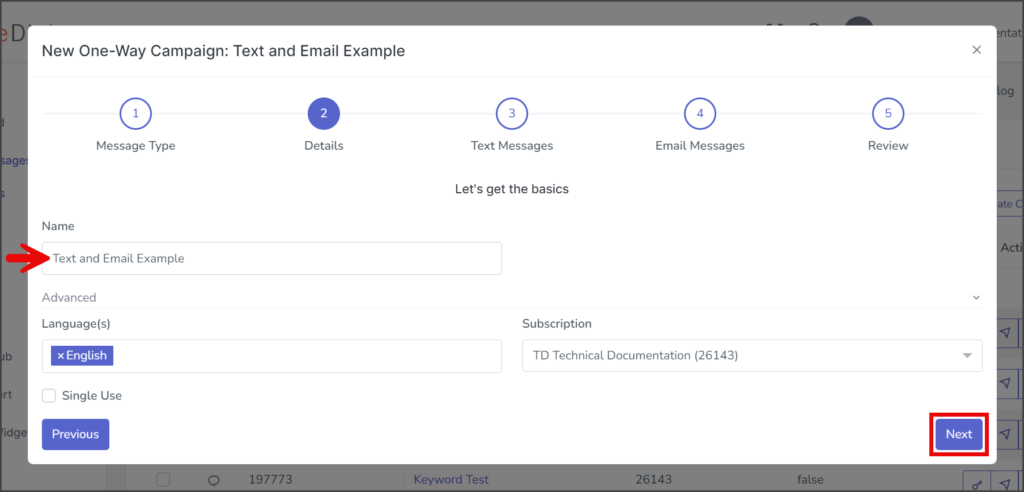
- Enter your campaign’s name in the Name textbox.
- (Optional) Expand the Advanced section.
- Language(s) – You can add or remove any supported languages. If you select multiple languages, the Email Messages page will have a Message Content box for each language.
- Subscription – Select the subscription to use for this campaign. The default subscription will be selected.
- Single Use—If checked, the end-user will receive a text message from this campaign only once. Note: This only applies to text messages, not email messages. Don’t set it to single-use until testing is complete.
- Click Next to go to the Text Messages page.


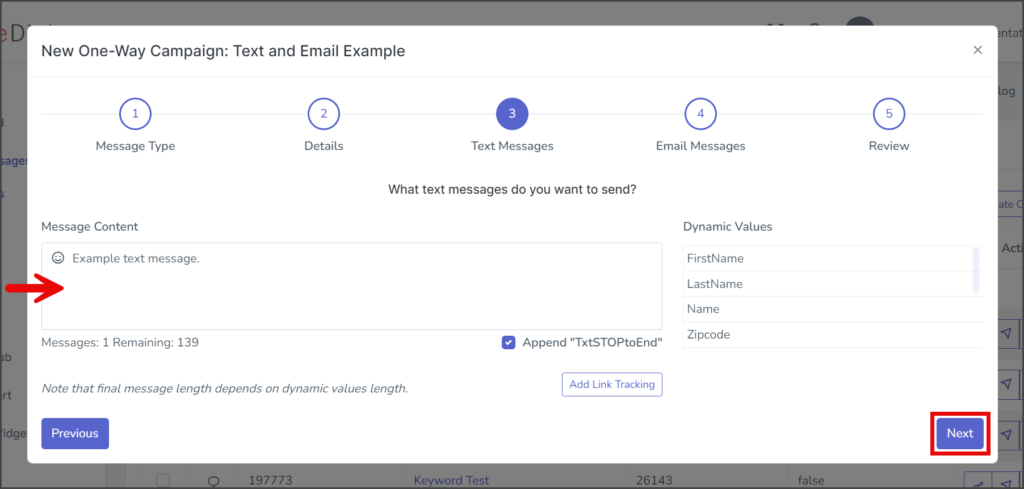
Text Messages Page
See the Creating a Campaign – One Way SMS article for more detailed instructions on creating a text message.
- Enter your message in the Message Content textbox.
- Click Next to go to the Email Messages page.

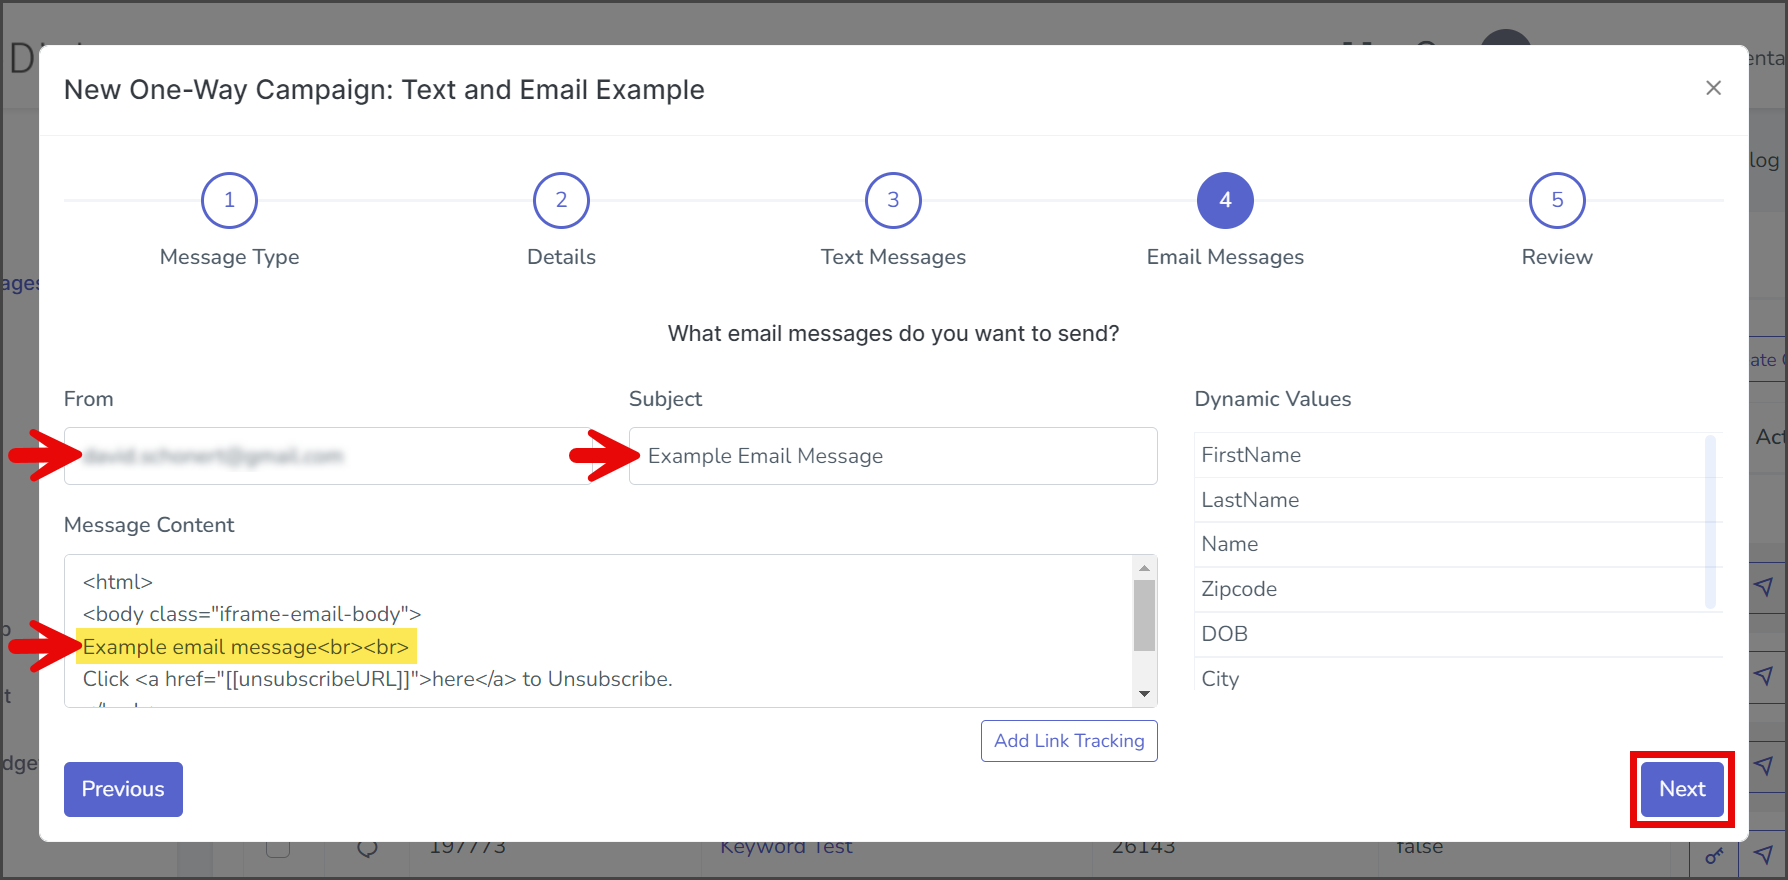
Email Messages Page
See the Creating a Campaign – Email article for more detailed instructions on creating an email message.
- Enter your sender email address in the From textbox.
- Enter your email subject in the Subject textbox.
- Edit the HTML to add your email message in the Message Content textbox.
- Click Next to go to the Review page.

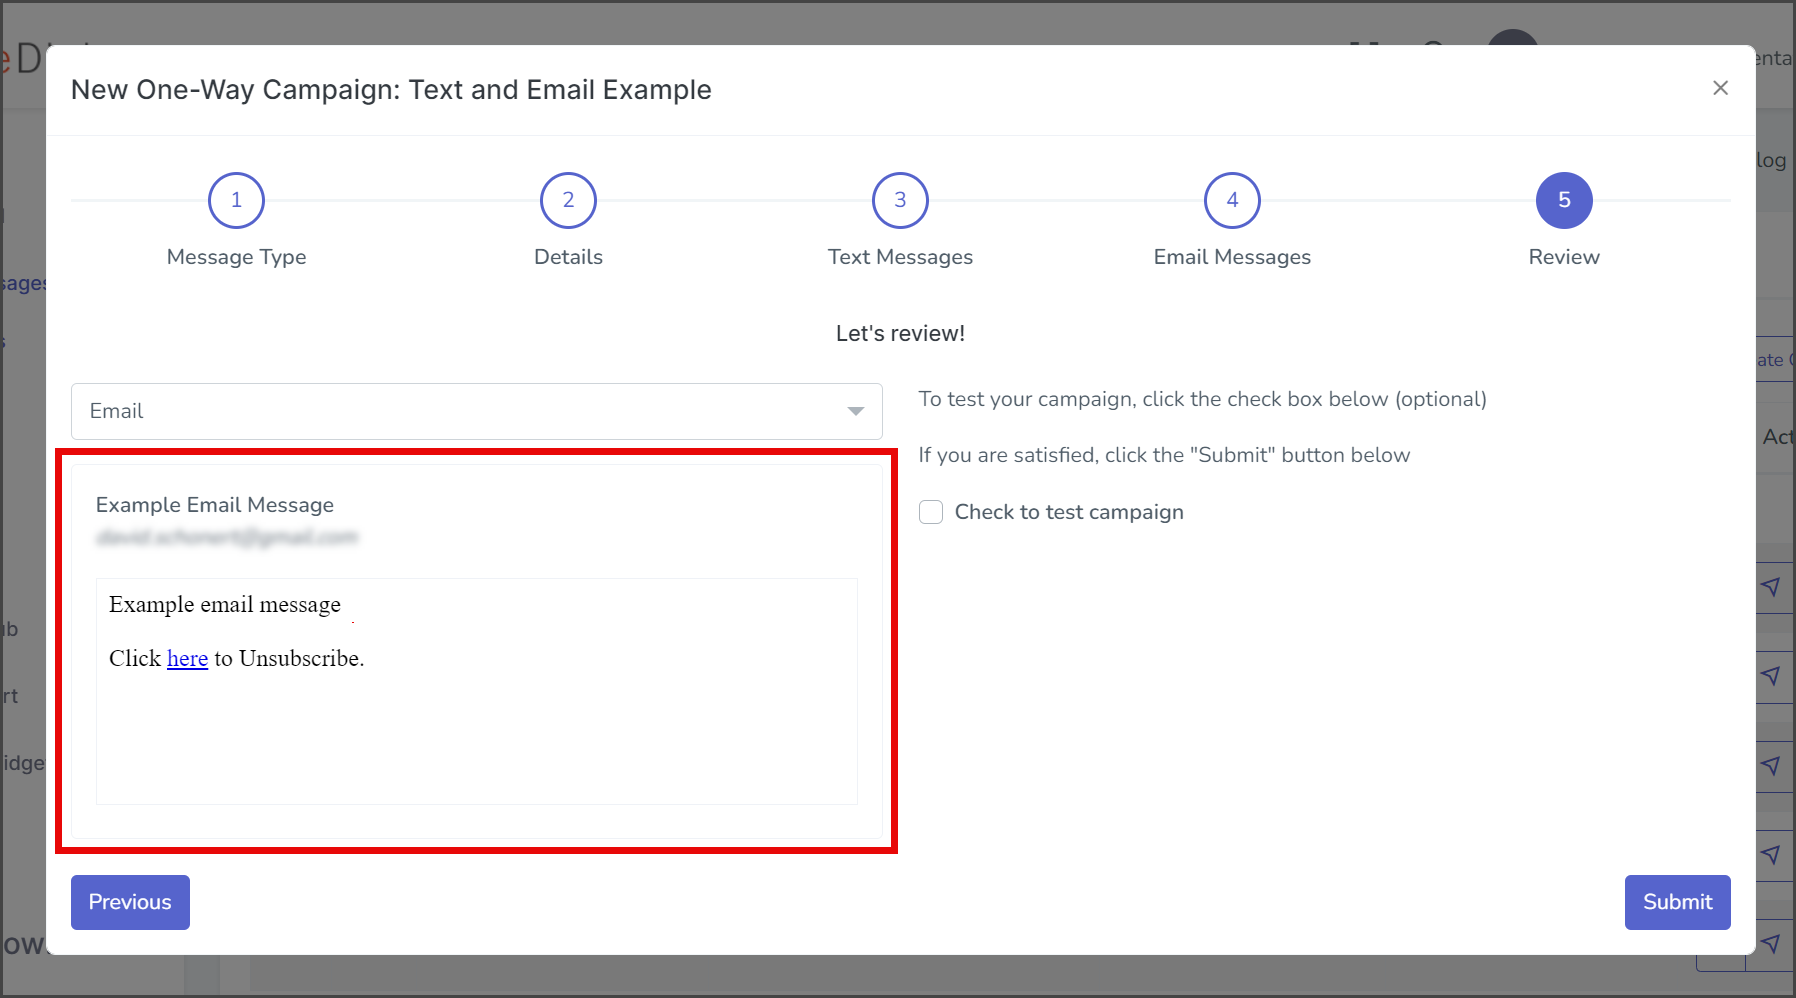
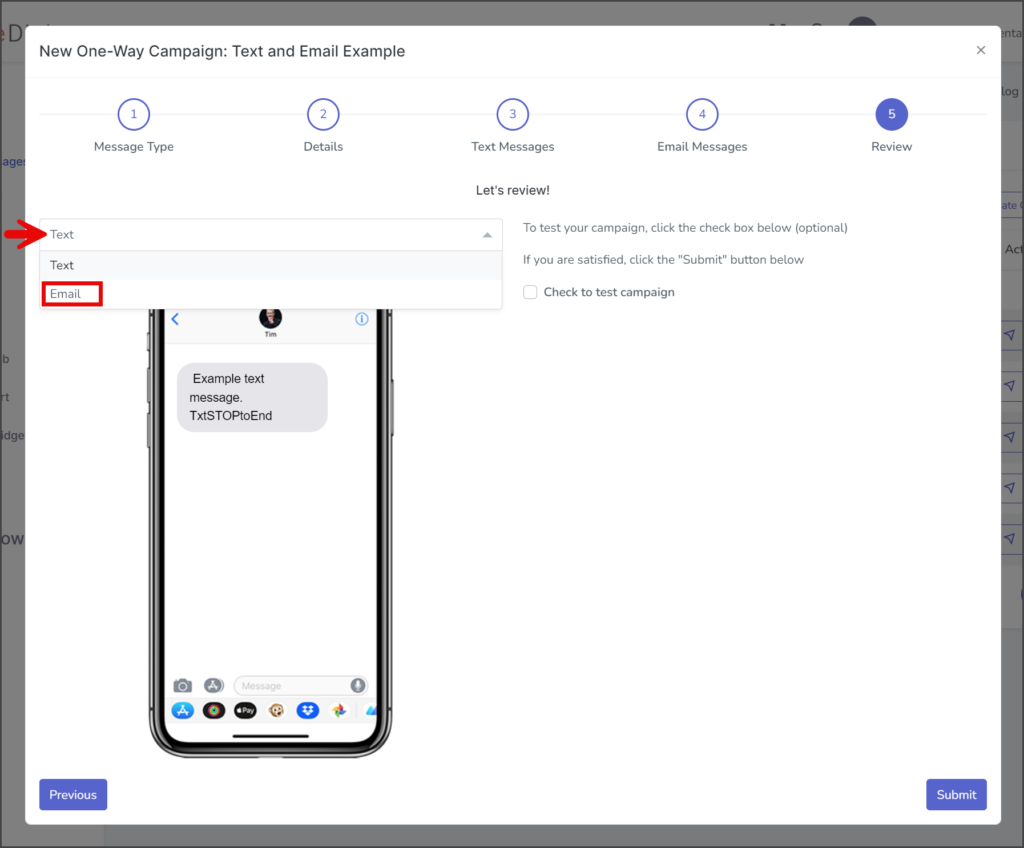
Review Page
- Review the message in the mockup phone to ensure everything is as expected.

- Click the dropdown menu and select Email to review the email message.
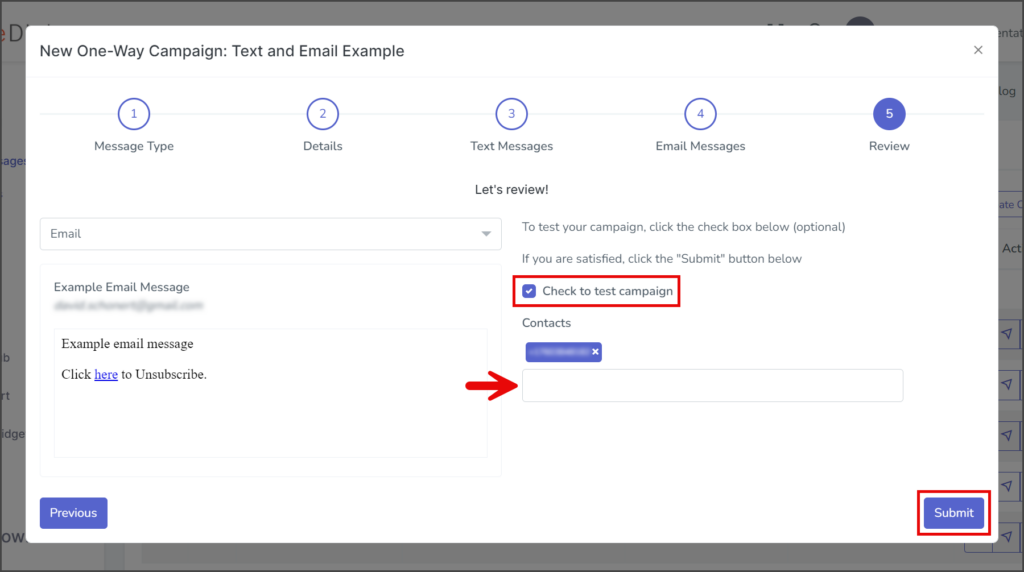
- Review the email message to make sure everything is displayed as expected.

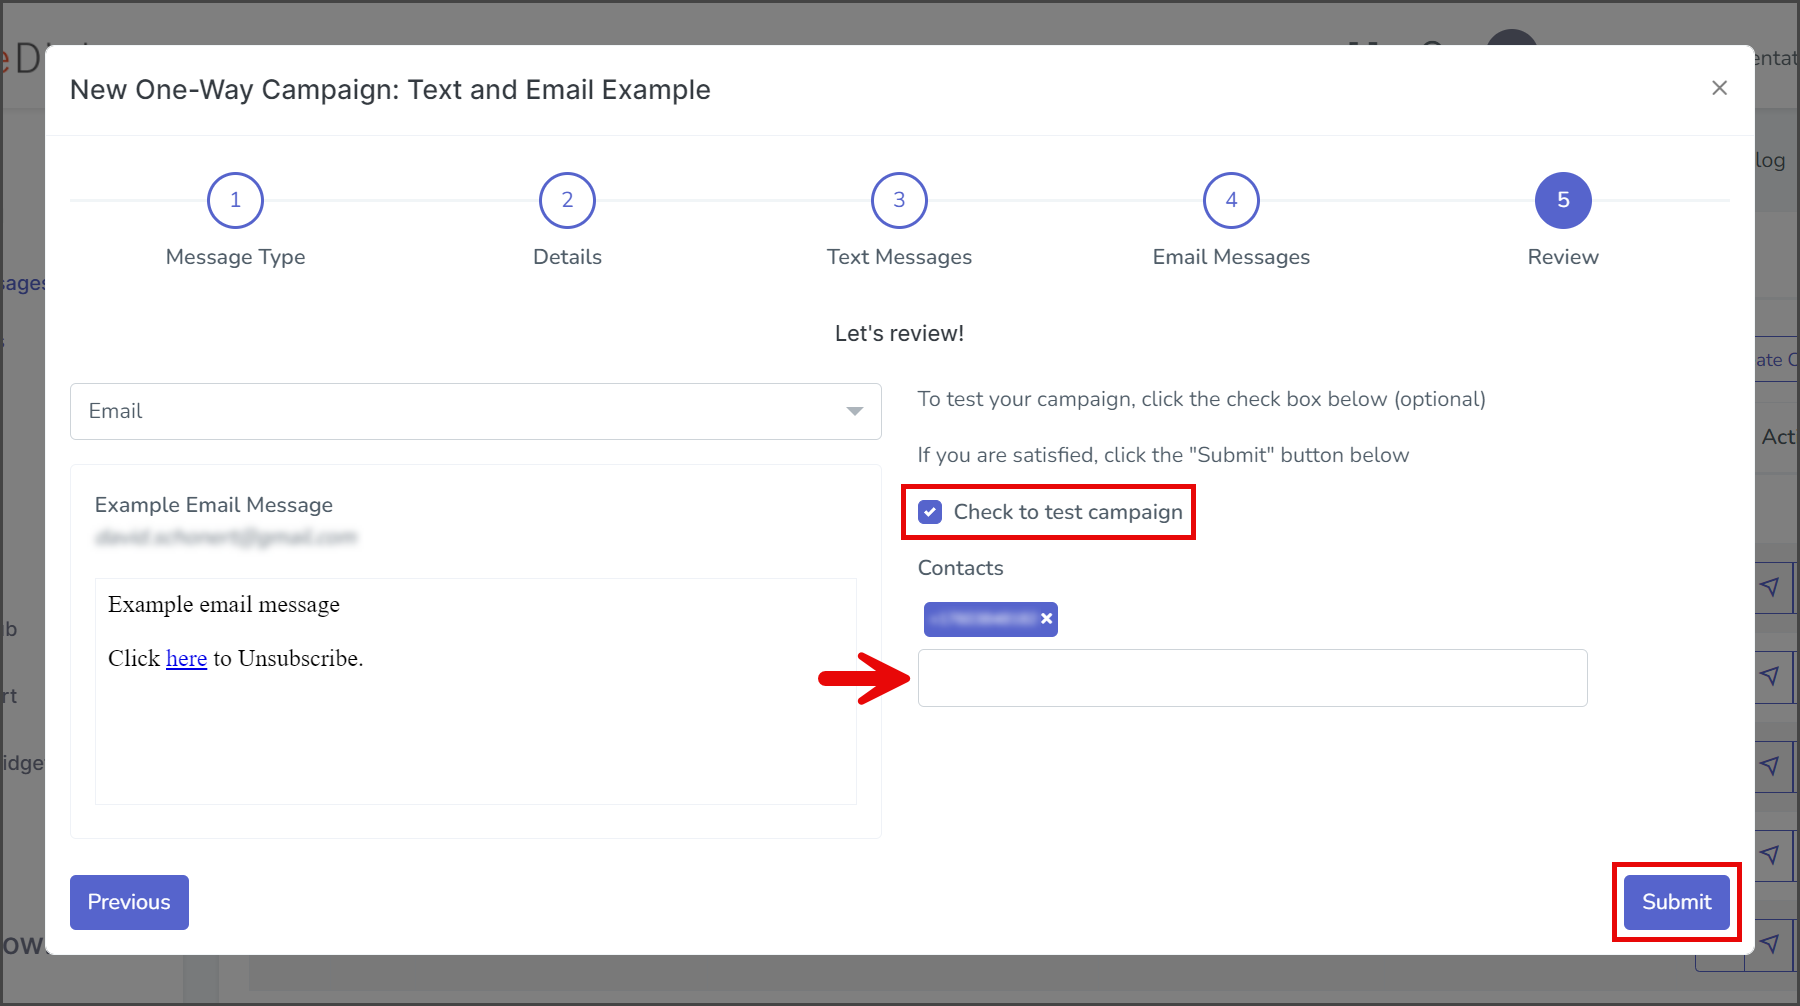
- (Optional) Check to test campaign – If checked, the campaign will be tested by sending a text or email to the specified contact once it is created.
- Note: It is strongly recommended that you test all campaigns before making them live.
- In the Contacts textbox, enter the phone number or email address to receive the test message. To enter multiple contacts, type a comma after the contact, and the email will automatically be added to the list of contacts.
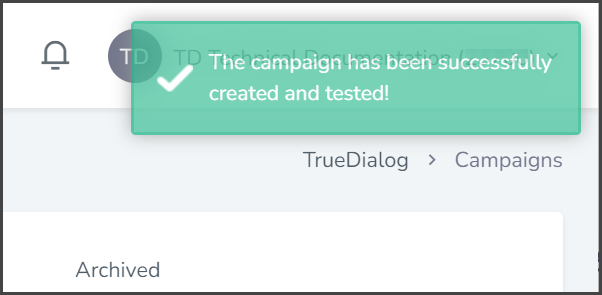
- Click Submit to create the campaign. The campaign message will be sent to the listed contacts if the Check to test campaign checkbox is checked.
- After creating the campaign, a success message will appear in the upper right corner.