
TrueDialog Portal
Comms Hub > Chat Widget
TrueDialog provides a Chat Widget for you to integrate with your website. With this widget, your website users can start a chat directed to the Comms Hub – External Chat. This article will guide you through the process of creating a Chat Widget. See the Managing Comms Hub Chat Widgets article for information on managing your Chat Widgets.
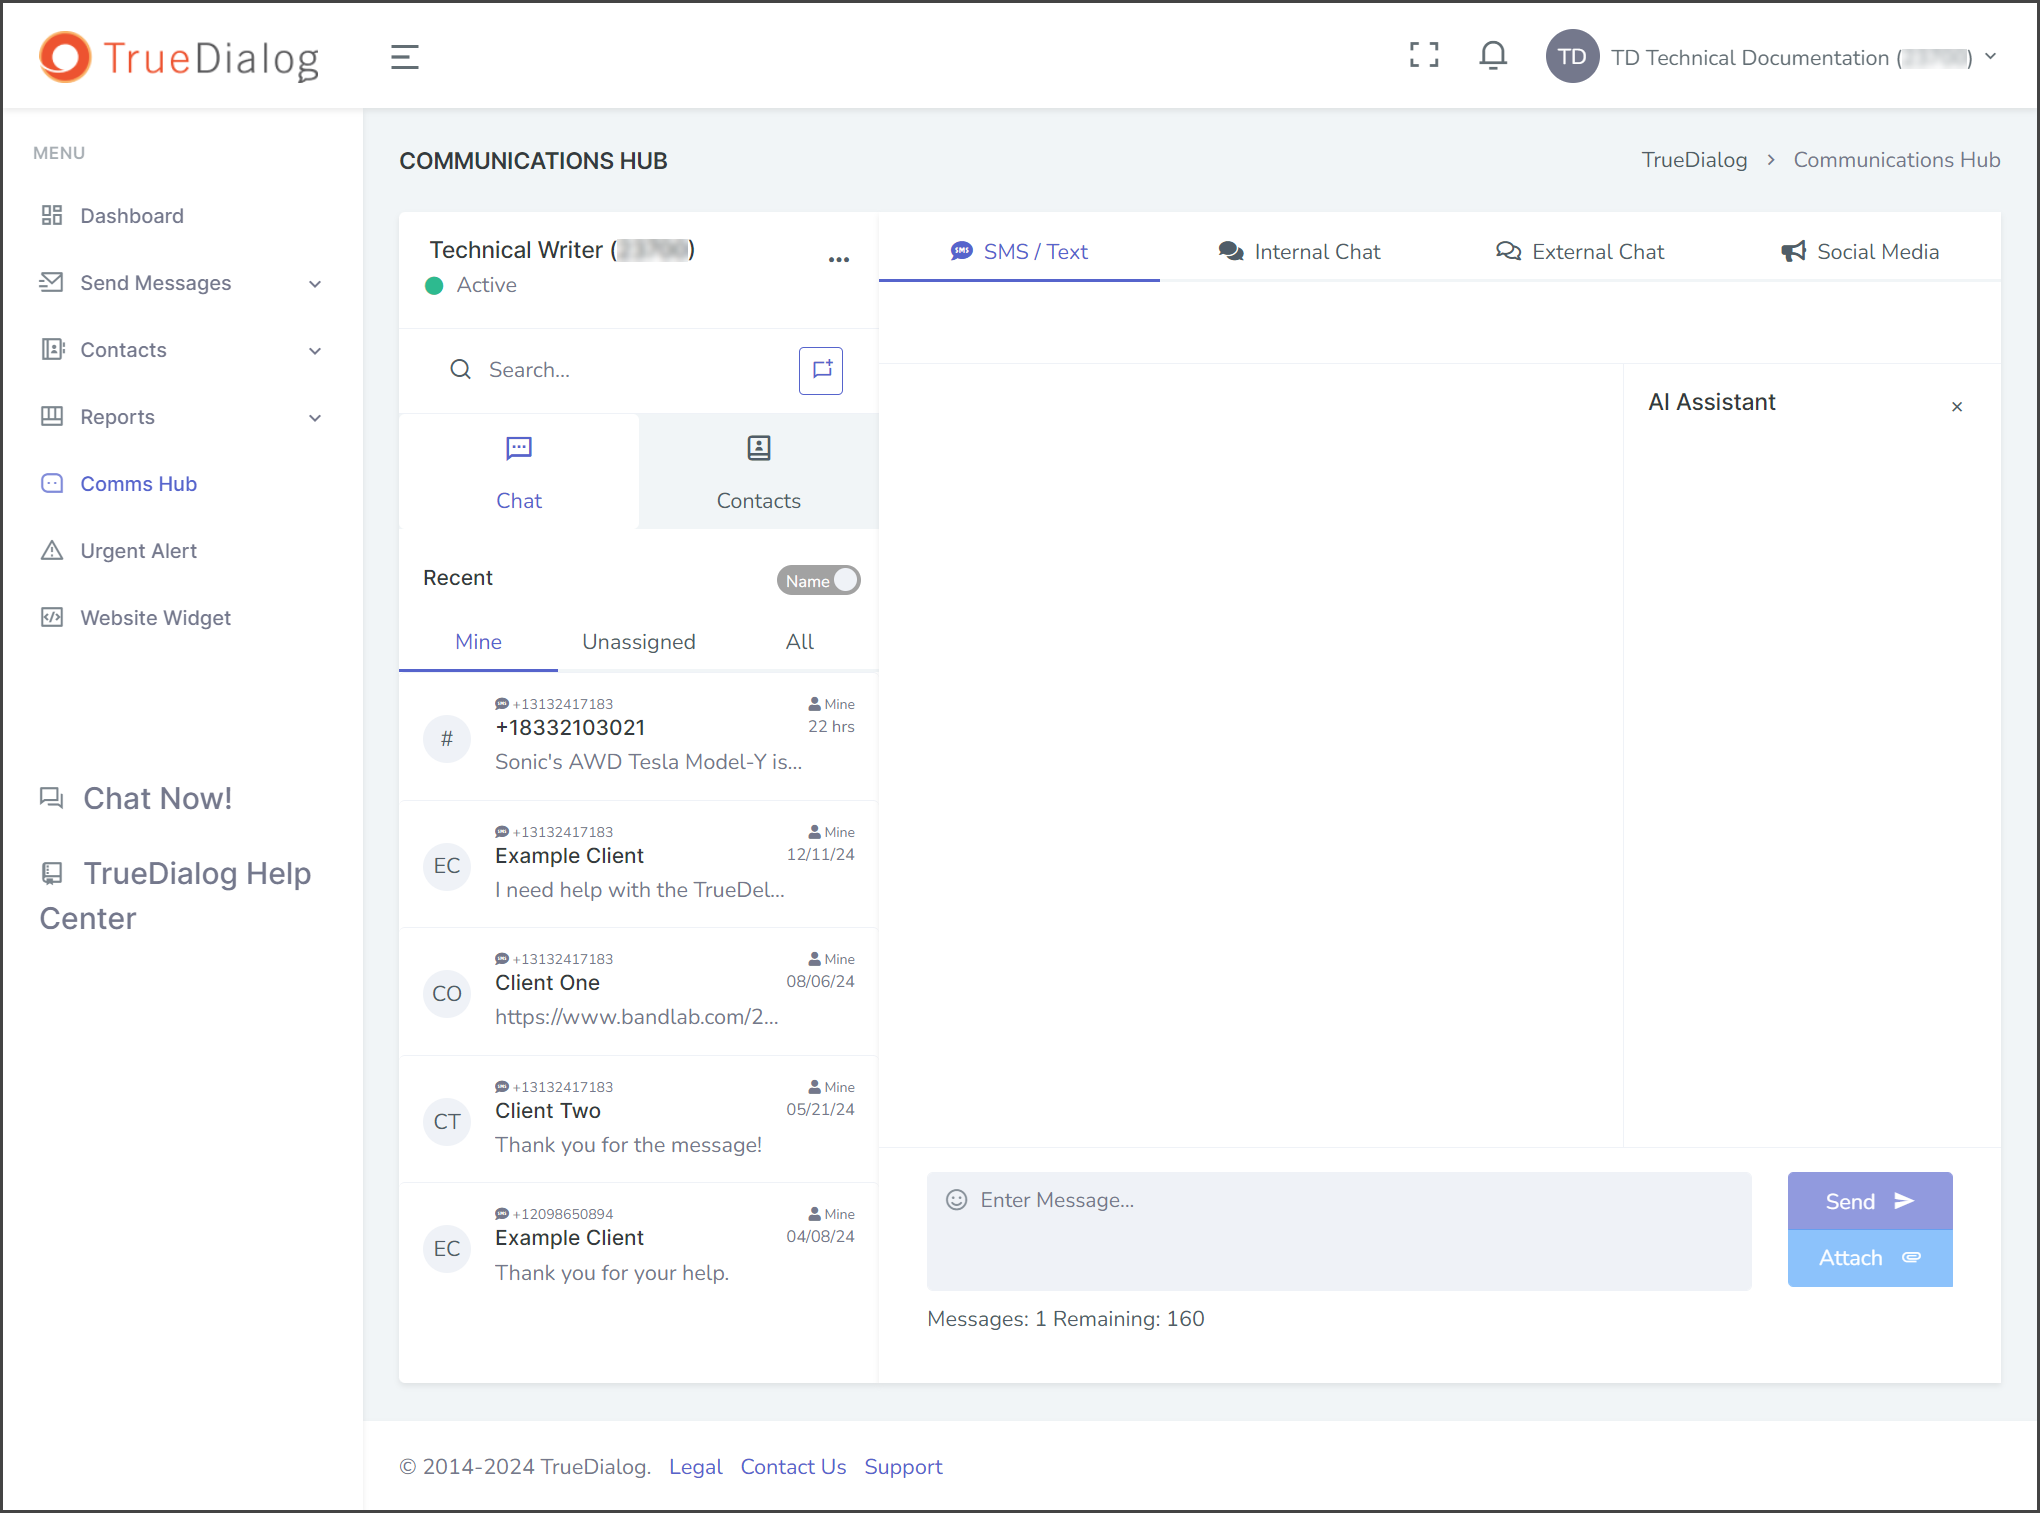
- Access the Communication Hub page by clicking Comms Hub in the left sidebar.

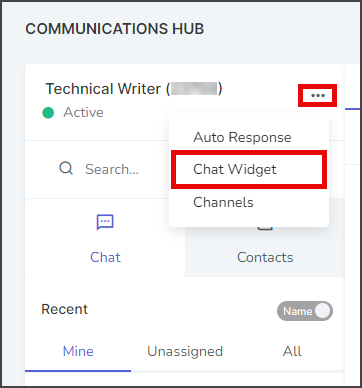
- Click the horizontal line of three dots to the right of the user name and select Chat Widget.
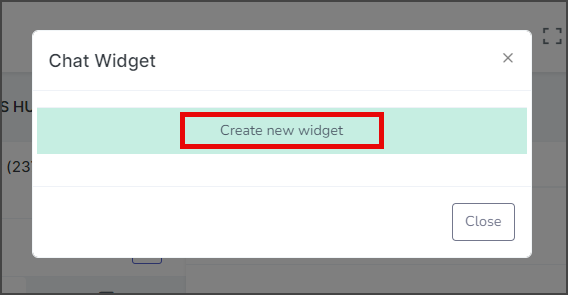
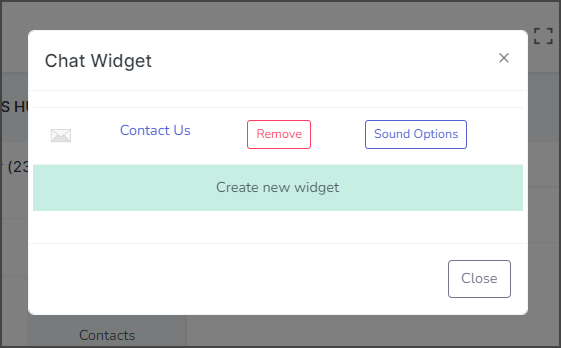
- Click Create new widget in the Chat Widget window.
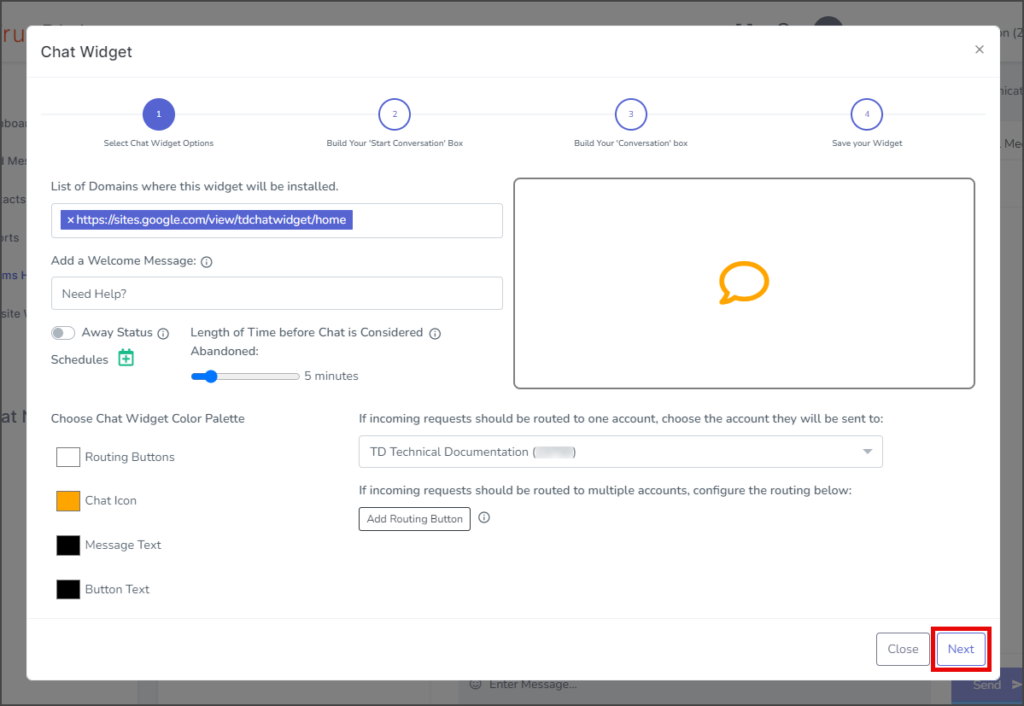
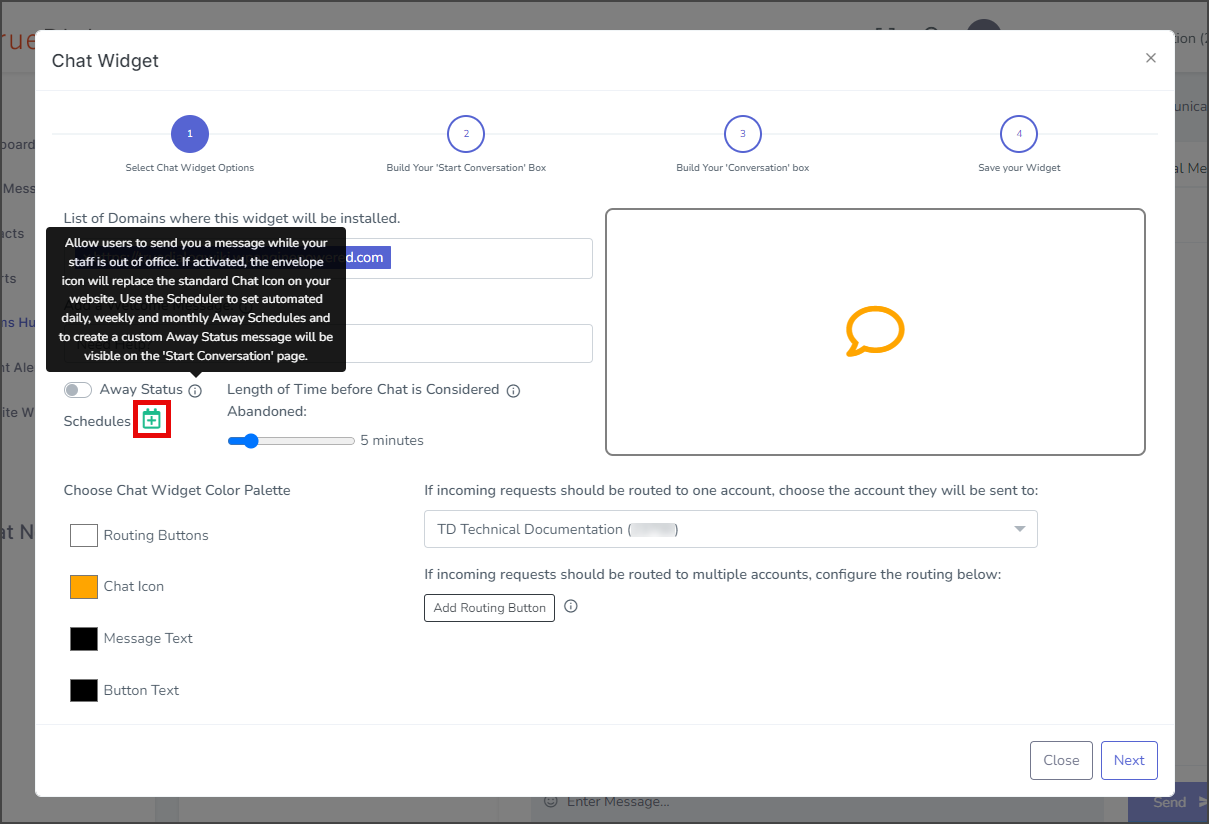
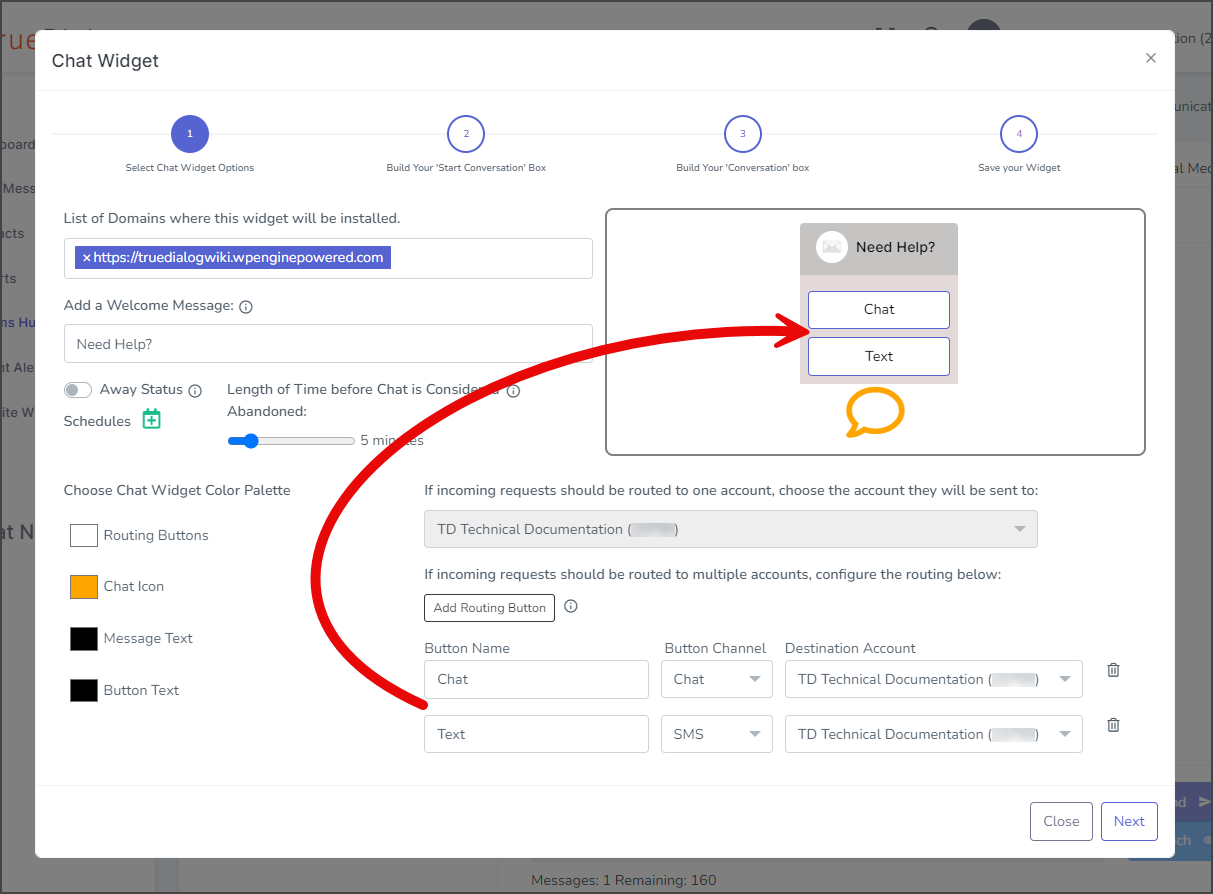
Select Chat Widget Options
- Enter the website address that will use the widget in the List of Domains where this widget will be installed textbox, then select it. You can enter multiple websites one at a time.

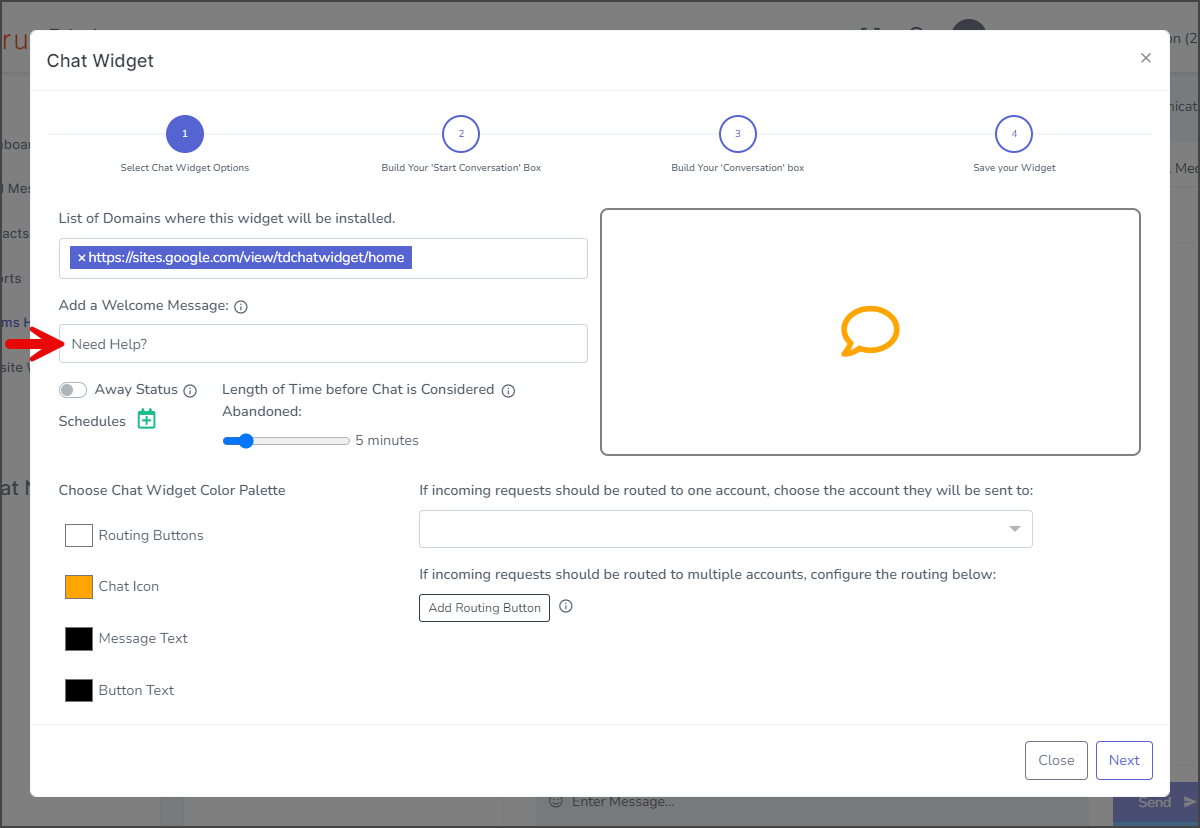
- Enter a message in the Add a Welcome Message textbox, max 25 characters. This message is displayed at the top of the Routing Button window. See the Add Routing Button section for information about Routing Buttons. If Routing Buttons are not used, this message will not be shown.

- (Optional) Adjust the Length of Time before Chat is Considered Abandoned interval by dragging the slider anywhere from 1 to 30 minutes.
- (Optional) Adjust the widget’s colors by selecting one of the color boxes under the Choose Chat Widget Color Palette section.
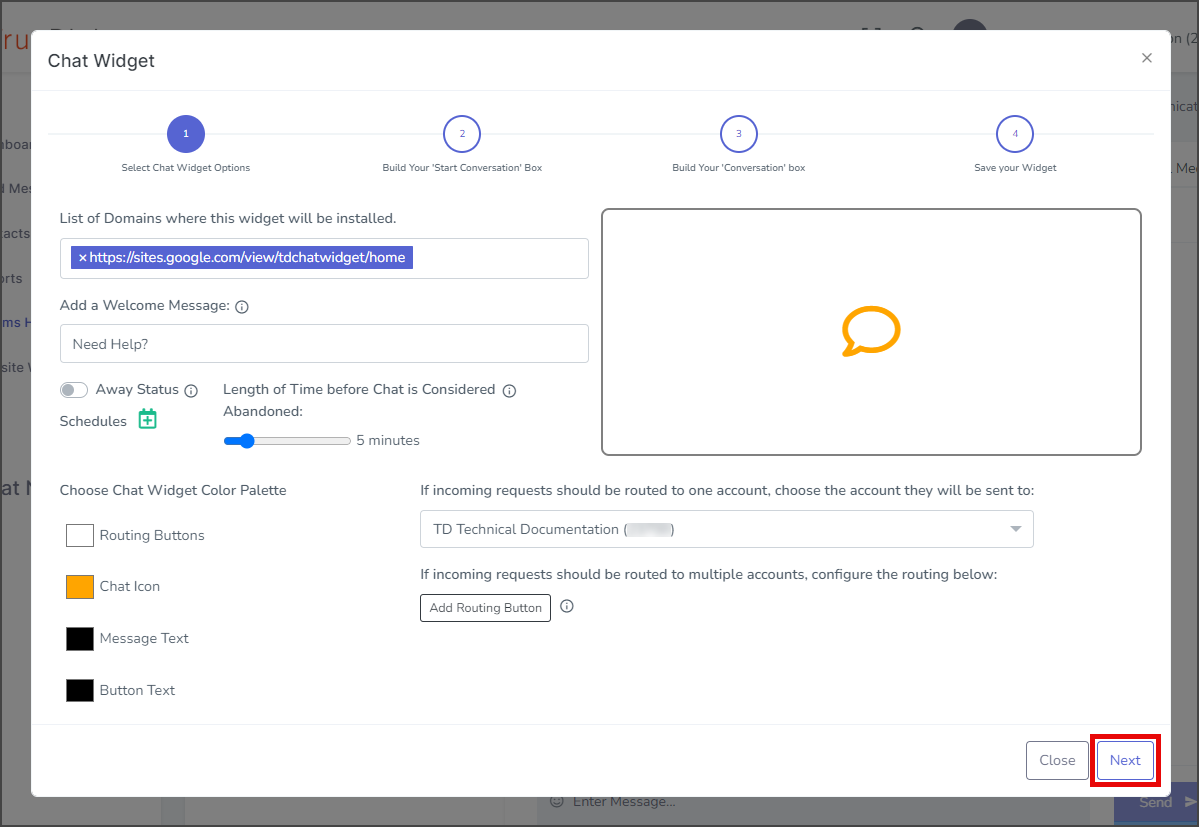
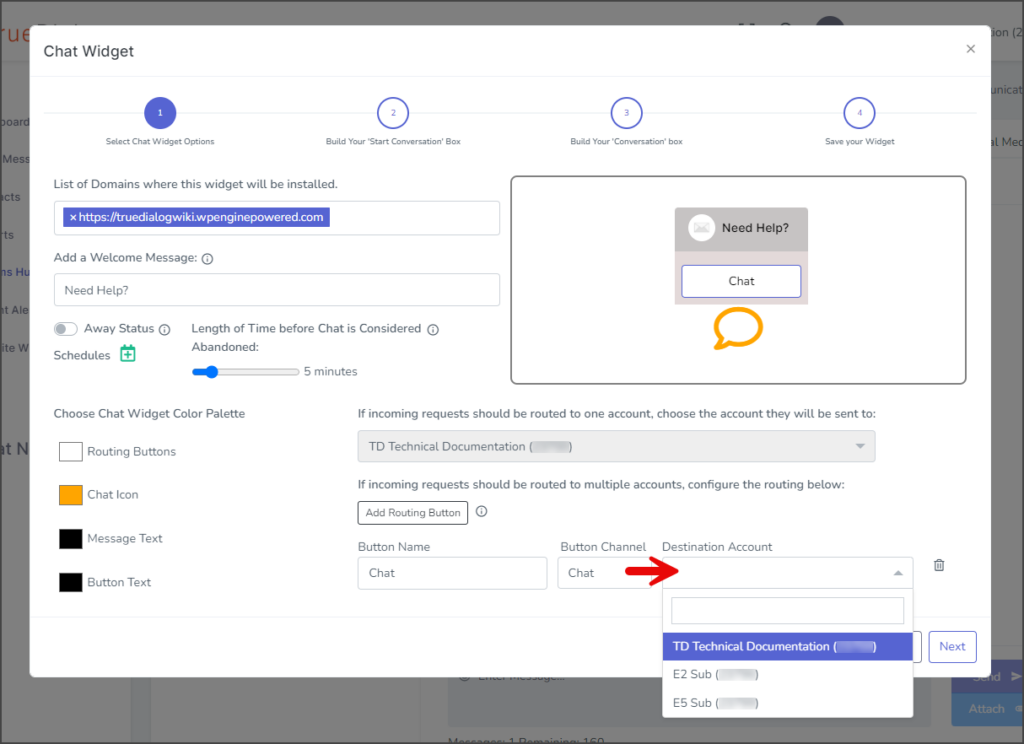
- Click the Routing Account dropdown to select the account for which you want to receive incoming requests from this chat widget. Usually, this will be your root account, the top account in the list. This will be disabled if Routing Buttons are used. See the Add Routing Buttons section for more information about Routing Buttons.
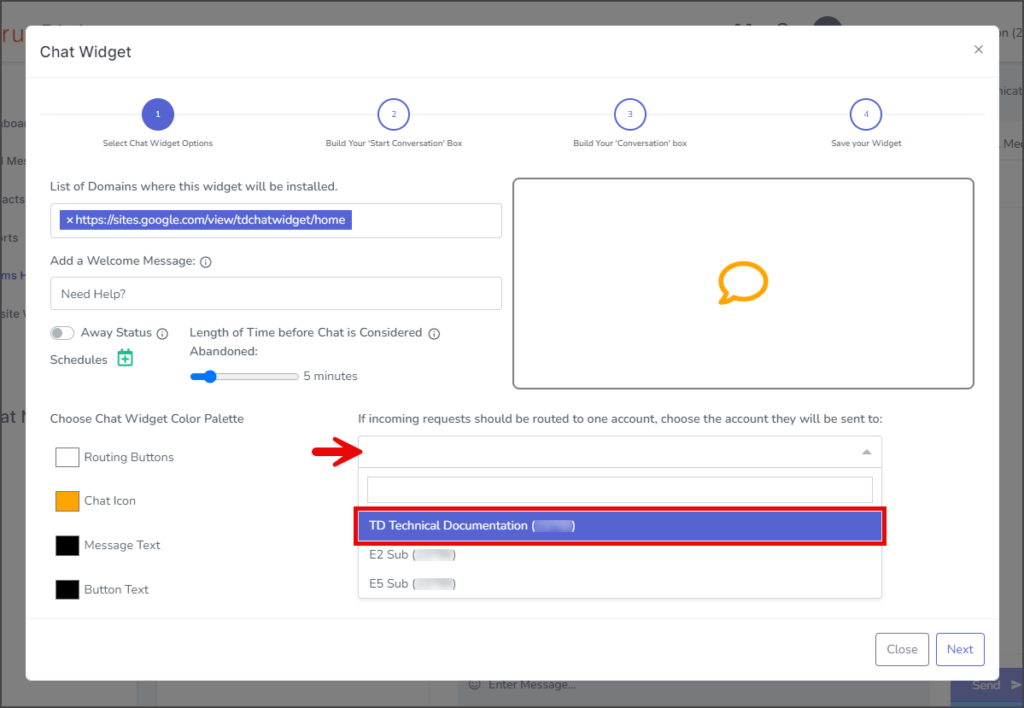
- Click Next to go to the Build Your “Start Conversations” Box page.


Away Status (Optional)
You can use the Away Status feature to inform your users that you are currently unavailable to respond to messages. Adding Away Status Schedules allows you to set specific times for the Away Status to be enabled and disabled and includes a customized notification.

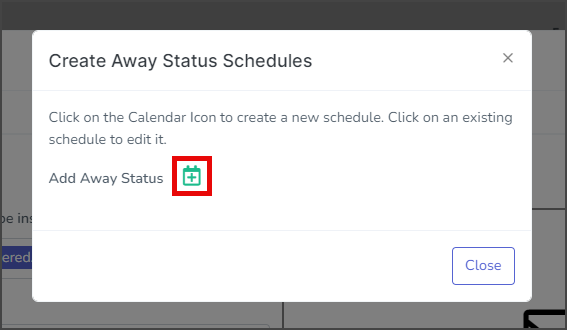
- Add an Away Status Schedule by clicking the green calendar icon next to Schedules.

- Click the green calendar icon next to Add Away Status in the Create Away Status Schedules window.
- Enter a name for your schedule in the Lable textbox.
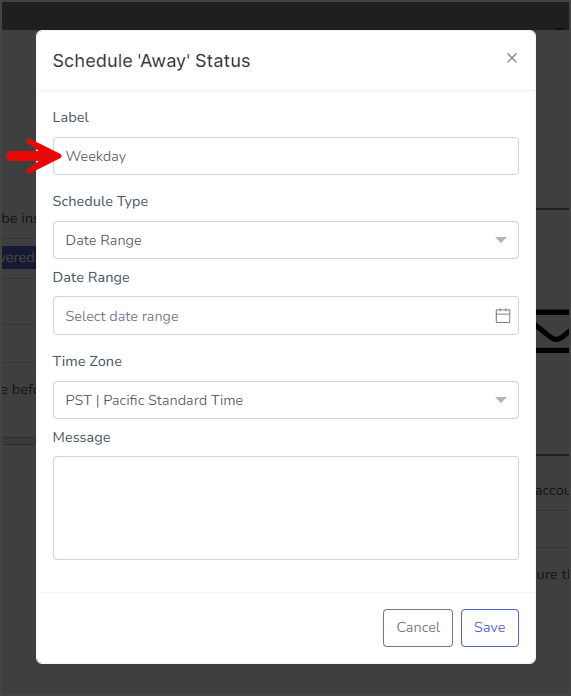
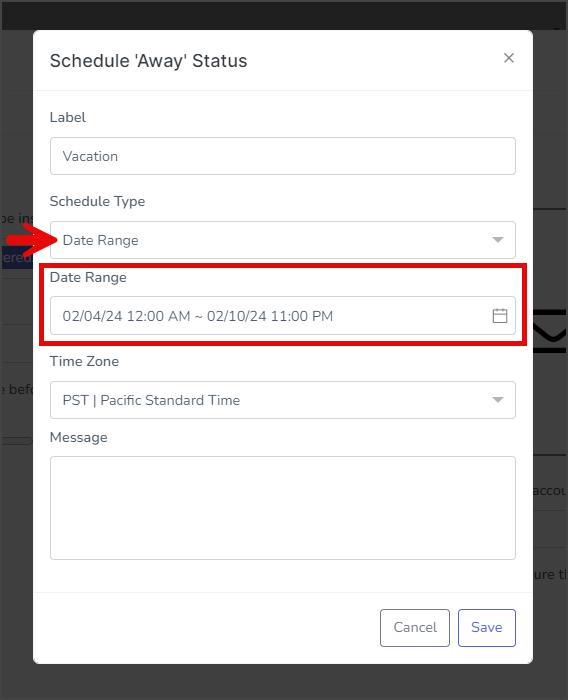
- Select the Schedule Type from the dropdown.
- Date Range – Allows you to enter a set start and end Date Range using a calendar widget and a time widget.
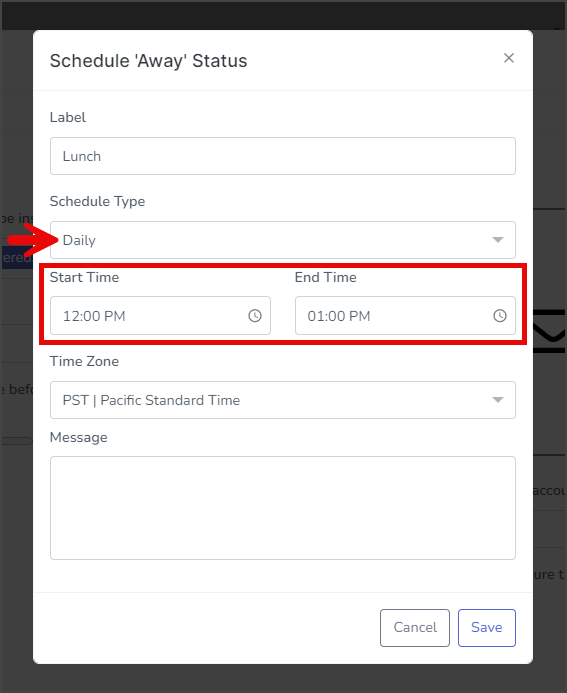
- Daily – Allows you to enter Start Time and End Time for when you will be away every day.
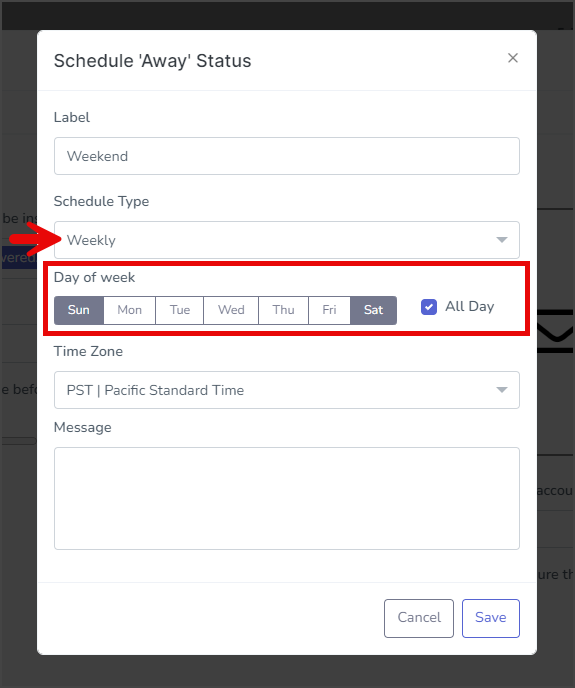
- Weekly – You can select Day of week, Start Time, and End Time. If All Day is checked, the Start Time and End Time fields are removed, and the schedule will be for all hours of the selected days.

- Date Range – Allows you to enter a set start and end Date Range using a calendar widget and a time widget.
- Select the Time Zone from the dropdown to use for this schedule.
- Enter the message you want to send to your users in the Message textbox when this schedule is active.
- Click Save.

- After creating the schedule, a success message will appear in the upper right corner.
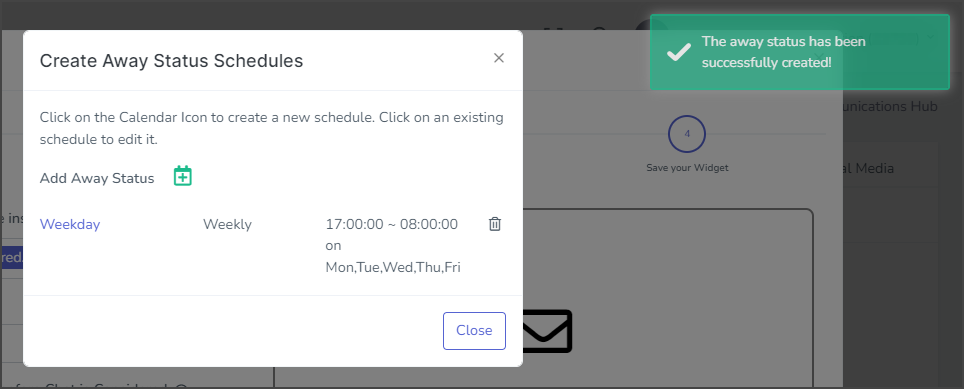
- The new schedule will appear on the Create Away Status Schedules and can be edited or deleted.
- You can add as many schedules as you need.
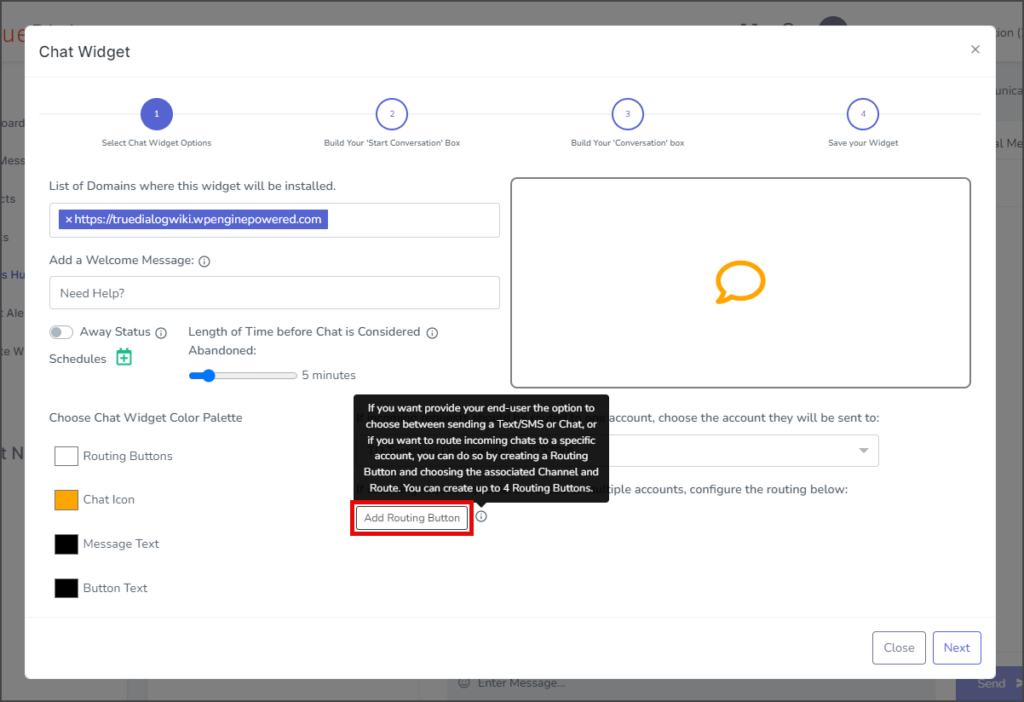
Add Routing Button (Optional)
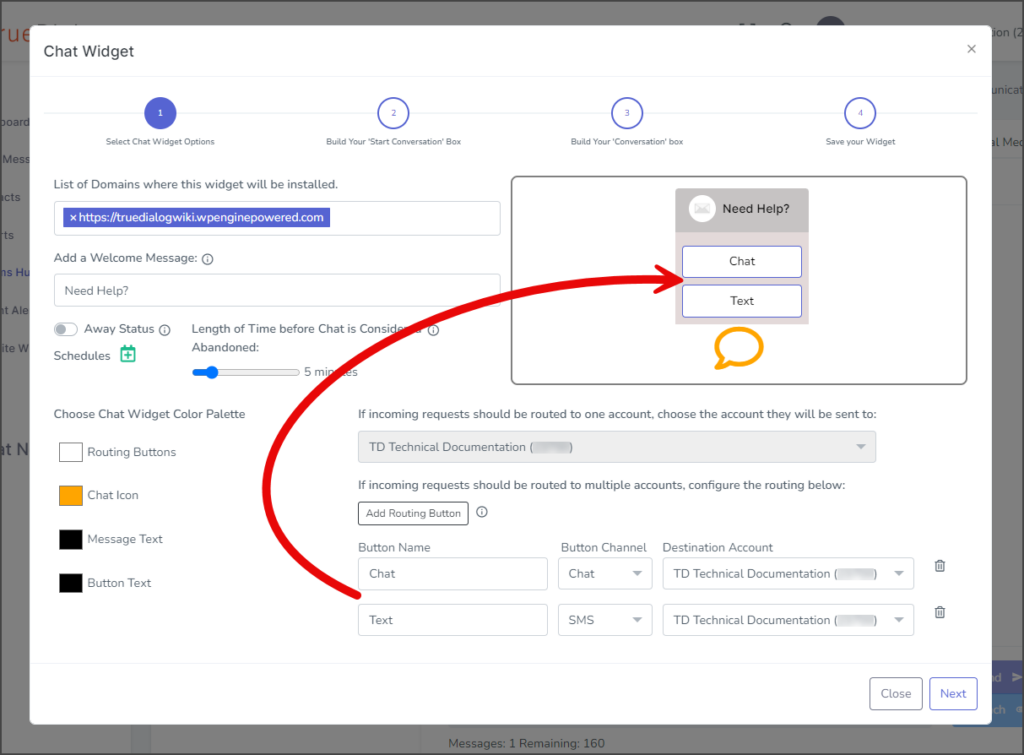
The Routing Buttons give you the option of offering your users the choice of communicating via Chat Widget messaging or SMS messaging. The Chat Widget comes with an online messenger which allows users to communicate with you. This messaging channel is called Chat, and when a user sends a message, it is sent to your Comms Hub External Chat section. However, the Chat Widget can also route messages to your Comms Hub SMS/Text section. This messaging channel is called SMS. When a user sends a message through the SMS Channel, you will receive it in your Comms Hub SMS/Text section. Any messages you send back to the user will be sent to the mobile phone number they provided in the Chat Widget.
The Routing Buttons feature allows you to direct messages to different accounts based on the button clicked by the user. For instance, you can create buttons such as Sales, Returns, and Billings to let users choose the department they want to communicate with.
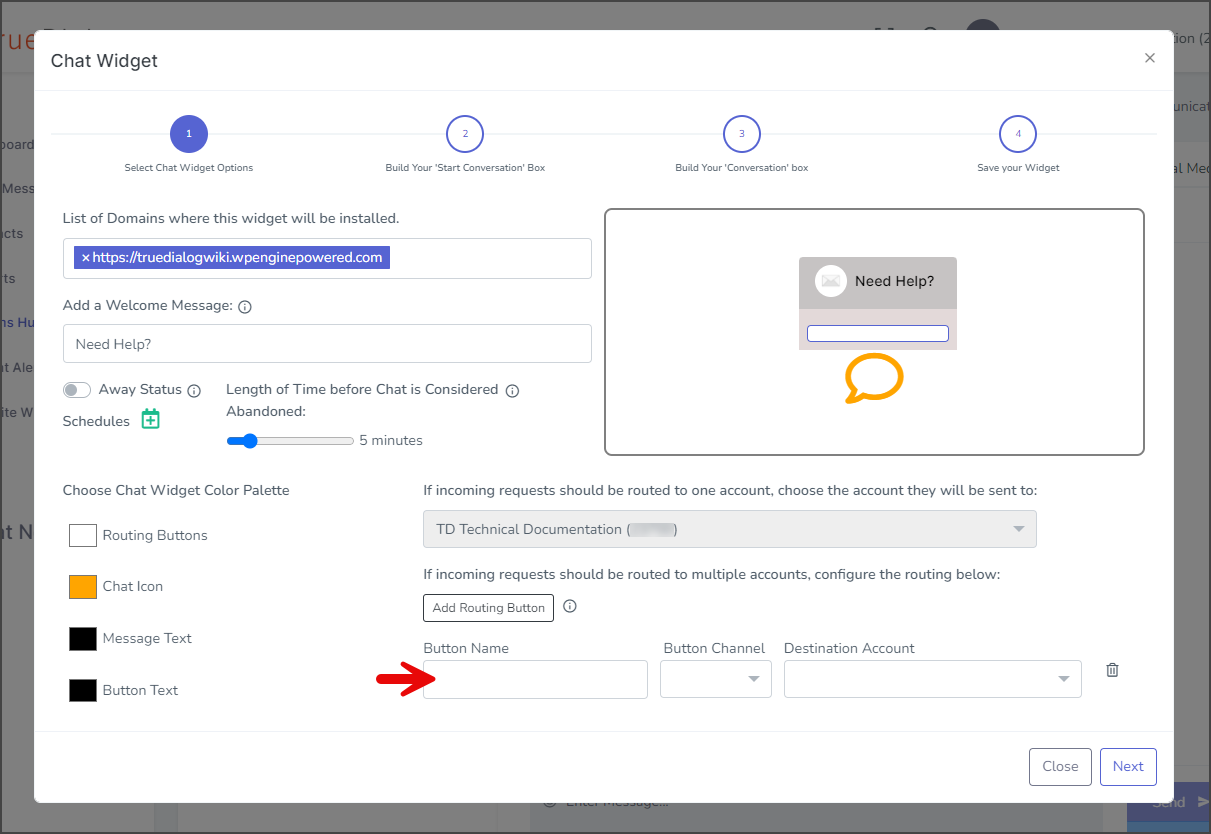
- Click Add Routing Button.
- Enter the name to display on the button in the Button Name textbox.
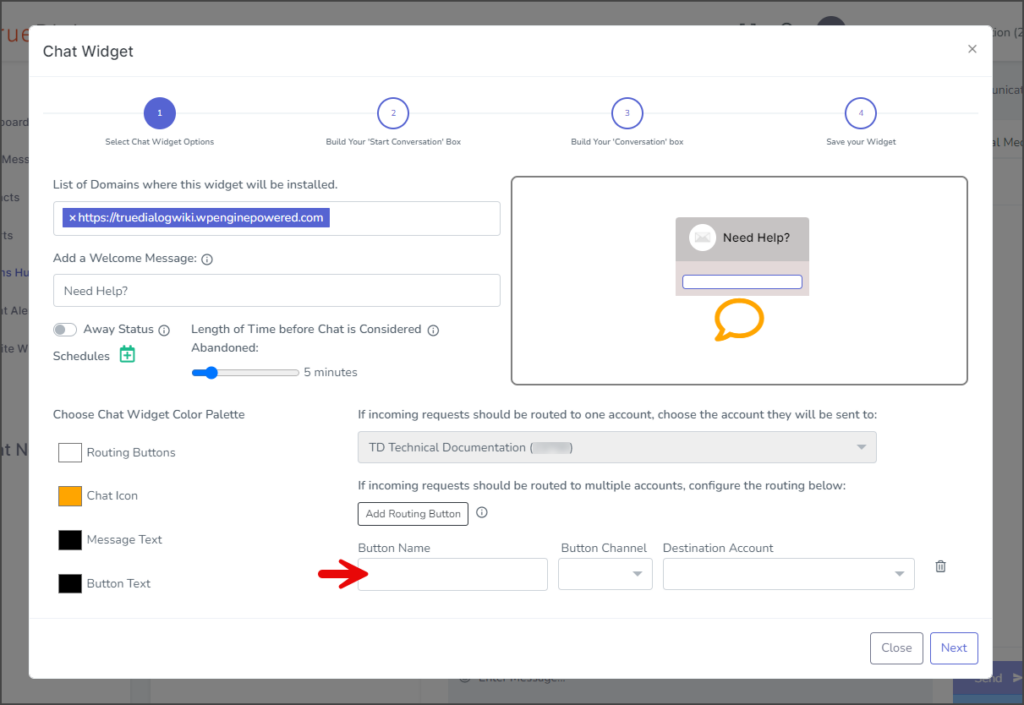
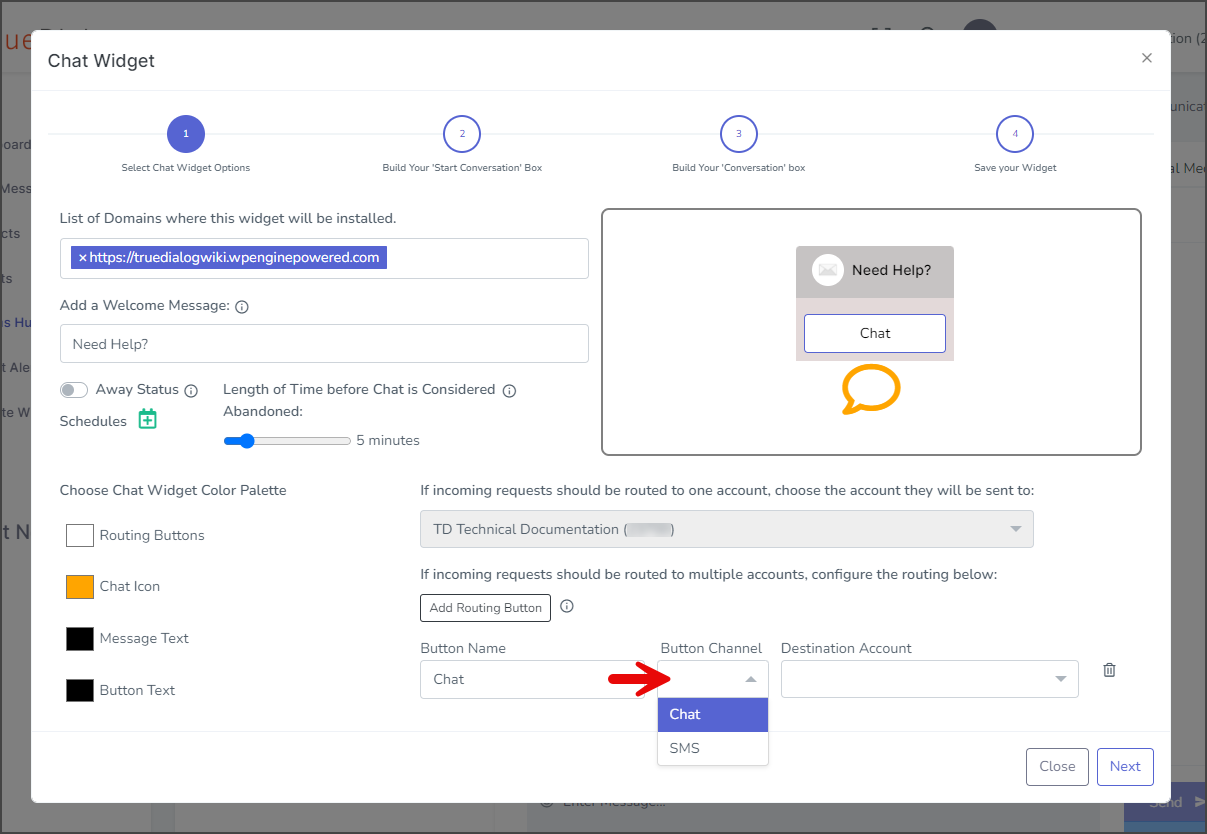
- Select the channel to use from the Button Channel dropdown.
- Chat – The user will start an online chat, and the messages will be sent to the External Chat section of the Comms Hub.
- SMS – The will start an SMS conversation, and the messages will be sent to the SMS/Text section of the Comms Hub.

- Select the account the conversation will be routed to.
- Repeat the steps to add another button. You can add up to four buttons.
- A preview of the widget with its buttons is shown above.


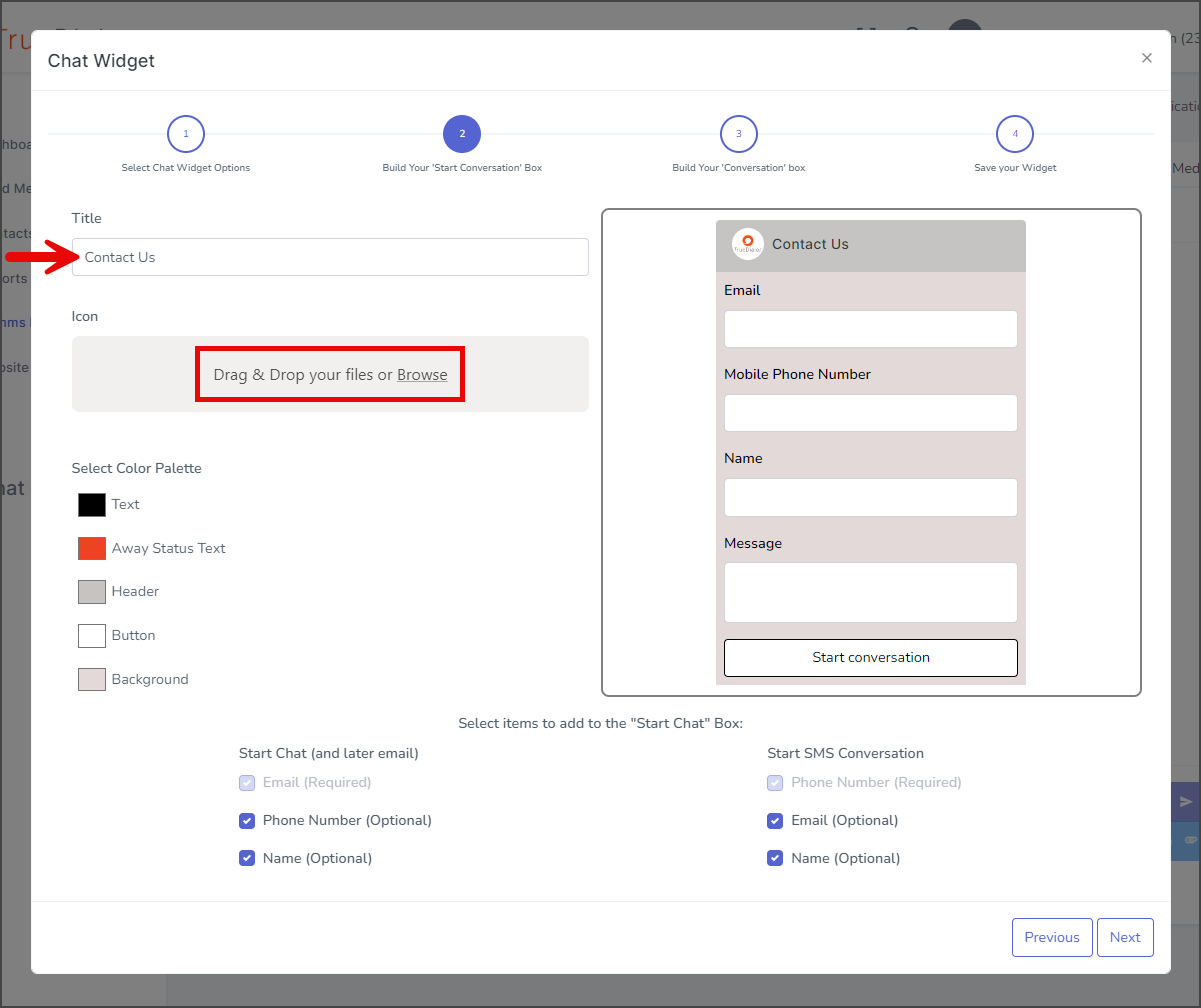
Build Your “Start Conversation” Box
- Enter a title for the Start Conversation window in the Title textbox.
- Add an Icon to the window using Drag & Drop or clicking Browse. By default, the TrueDialog log is shown on this window.

- (Optional) Adjust the window’s colors by selecting one of the color boxes under the Choose Color Palette section.
- You can change what fields are displayed on the Start Conversation form by checking or unchecking any of the checkboxes in the Select items to add to the “Start Chat” Box section.
- Click Next to go to the Build Your “Conversation” Box page.


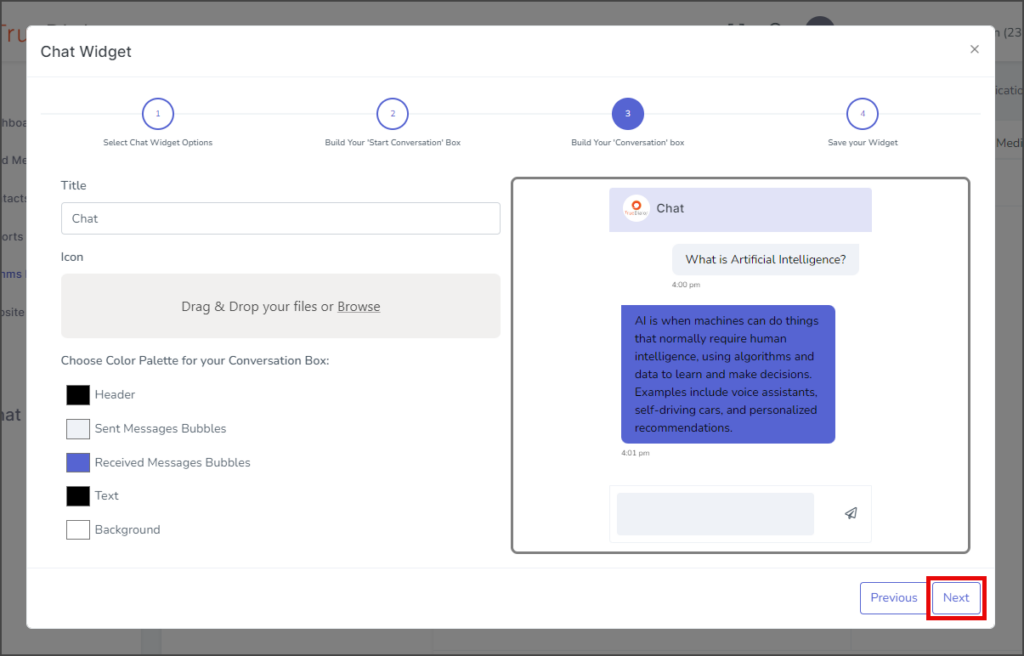
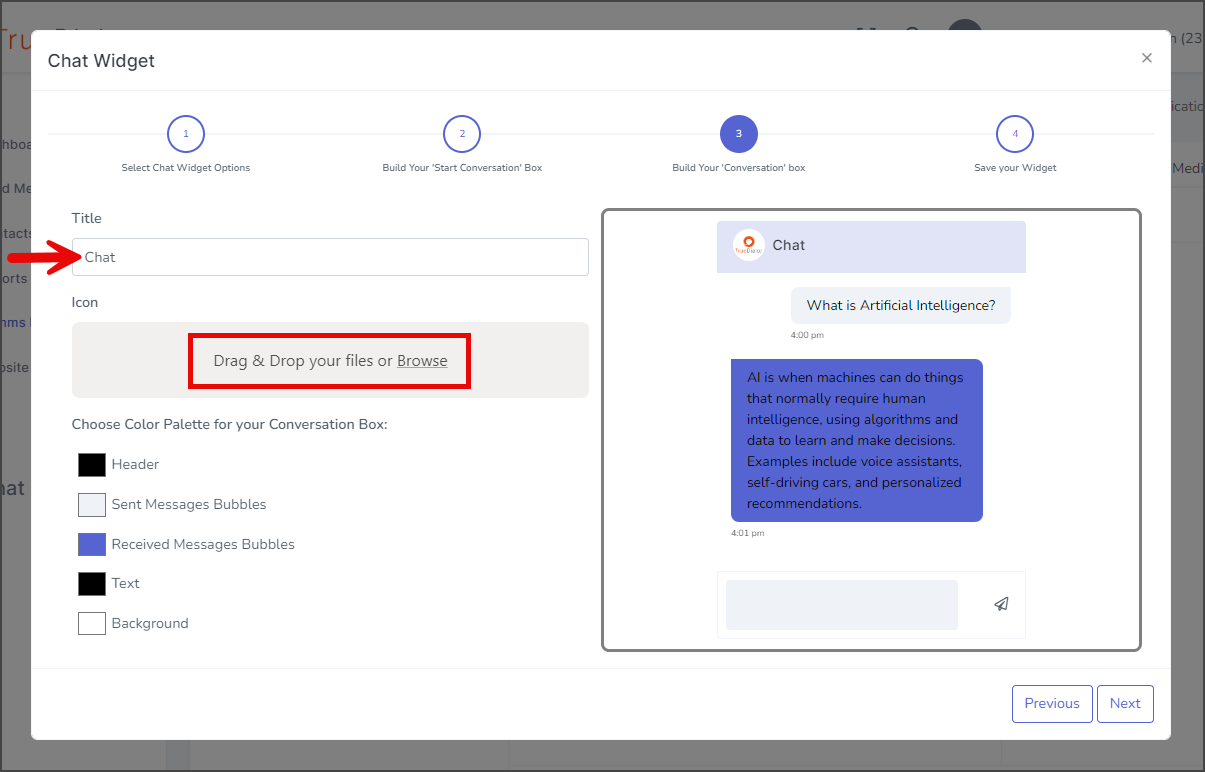
Build Your “Conversation” Box
- Enter a title for the Conversation window in the Title textbox.
- Add an Icon to the window using Drag & Drop or clicking Browse. By default, the TrueDialog log is shown on this window.

- (Optional) Adjust the window’s colors by selecting one of the color boxes under the Choose Color Palette section.
- Click Next to go to the Save your Widget page.

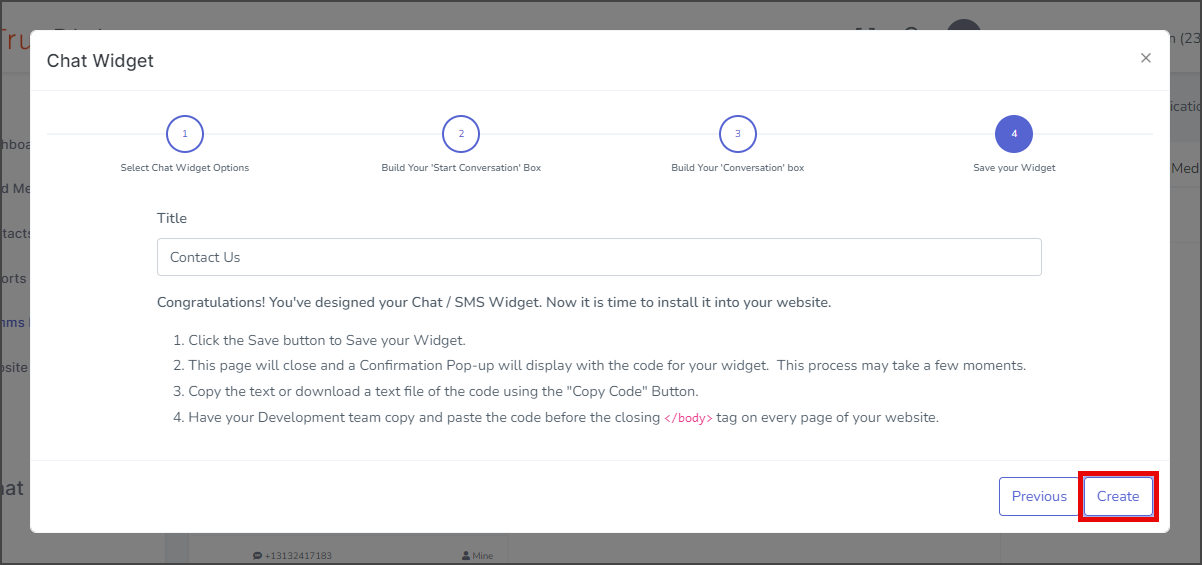
Save your Widget
- Click Create.

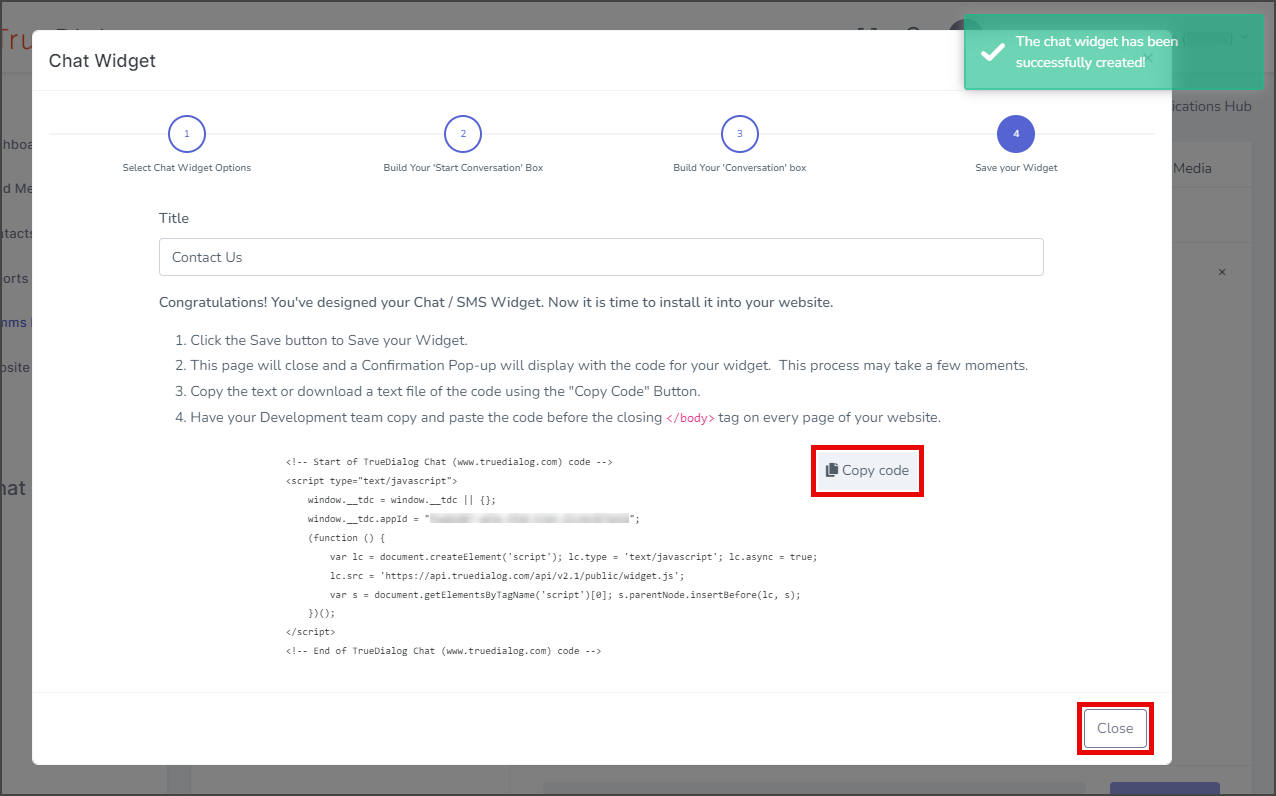
- Click Copy code and save the copied code to a text file.
- The copied code can now be deployed to your website by placing it before the closing </body> tag of every page on which you want the widget to appear.
- Click Close.

- Your newly created Chat Widget will now be listed in the Chat Widget window.
Using The Chat Widget
Once the Chat Widget has been deployed to your website, your users can start a chat conversation with you. Below are the steps your users will take when using the widget. See the Comms Hub- External Chat article for instructions on using the Comms Hub – External Chat.
- Click the Chat Widget.
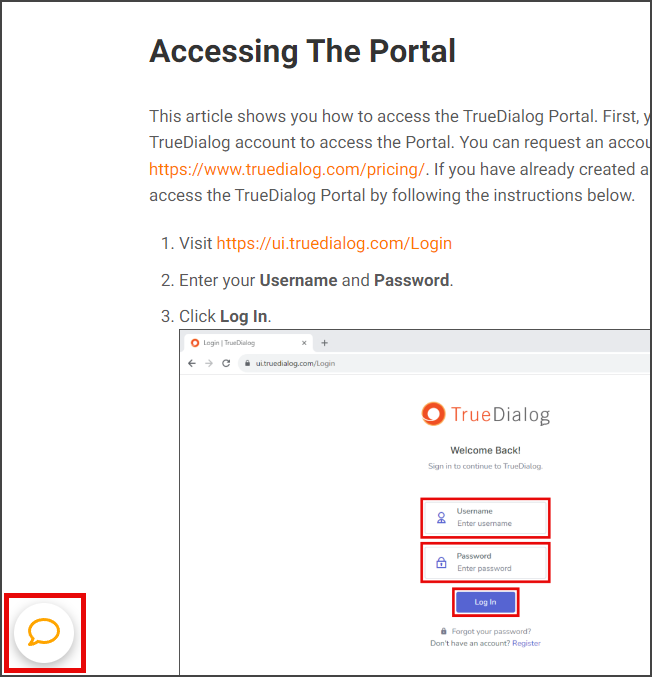
- Fill out the Contact Us page.
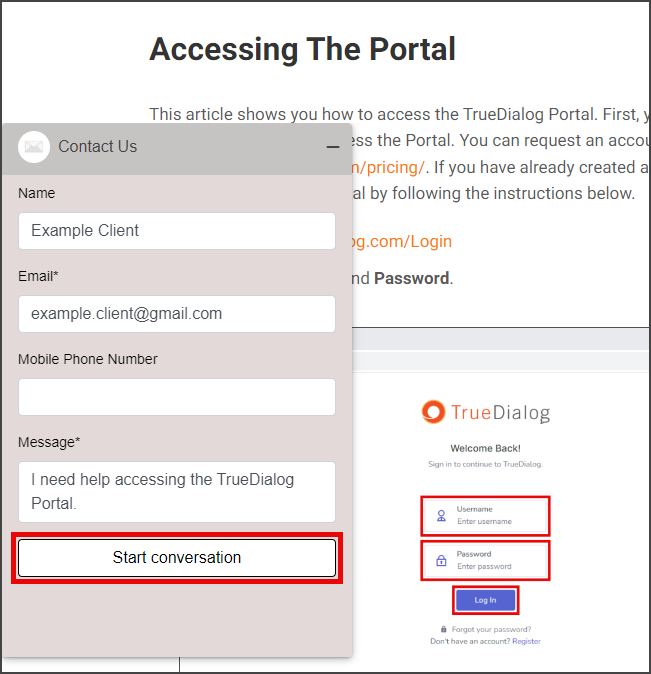
- Click Start conversation.
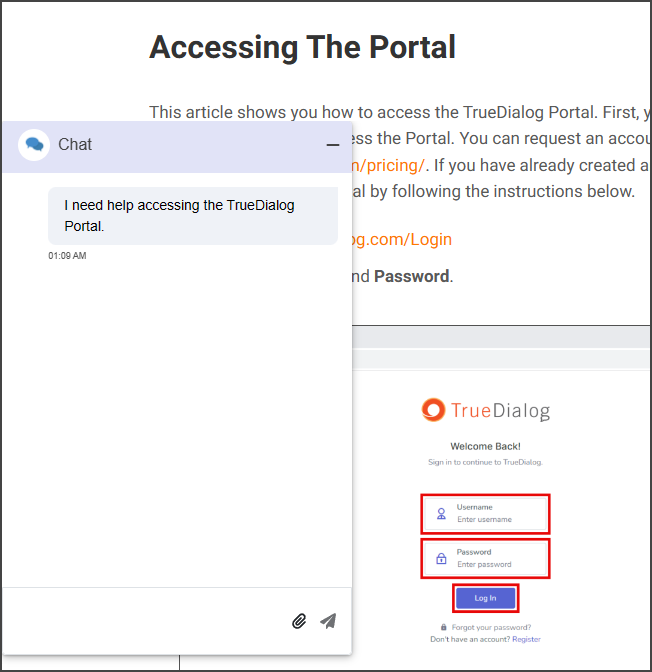
- Wait for a support team member to respond to you.