HubSpot
TrueDialog Integration
In this article, you will learn how to send a Mass SMS to your contacts using a workflow. While there are many ways to create a workflow using the TrueDialog Mass SMS Integration, this example will show you how to send the message to a list of contacts immediately after the workflow is created. There are some limitations due to the way HubSpot processes workflows to be aware of; see the warning below for those limitations.
Limitations
Create Blank Workflow
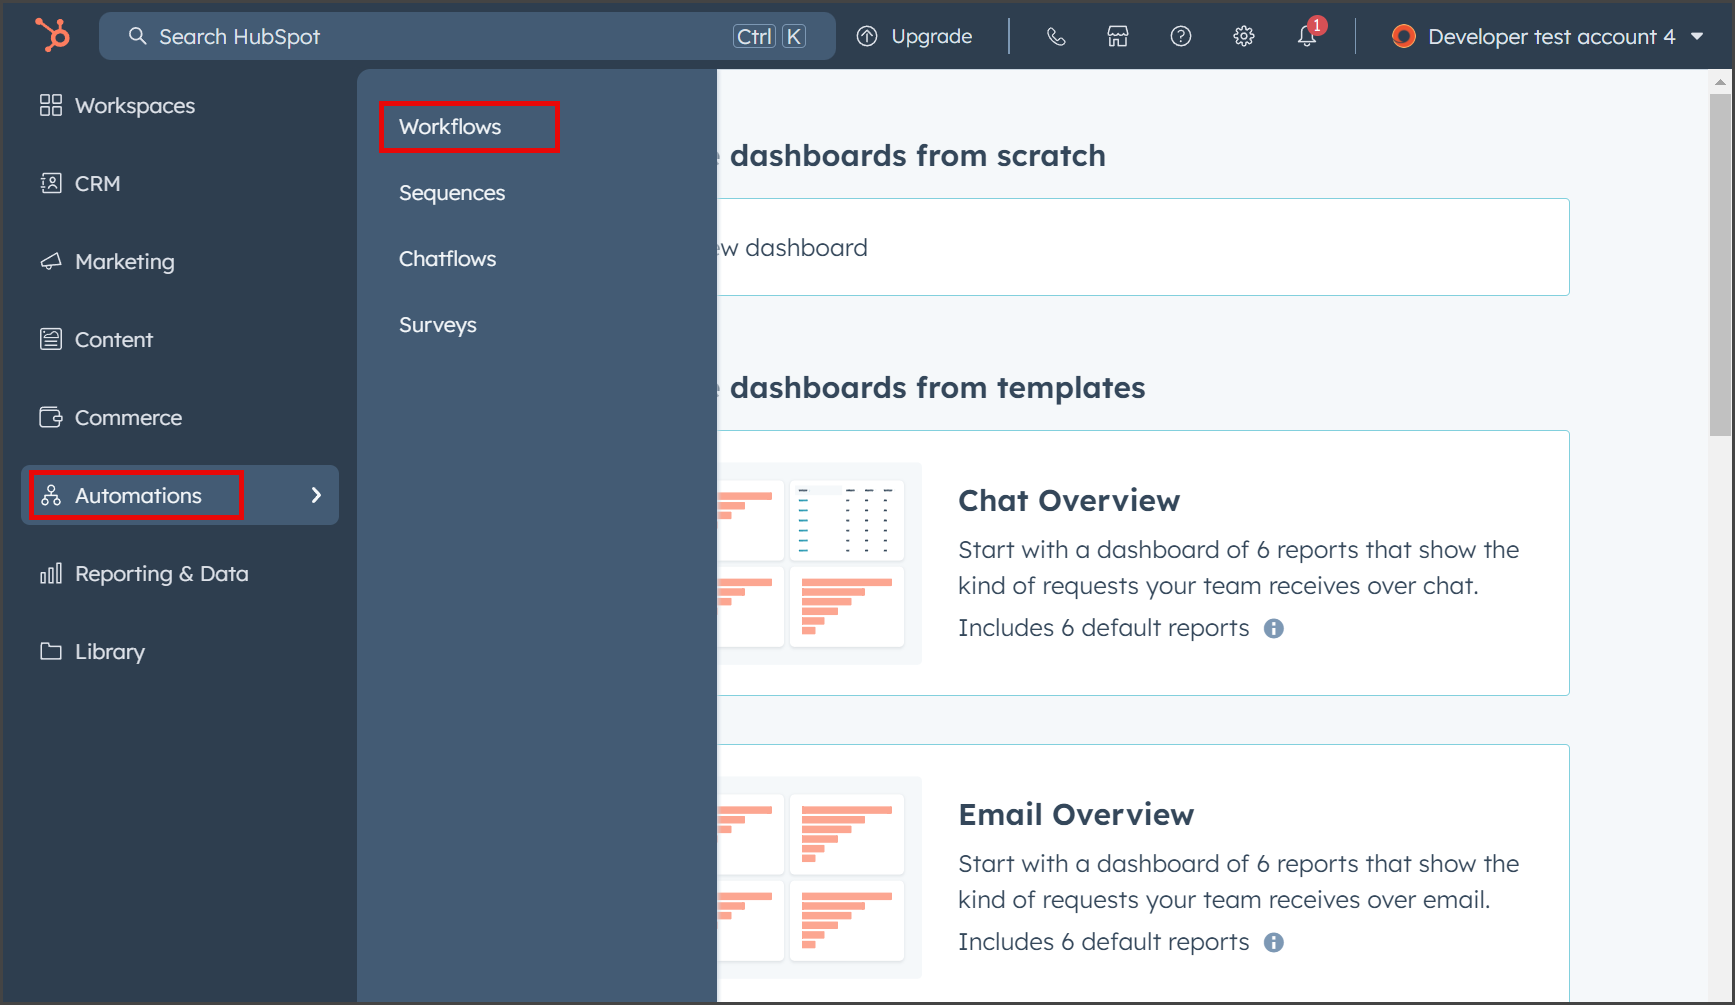
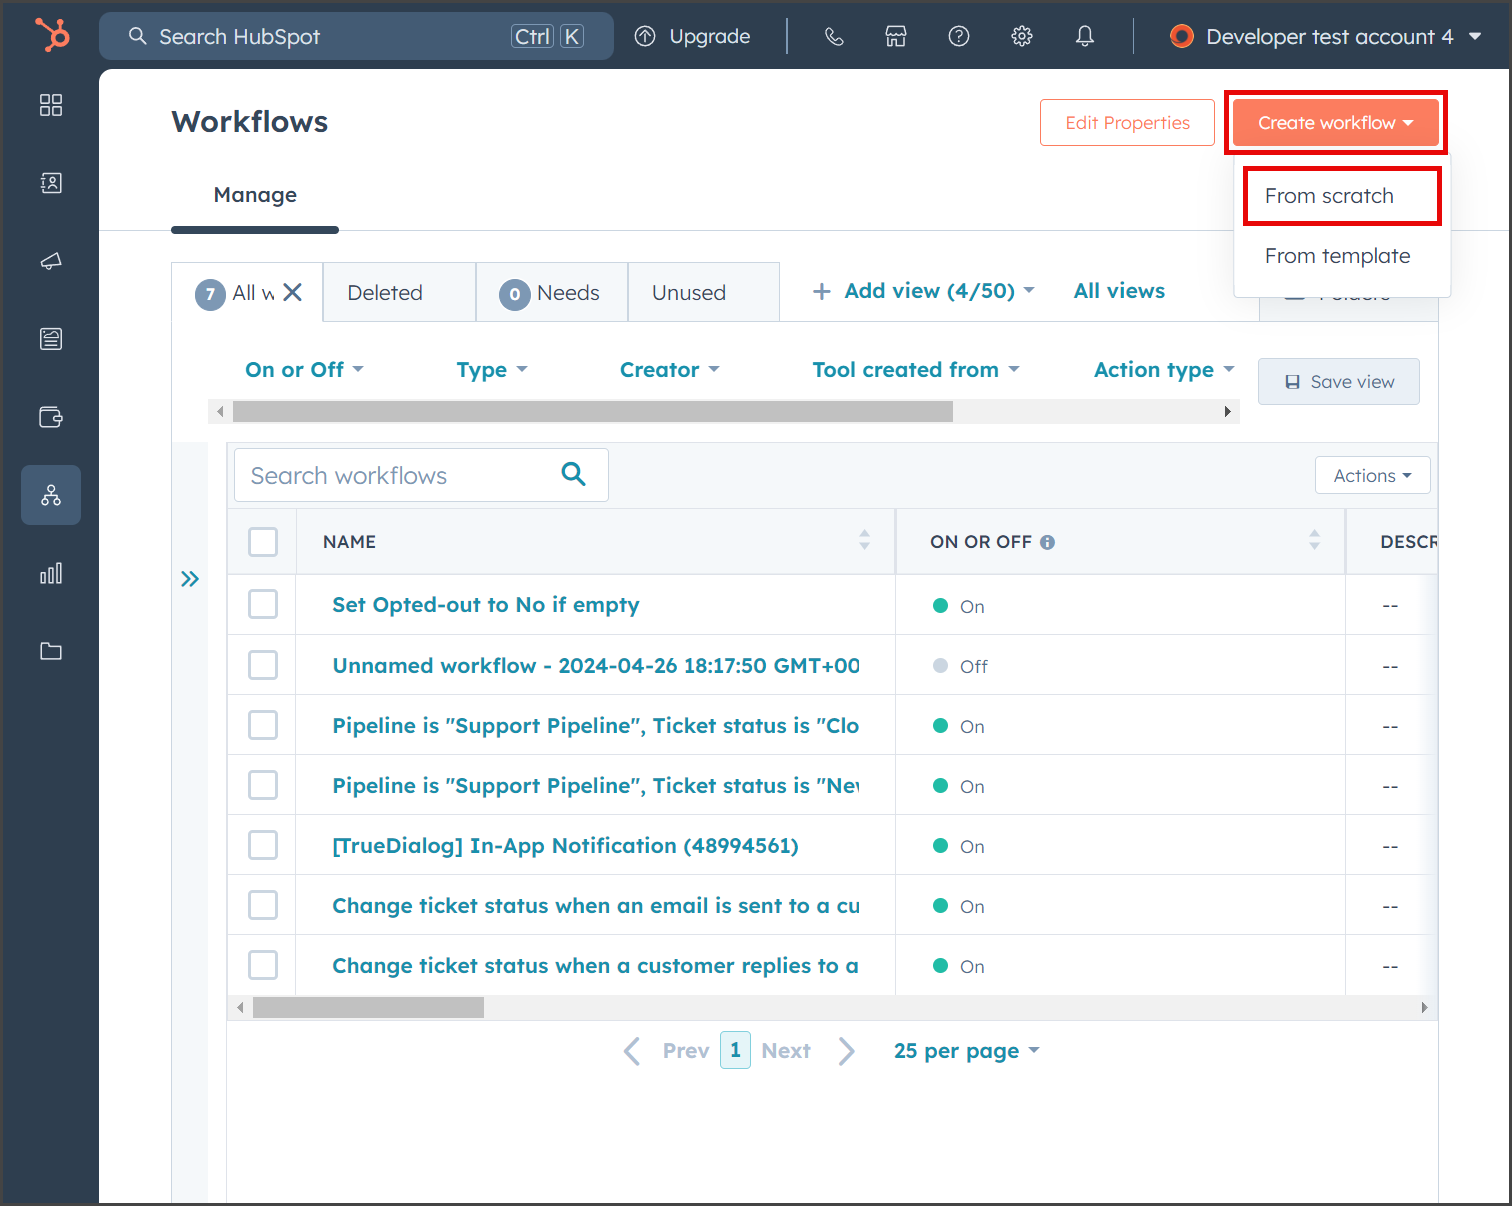
- From the left sidebar, expand Automations and click Workflows.
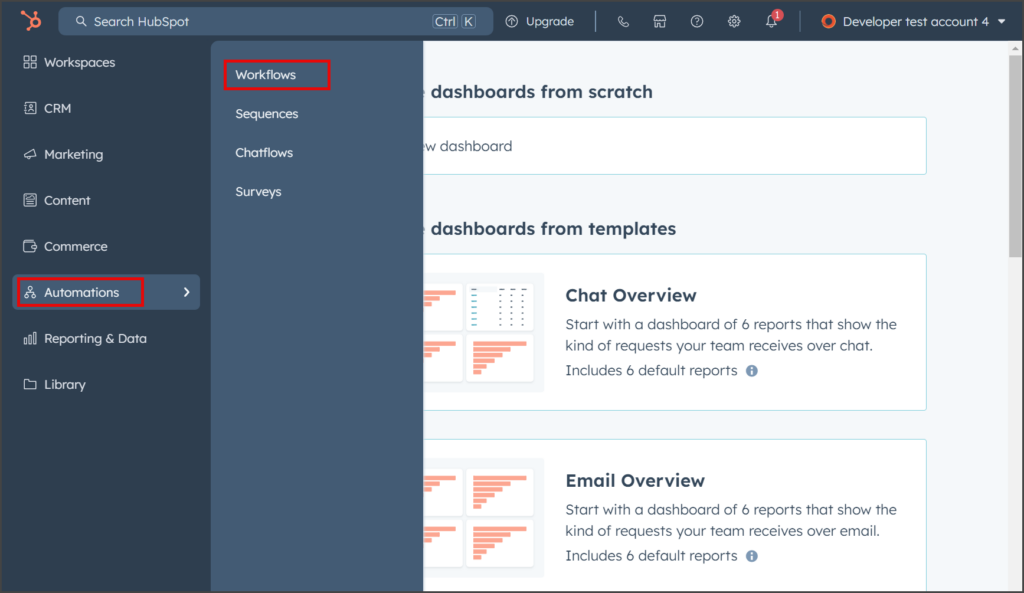
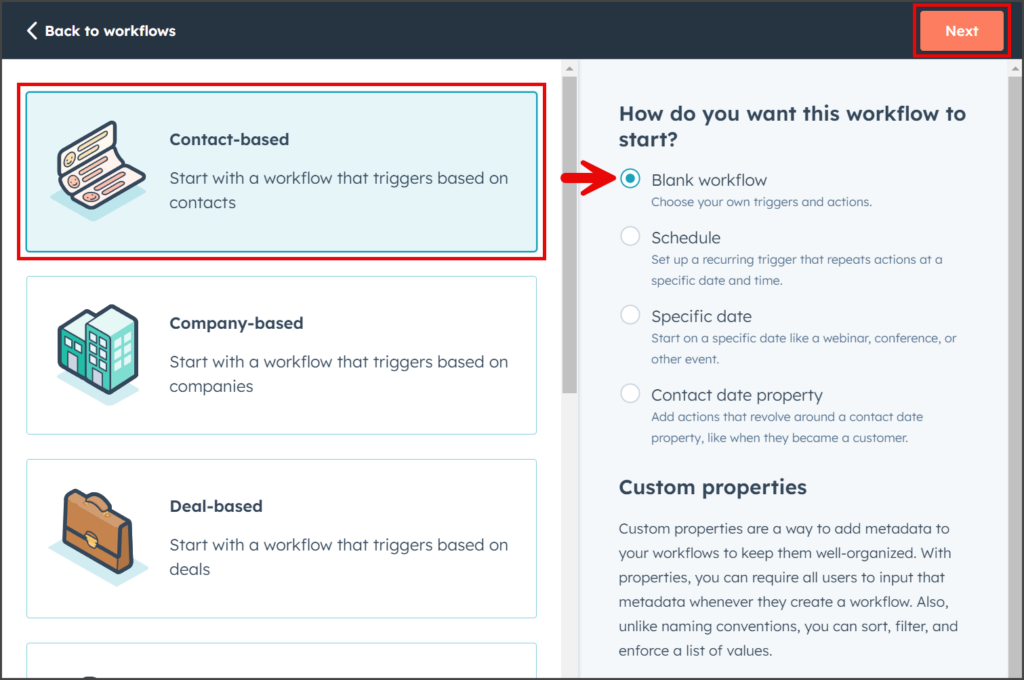
- Click Create workflow, and in the dropdown, click From scratch.

- Select Contact-based workflow.
- Choose Blank workflow.
- Click Next.
- A blank workflow will be created.

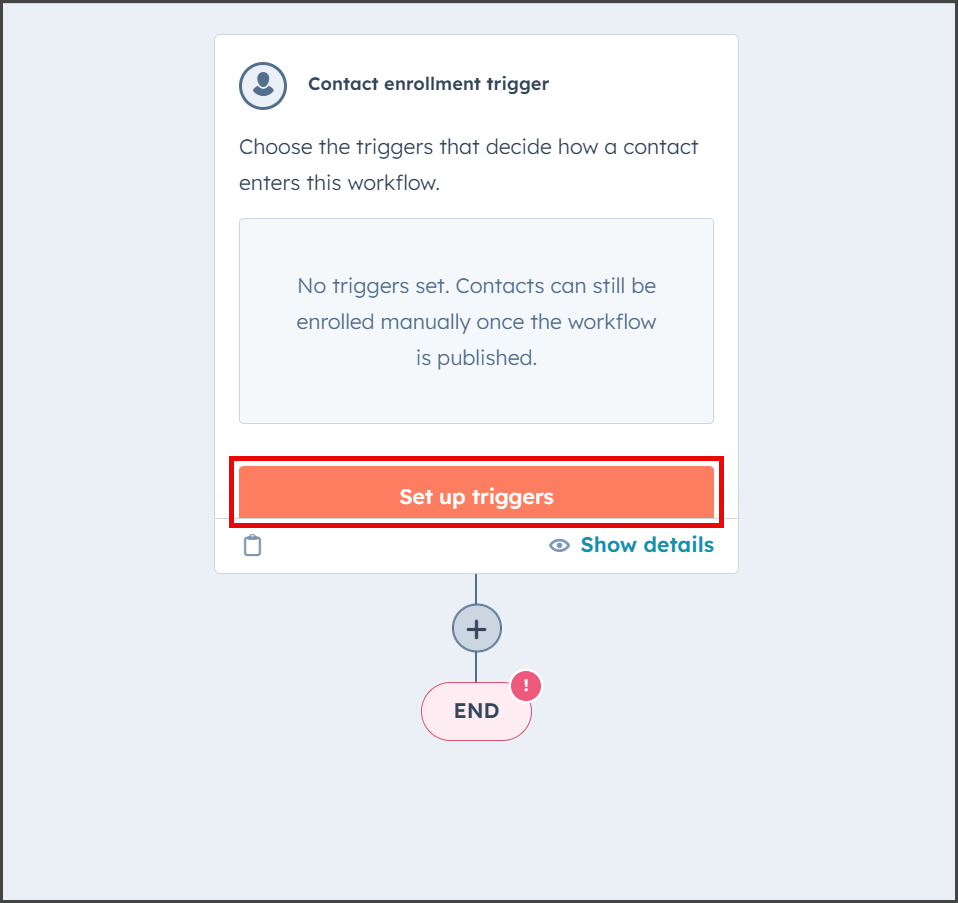
Set Trigger
While there are many ways to set an enrollment trigger in HubSpot, this article will only show you how to create a trigger that filters on a list of contacts. See HubSpot’s documentation article, Set your workflow enrollment triggers, for more details about triggers. With whatever trigger you implement, you must include a filter to check the SMS Opted-out property. While TrueDialog will check if a contact is opted out before sending the message, your workflow will execute more efficiently if you only submit contacts that are not opted out.
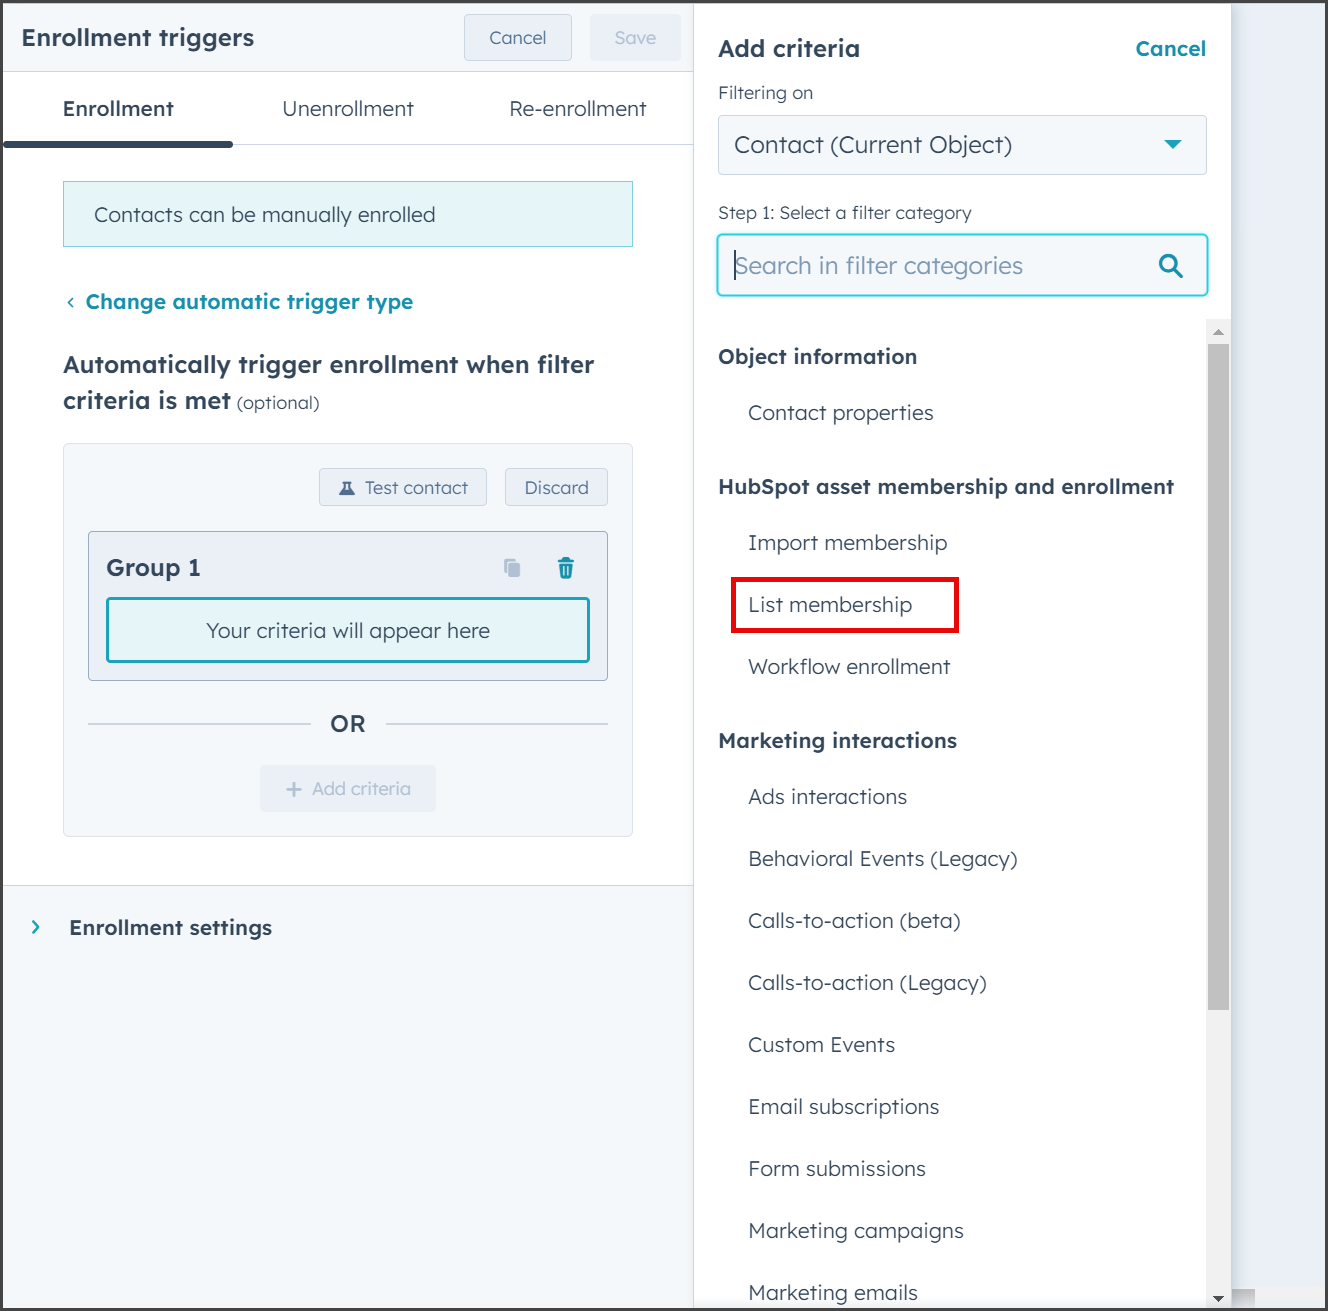
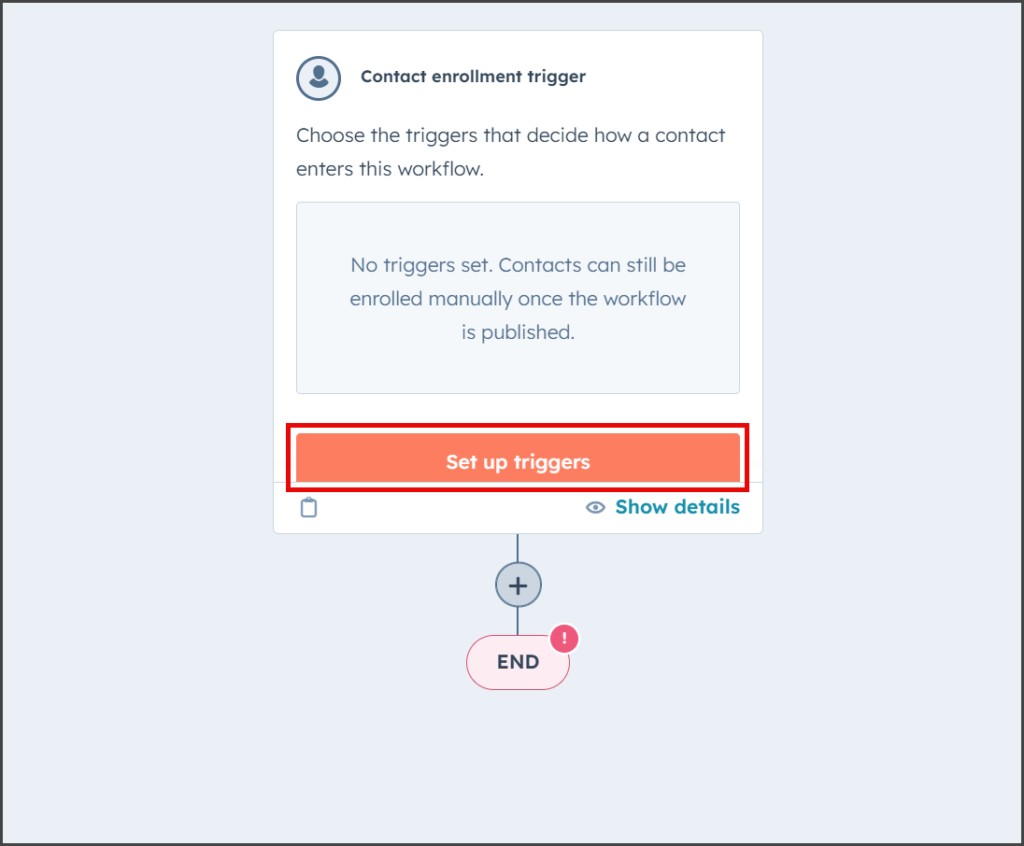
- Click Set up triggers for the Contact enrollment trigger.
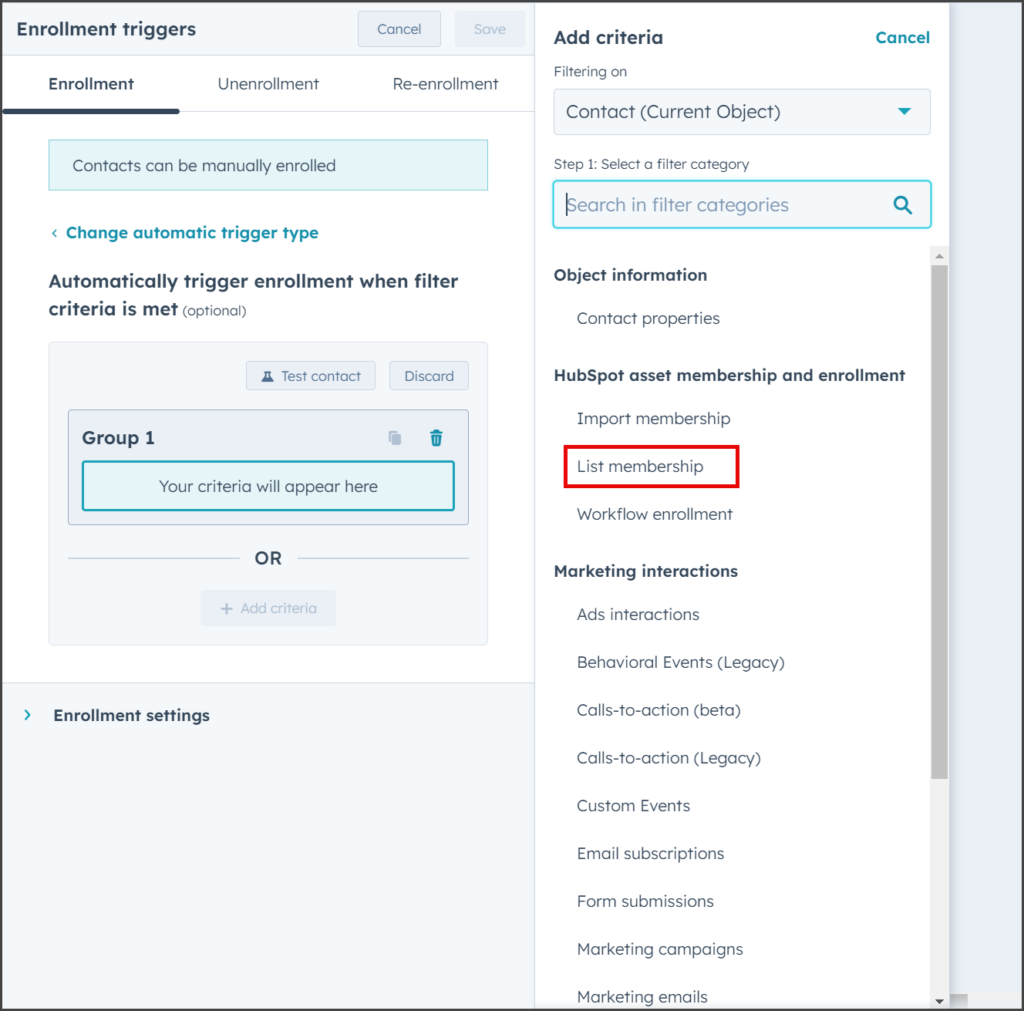
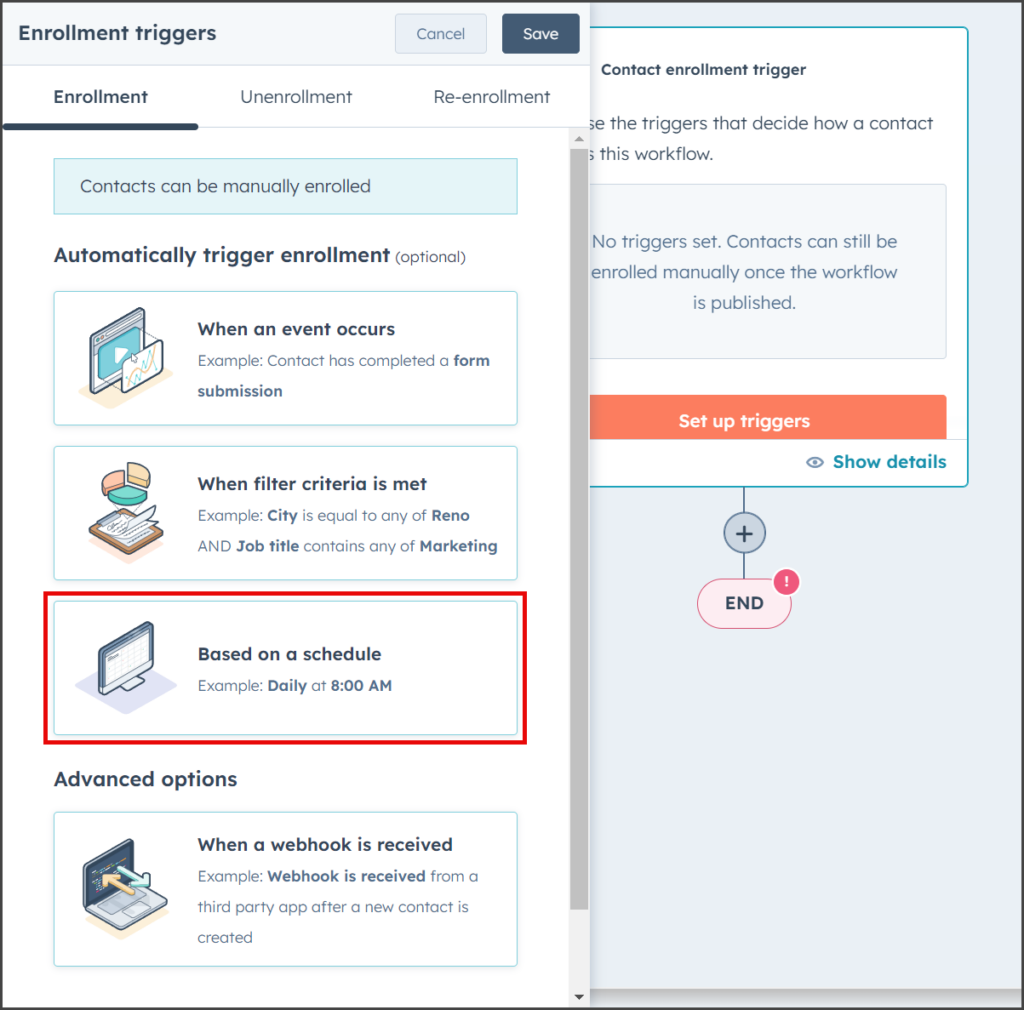
- Click When filter criteria is met.

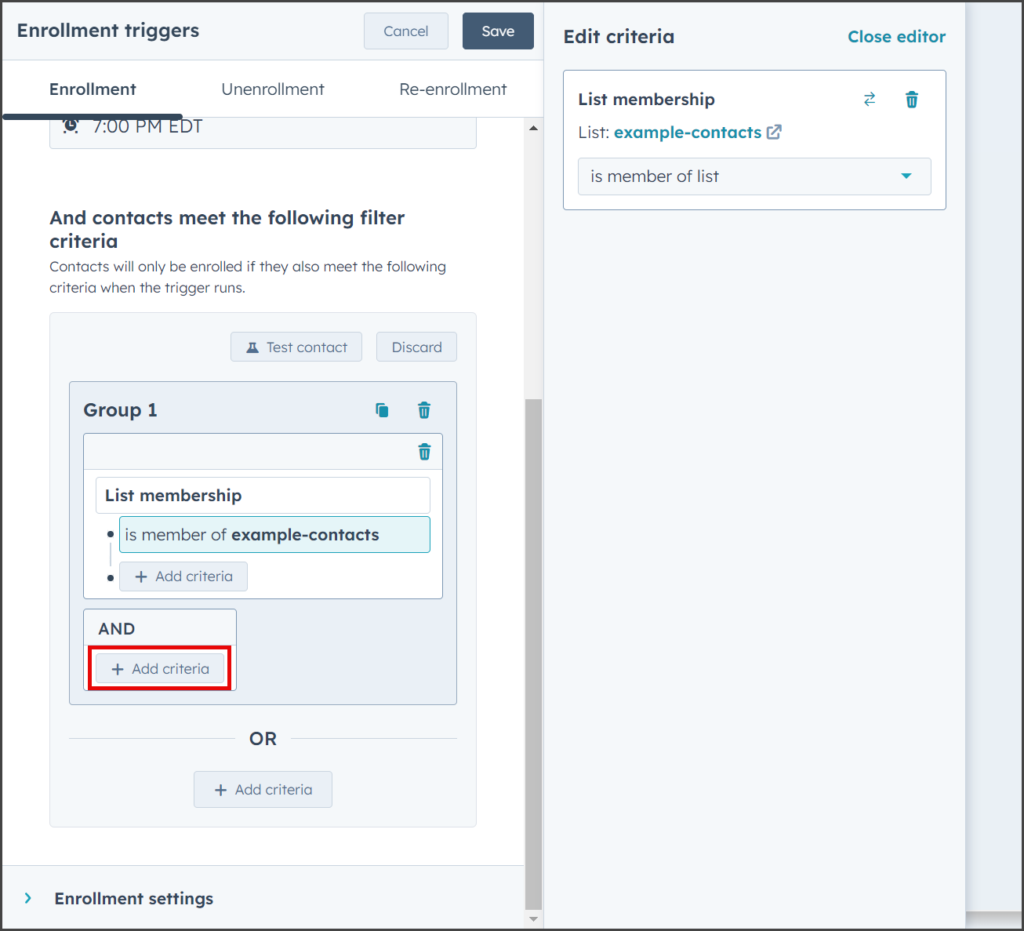
- Click List membership under the HubSpot asset membership and enrollment section.
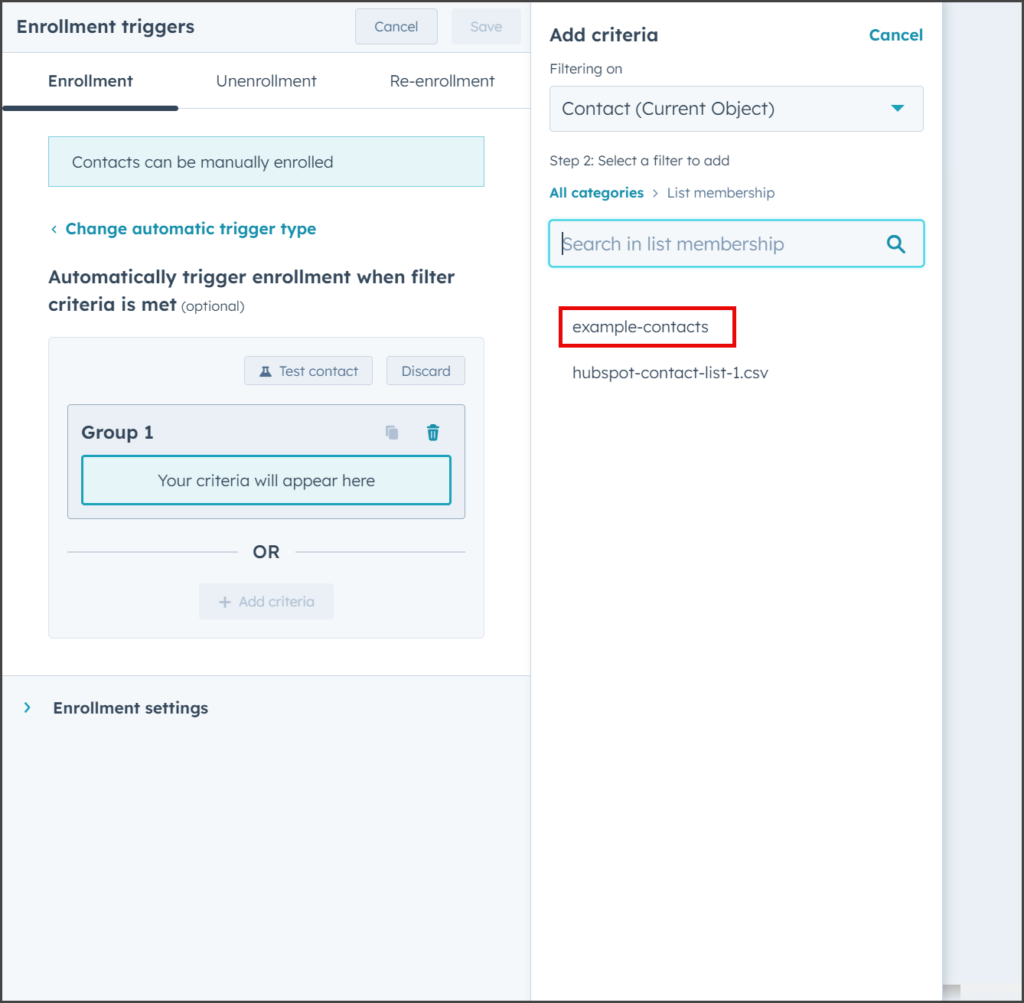
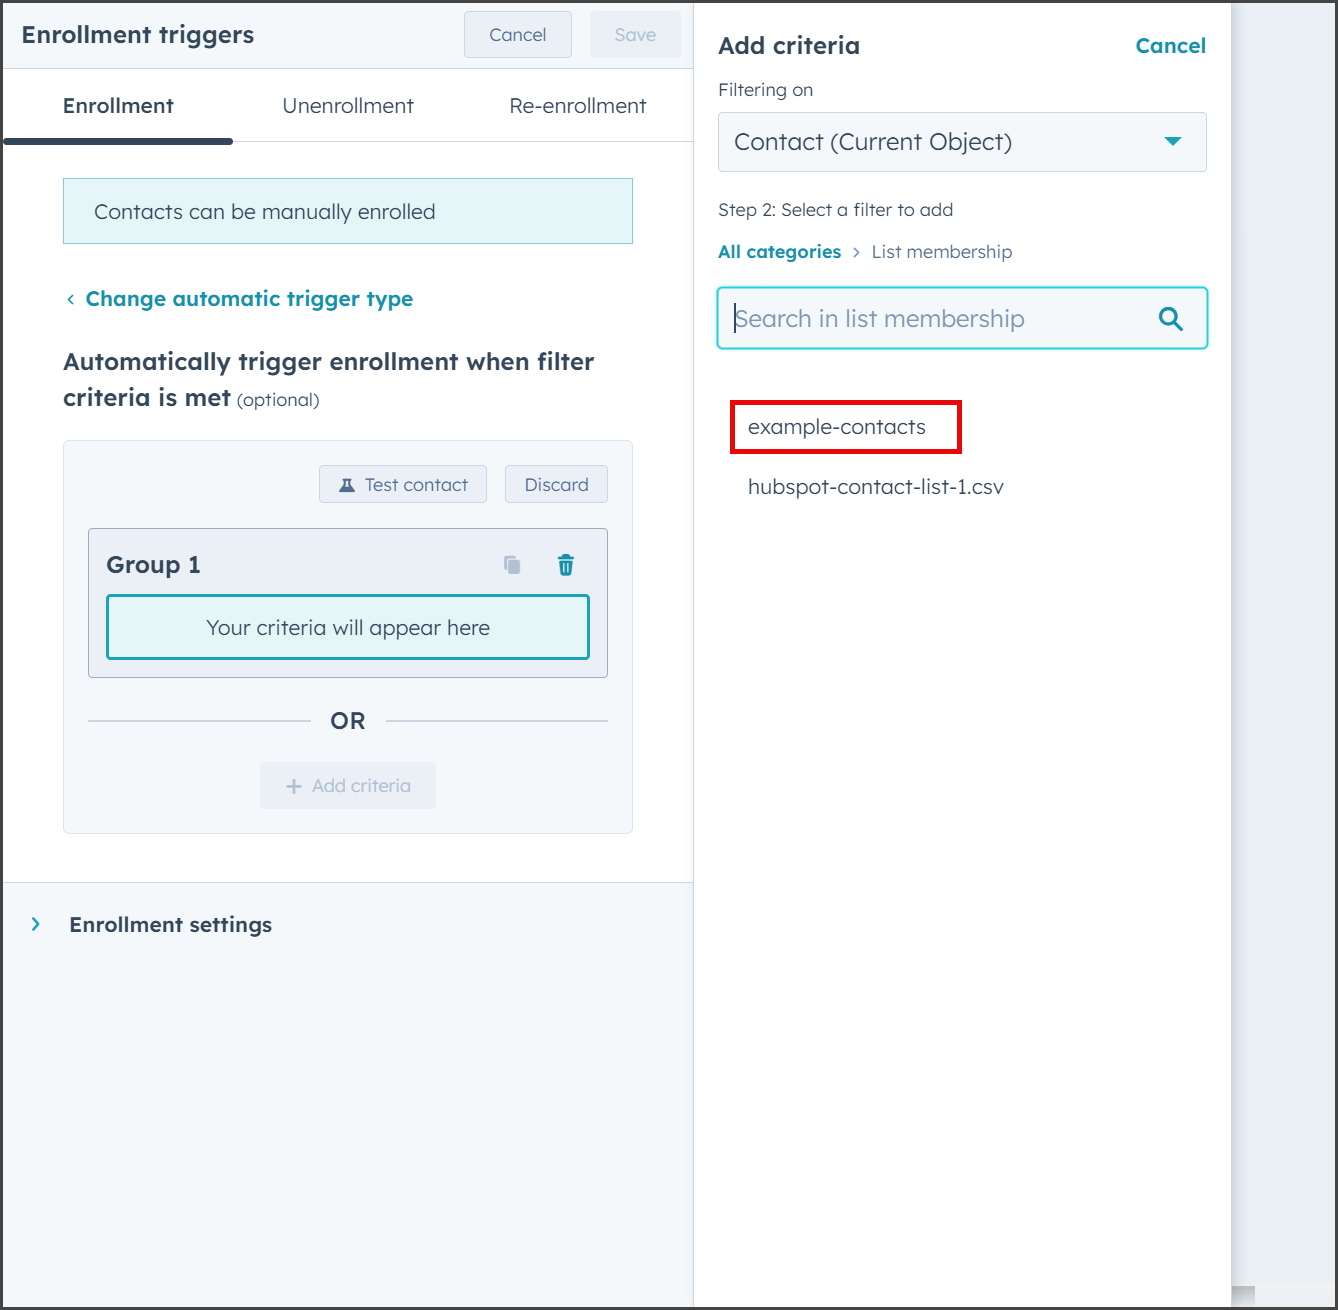
- Select the list of contacts for which you want to receive the SMS message. This example uses the example-contacts list.
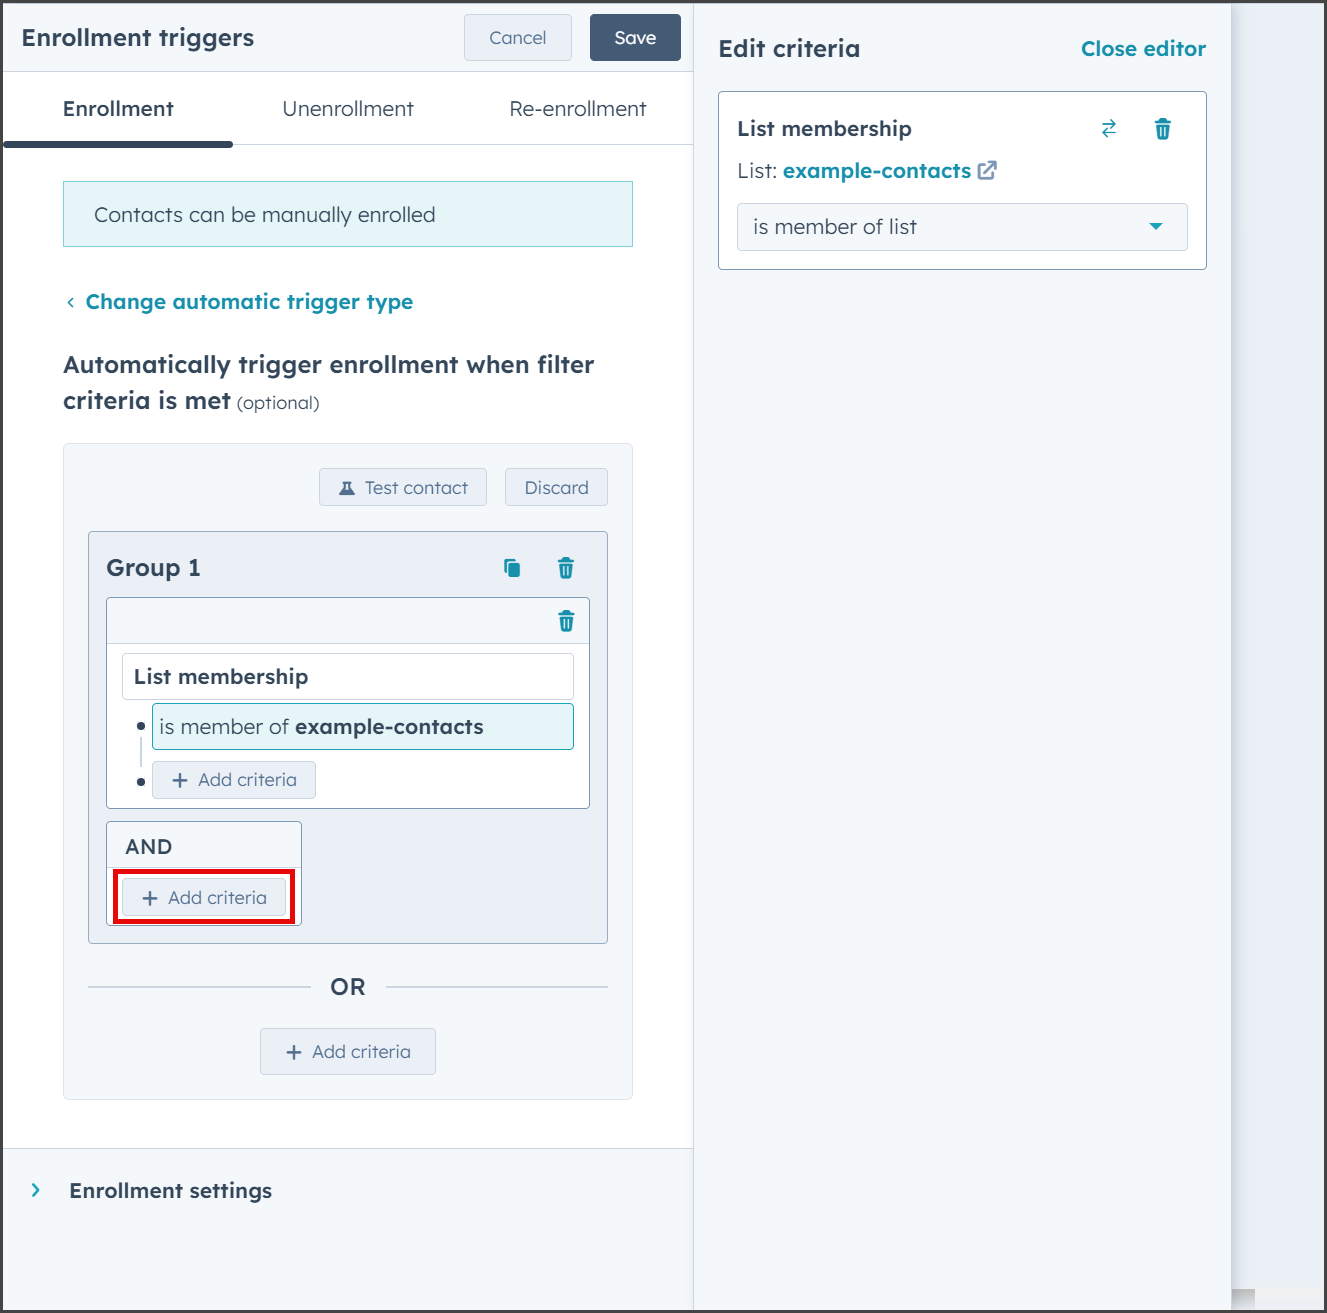
- Click Add criteria in the AND box.
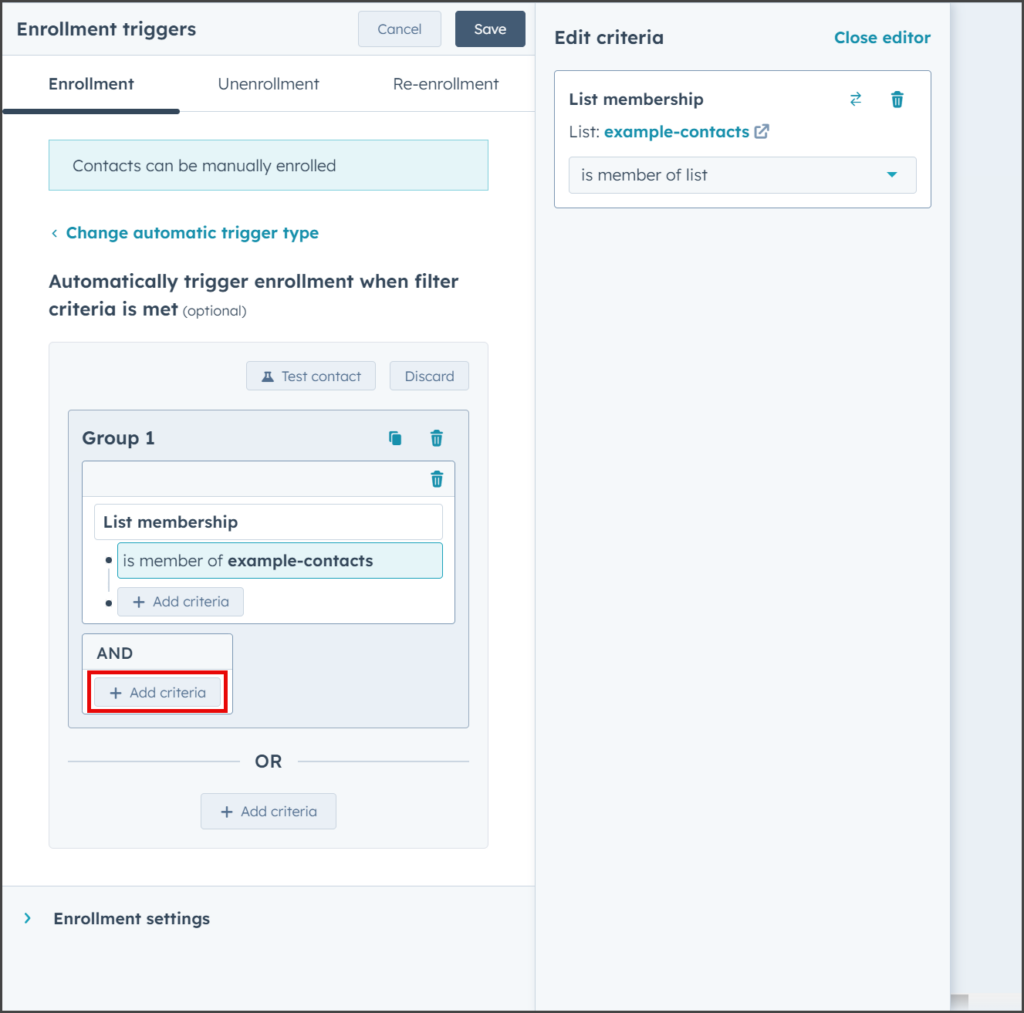
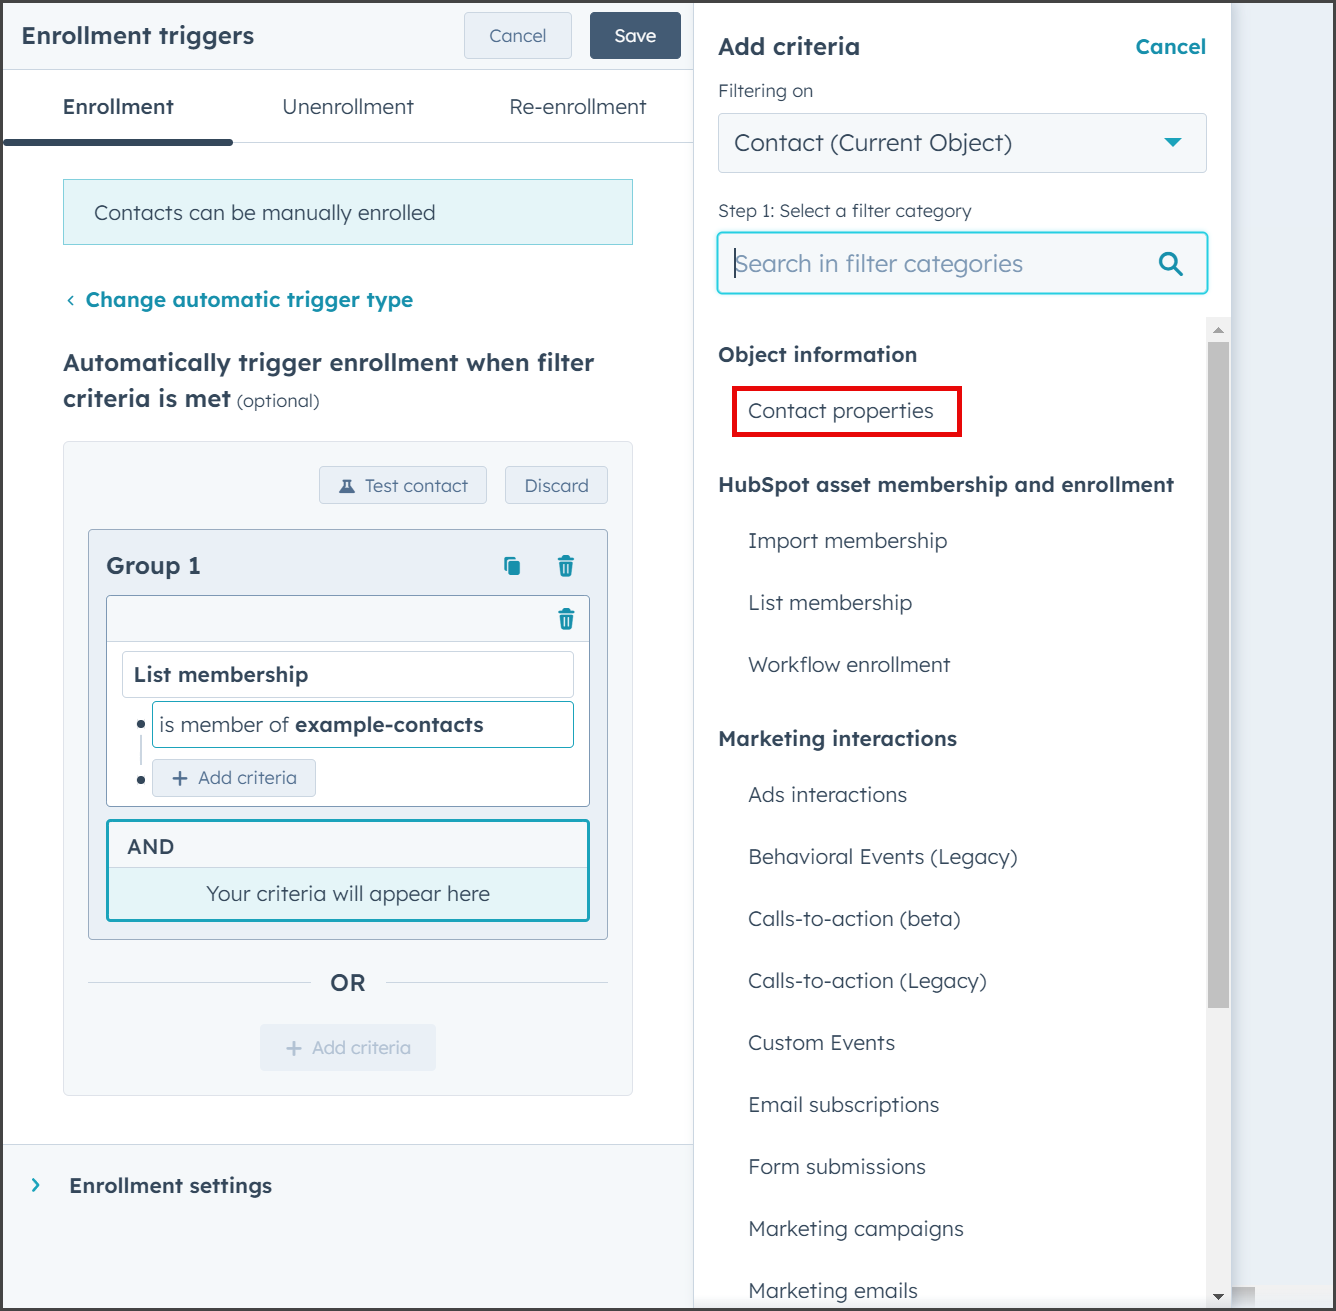
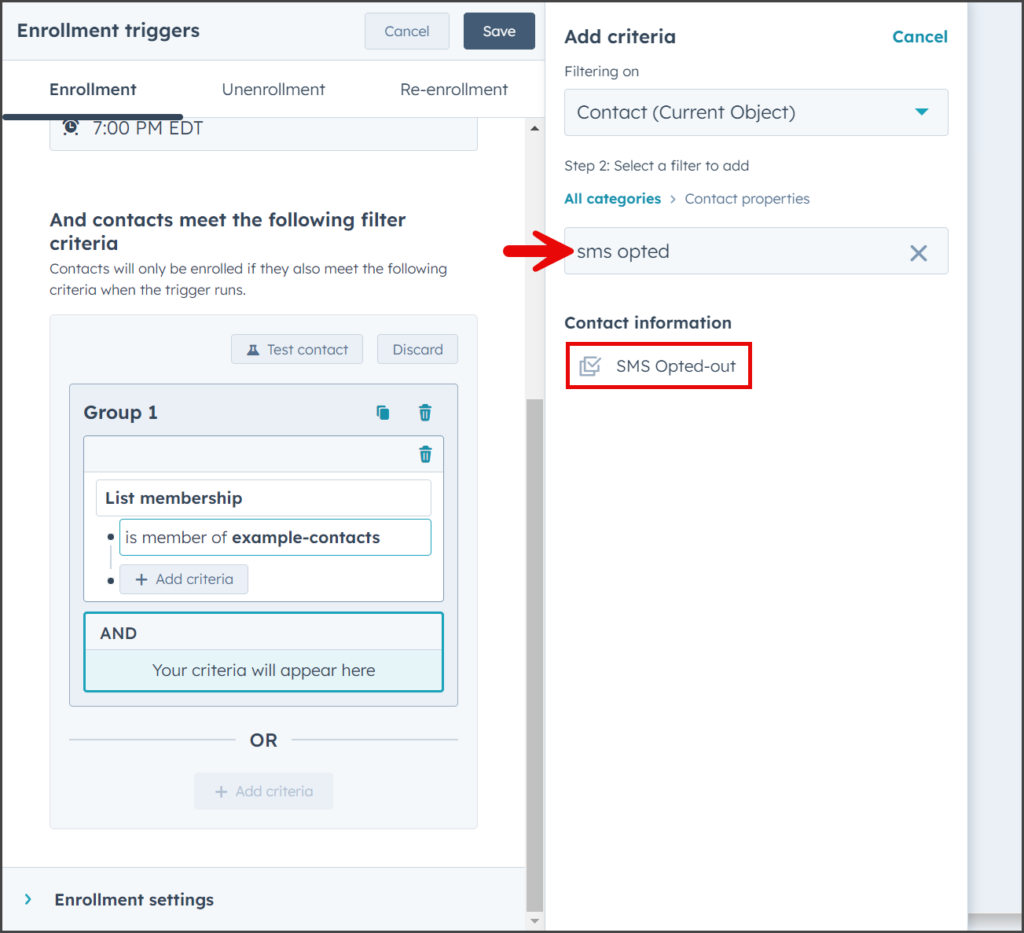
- Click Contact properties under the Object information section.
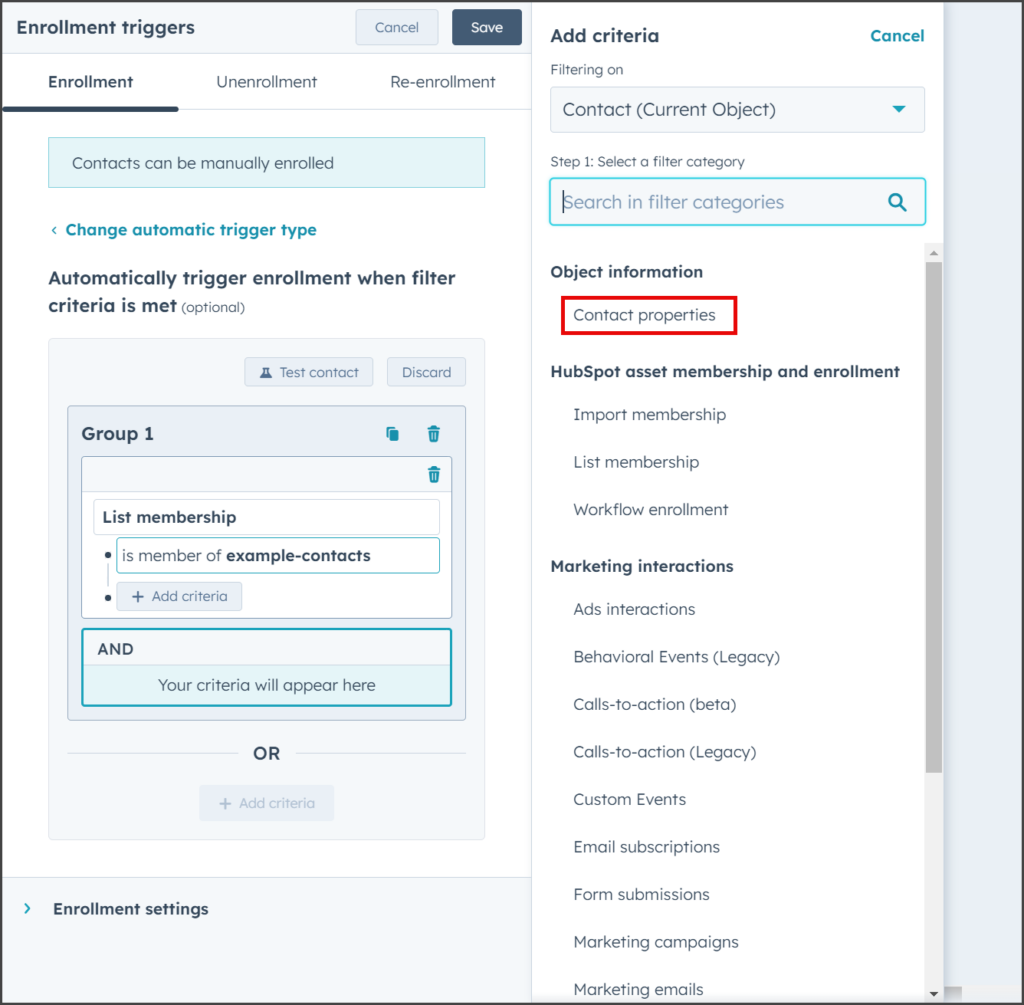
- Enter SMS opted in the search box.
- Click SMS Opted-out.

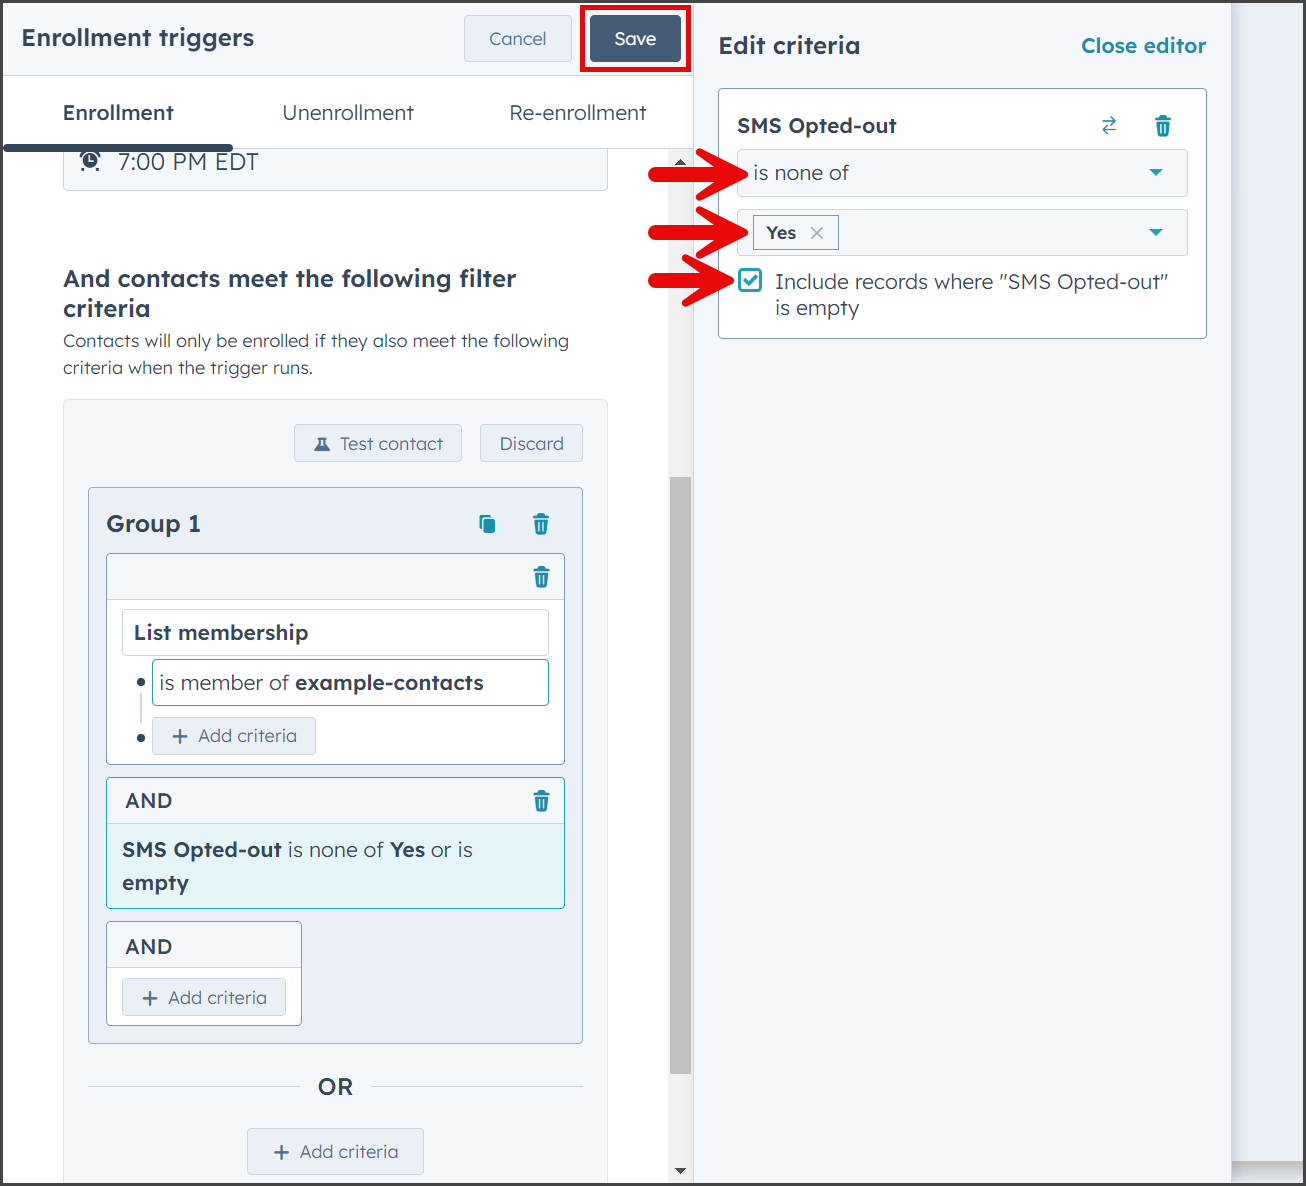
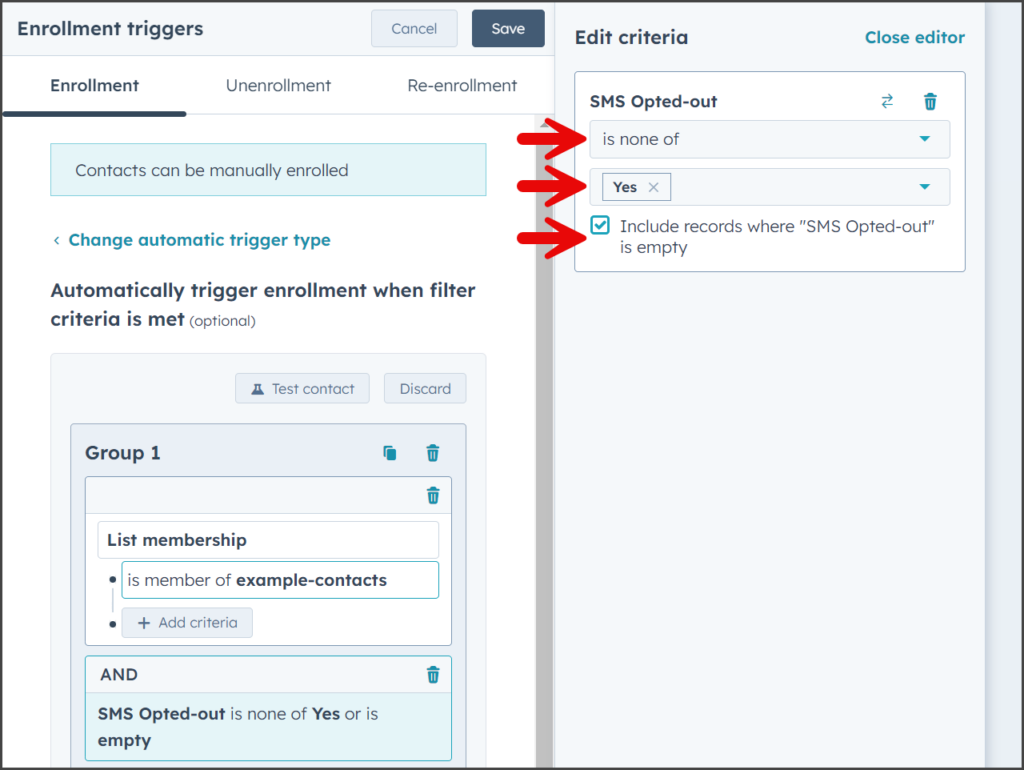
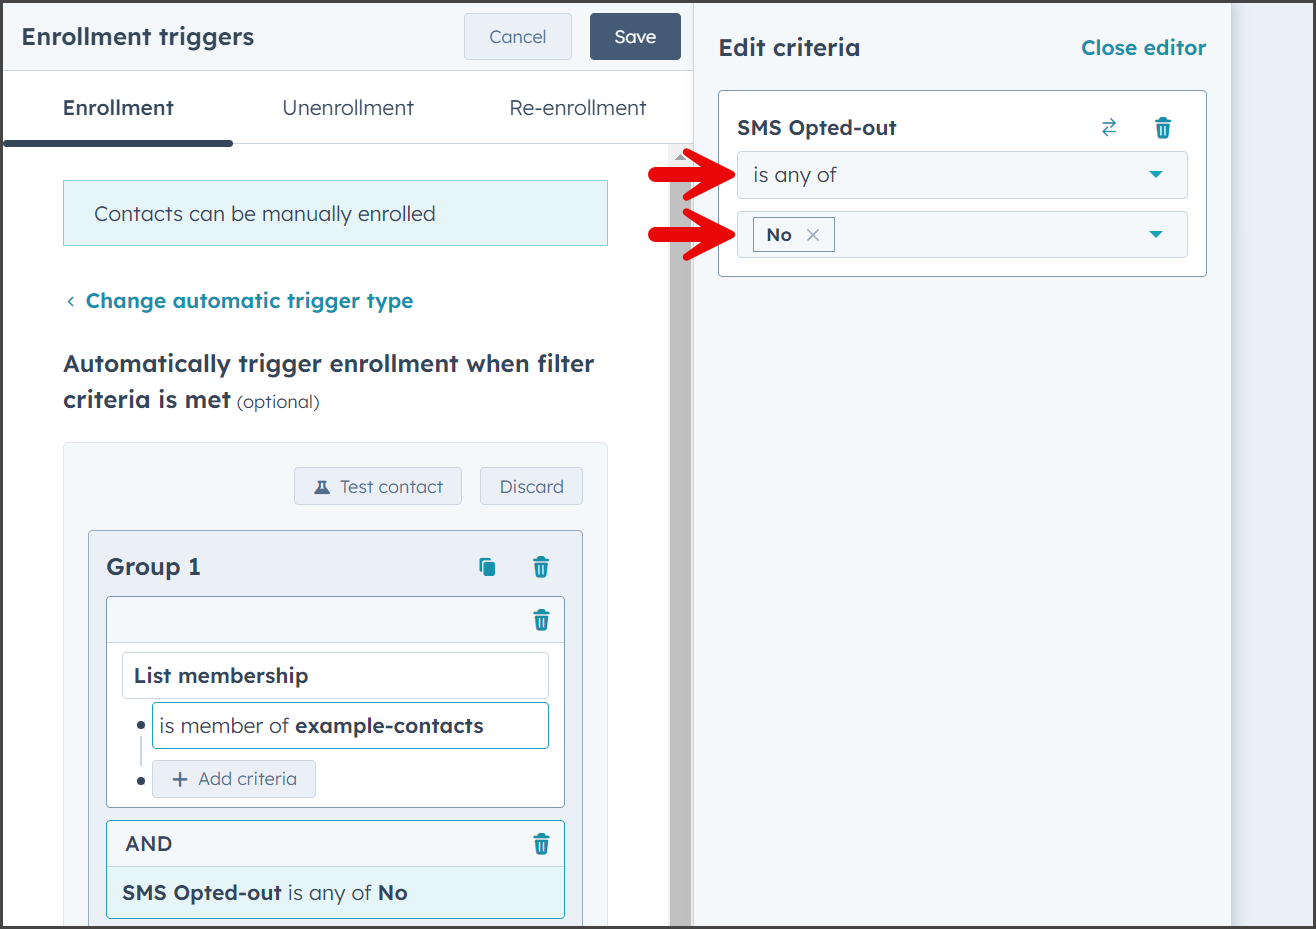
- There are two ways to filter out contacts that are opted out.
- Include only contacts that have SMS Opted-out set to No. (This excludes contacts with SMS Opted-out set to Yes or empty.)
- Click the first dropdown and select is any of.
- Click the second dropdown and select No.

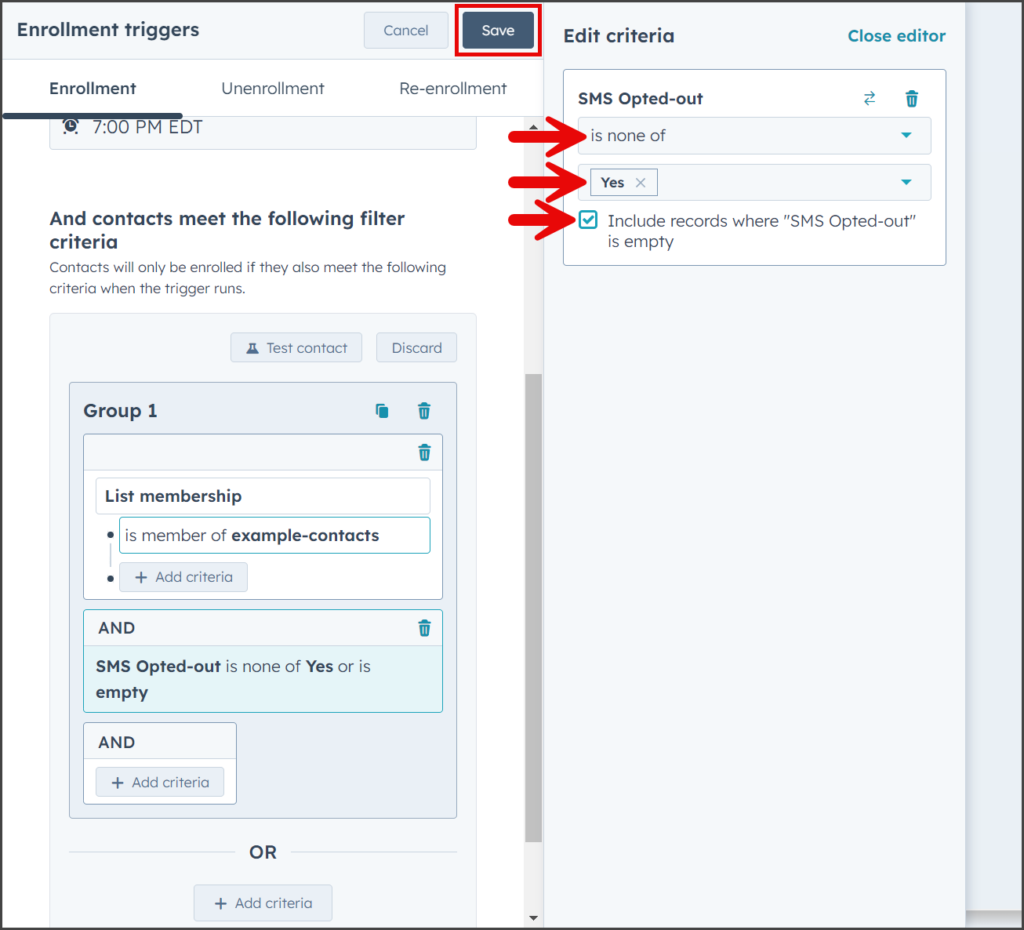
- Include contacts that have SMS Opted-out set to No or empty. (This excludes contacts with SMS Opted-out set to Yes.)
- Click the first dropdown and select is none of.
- Click the second dropdown and select Yes.
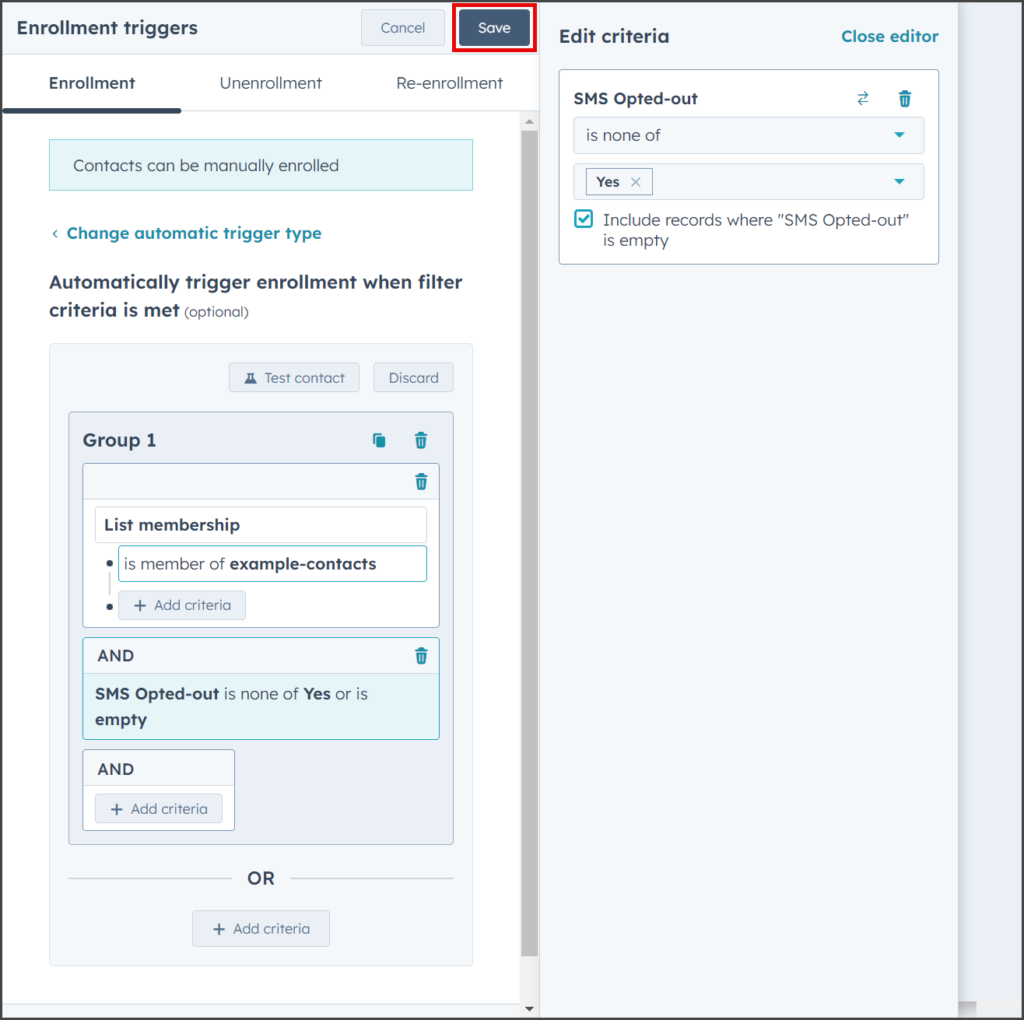
- Check Include records where “SMS Opted-out” is empty.
- Include only contacts that have SMS Opted-out set to No. (This excludes contacts with SMS Opted-out set to Yes or empty.)
- Click Save.


Set Action
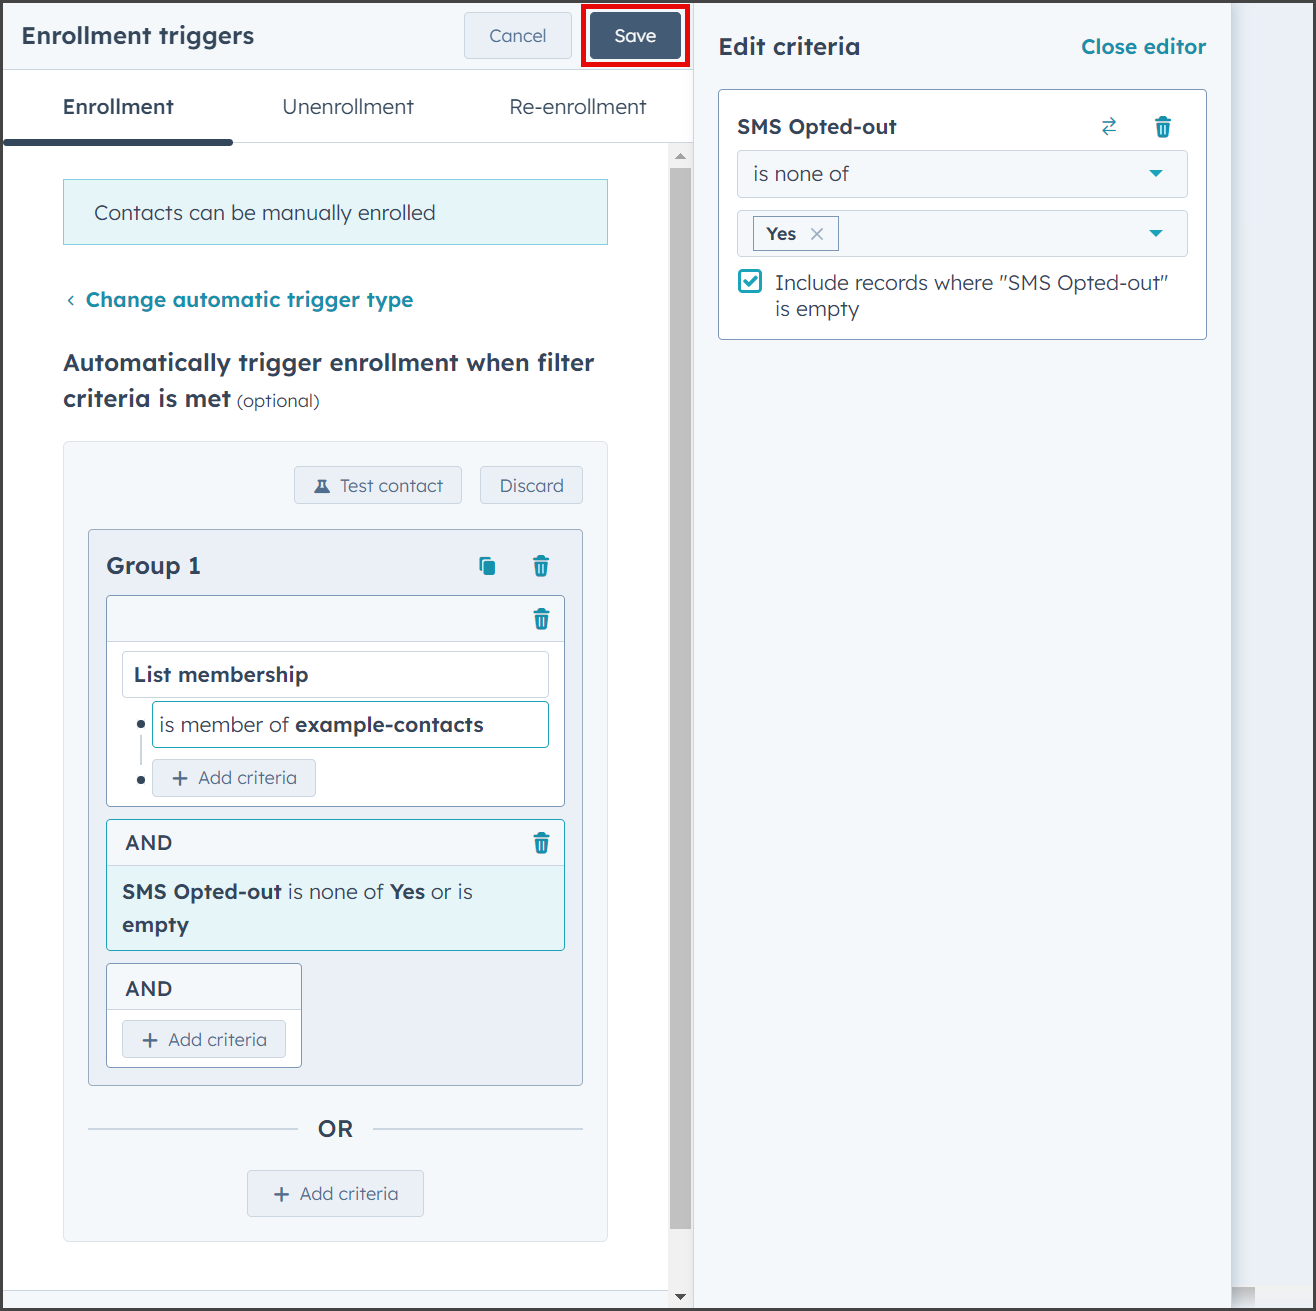
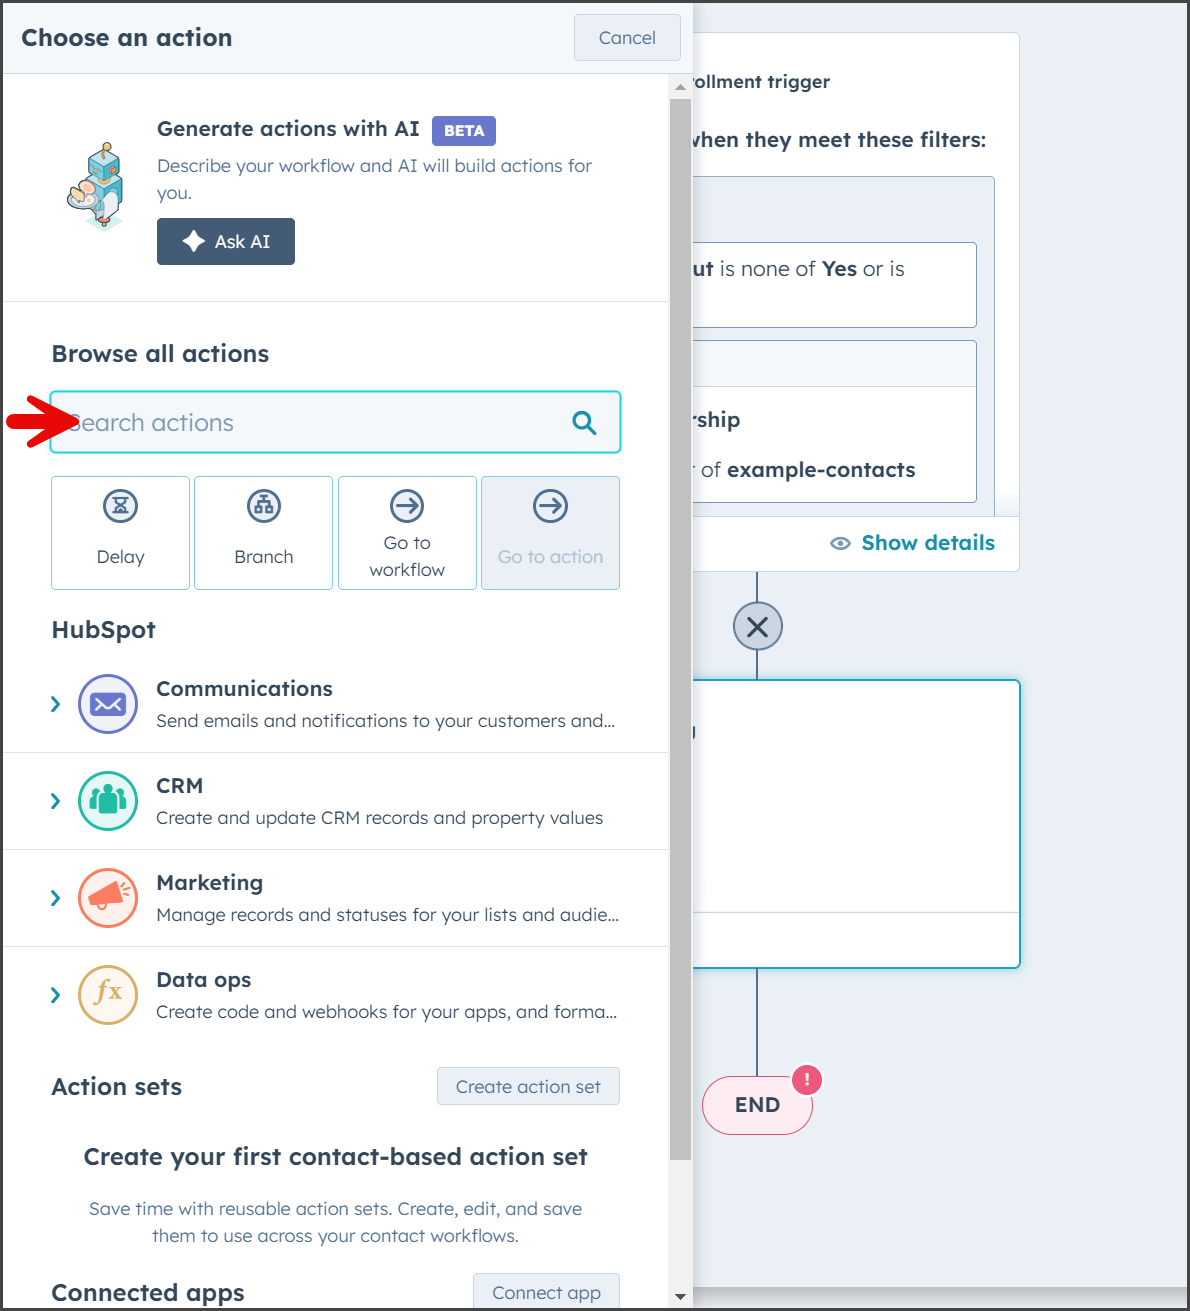
- Click the Plus icon below the Contact enrollment trigger.
- Enter send mass in the search box on the Choose an action sidebar.

- Click [TrueDialog] Send Mass SMS under the TrueDialog section.
![Click [TrueDialog] Send Mass SMS](https://wiki.truedialog.com/wp-content/uploads/2024/07/HubSpot-SendingMassSMSFromWorkflow-Action3-899x1024.png)
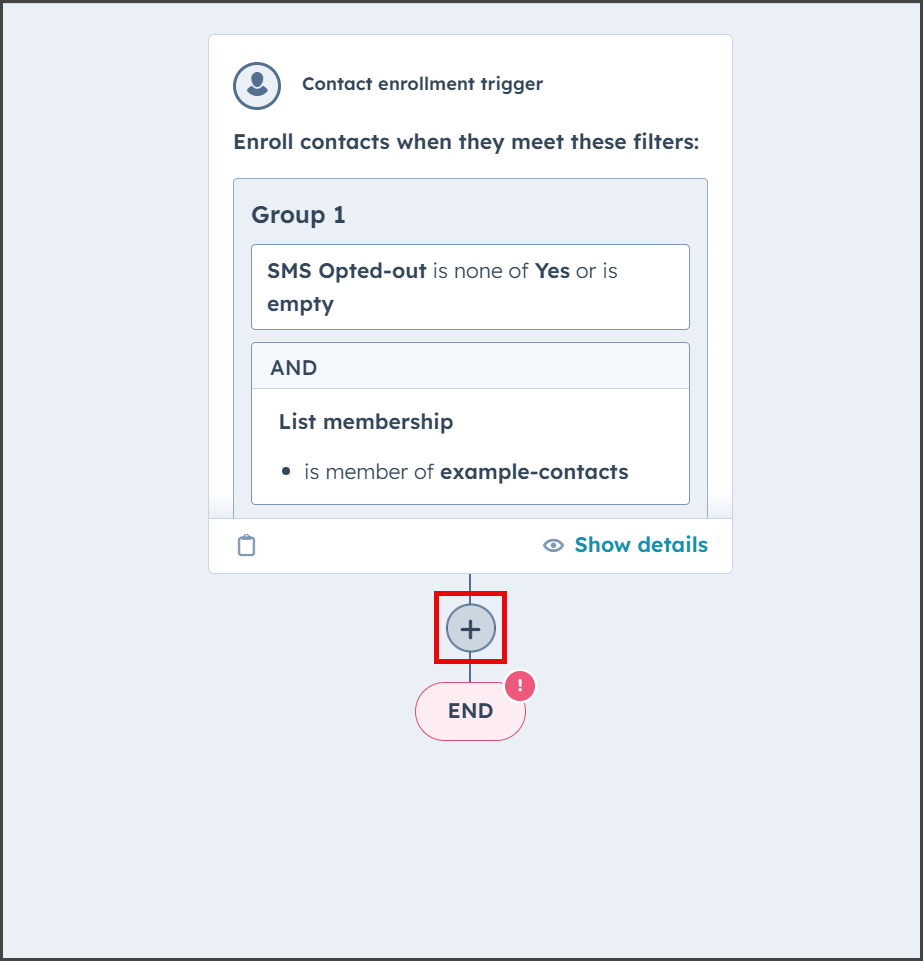
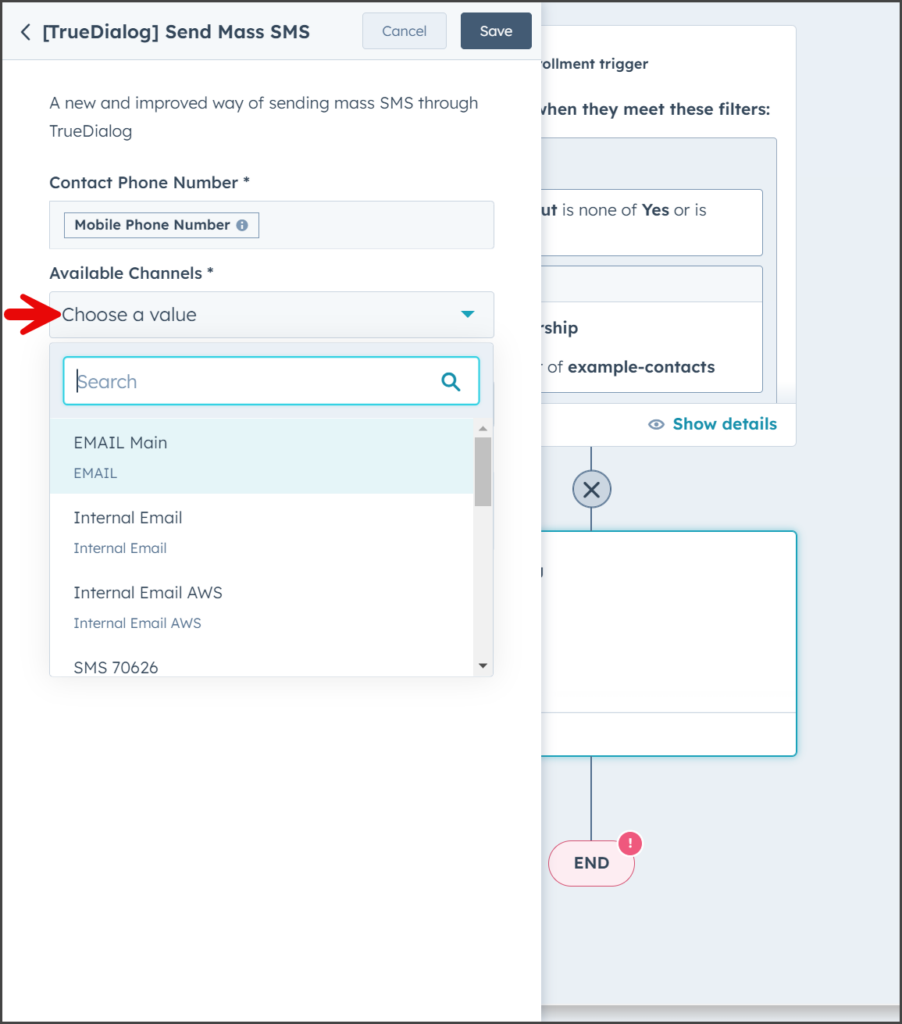
- Click the Contact Phone Number textbox to expand the Insert data panel.
- Enter mobile in the search box.
- Click Mobile Phone Number to add the property to the Contact Phone Number textbox.
- Click the Available Channels dropdown to display the list of your TrueDialog channels.
- Select the channel from which the message will be sent.
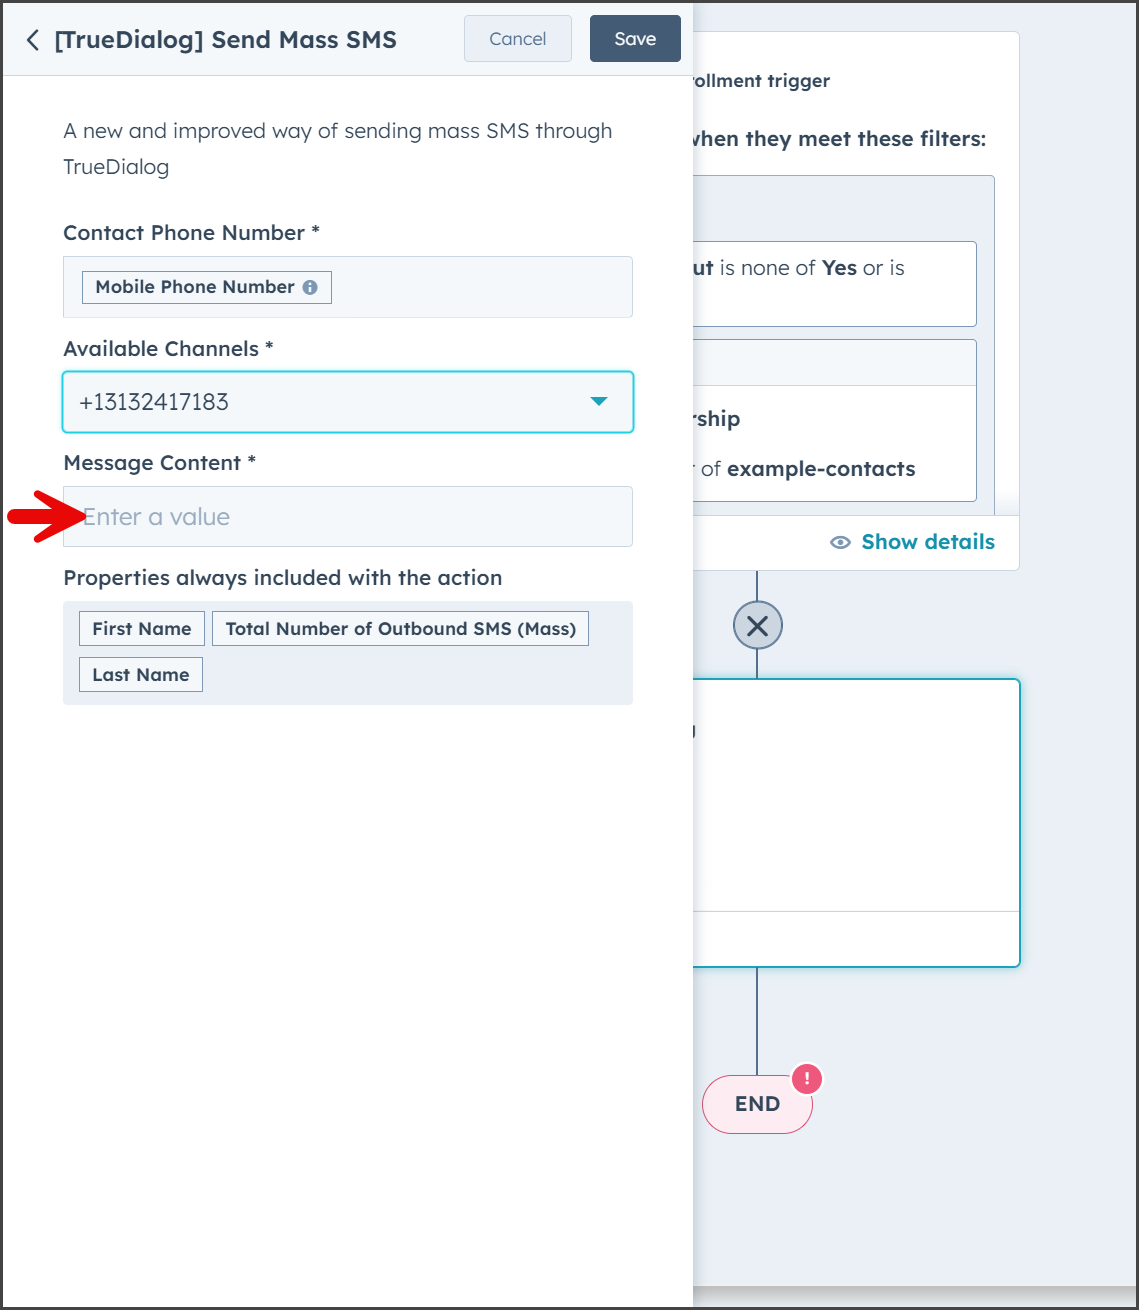
- Enter the text message to send to your contacts in the Message Content textbox.

- (Optional) Dynamic content can be added to the message using the Insert data panel to select the property. For example, you can add the contact’s first name to the message.
- Enter first name in the search box.
- Click First Name under the Text properties section.
- The First Name property will be inserted into the Message Content textbox at the cursor’s location.

- Click Save.

![Click [TrueDialog] Send Mass SMS](https://wiki.truedialog.com/wp-content/uploads/2024/07/HubSpot-SendingMassSMSFromWorkflow-Action3.png)


Review and Turn On Workflow
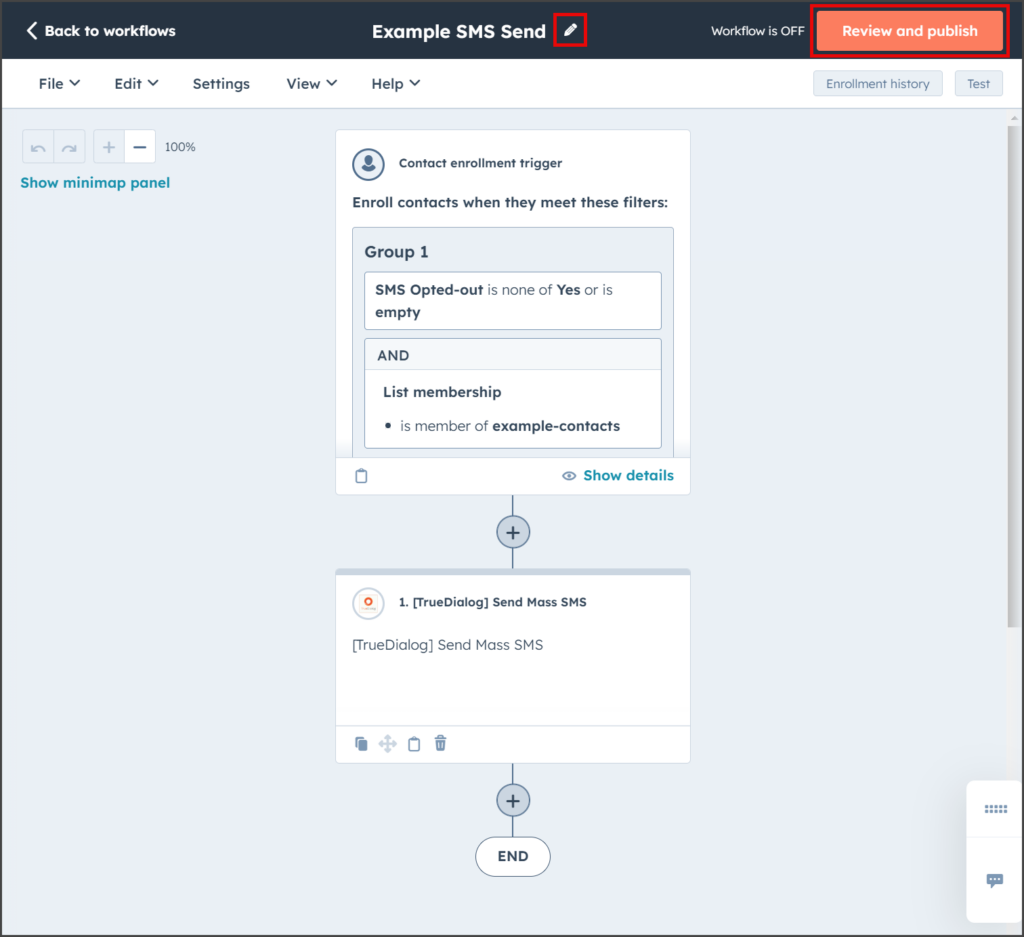
- Review the workflow and verify that the following conditions are set:
- Trigger if SMS Opted-out is not Yes AND is in the example-contacts list.
- Send Mass SMS with TrueDialog.
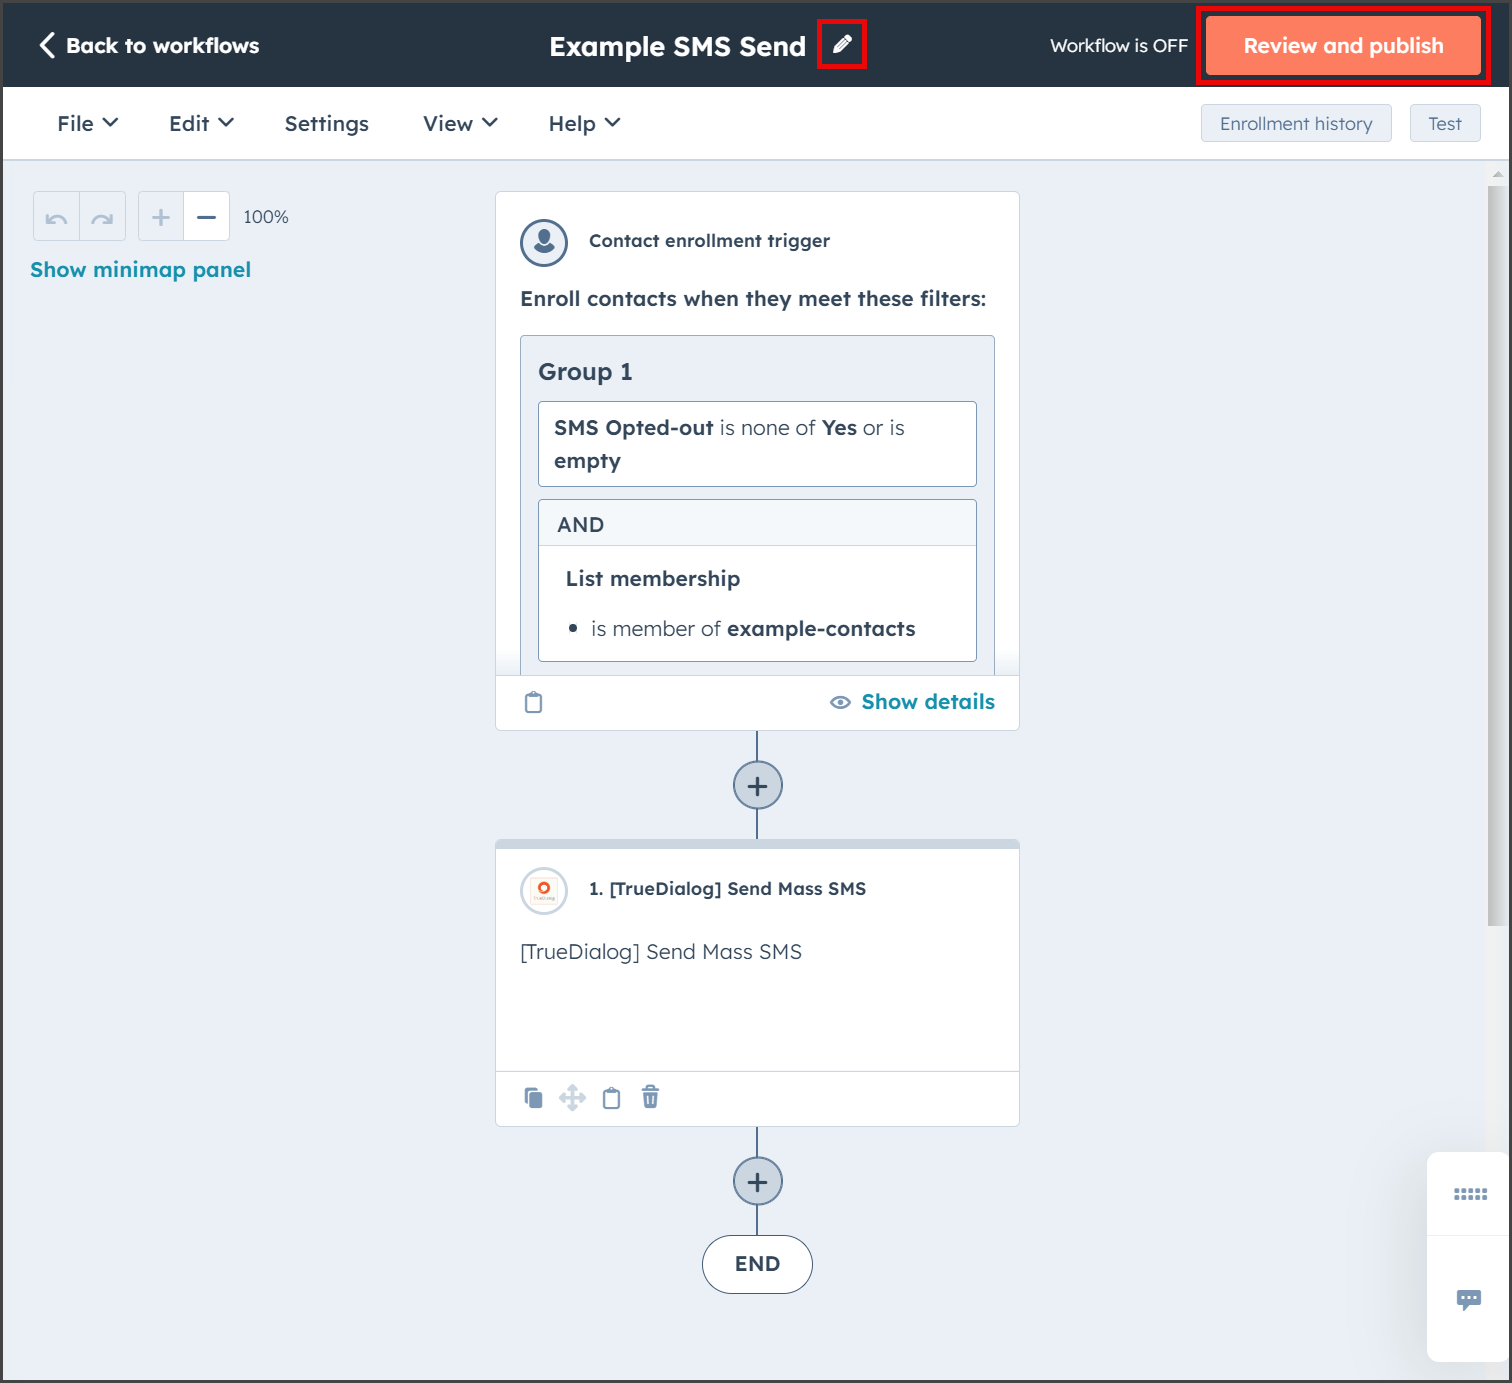
- Click the Pencil icon to set the name of the workflow.
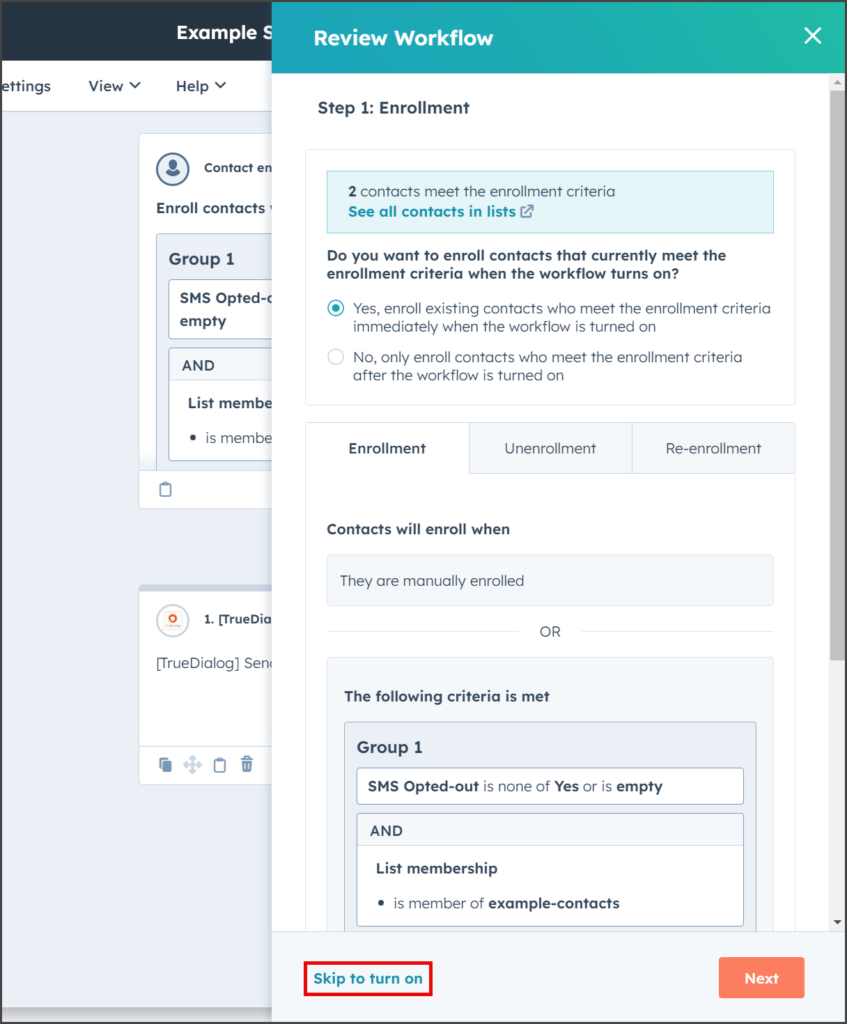
- Click Review and publish.
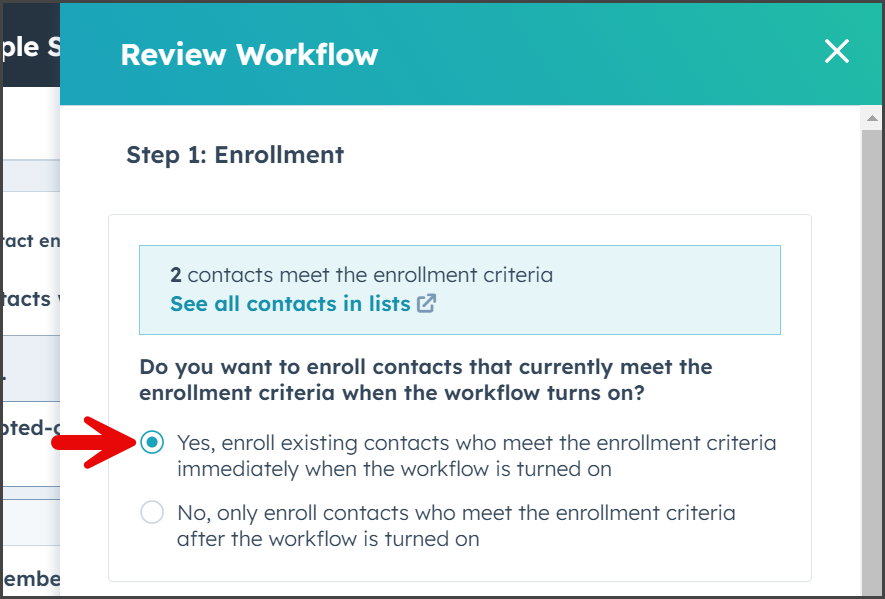
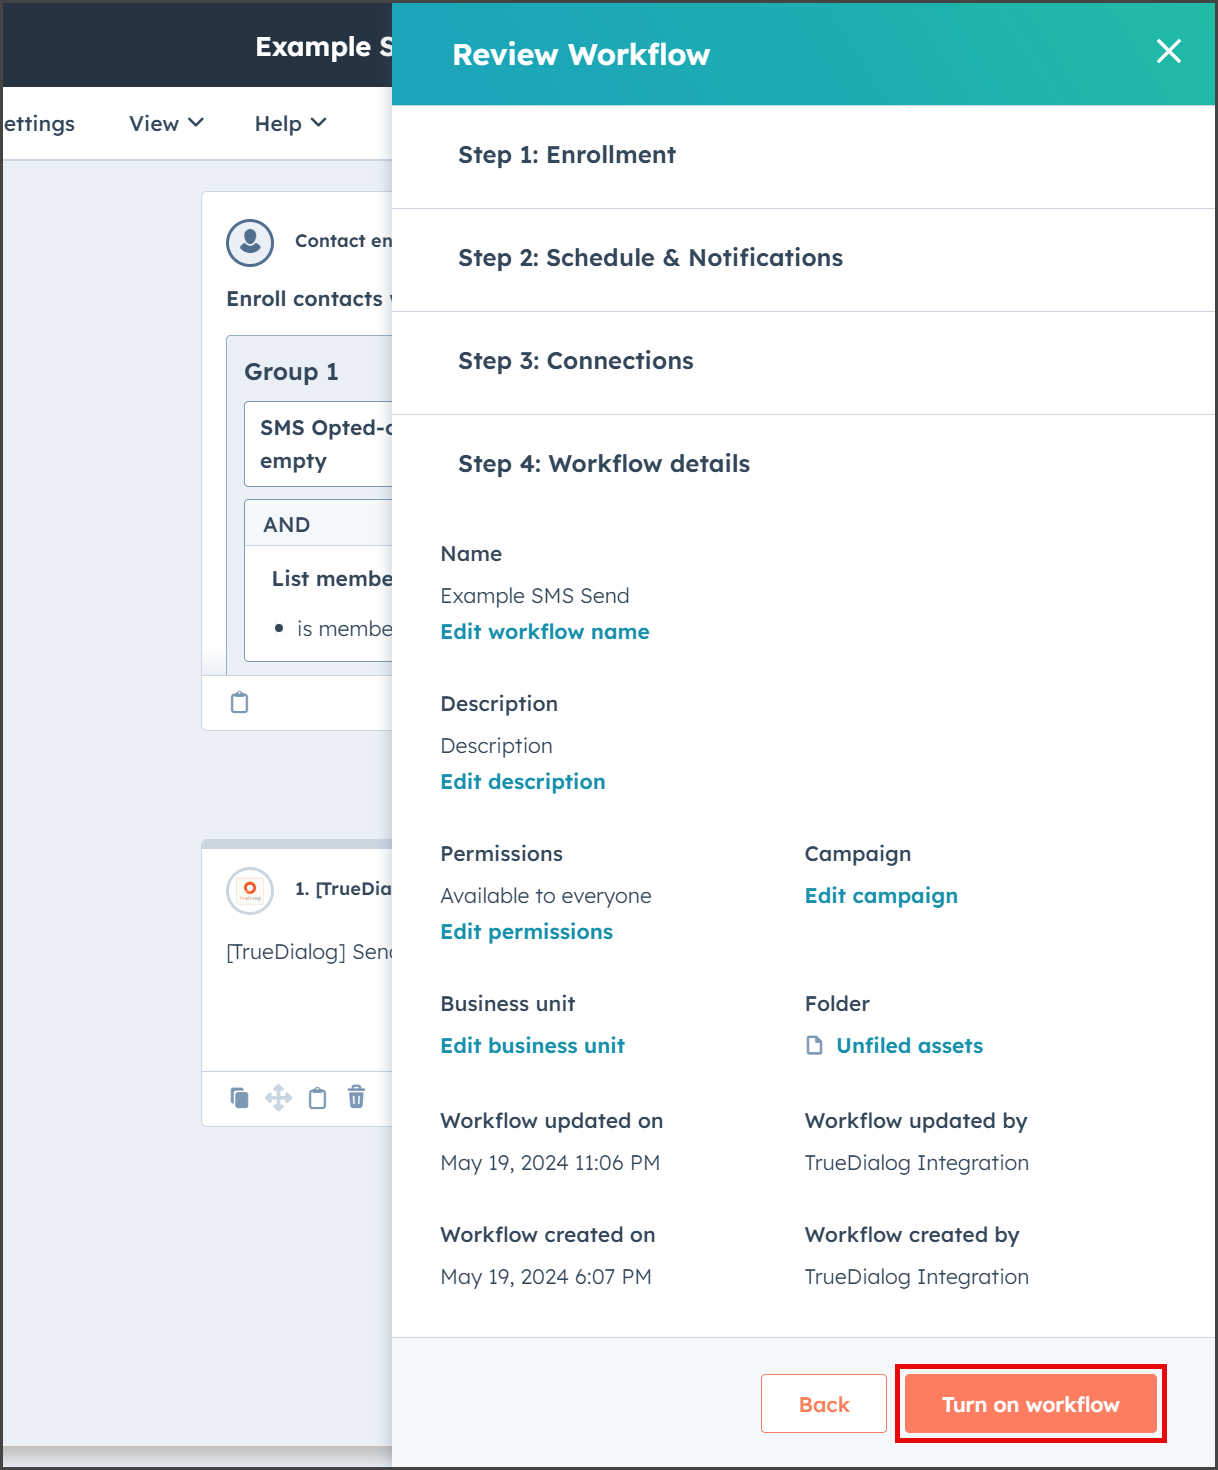
- For the Enrollment section, select Yes to start the workflow with the current contacts as soon as Turn on workflow is clicked.
- Click Skip to turn on. The rest of the review steps are optional for this workflow and can be skipped.
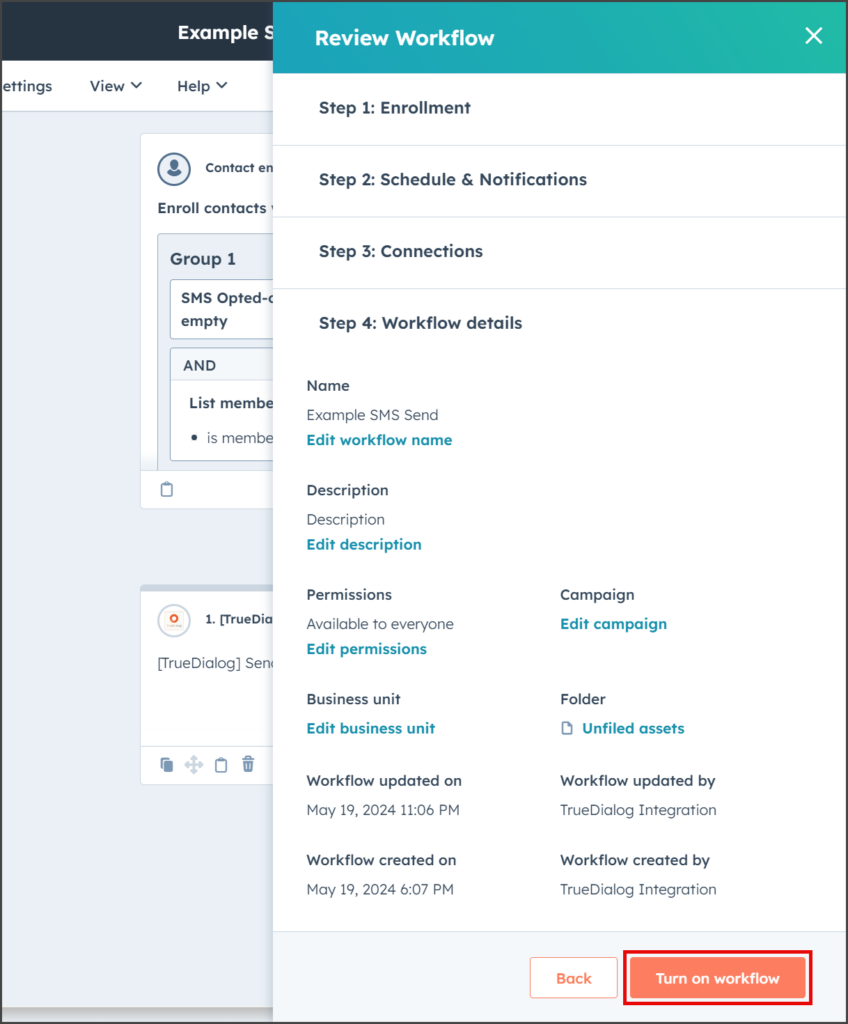
- Click Turn on workflow.
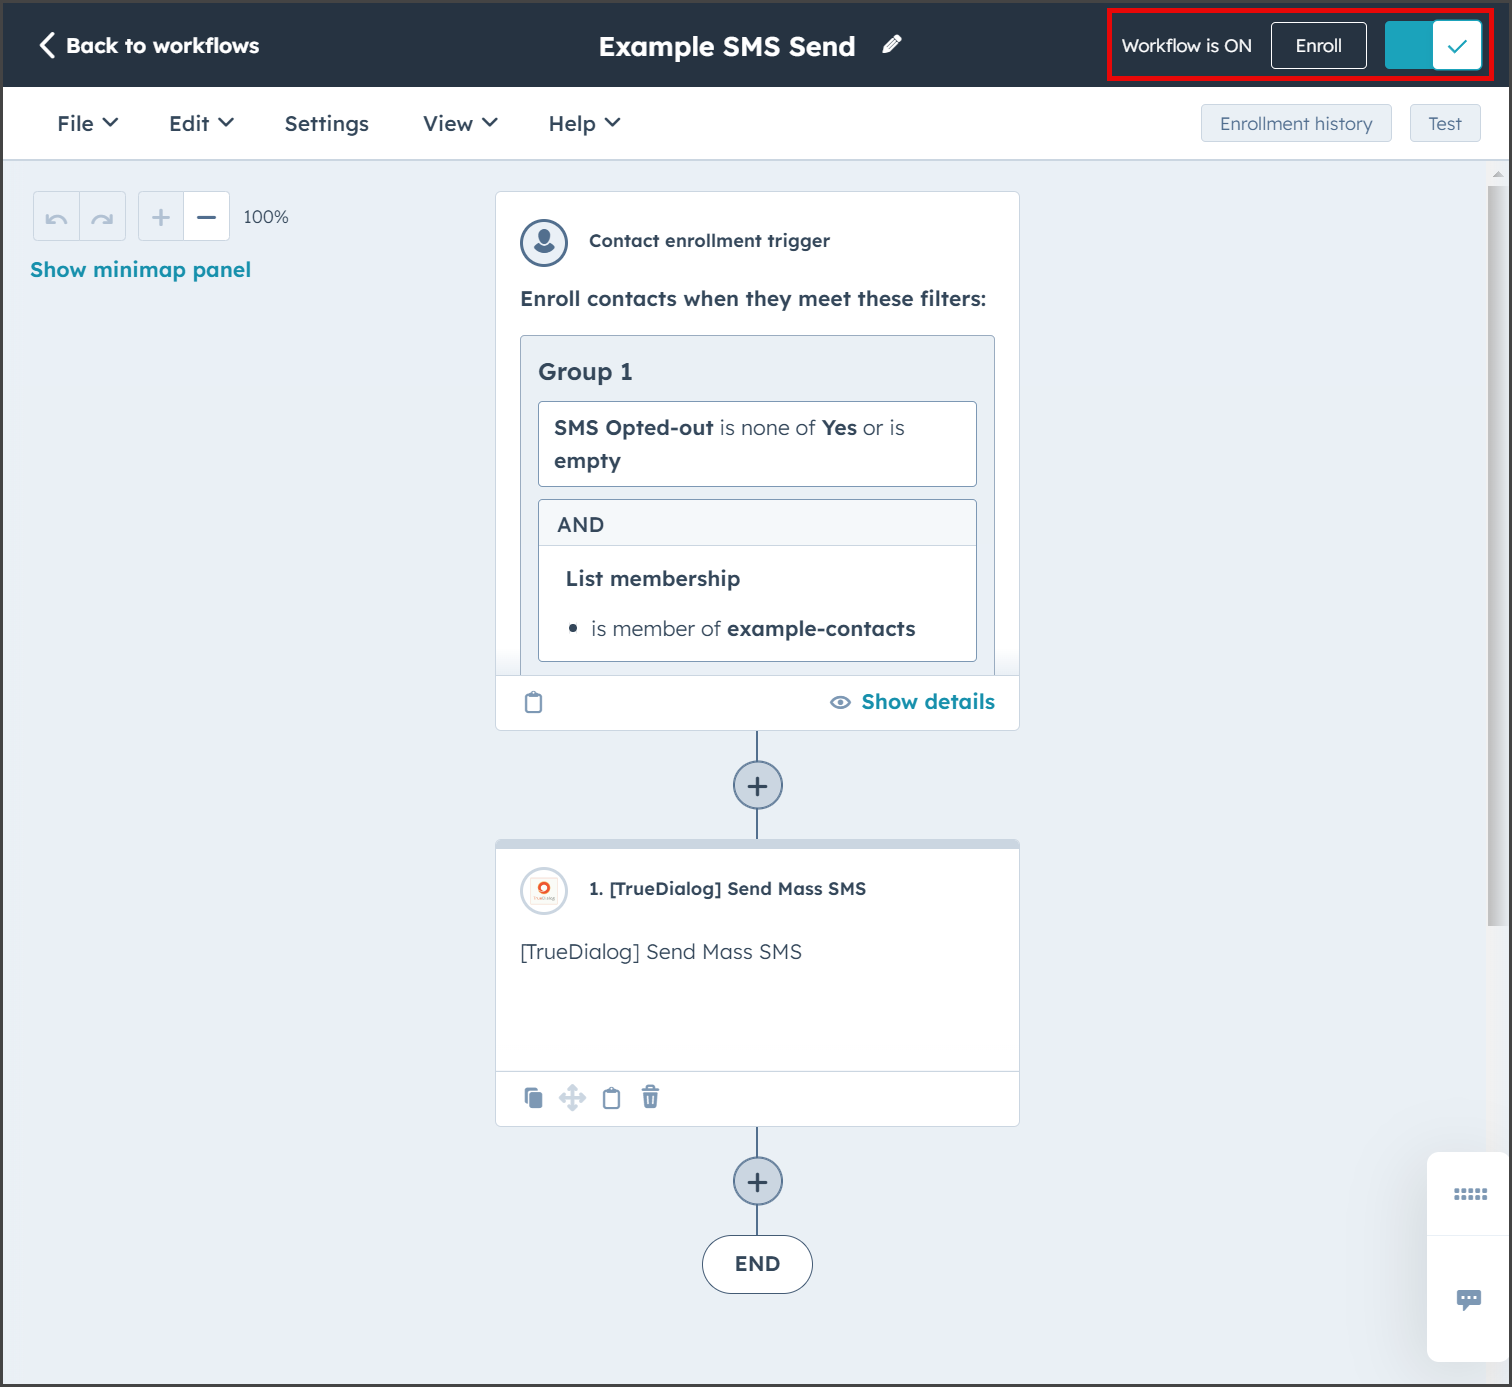
- The workflow will now show that it is ON.
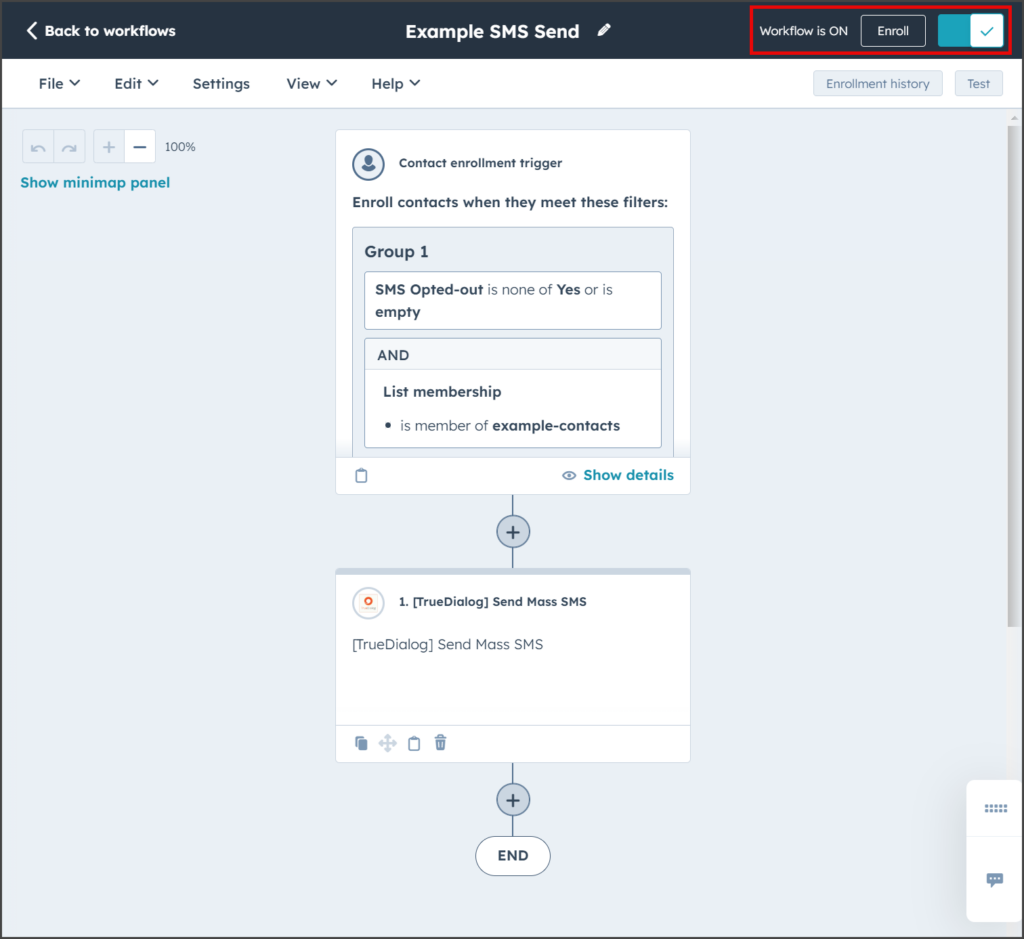
- TrueDialog will begin sending your message within the next ten minutes.

View Workflow Results
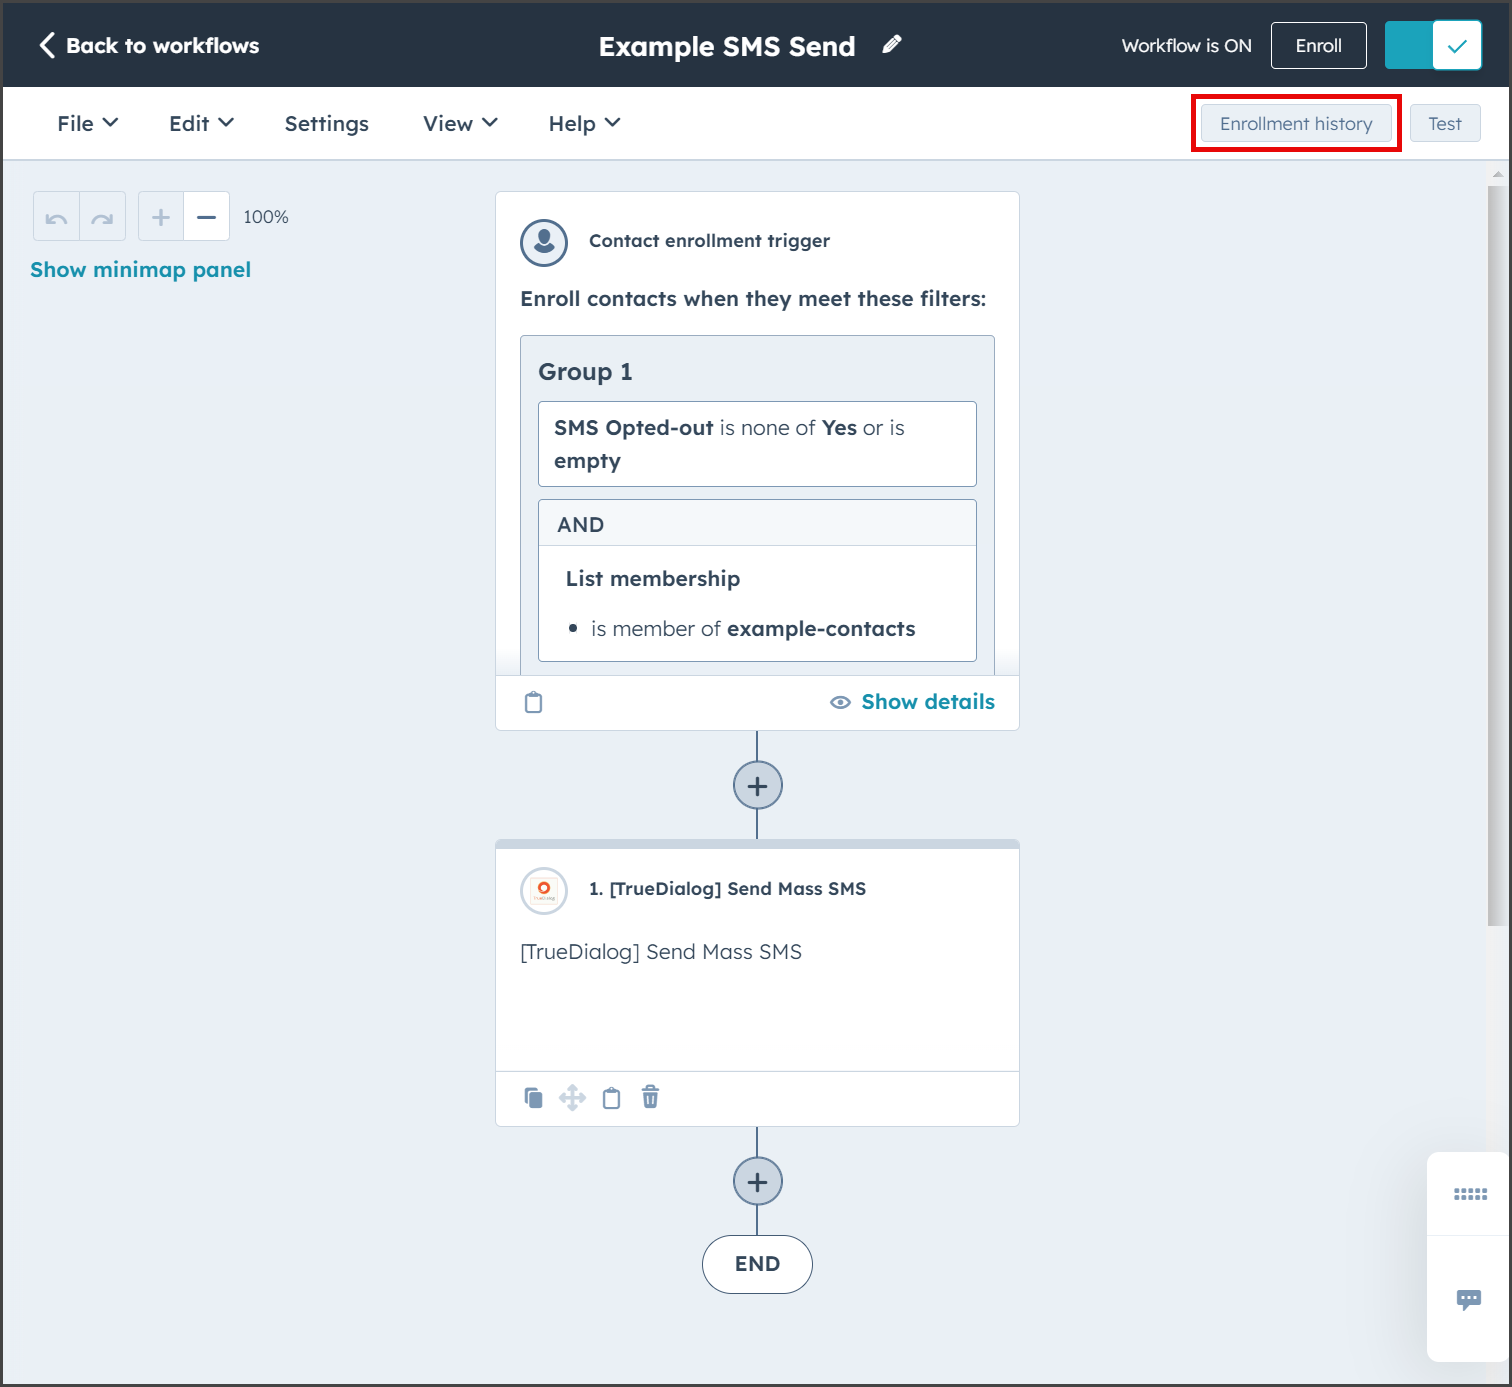
- Click Enrollment history.
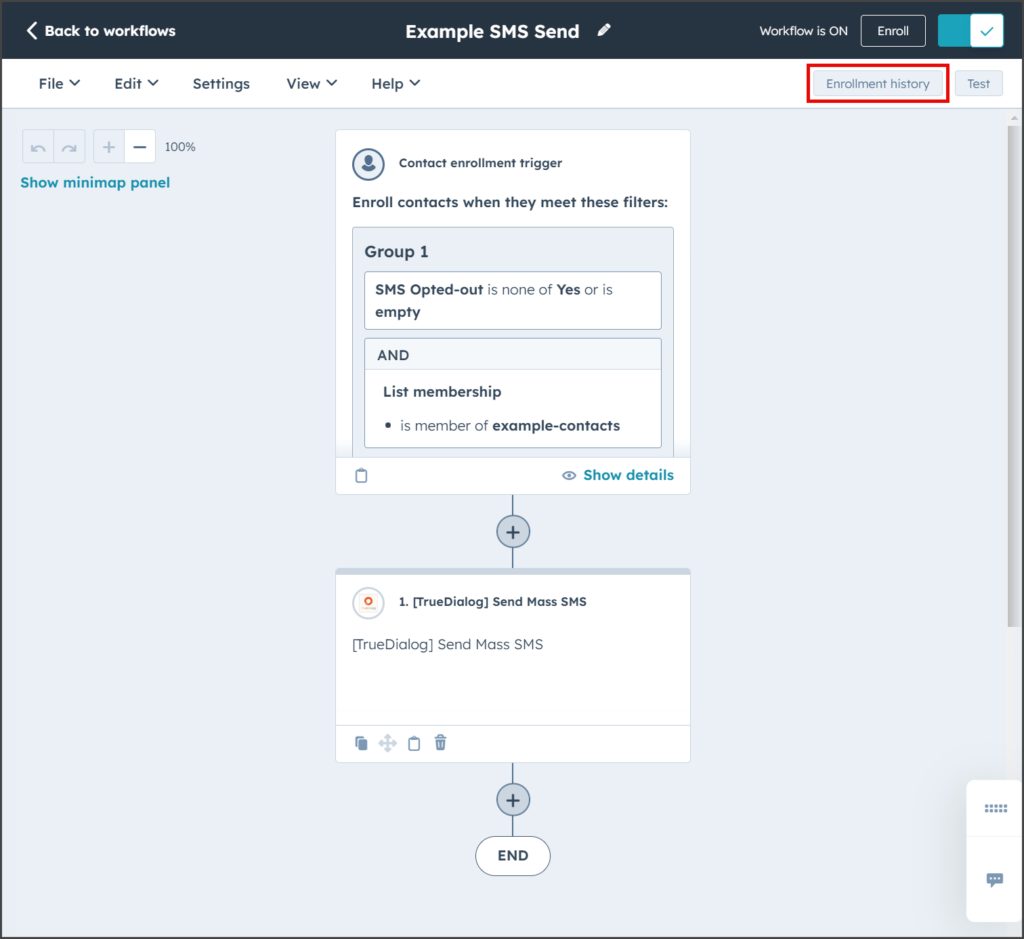
- View the history of the workflow.
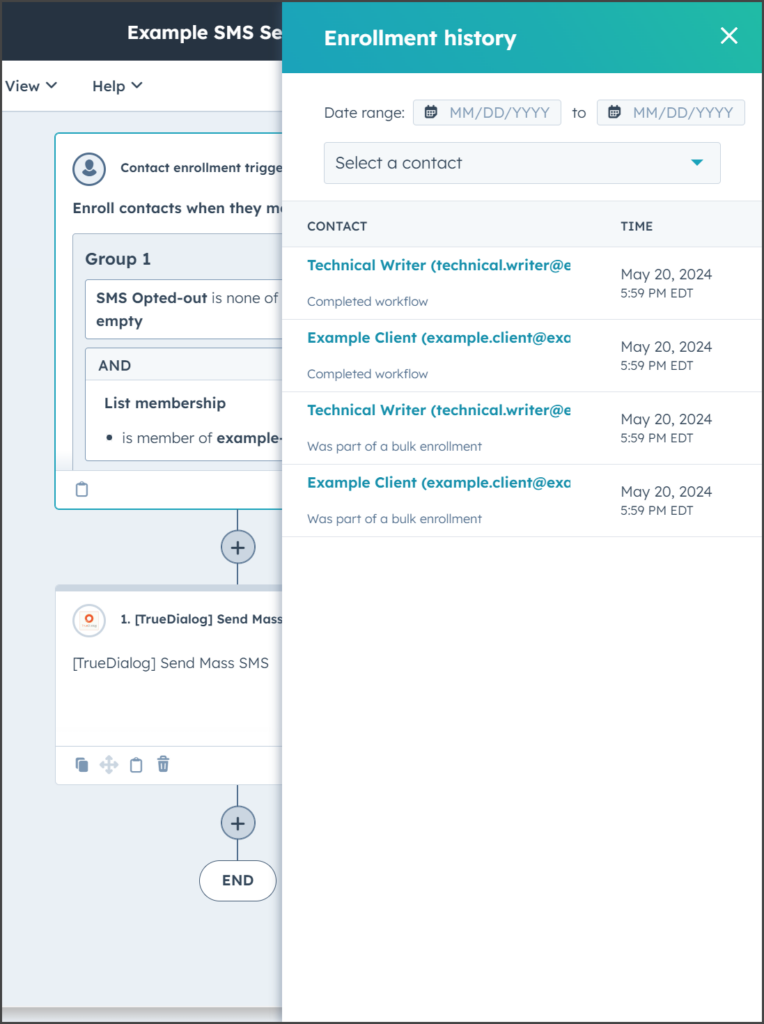
- For this example, two contacts were enrolled in this workflow and received the SMS message.

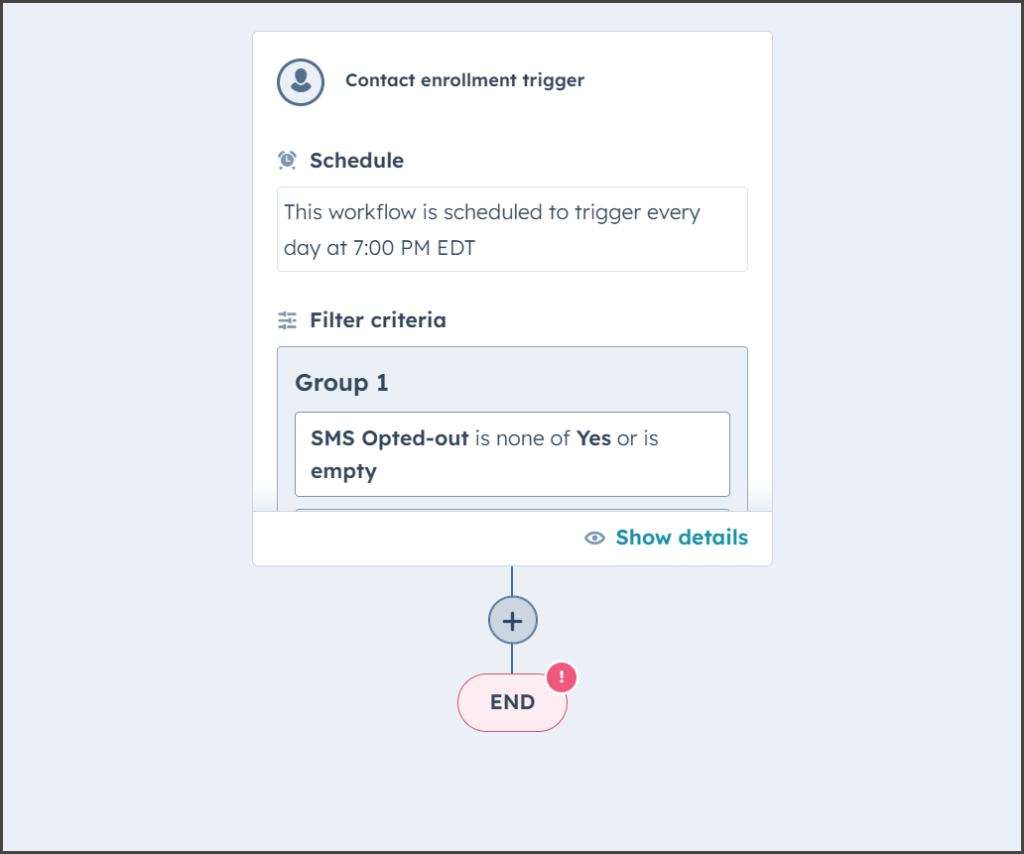
Set a Recurring Trigger (Schedule Mass SMS)
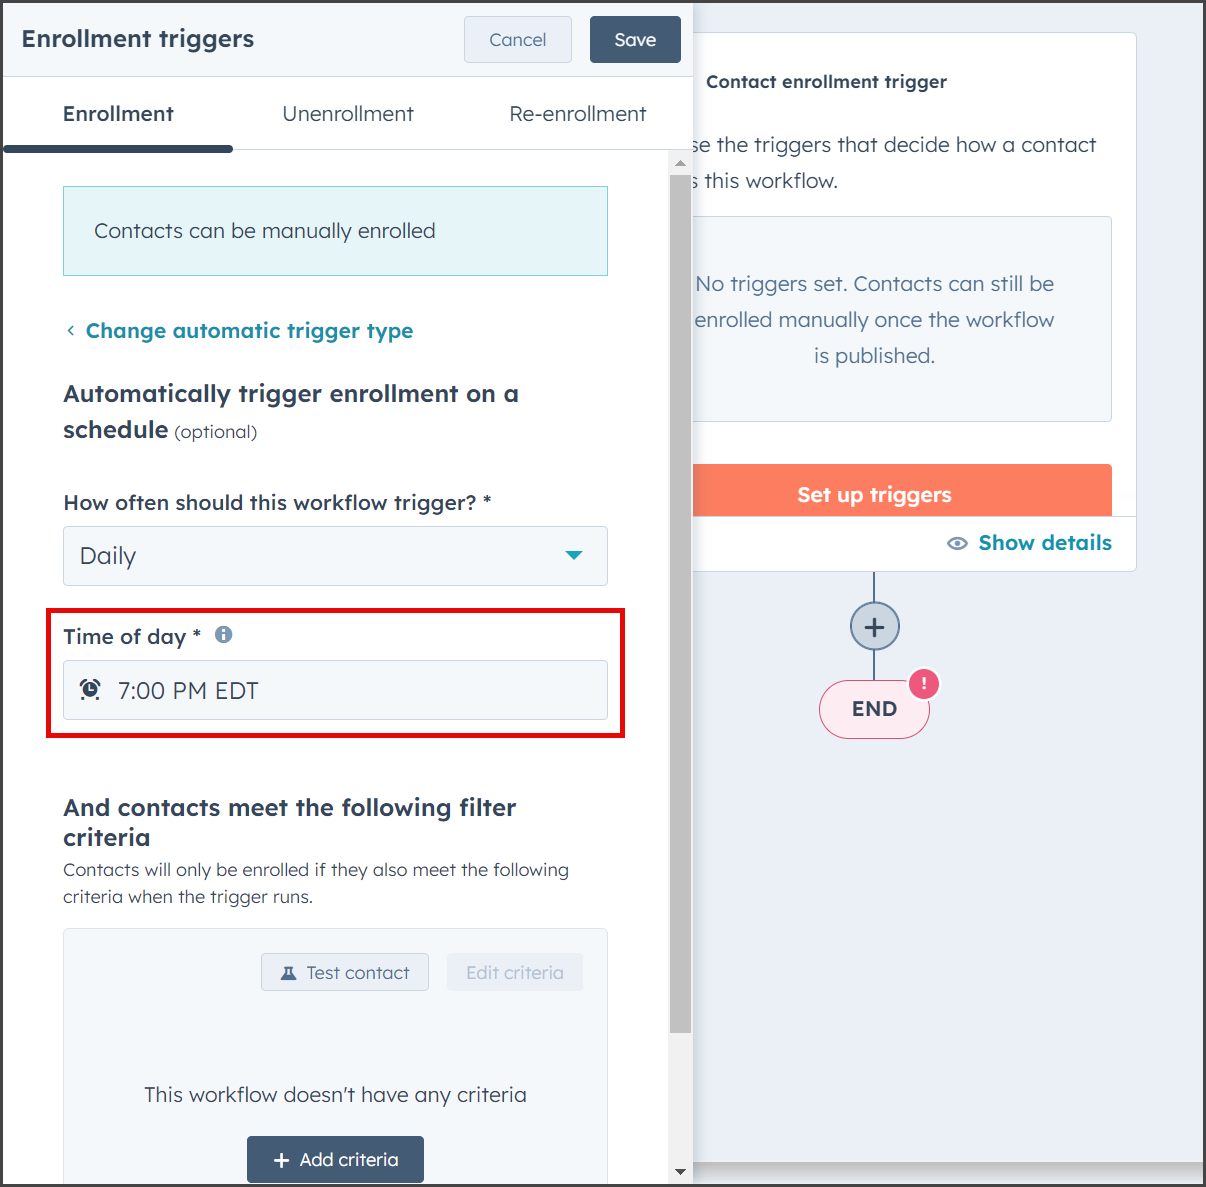
If you want to send your Mass SMS on a recurring basis, you will need to create a Based on a schedule trigger. The following instructions will show you how to create the trigger, but first, a blank workflow needs to be made by following the instructions above in the Create Blank Workflow section. After creating the trigger, follow the instructions in the Set Action and Review and Turn On Workflow sections above to complete the workflow.
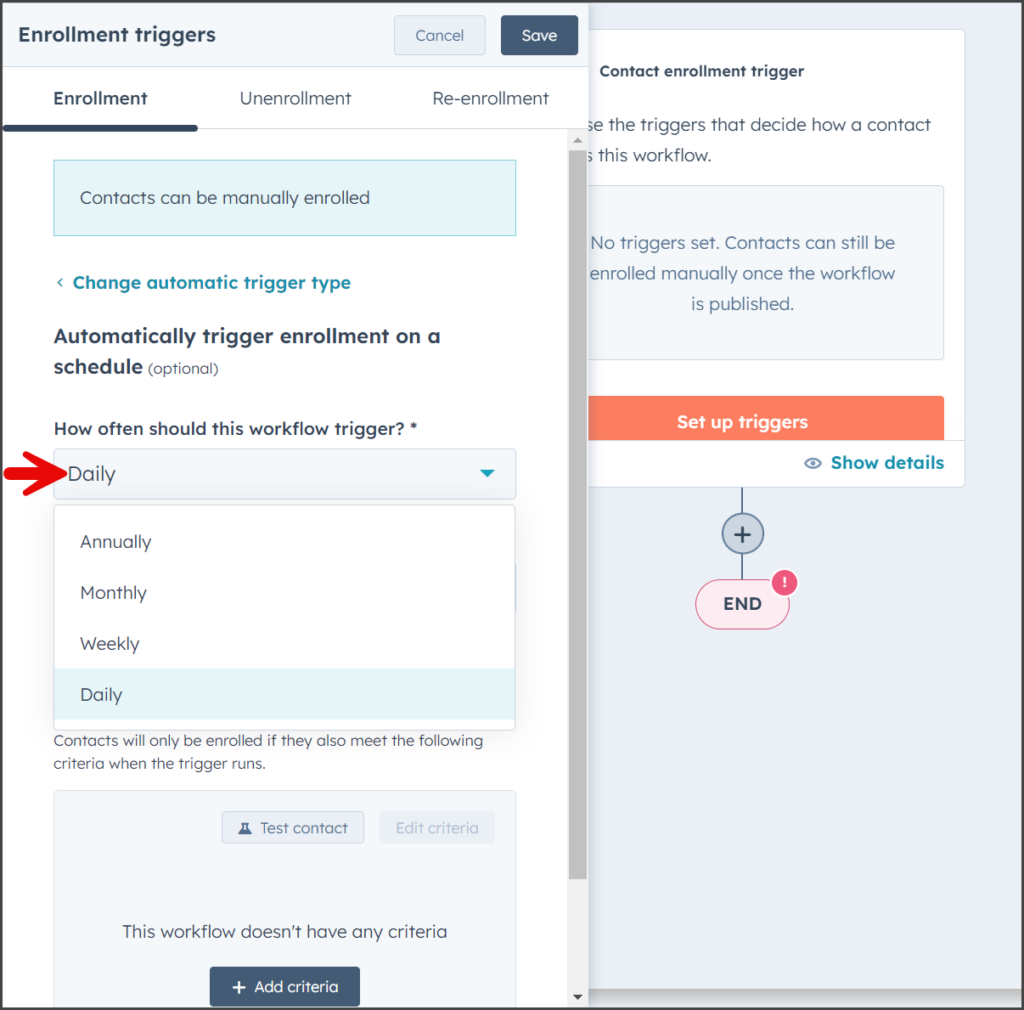
- Click Set up triggers.
- Click Based on a schedule.
- Click the How often should this workflow trigger? dropdown.
- Select the trigger interval: Annually, Monthly, Weekly, or Daily.
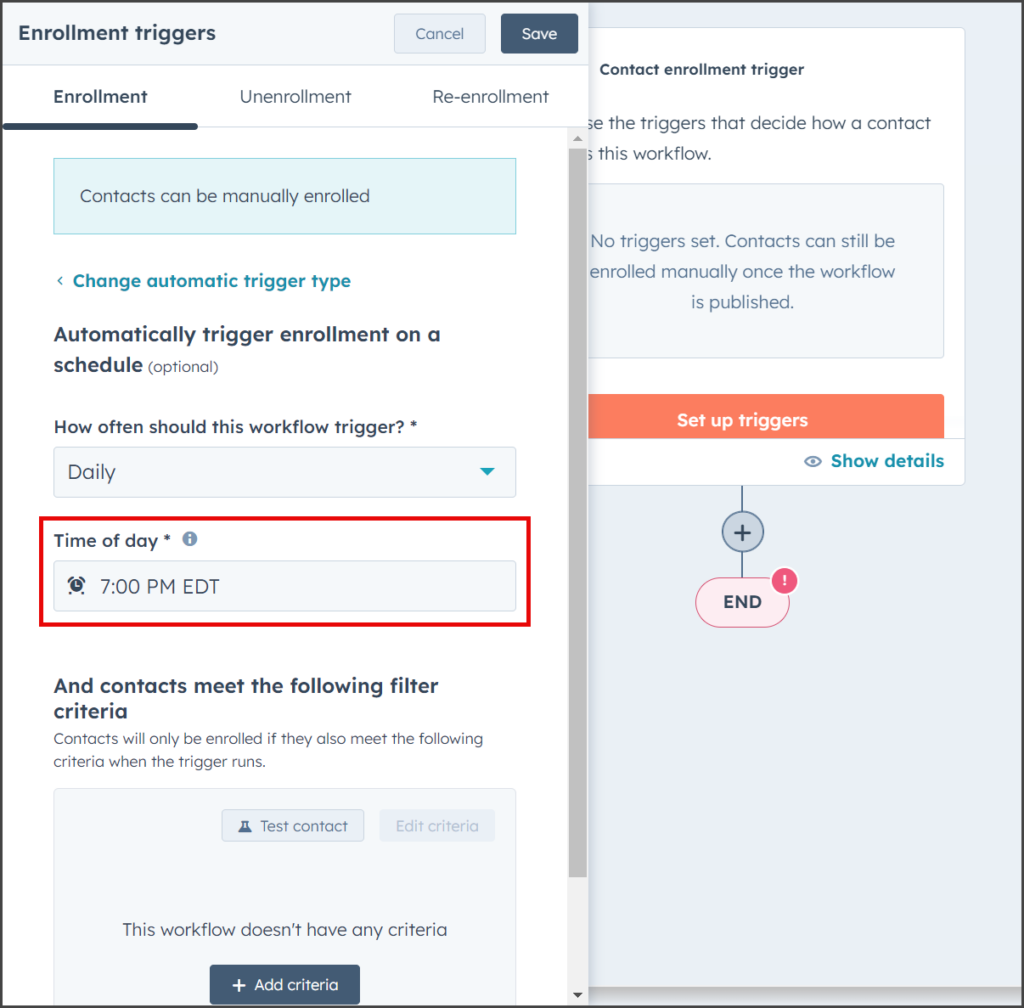
- Enter the scheduled time details; each interval has different options.
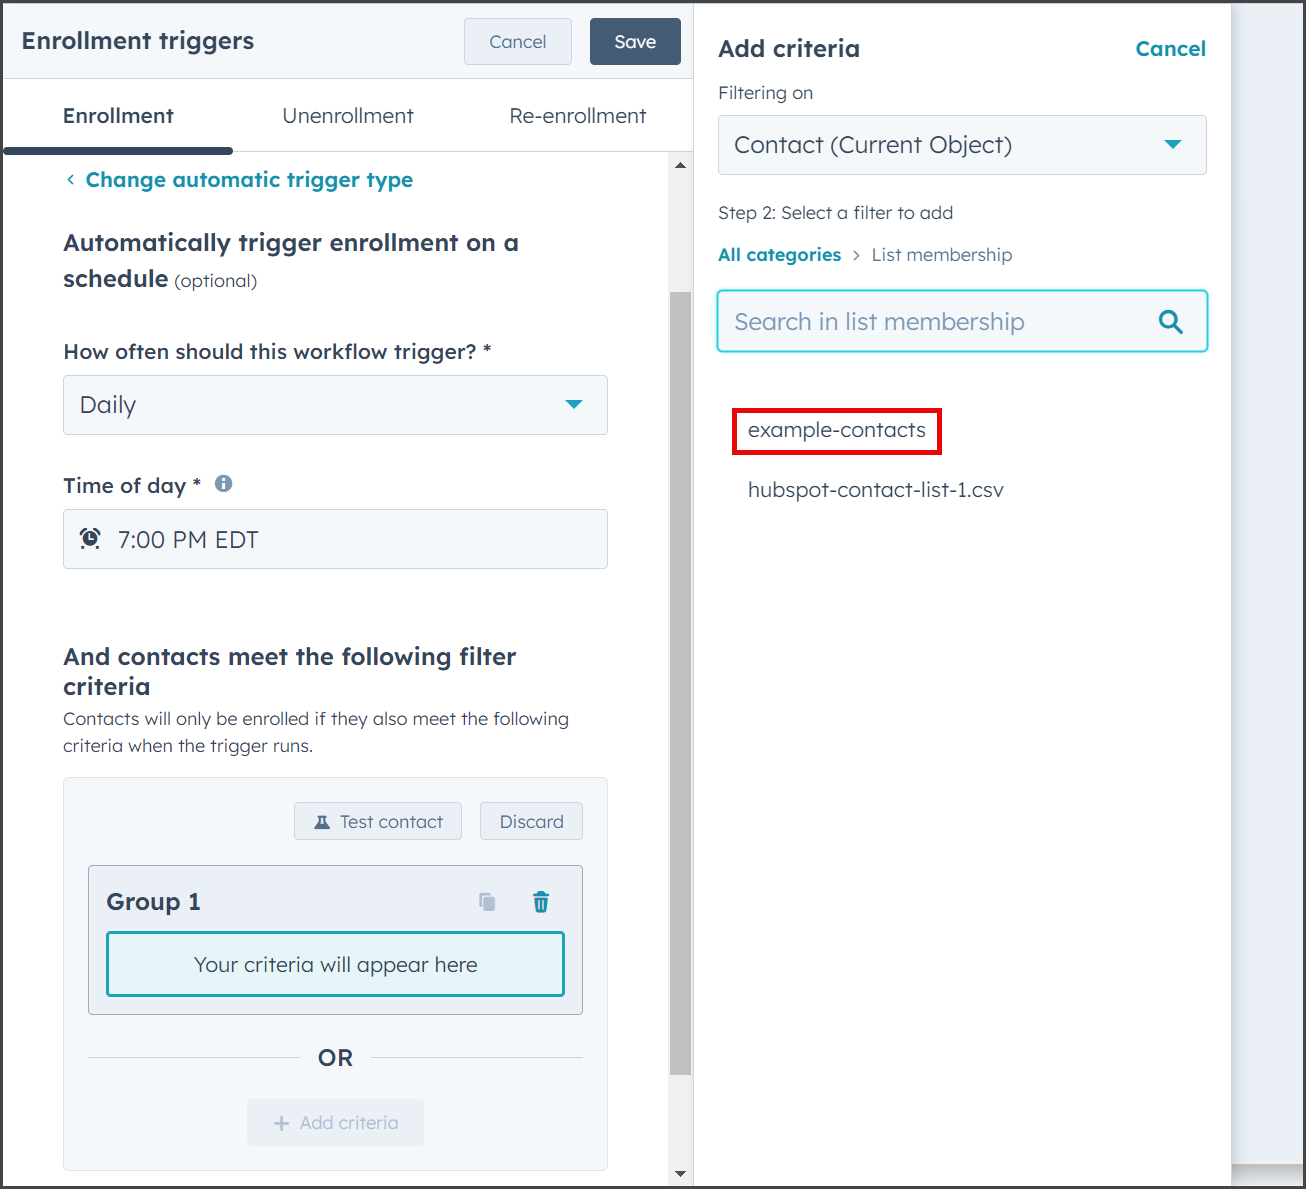
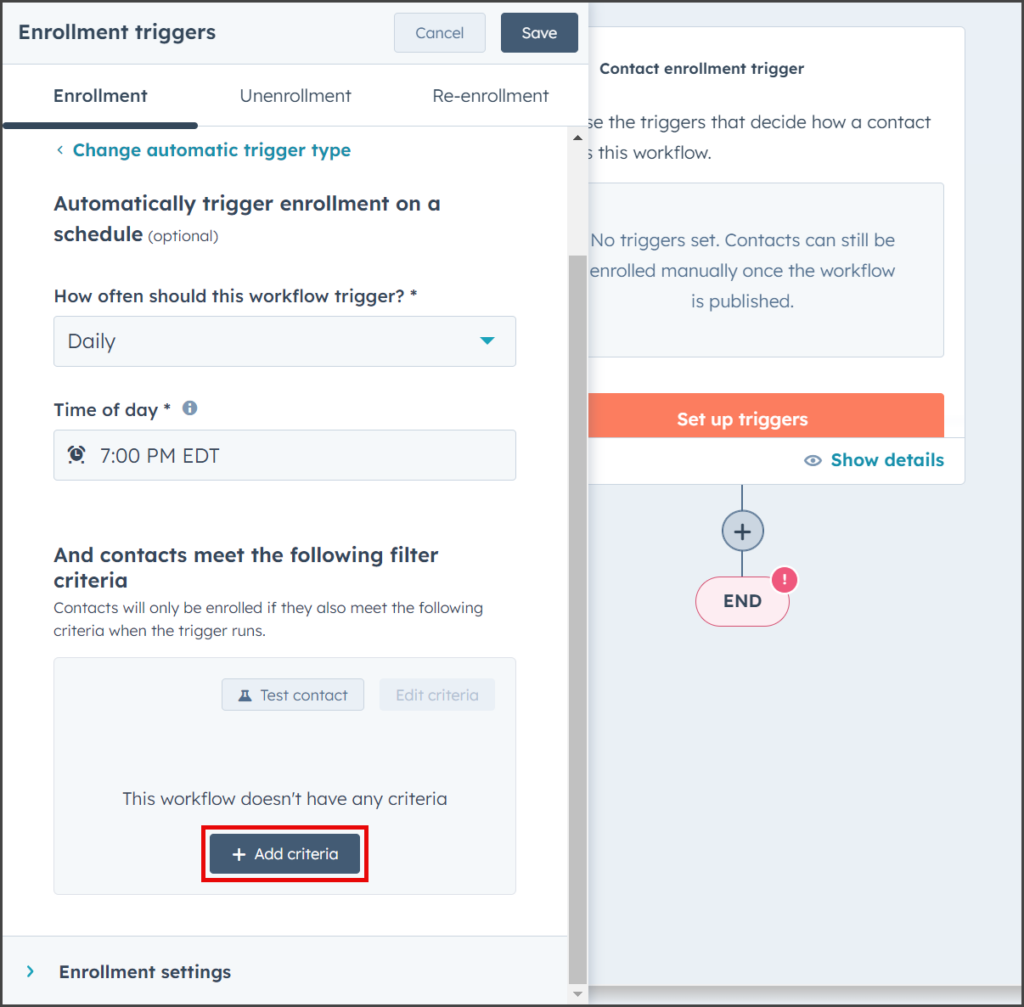
- Click Add criteria under the And contacts meet the following filter criteria.
- Click List membership under the HubSpot asset membership and enrollment section.
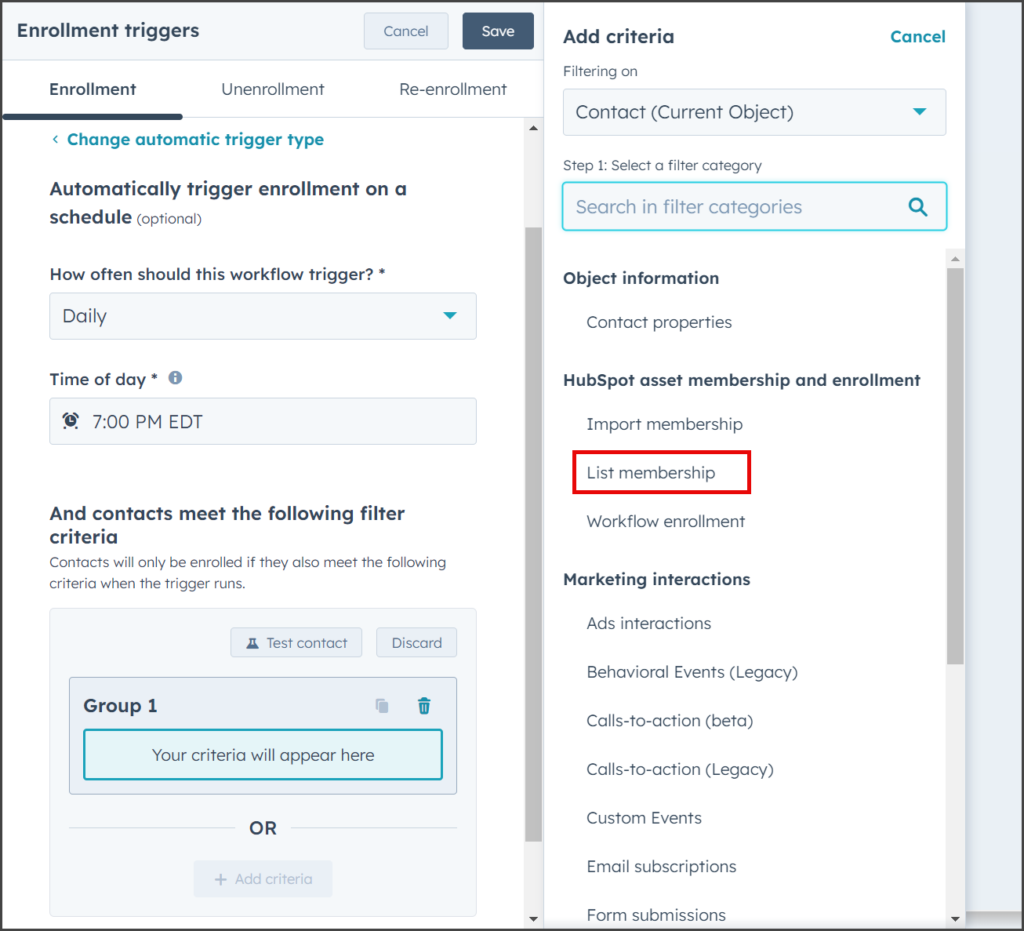
- Select the list of contacts for which you want to receive the SMS message. This example uses the example-contacts list.

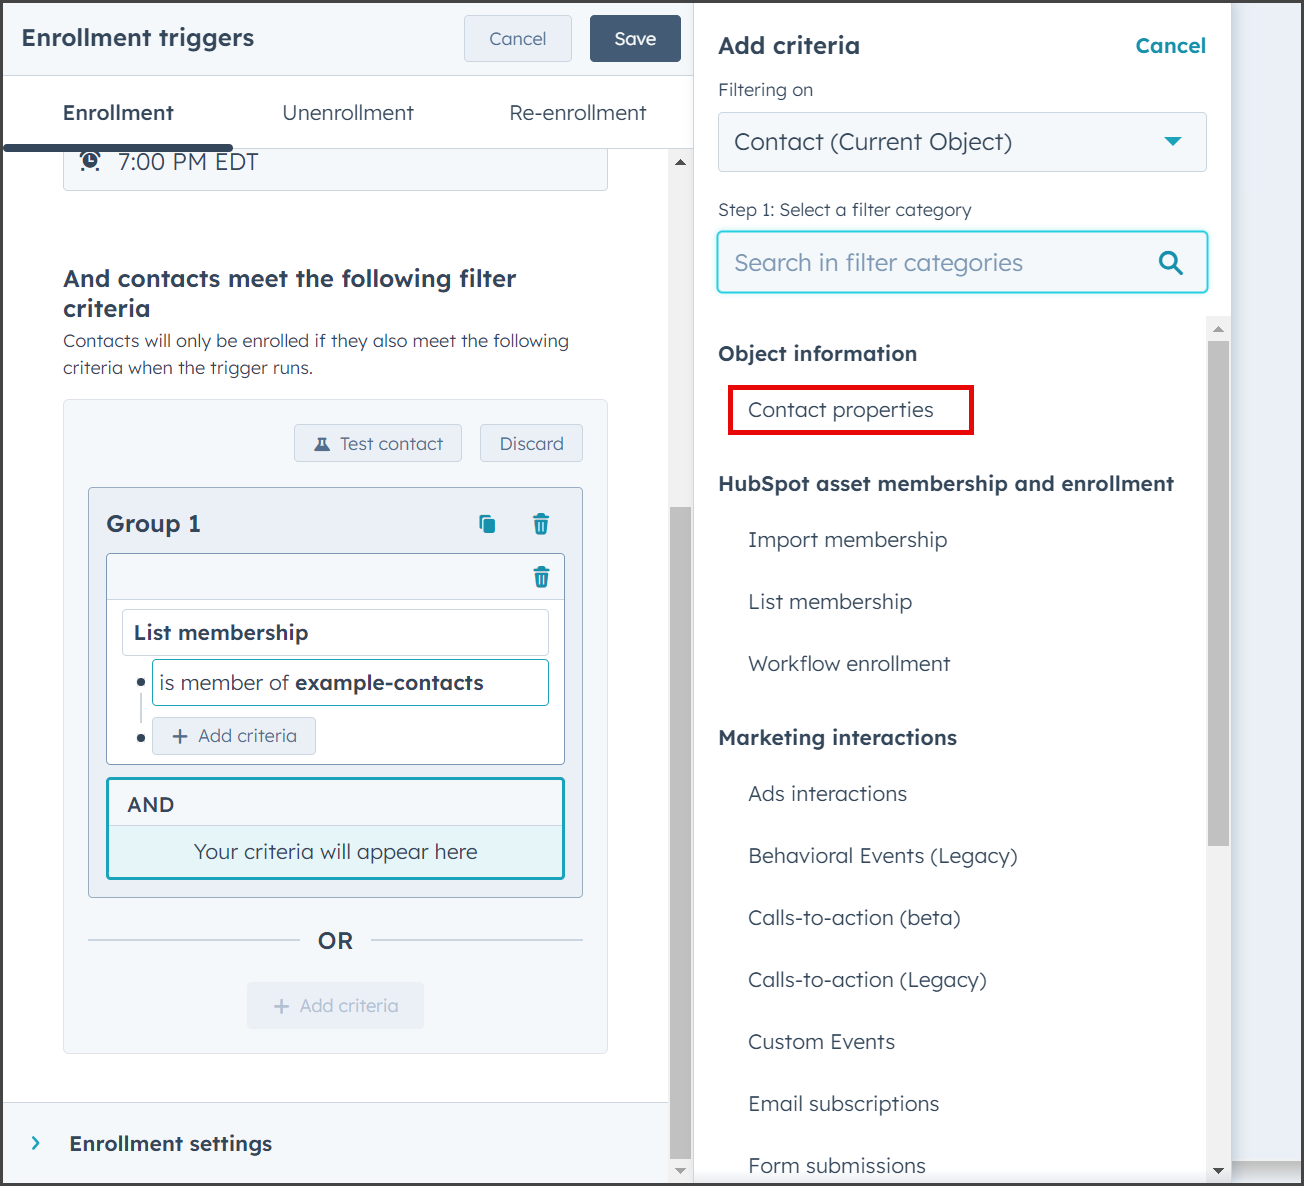
- Click Add criteria in the AND box.
- Click Contact properties under the Object information section.

- Enter SMS opted in the search box.
- Click SMS Opted-out.
- Filter out contacts that are opted out:
- Click the first dropdown and select is none of.
- Click the second dropdown and select Yes.
- Check Include records where “SMS Opted-out” is empty.
- Click Save.
- Follow the Set Action instructions above to add an action to the workflow.