TrueDialog Portal
Contacts > Import Contacts
This article covers the advanced features of the Import tool. If you are unfamiliar with the basics of importing contacts, please review the Importing Contacts – Simple article first. Each of the sections in the article covers a different feature of the import tool; you can skip to the section you need.
| Section | Description |
|---|---|
| Select Import Account | If you are importing to an account with Primary Subaccounts, select the account into which you want to import the contacts. |
| Subscription Options | Explains the available Opt-In/Opt-Out options. |
| Contact List Options | Explains how to create a contact list based on the import. |
| Import Contact Attributes | Explains how to add contact attributes to the import file. |
| Unrecognized Column Handling | When a column in the import file is unrecognized, the import tool can map the column to a contact property or attribute. |
| Import Failed | Explains how to troubleshoot a failed import. |
Select Import Account
If you are importing contacts into an account that has Primary Subaccounts (see Creating a Subaccount to learn about the types of subaccounts), you will need to specify which account the contacts are imported into.
- Click the Add contacts to the following account dropdown.
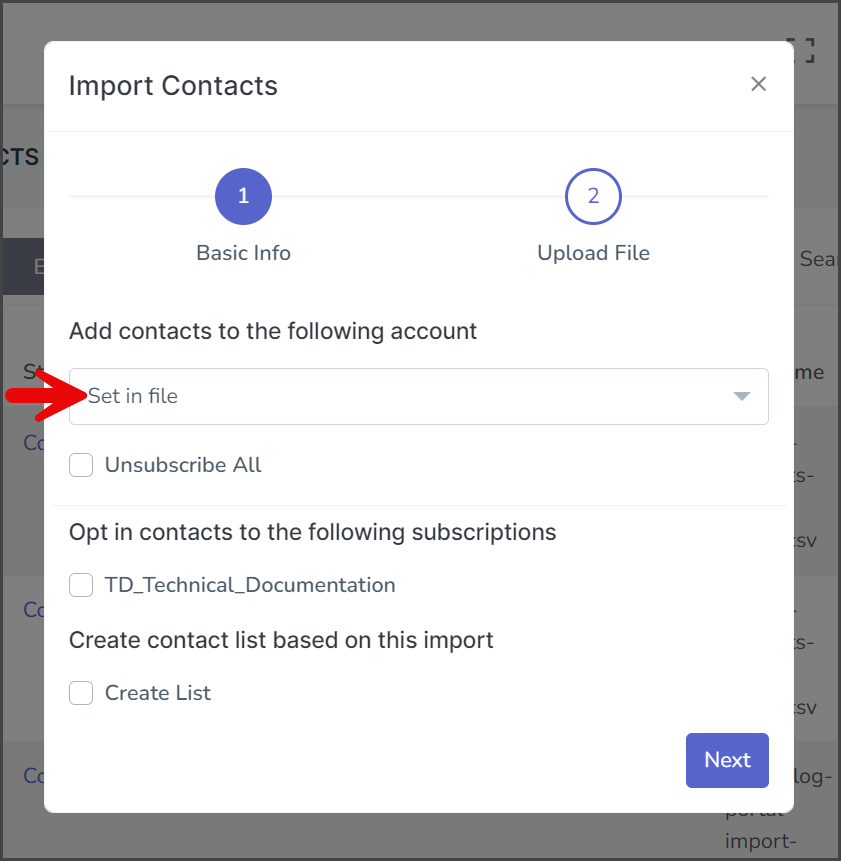
- Select the root account; this should be the first account on the list.

Subscription Options
The Import tool has several options for handling the Opt-In/Opt-Out status of the imported contacts.
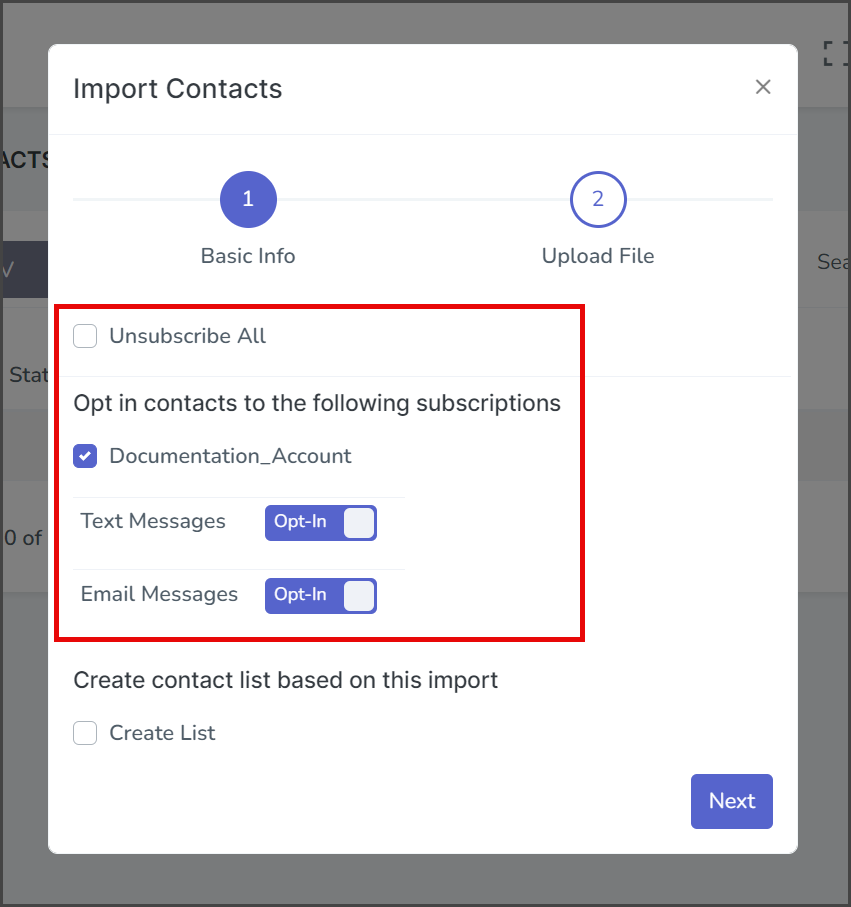
Unsubscribe All
All contacts will be set to Opt-Out for all messages when imported.
Subscription Checkbox
The name of your subscription is displayed here, and when checked, it gives you options to opt in or out of text and email messages.
Text Messages
The toggle can be set to Opt-In or Opt-Out.
Email Messages
The toggle can be set to Opt-In or Opt-Out.
See the table below for details on how the different subscription options affect the contacts.
| New Contact | Existing Contact | |
|---|---|---|
| Unsubscribe All | Opt-Out | Opt-Out |
| Text Messages Opt-In | Opt-In | No Change |
| Text Messages Opt-Out | Opt-Out | No Change |
| Email Messages Opt-In | Opt-In | No Change |
| Email Messages Opt-Out | Opt-Out | No Change |
The Opt-In type of your account’s subscription affects how imported contacts are opted into it. To check your subscription opt-in type, see the Editing Subscriptions article.
- For Double Opt-In subscriptions, a Handset Verification message will be sent out to all contacts.
- For Single Opt-In subscriptions, the contact will be automatically subscribed without any action required.
Contact List Options
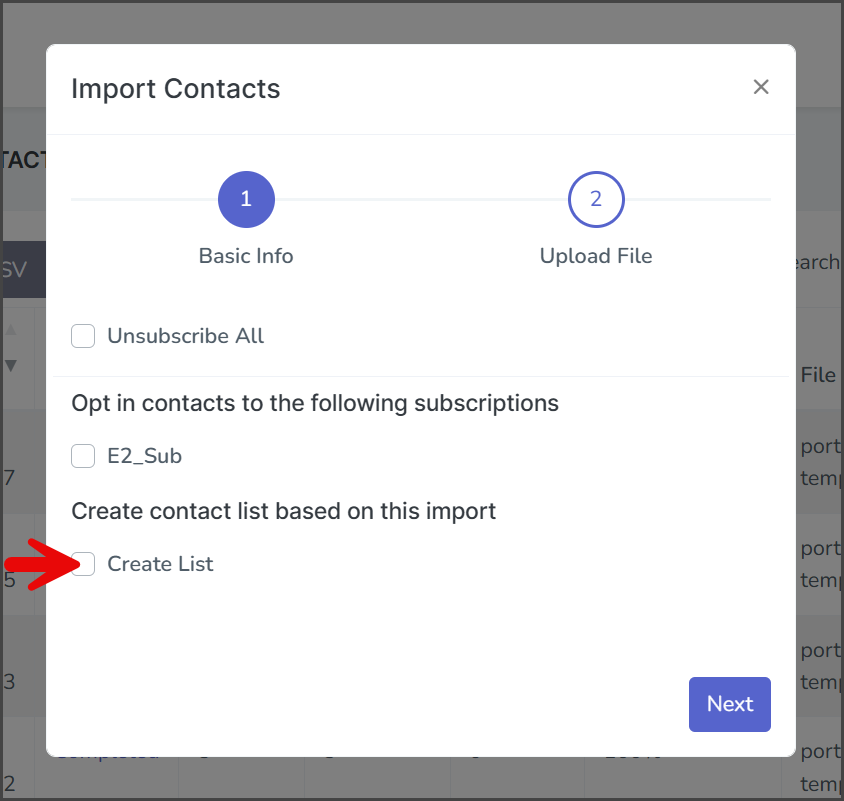
The Create contact list based on this import section allows you to create a contact list that includes the contacts you import.
- Click Create List.
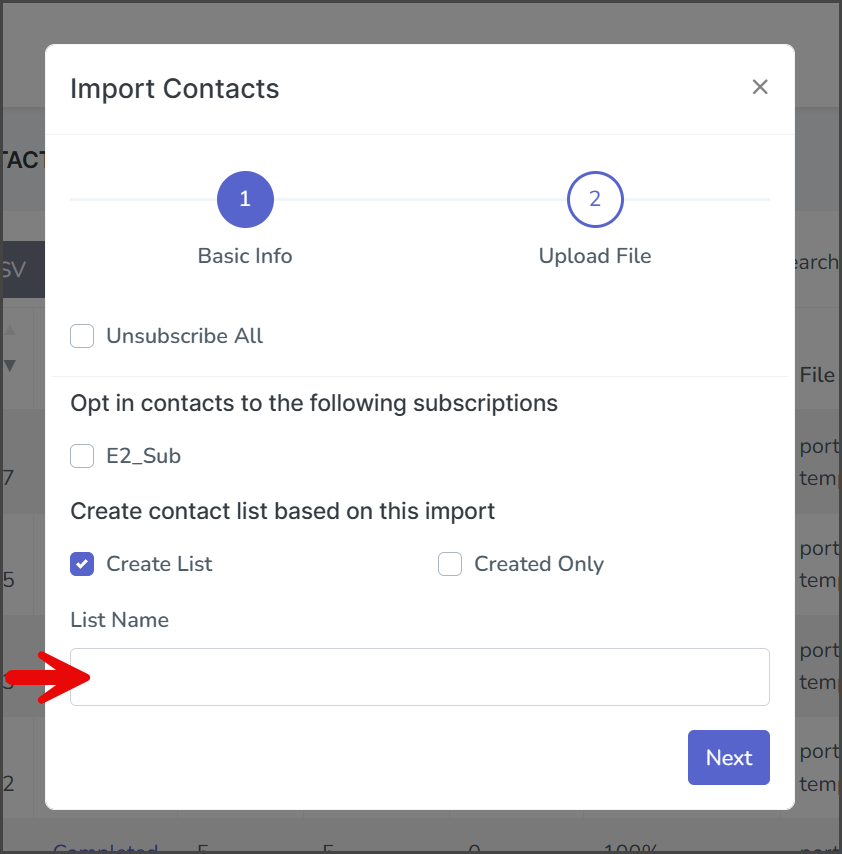
- (Optional) Click Created Only to include new contacts and exclude existing contacts from the list.
- Enter a name for the contact list in the List Name textbox. It is recommended that the name be descriptive to help identify the import later, such as Import 2024-06-29.
Import Contact Attributes
This section shows you how to import contact attributes not covered in the Importing Contacts – Simple article. The import file must include the contact attribute name as a header column name. Follow the instructions below to find the attribute name. If the attribute you wish to import doesn’t exist, it can be created during import by following the instructions in the Unrecognized Column Handling section below or before importing by following the instructions in the Creating a Contact Attribute article.
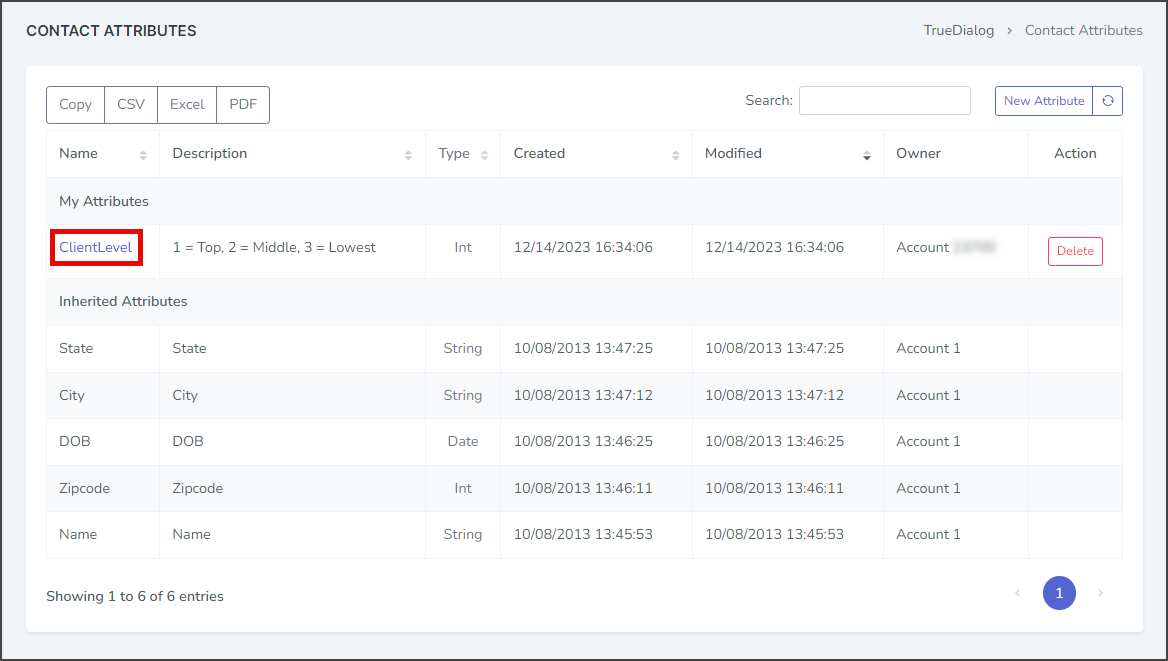
- Expand Contacts in the left sidebar and select Contact Attributes.
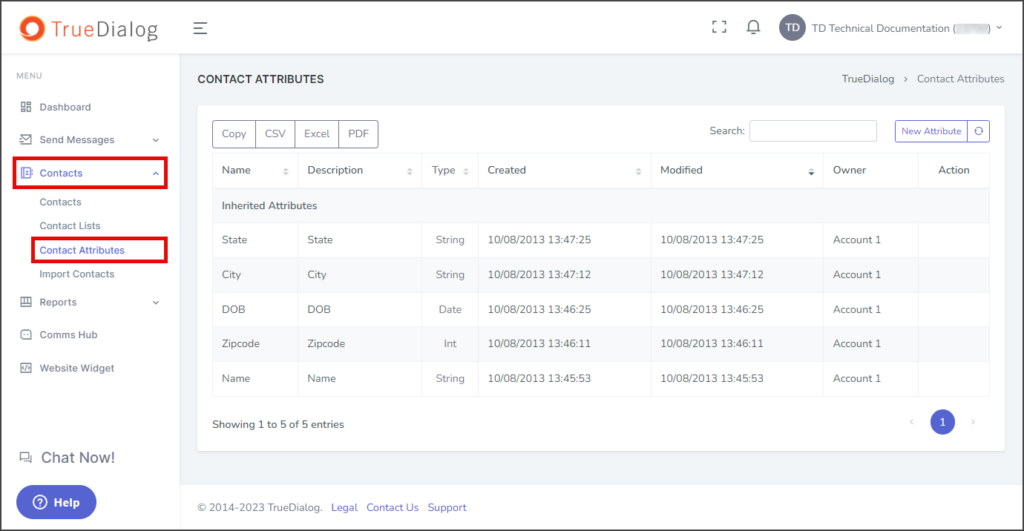
- Find the Name of the attribute to include in your import.
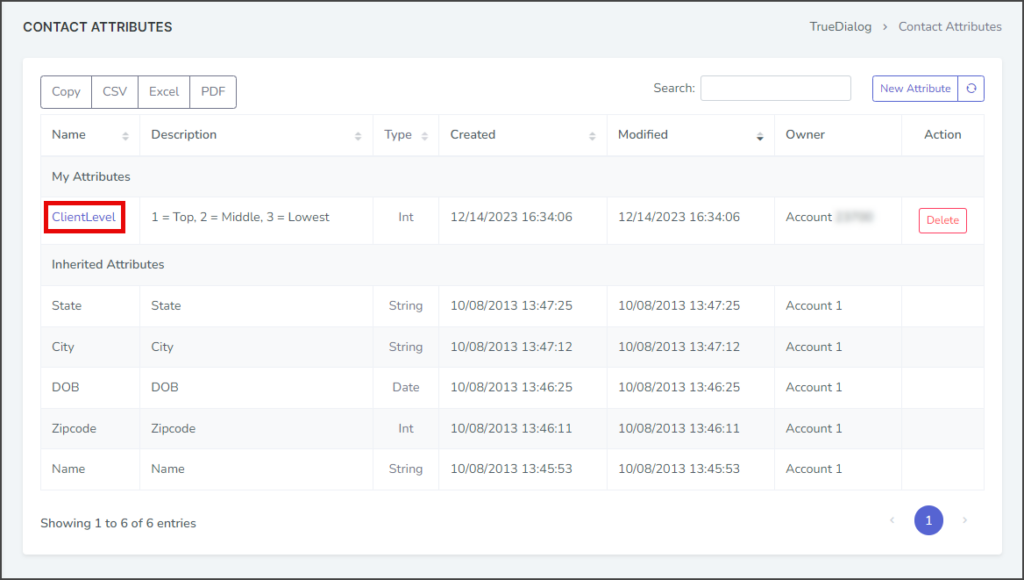
- Add the Name to the first row of your CSV import file.
- Include the attribute data for each contact in your CSV import file.

Unrecognized Column Handling
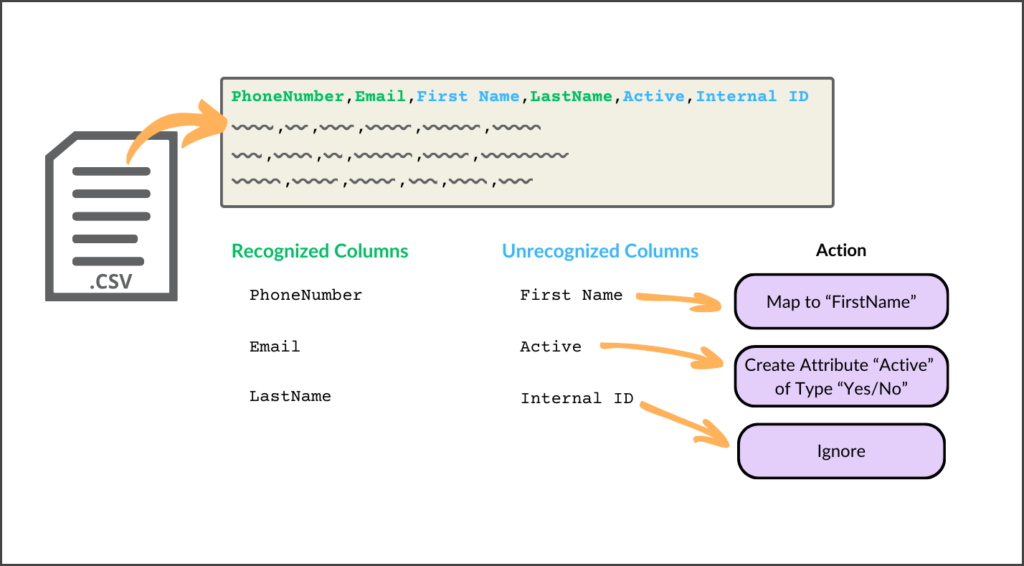
If the import file contains column header names that the import tool does not recognize, you must specify how to handle these columns. There are three available actions for an unrecognized column: Map, Create, and Ignore. The following example will demonstrate how each action can handle unrecognized columns. The figure below illustrates the import file used in this example and the action taken for each unrecognized column. This example assumes you have already followed the instructions in the Importing Contacts – Simple article to upload your import file.
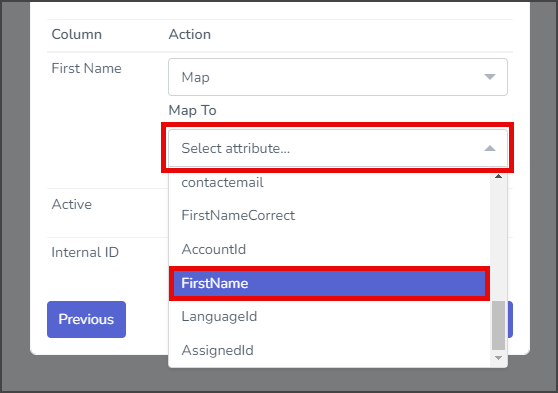
Map
This action will Map the values from the selected column in the import file to the chosen contact attribute. This is used when the contact property exists, but the column name in the import file doesn’t match the attribute name.
- Click the Action dropdown and select Map.
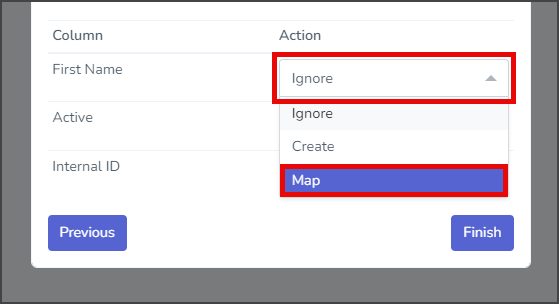
- Click the Map To dropdown and select the attribute to map.
Create
This action will Create a new contact attribute and then import the selected column data into the new attribute. This is used when the contact property doesn’t exist, but you still want to import the data.
- Click the Action dropdown and select Create.
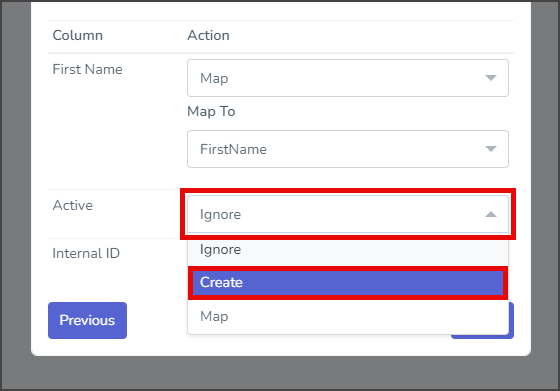
- Enter a Name for the attribute.
- Select the attribute data Type. The most common type is Text.
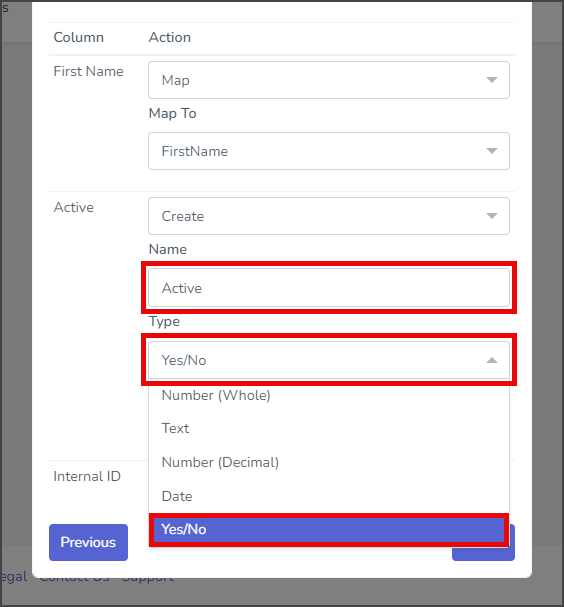
- (Optional) Enter a Description for the attribute.
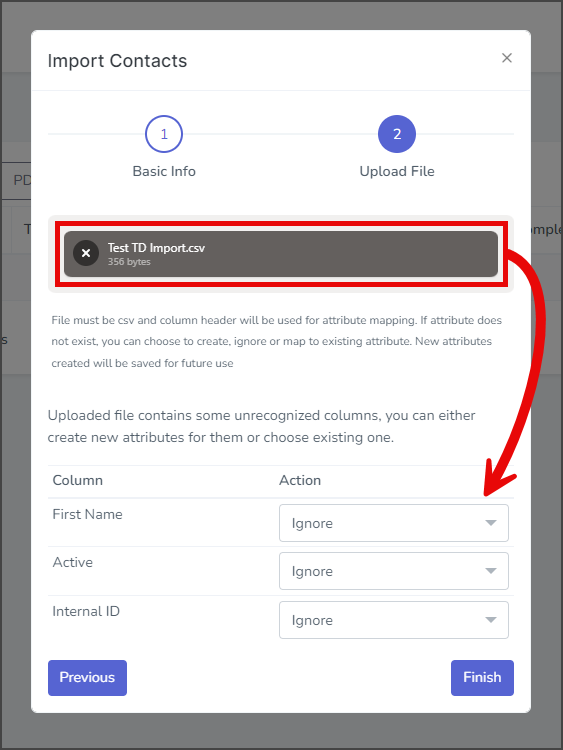
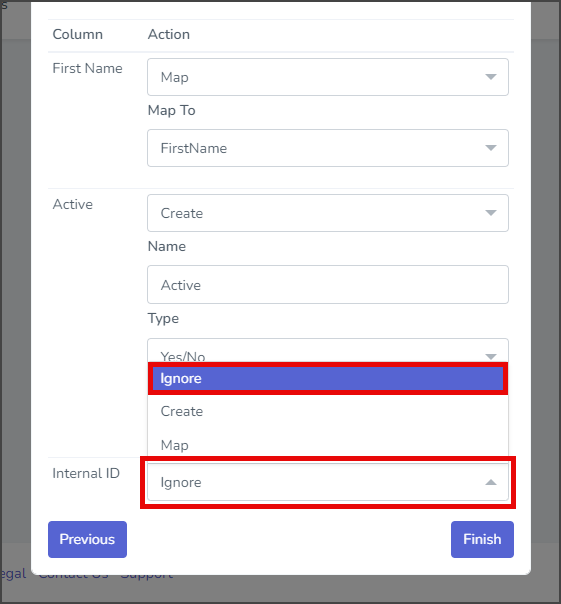
Ignore
This action will Ignore the selected column data when importing. This is used if there are properties that you don’t want to import.
- Click the Action dropdown and select Ignore.
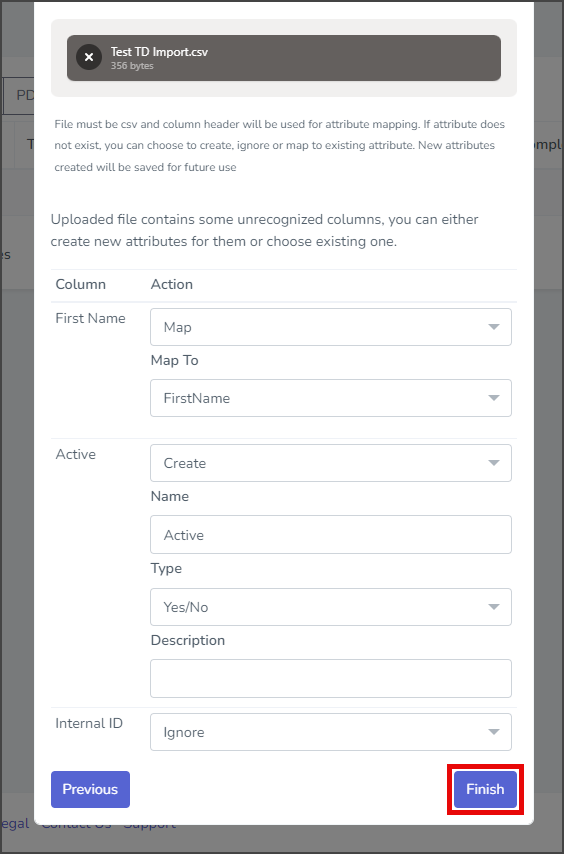
Finish Import
Once the correct actions are selected, the import can be completed.
- Click Finish to import the contacts.
Import Failed
The following instructions will show you how to check the cause of a failed import. For assistance troubleshooting your error, contact TrueDialog’s knowledgeable support team: email support@truedialog.com or call 1-877-501-4276.
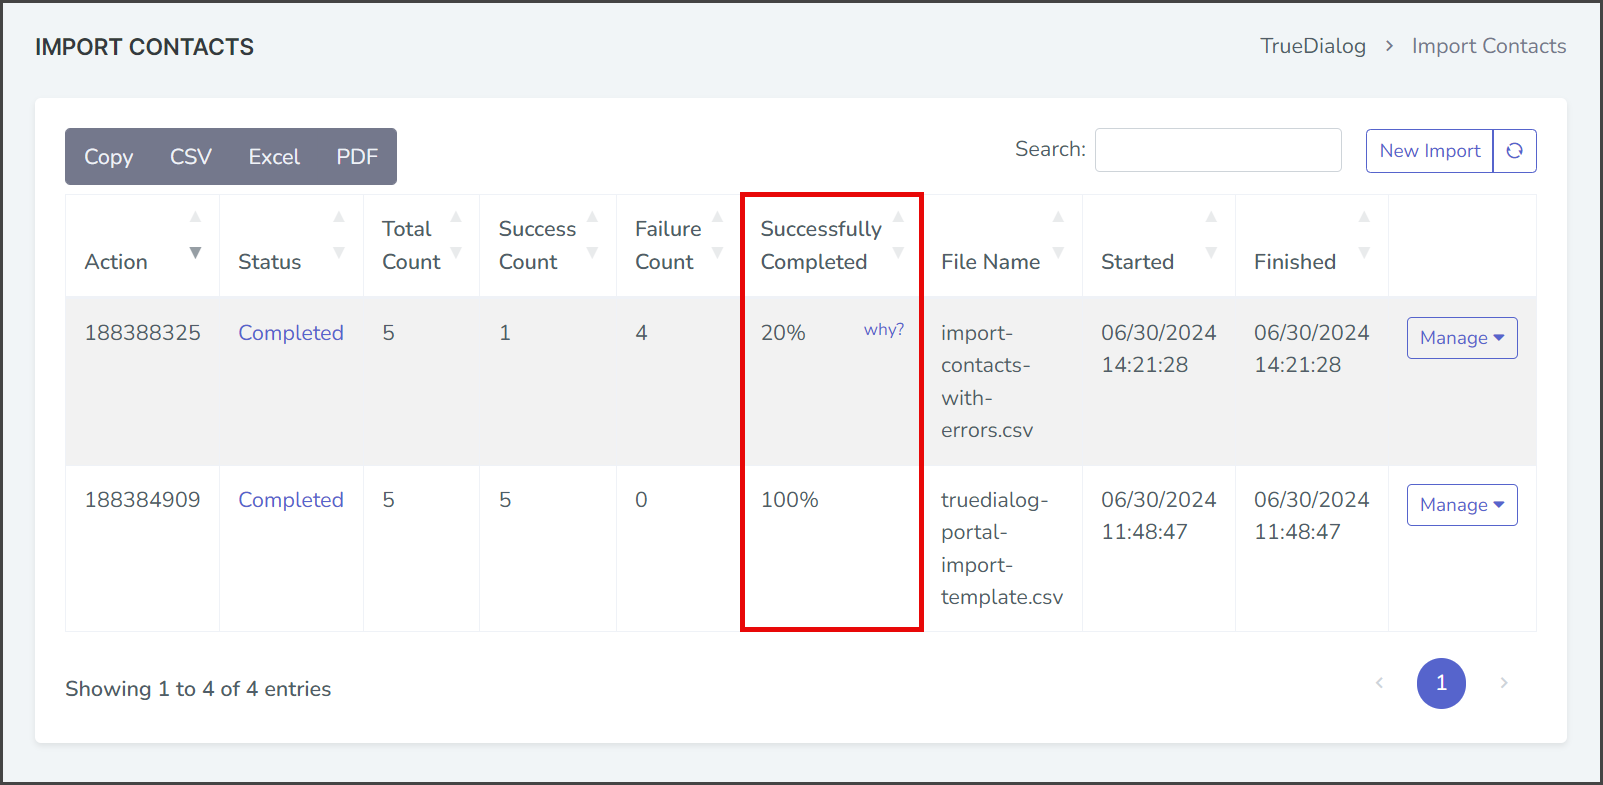
- Once the Status shows Complete, check the Successfully Completed percentage.
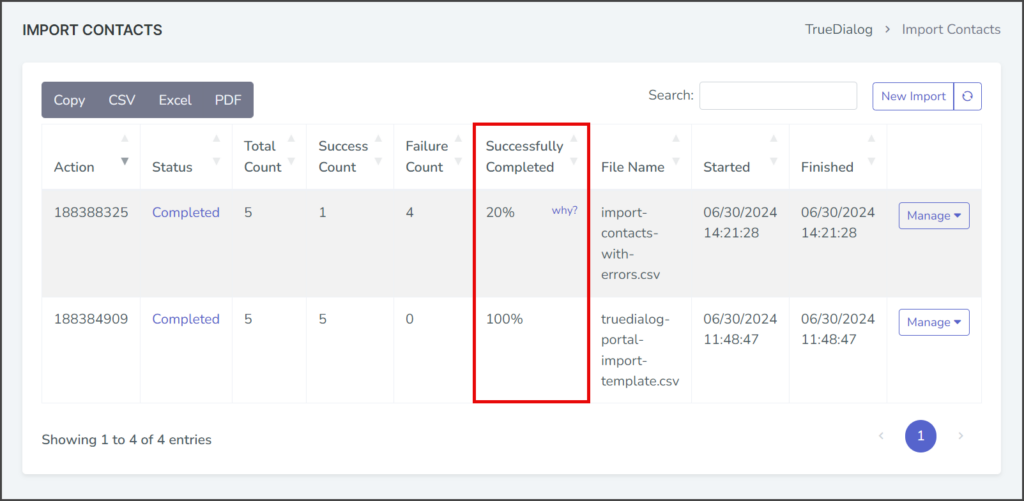
- If the percentage is not 100%, some or all of the imported contacts failed to import correctly.
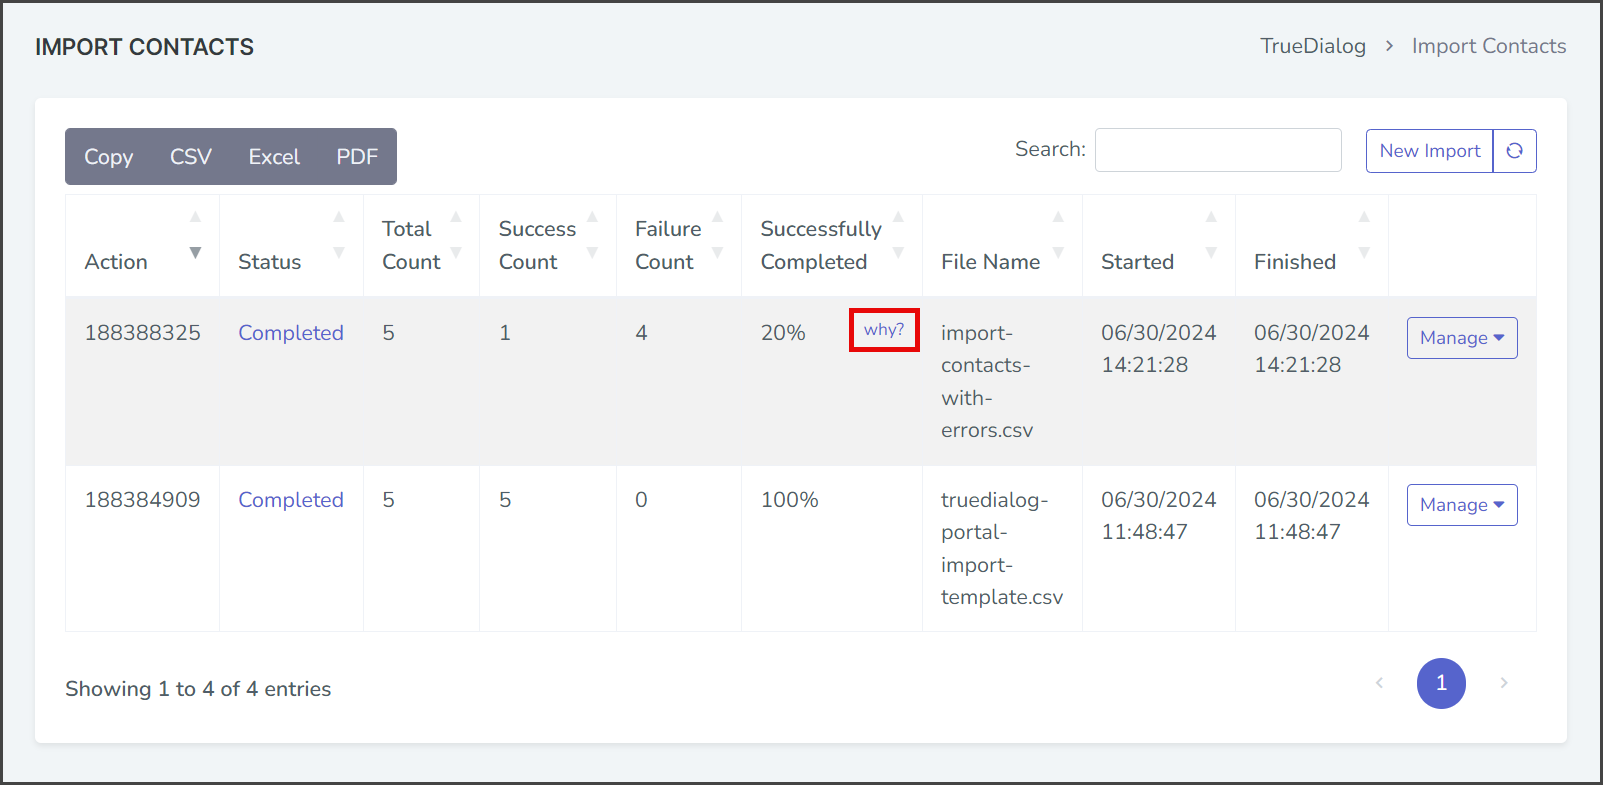
- Click why? to the right of the percentage of Successfully Completed.
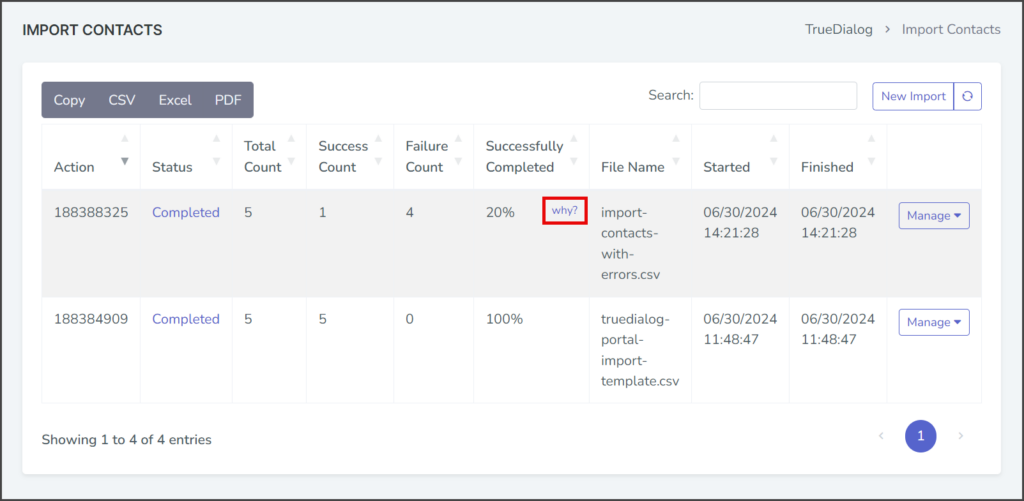
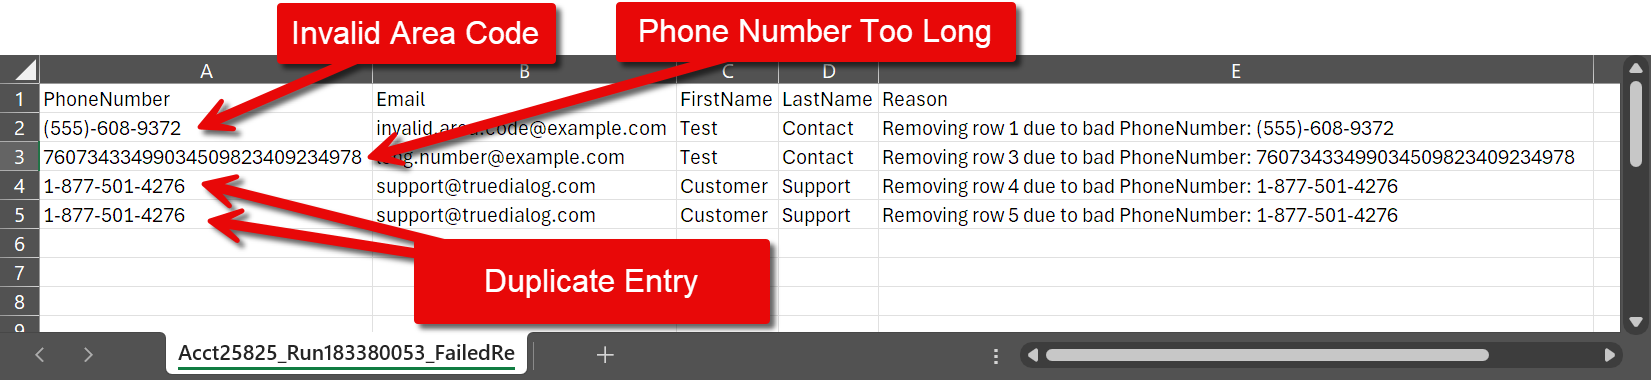
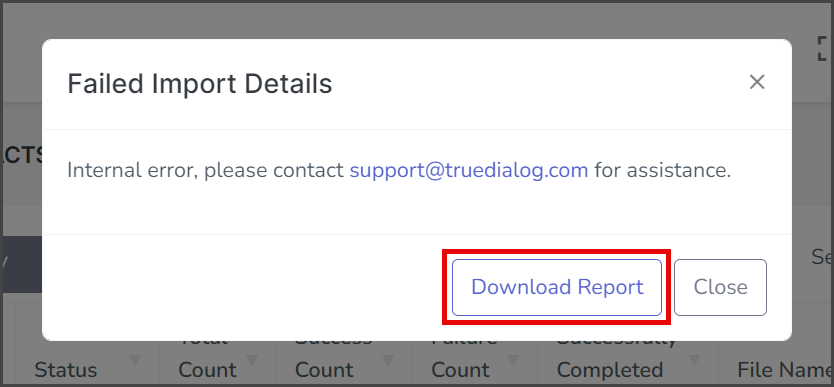
- Click Download Report to get a report of each error for your import.
- Open the report file and read the errors. The screenshot below shows some common errors.