TrueDialog Portal
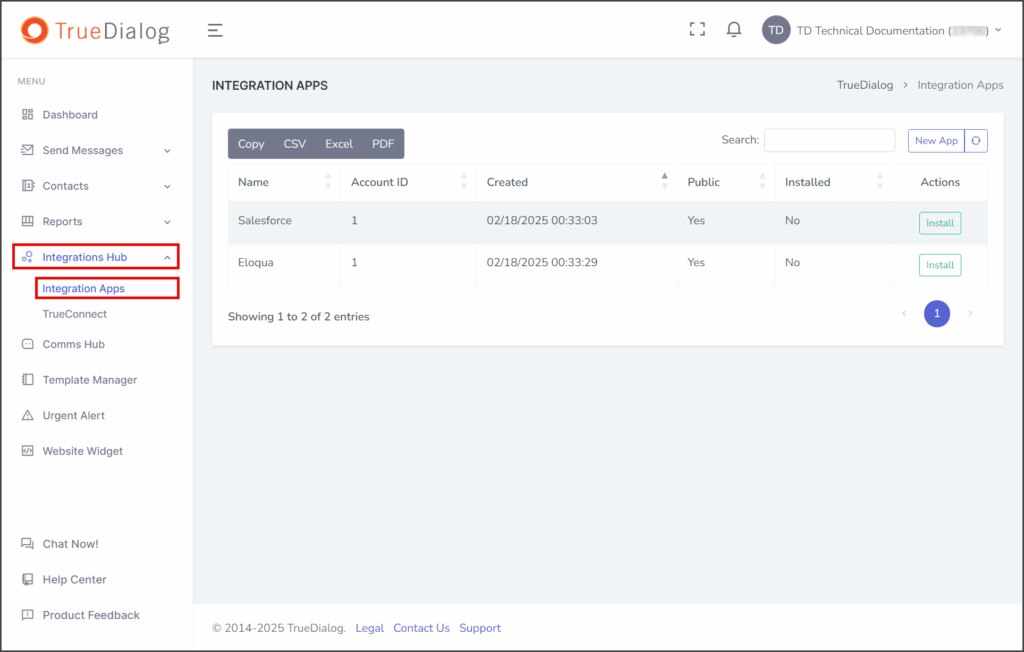
Integrations Hub > Integration Apps
The Integration Apps page lets you install Apps in the Integrations Hub, enabling webhook connections between Apps. The instructions below can be used to install both built-in and custom Apps.
| Connection Type | Webhook Behavior |
|---|---|
| Classic | Webhooks sent immediately after the App is installed. |
| TrueConnect | Webhooks are sent only after the App is installed and a connection is established on the TrueConnect Chart. |
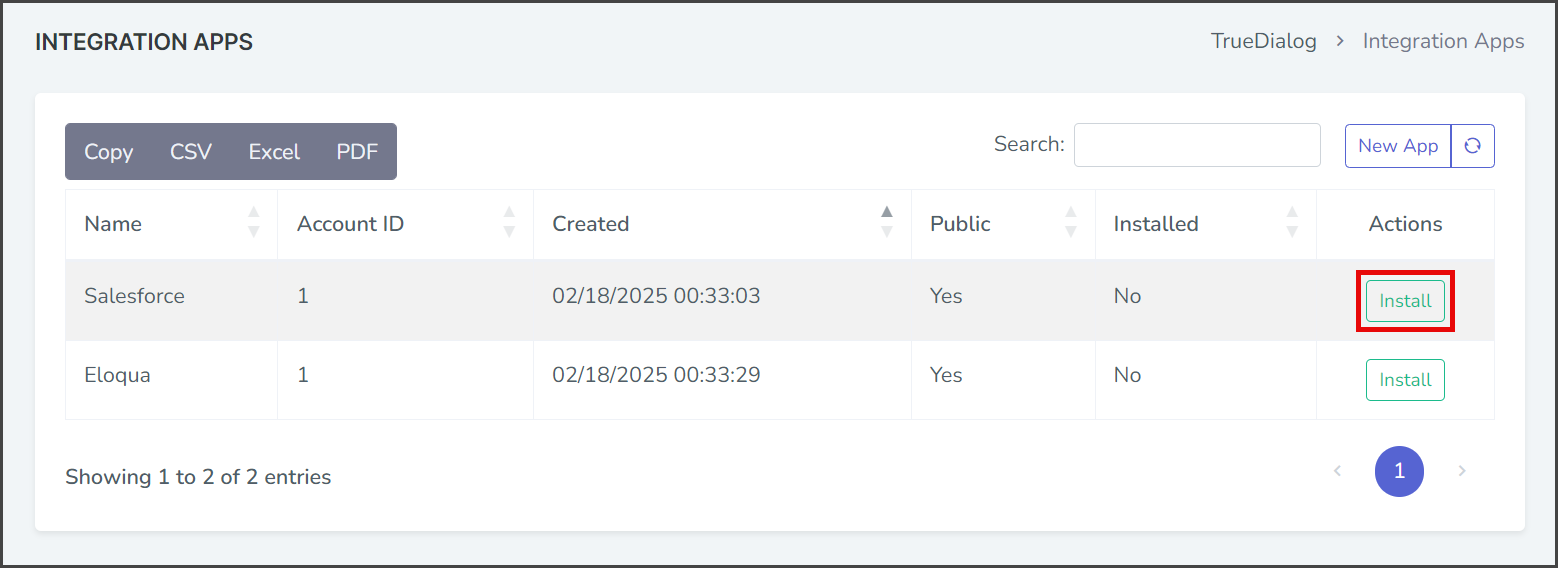
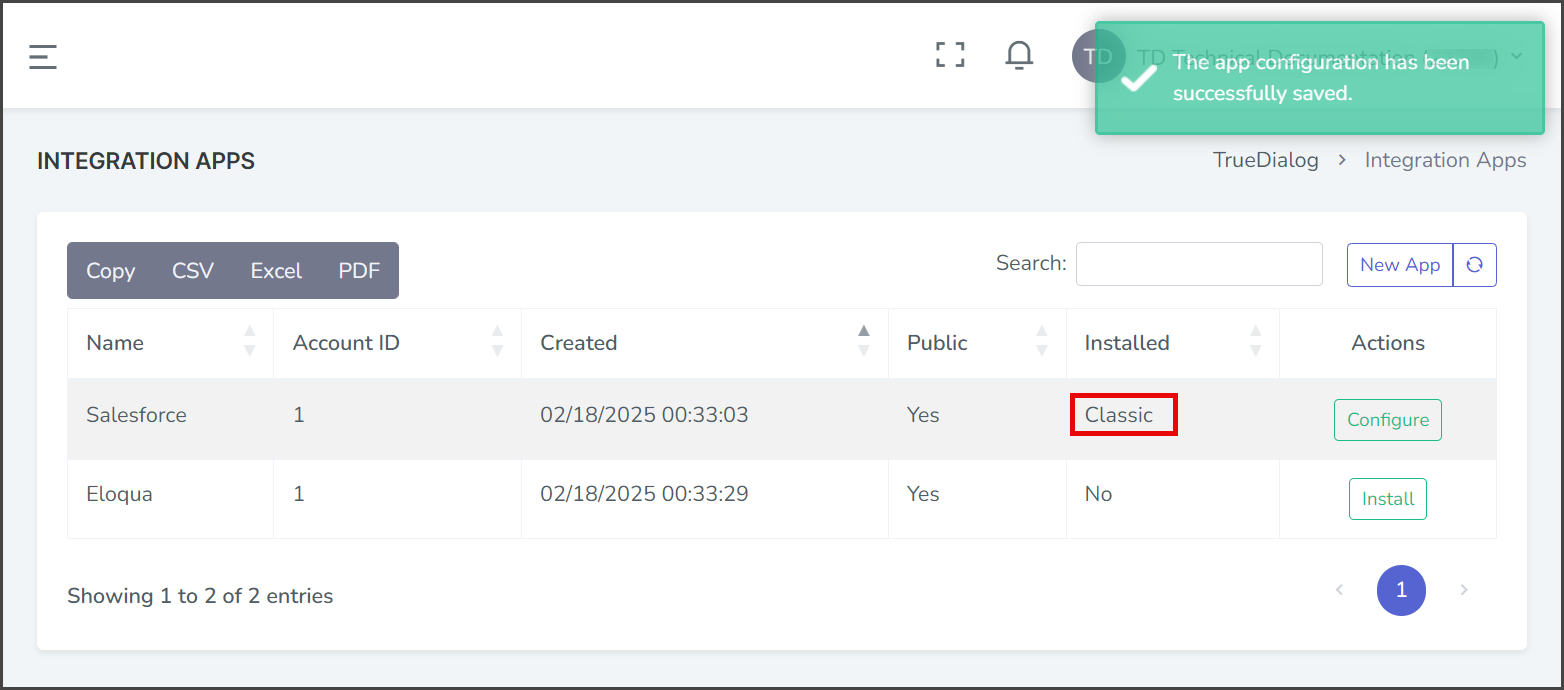
- Access the Integration Apps management page by expanding the Integrations Hub in the left sidebar and clicking Integration Apps.
Install an Integration App
- Click the Install button in the row of the App you wish to install.

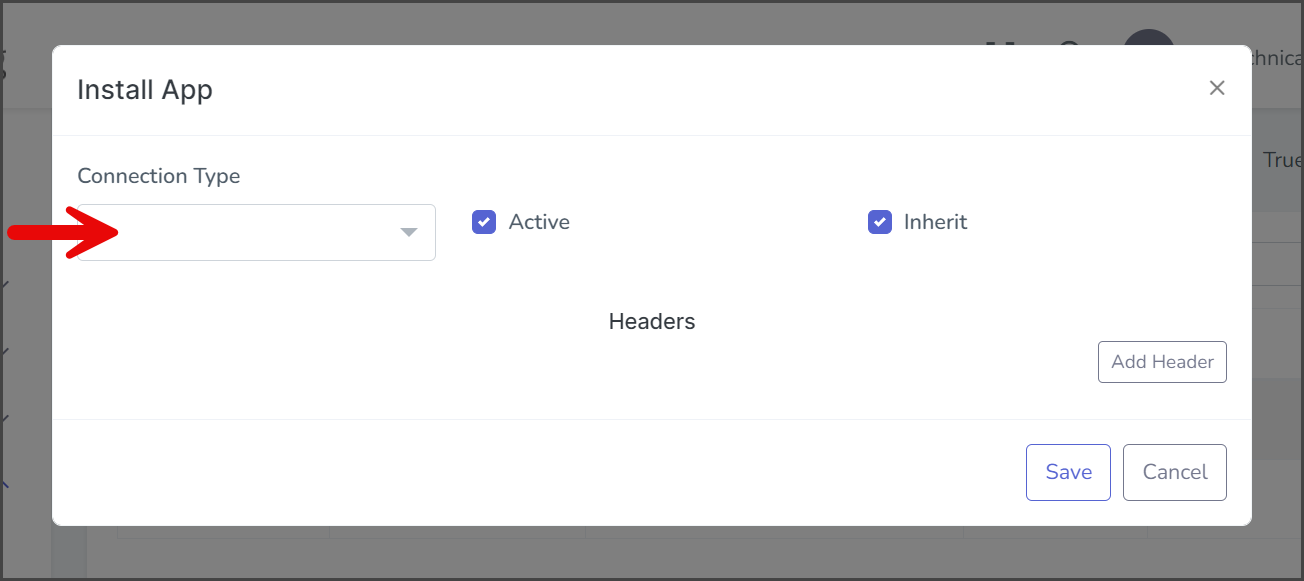
- Click the Connection Type dropdown.

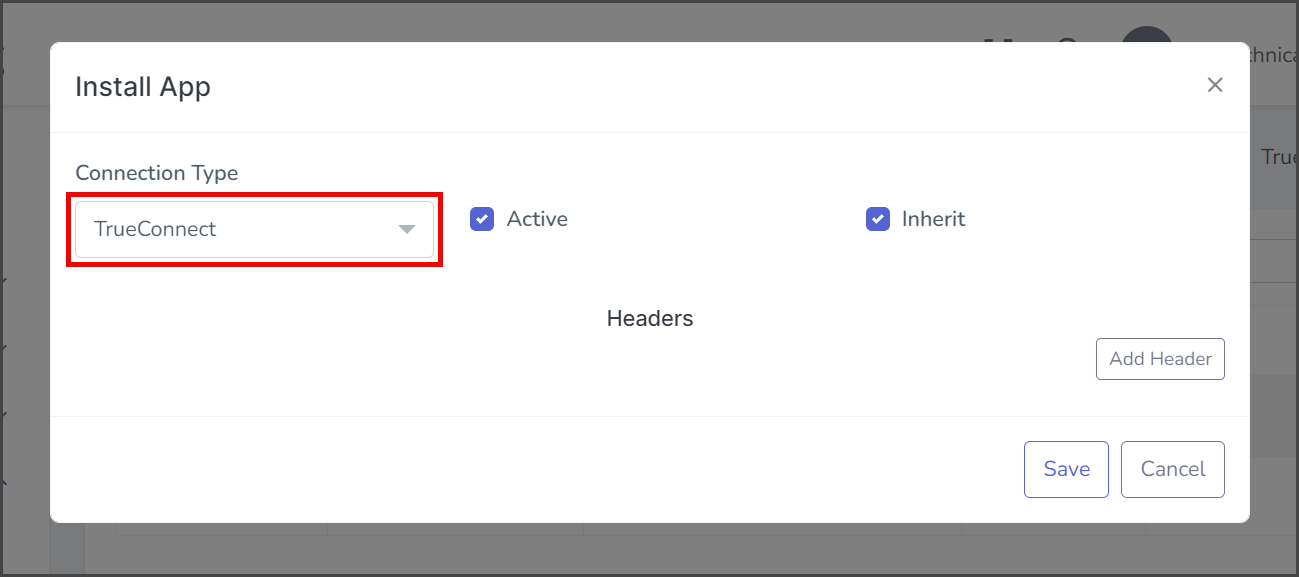
- Select TrueConnect.
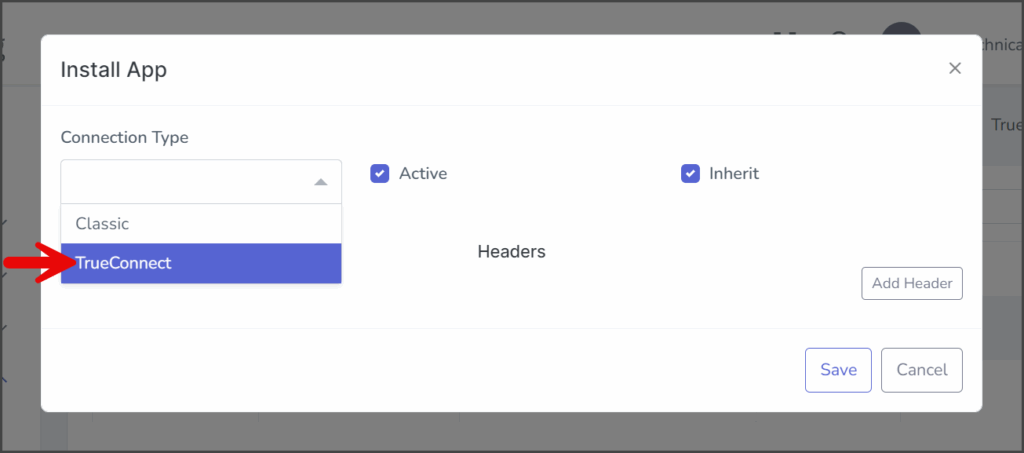
- Configure the App according to your needs. See the sections below for each of the installation options.
- Click Save to install the App.
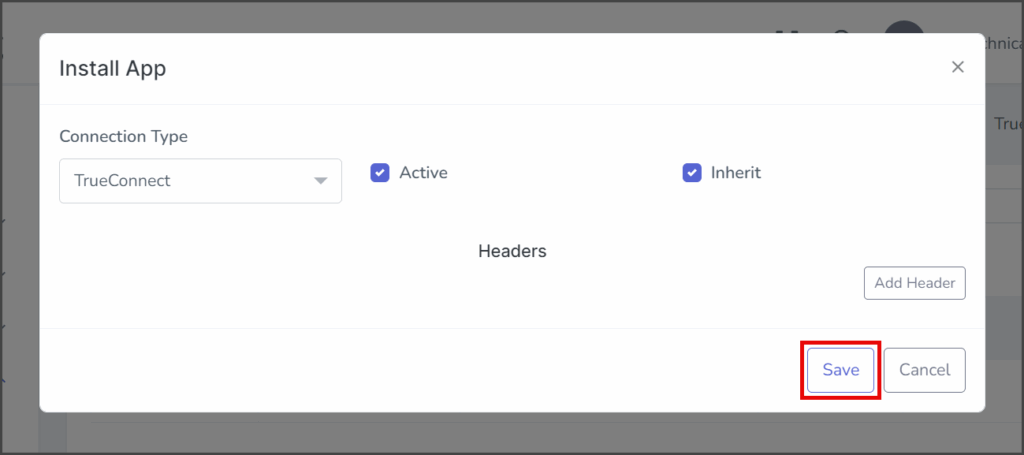
- After installing the App, a success message will appear in the upper right corner, and the Apps Installed field will change to TrueConnect.


Installation Options
Connection Type
The App’s connection type is selected using the Connection Type dropdown. There are two connection type options, TrueConnect and Classic. To learn more about each connection type, see the sections below.
TrueConnect
TrueConnect is the preferred Connection Type for apps, as it provides advanced control over which systems send webhook messages to your apps through the TrueConnect Chart.
The screenshot below shows the Salesforce app installed with the TrueConnect connection type.

Classic
Classic operates similarly to TrueDialog’s callback system but offers a more intuitive interface and enhanced management tools. It is a legacy connection type and should only be used if you cannot use the TrueConnect connection type.
The screenshot below shows the Salesforce app installed with the Classic connection type.
Active
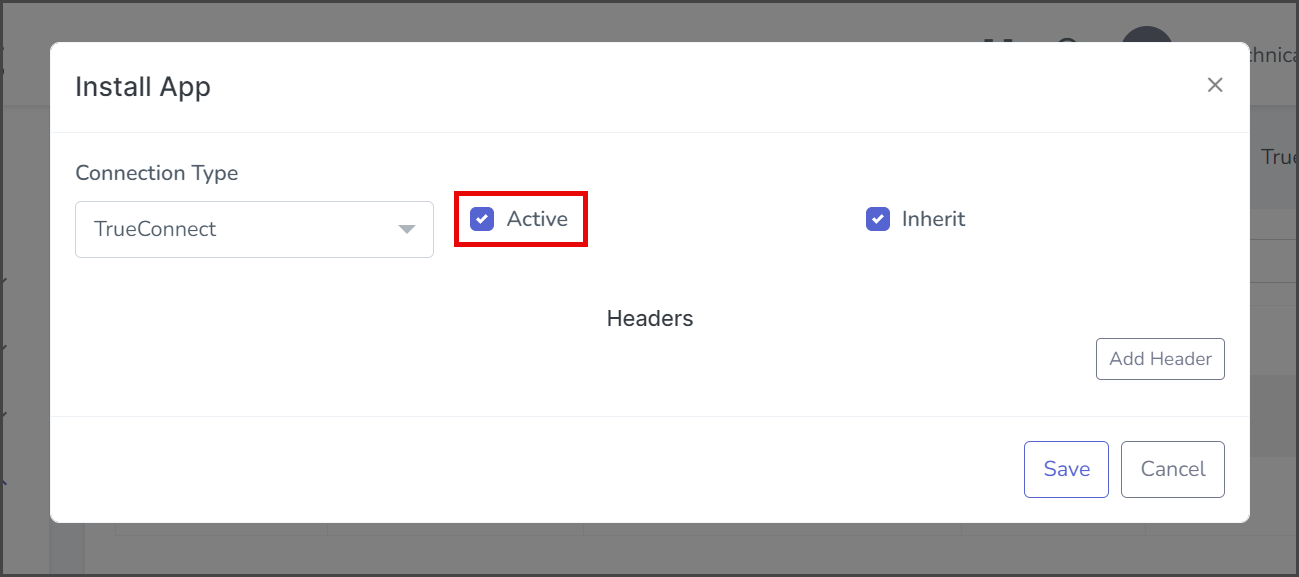
Checked:
The App installation is active, and the configured webhooks will be sent to this App.
Unchecked:
The App installation is inactive, and no webhooks will be sent to this App. Use this option if you don’t want the App to receive webhooks after installation.
Inherit
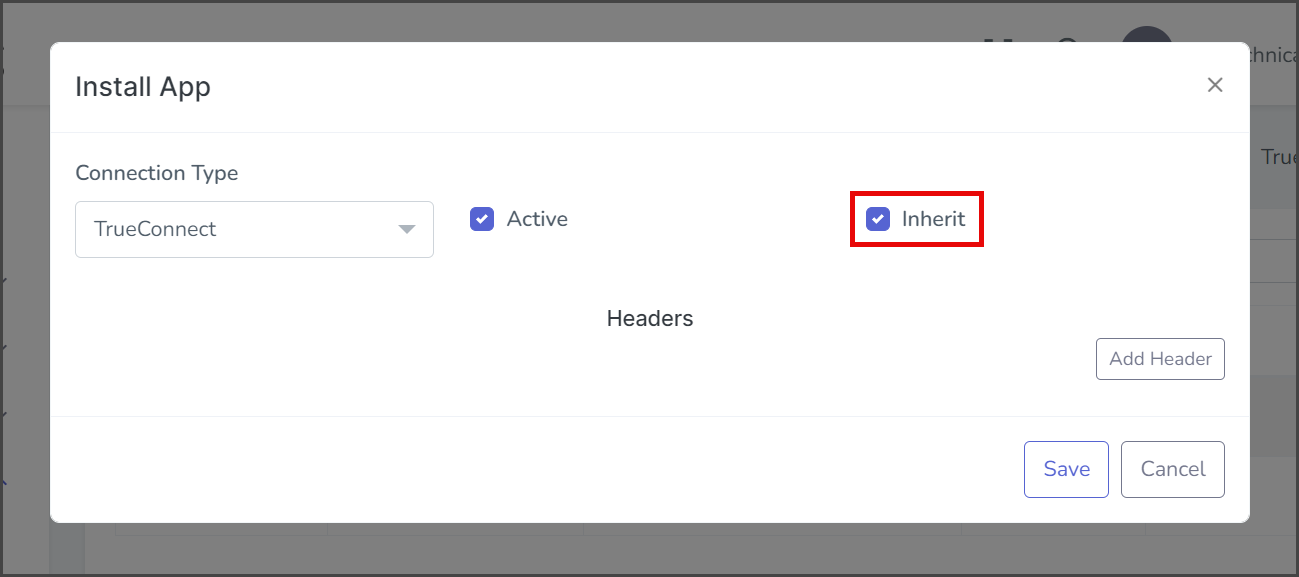
Checked:
The App installation will be applied to all subaccounts. This means that events in subaccounts will trigger webhooks to be sent to this App.
Unchecked:
The App installation applies only to the account that installed it. This means that no webhooks will be sent to this App for events in any subaccounts.
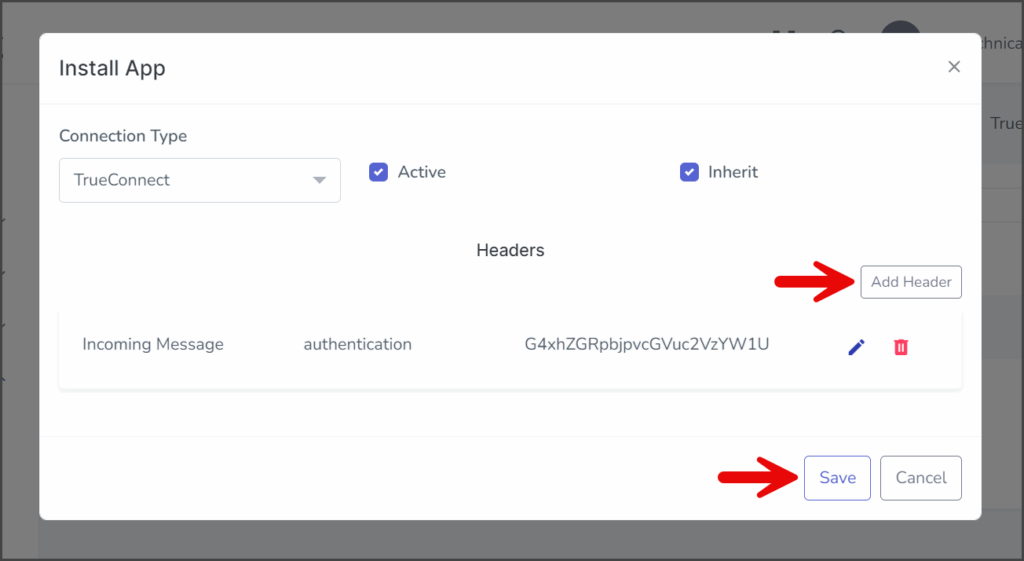
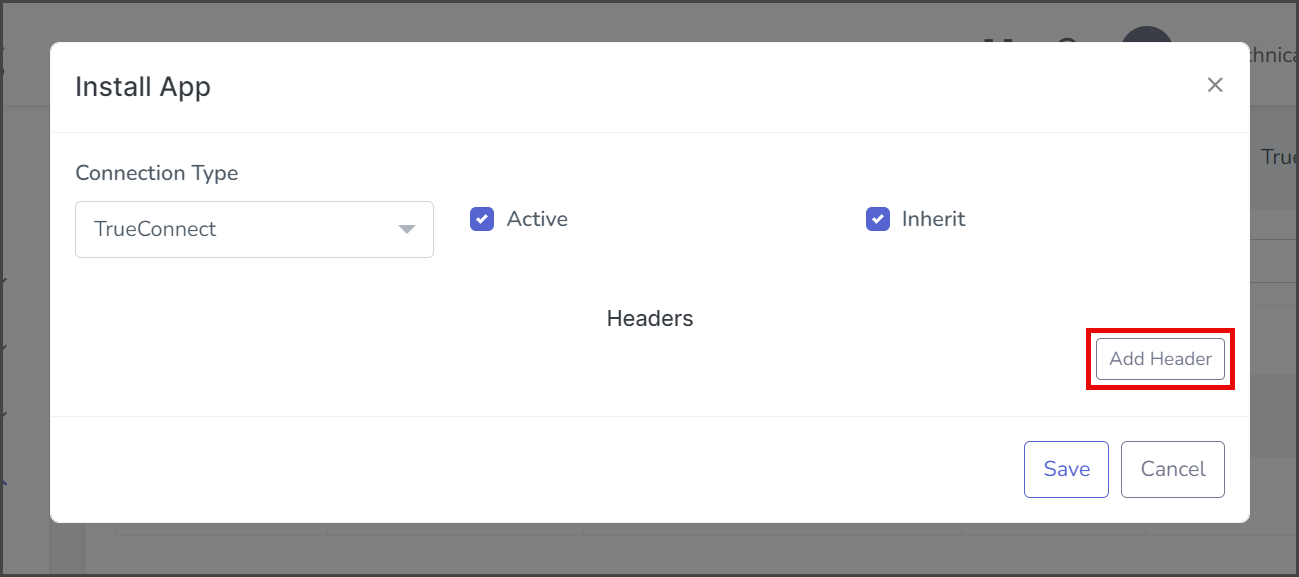
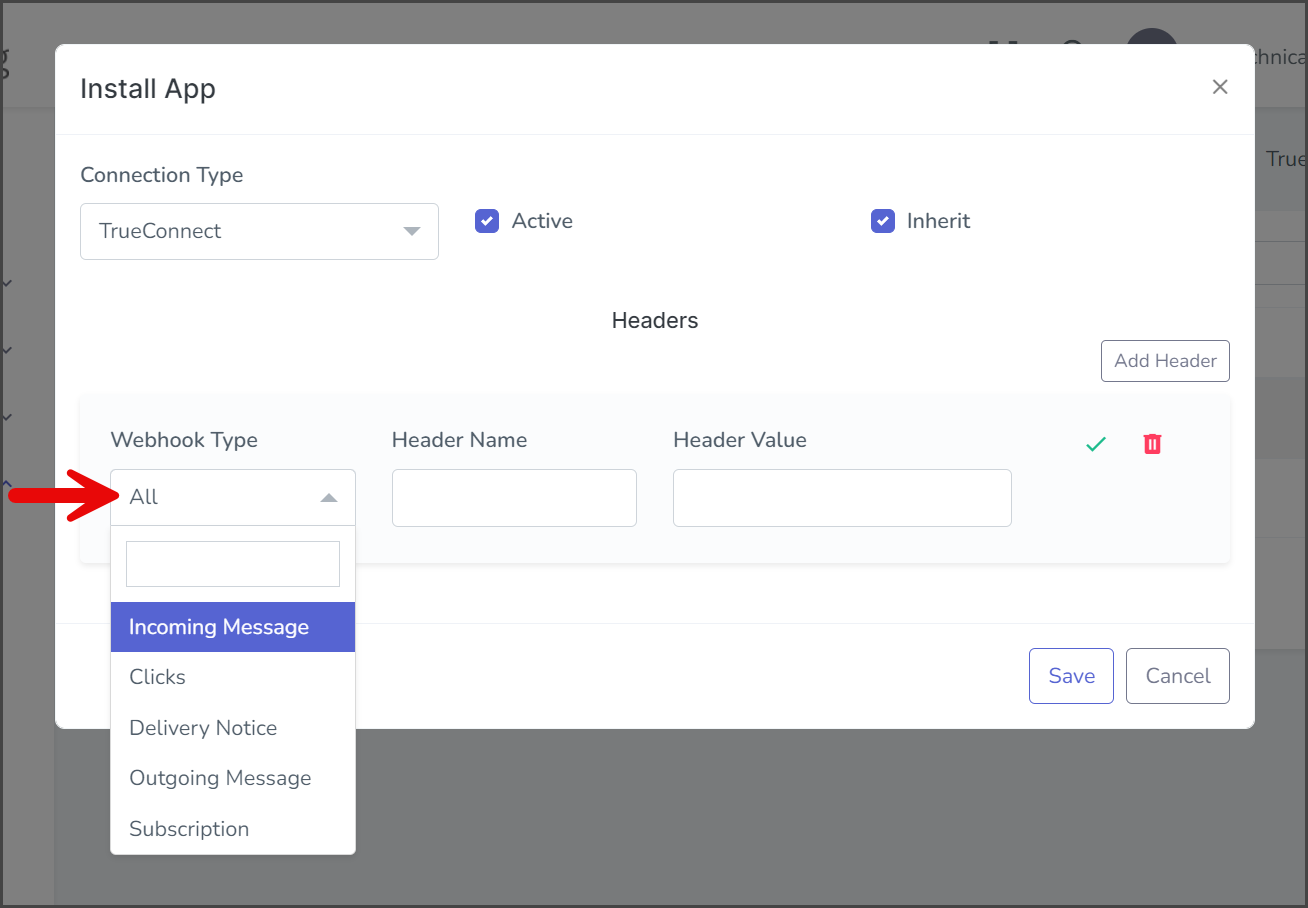
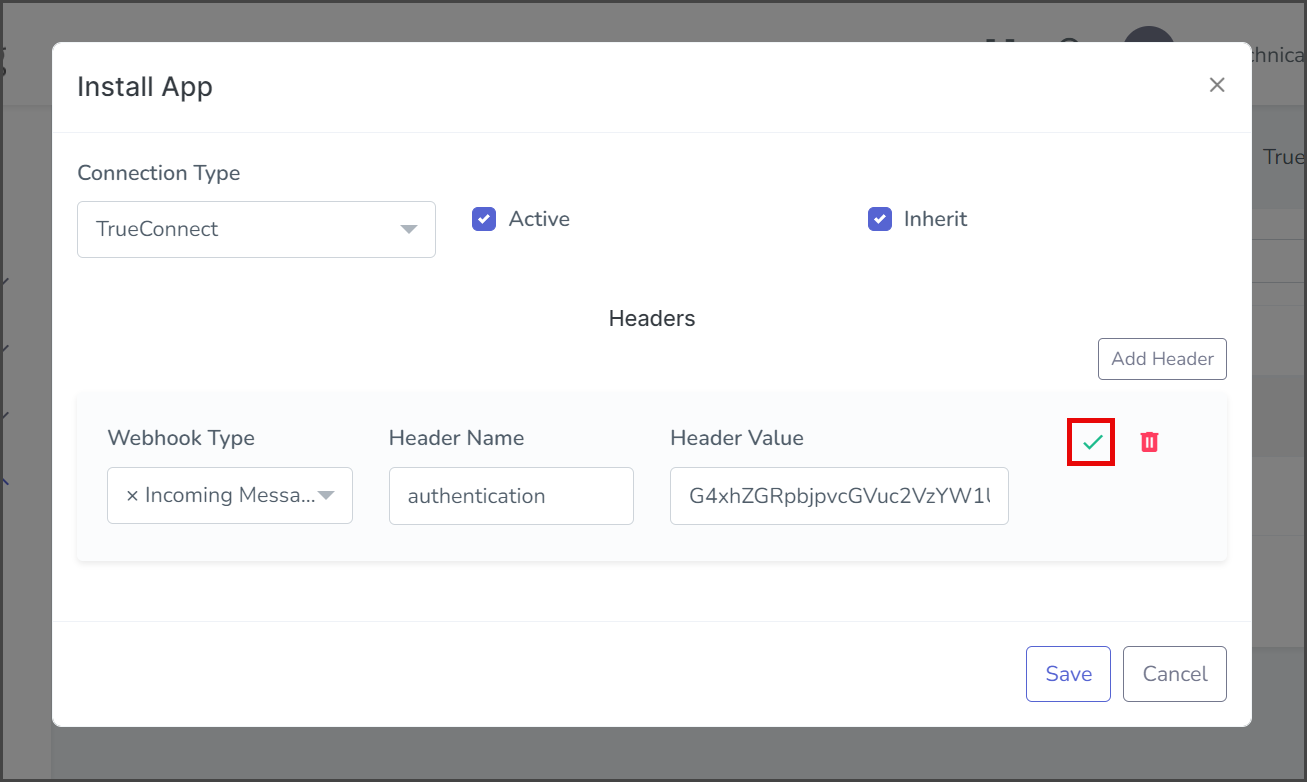
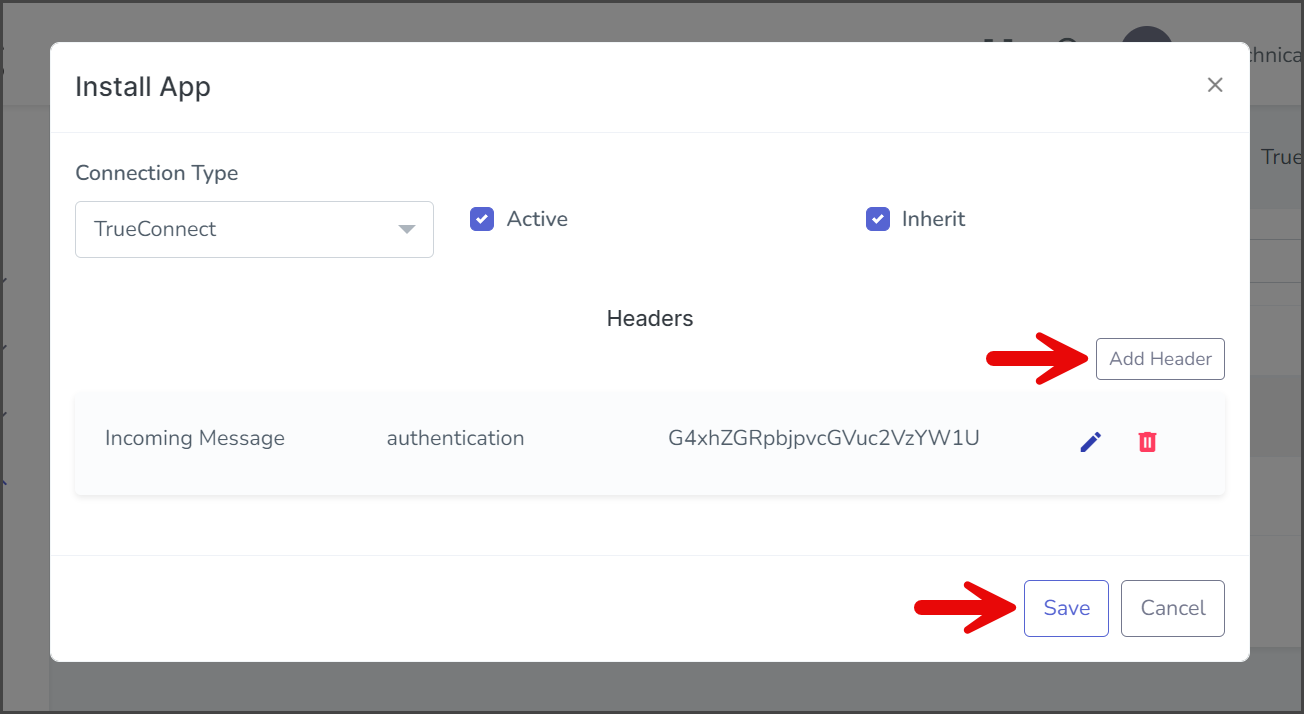
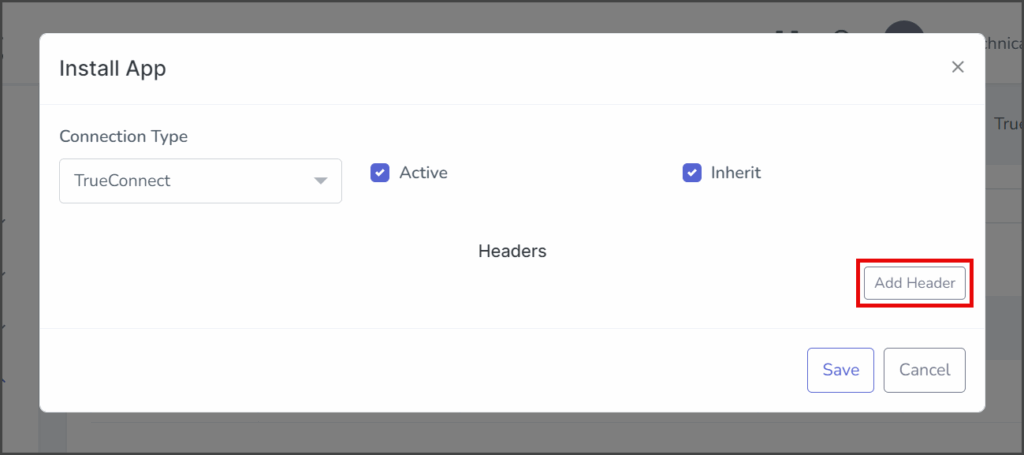
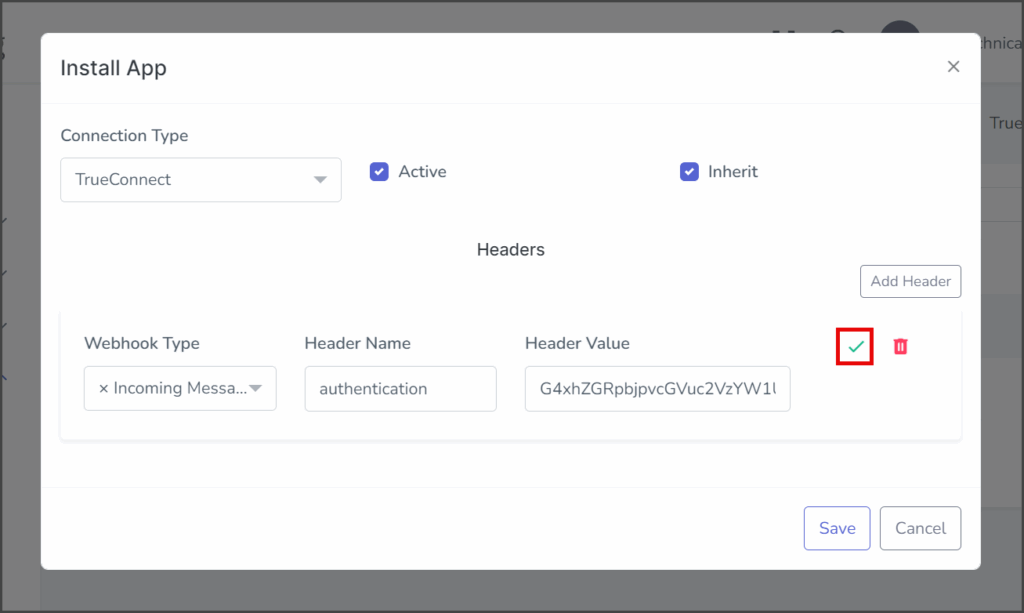
Add Header
You can add a custom static header value to any of the App’s available webhooks. This value will be included in the header of any webhooks of the corresponding type sent to this App. This is useful for sending authentication or other static information.
- Click Add Header.
- In the newly added header row, click the Webhook dropdown.
- Select a webhook from the list of available webhooks for this App.

- Enter Header Name and Header Value in the corresponding text boxes. These values will appear in the webhook header as a key/value pair.
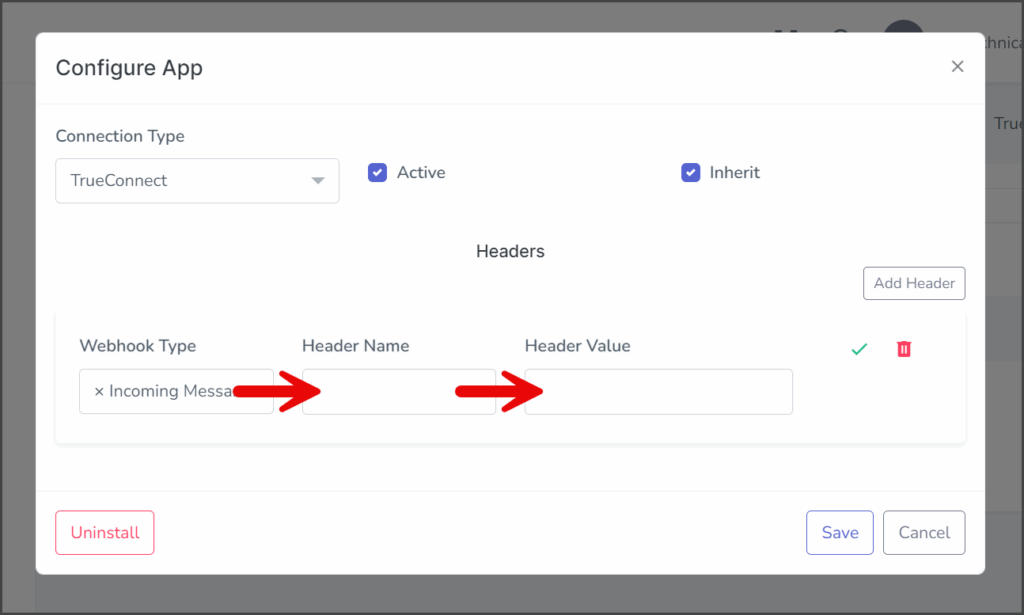
- Click the Check Mark icon in the Action column to finish the header.
- Once the header is complete, you can add another one or save the App.