Microsoft Dynamics
TrueDialog Integration
This article contains instructions for setting up the SMS Chat Messenger and Communication Dashboard to send one-to-one messages. See the MS Dynamics – Sending a Single MMS Message article for instructions on using the SMS Form Messenger. See the MS Dynamics – Using the SMS Messengers article for details about using the features of the messengers.
SMS Chat Embedded on Contact/Account/Lead Form
This implementation embeds the Canvas App created by TrueDialog into the record form. Your administrator will find instructions on how to add the app to the form below.
- Complete the following steps:
- Go to the Power Apps portal.
- Make sure that the correct Environment is selected.
- Open the Solutions list.
- Open the TrueDialog solution.

- Complete the following steps:
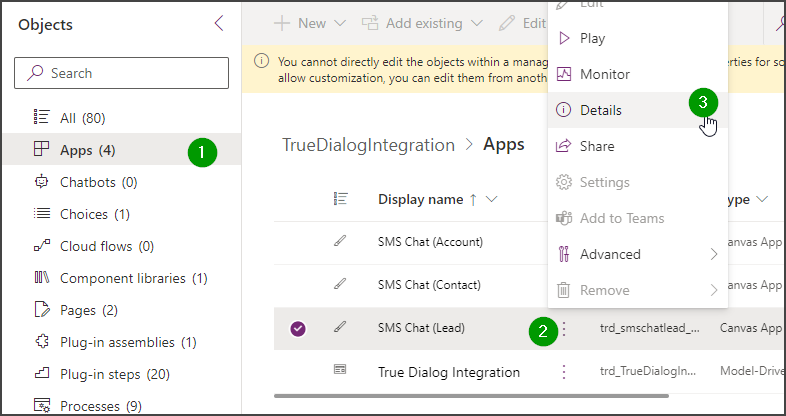
- Go to Apps.
- Select the app for the appropriate entity.
- Select Details.
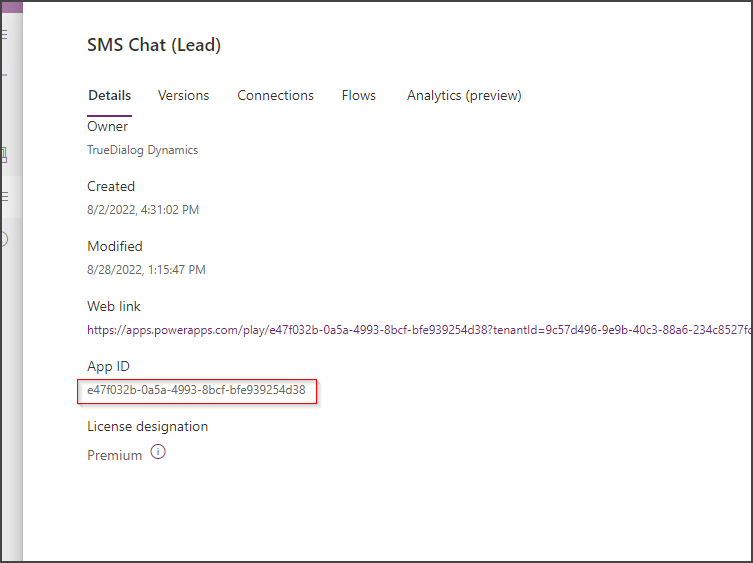
- In the Details window, copy the App ID value.
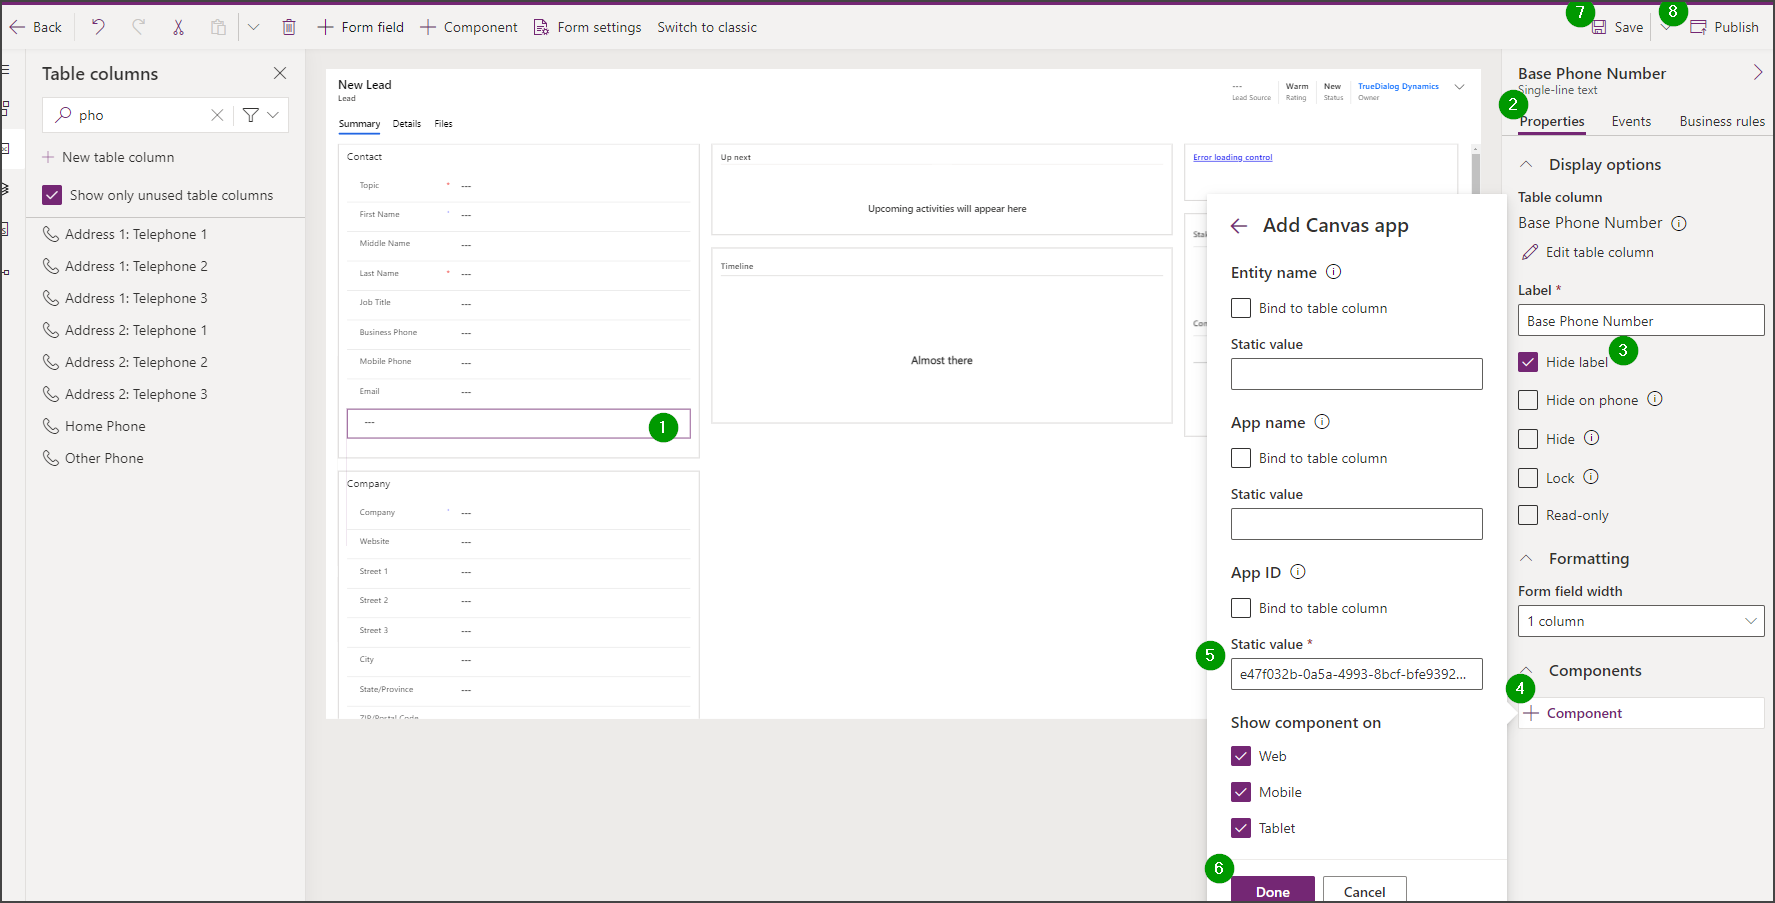
- Open the form to edit where you plan to add this functionality. This example uses the Lead form. On the form, define an existing section or create a new section where you plan to host the embedded chat. In that section, add the field Base Phone Number (it can be any other dummy field).
- Select the field to use.
- Go to Properties.
- Enter Base Phone Number in the Label textbox.
- Click + Component.
- On the Canvas App window, enter the App ID value you got in the previous step into the Static value textbox.
- Click Done.
- Click Save.
- Click Publish.

- Open the form to ensure your changes are applied correctly.
SMS Chat on Right of Contact/Account/Lead Form
To activate this feature:
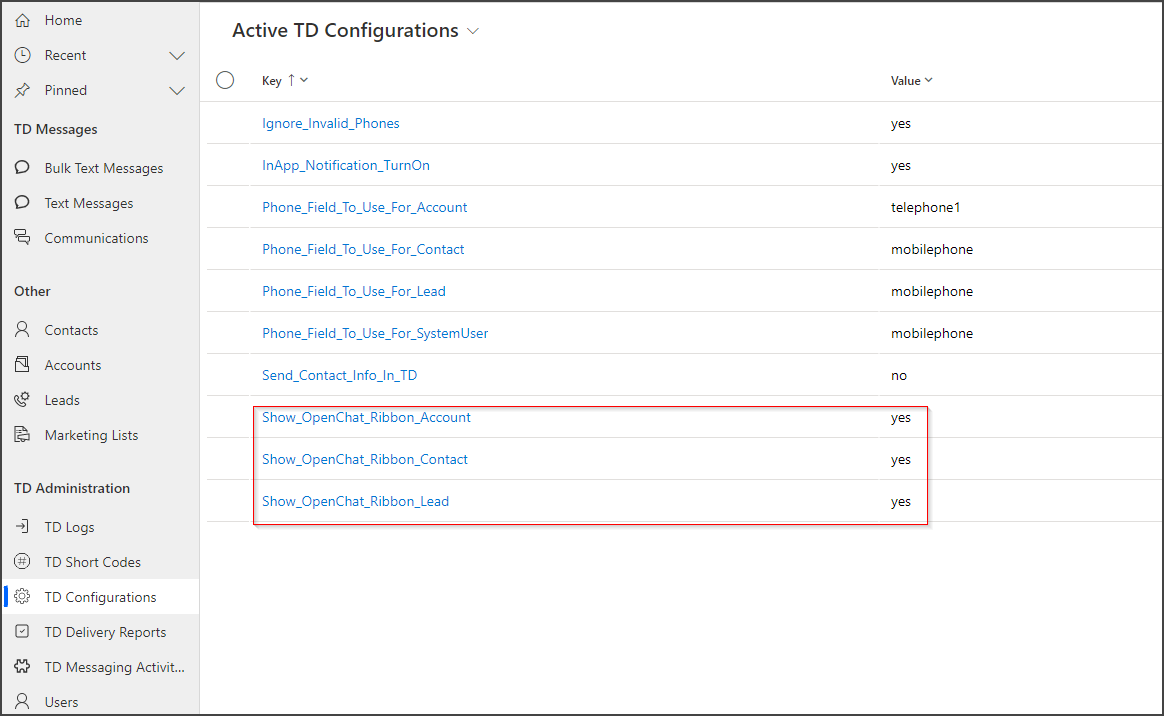
- Go to the TrueDialog integration app.
- TD Configuration section and make sure that the following toggles are turned on for the required entity:
- Show_OpenChat_Ribbon_Account
- Show_OpenChat_Ribbon_Contact
- Show_OpenChat_Ribbon_Lead
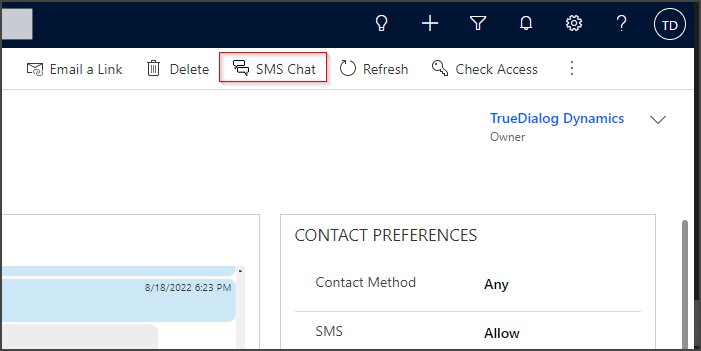
Once enabled, users will see a new button, SMS Chat, on the ribbon.
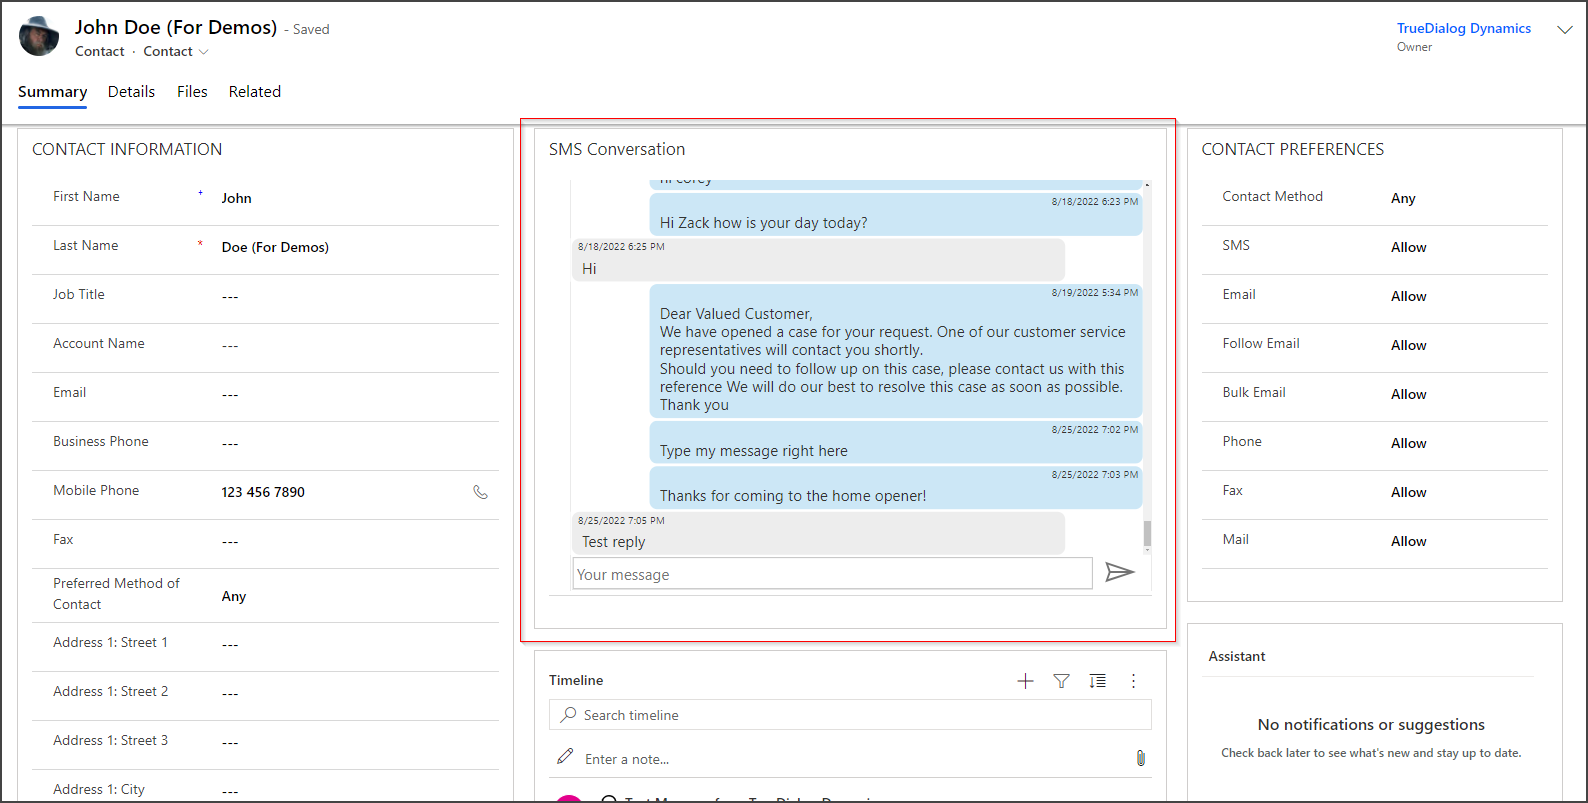
When the user clicks on the SMS Chat button, a side panel appears with the conversation history for this record and the ability to send a new message.
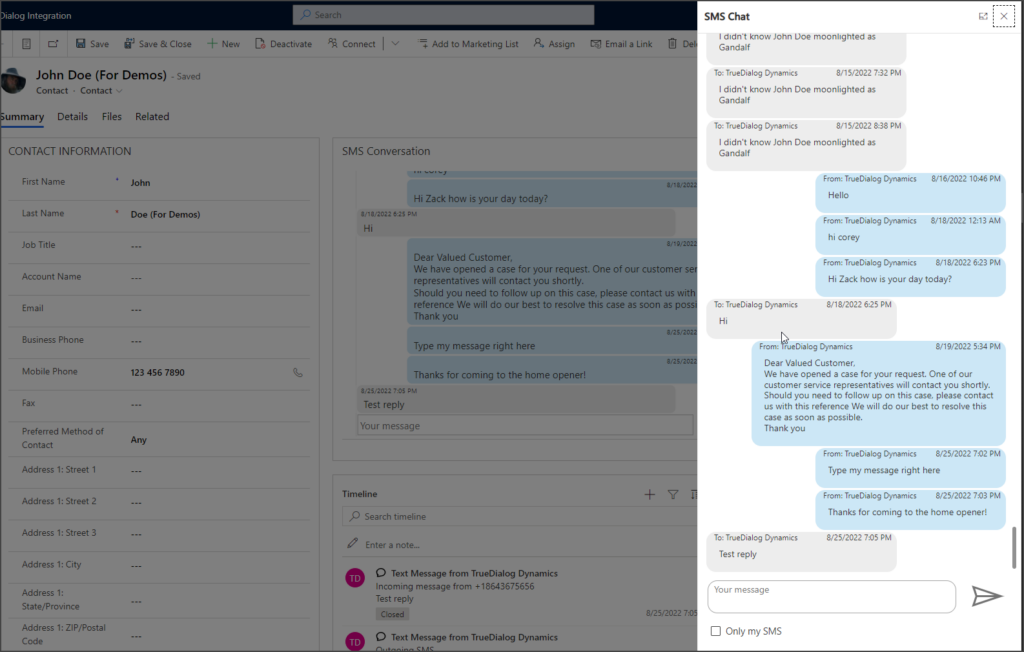
If multiple users send messages to the same record, you can filter only messages sent by the current user by checking the Only my SMS checkbox under the message textbox.
SMS Chat in Model-driven Apps
- If the app is already added to a solution, you can skip this step. Otherwise, create a new solution and add the app you need to update to it.
- Open the app in Edit mode.

- Once loaded, complete the following steps:
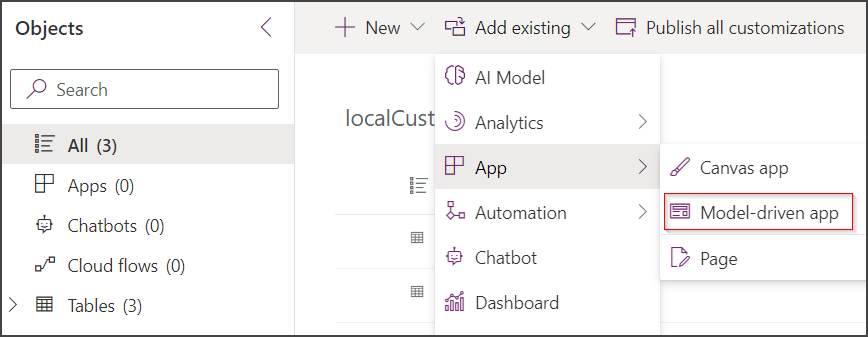
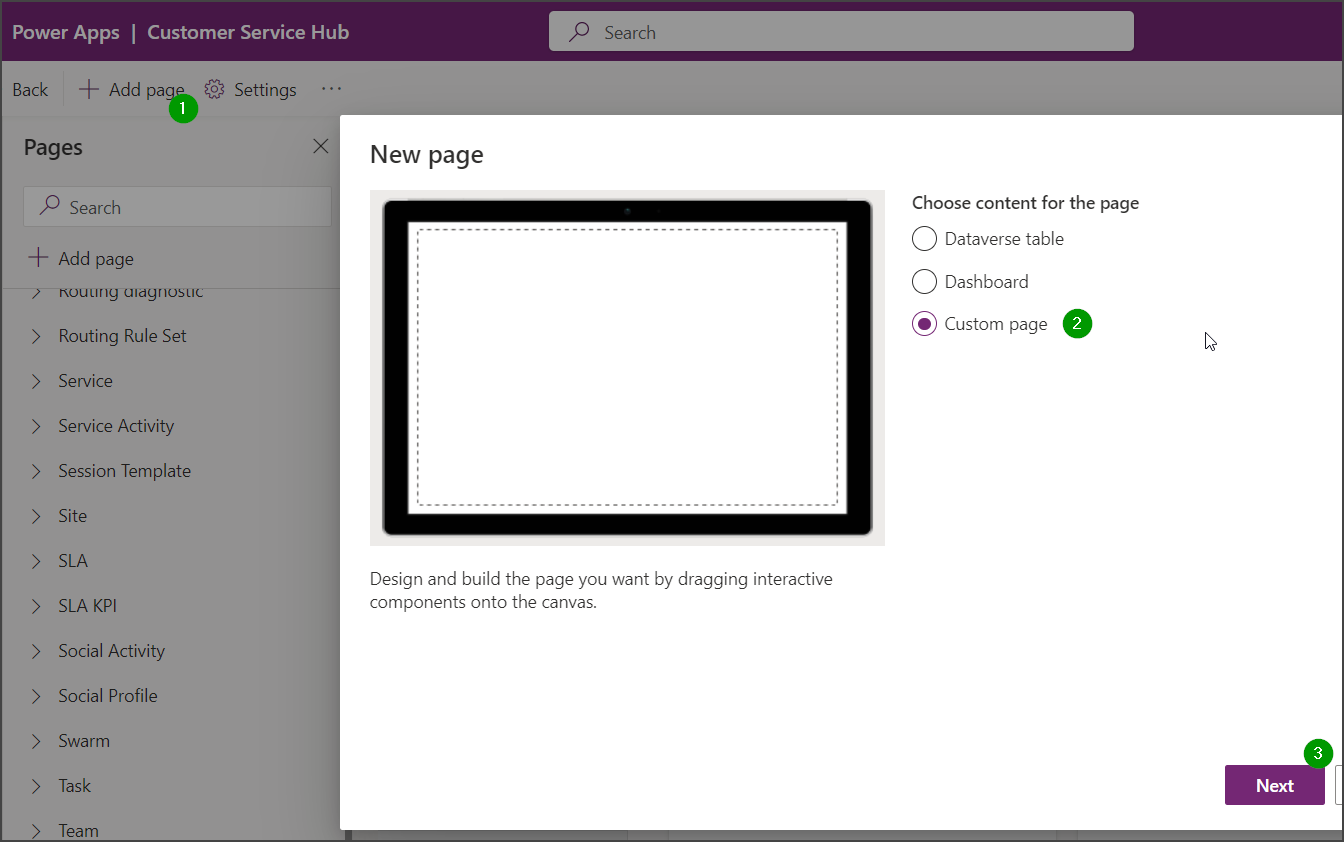
- Click the Add Page button.
- Select the Custom Page option.
- Click Next.

- Complete the following steps:
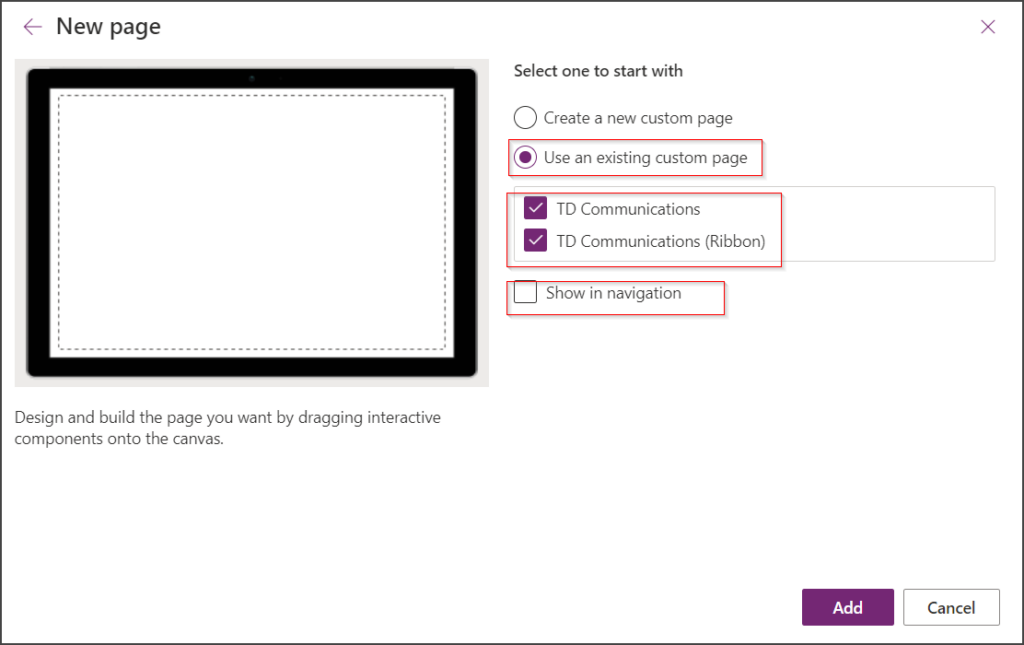
- Select the Use an existing custom page option.
- Select all the pages with the TD prefix.
- Uncheck the Show in navigation checkbox.
- Click the Add button.
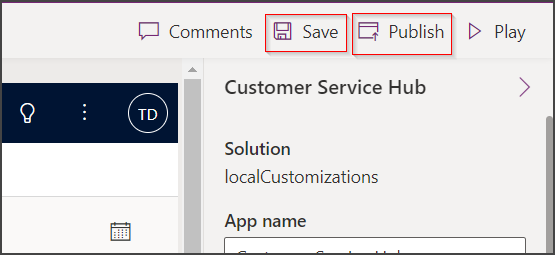
- Click Save and Publish after saving.
- Return to your app, open the Account, Contact, or Lead record, refresh the page several times, and click on the SMS Chat button on the ribbon. Functionality should start working, and the window for sending messages should appear.

SMS Communication Dashboard
The Communication Dashboard is a page that can be embedded in the site map (navigation menu) and displays messages from different types of records (accounts/contacts/leads) in one place.
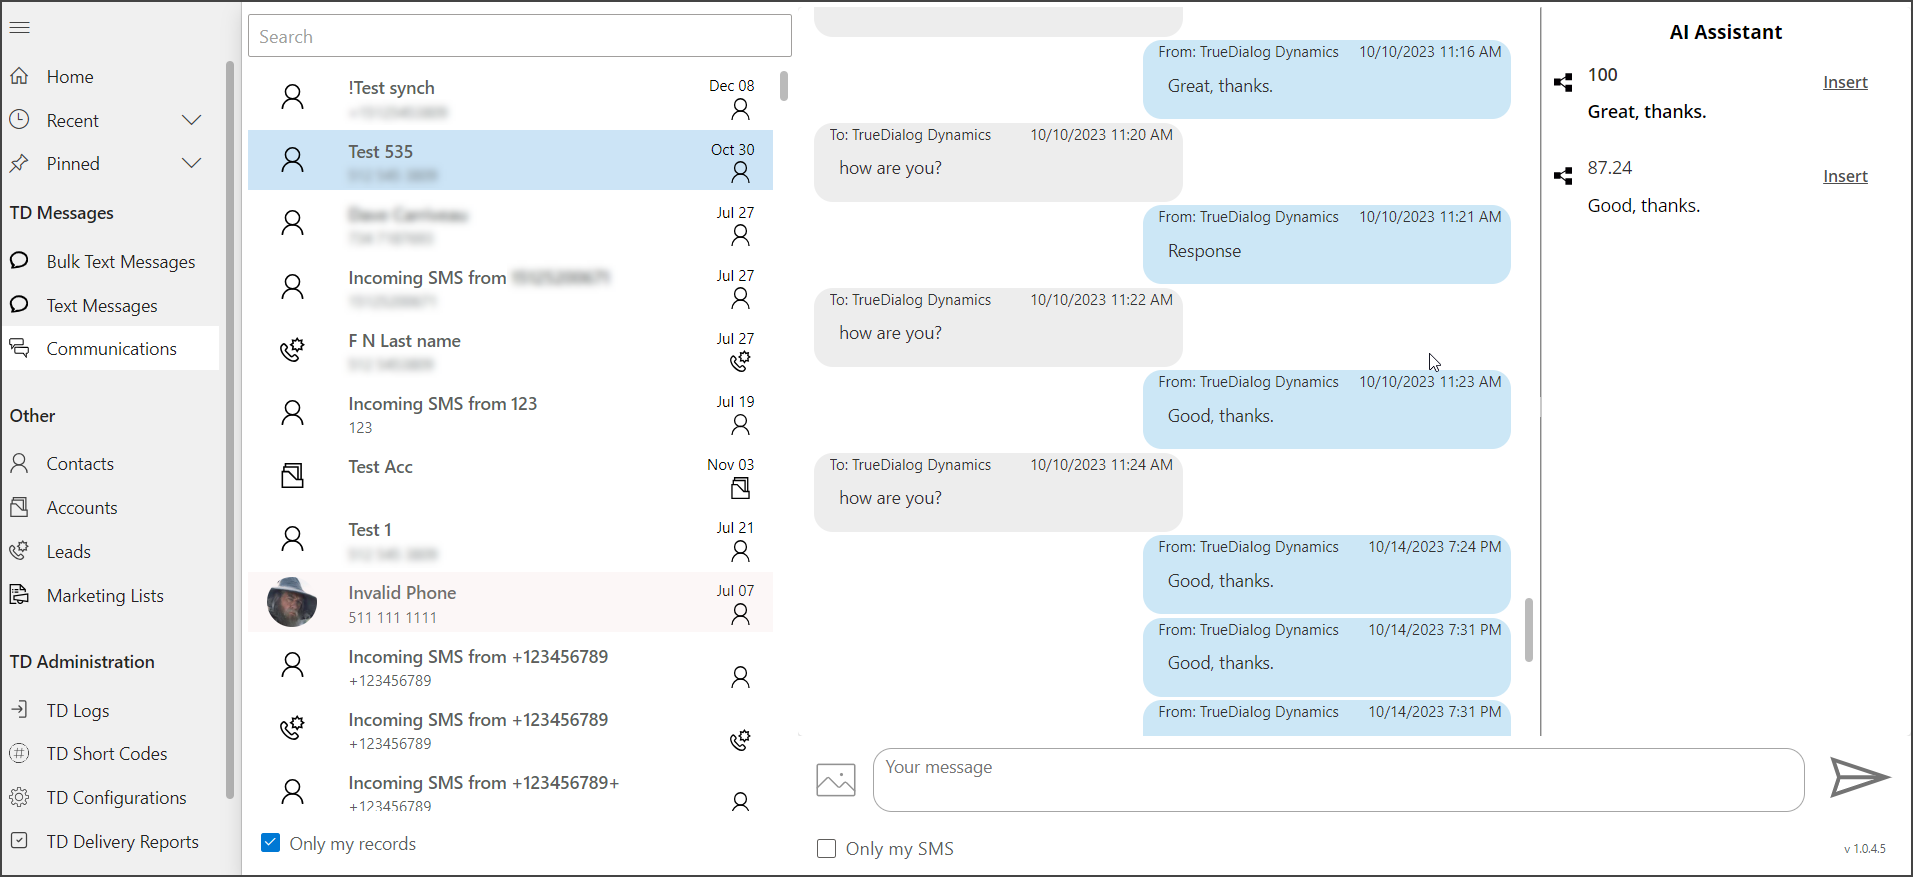
- The user Image is taken from the record’s image; a standard entity icon is displayed if nothing is present.
- The icon below the date/time of the last message is clickable. Once clicked, the user is redirected to the associated record main form.
- The Only my records checkbox, filters contacts/accounts/leads, and displays only the records where the current user is assigned as an owner. When a user checks/unchecks the field, the value is stored in the field trd_userconfig in the table system user. If users don’t have permission to update the record, administrators can copy the JSON from a record where it was filled in and set the value in communicationDashboard_DefaultOwnedByUser to true.
- The AI Assistant can be turned on and off. For details, please see the MS Dynamics – Using the SMS Messengers – AI Assistant article.