TrueDialog Portal
Sending Messages > Campaigns
After creating an Email campaign, the next step is to push it to a list of contacts. This article will guide you through immediately pushing your Email campaign to a Contact List.
There are various options available to configure the push action for your campaign. You can execute it immediately, at a scheduled time, or make it recurring. Additionally, you can add recipients as a Contact List or manually enter their email addresses. The article series [Immediate, Scheduled, Recurring] on pushing a text message campaign explains these options in detail and can be applied to other types of campaigns. For simplicity, this article will only focus on how to push an Email campaign to a Contact List immediately.
Create Push
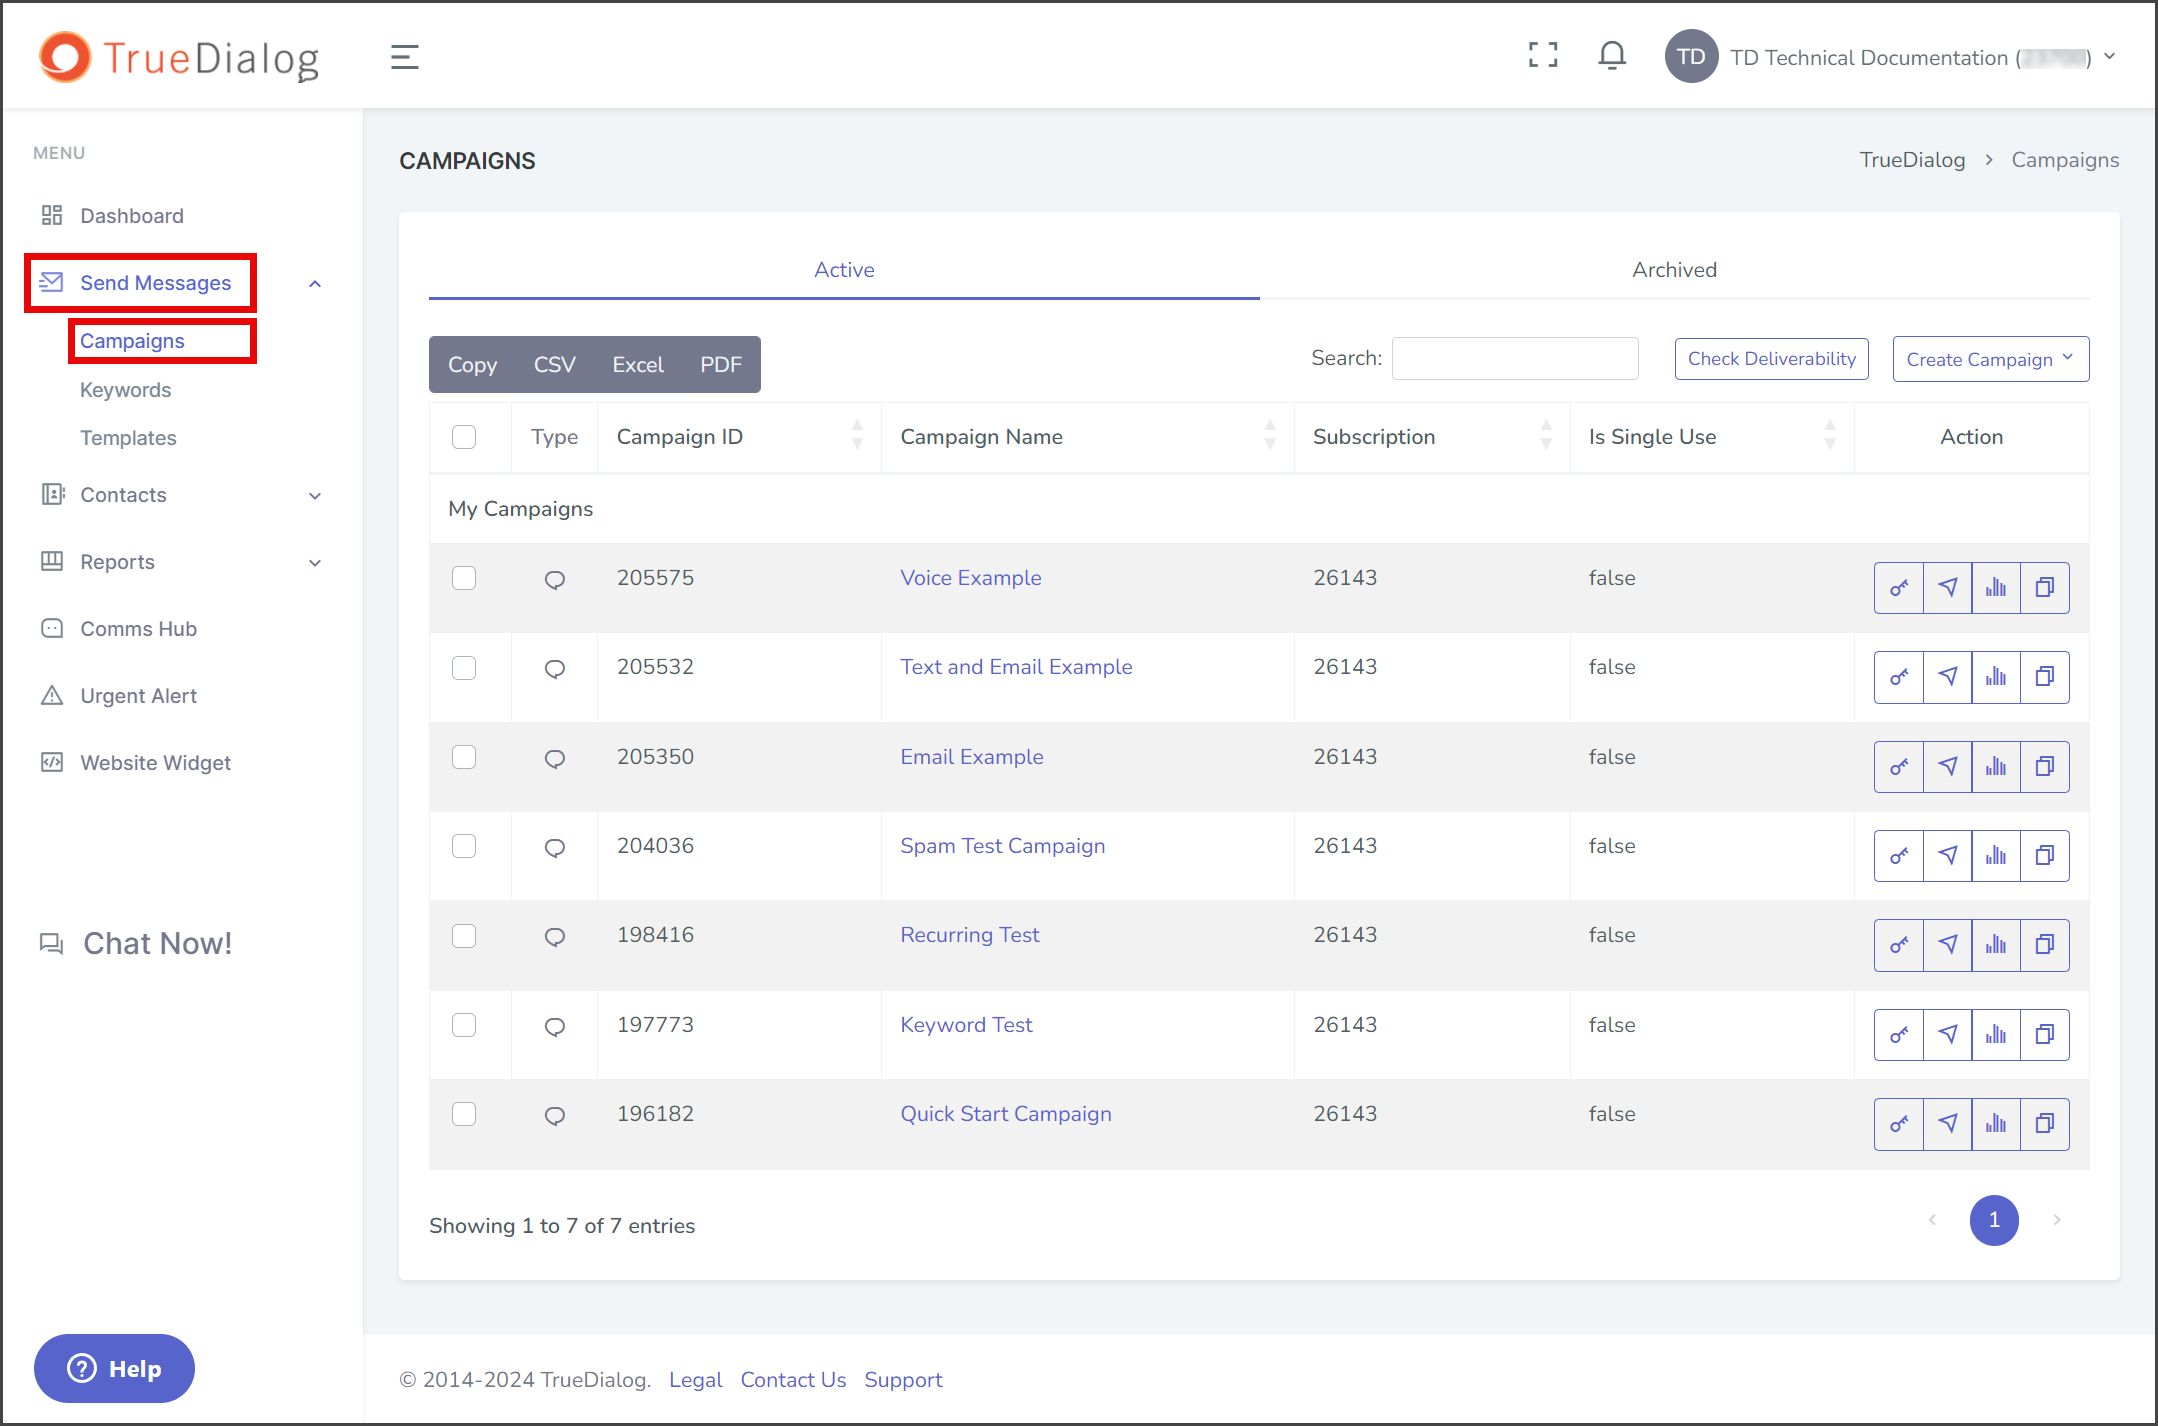
- Expand Send Messages in the left sidebar and select Campaigns.
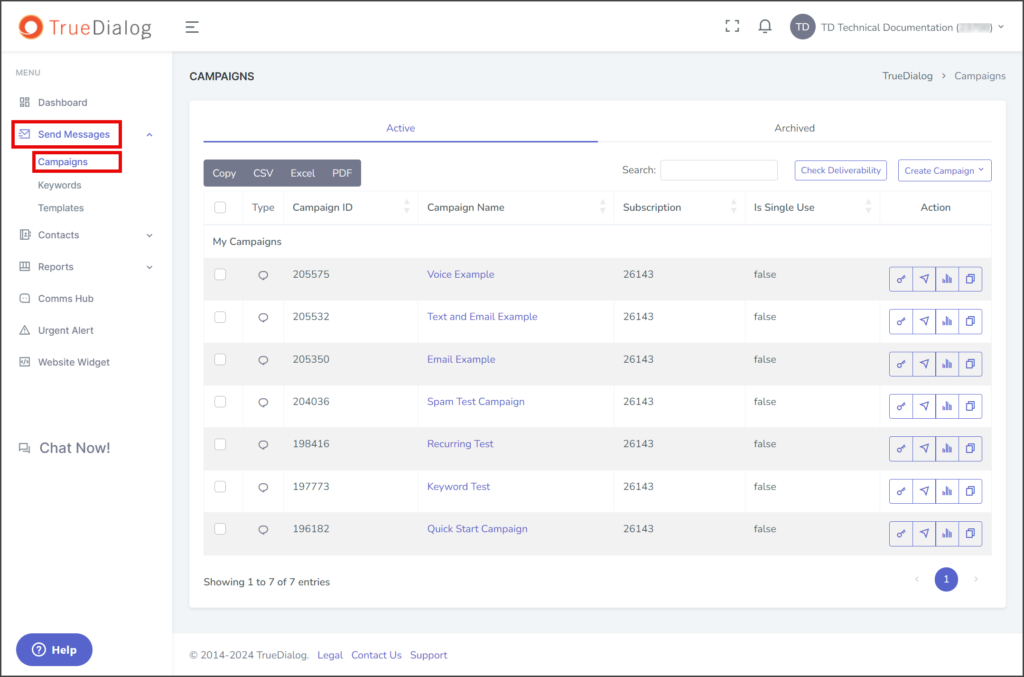
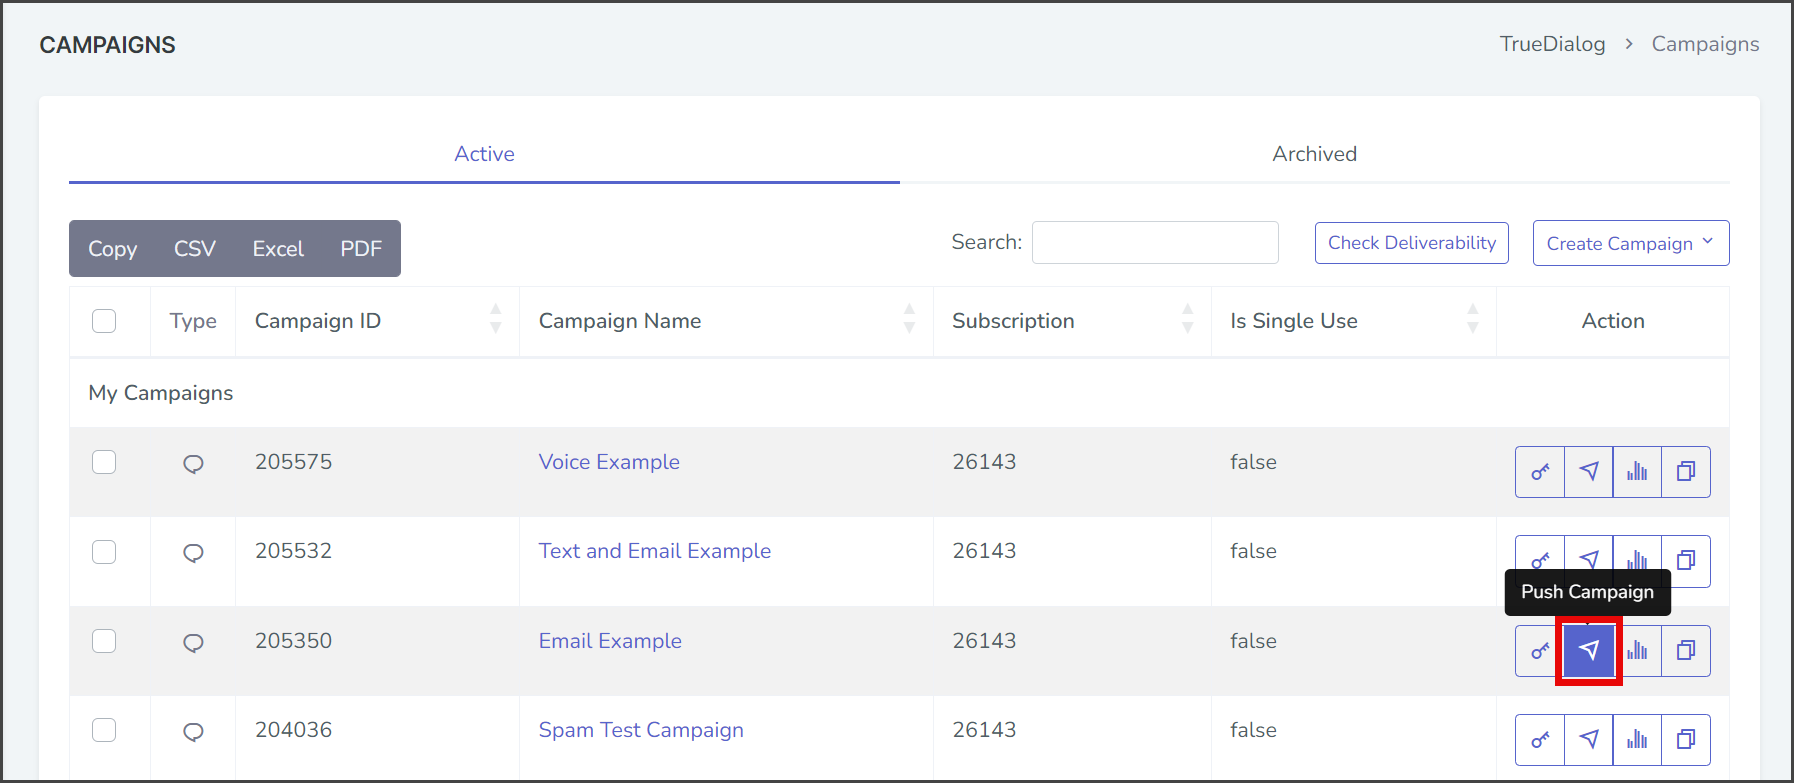
- Click the arrow icon in the campaign’s action column to open the dialog window to push the campaign.

- Select Execute.
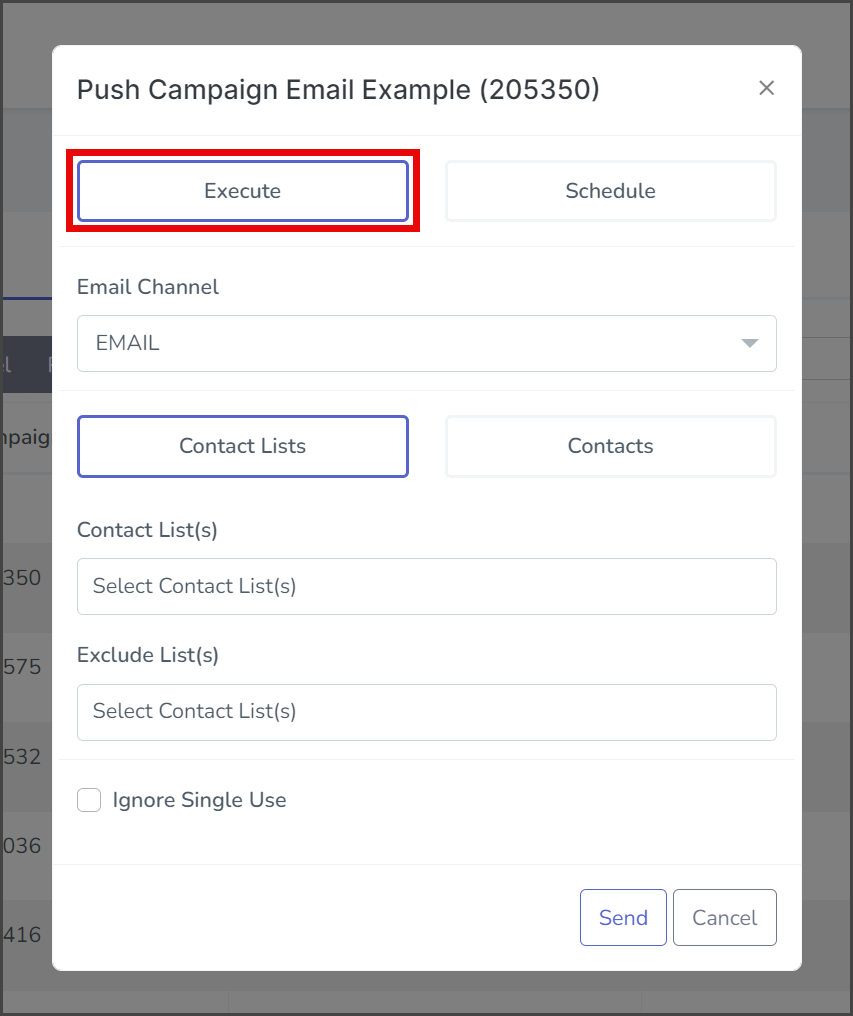
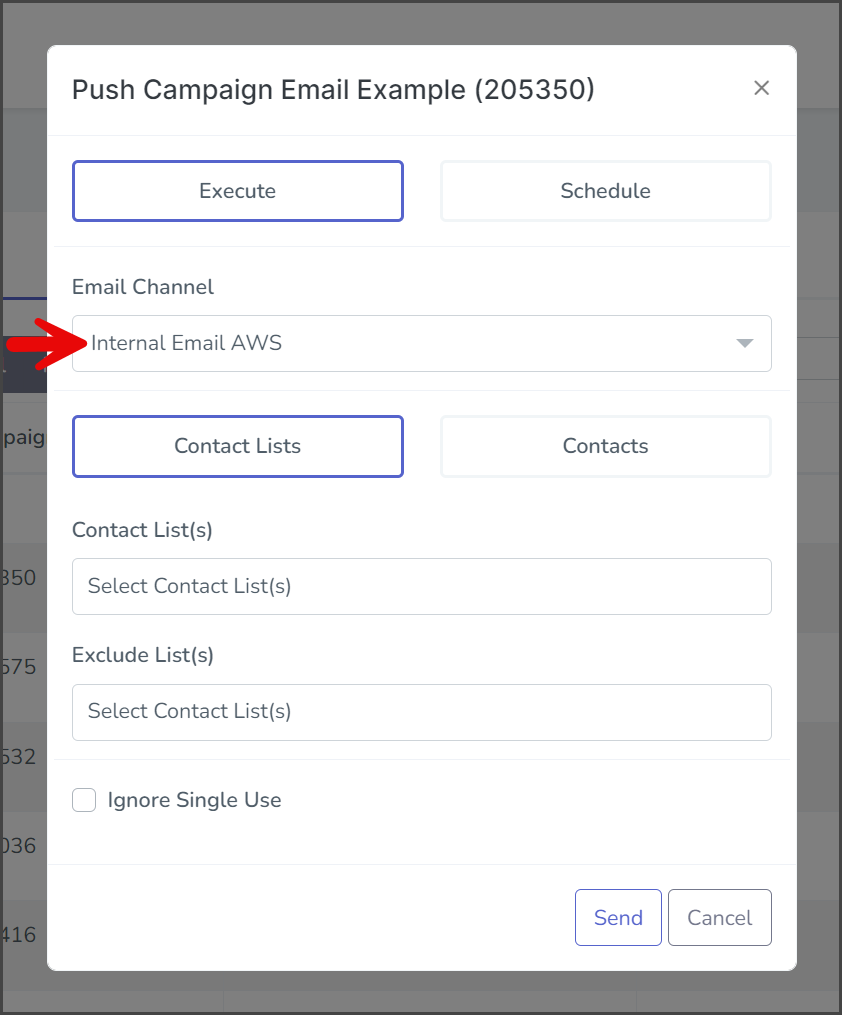
- Click the Email Channel dropdown and select the email channel from which the messages will be sent.
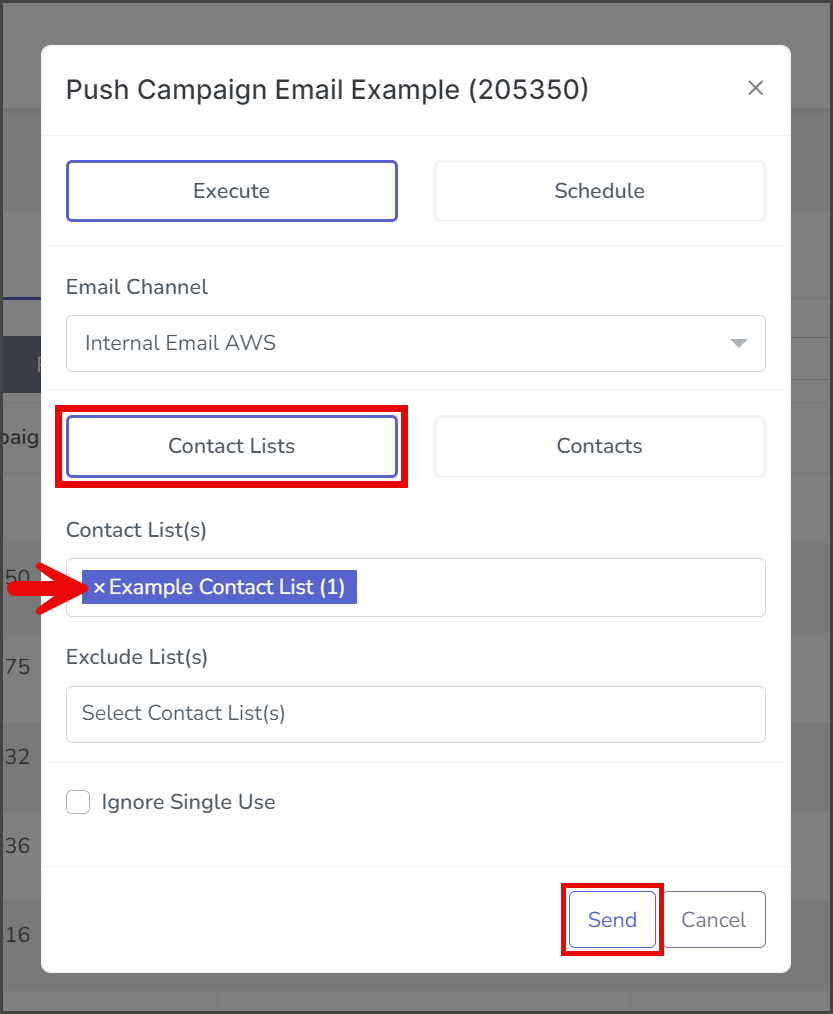
- Click the Contact List(s) box to get a list of the available contact lists.
- Select one of the contact lists to add. Repeat these steps to add as many contact lists as required. Note: If a contact is in multiple lists, the system will only send a message to the contact once.
- (Optional) Select Ignore Single Use if you wish to send a single-use campaign message to contacts that have already received the campaign.
- Click Send.
- Review the details of the push. An estimate of the number of messages the push will send is shown.
- Enter the confirmation code on the left in the box on the right.
- Click Confirm.

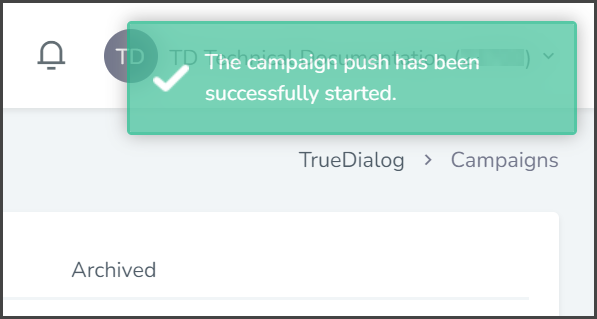
- After starting the campaign push, a success message will appear in the upper right corner.