Salesforce
TrueDialog Integration
The TrueDialog Settings utility provides access to various TrueDialog settings and functions. The instructions in this article show you how to add this utility to your app. See the Salesforce – Using TrueDialog Settings Utility to learn how to use the utility.
Add Utility
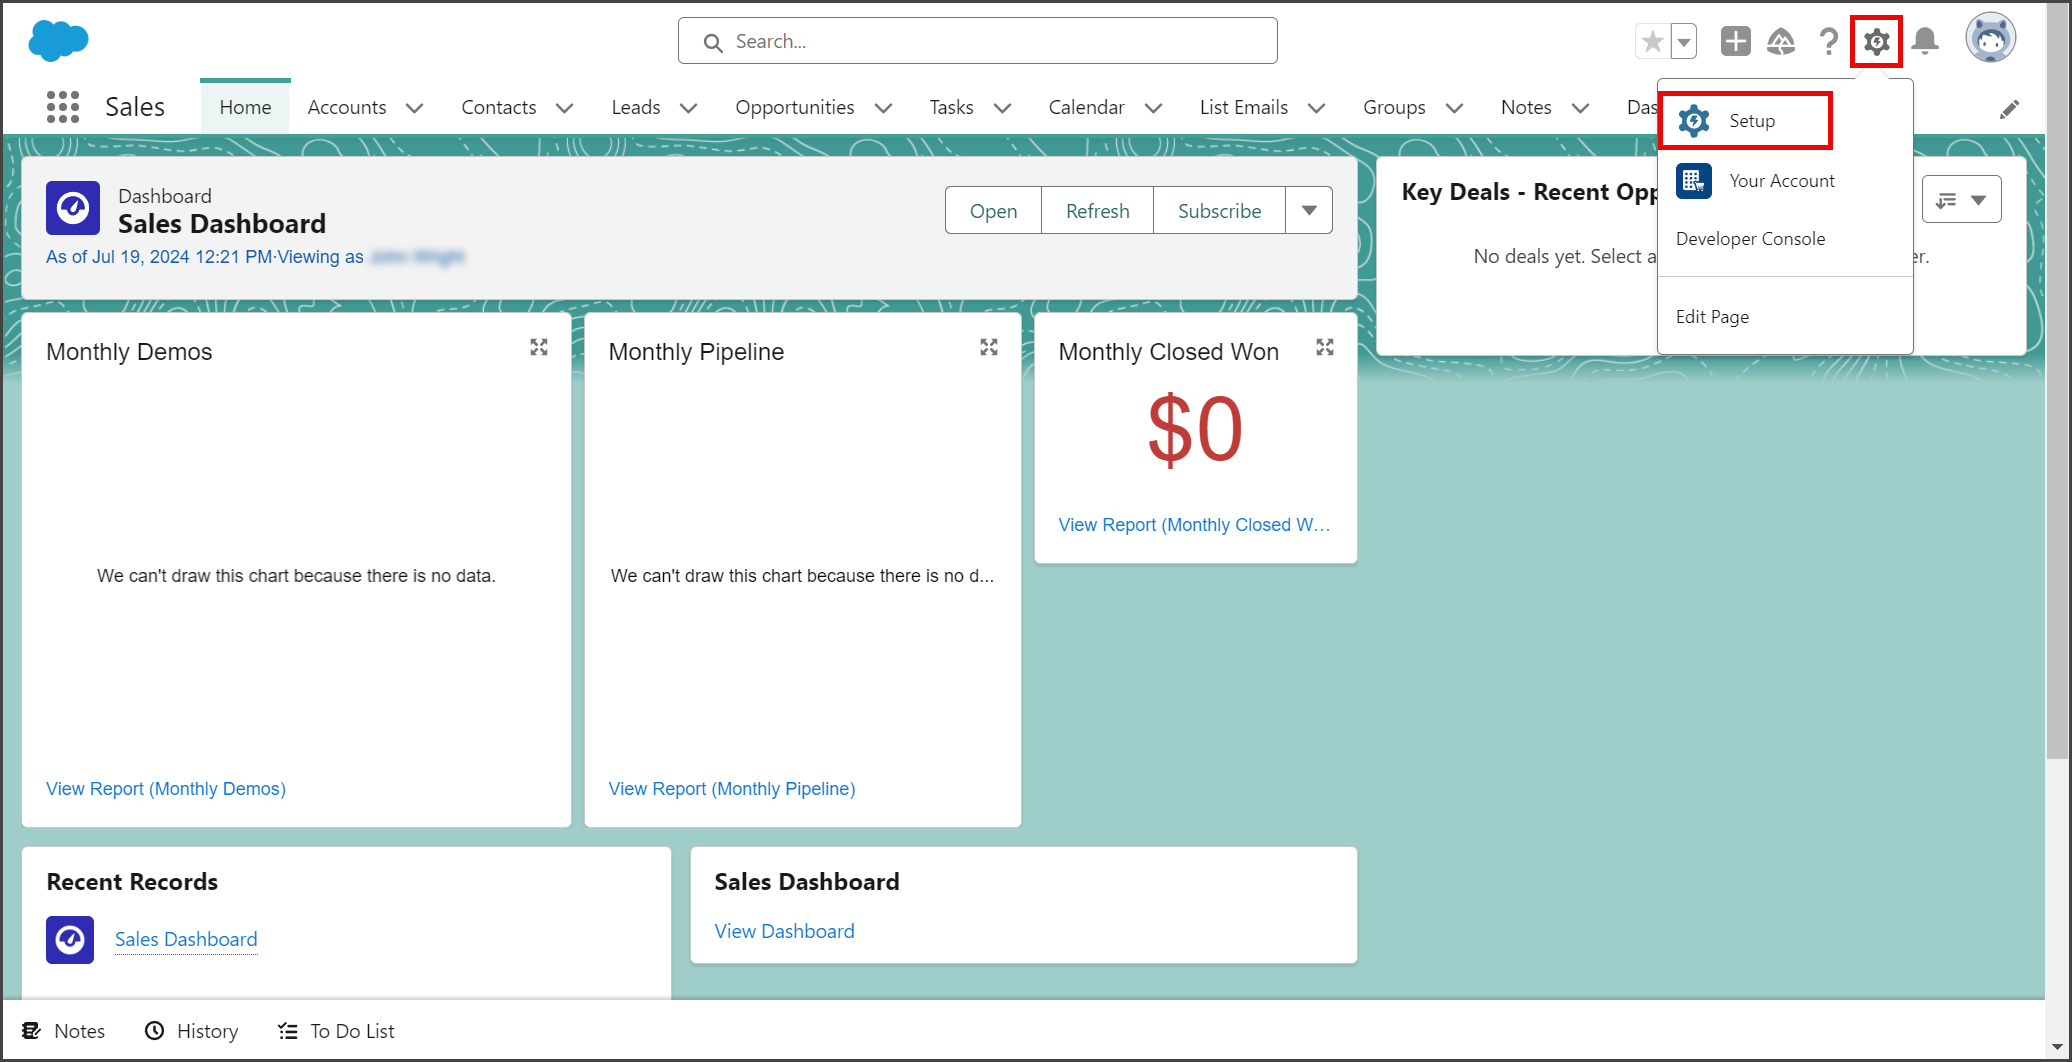
- Click the Settings Gear icon to open the settings menu.
- Click Setup.

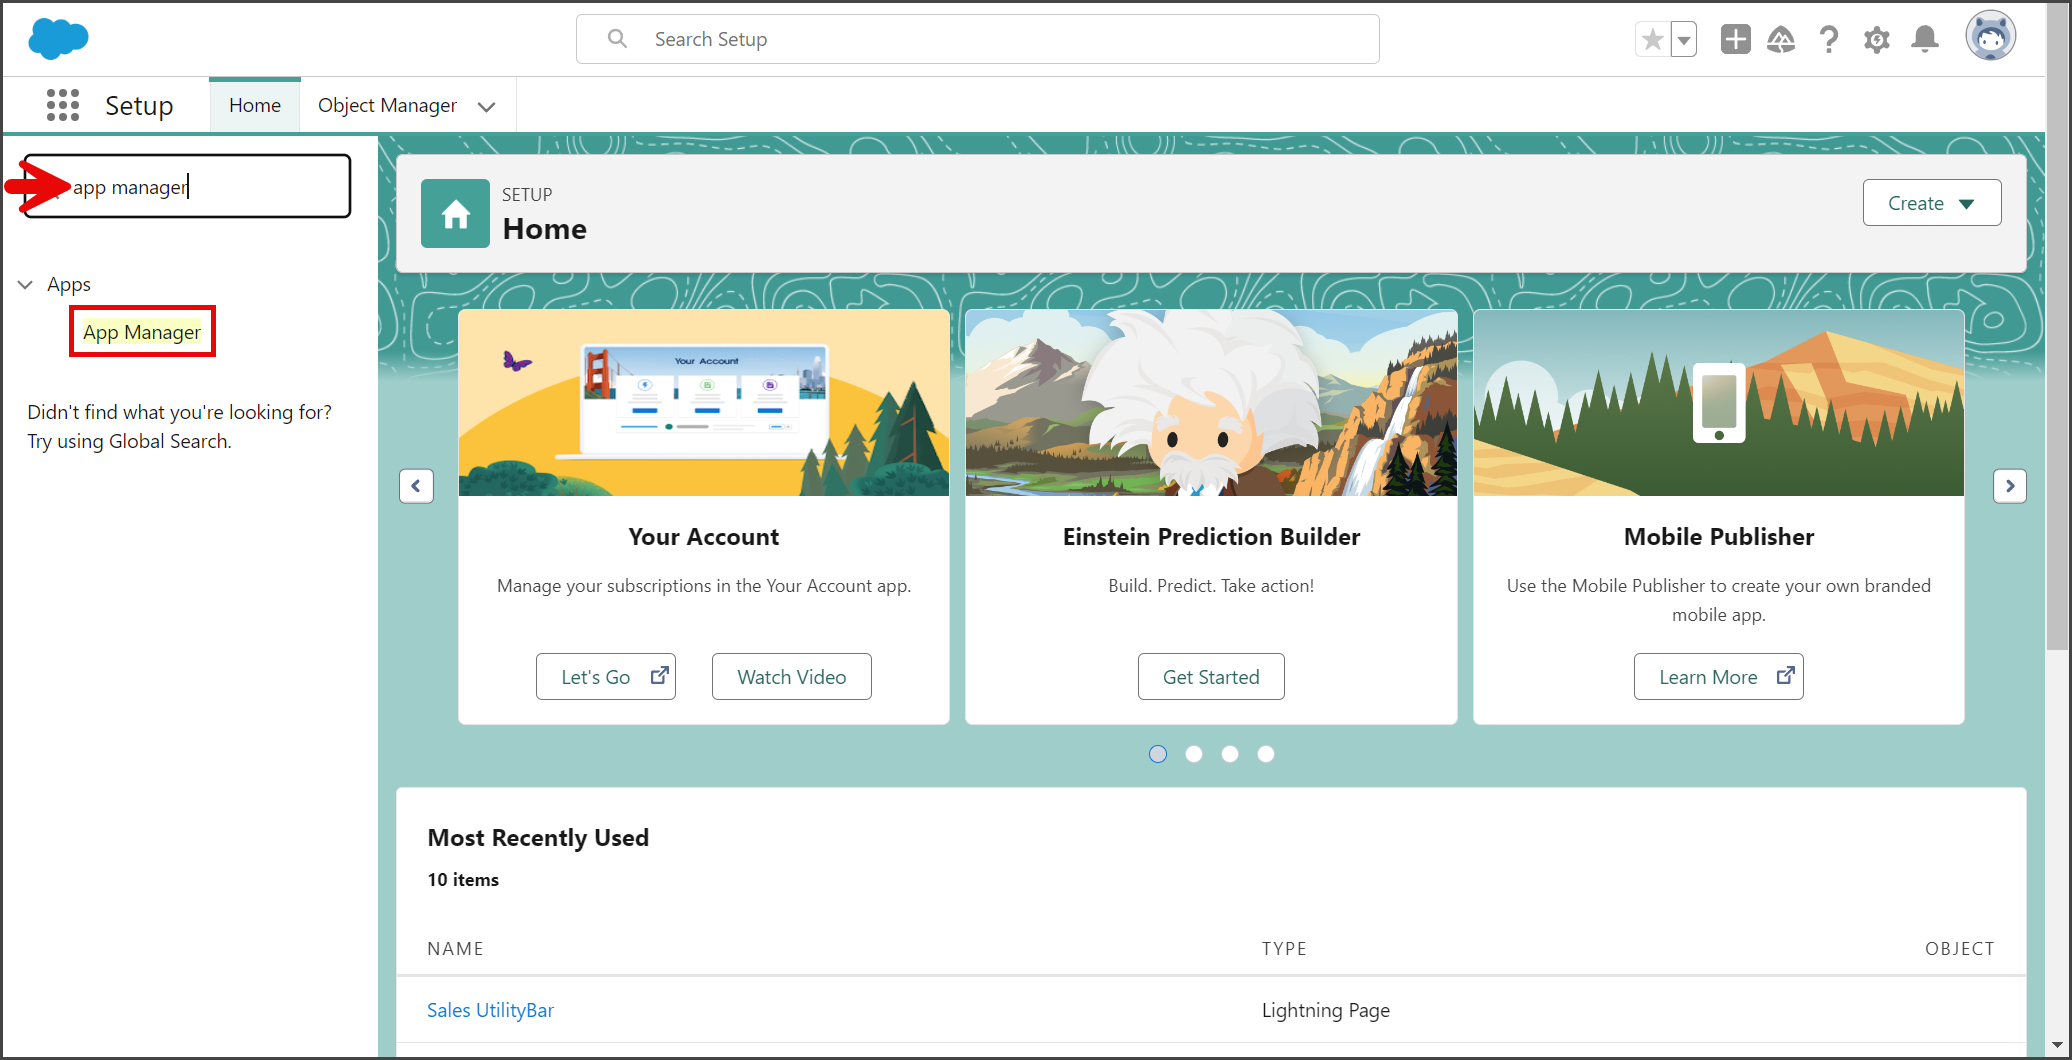
- Enter app manager in the search box.
- Click App Manager.

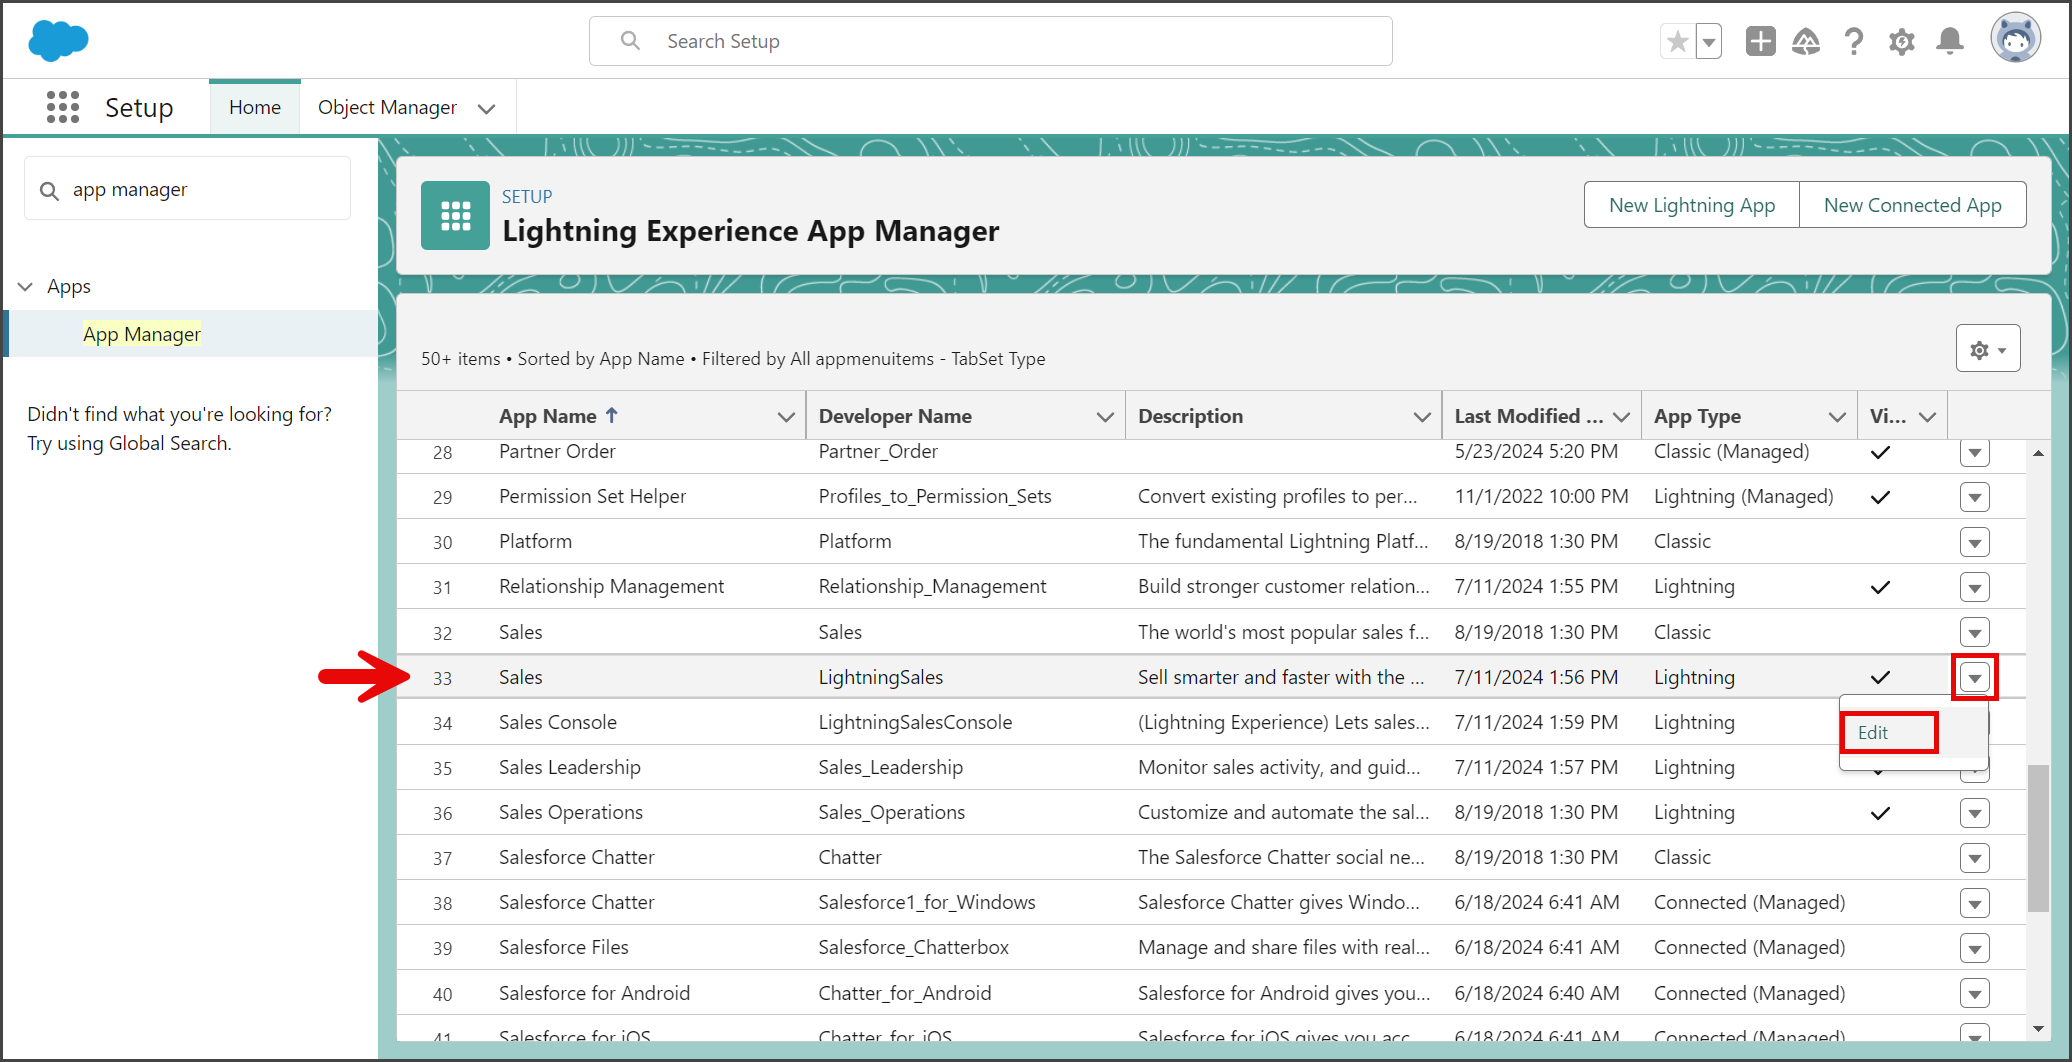
- Scroll down the list to find the app to which you want to add the utility item. This example is using the Sales (Lightning) app.
- Click the Action (down triangle) button in the last column.
- Click Edit.

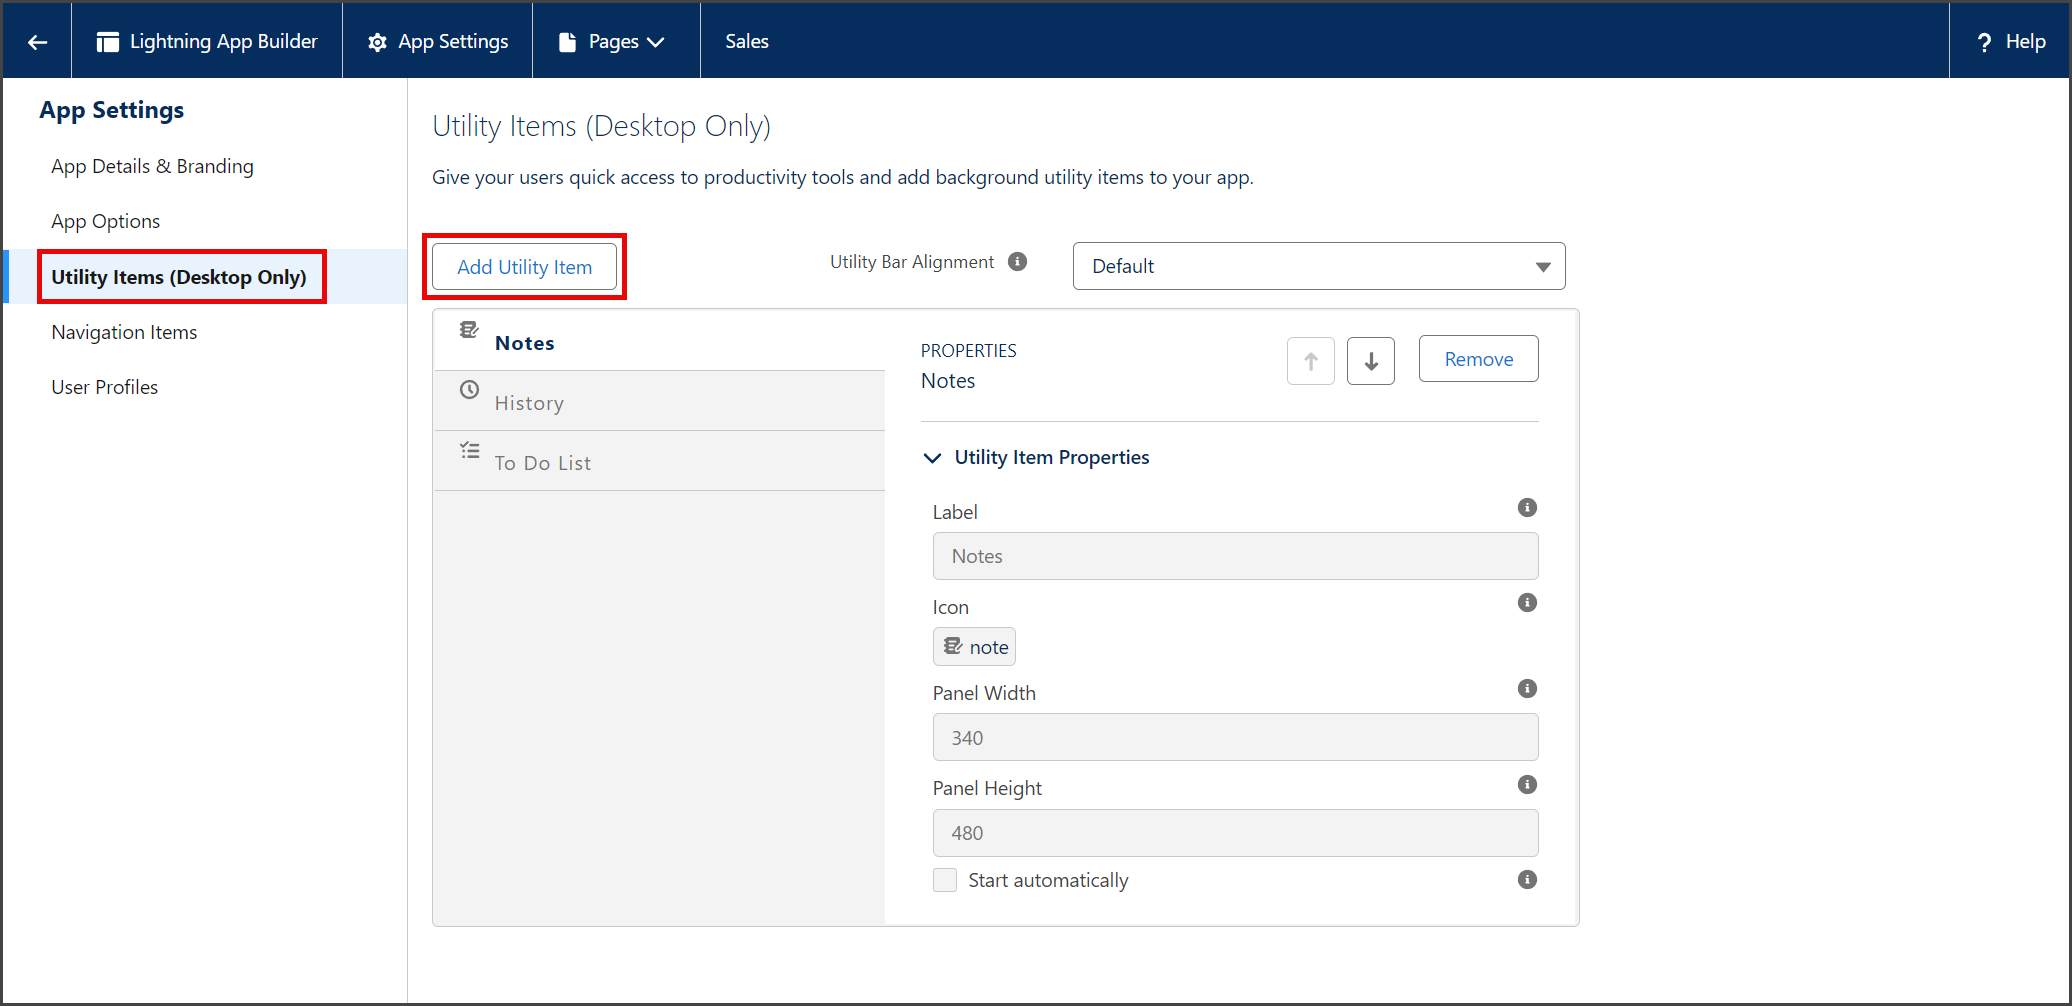
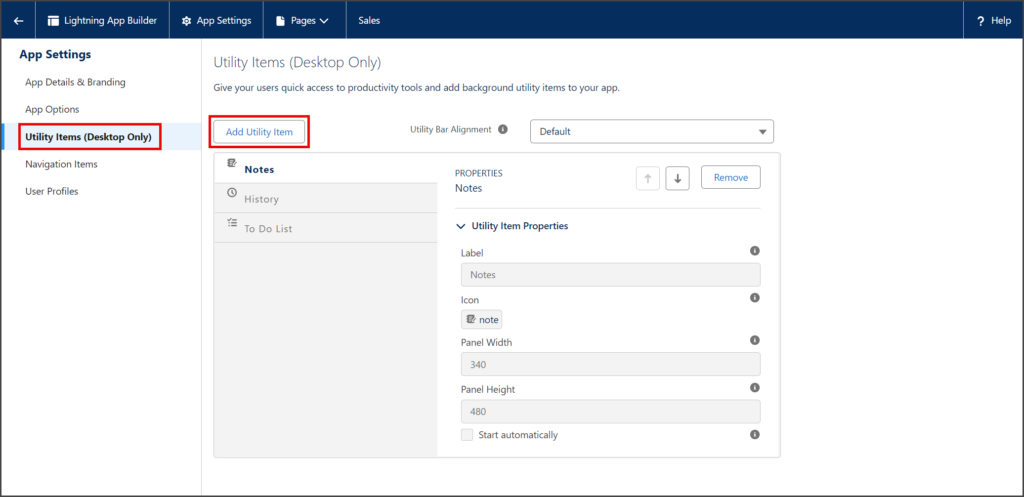
- Click the Utility Items (Desktop Only) settings.
- Click Add Utility Item.
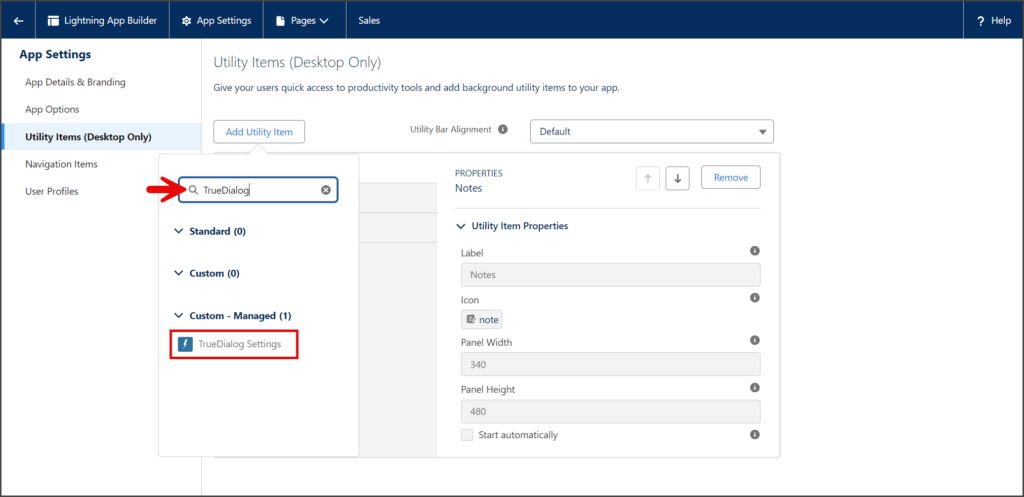
- Enter TrueDialog in the search box.
- Click TrueDialog Settings.
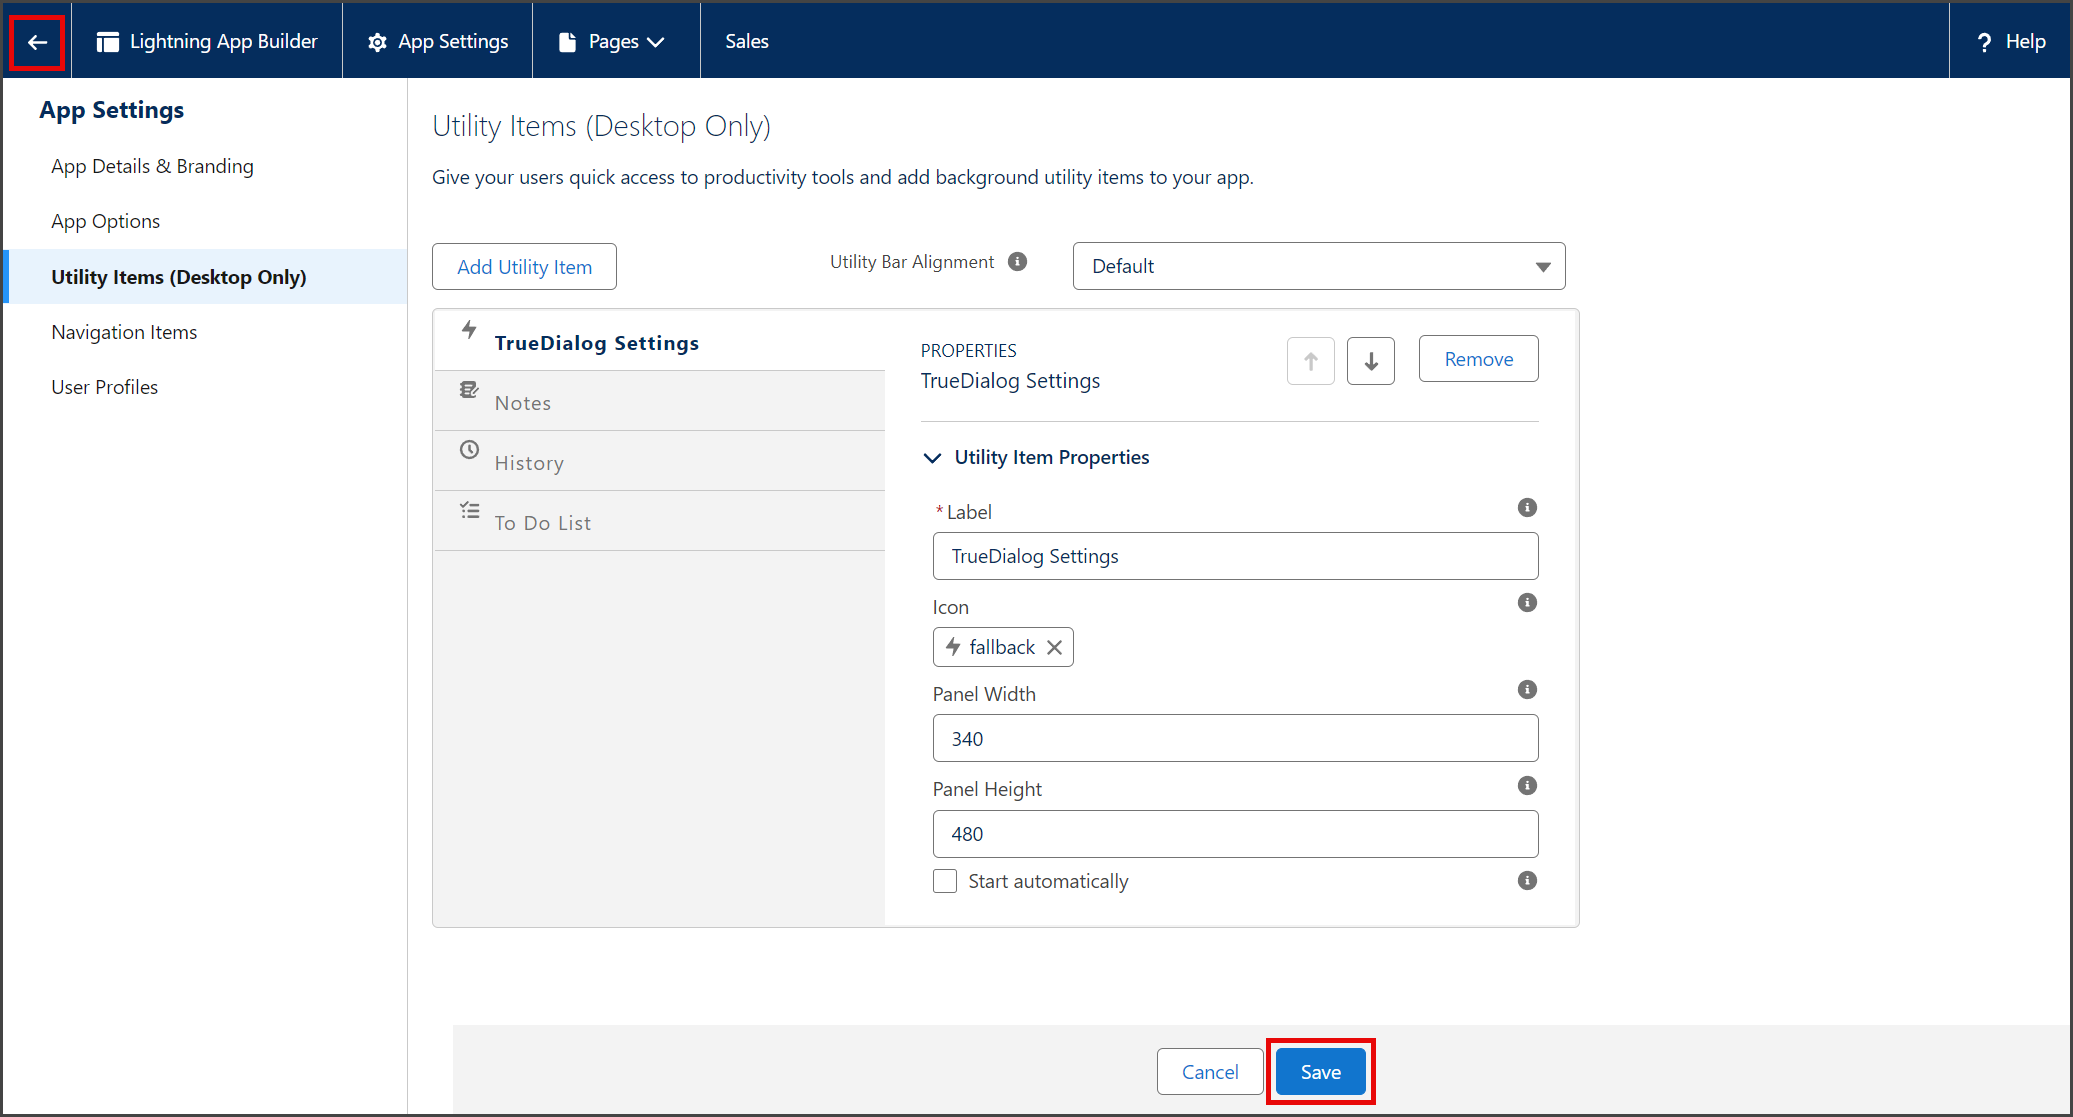
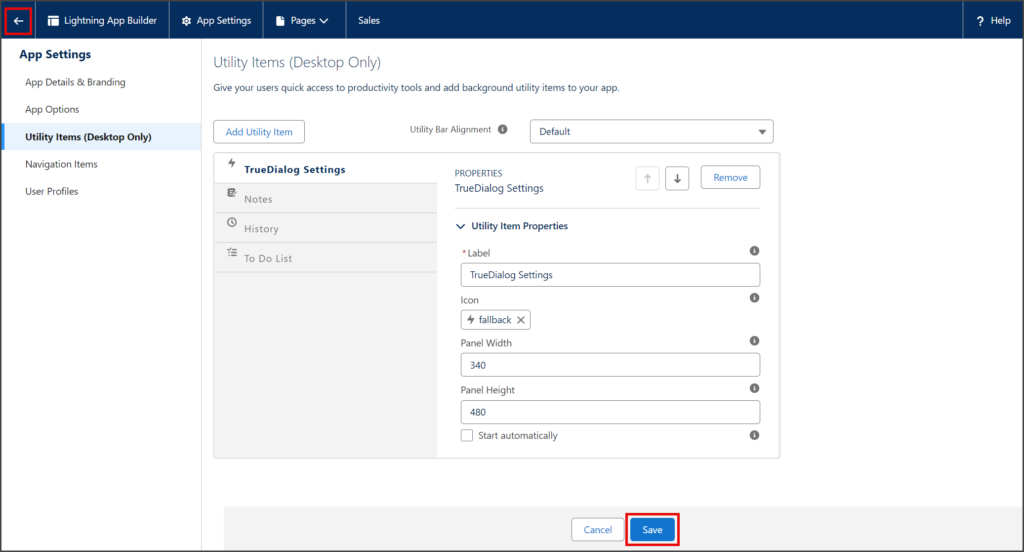
- (Optional) Customize the utility properties.
- Click Save.
- Click the Back arrow.
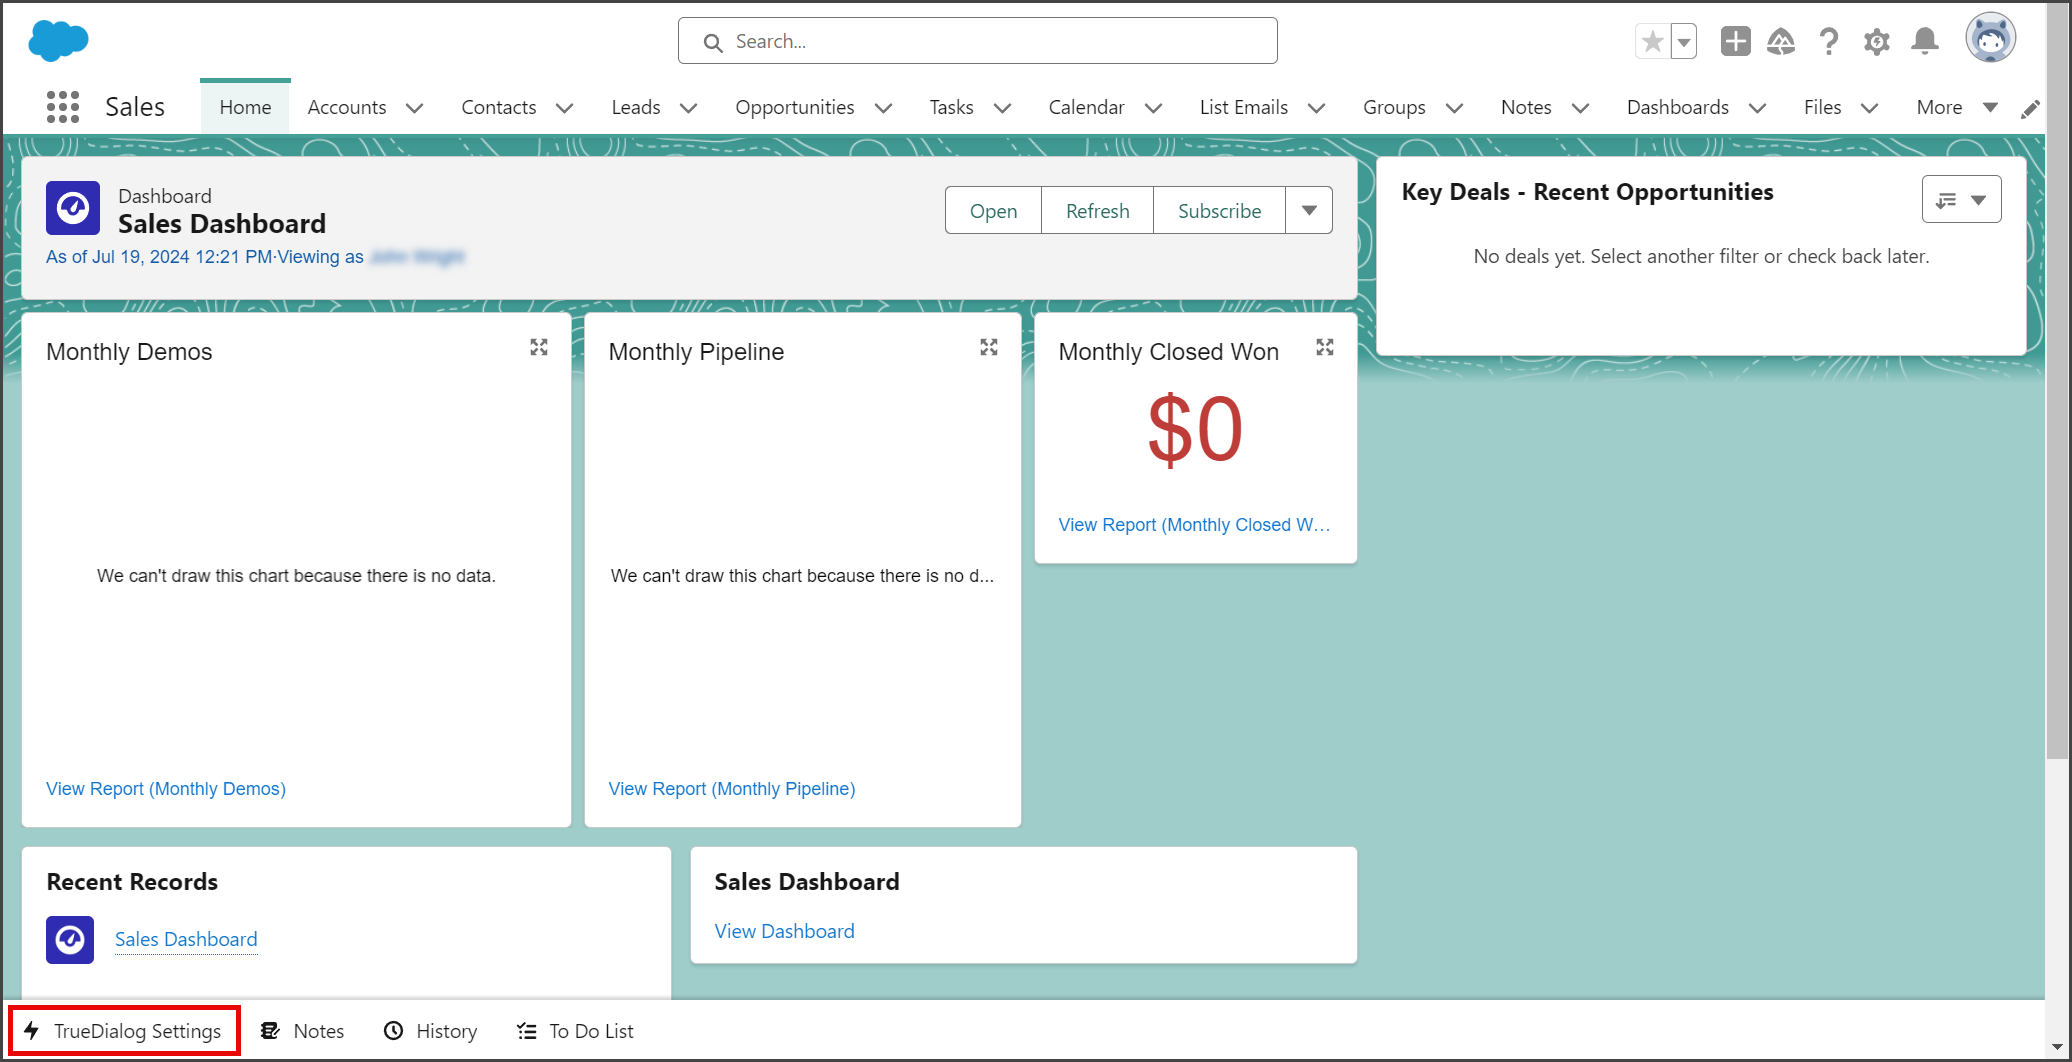
- Go to the app to which you add the TrueDialog utility.
- The TrueDialog Settings utility will now appear at the bottom of the page while in the app.