Salesforce
TrueDialog Integration
The Log A Call On SMS Flow is included with the TrueDialog integration but only works for Contact records. The instructions below will show you how to build a Flow that logs incoming SMS messages to a Task for Opportunity records. Once the Flow is created, the Adding Activity Task List to Opportunity Page sections show you how to display the tasks on your Opportunity page. The instructions in this article are written for the Opportunity object, but they can be applied to other object types. To learn how to use the Log A Call On SMS, see the Salesforce – Using Log a Call On SMS article.
Build Incoming Opportunity SMS Log A Call Flow
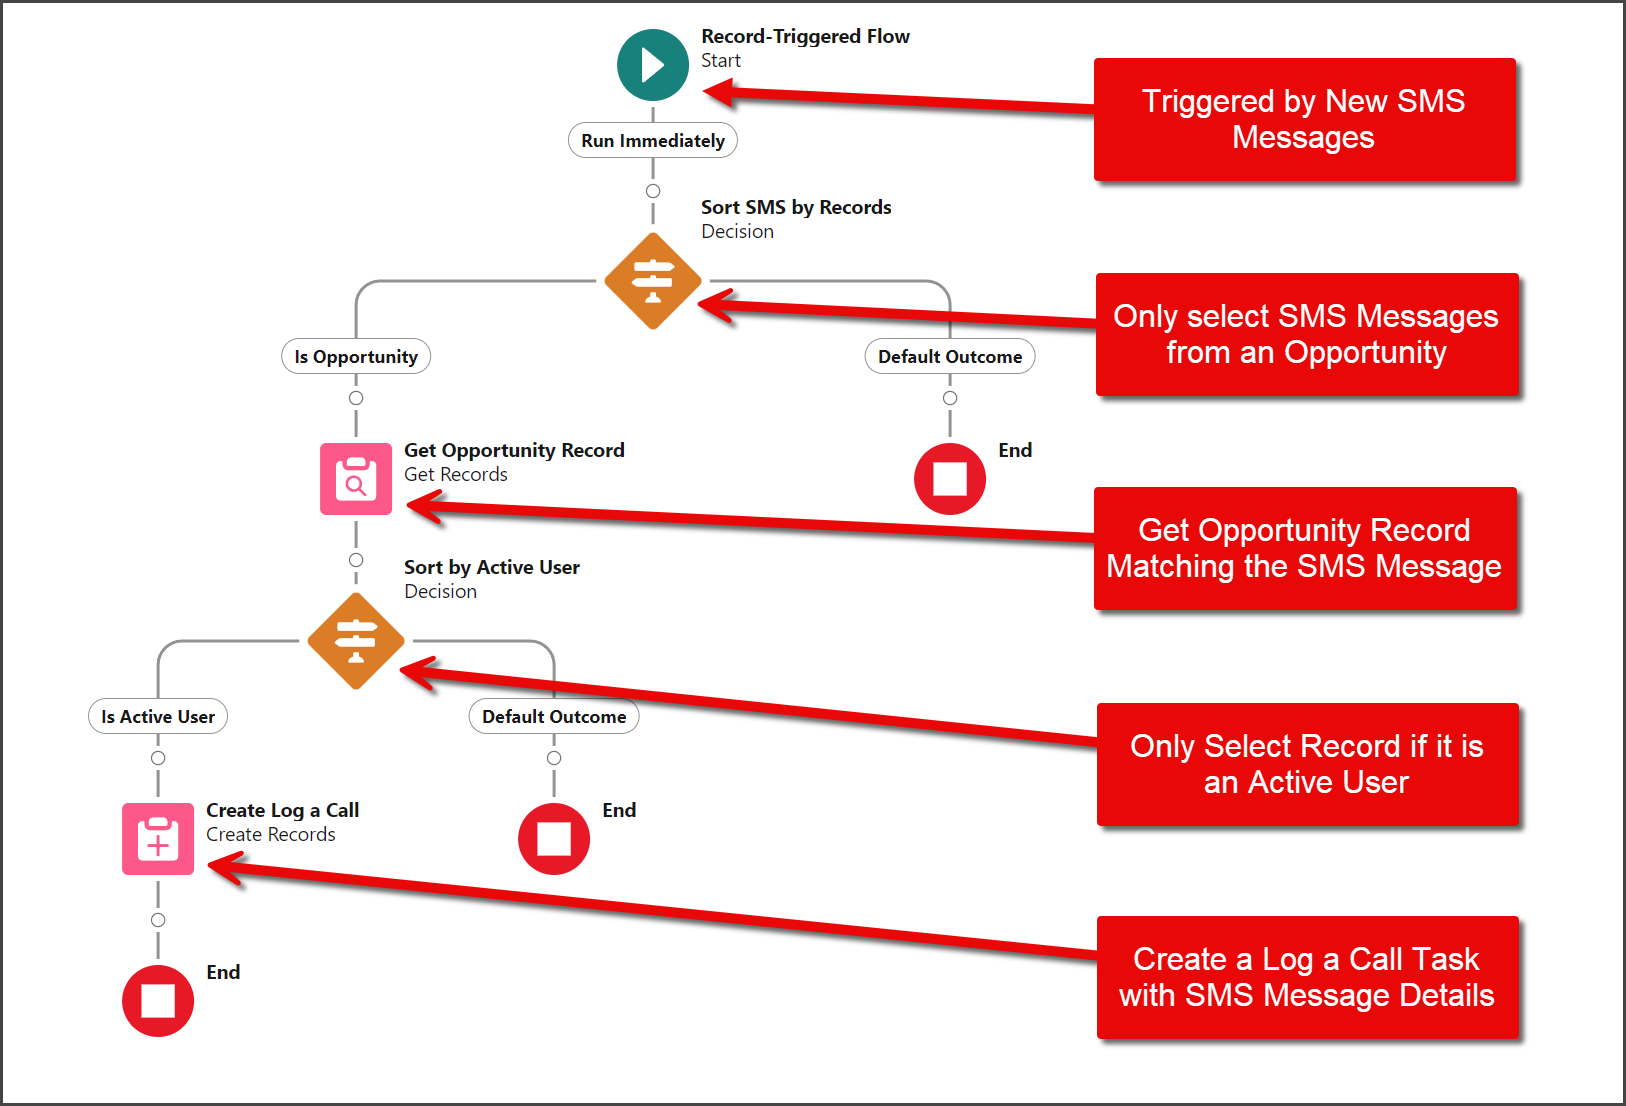
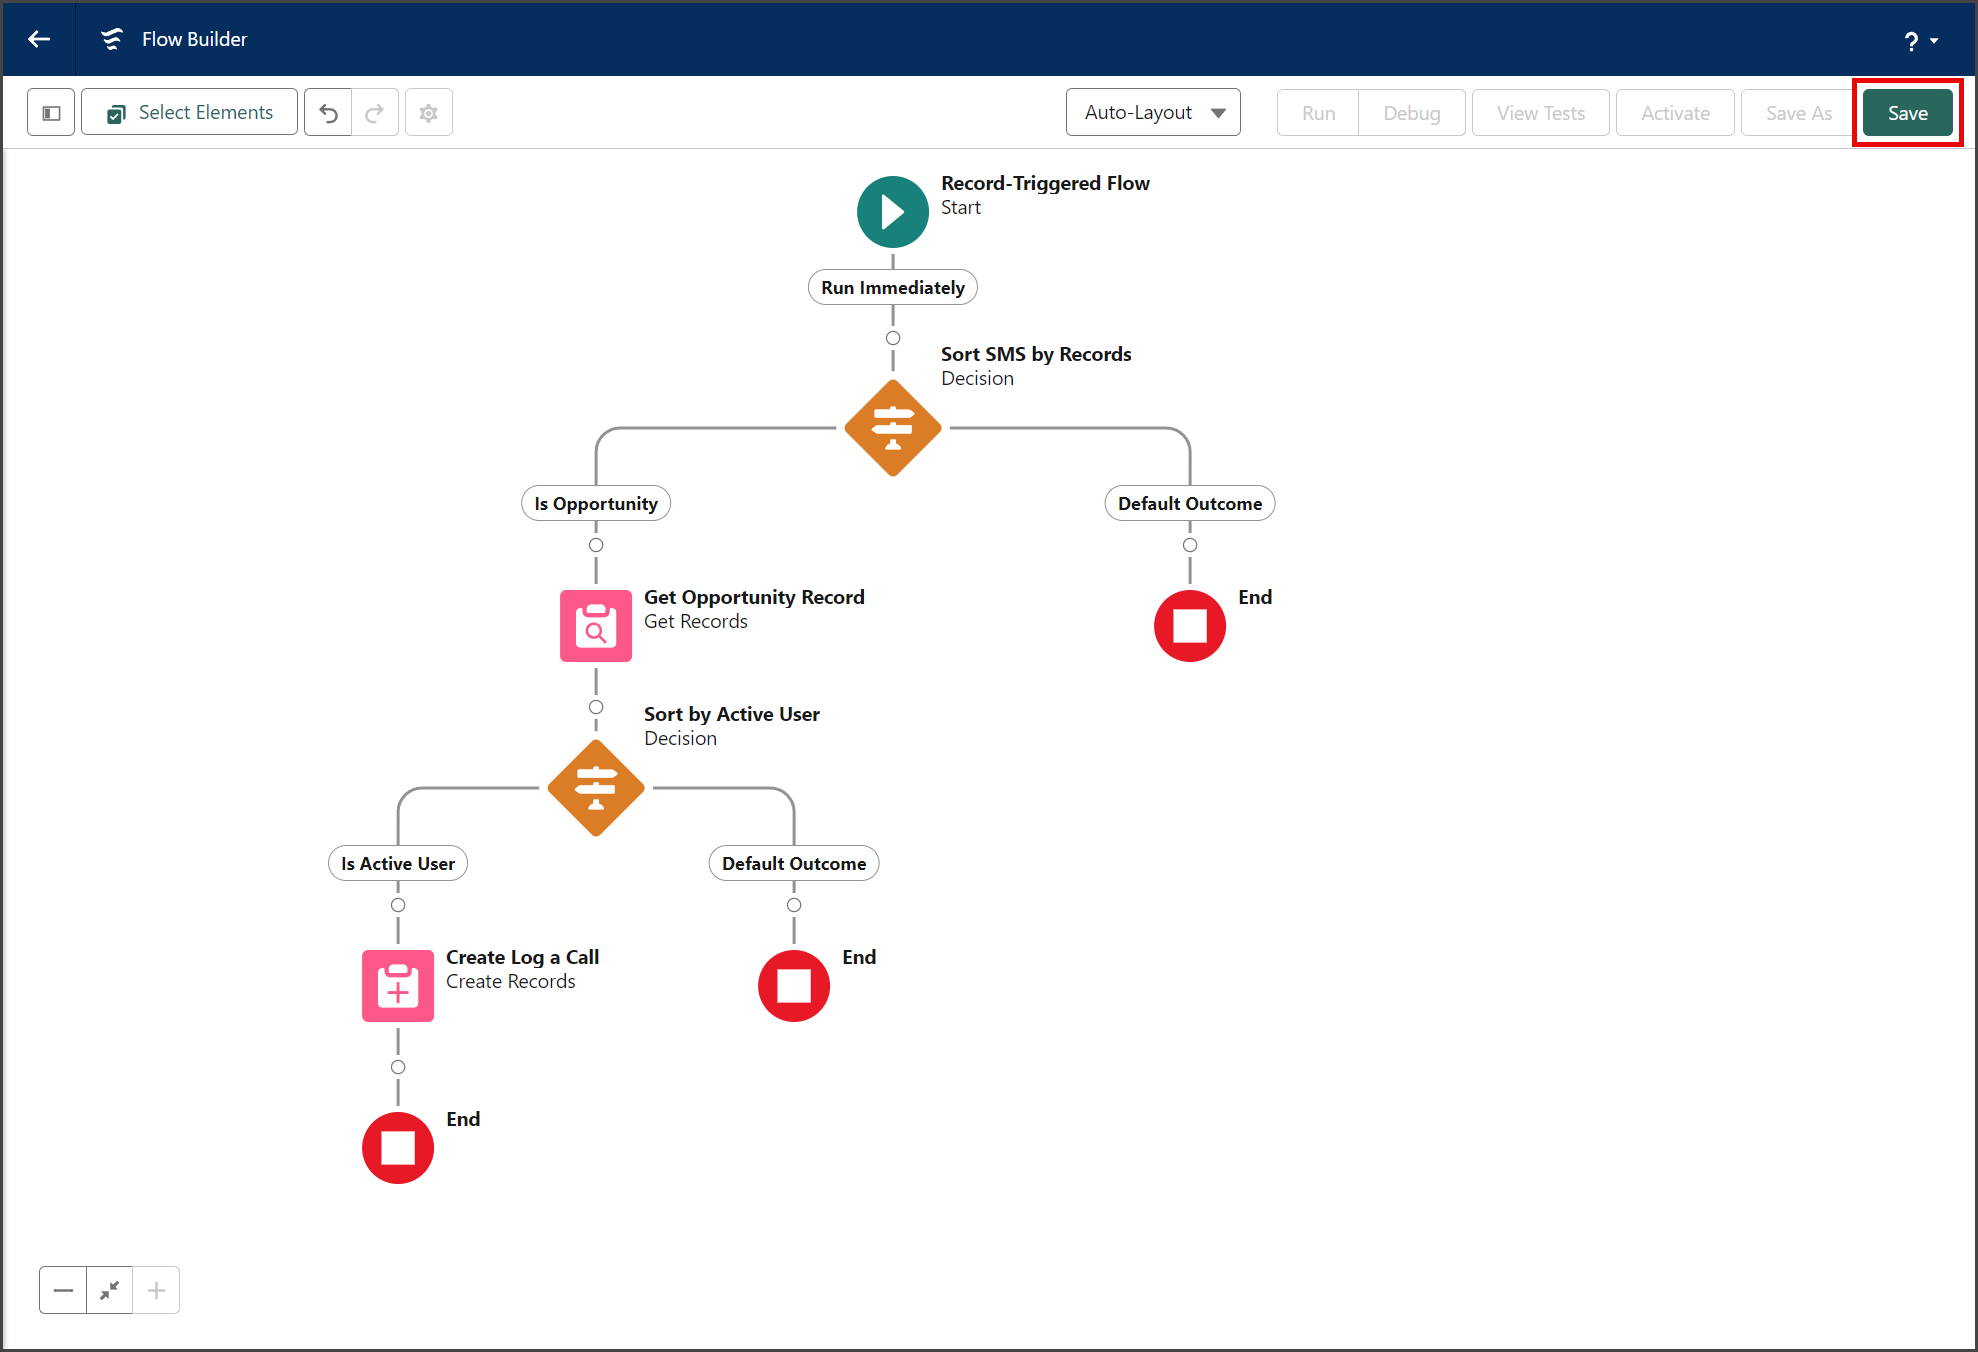
This Flow functions in the same way the Log A Call On SMS Flow does for Contacts. The screenshot below shows an overview that explains the Flow’s logical process.
Create Flow
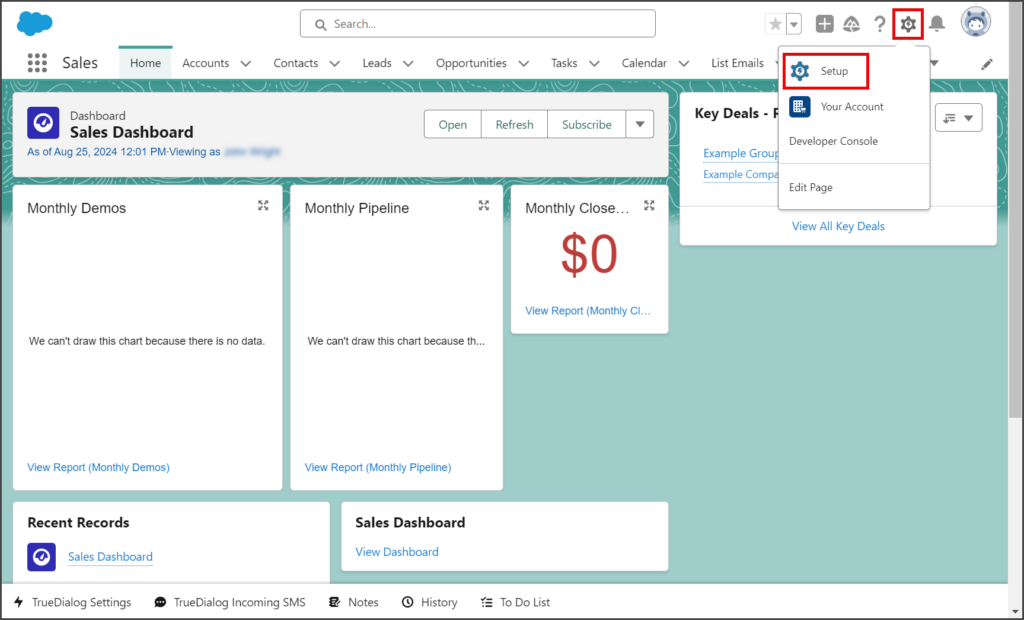
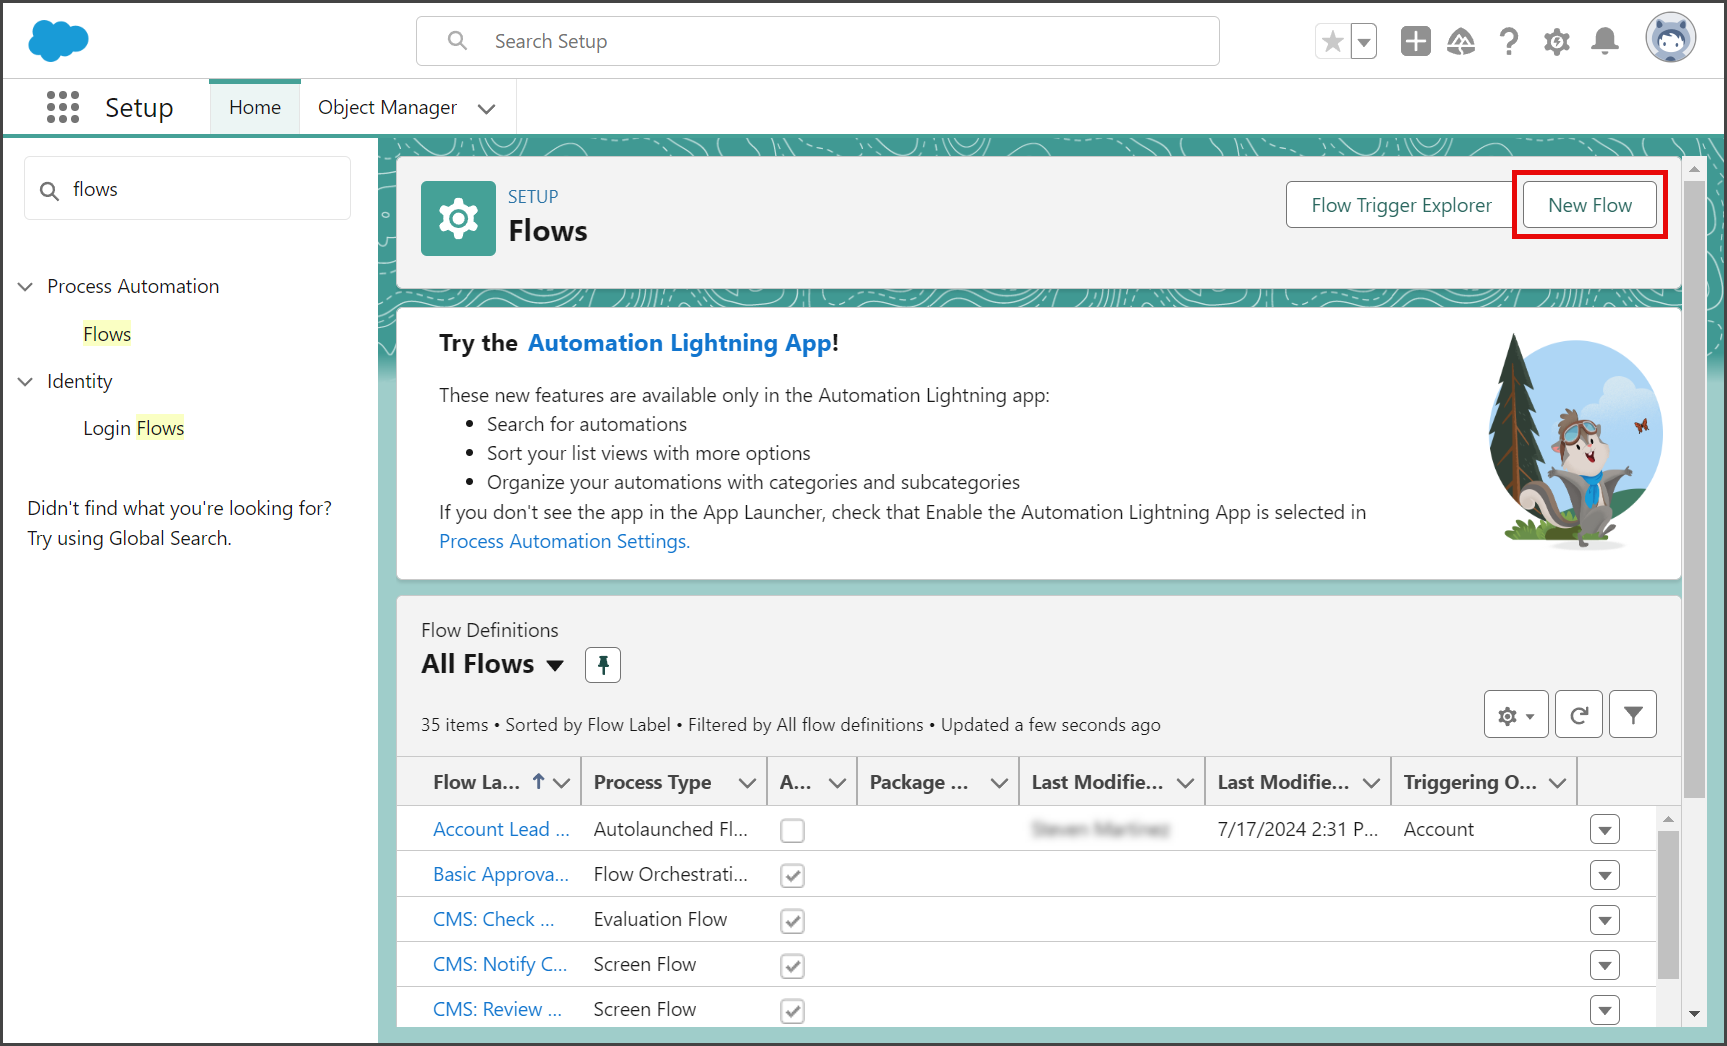
- Click the Settings Gear icon to open the settings menu.
- Click Setup.
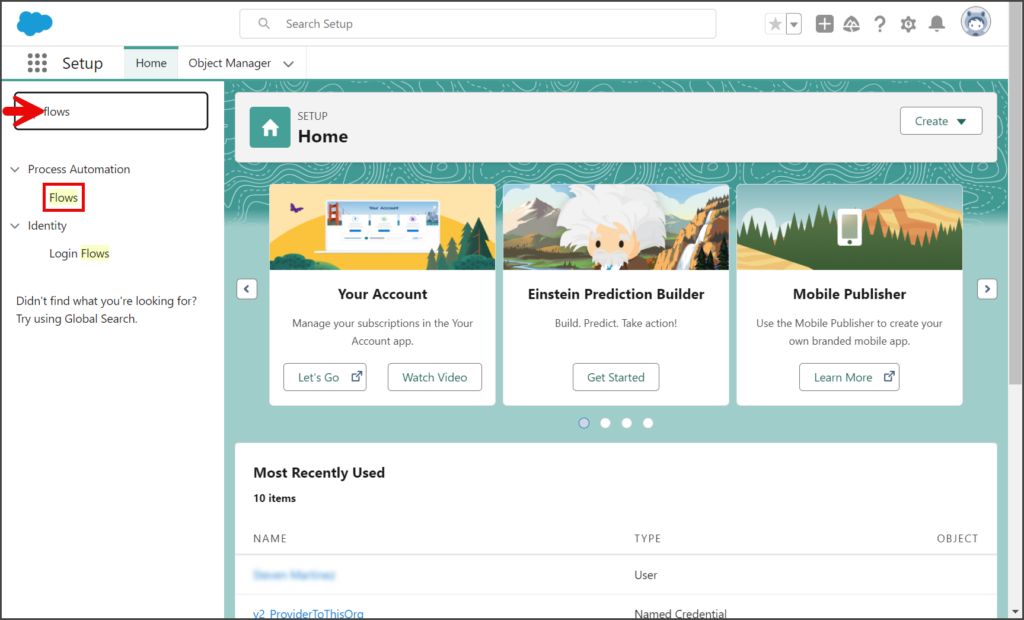
- Enter flows in the search box.
- Click Flows under the Process Automation section.
- Click New Flow.

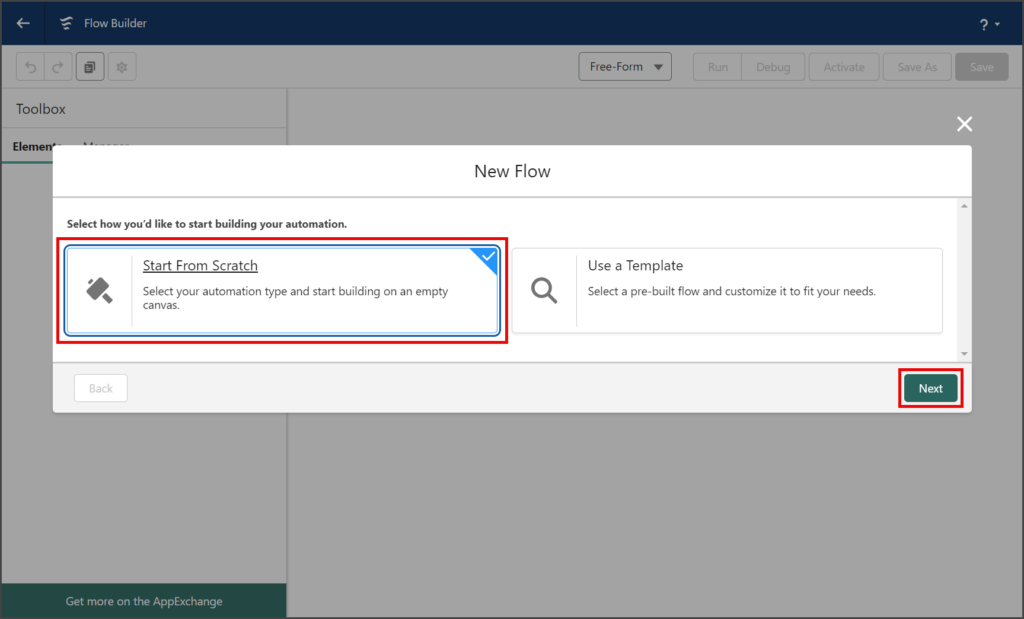
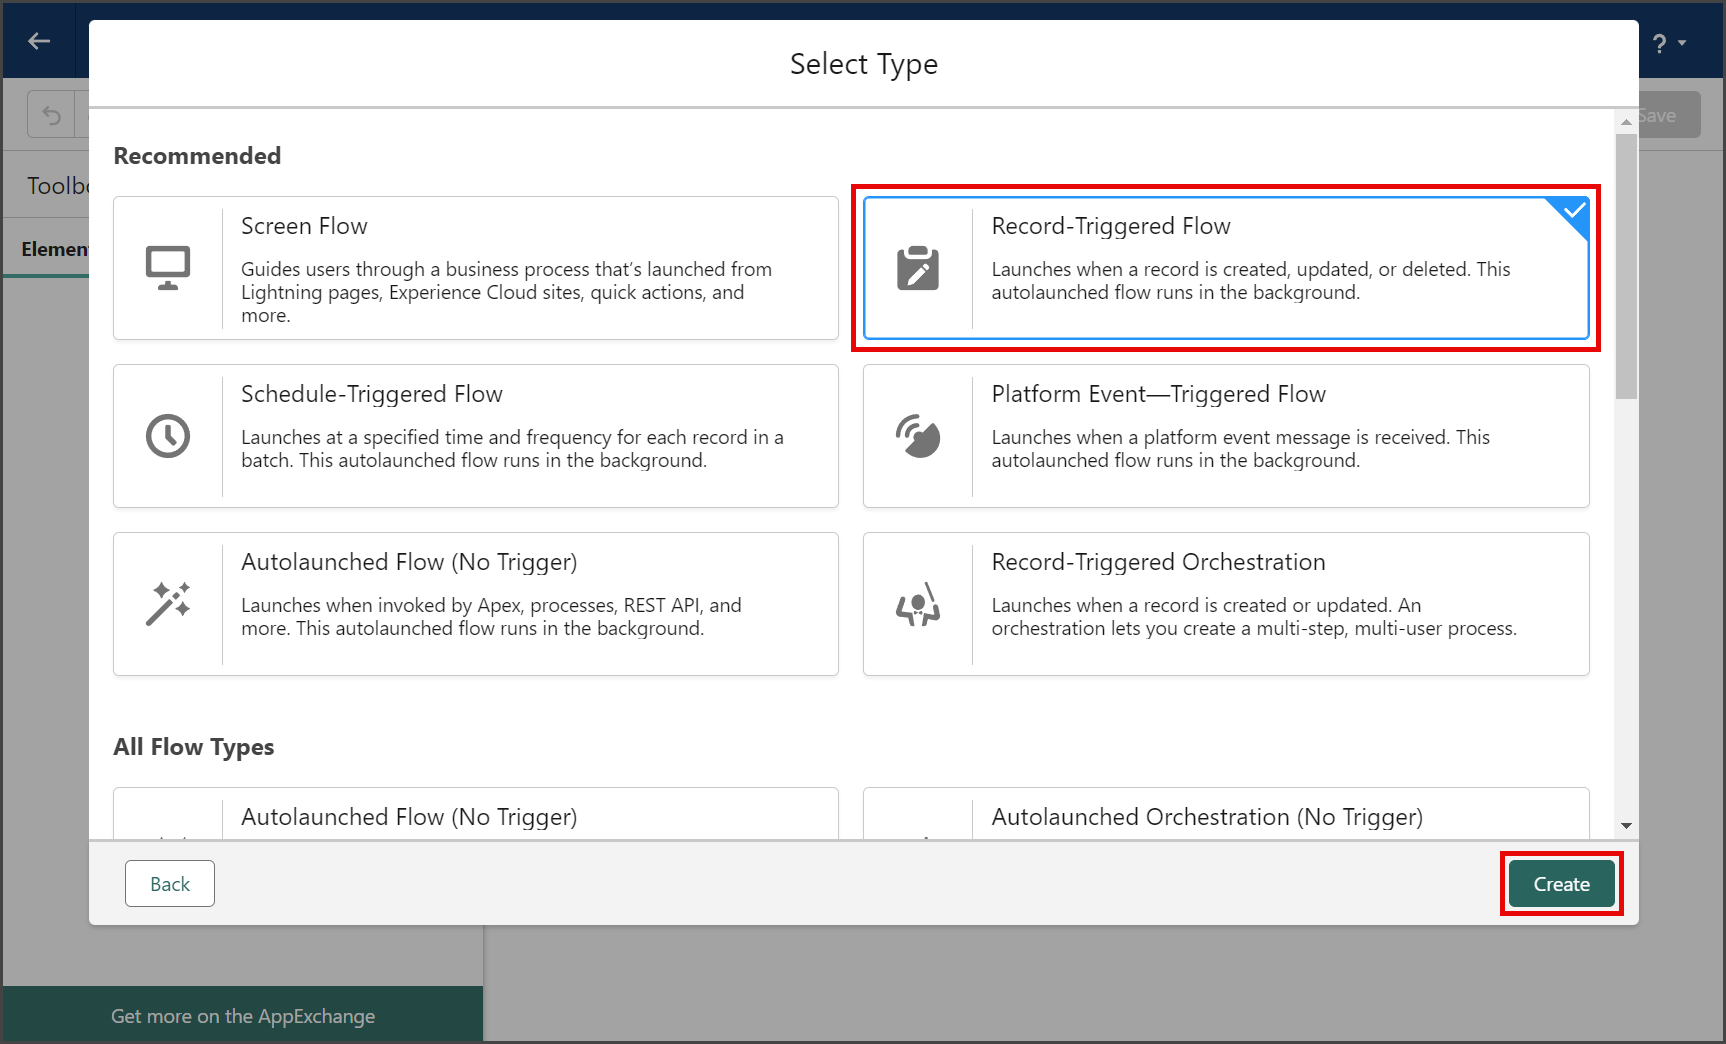
- Select Start From Scratch.
- Click Next.
- Select Record-Triggered Flow.
- Click Create.


Configure Flow
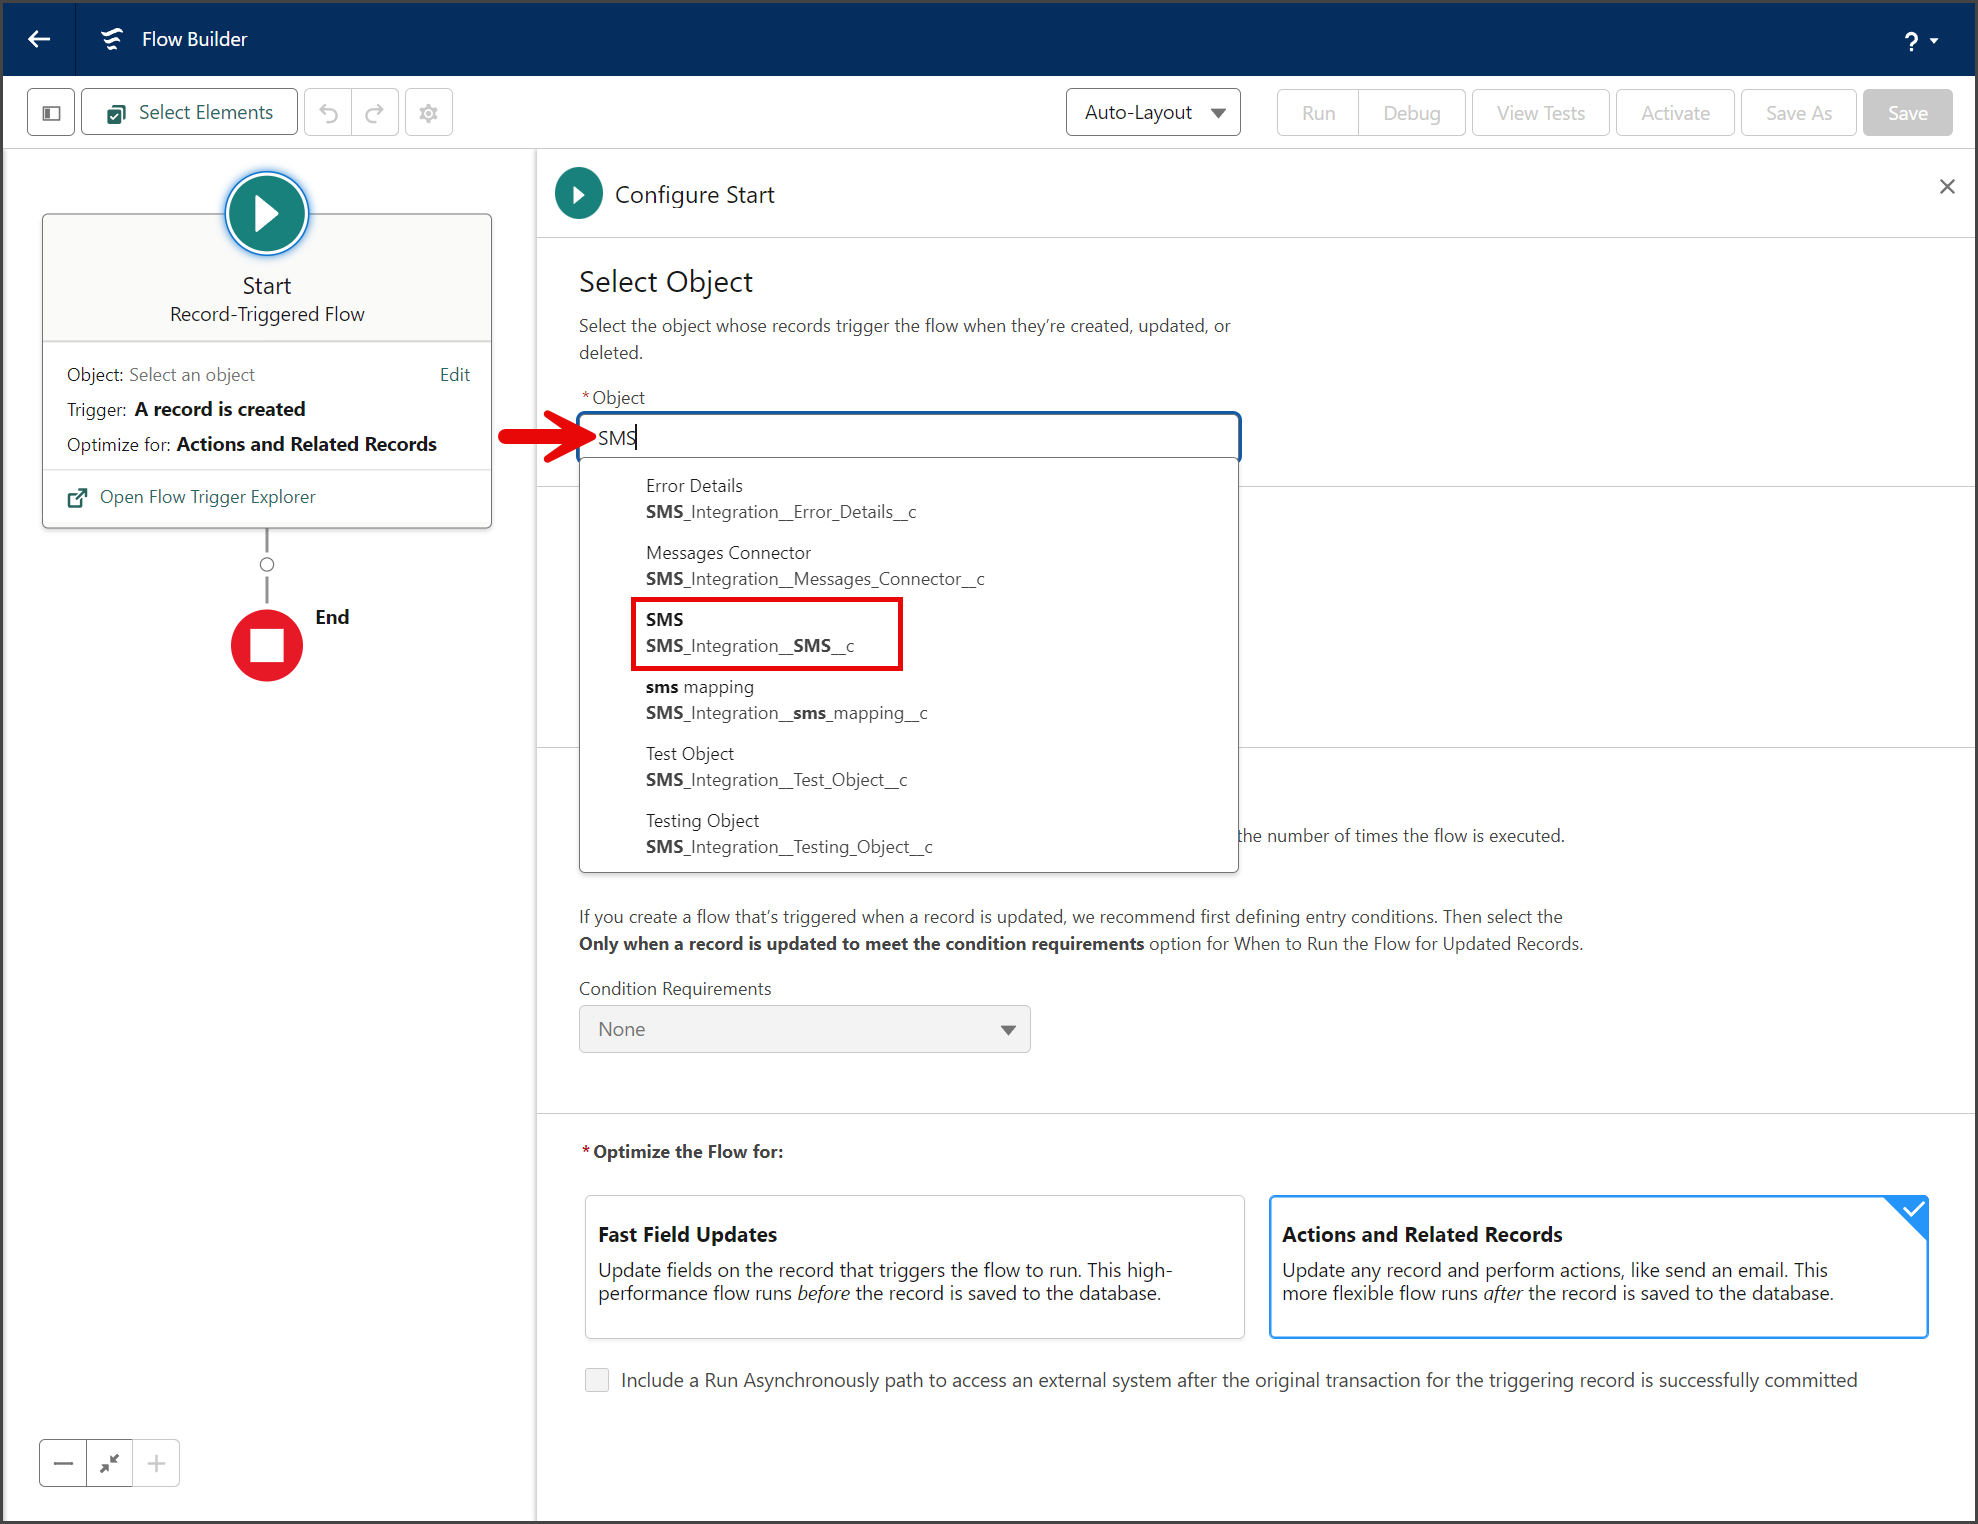
- Enter SMS in the Object search box of the Configure Start action.
- Click SMS SMS_Integration__SMS__c from the dropdown list.
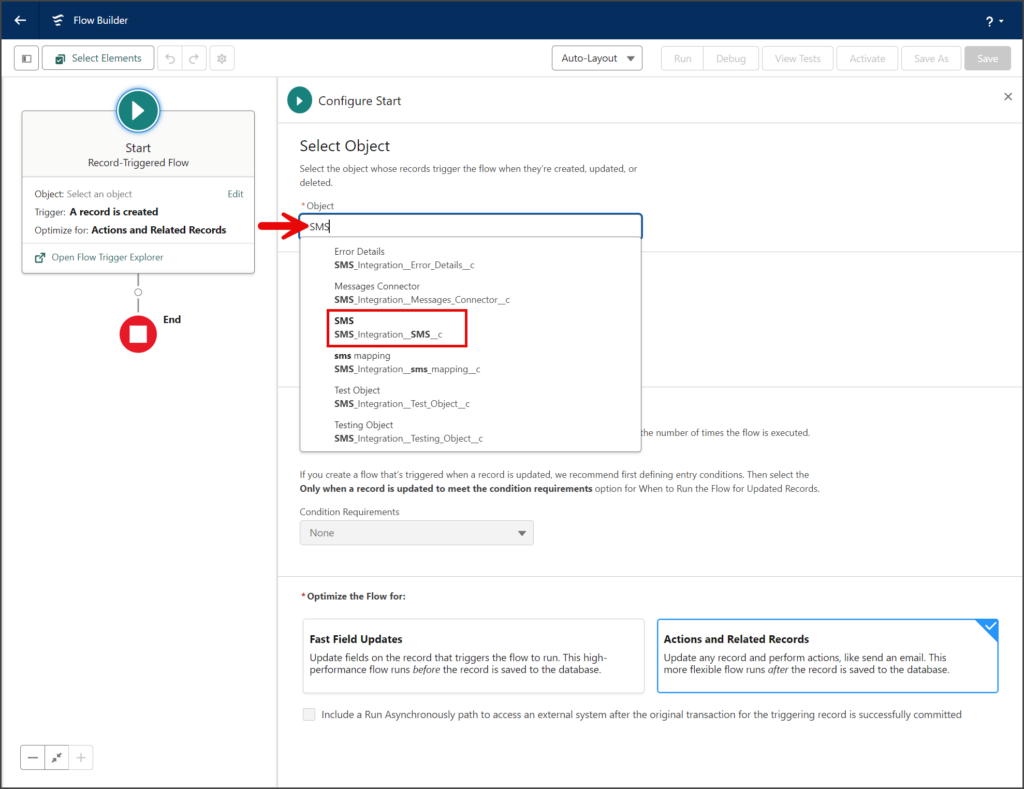
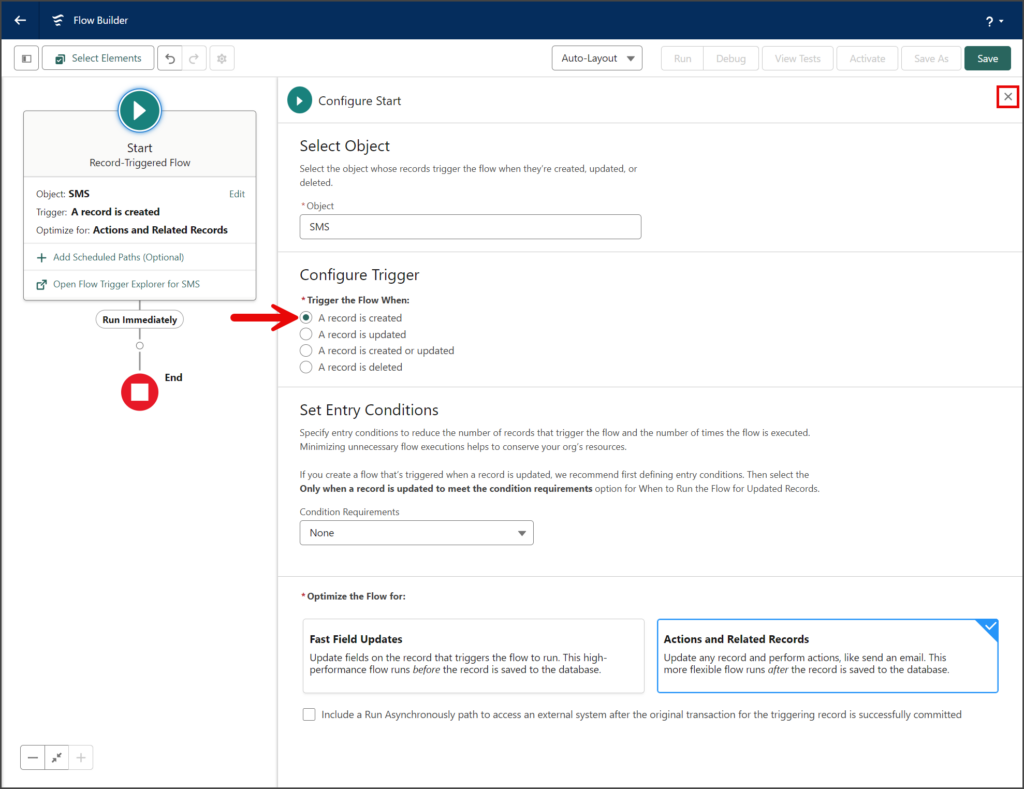
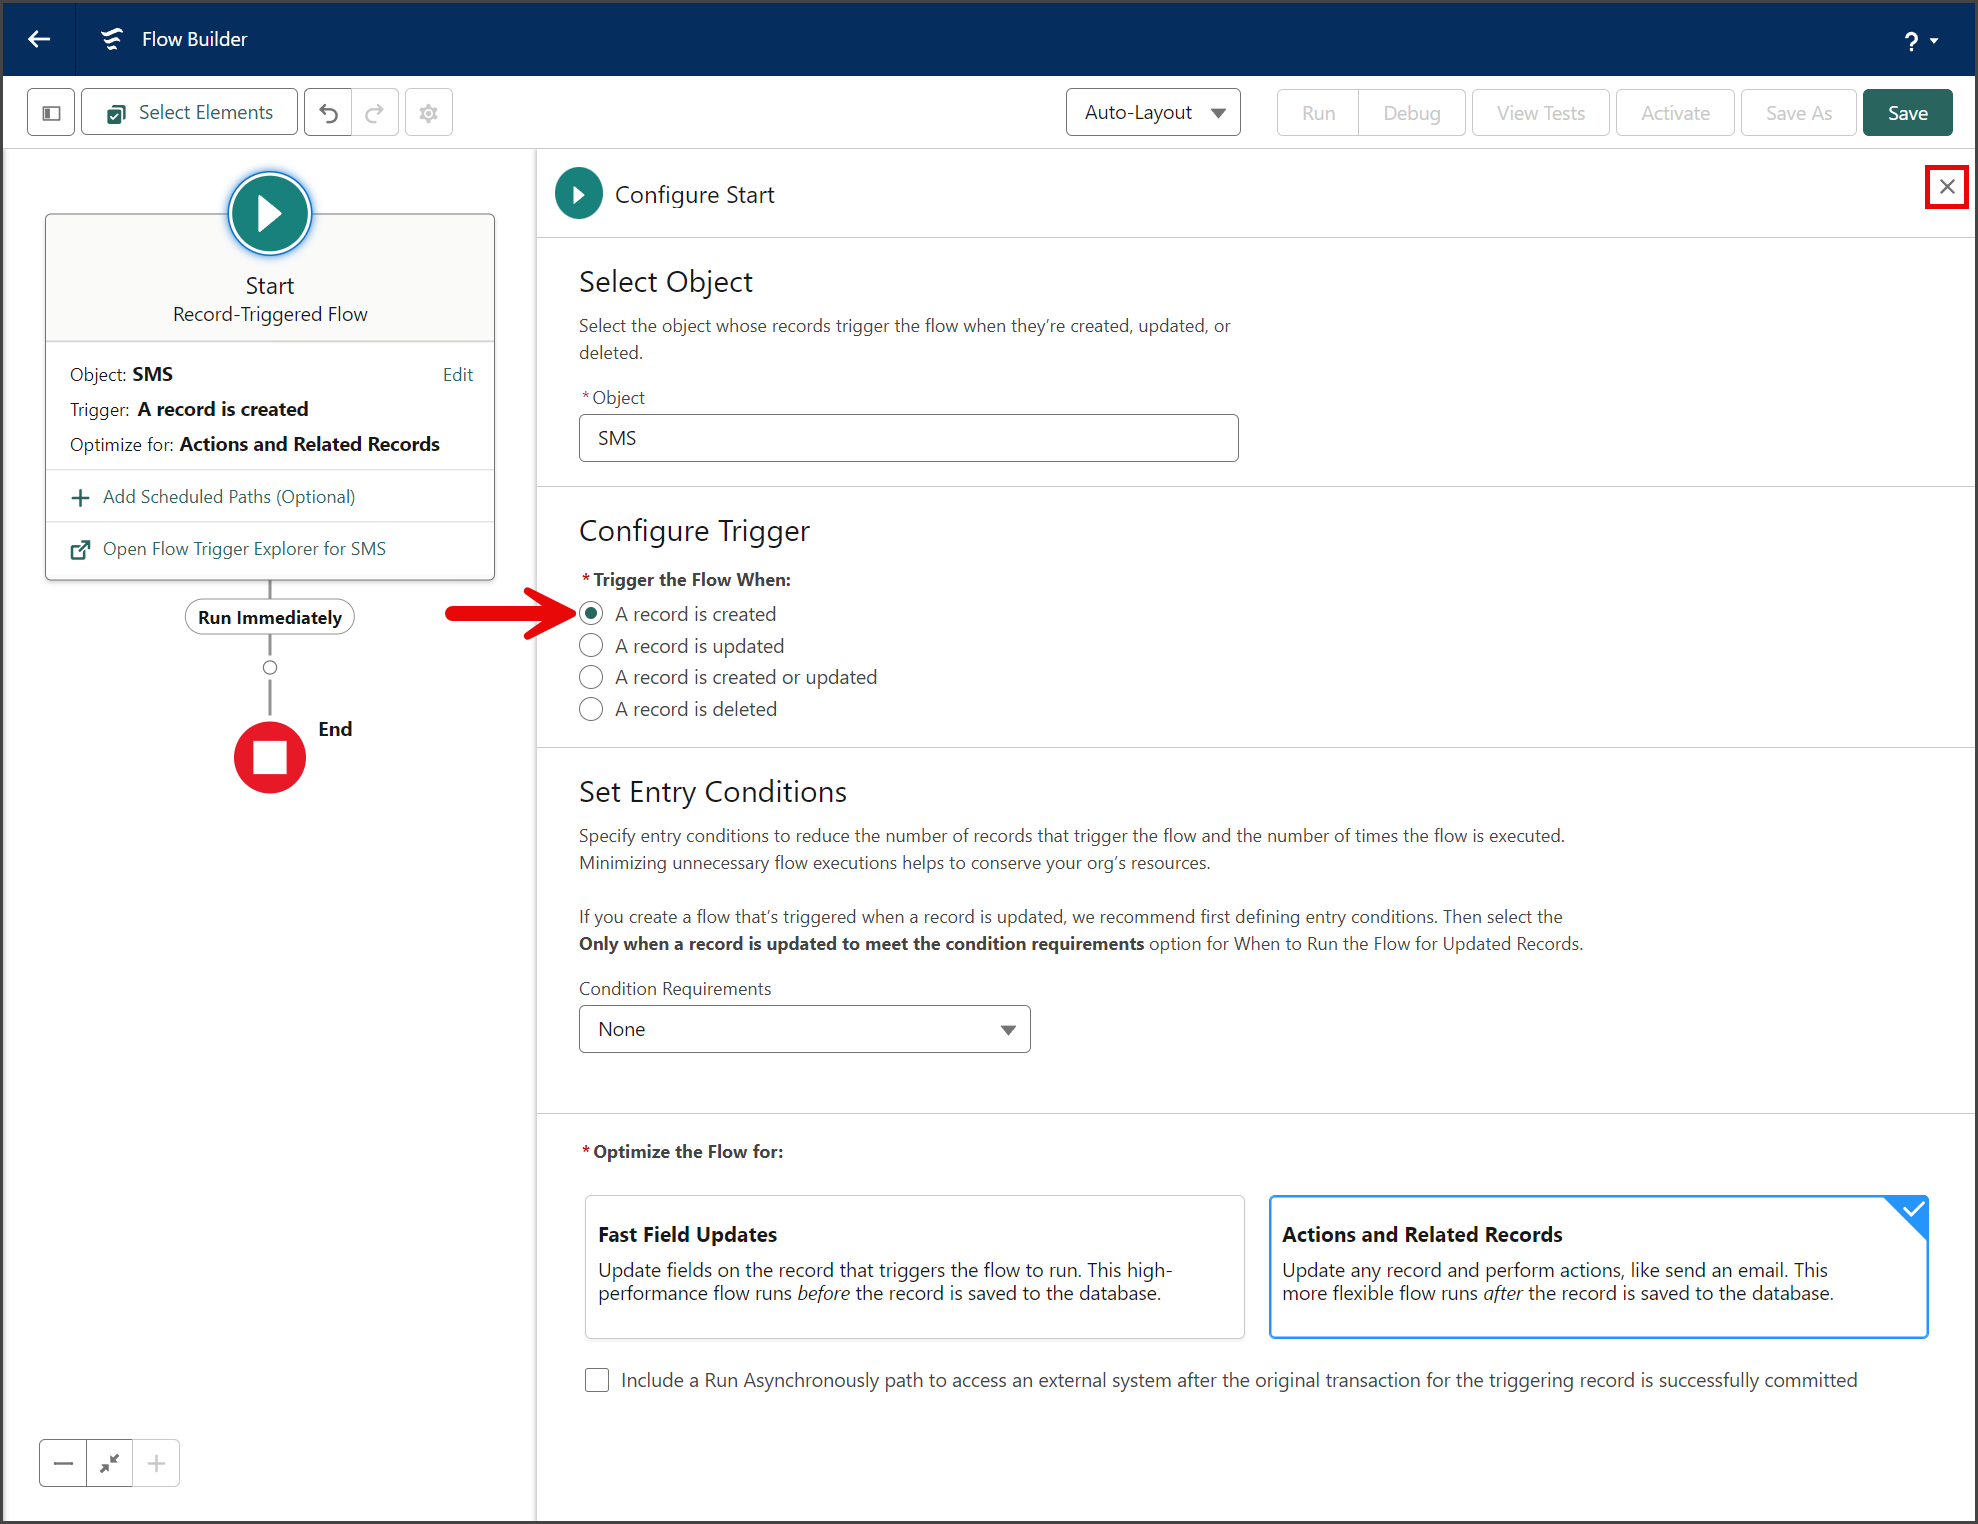
- Verify that the A record is created option is selected for Trigger the Flow When.
- Click the X to close the Configure Start window.
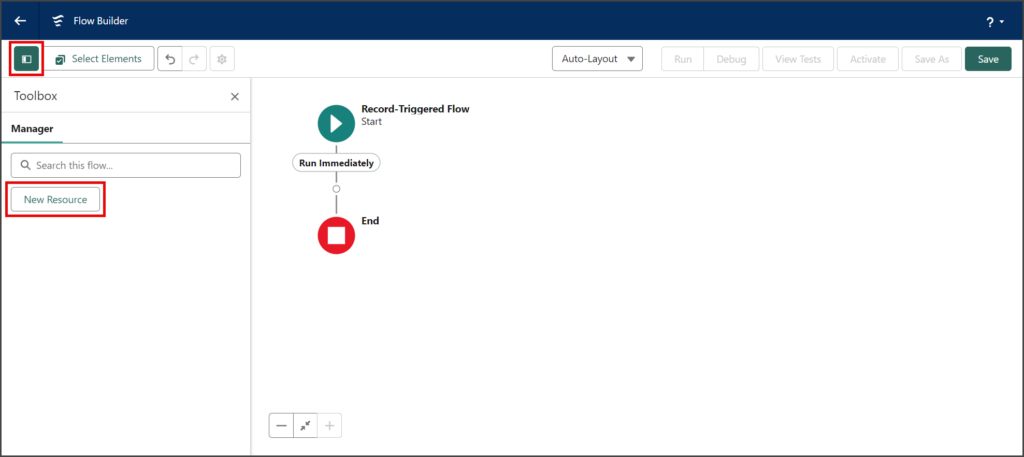
- Click the Toggle Toolbox button to open the Toolbox sidebar.
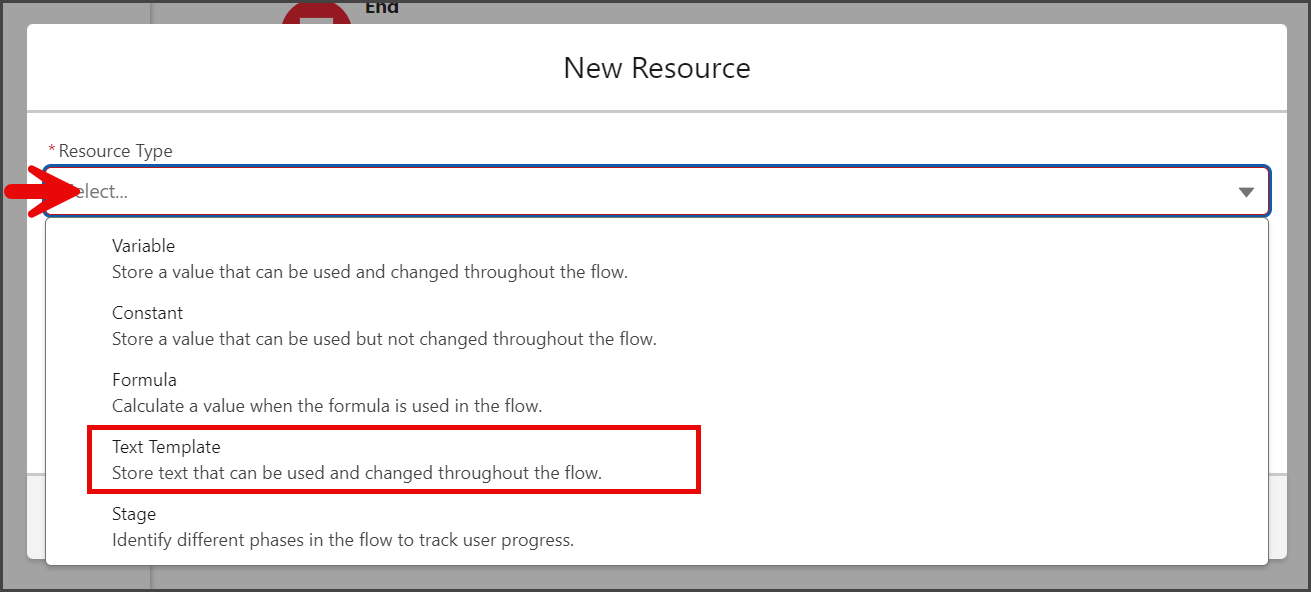
- Click New Resource.
- Click the Resource Type dropdown.
- Select Text Template from the dropdown list.

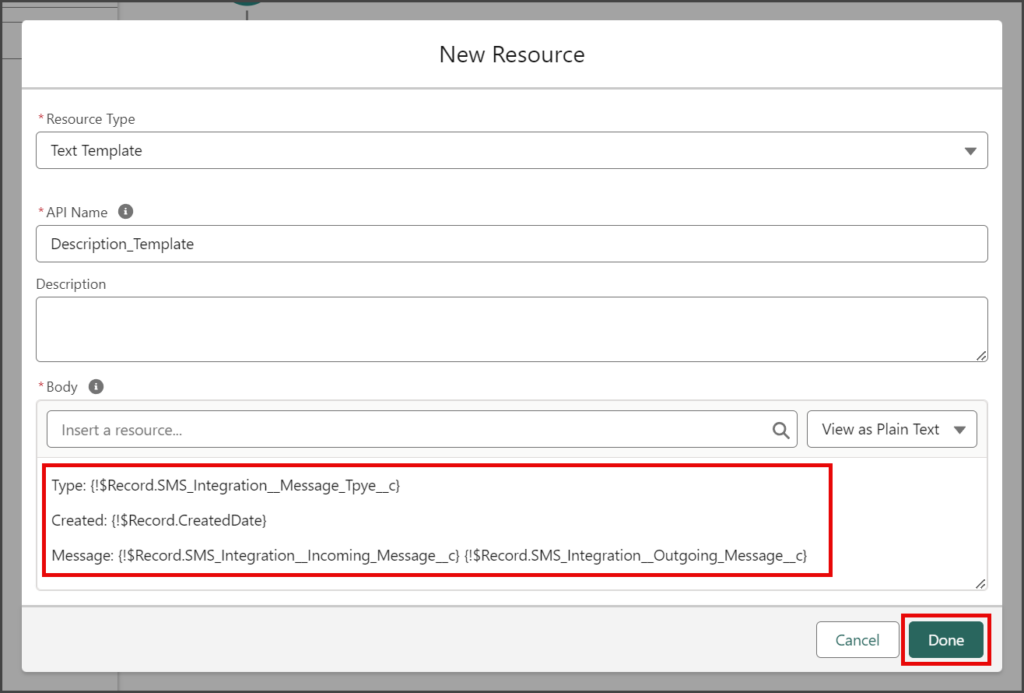
- Enter a name for the resource in the API Name textbox.
- Click the View as dropdown on the right of the Body section.
- Select View as Plain Text.
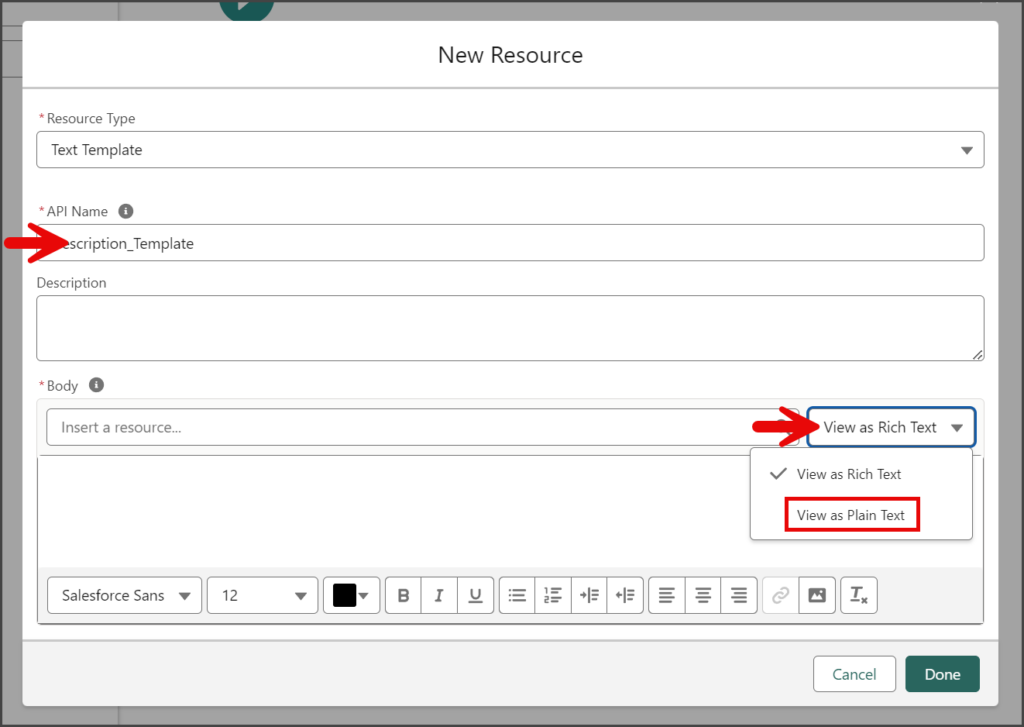
- Copy and paste the following text into the Body textbox.


Type: {!$Record.SMS_Integration__Message_Tpye__c}
Created: {!$Record.CreatedDate}
Message: {!$Record.SMS_Integration__Incoming_Message__c} {!$Record.SMS_Integration__Outgoing_Message__c}- Click Done.

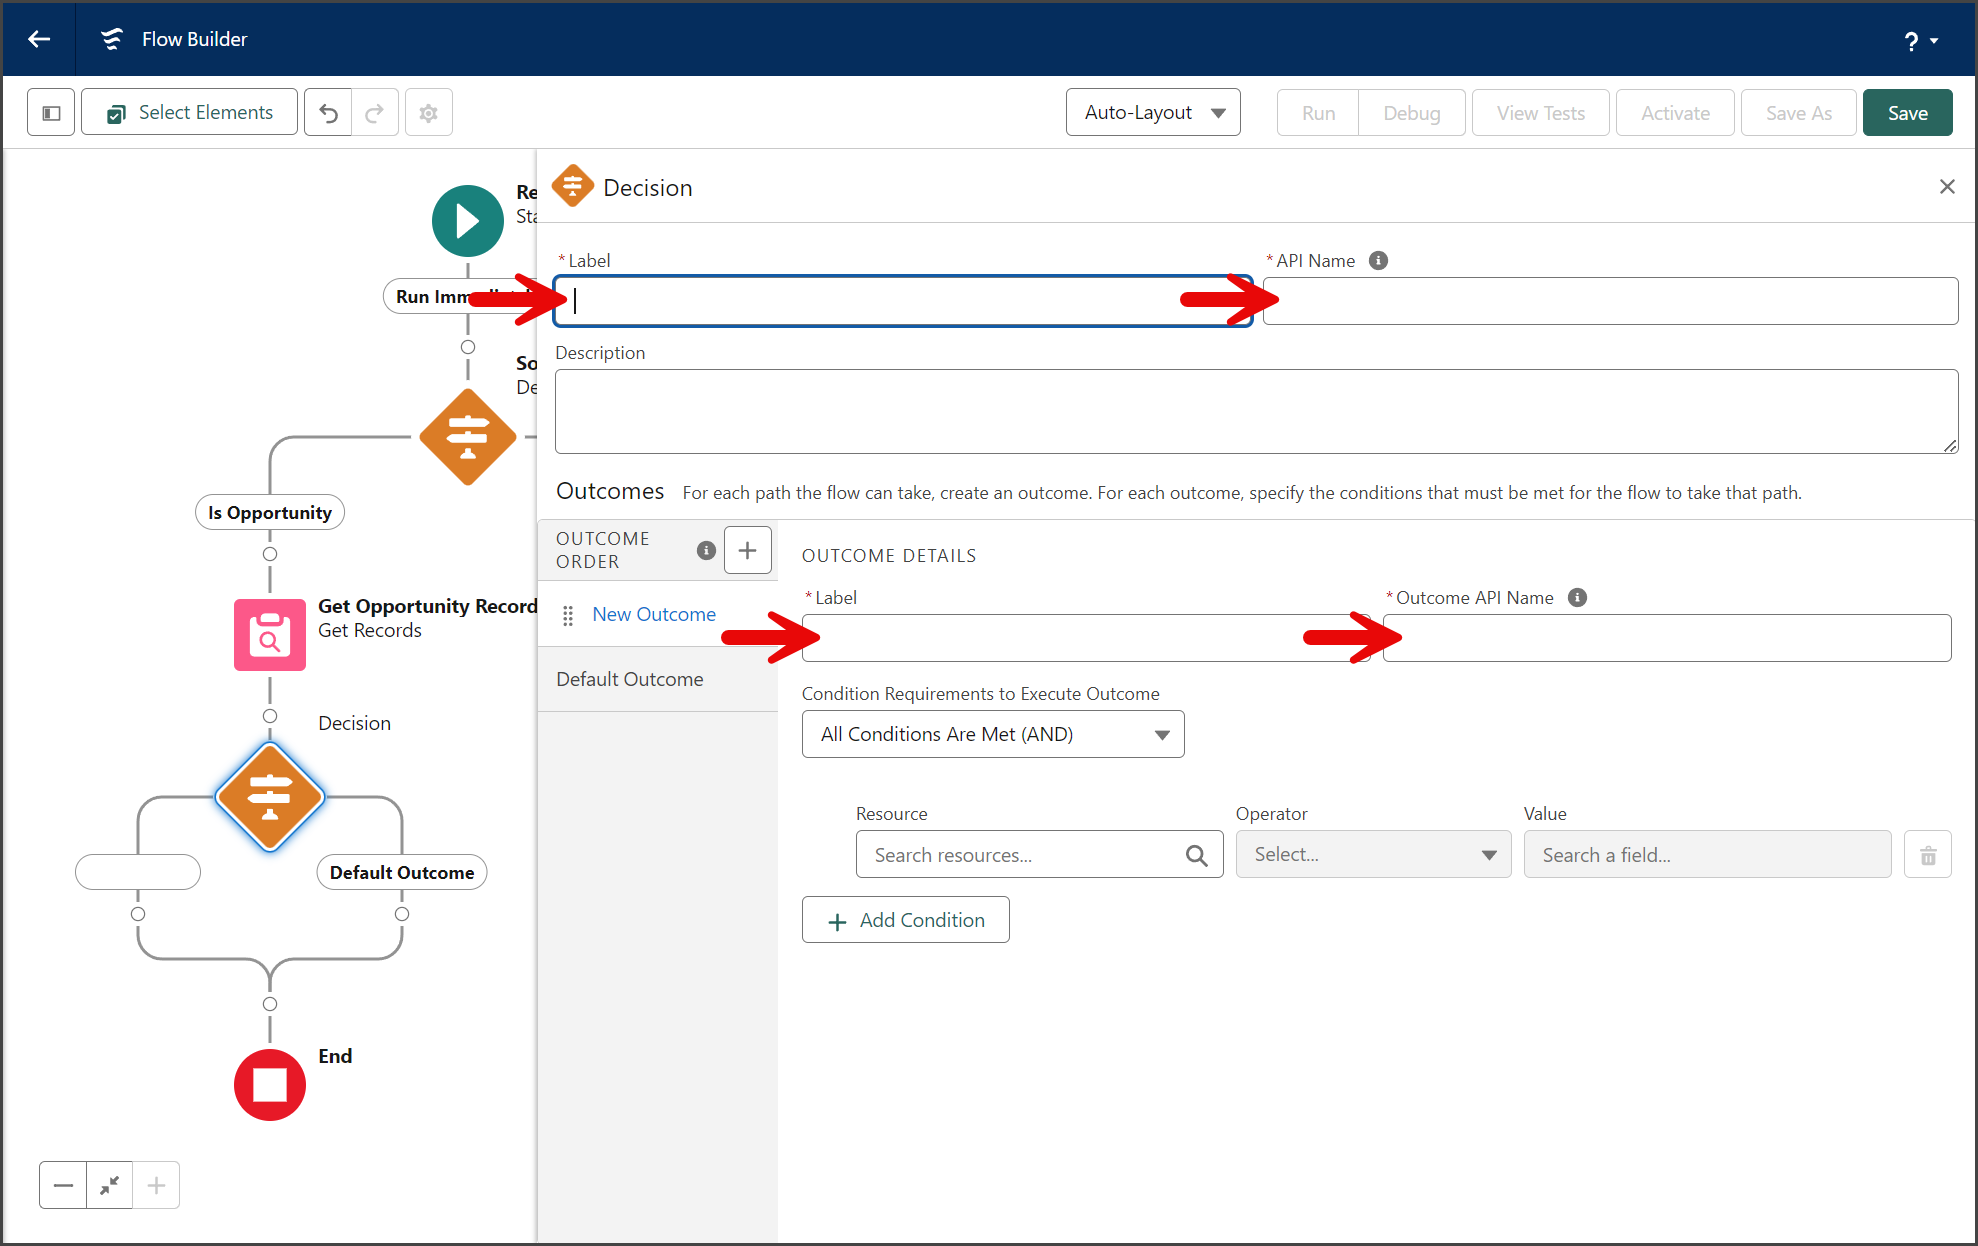
Sort by Opportunity Record
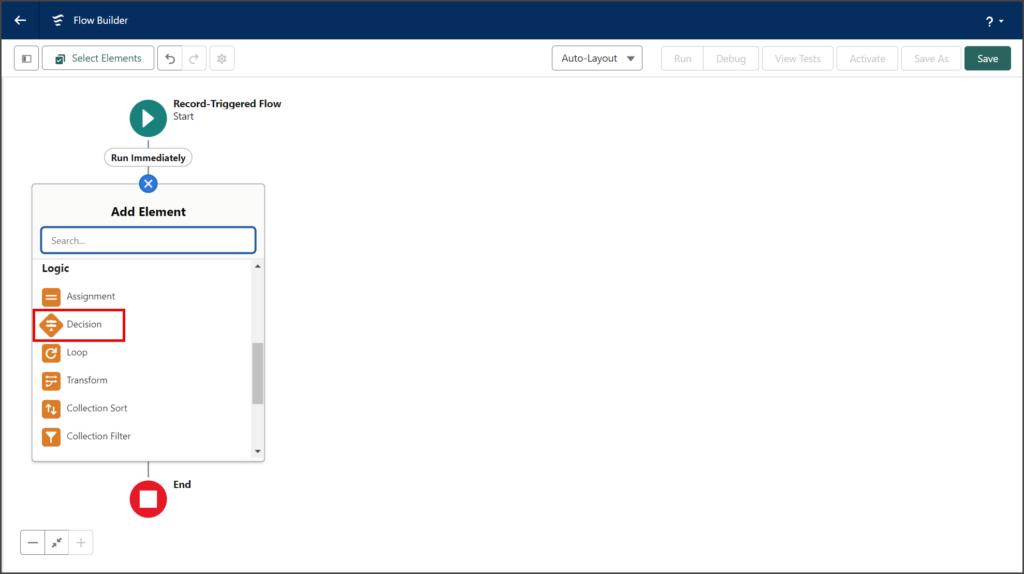
- Click the circle of the connector between the Start and End elements to add a new Element.
- Click the Decision element in the Logic section of the Add Element menu.
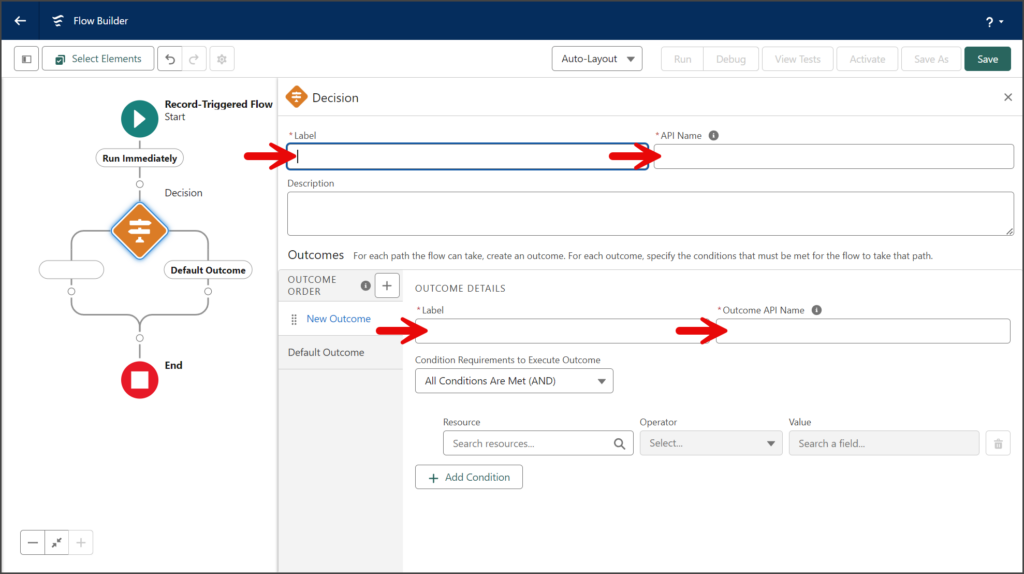
- Enter a name for the Decision in the Label textbox.
- Click the API Name textbox to auto-populate it with the Label with spaces replaced by underscores.
- Enter a name for the Outcome in the Label textbox.
- Click the Outcome API Name textbox to auto-populate it with the Label with spaces replaced by underscores.
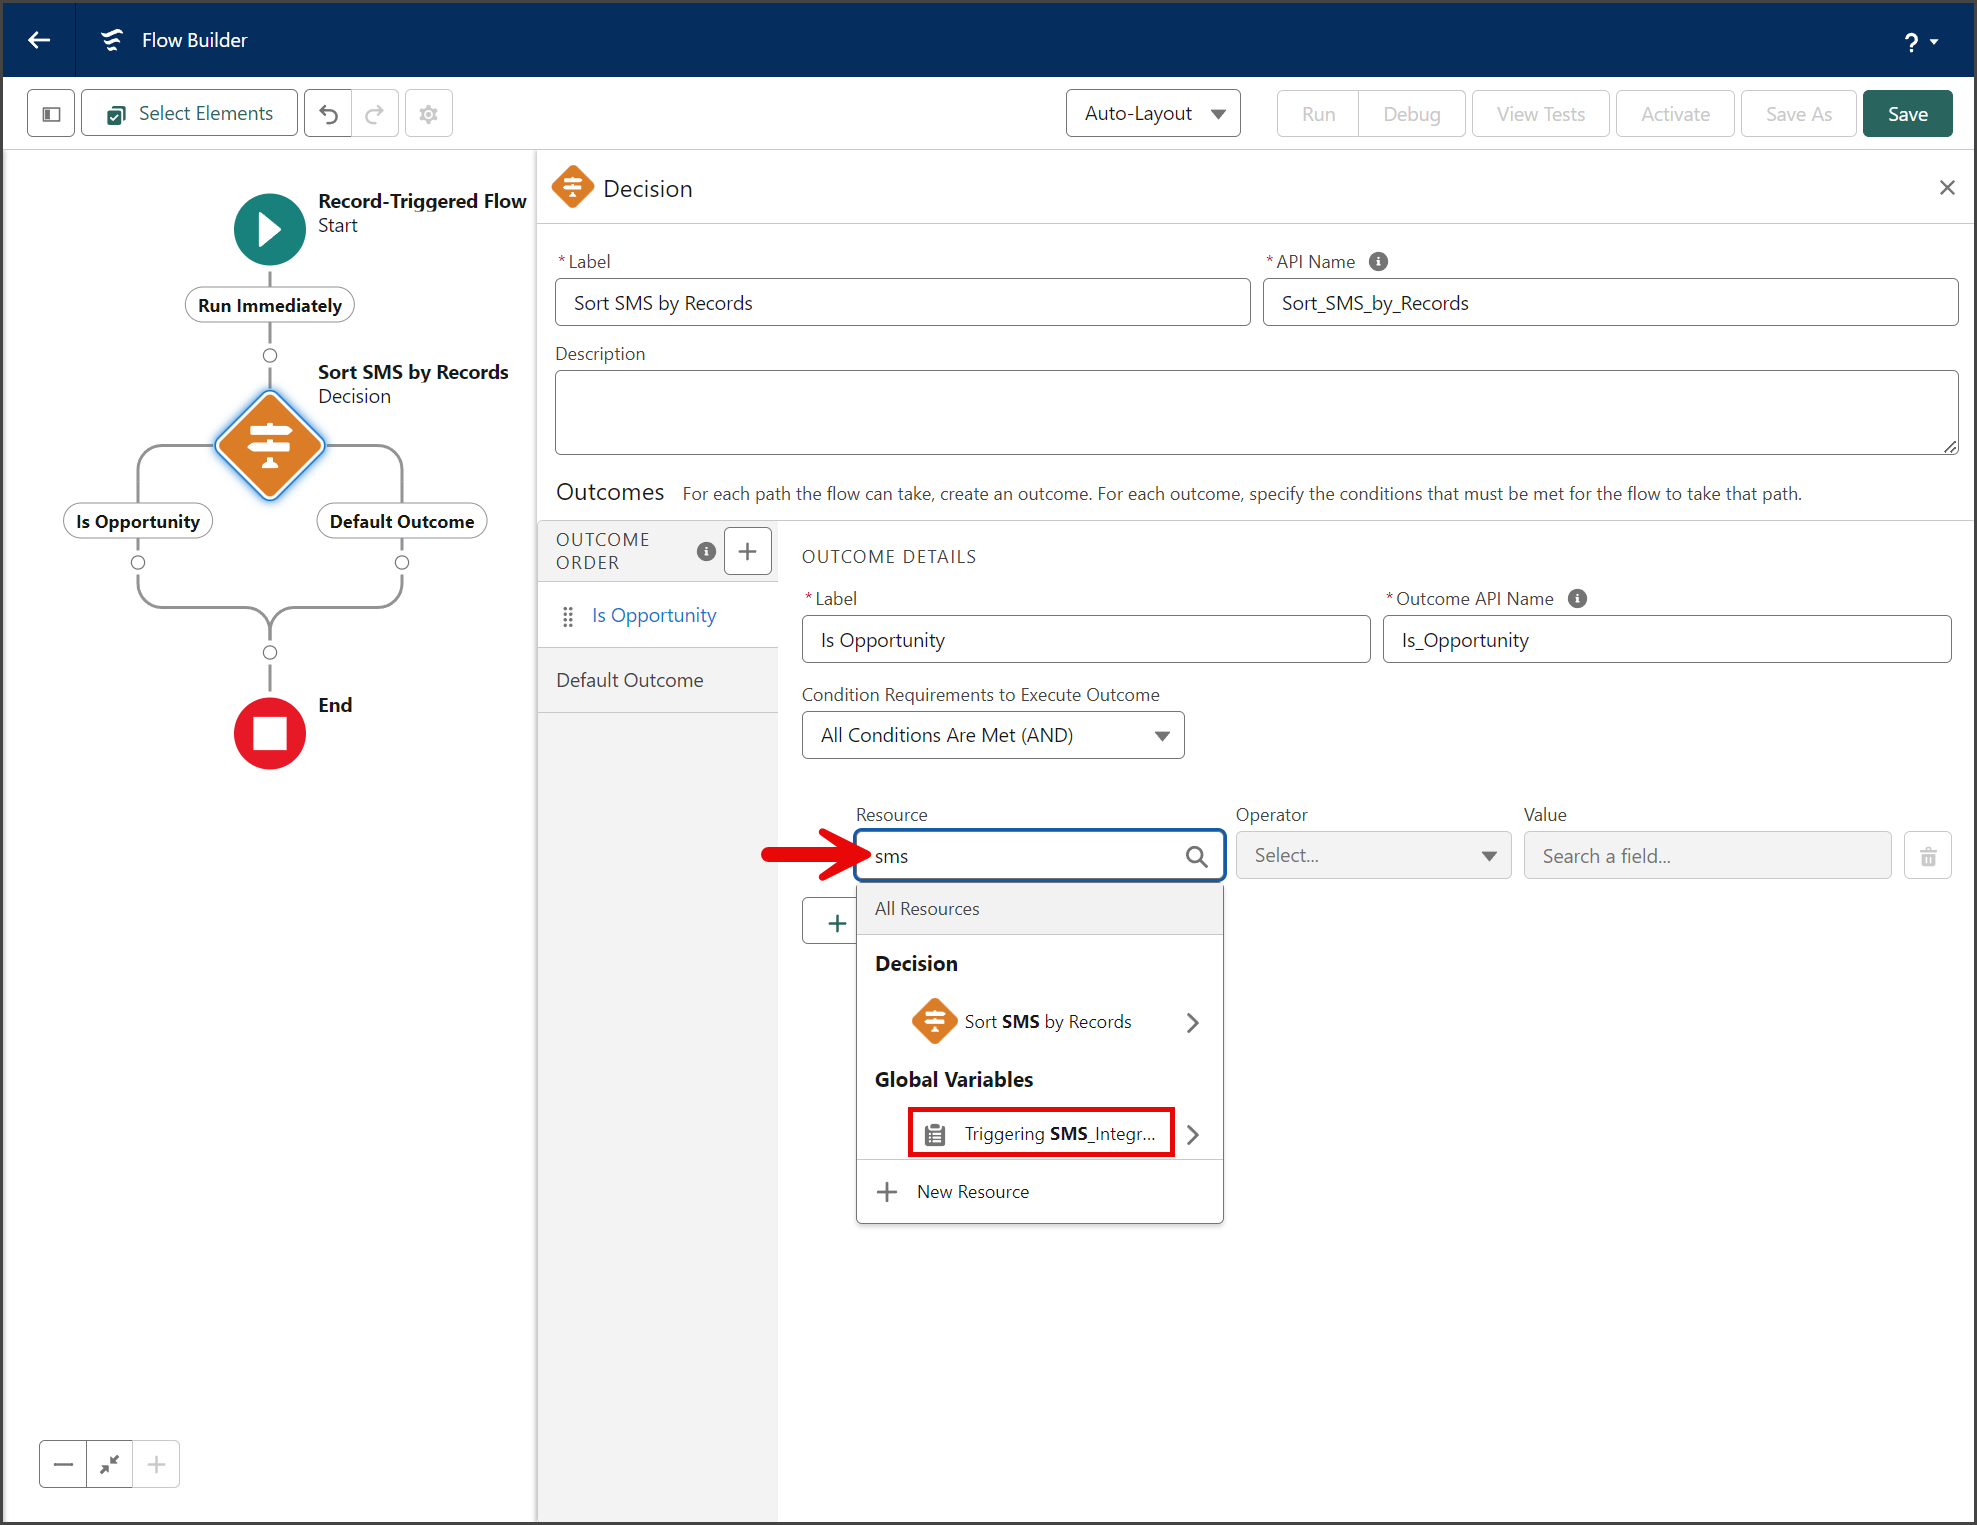
- Enter sms in the Resource search box.
- Click the Triggering SMS_Integr… resource. This is the Record resource variable from the Record-Triggered Flow Start element.
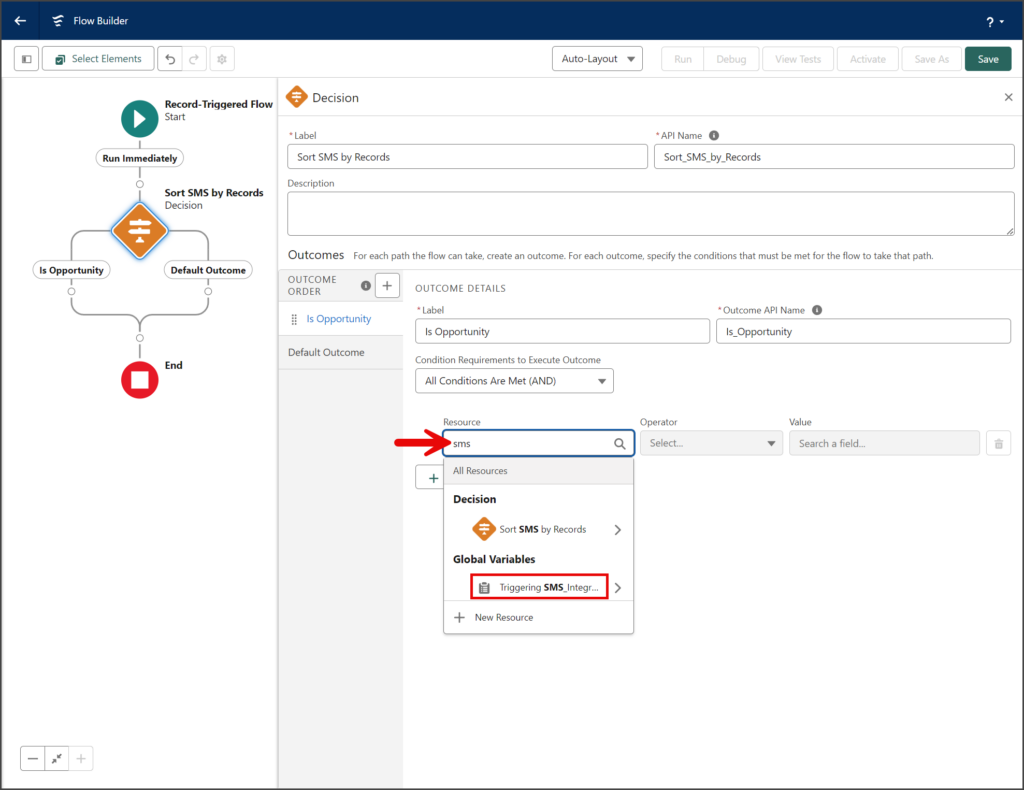
- Without moving the cursor or removing what has been filled in the Resource search box, enter opportunity.
- Click the Opportunity text resource (Aa icon).
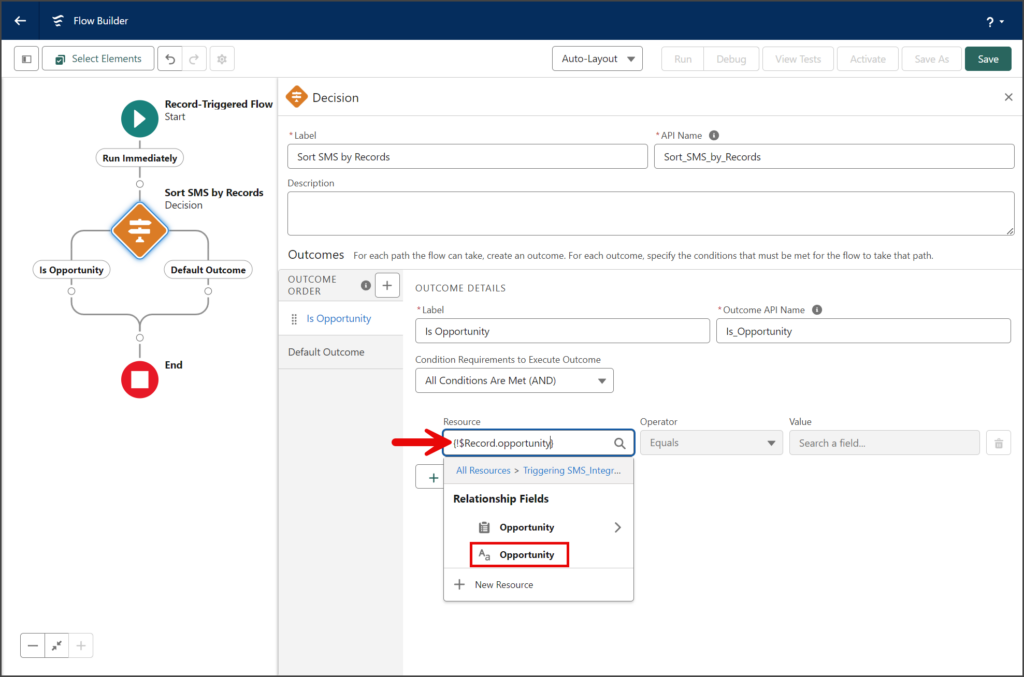
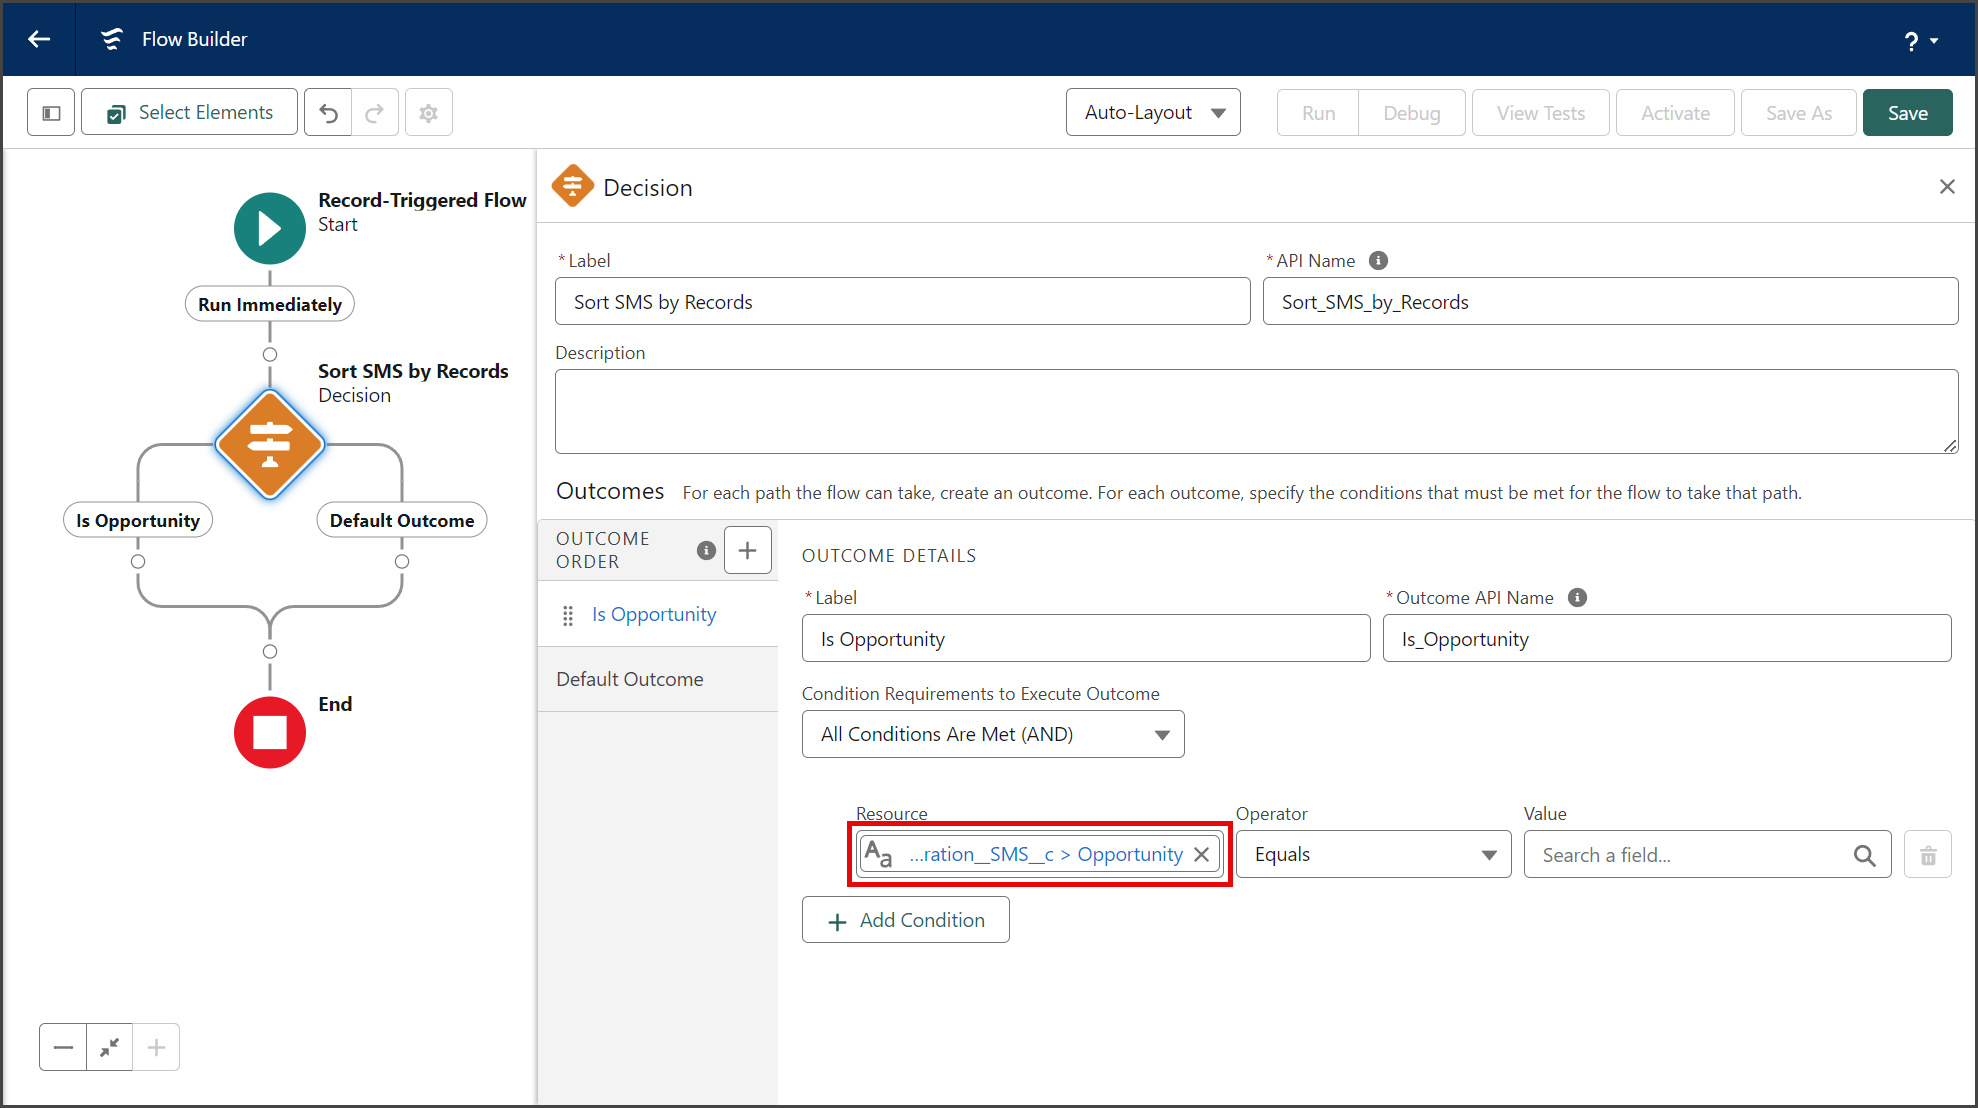
- The Resource search box should look like the screenshot below. Alternatively, you can enter
{!$Record.SMS_Integration__Opportunity__c}in the search box.
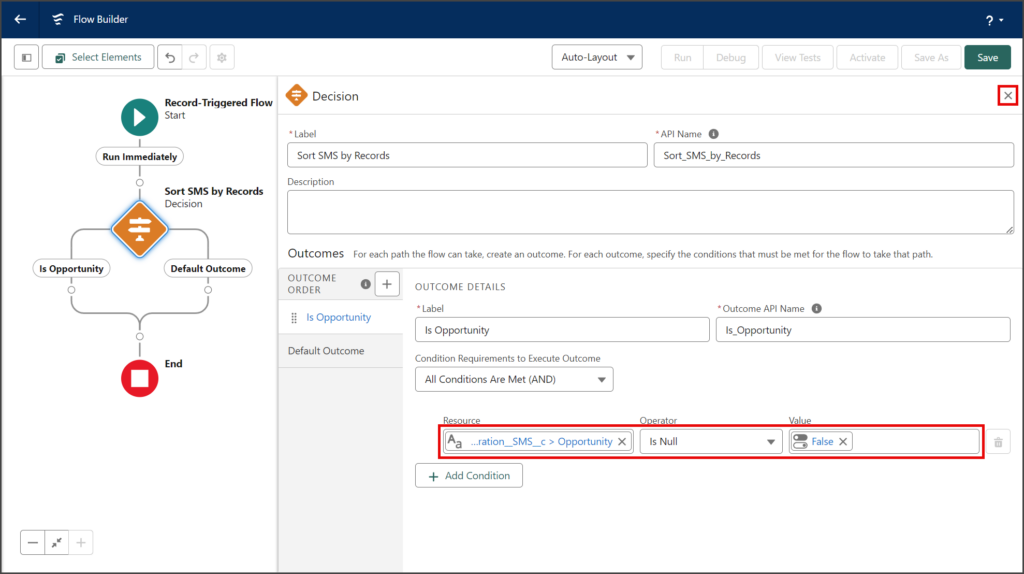
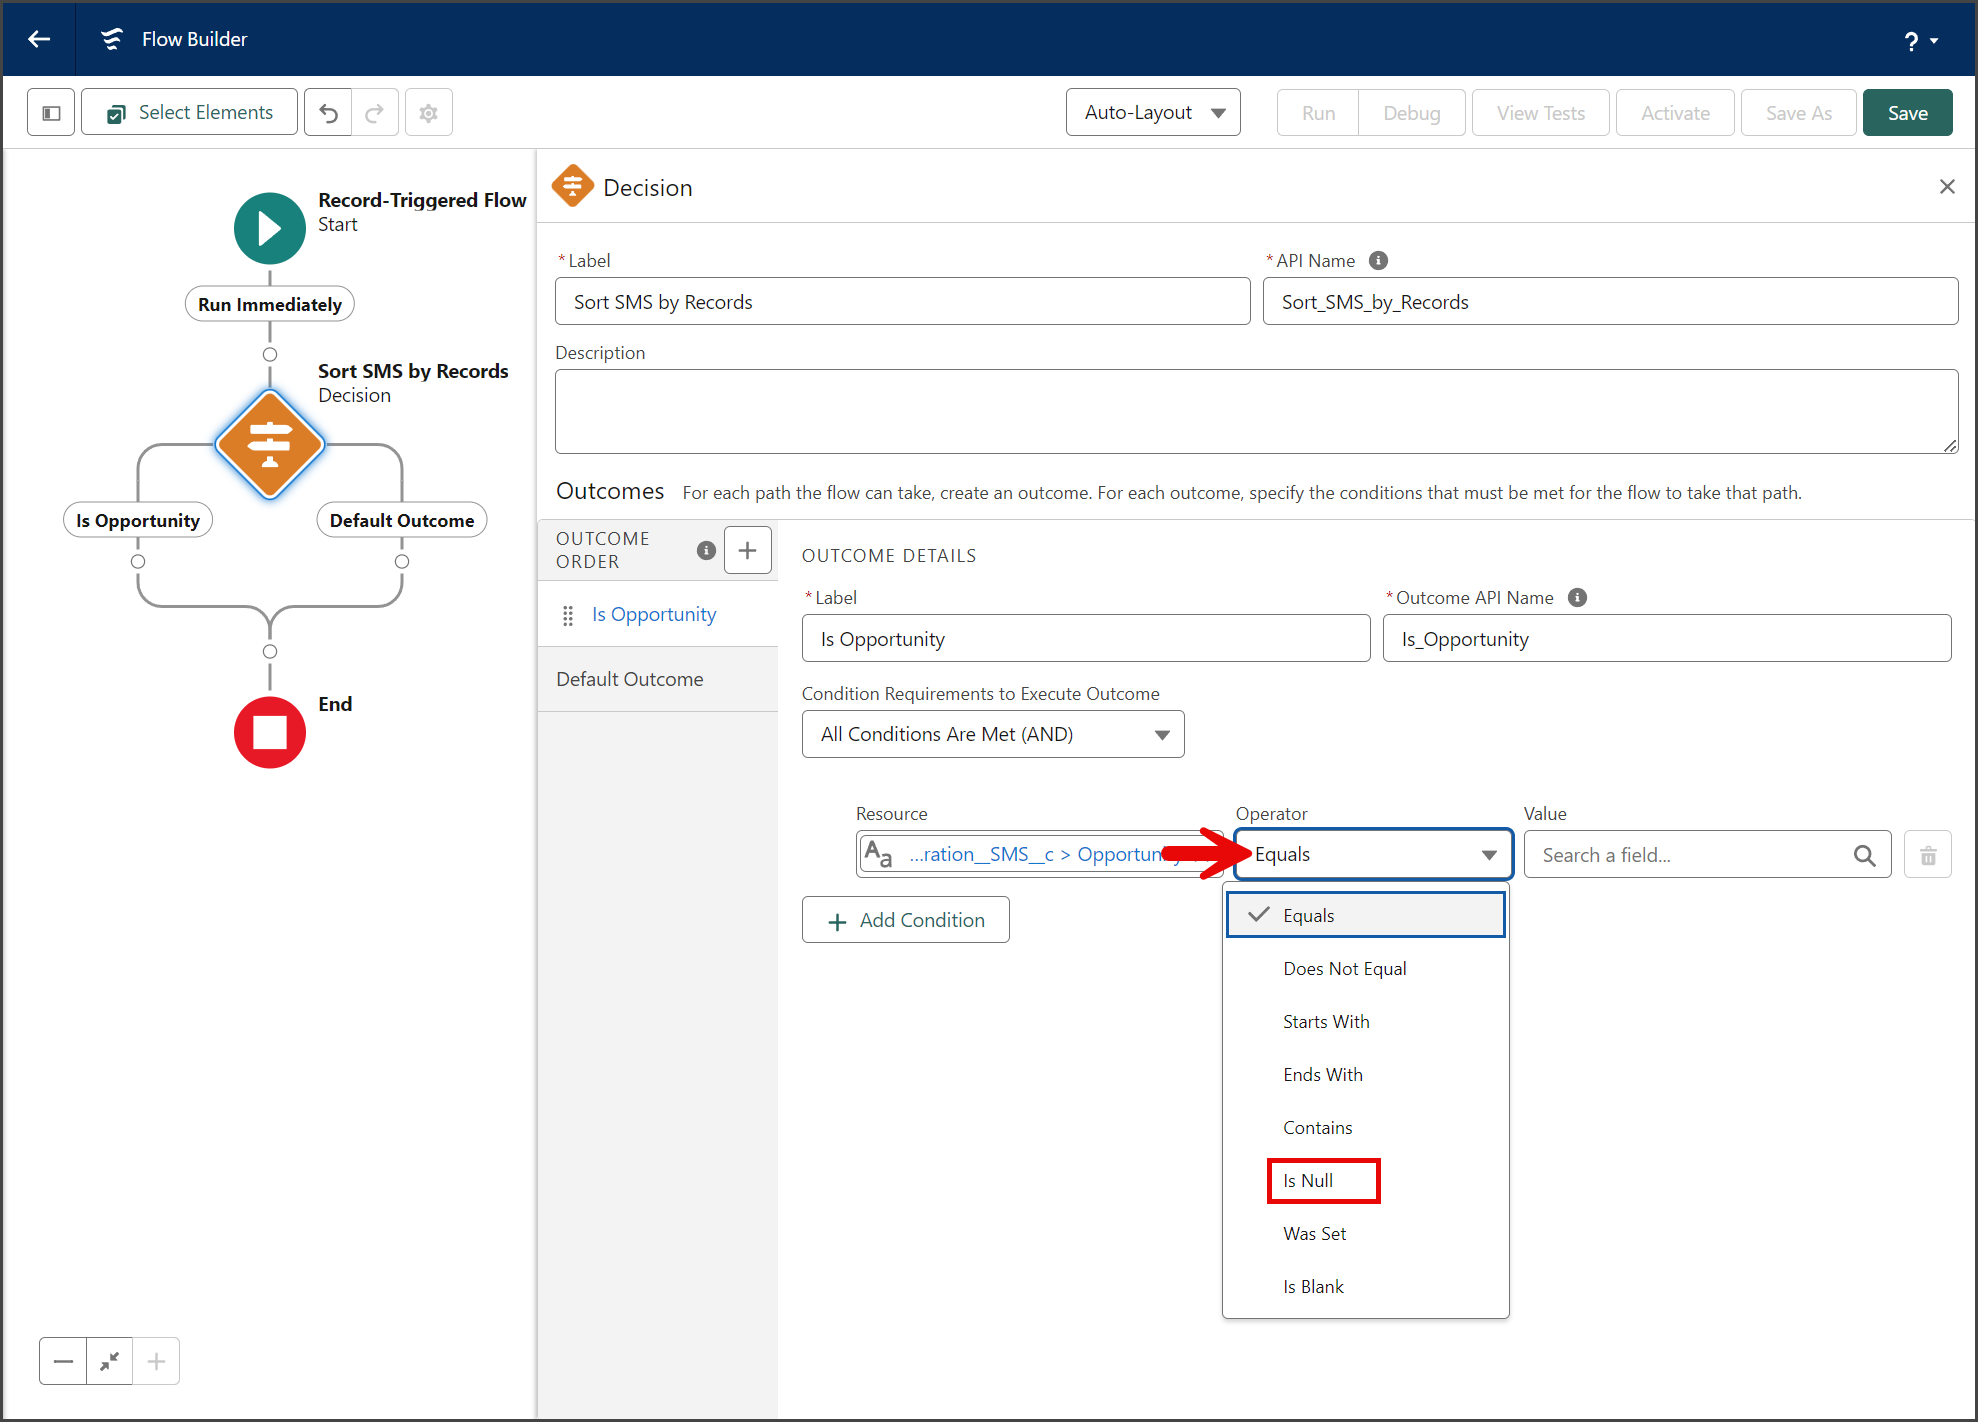
- Click the Operator dropdown.
- Select Is Null.

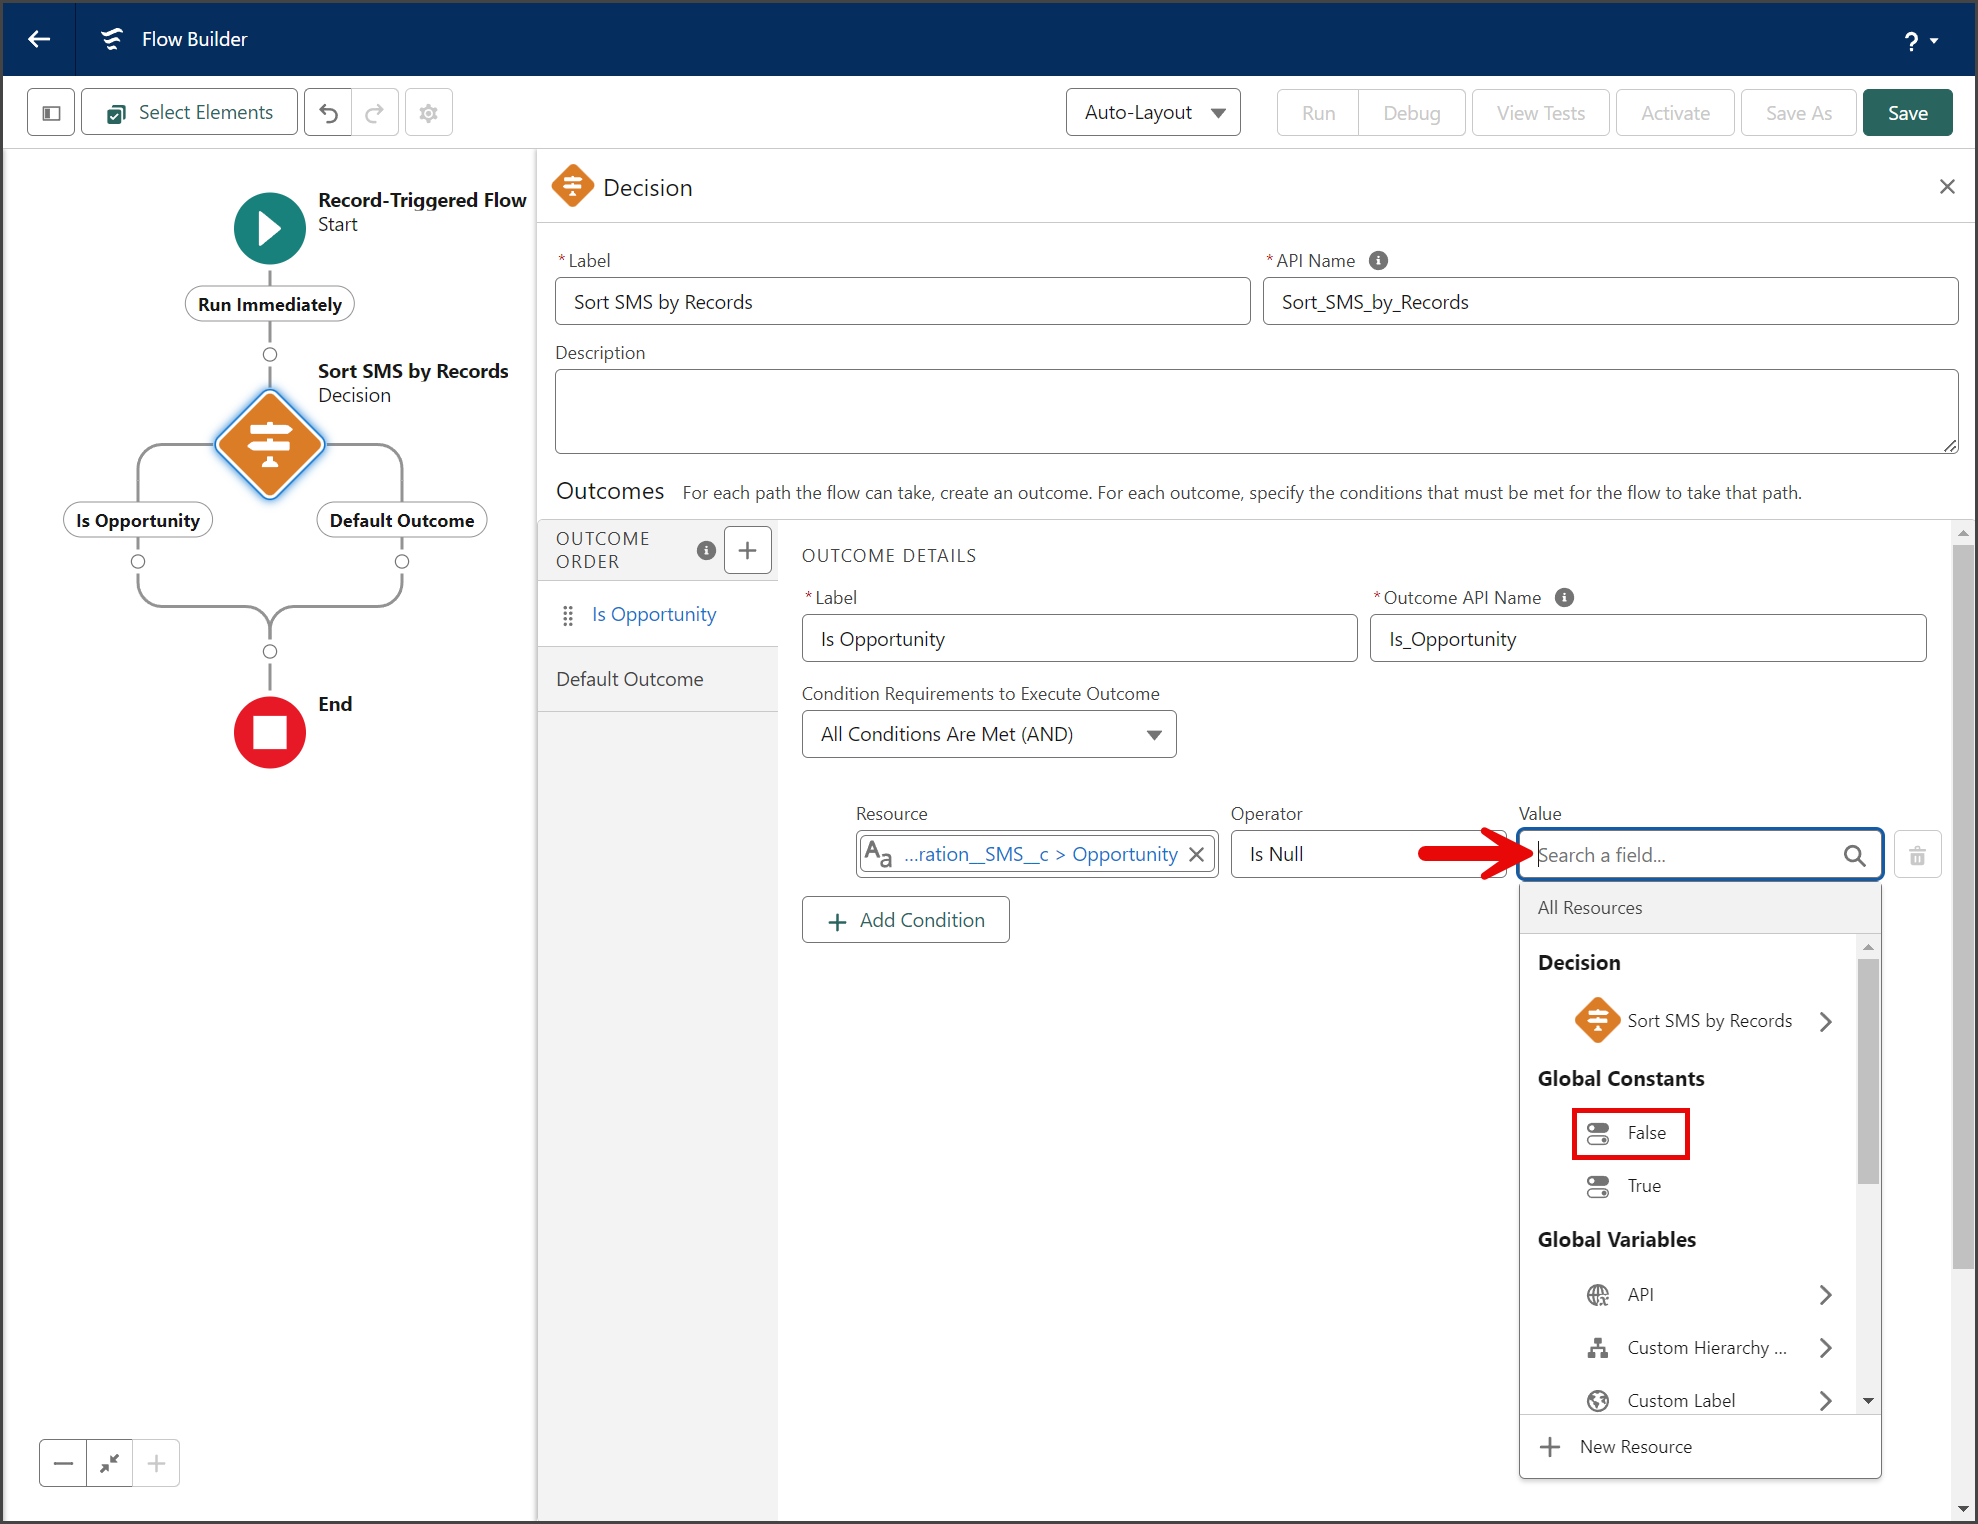
- Click the Value search box.
- Click False under the Global Constants.

- The completed Outcome Condition should look like the screenshot below.
- Click the X to close the Decision window.
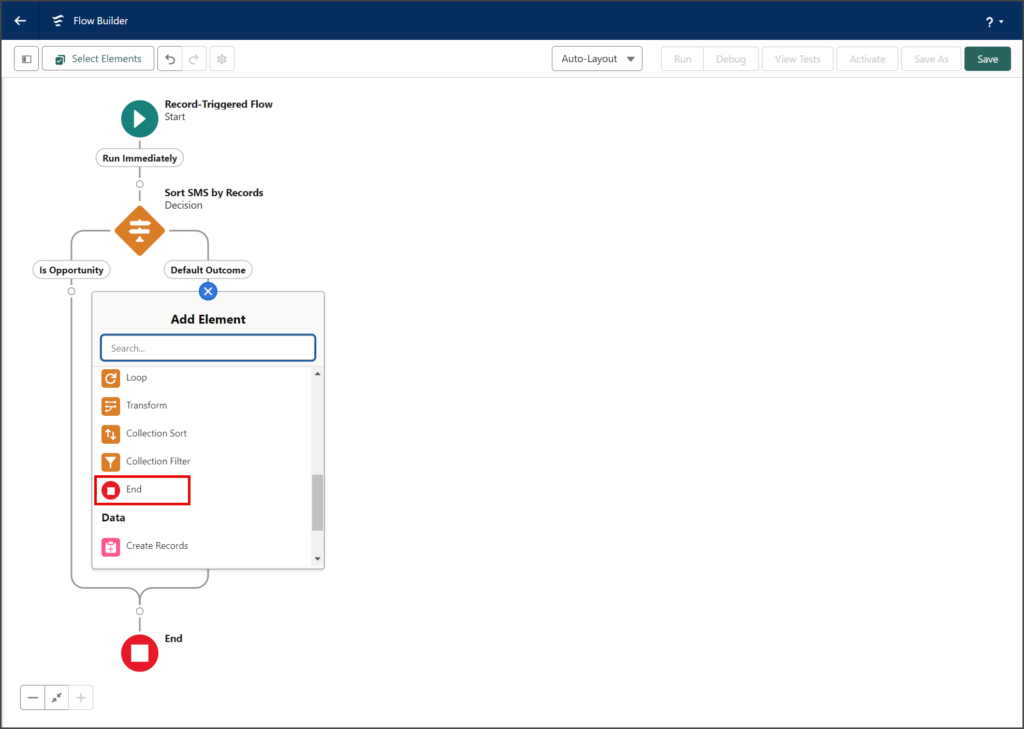
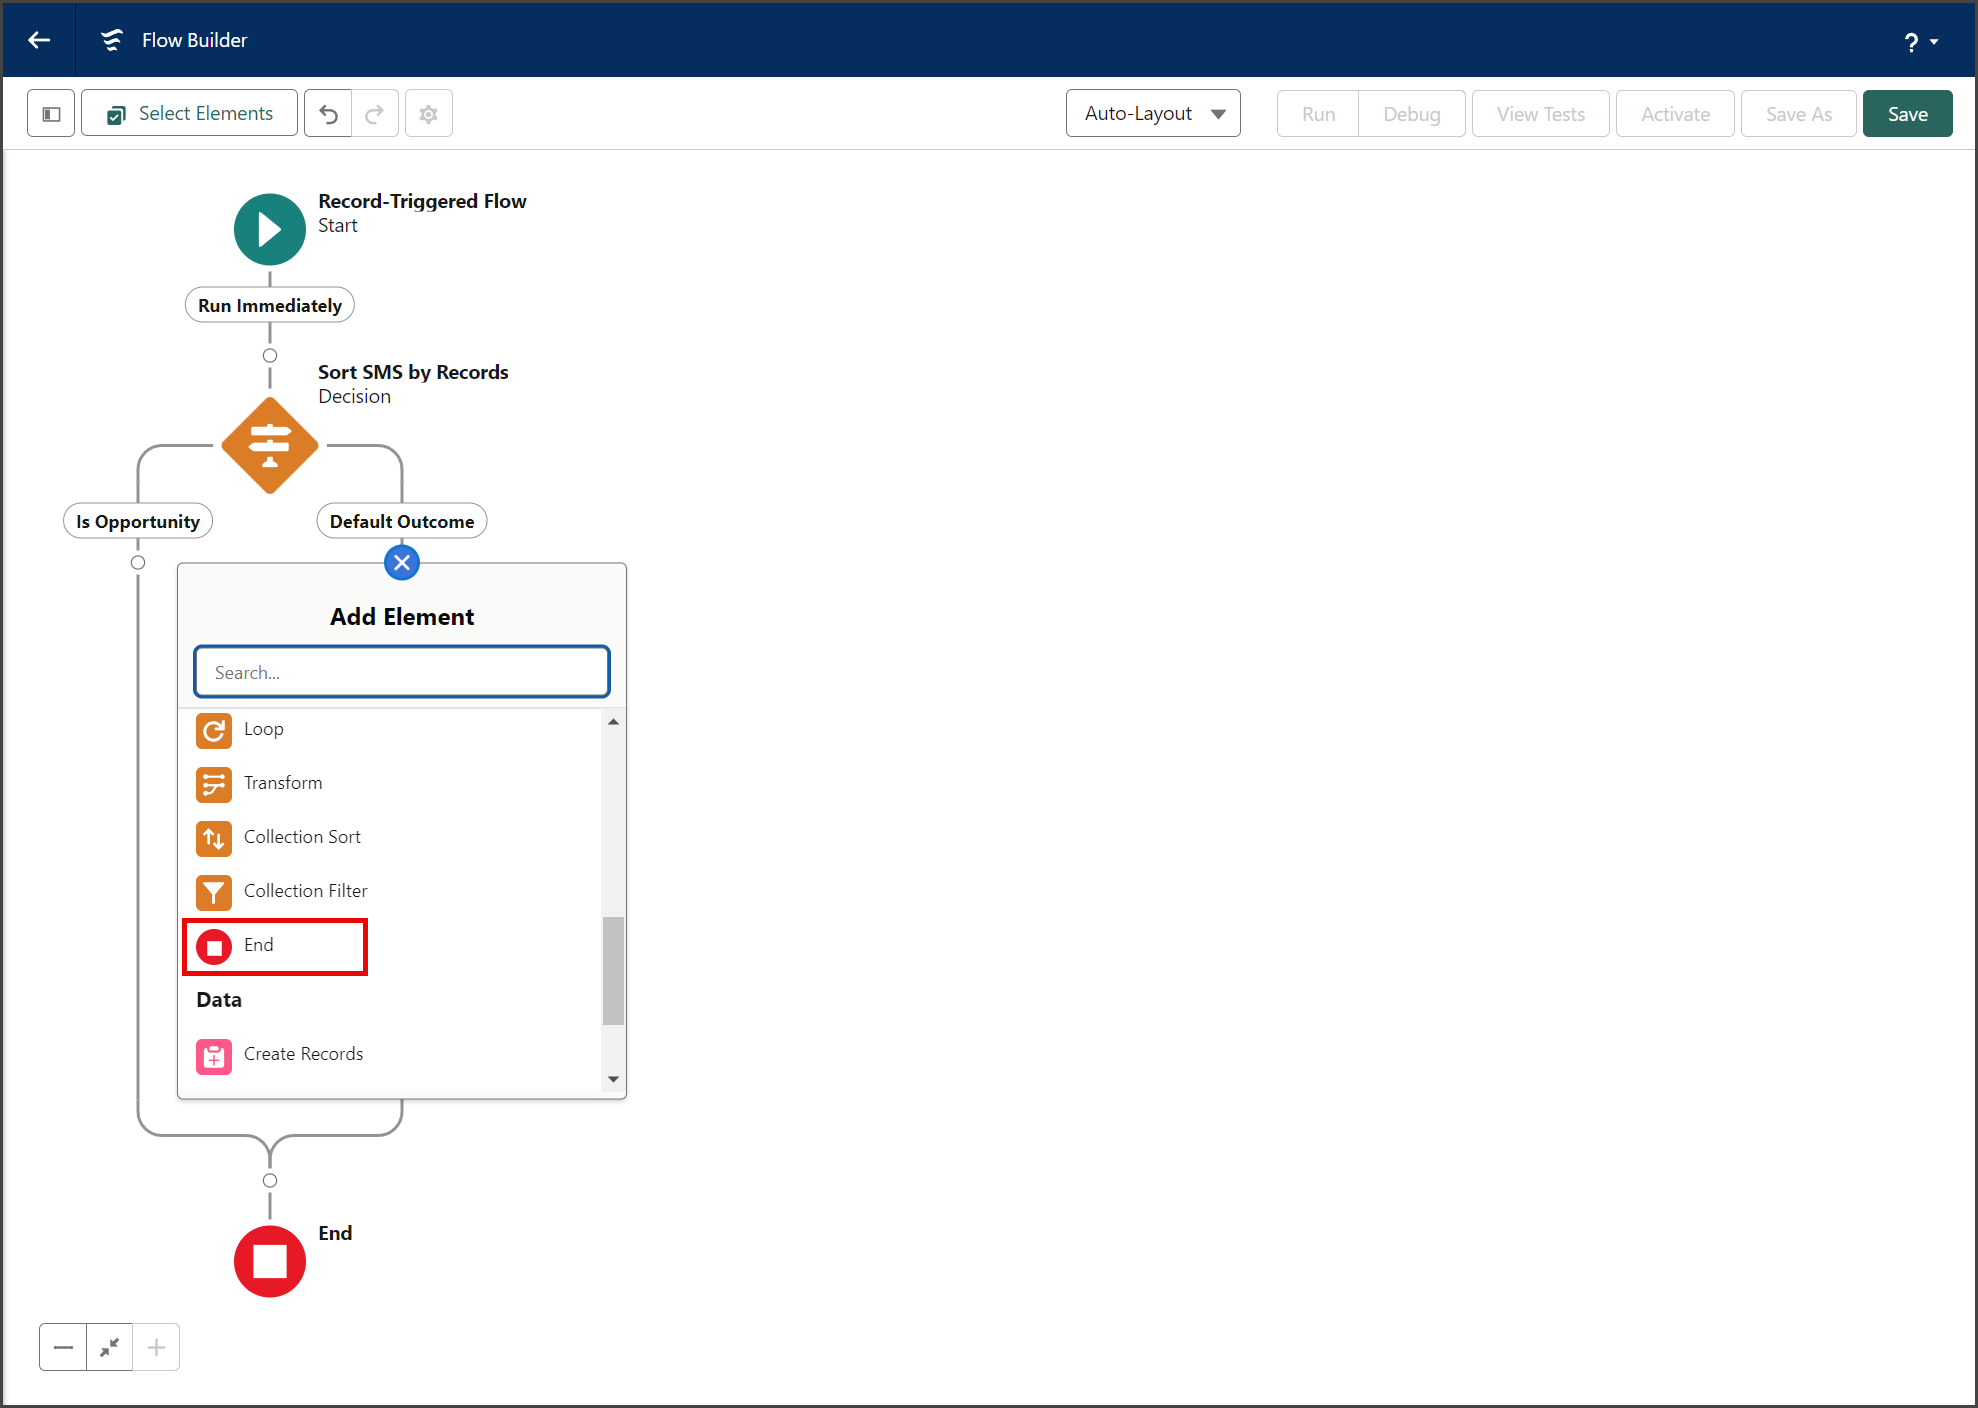
- Click the circle of the connector between the Default Outcome of the Decision element and the End element to add a new Element.
- Click the End element in the Logic section of the Add Element menu.


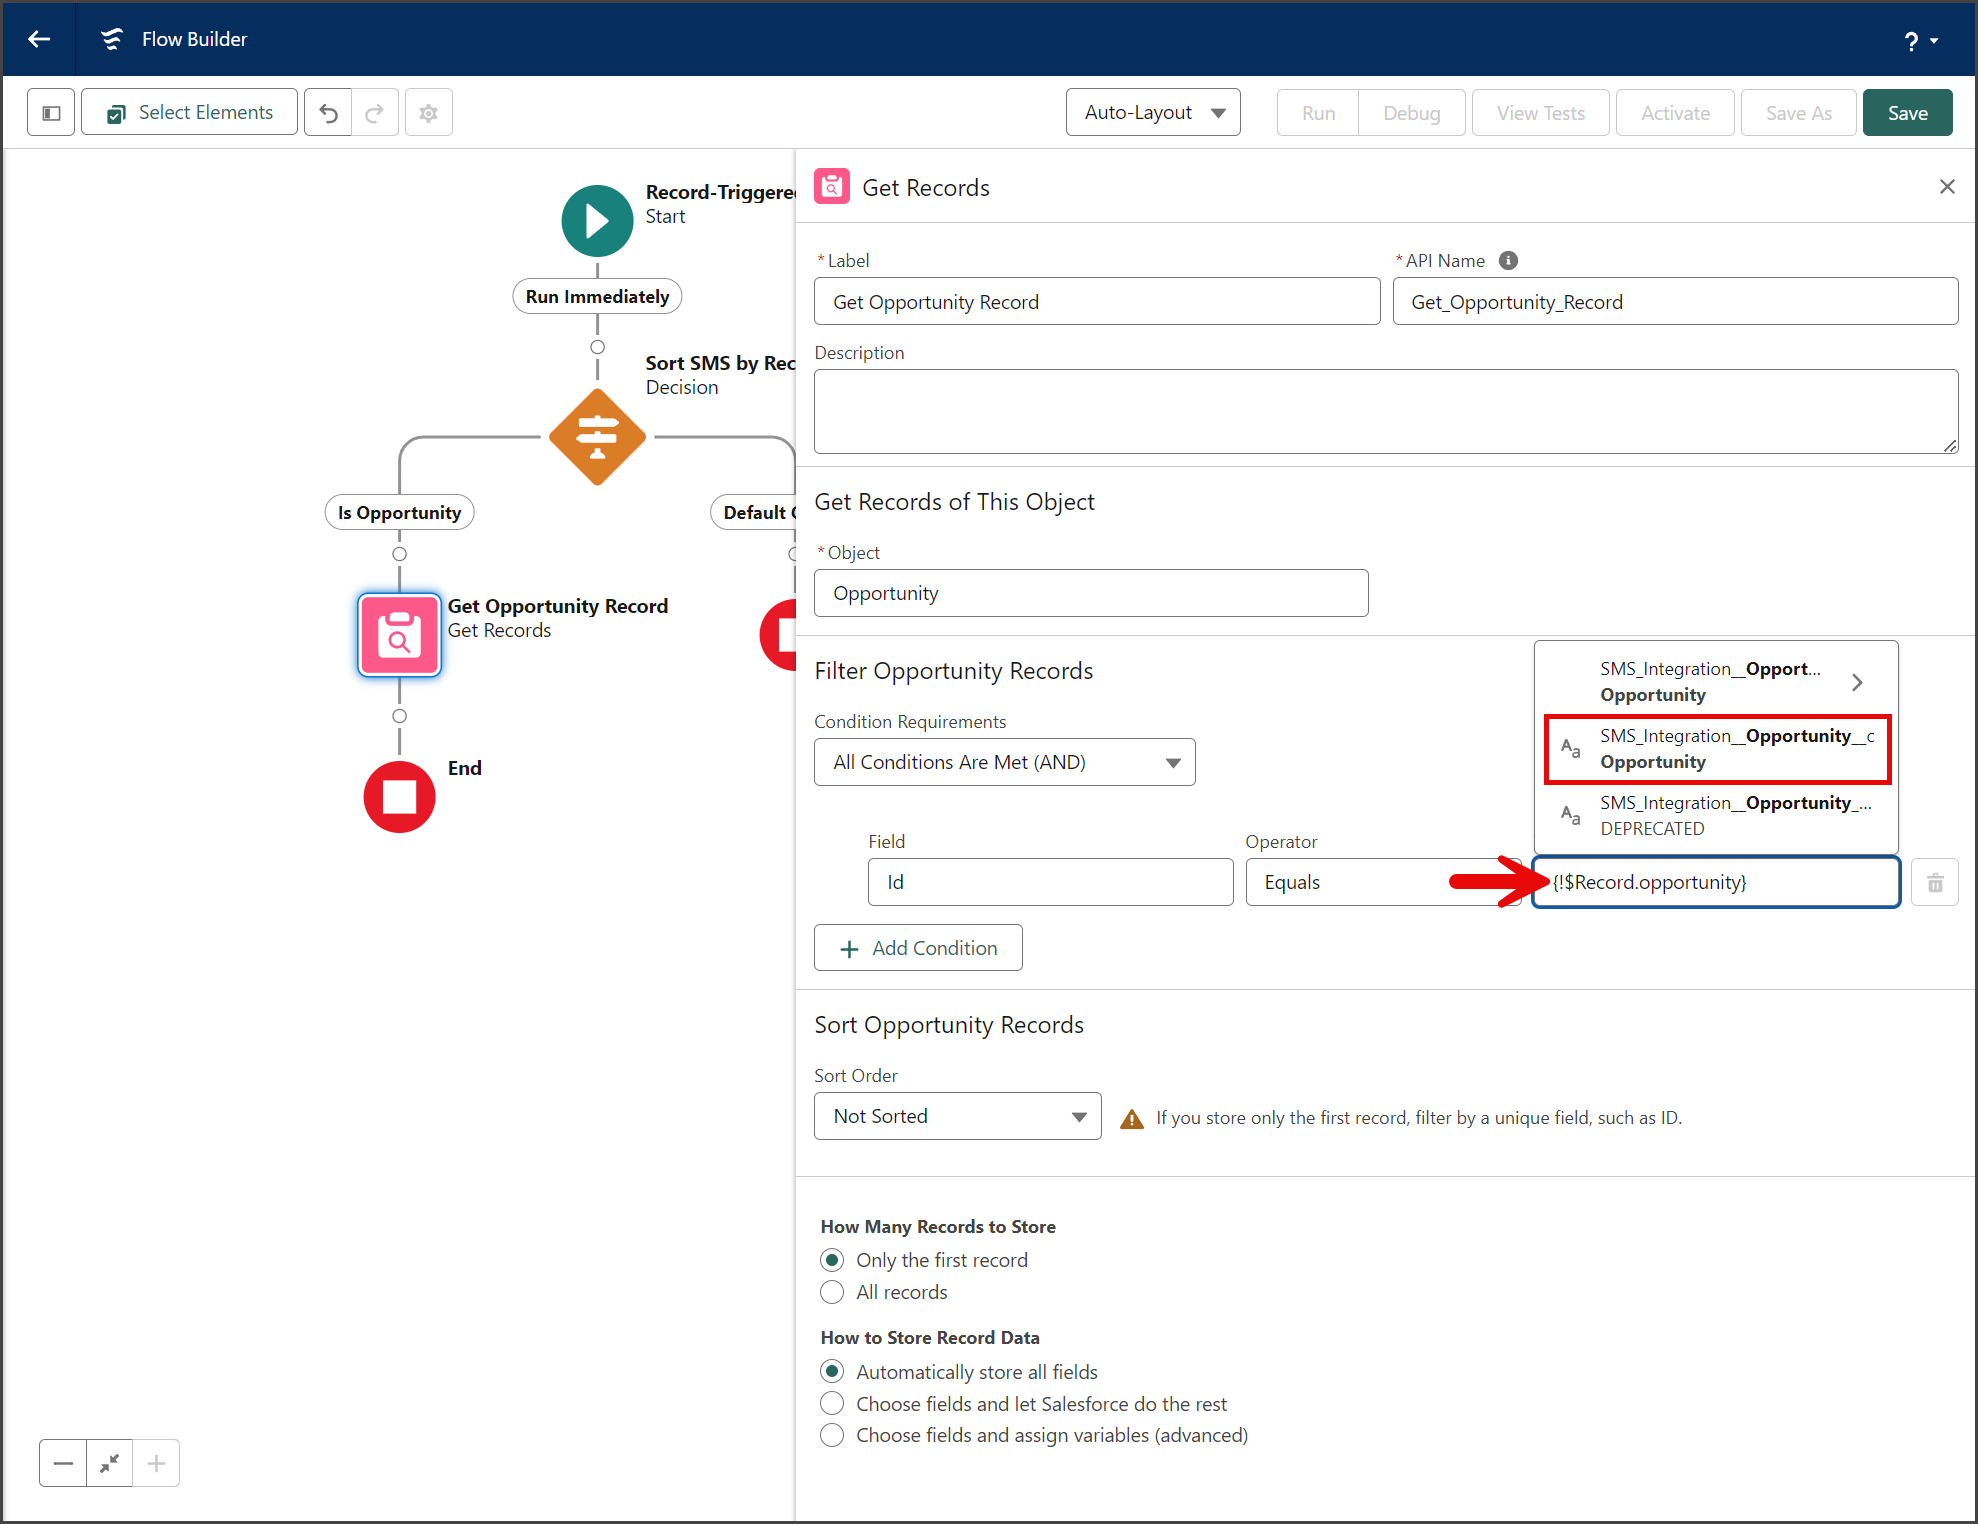
Get Opportunity Record
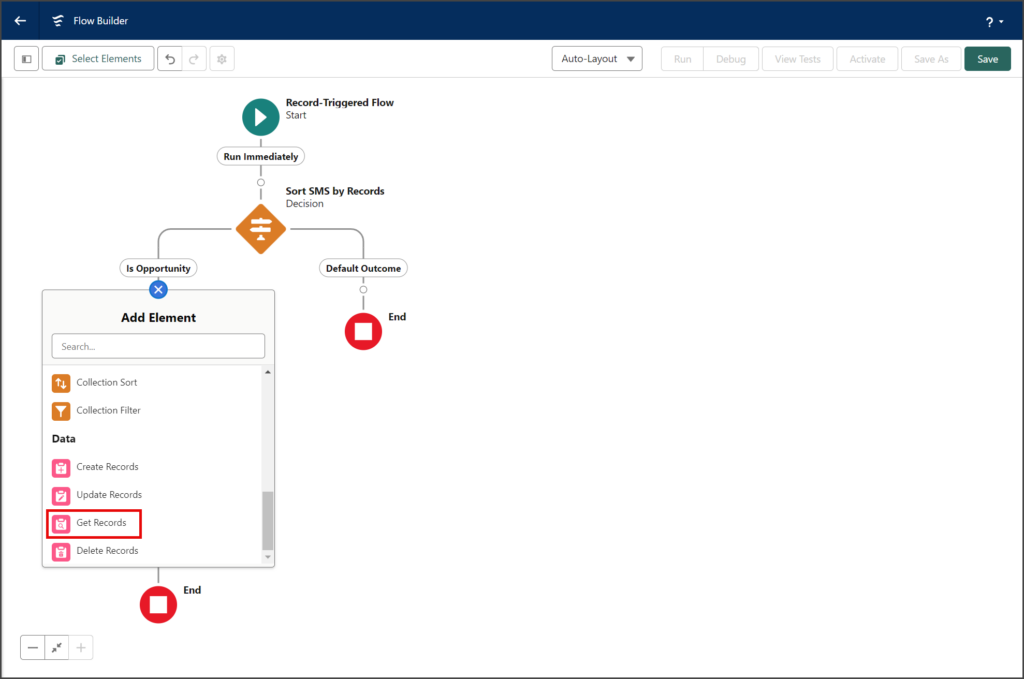
- Click the circle of the connector between the Is Opportunity of the Decision element and the End element to add a new Element.
- Click the Get Records element in the Data section of the Add Element menu.
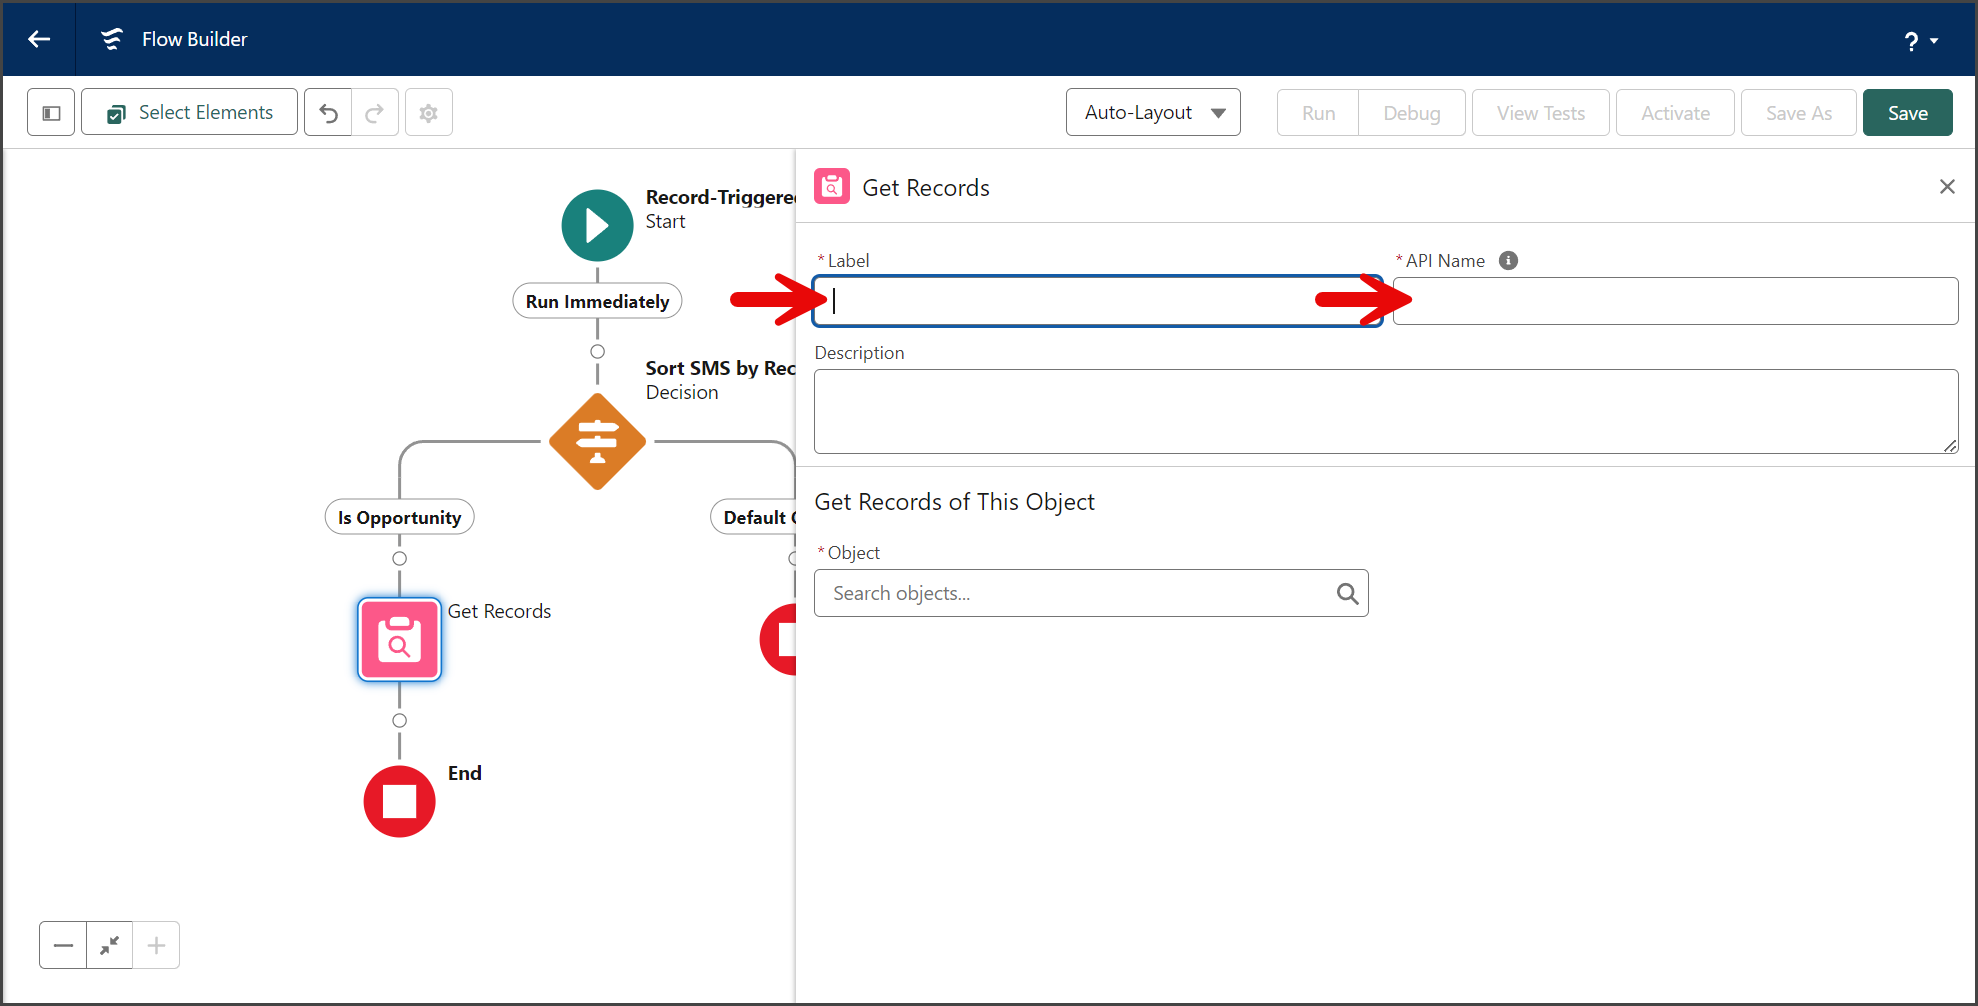
- Enter a name for the Get Records in the Label textbox.
- Click the API Name textbox to auto-populate it with the Label with spaces replaced by underscores.

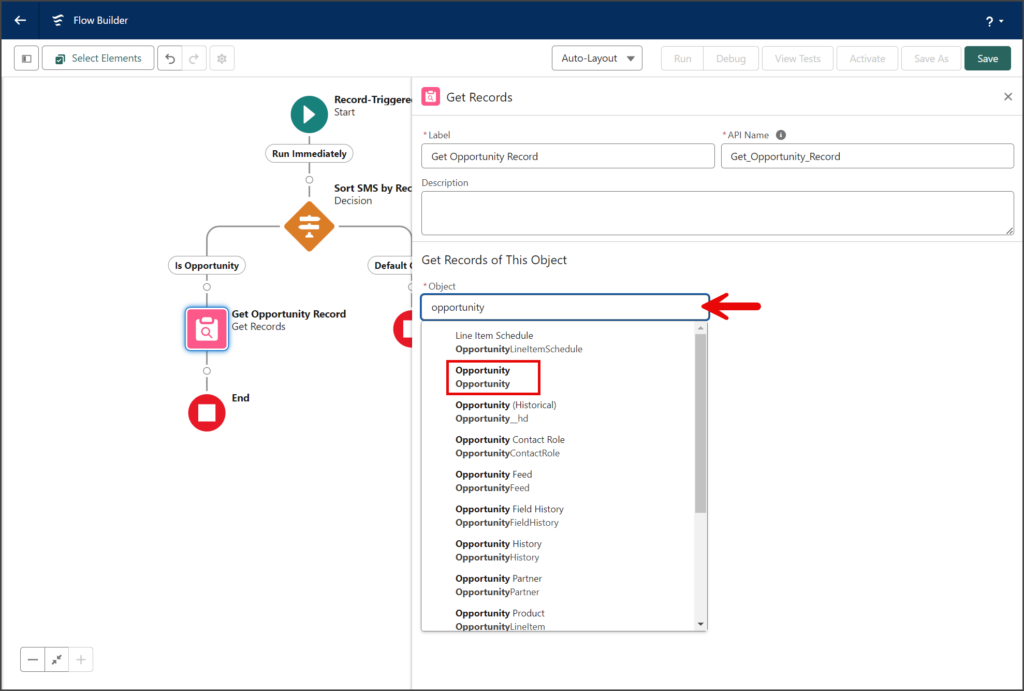
- Enter opportunity in the Object search box in the Get Records of This Object section.
- Click Opportunity.
- Enter id in the Field search box in the Filter Opportunity Records section.
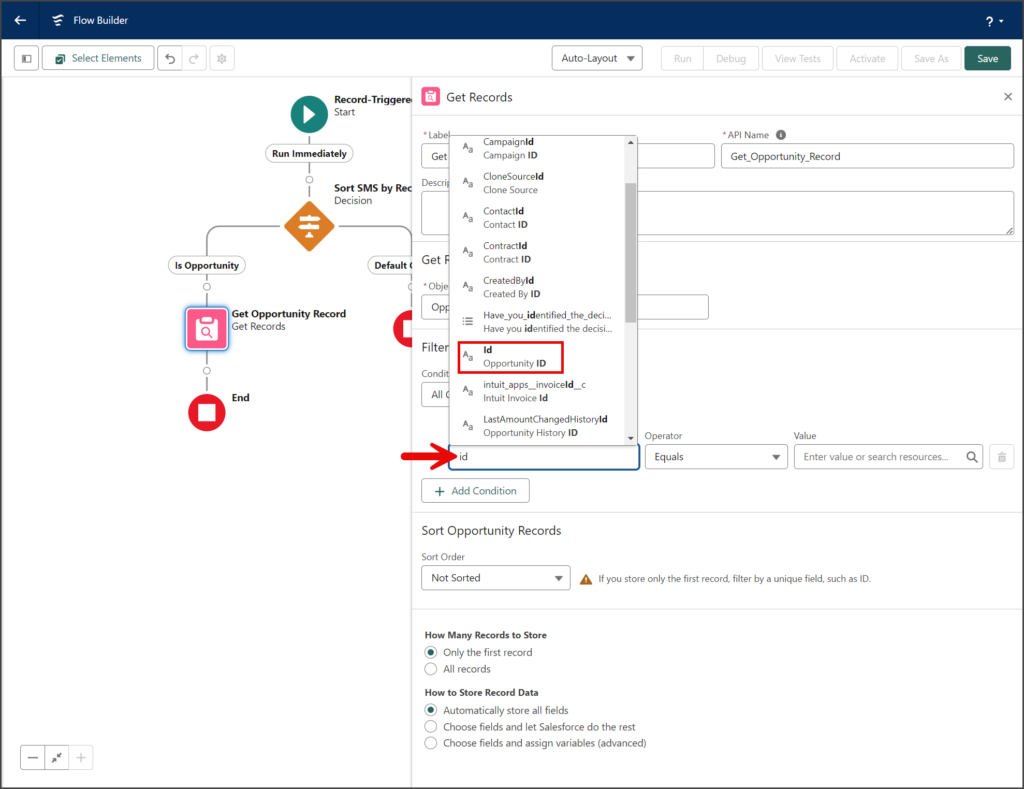
- Leave the Operator dropdown set to Equals.
- Enter sms in the Value search box.
- Click $Record SMS_Integration__SMS__c under Global Variables.

- Without moving the cursor or removing what has been filled in the Value search box, enter opportunity.
- Click the SMS_Integration__Opportunity__c text resource (Aa icon).
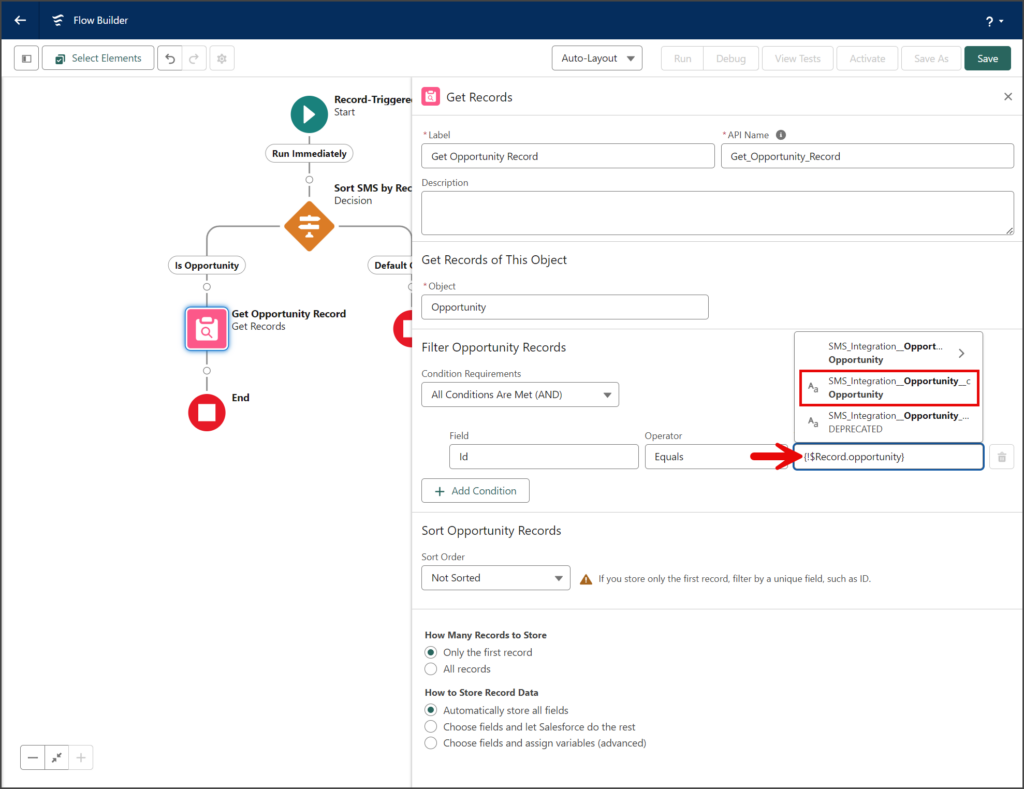
- The Value search box should look like the screenshot below. Alternatively, you can enter
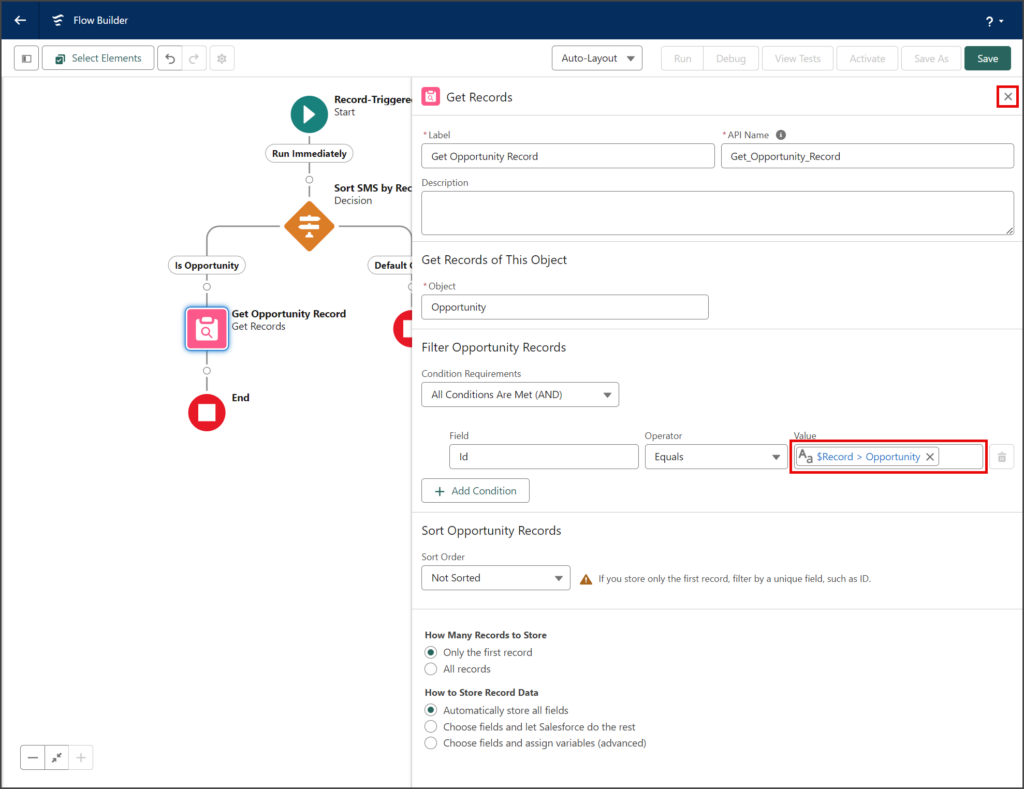
{!$Record.SMS_Integration__Opportunity__c}in the search box. - Click the X to close the Get Records window.


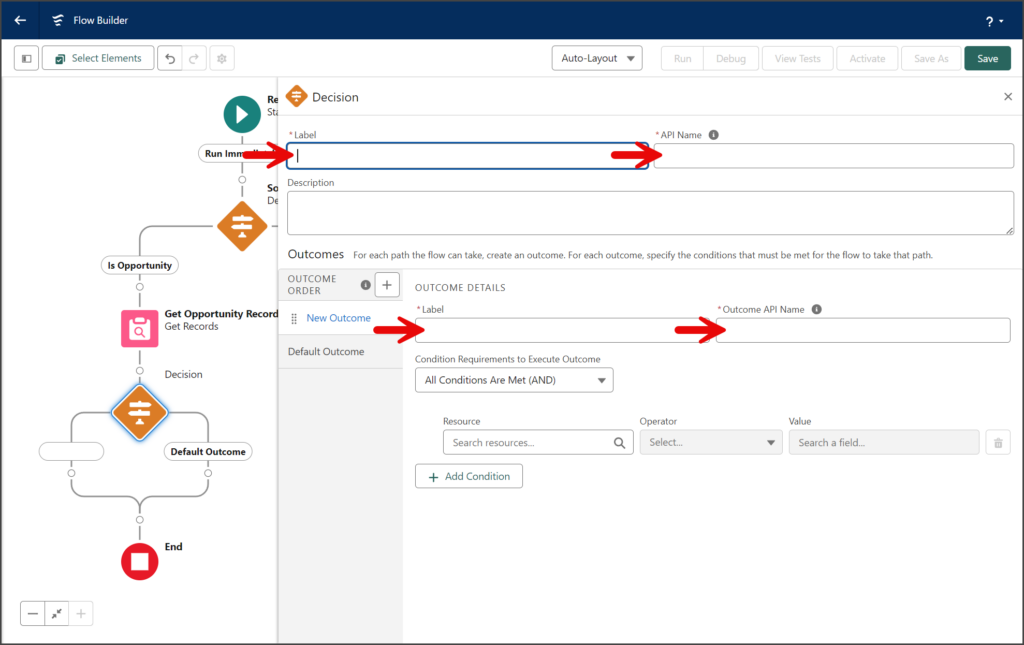
Sort by Active User
- Click the circle of the connector between the Get Records and End elements to add a new Element.
- Click the Decision element in the Logic section of the Add Element menu.

- Enter a name for the Decision in the Label textbox.
- Click the API Name textbox to auto-populate it with the Label with spaces replaced by underscores.
- Enter a name for the Outcome in the Label textbox.
- Click the Outcome API Name textbox to auto-populate it with the Label with spaces replaced by underscores.
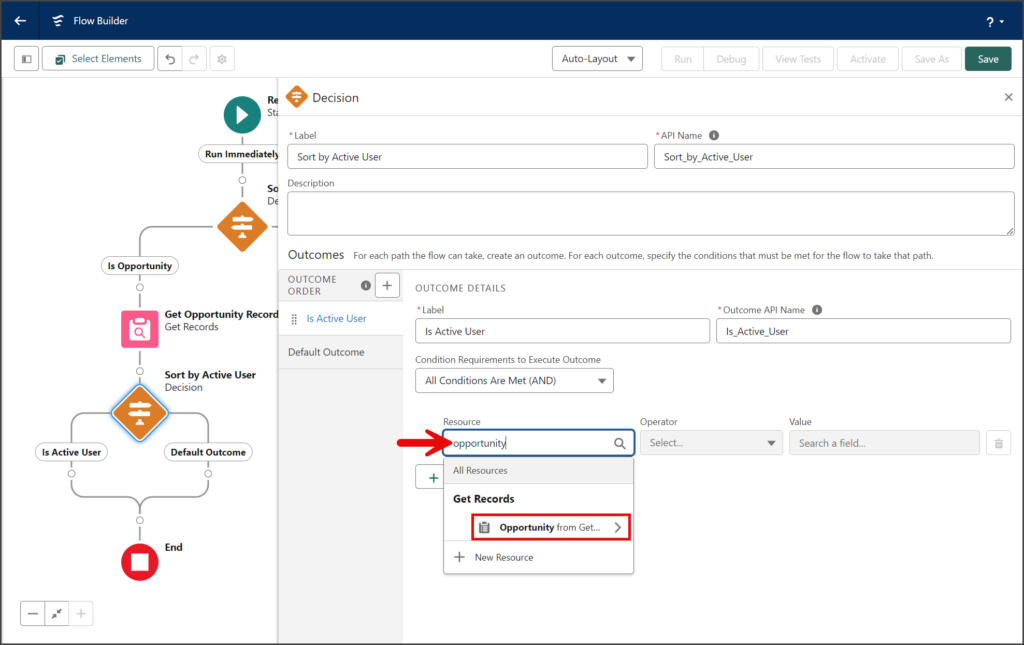
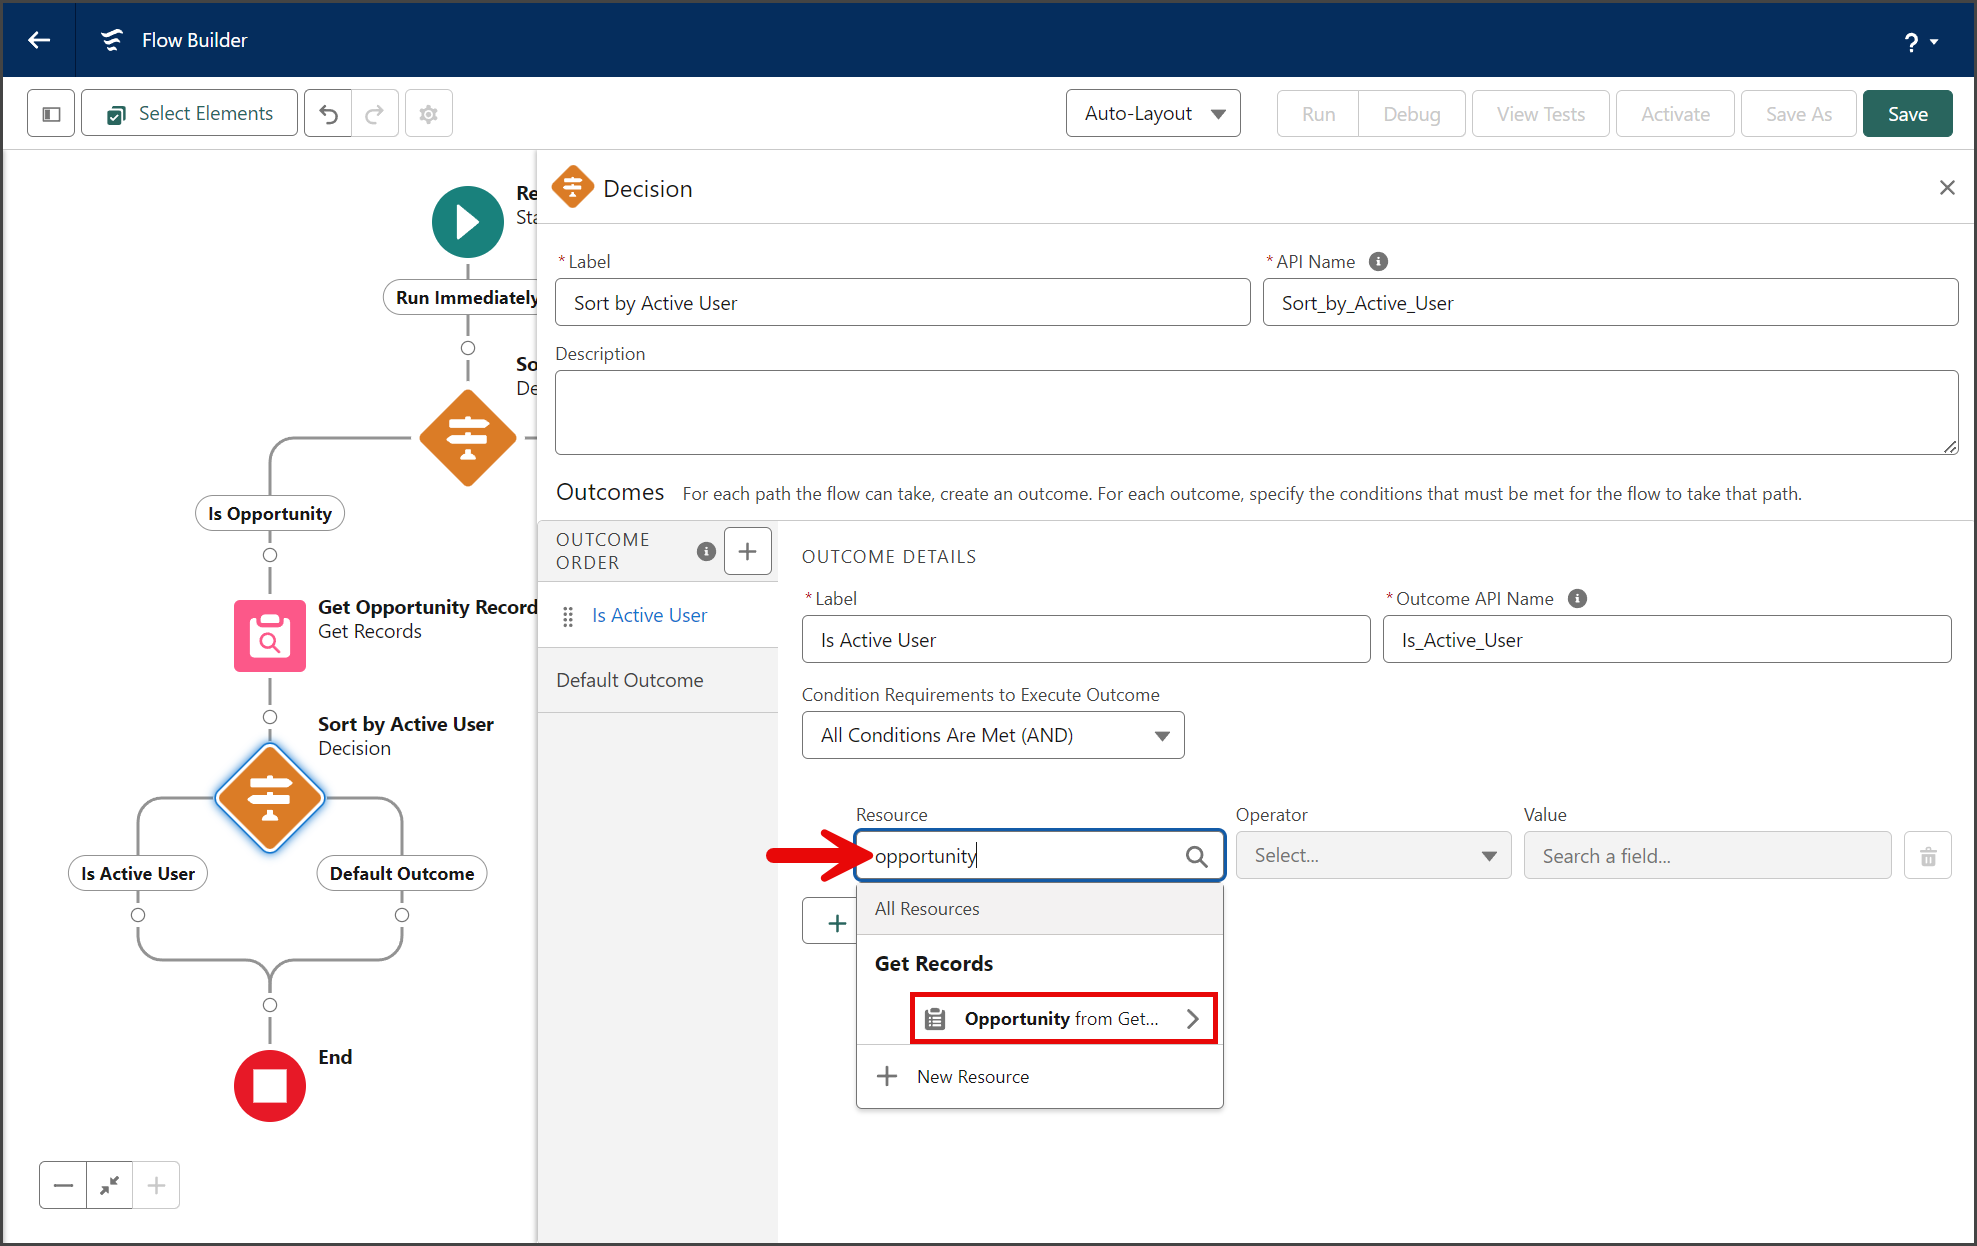
- Enter opportunity in the Resource search box.
- Click the Opportunity from Get… resource under Get Records.
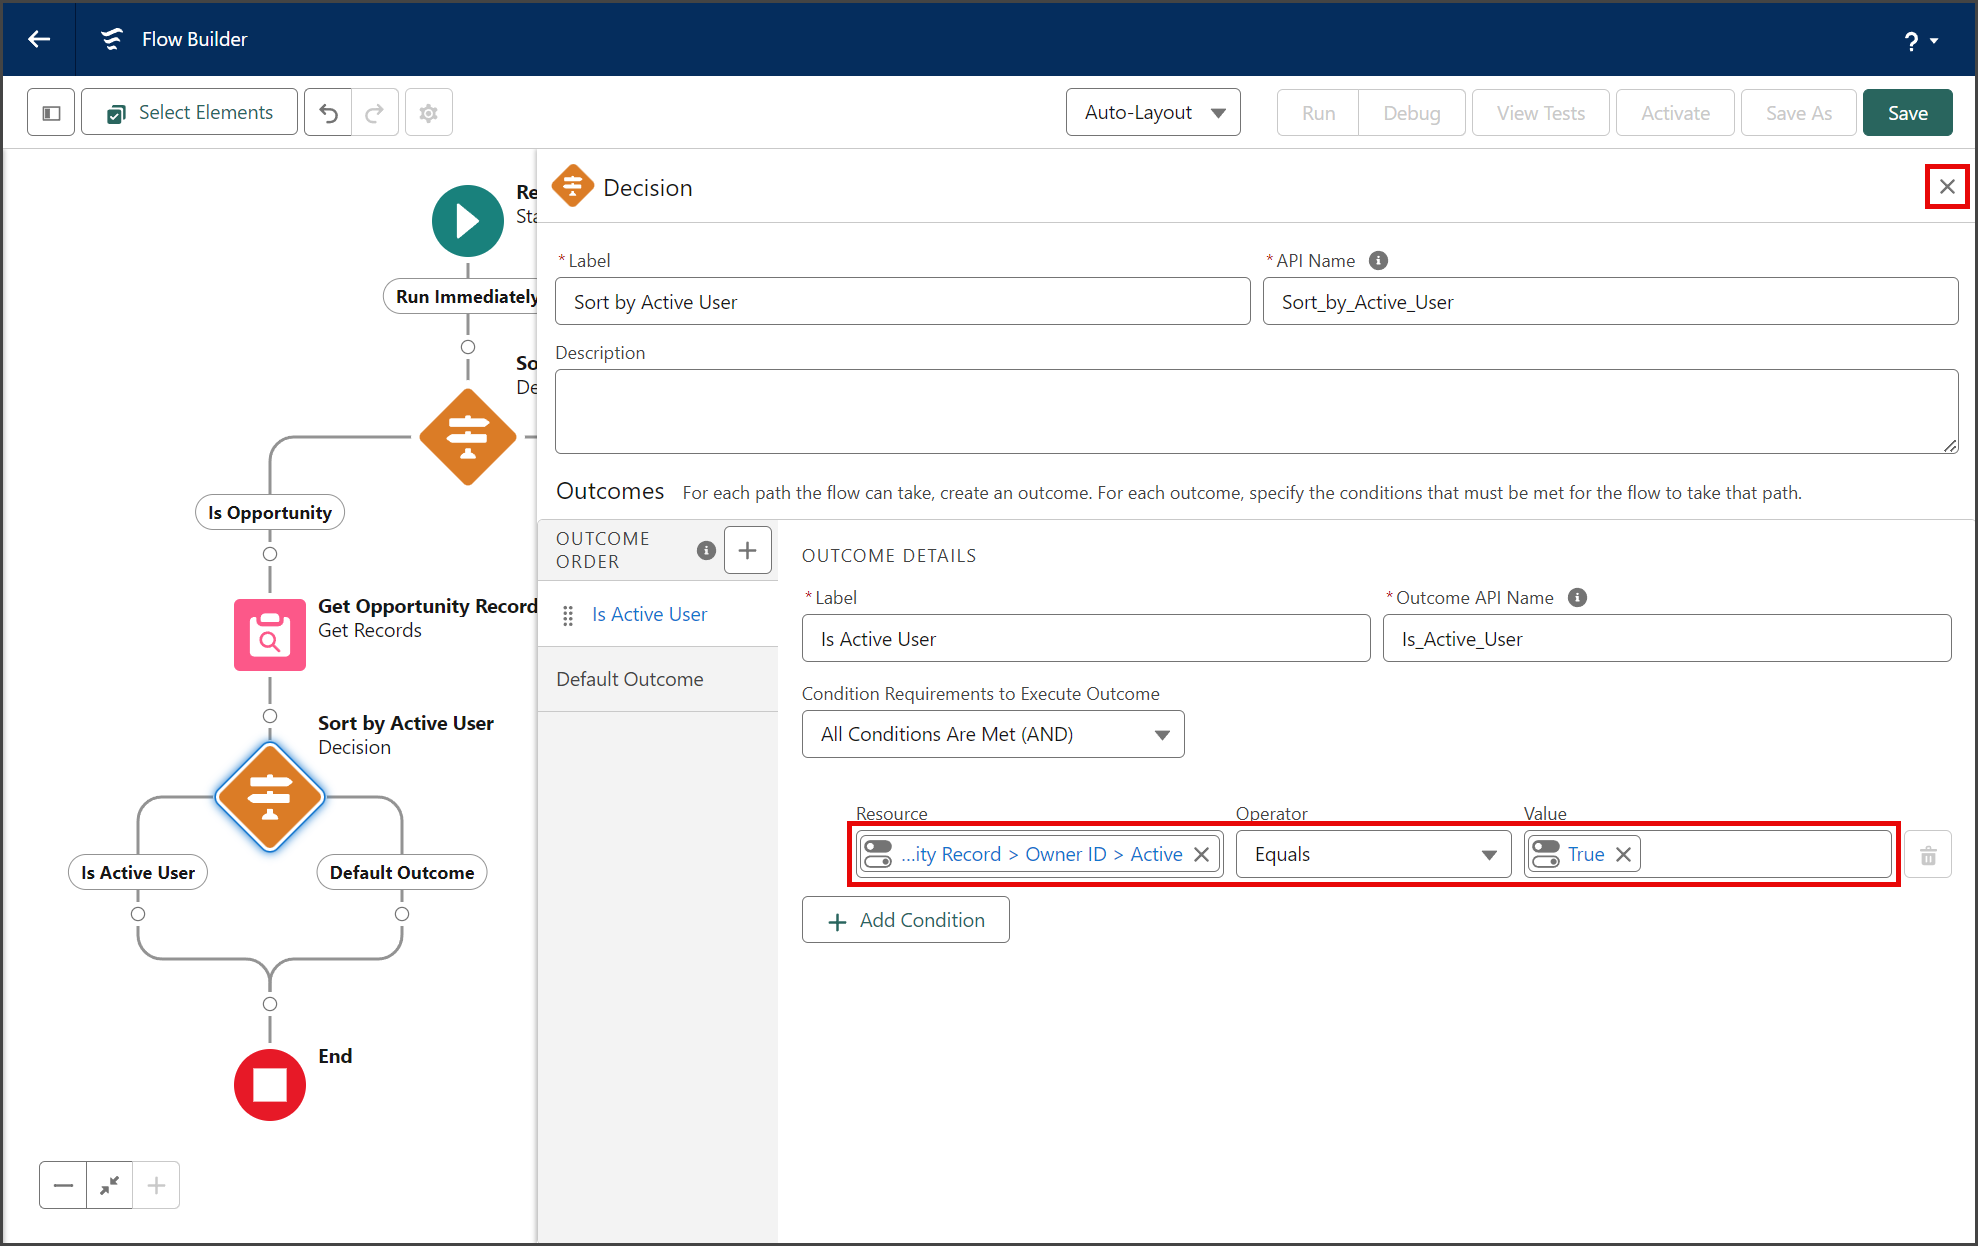
- Without moving the cursor or removing what has been filled in the Resource search box, enter owner.
- Click the Owner ID record resource (Clipboard icon).
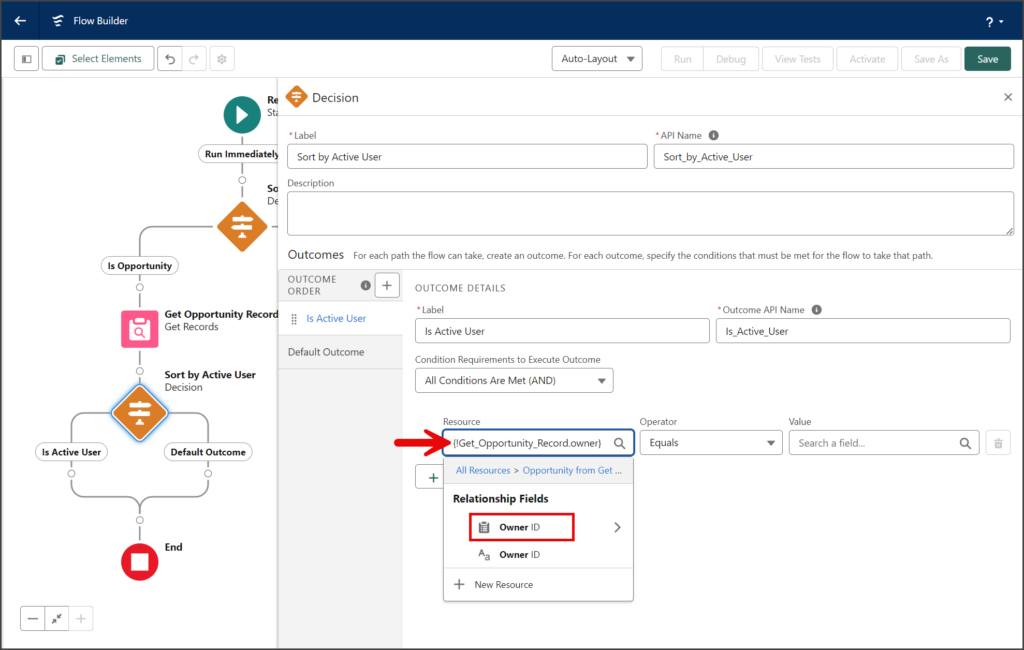
- Without moving the cursor or removing what has been filled in the Resource search box, enter active.
- Click the Active boolean resource (Togle icon).
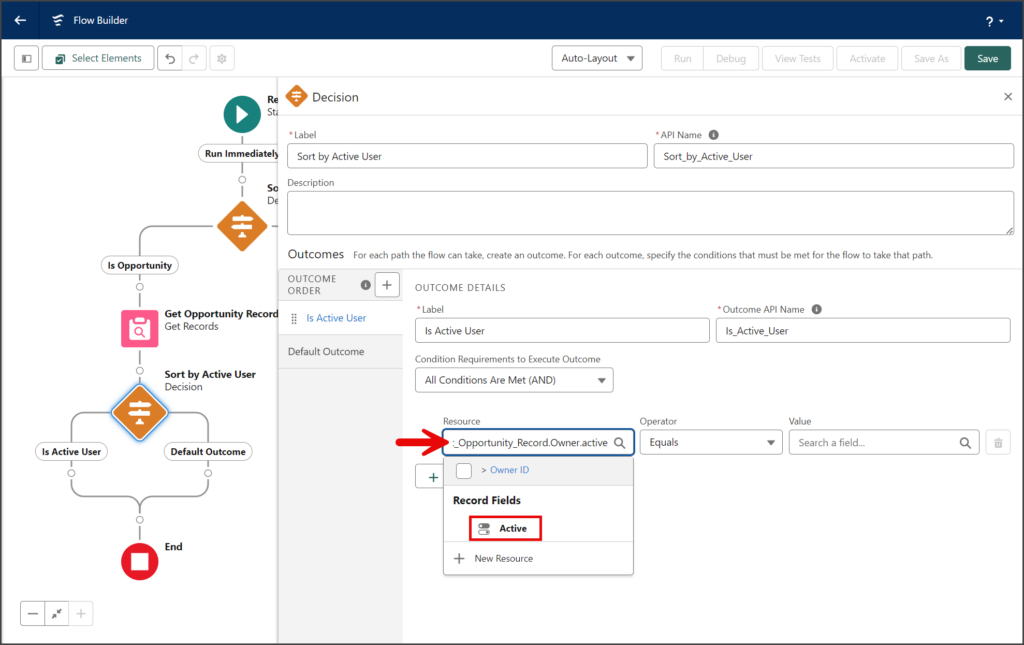
- The Resource search box should look like the screenshot below. Alternatively, you can enter
{!Get_Opportunity_Record.Owner.IsActive}in the search box.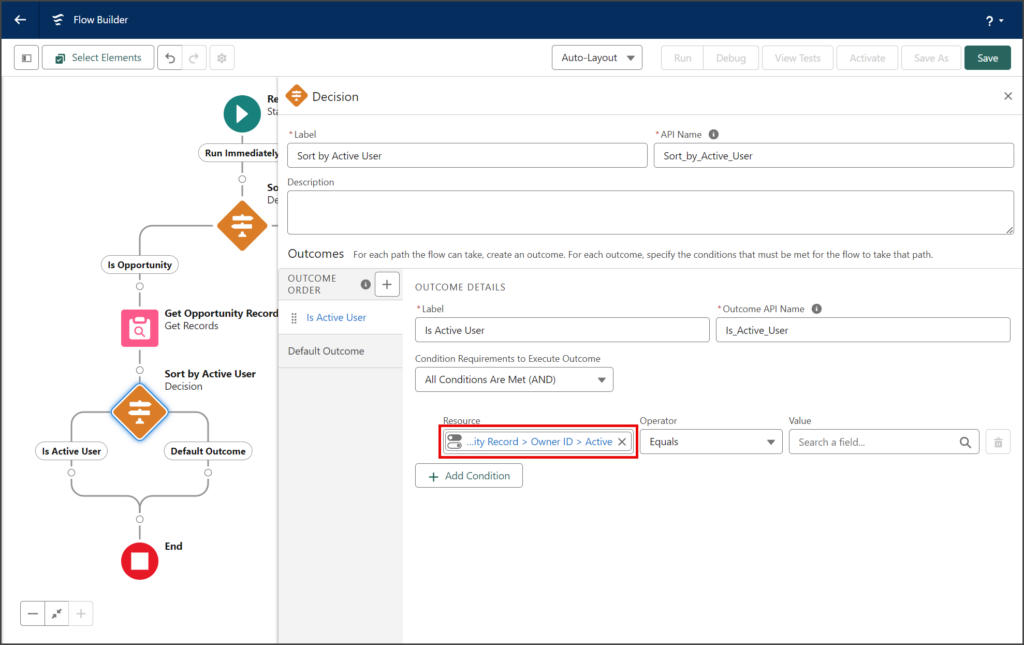
- Leave the Operator dropdown set to Equals.
- Click the Value search box.
- Click True under the Global Constants.
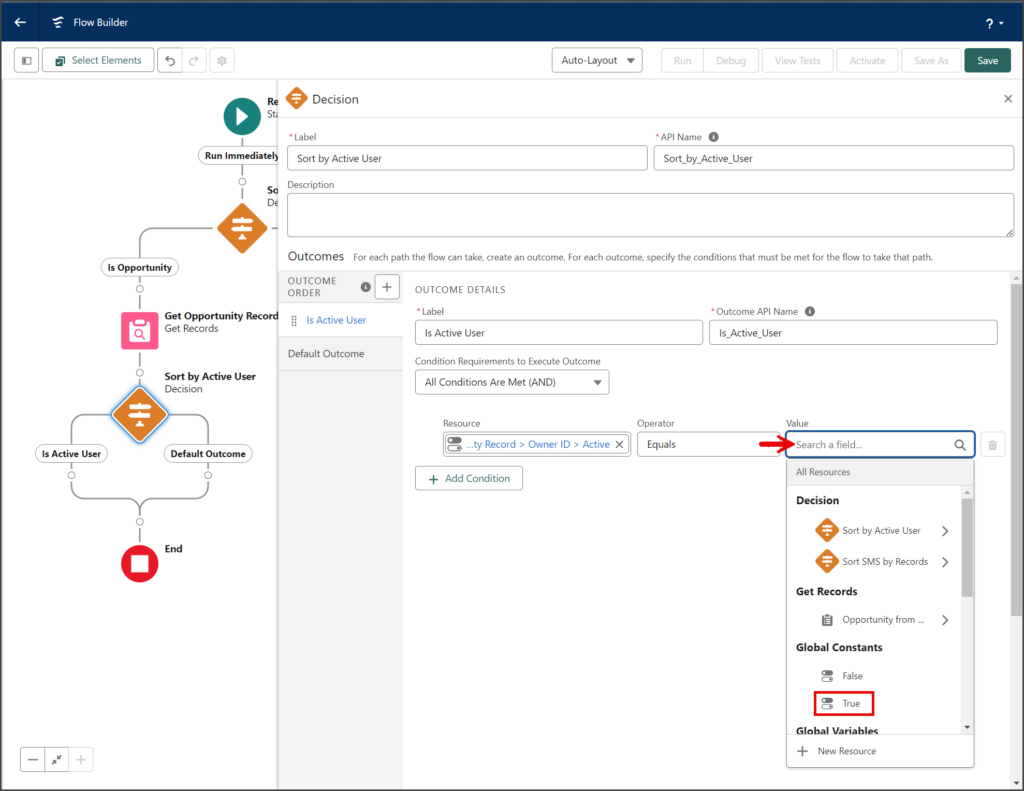
- The completed Outcome Condition should look like the screenshot below.
- Click the X to close the Decision window.

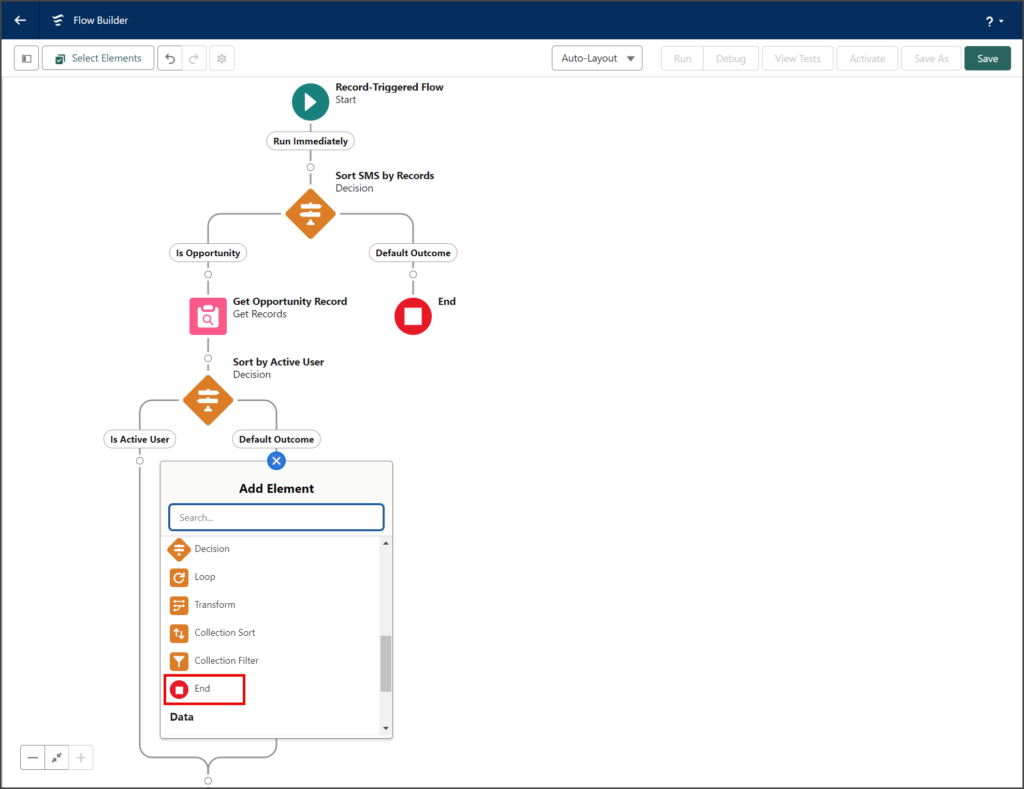
- Click the circle of the connector between the Default Outcome of the Decision element and the End element to add a new Element.
- Click the End element in the Logic section of the Add Element menu.


Create a Log a Call Record
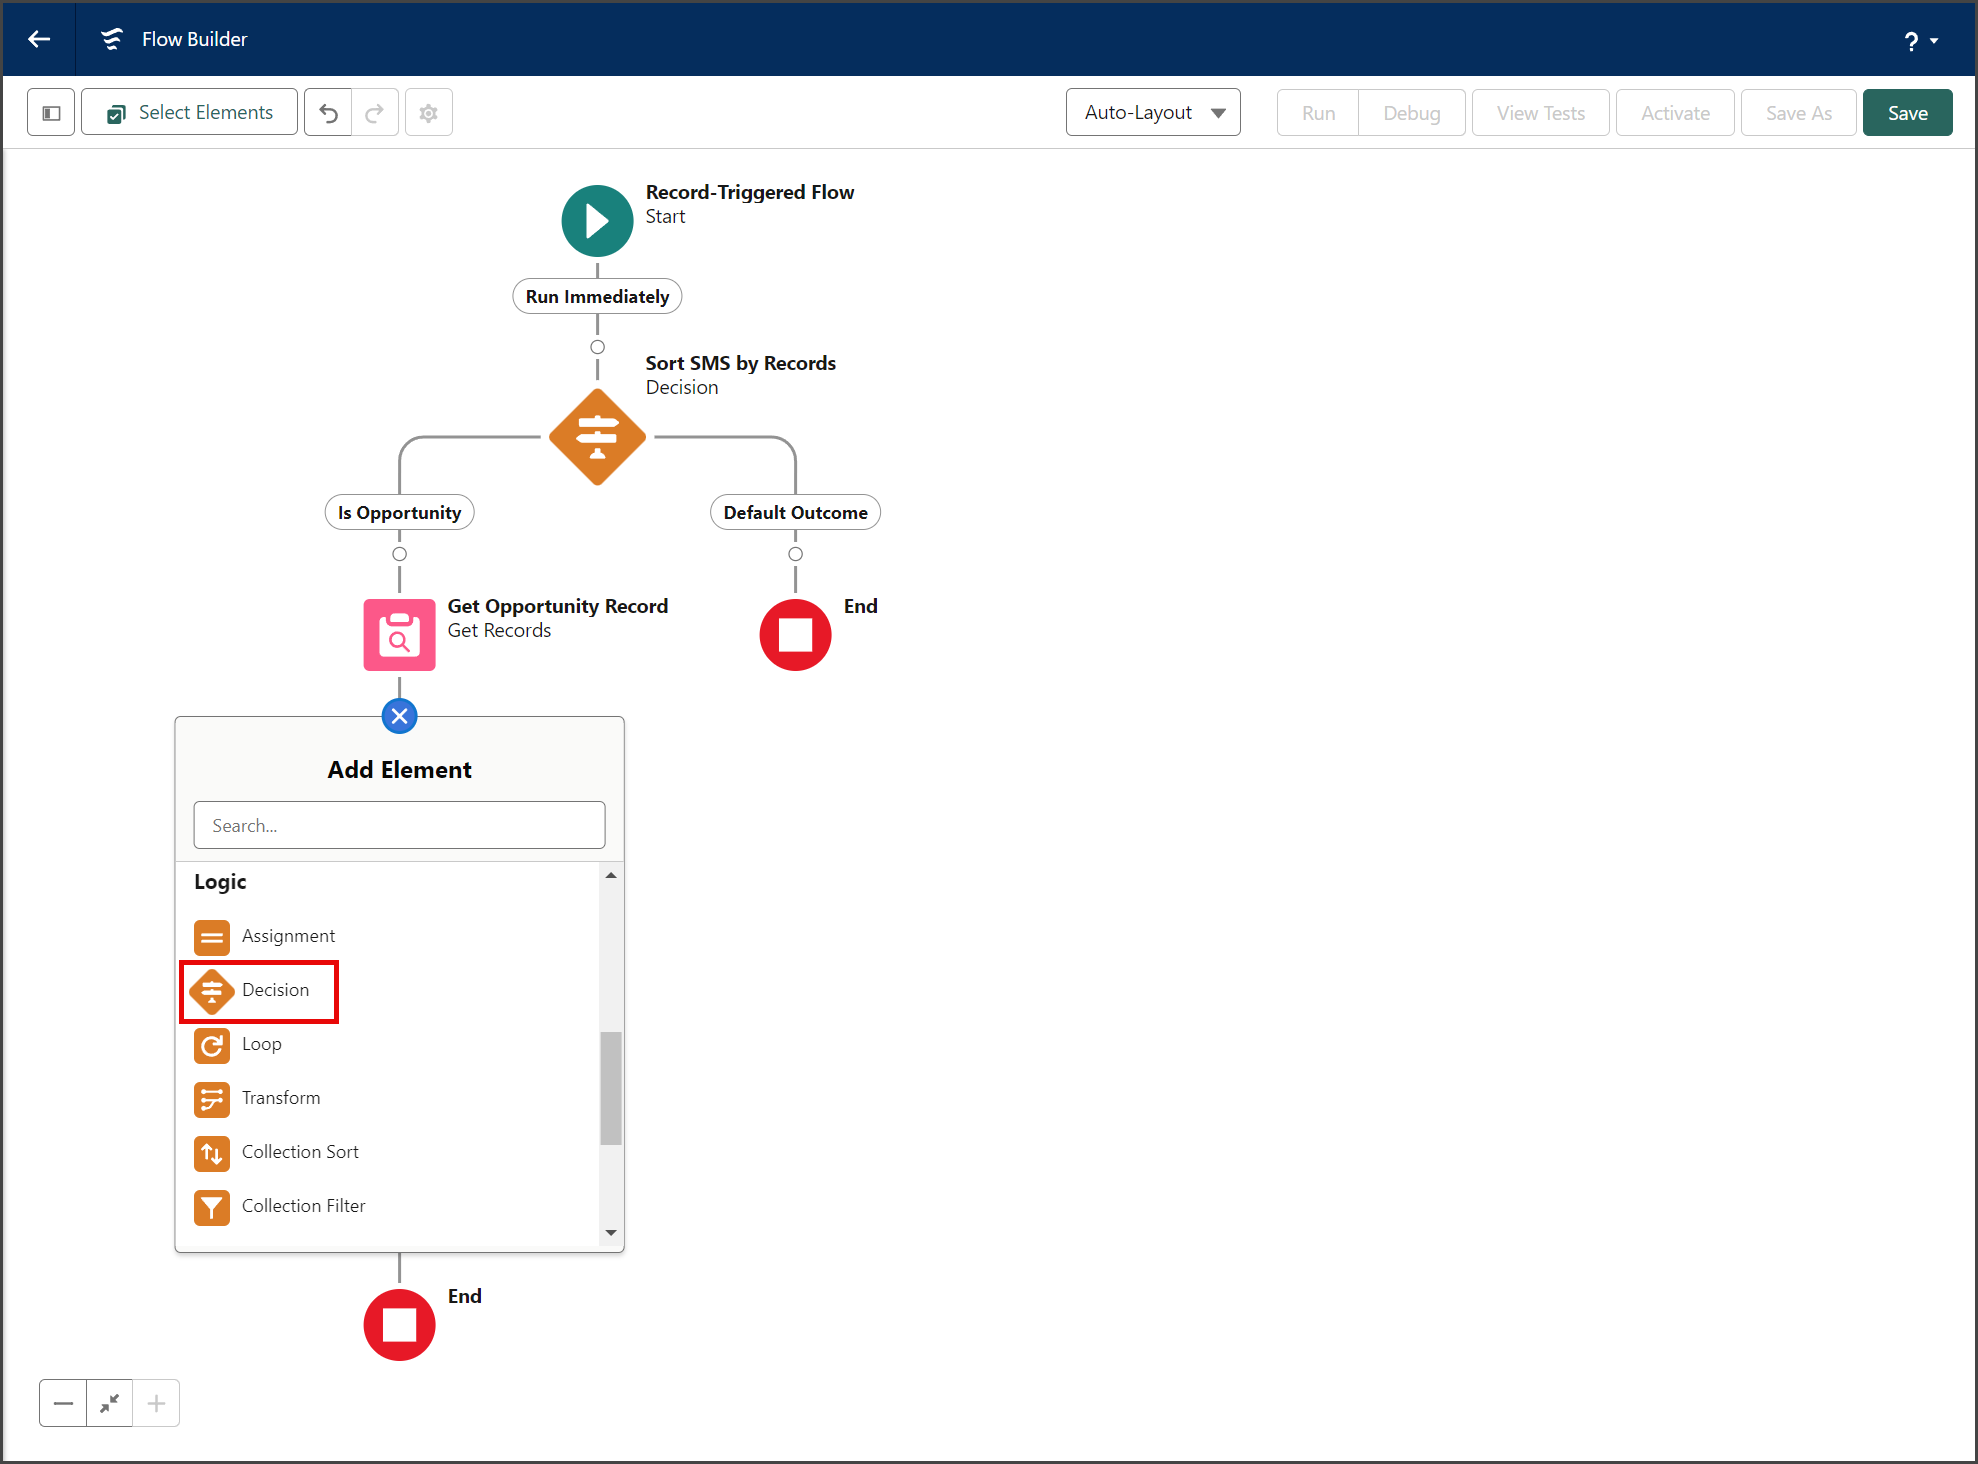
- Click the circle of the connector between the Is Active User of the Decision element and the End element to add a new Element.
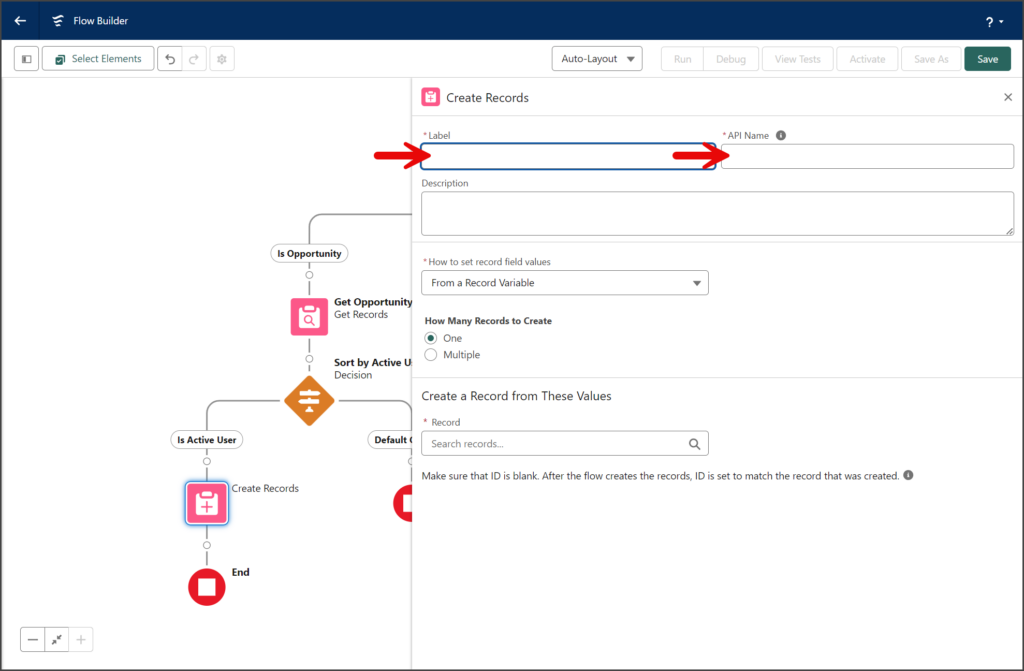
- Click the Create Records element in the Data section of the Add Element menu.
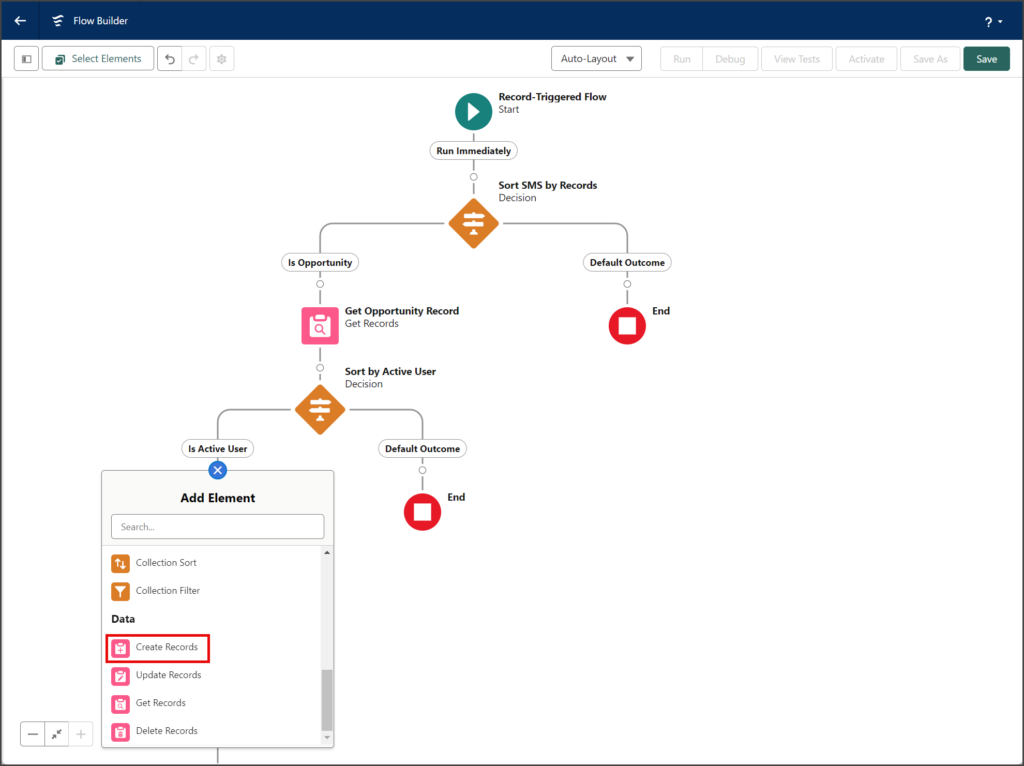
- Enter a name for the Create Records in the Label textbox.
- Click the API Name textbox to auto-populate it with the Label with spaces replaced by underscores.
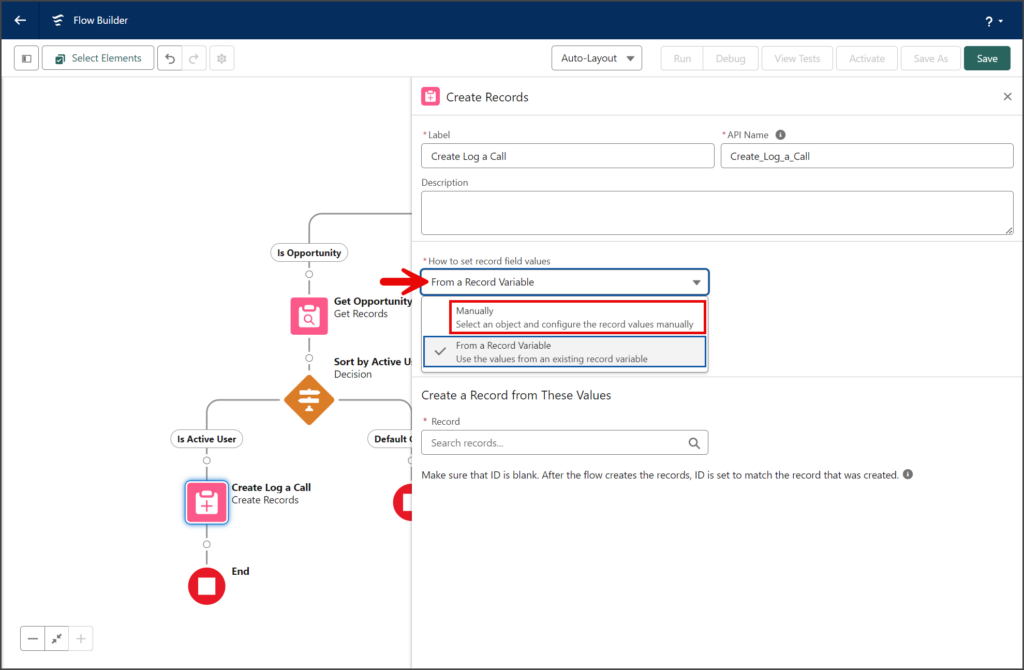
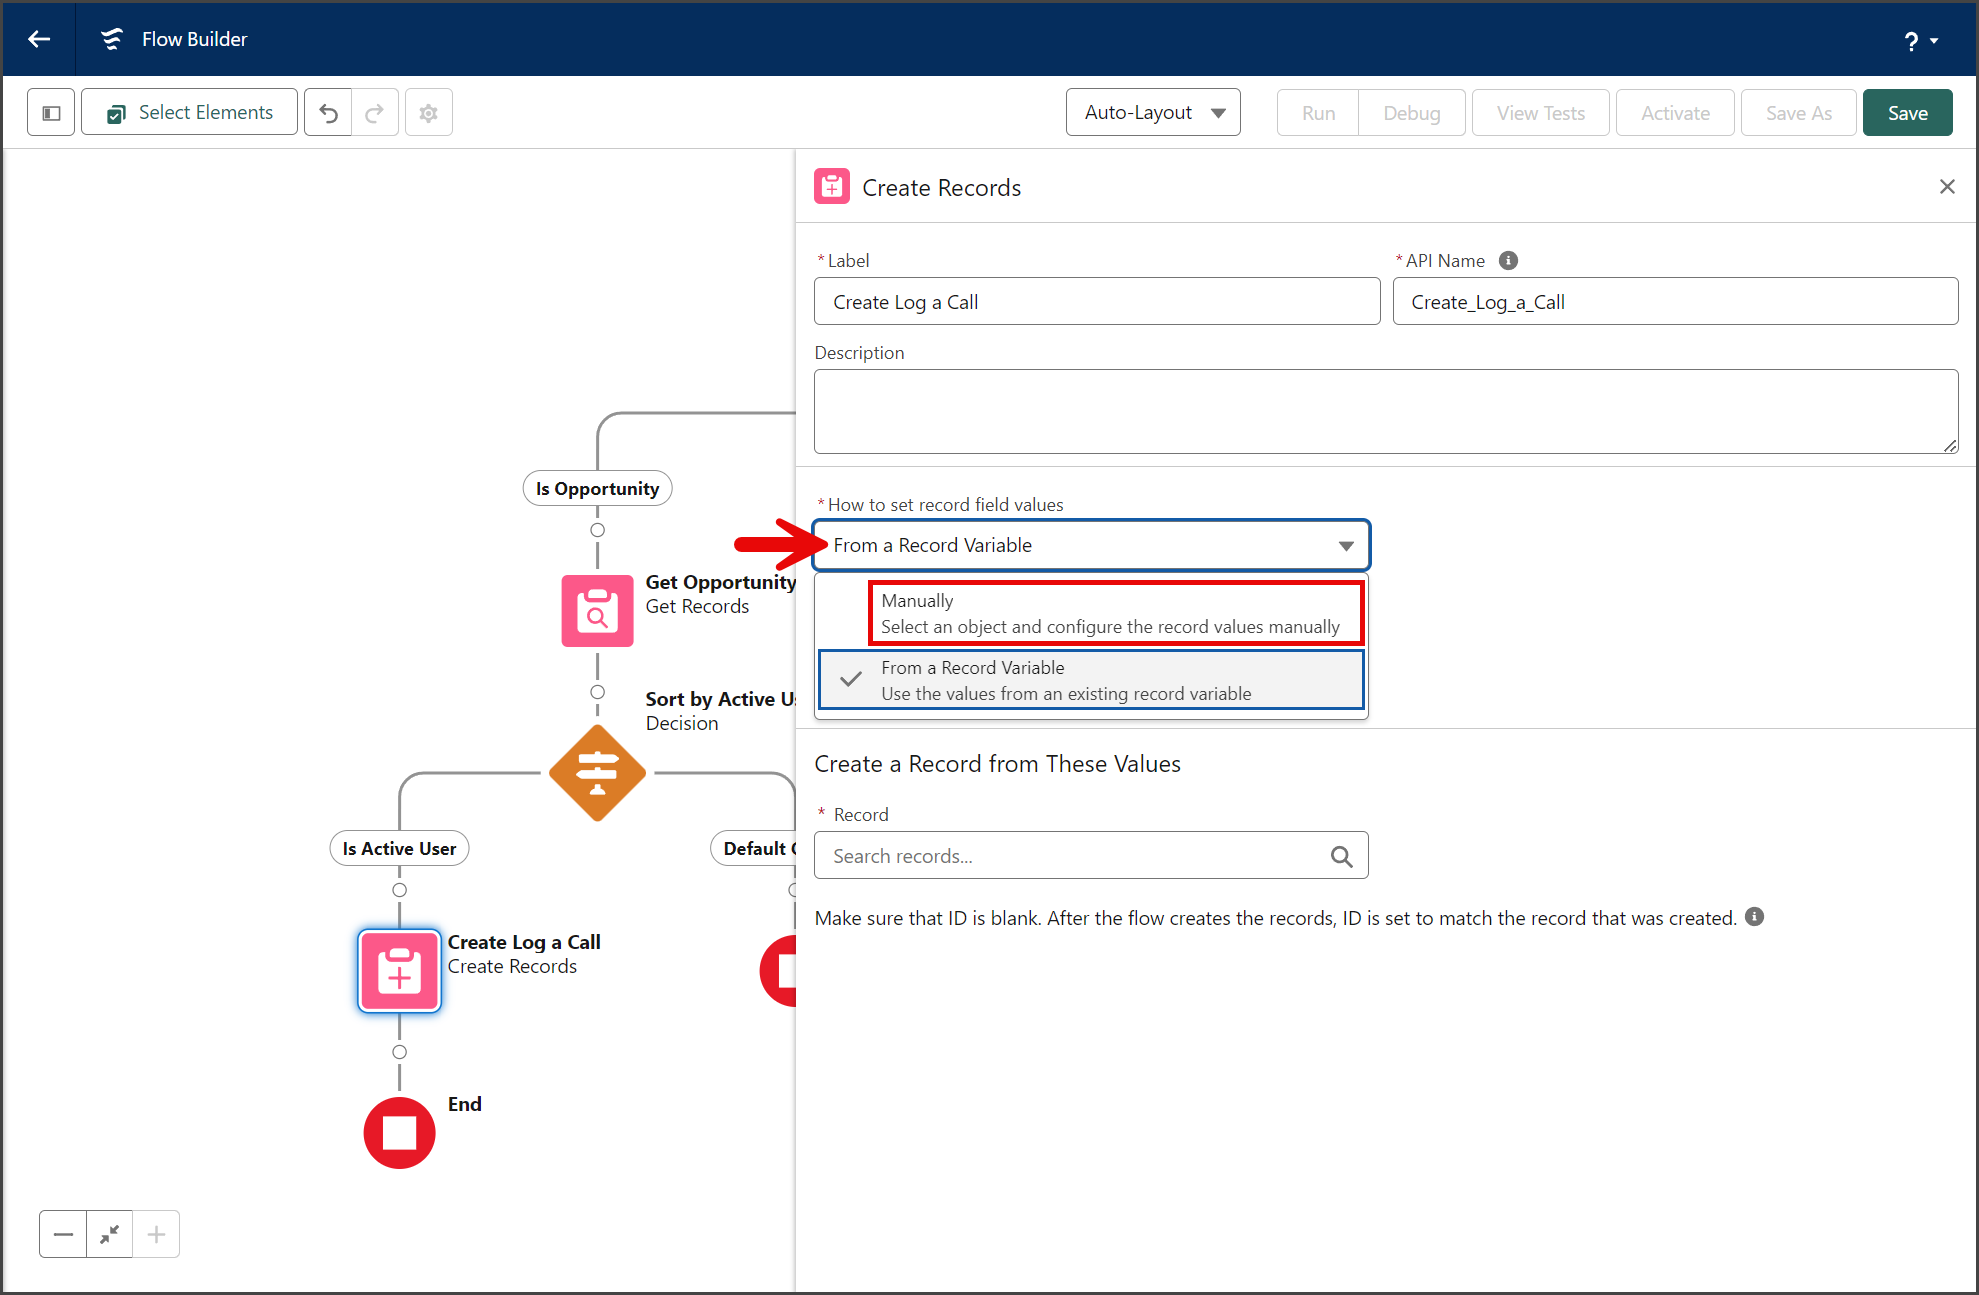
- Click the How to set record field values dropdown.
- Select Manually.
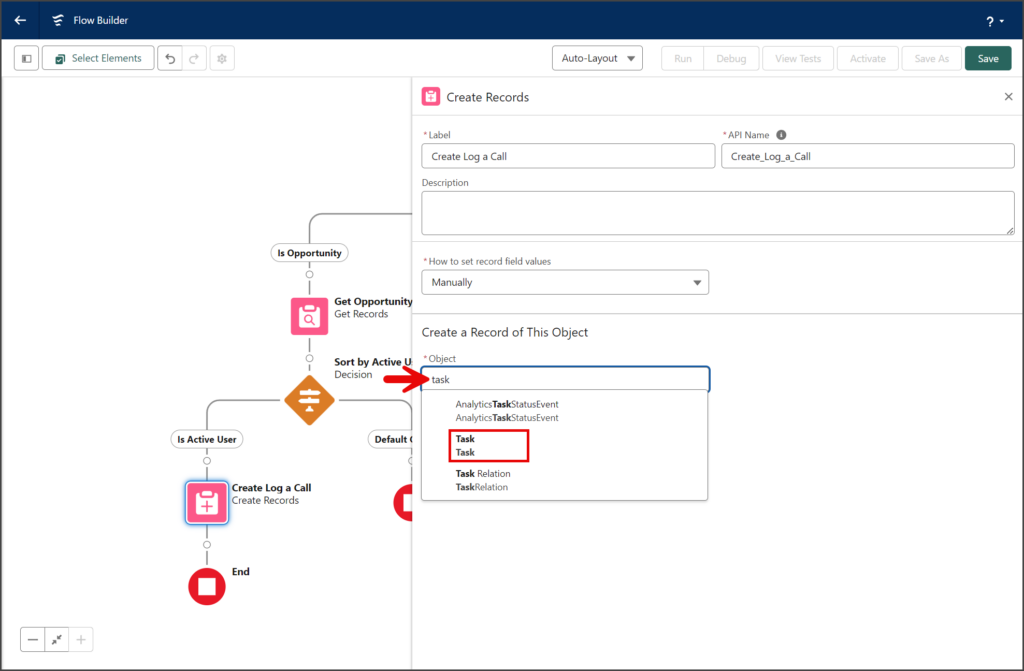
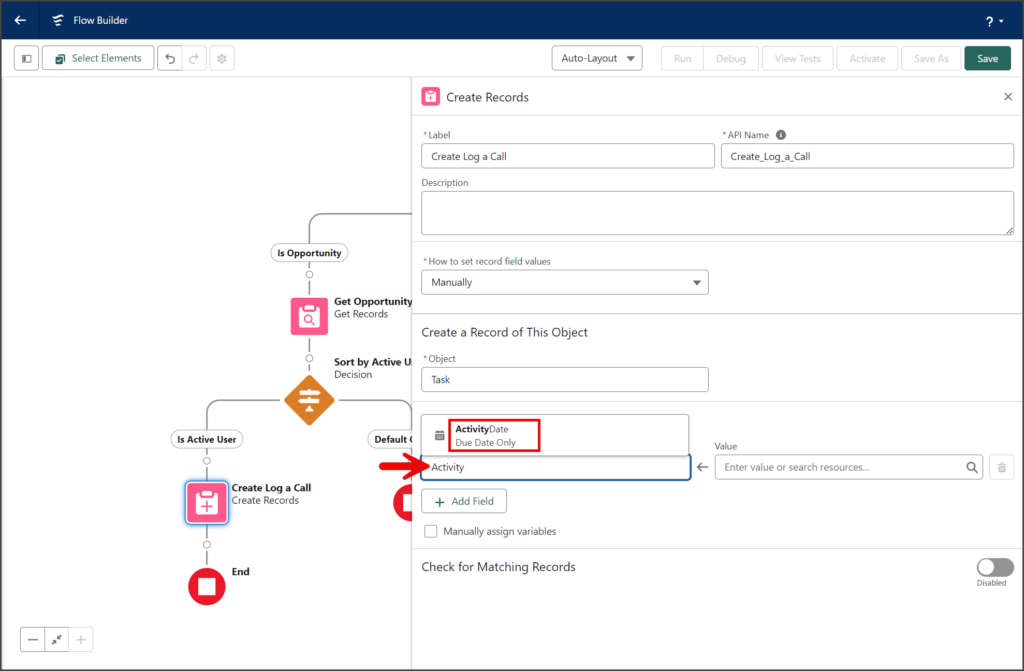
- Enter Task in the Object search box.
- Click Task from the list.


Add six Field and Value pairs for this Task object. The instructions below show you how to add a single Field and Value pair. You can repeat this process using the table below to create the rest of the Field and Value pairs.
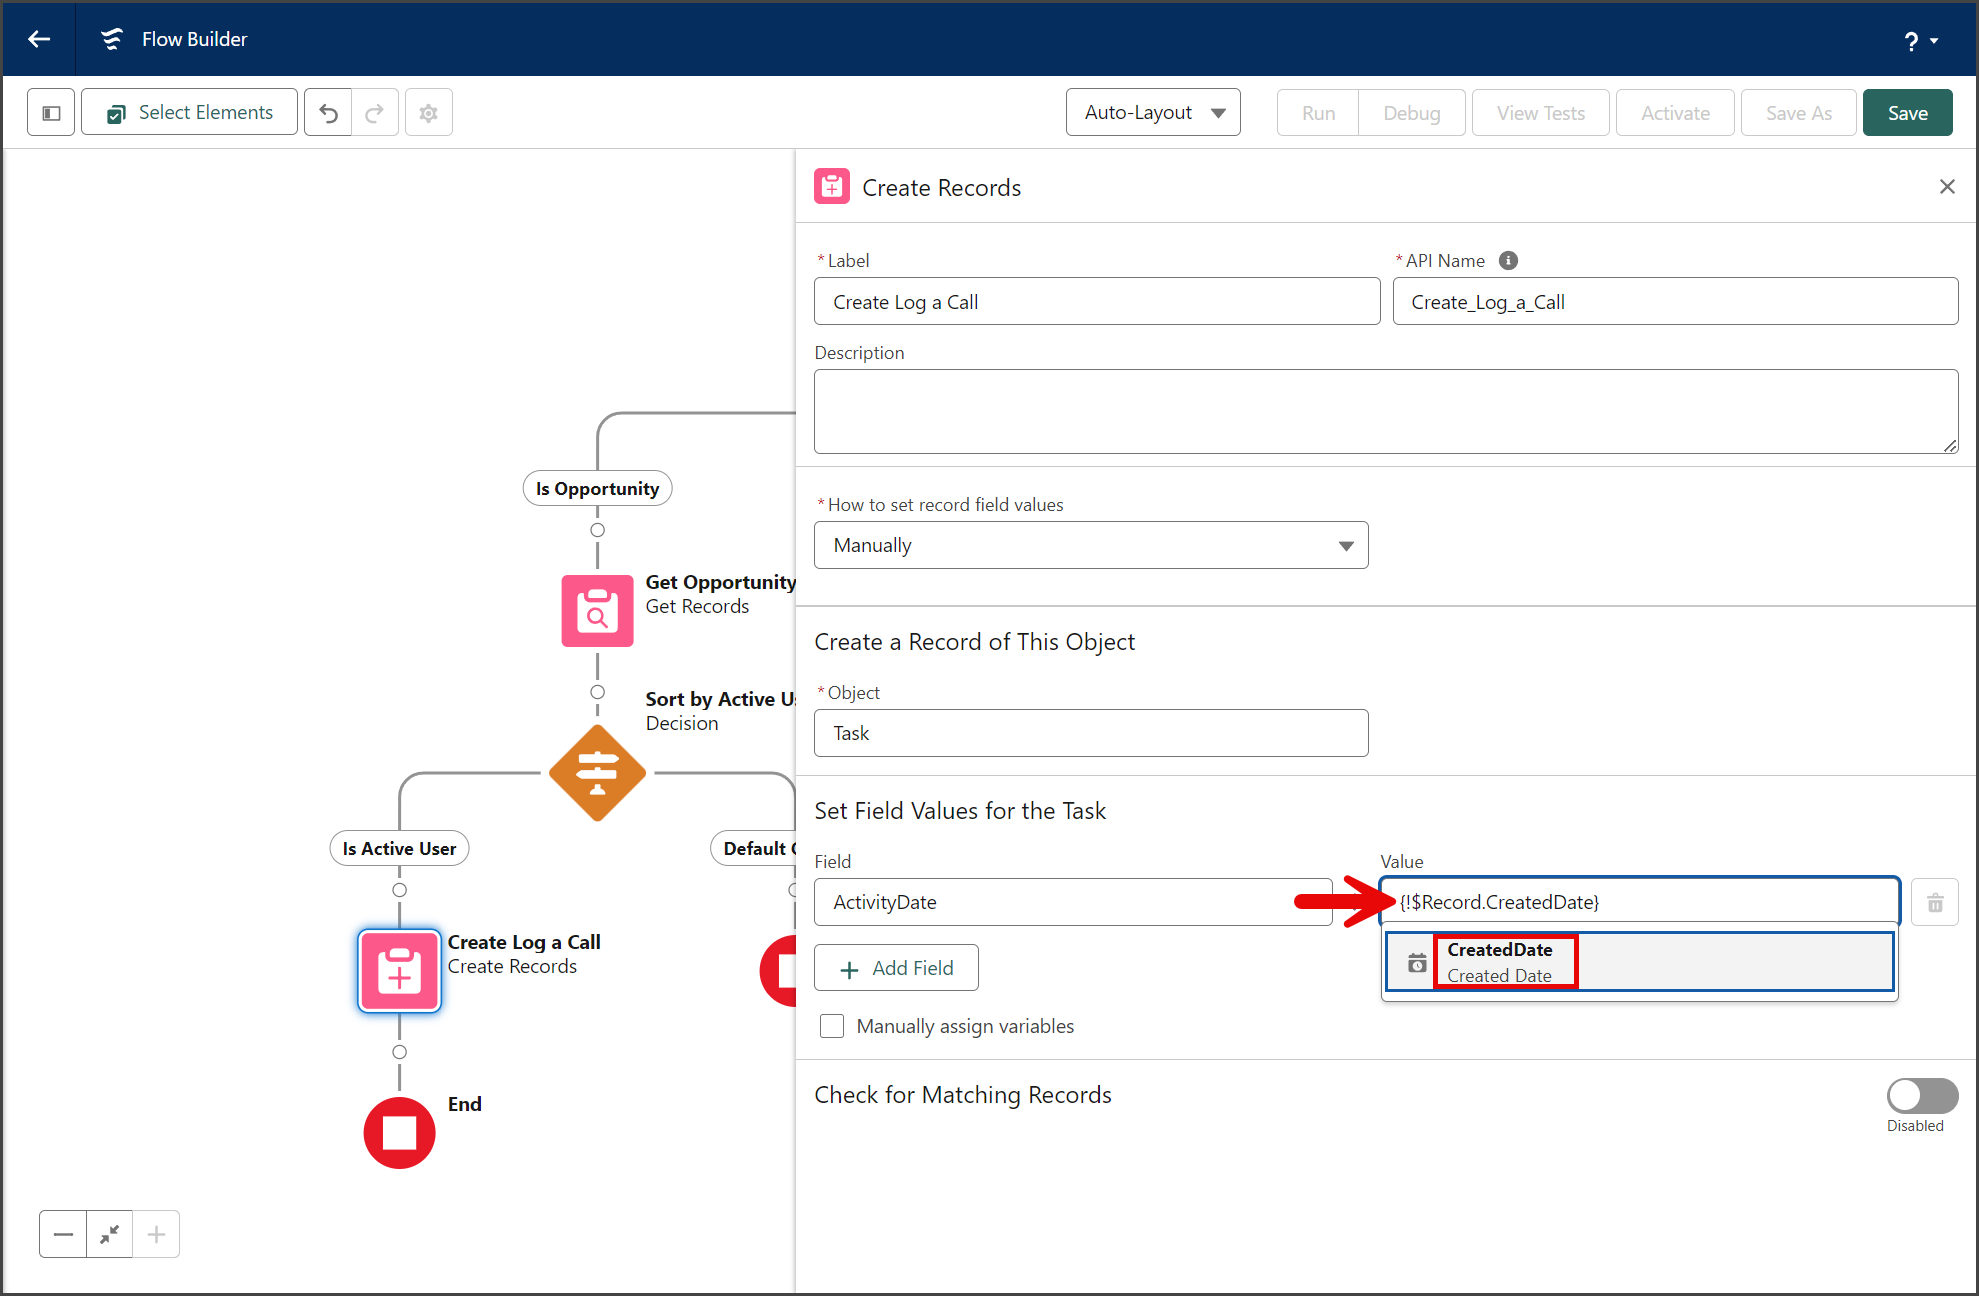
- Copy ActivityDate from the Field column of the table below to the Field search box.
- Click ActivityDate from the list.
- Copy
{!$Record.CreatedDate}from the Value column of the table below to the Value search box. - Click CreatedDate from the list.

- Click Add Field to add another Field and Value pair.
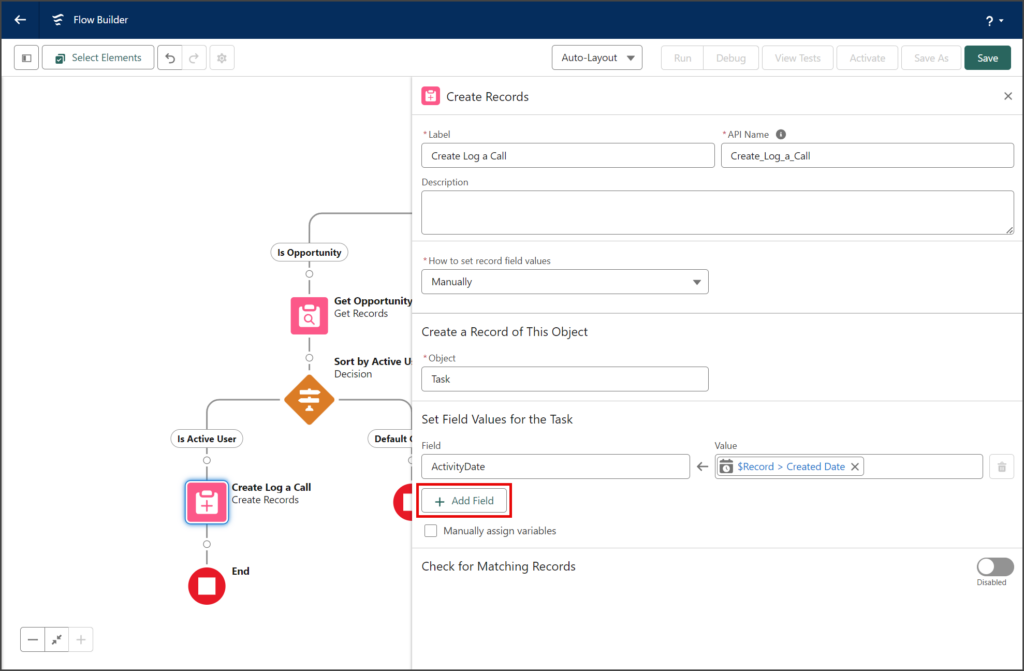
- Repeat this process for the rest of the rows in the table below.


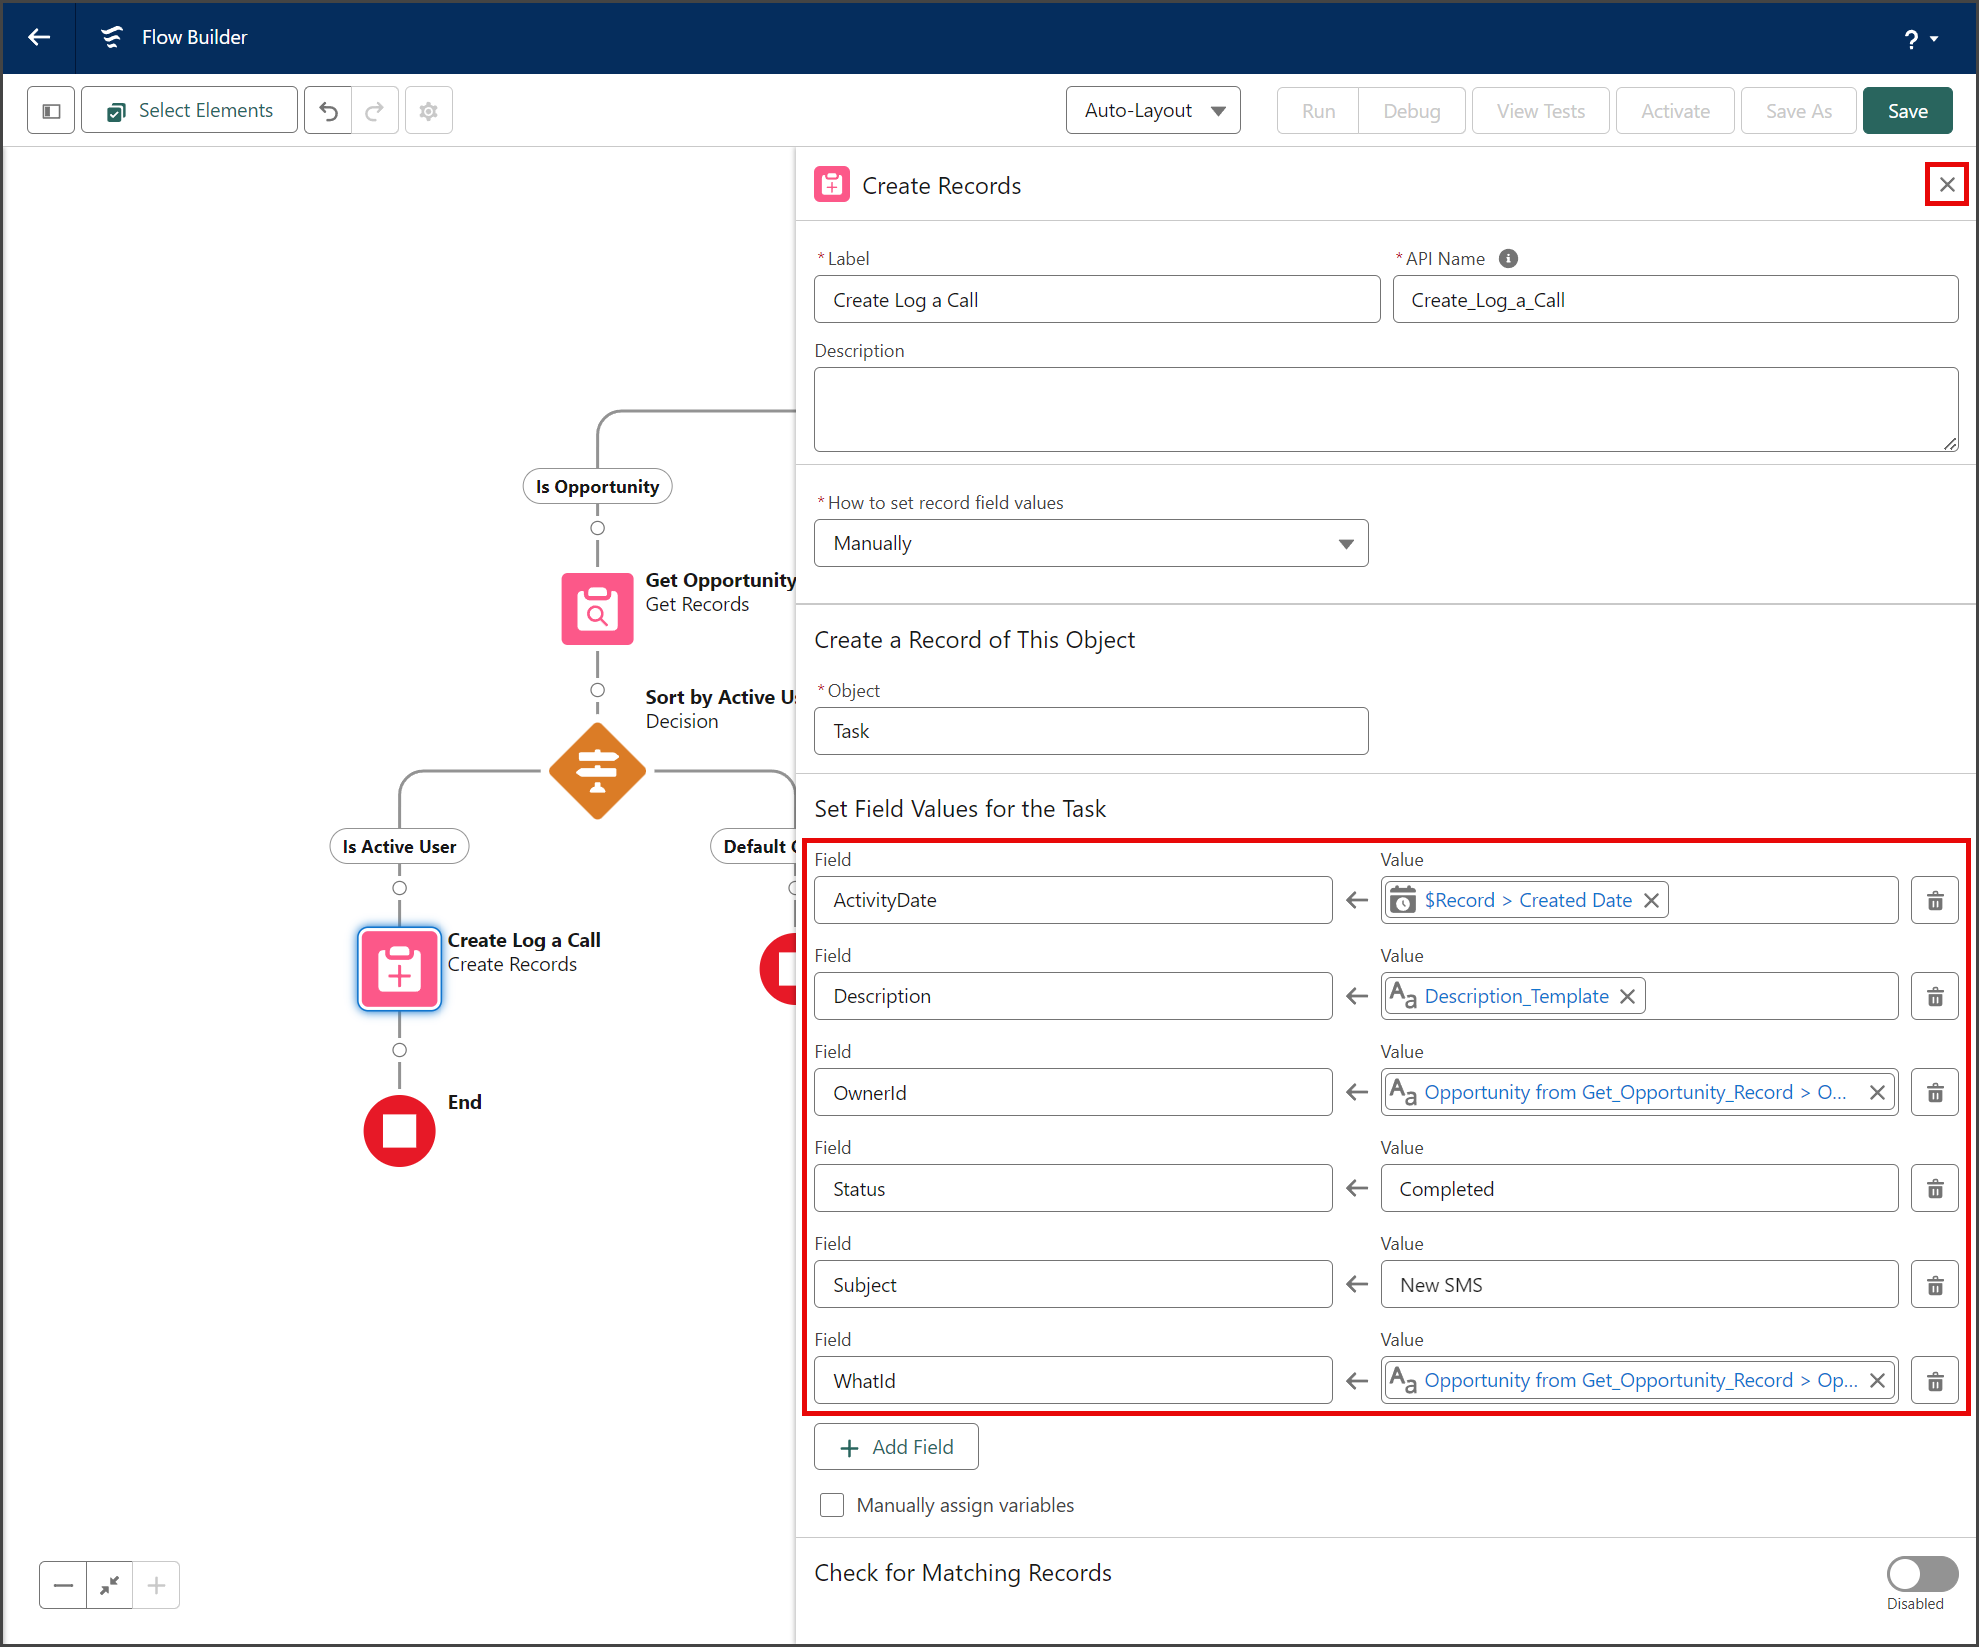
| Field | Value |
|---|---|
| ActivityDate | {!$Record.CreatedDate} |
| Description | {!Description_Template} |
| OwnerId | {!Get_Opportunity_Record.OwnerId} |
| Status | Completed |
| Subject | New SMS |
| WhatId | {!Get_Opportunity_Record.Id} |
- Once you have completed the Field and Value pairs, your Task should look like the following screenshot.
- Click the X to close the Decision window.

Save and Activate the Flow
- Click Save.

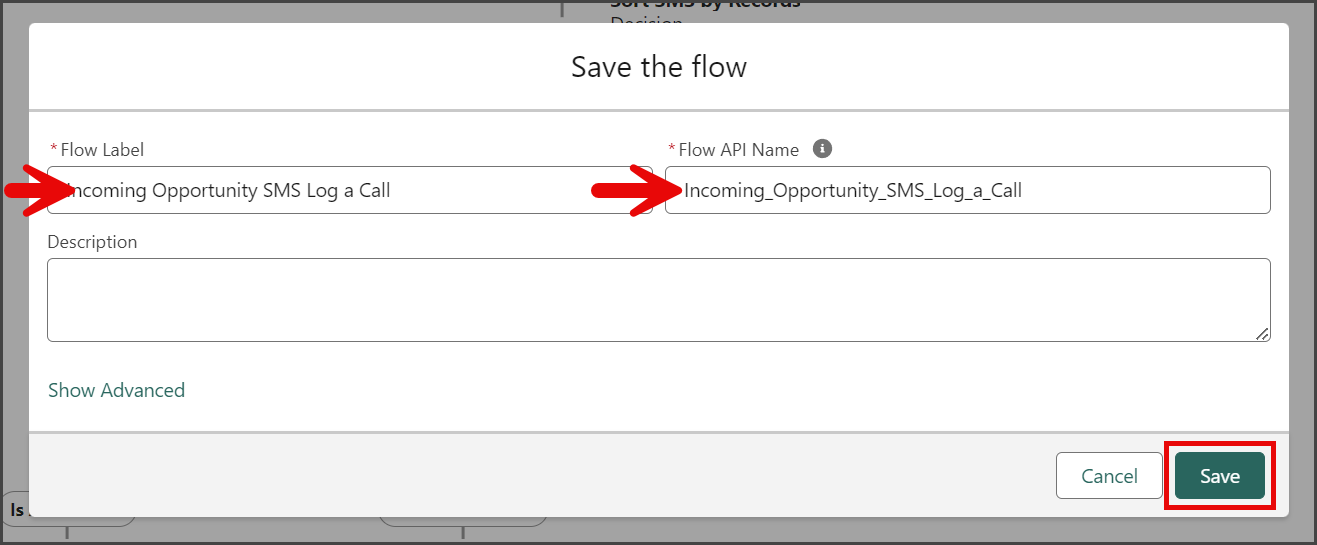
- Enter a name for the Flow in the Flow Label textbox.
- Click the Flow API Name textbox to auto-populate it with the Flow Label with spaces replaced by underscores.
- Click Save.

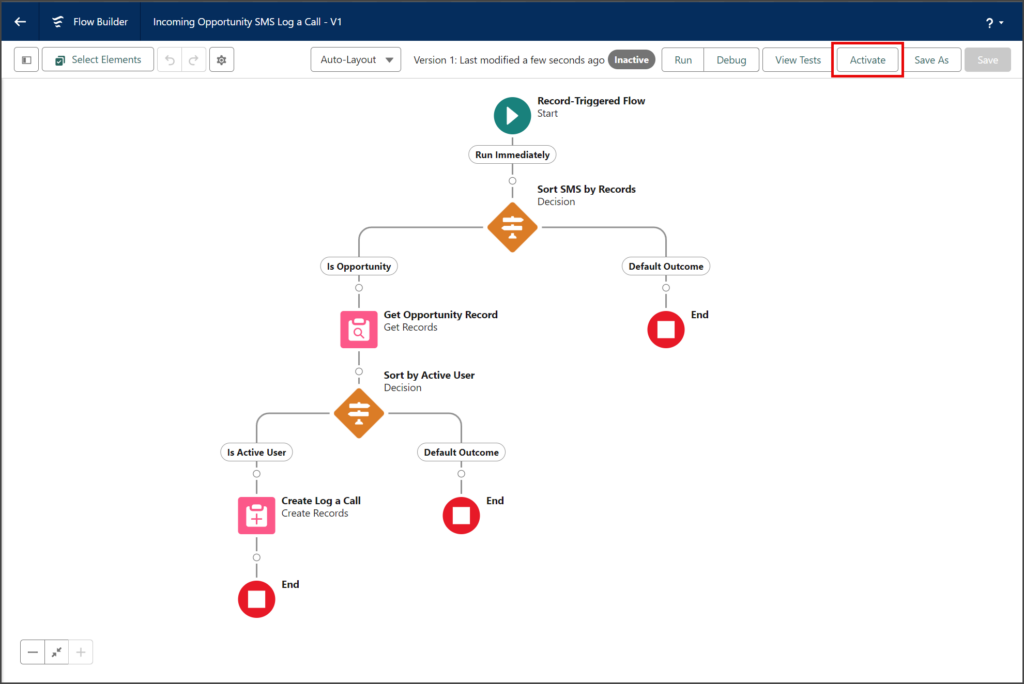
- Click Activate.

Adding Activity Task List to Opportunity Page
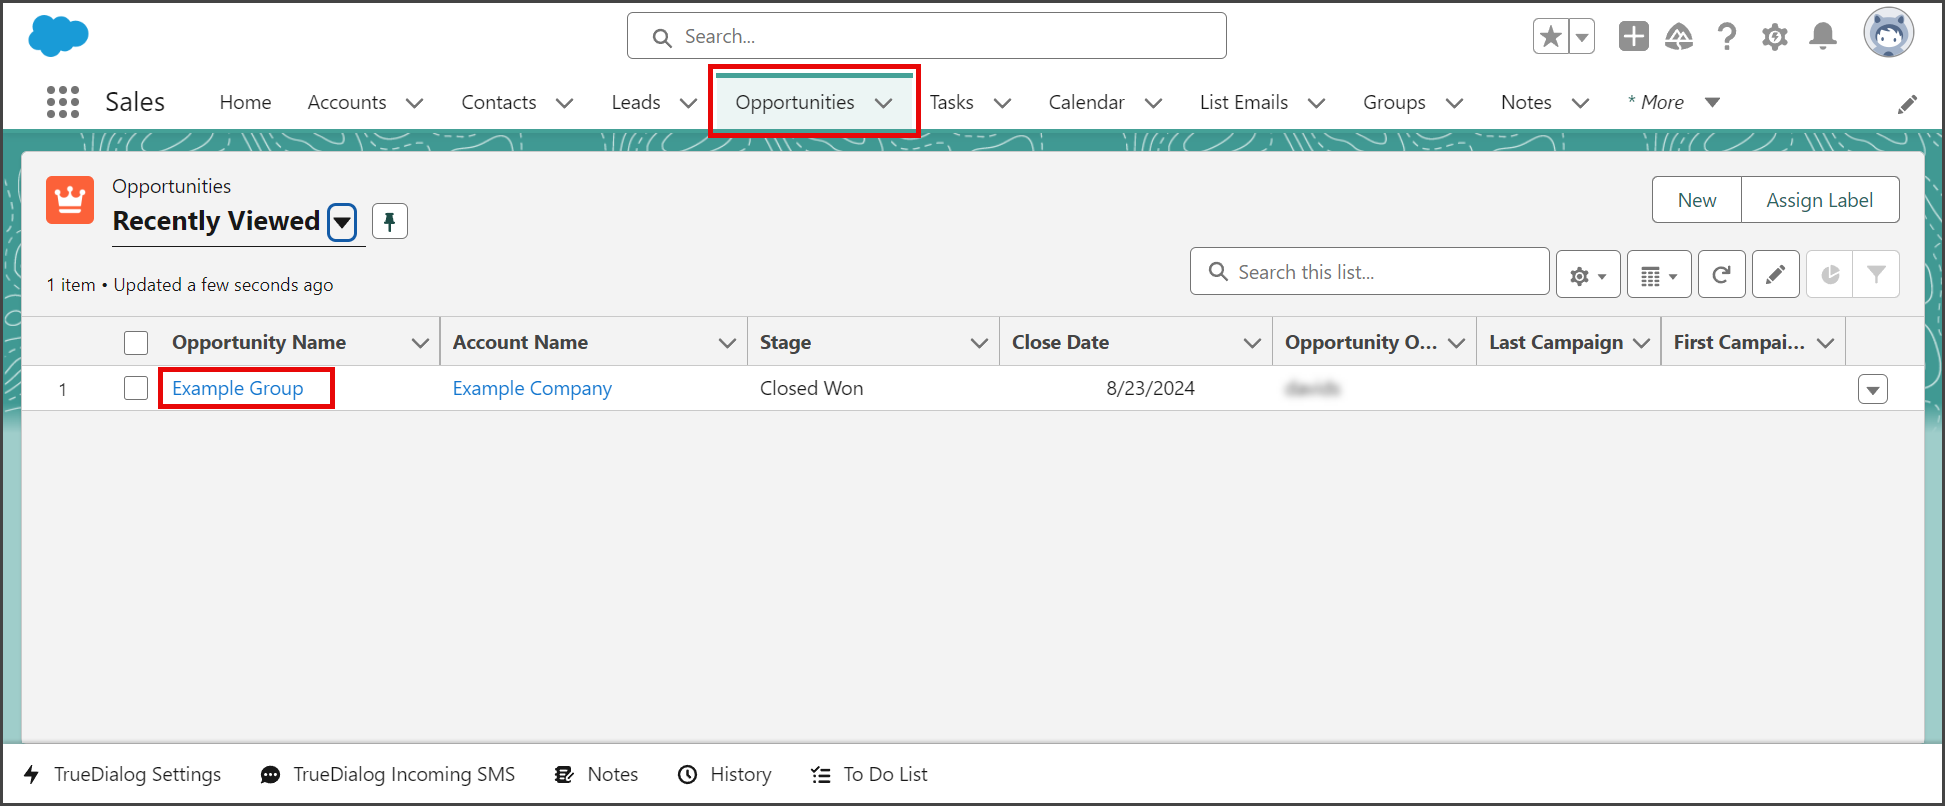
- Select the Opportunities tab.
- Click your opportunity.

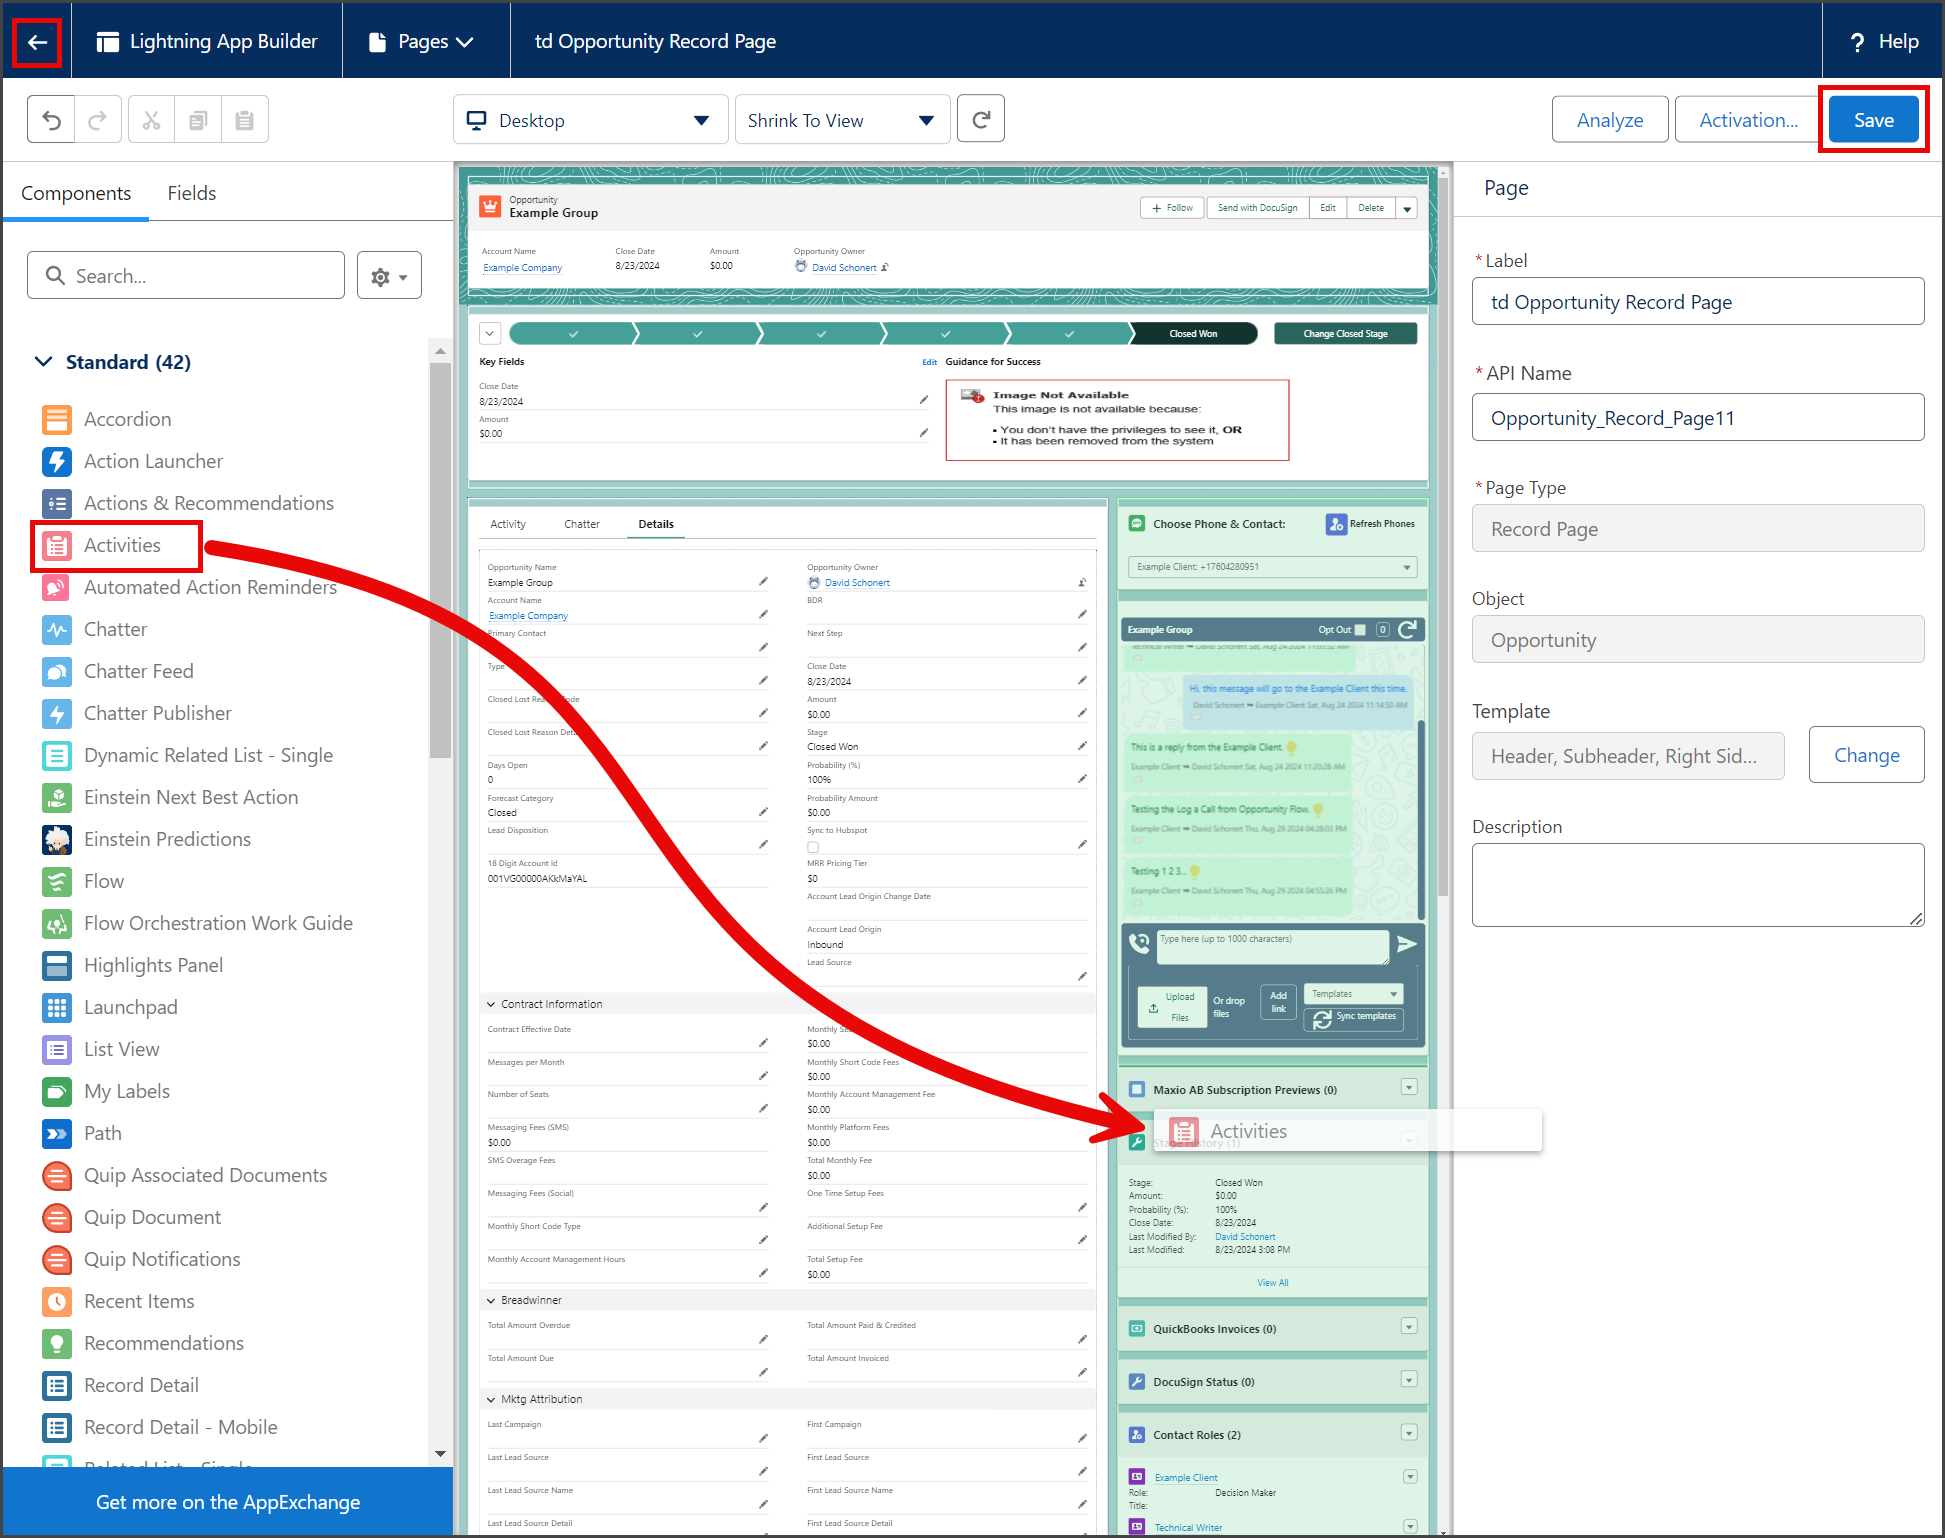
- Click the Settings Gear icon to open the settings menu.
- Click Edit Page.
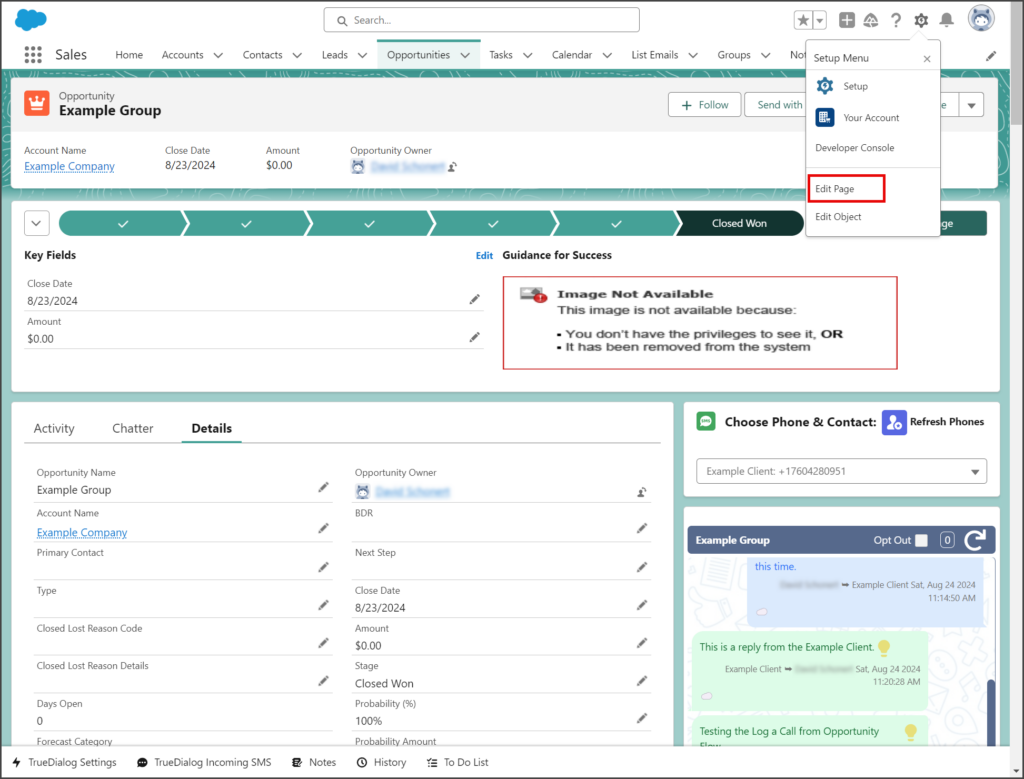
- Drag and drop the Activities component to a location on the page where you want it to appear.
- Click Save.
- Click the Back arrow to go back to your opportunity.

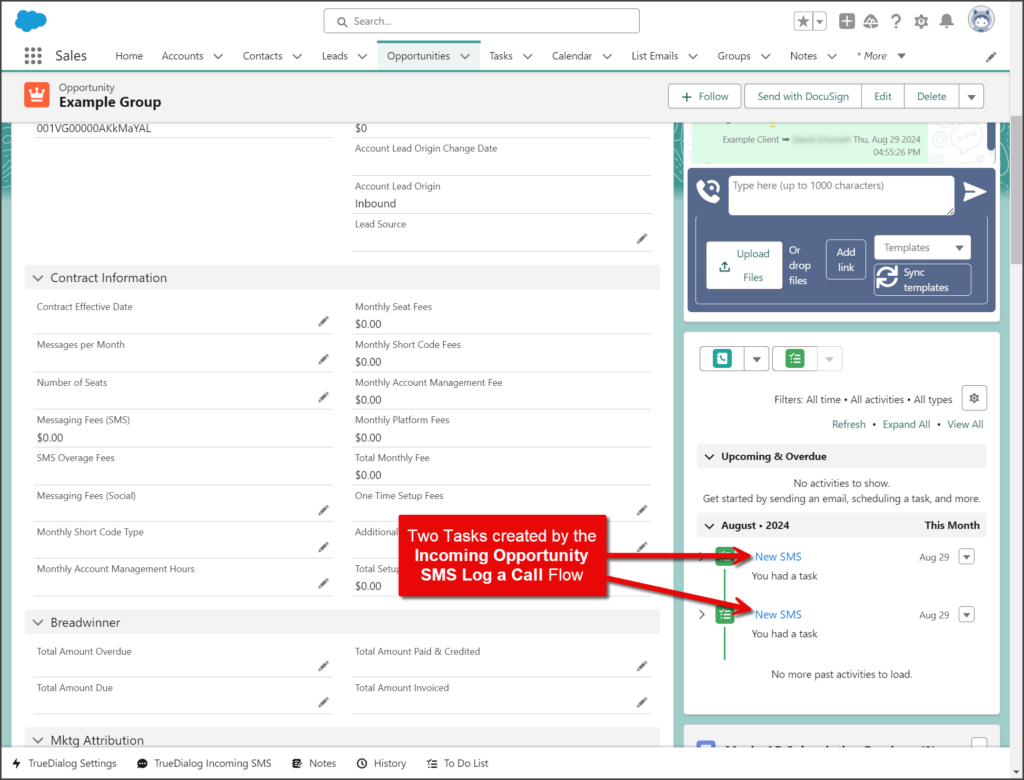
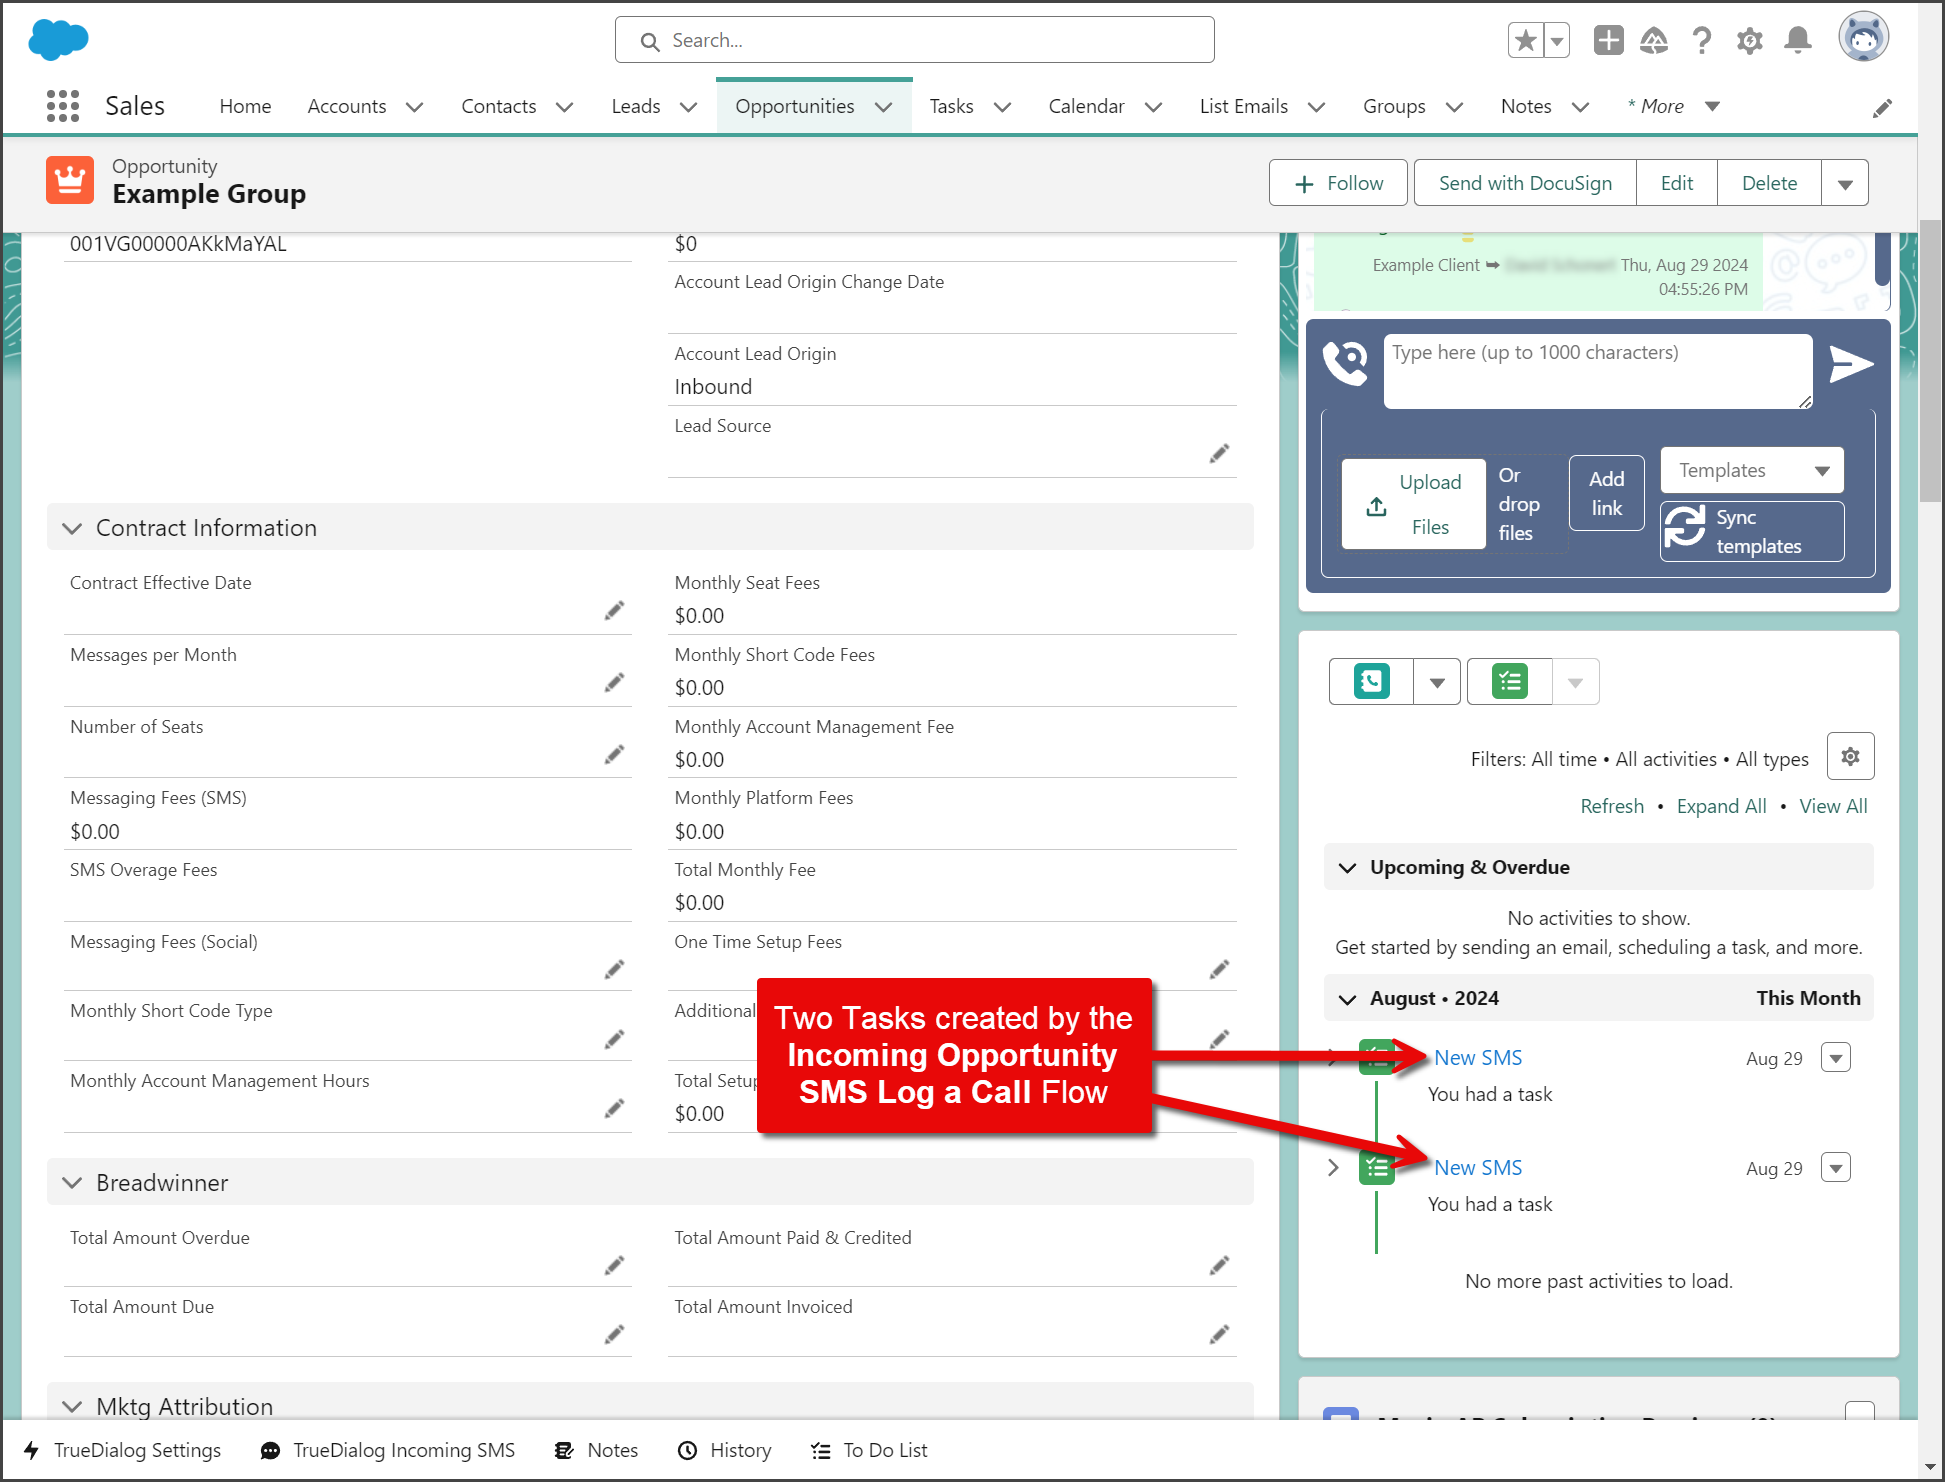
- The following screenshot shows two tasks in the Activity list created by the Incoming Opportunity SMS Log a Call Flow in the instructions above.