Salesforce
TrueDialog Integration
This article shows the Salesforce System Admin how to install and connect the TrueDialog App with your organization’s Salesforce installation. After the app is installed, several post-installation steps must be completed before it is ready to be used.
AppExchange Install
The TrueDialog app can be installed from the AppExchange or a link provided by TrueDialog. Below are instructions for installing from the AppExchange, and in the next section are instructions for installing with a link. See the Salesforce Help article AppExchange Basics for more information about installing apps.
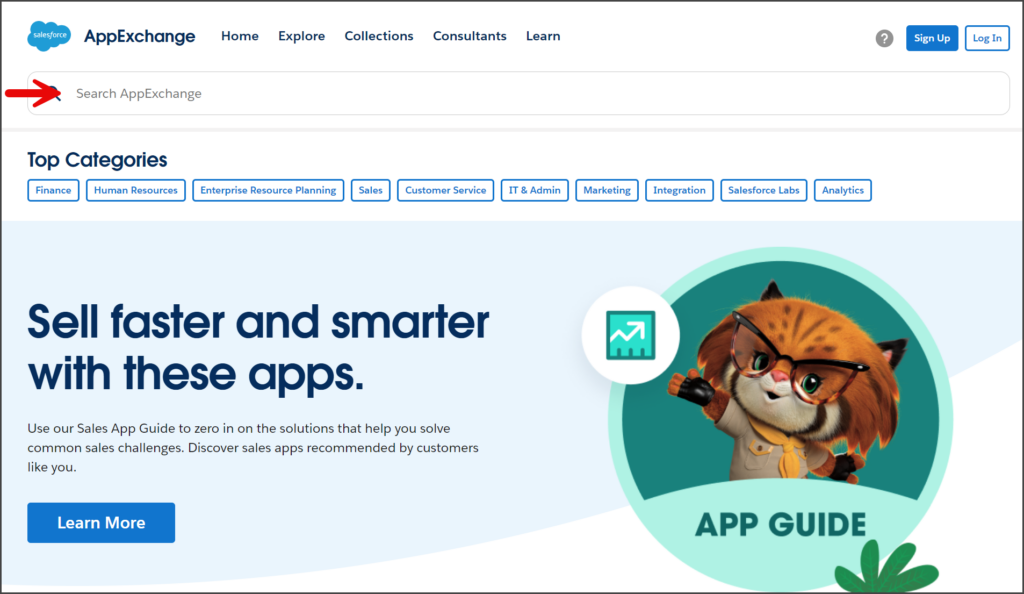
- Go to the AppExchange website: Salesforce AppExchange | Leading Enterprise Cloud Marketplace
- Enter TrueDialog in the search bar.
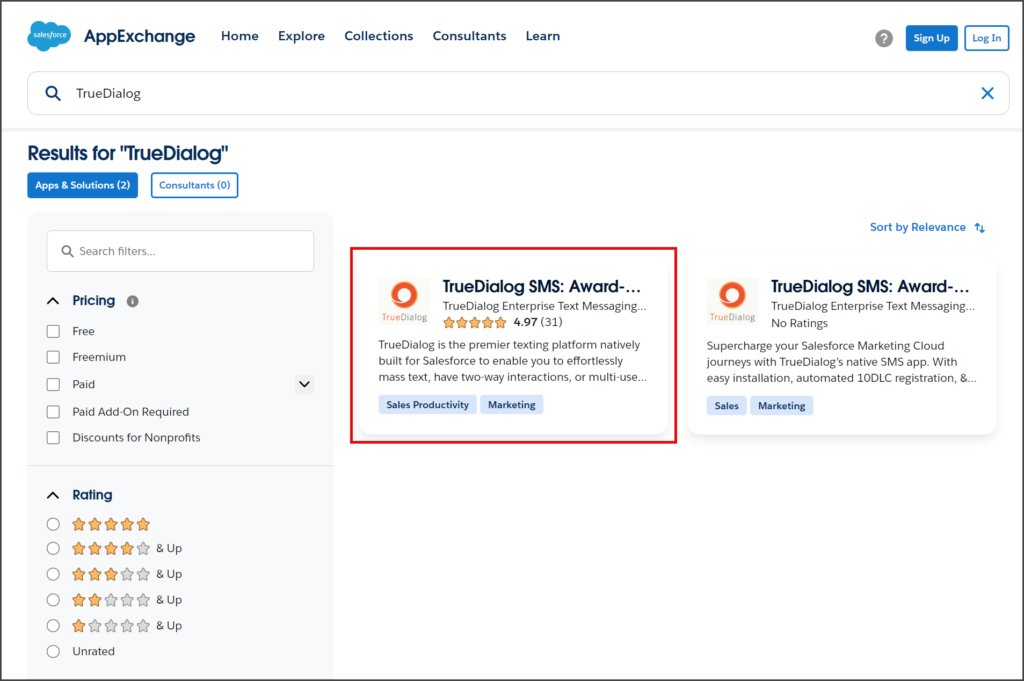
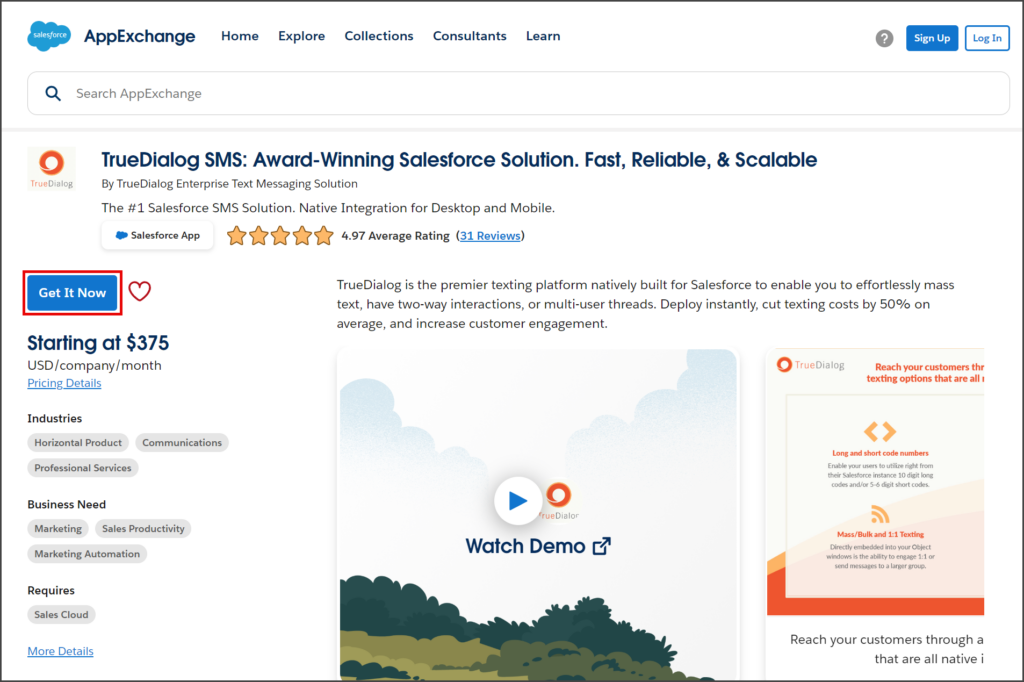
- Click the correct TrueDialog SMS app for Salesforce. The description begins with “TrueDialog is the premier texting platform…”.
- Click Get It Now.
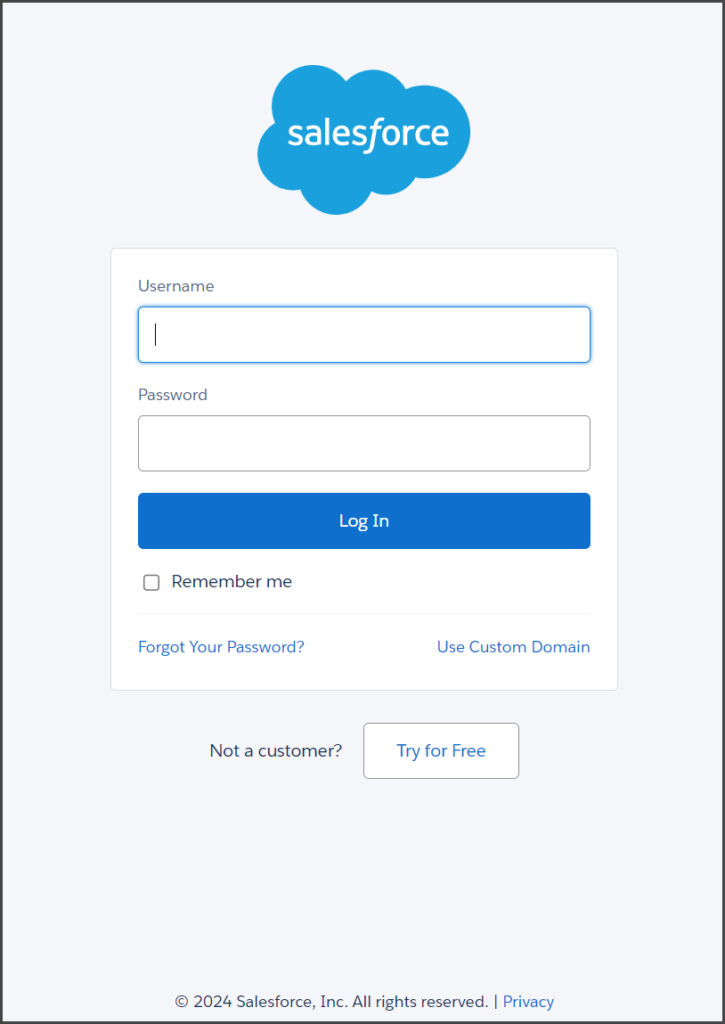
- Log in to your Salesforce account to start the installation.
- Follow the instructions in the Install SMS Integration Package section to complete the installation.
Link Install
To install using a link, contact Customer Support (1-877-501-4276 | support@truedialog.com) to get the link to the latest version of the TrueDialog SMS Integration.
- Select the type of installation to complete: Production or Sandbox.
- Click the link for the selected type of installation.
- Log in to your Salesforce account to start the installation.

- Follow the instructions in the Install SMS Integration Package section to complete the installation.
Install SMS Integration Package
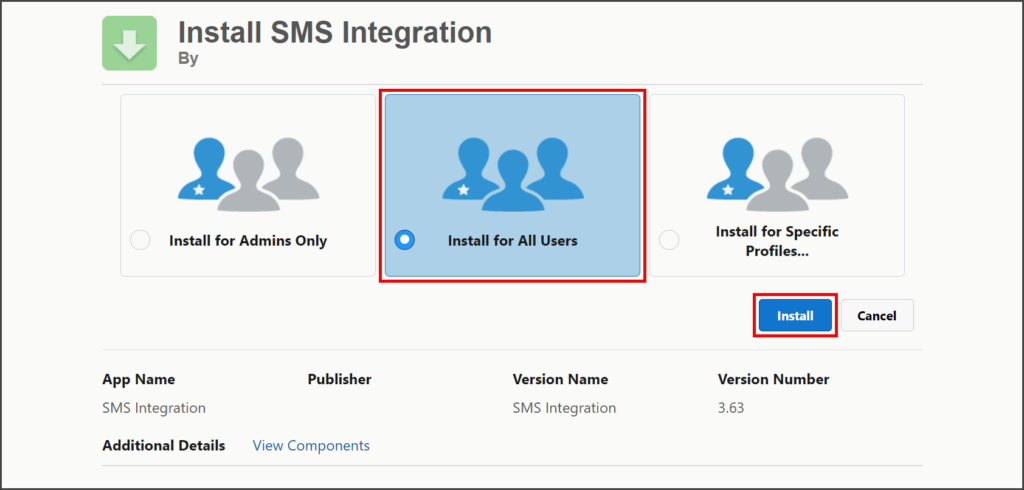
Once this installation is started, you will be prompted to install the SMS Integration, the package name of TrueDialog’s SMS Messaging app.
- Select Install for All Users.
- Click Install.
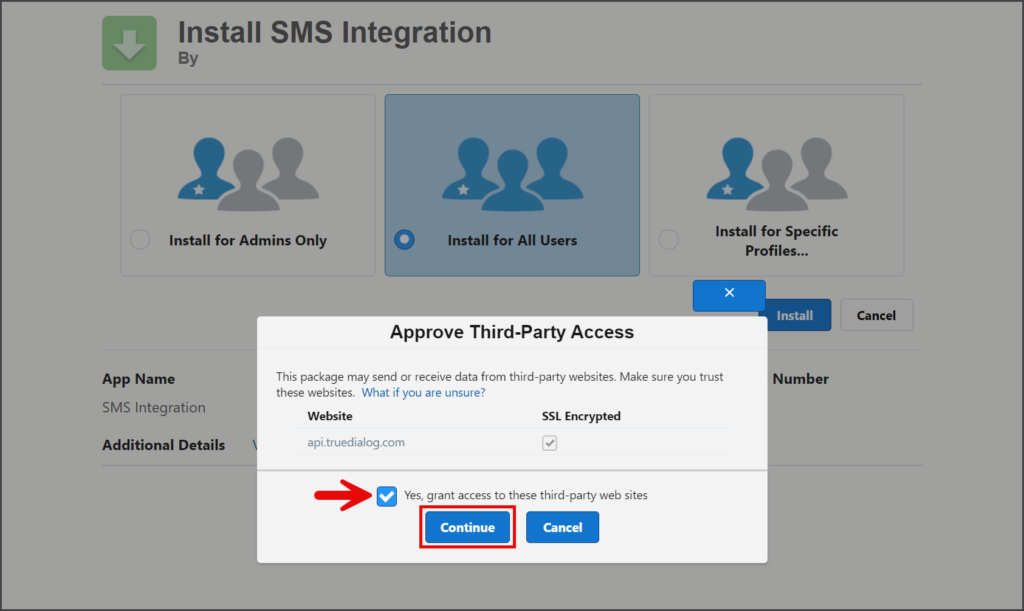
- Check the Yes, grant access to these third-party web sites checkbox.
- Click Continue.
- Once the installation starts, you will see the Installing and granting access to all Users… message.
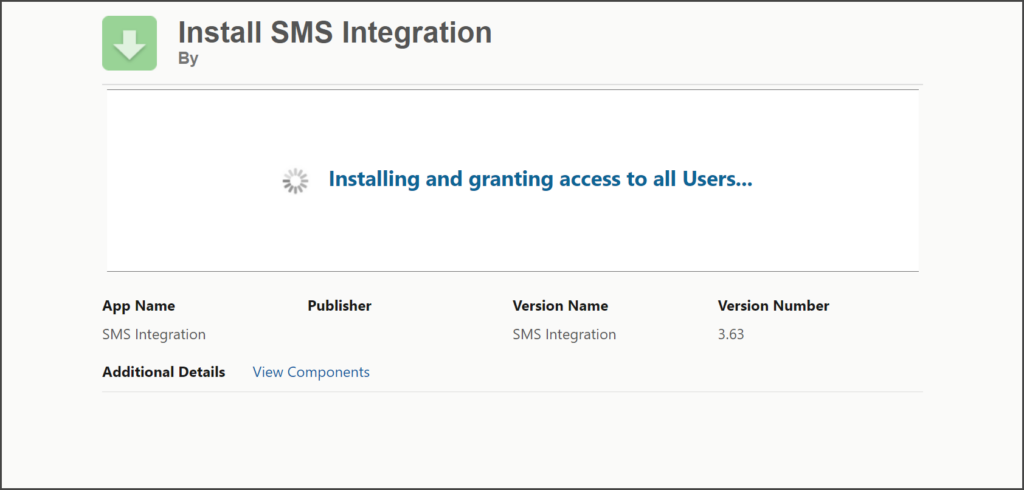
- Wait for the installation to complete.
- The installation typically takes three to five minutes, and you may receive the message, This app is taking a long time to install.
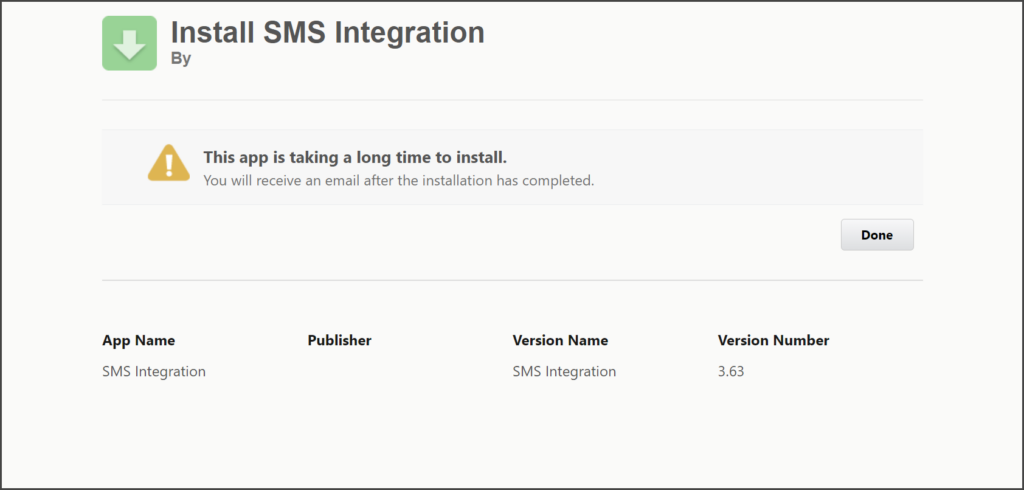
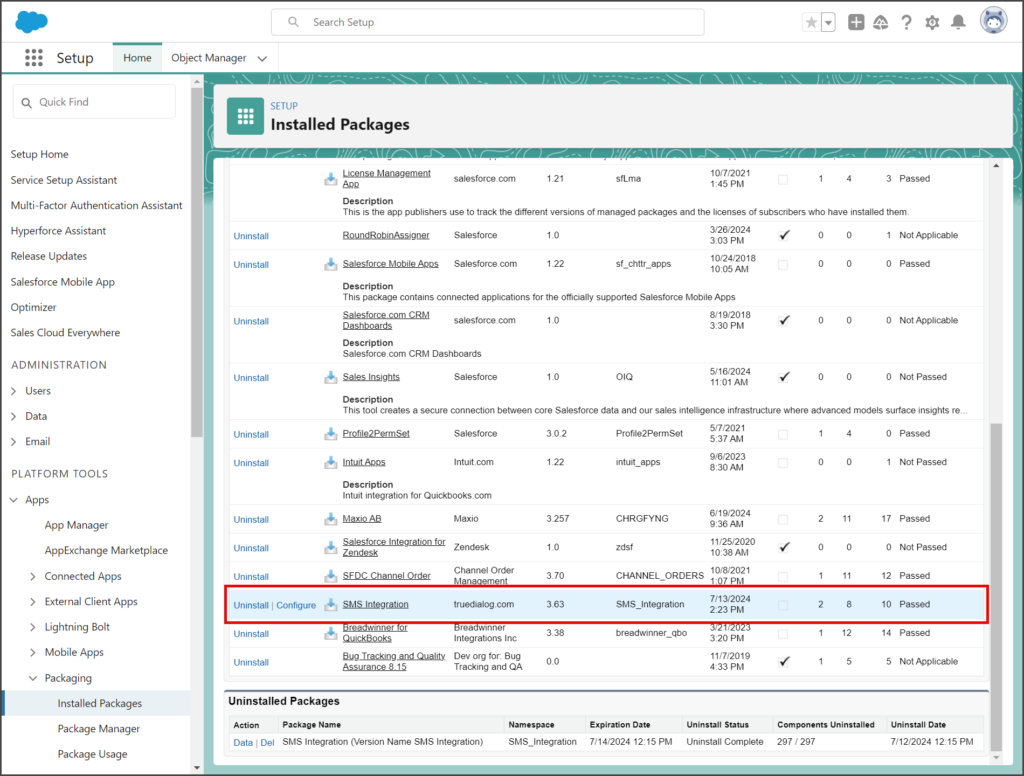
- Once the installation is complete, you can find the package in the list of Installed Packages.
Post Installation Instructions
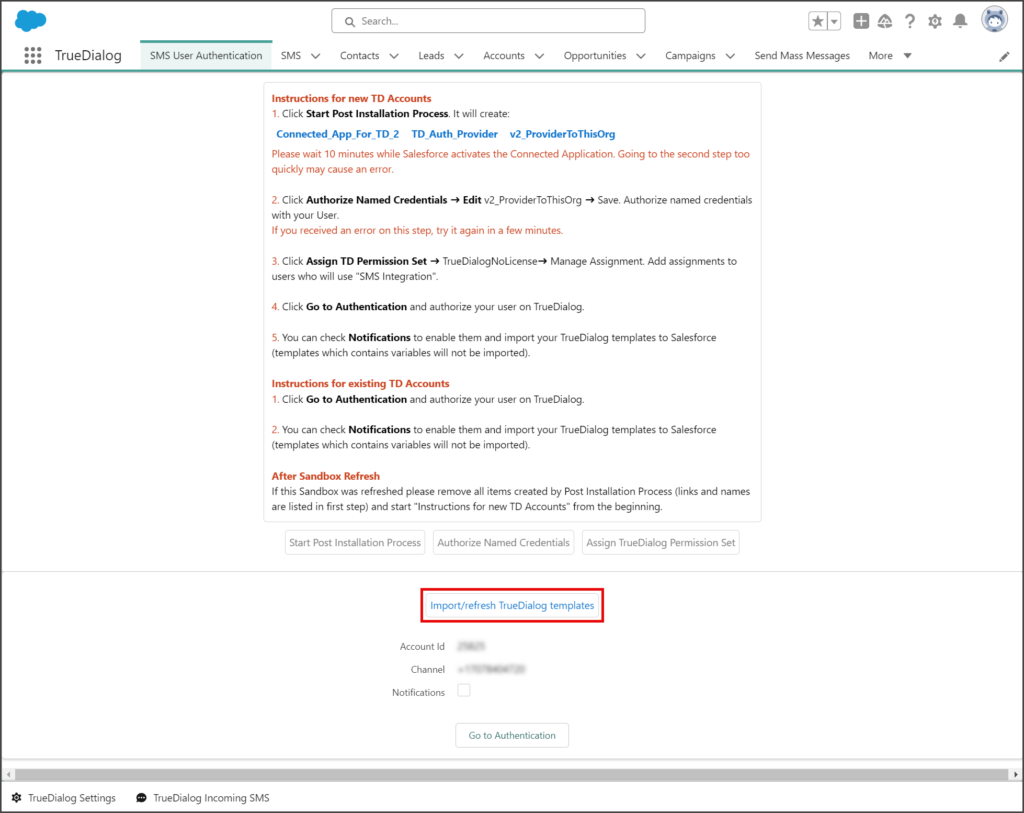
After the installation, as the System Admin, you must perform post-installation steps to connect the TrueDialog app with your TrueDialog account. Once your post-installation is complete, each Salesforce user using the TrueDialog app must also connect their account with TrueDialog by following the instructions in the Salesforce – Authenticating TrueDialog App For Users article.
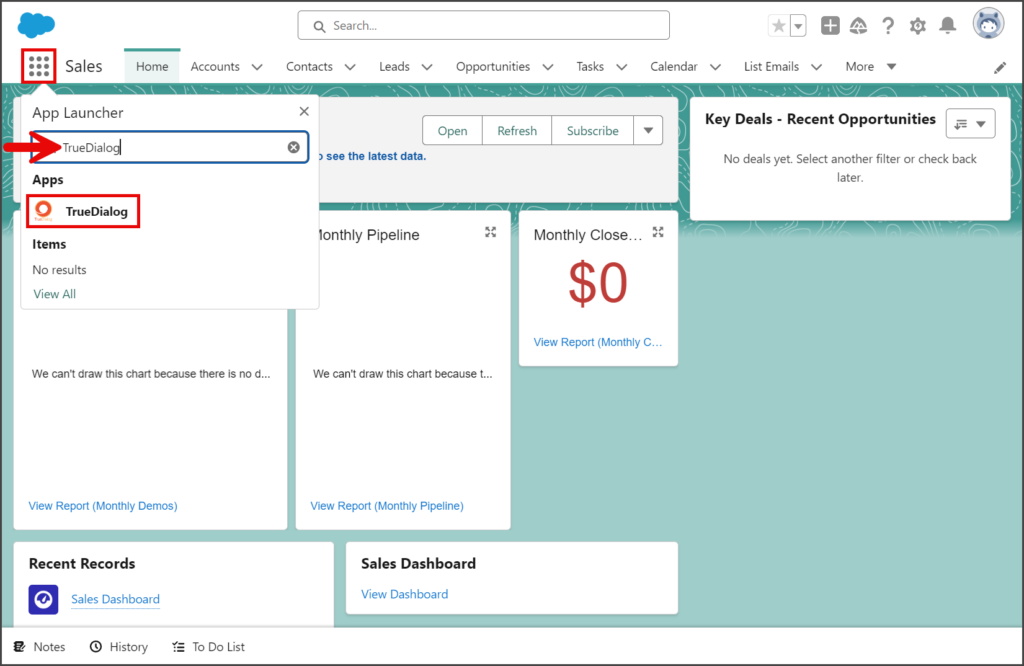
- Click the App Launcher.
- Enter TrueDialog in the search box.
- Click the TrueDialog app.
- Click the SMS User Authentication tab.
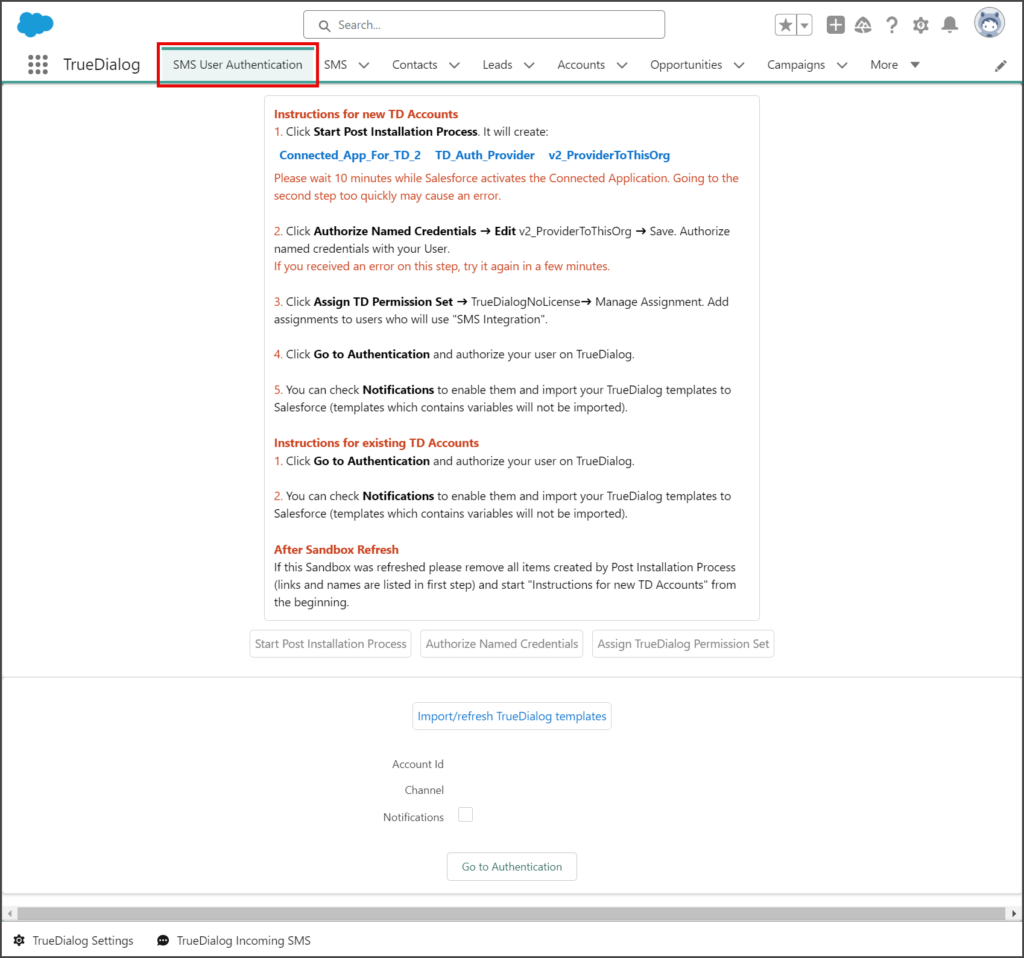
- The instructions below will walk you through each of the Post Installation steps.
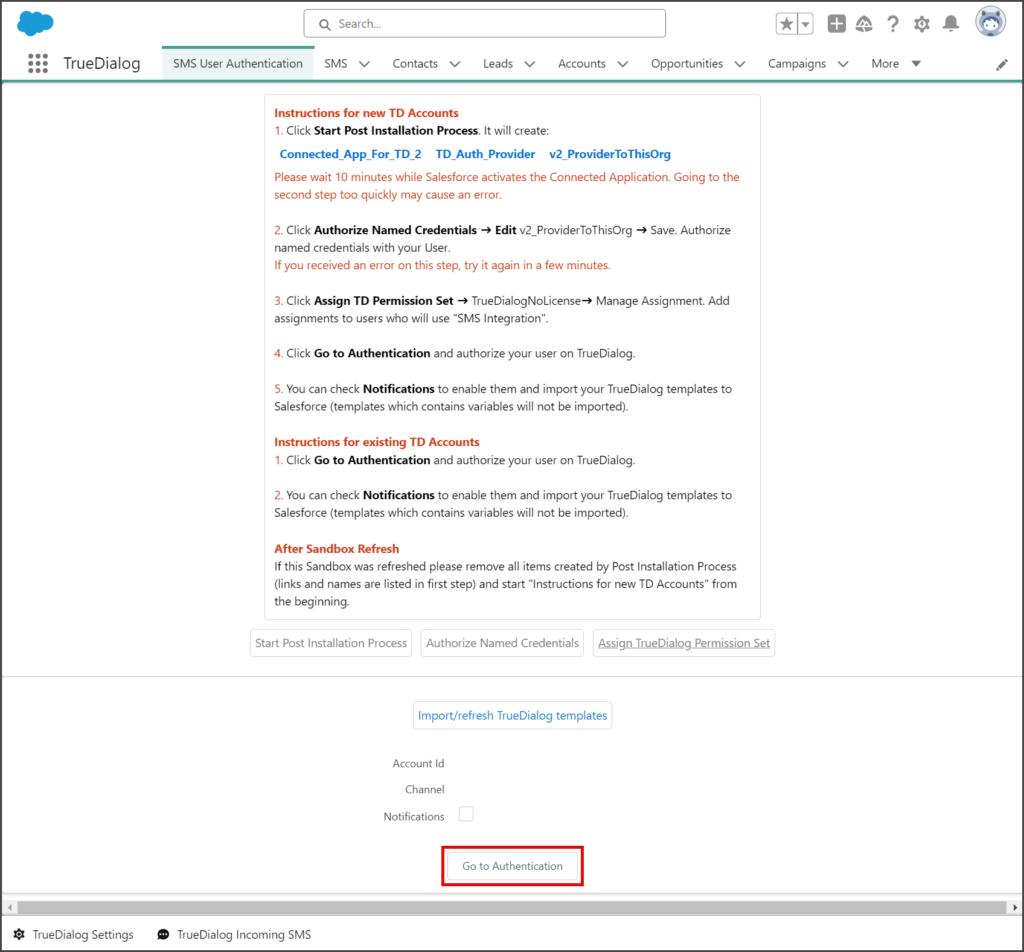
Step 1: Start Post Installation Process
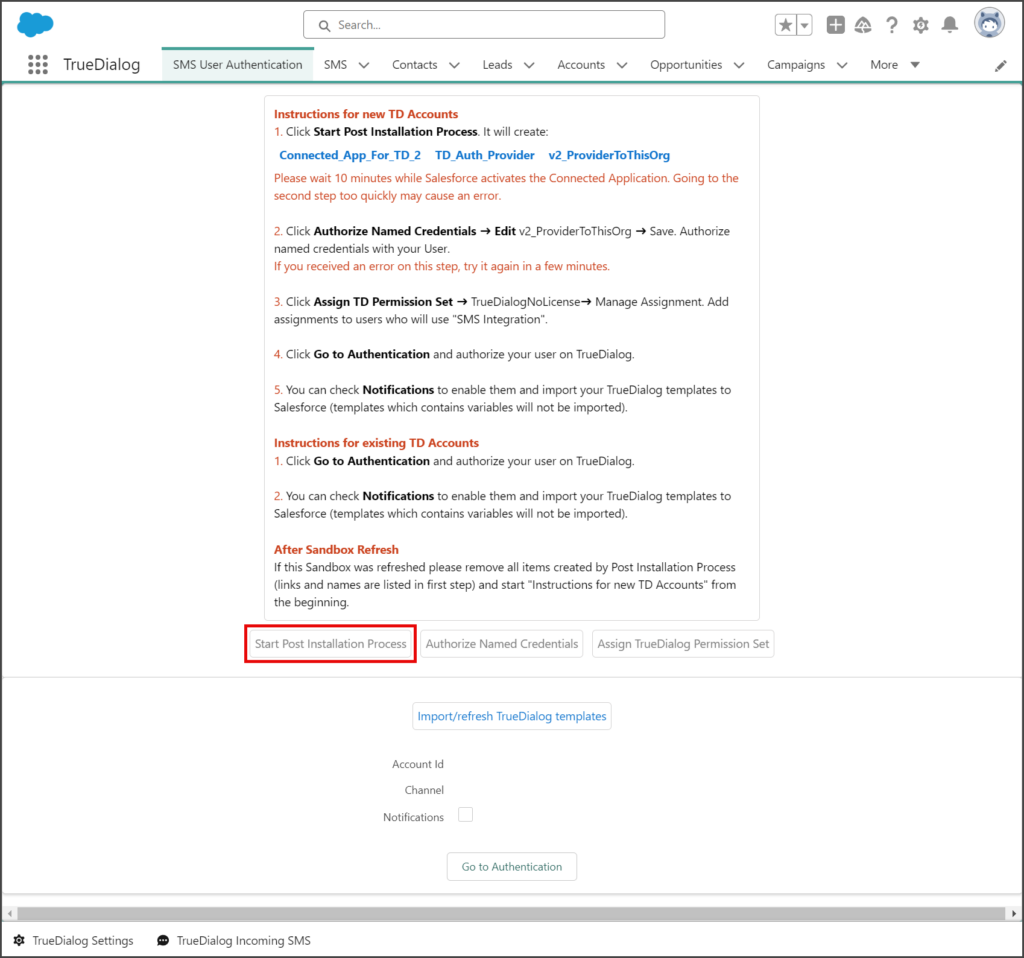
- Click the Start Post Installation Process button below the instructions section.
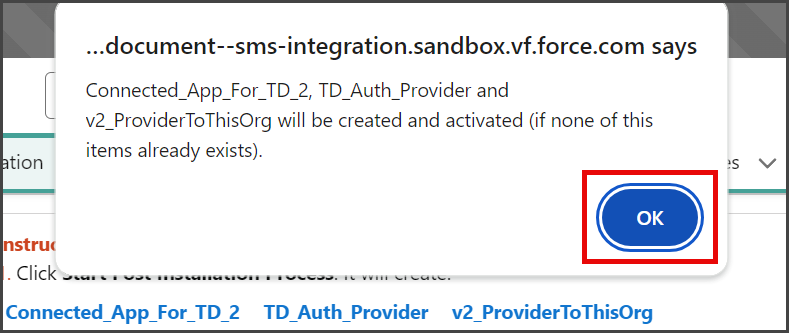
- Click the OK button in the popup message window.
- This process will create the items below. Once created, each item can be accessed by clicking the link for the corresponding item.
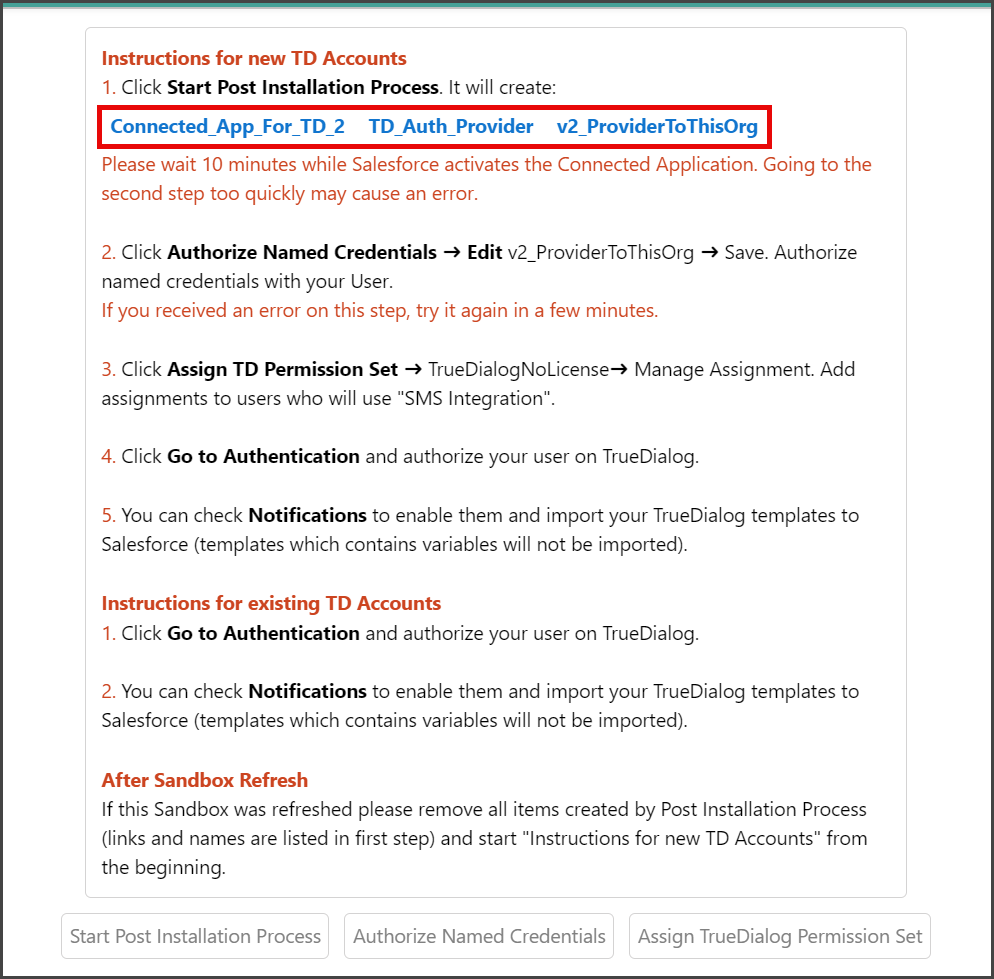
- Connected_App_For_TD_2 – Managed App
- TD_Auth_Provider – Authentication Provider
- v2_ProviderToThisOrg – Named Credentials
- Creating these components can take up to 10 minutes, and this process must be completed before starting Step 2.
Step 2: Authorize Named Credentials
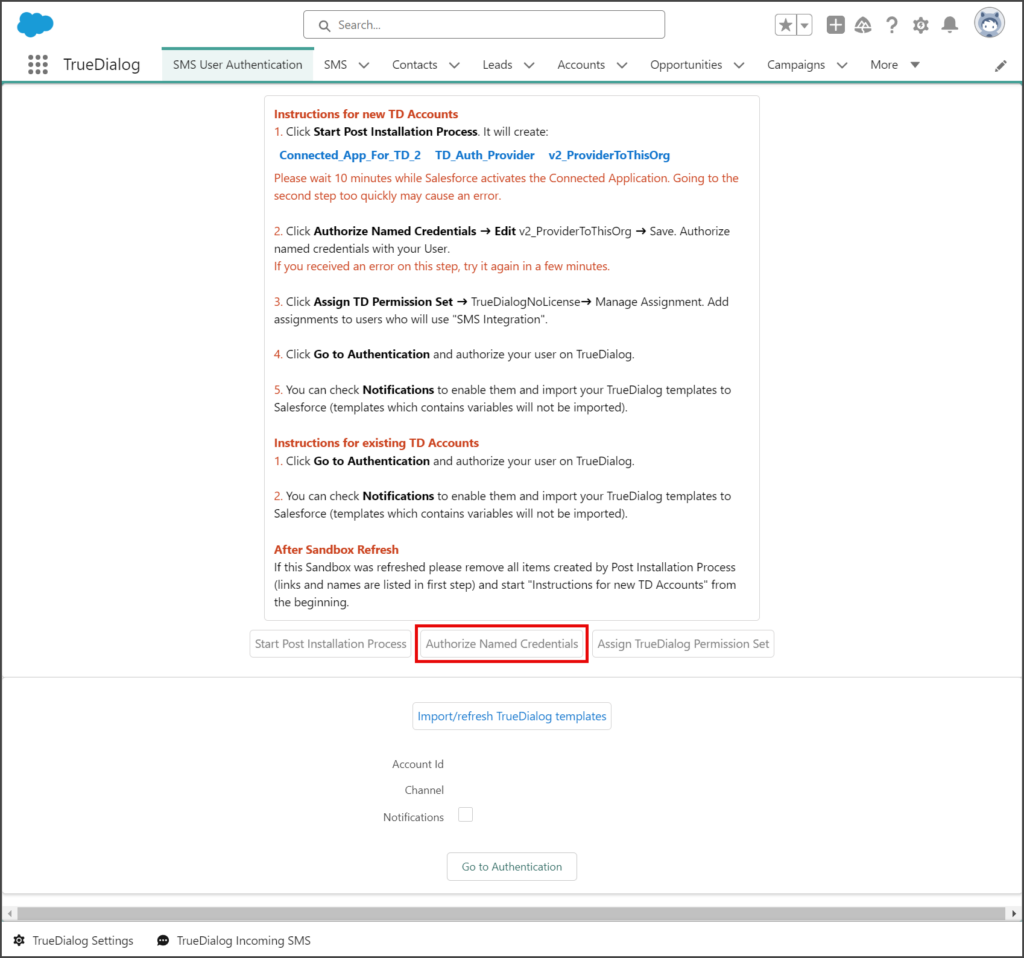
- Click the Authorize Named Credentials button below the instructions section.
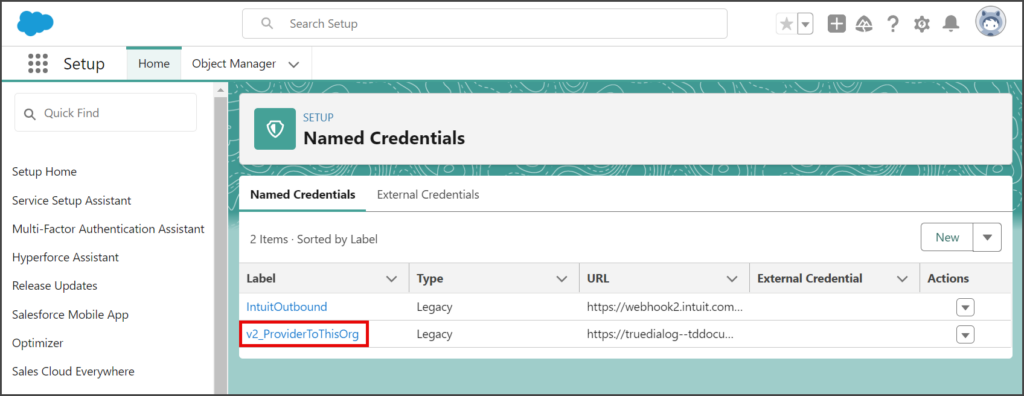
- Click v2_ProviderToThisOrg in the Named Credentials table.
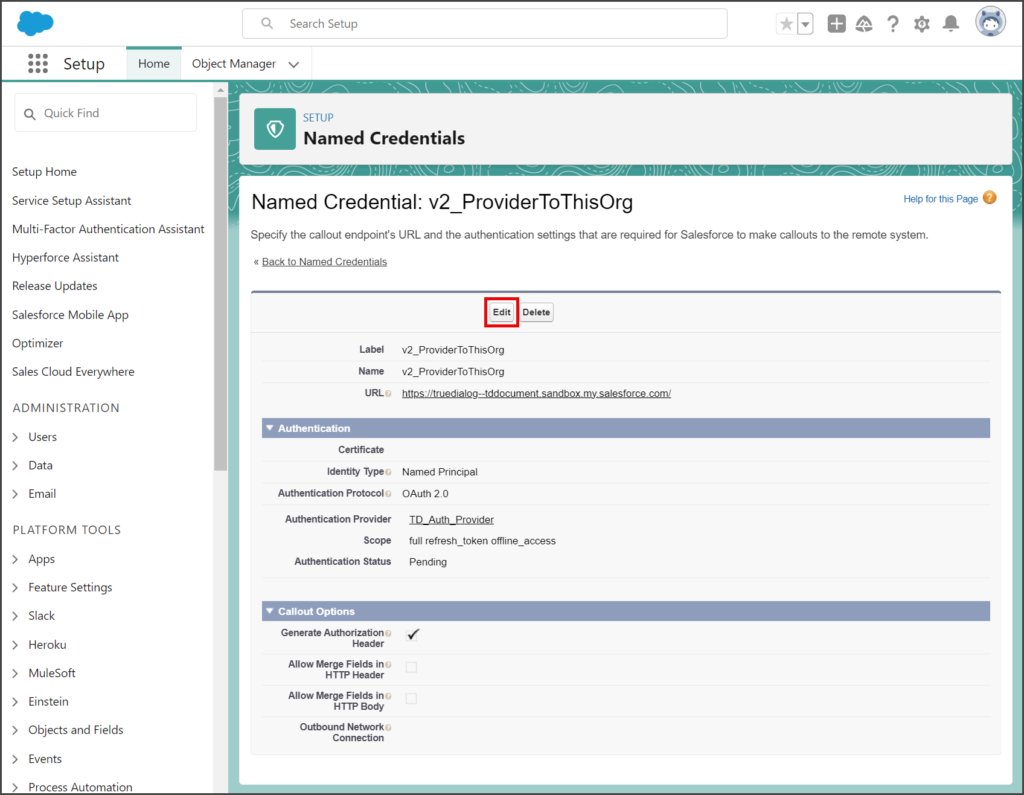
- Click Edit.
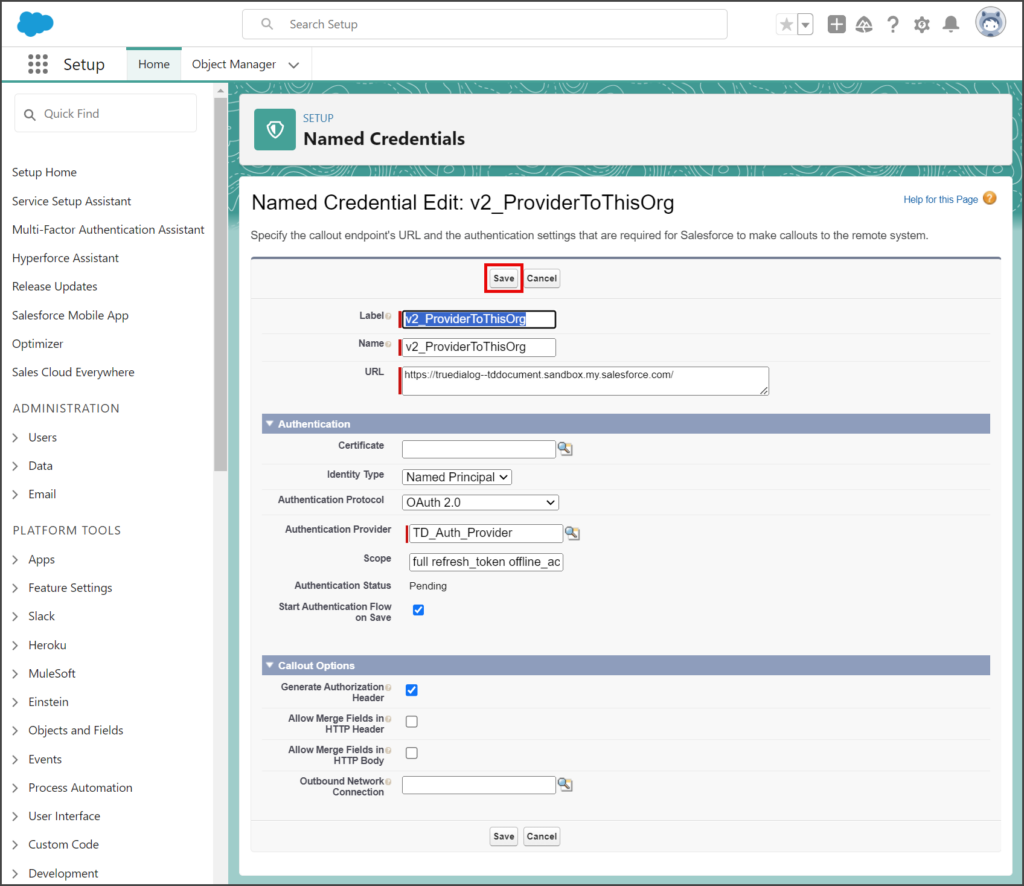
- Click Save. This will trigger Salesforce to ask for your login credentials.
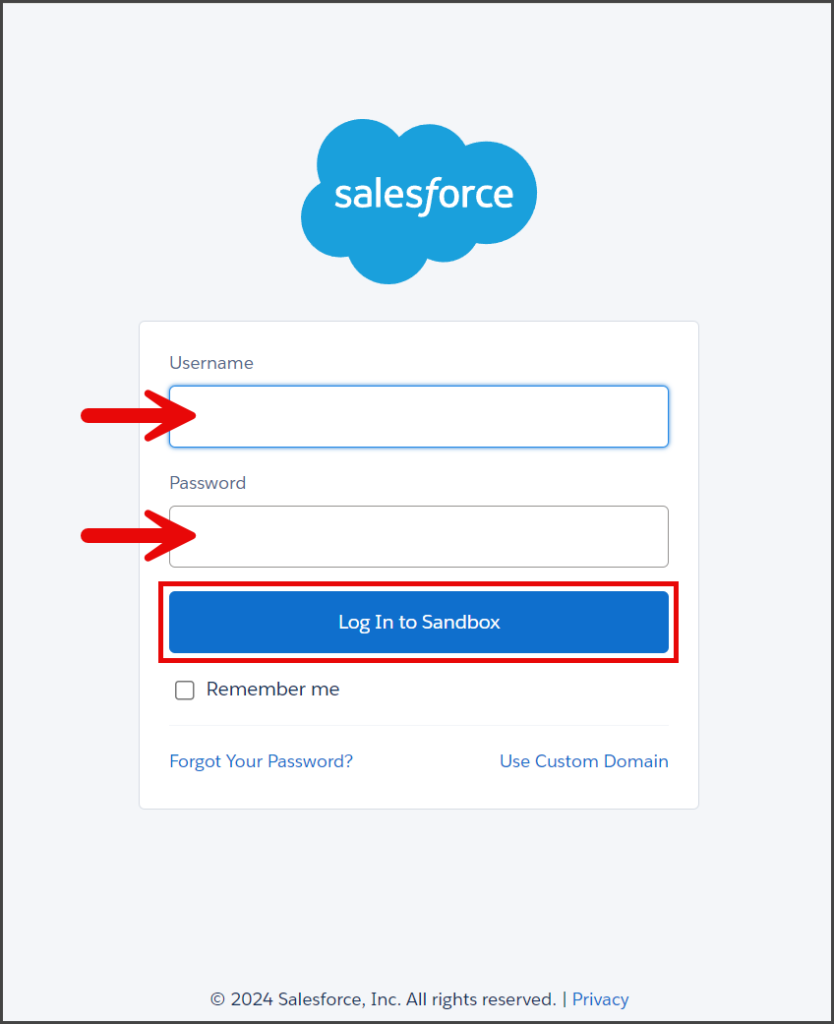
- Enter Username and Password.
- Click Log In (or Log In to Sandbox).
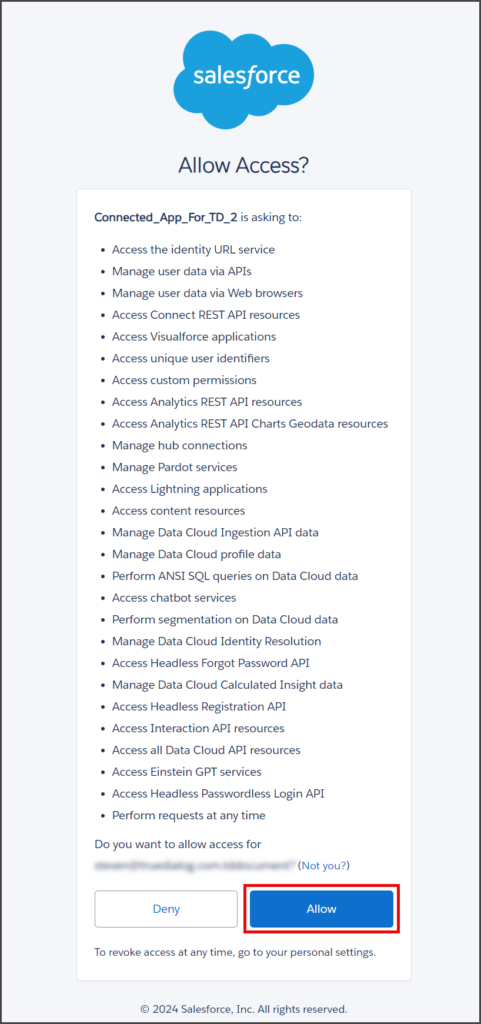
- Salesforce will ask you to allow access to your account for the Connected_App_For_TD_2 app. The list of permissions given is necessary for the TrueDialog app to work.
- Click Allow.
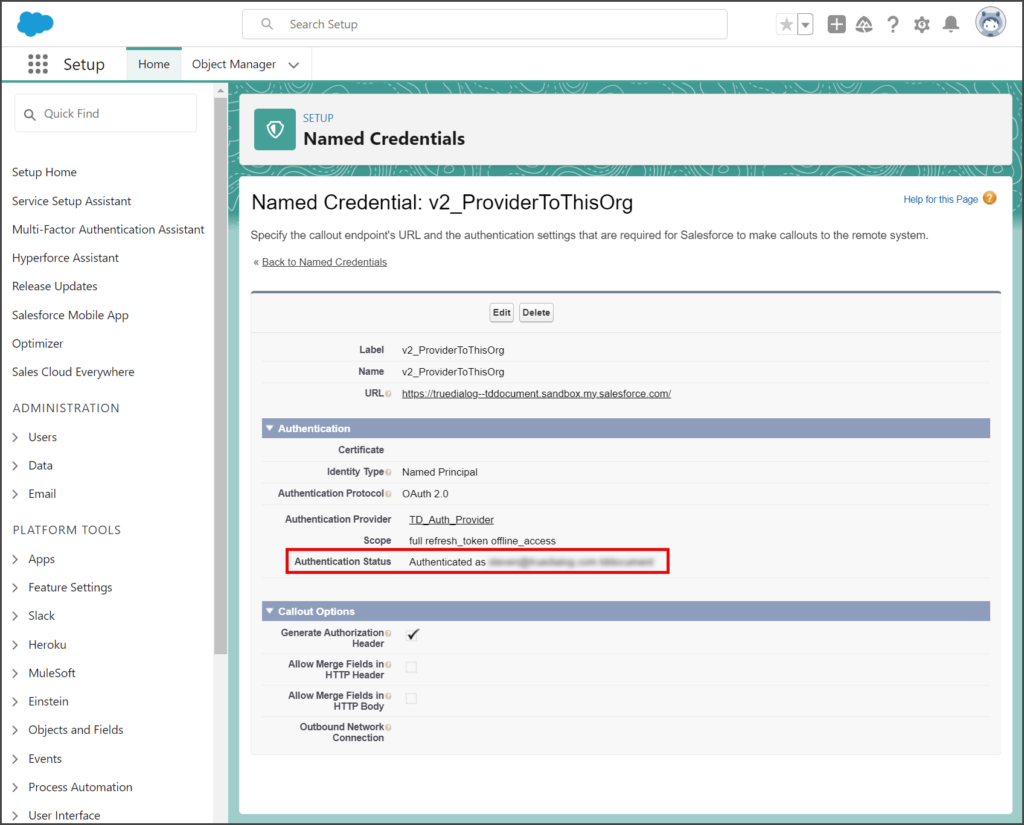
- You will be taken back to the Named Credential: v2_ProviderToThisOrg page.
- The Authentication Status field will now be updated with your username.
Step 3: Assign TD Permission Set
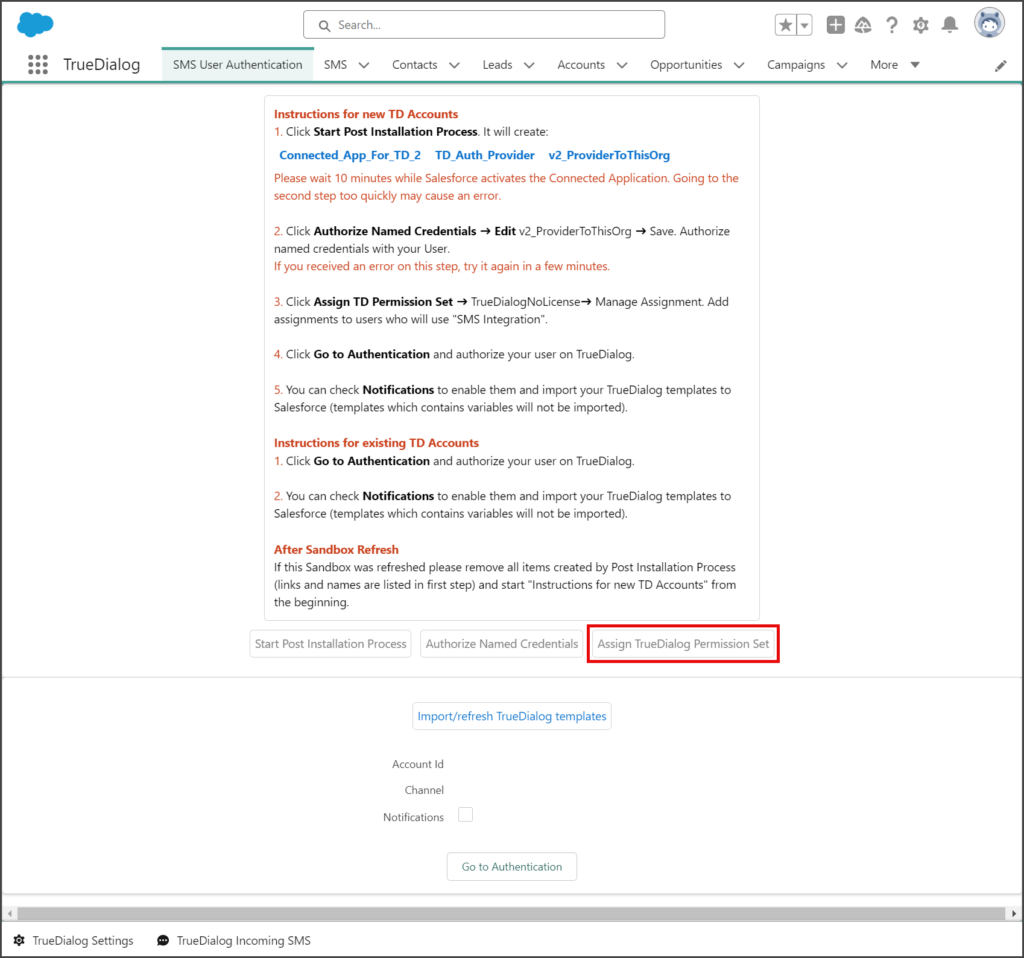
- Click the Assign TrueDialog Permission Set button below the instructions section.
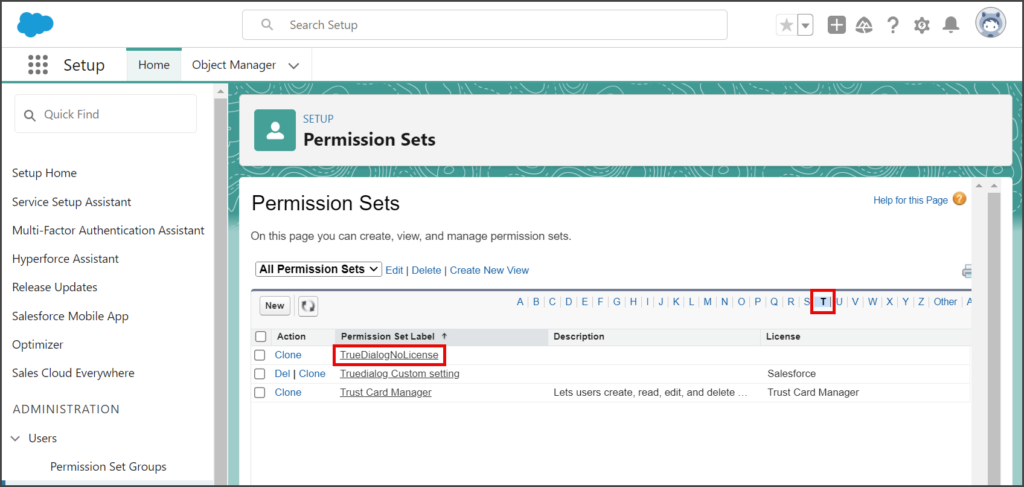
- (Optional) If you have more than a page of Permission Sets, you can click T to limit the shown Permission Sets to only ones starting with T.
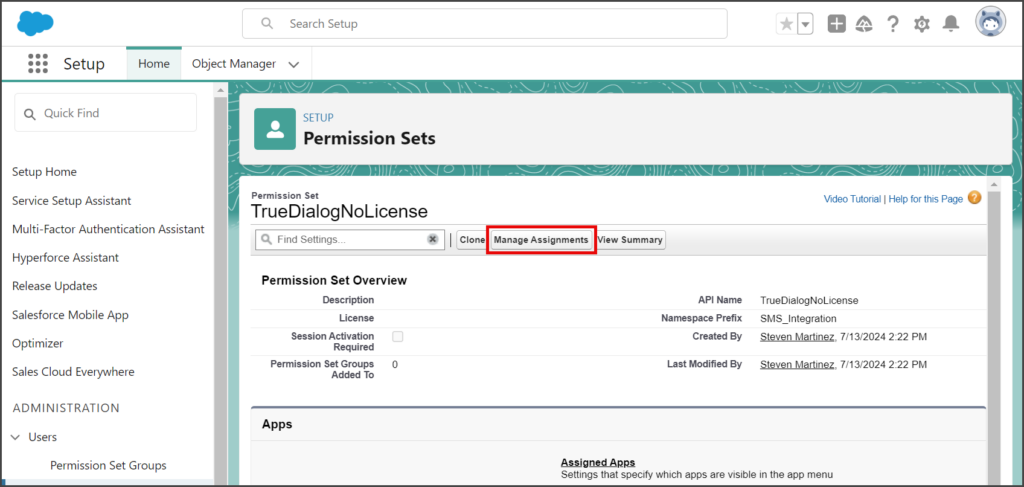
- Click the TrueDialogNoLicense permission set.
- Click the Manage Assignments button.
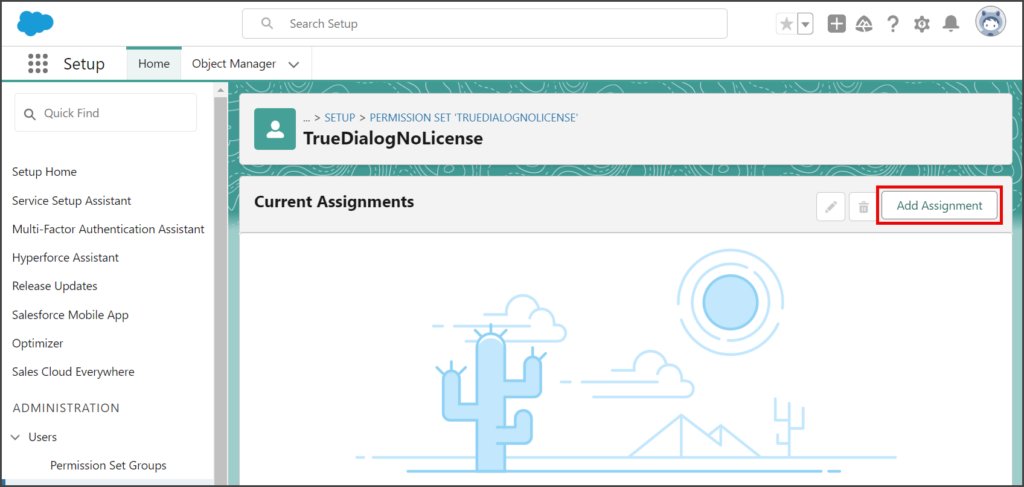
- Click Add Assignment.
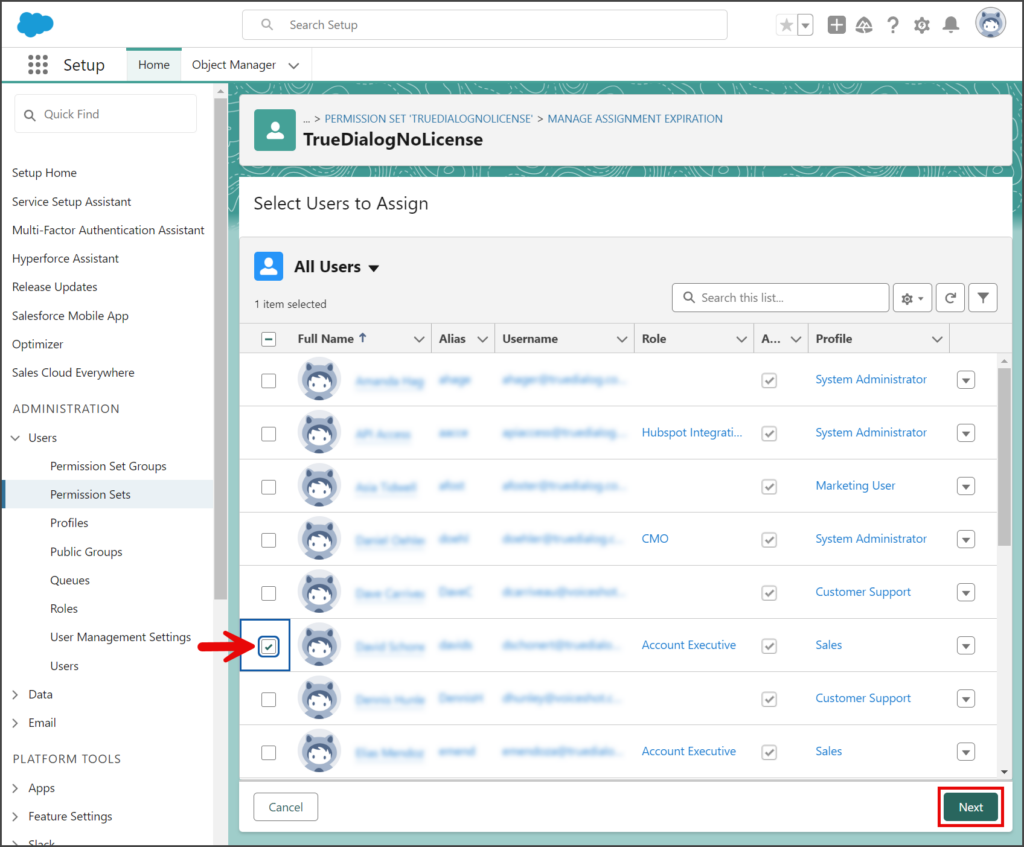
- Check the check box next to each User who needs access to the TrueDialog app.
- Click Next.
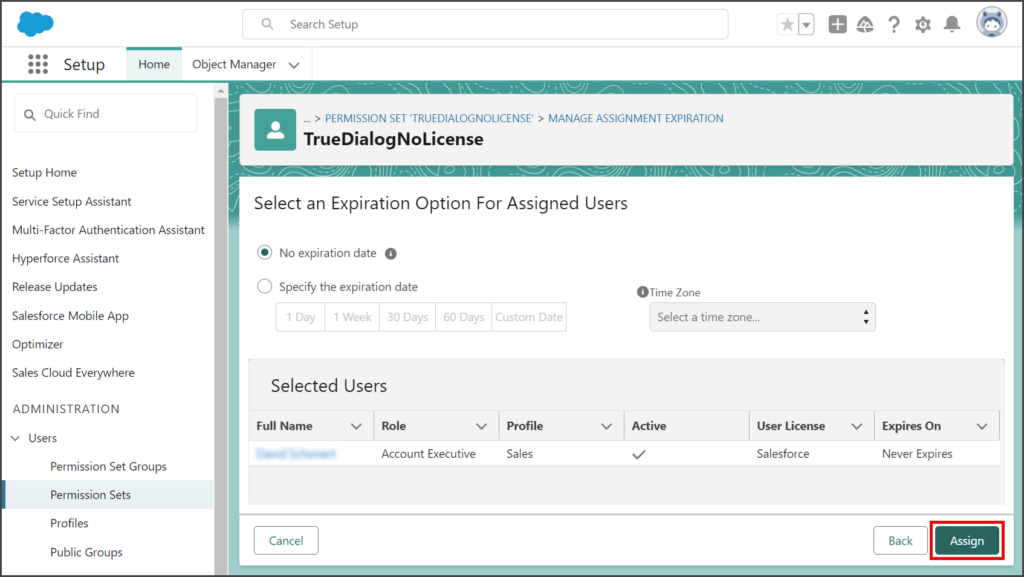
- Review the list of Selected Users.
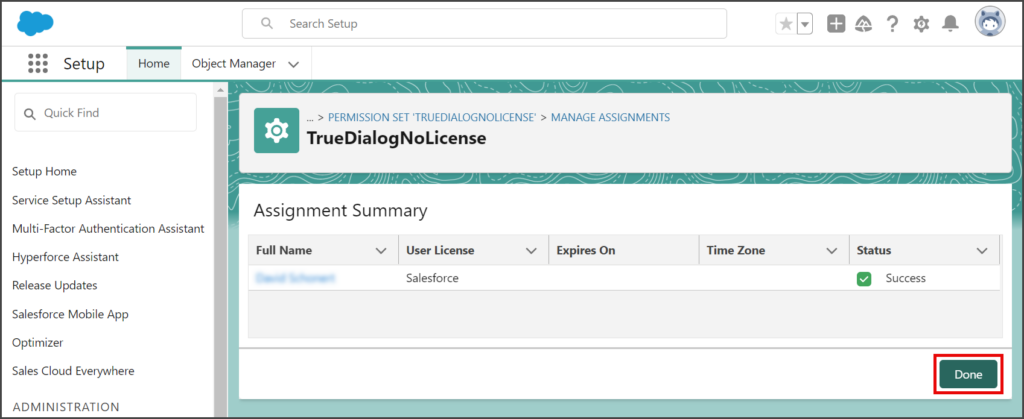
- Click Assign.
- Once complete, a successful message will be displayed.
- If there are any errors assigning users, view the error message and fix any issues. Once fixed, add the User again.
- Click Done.
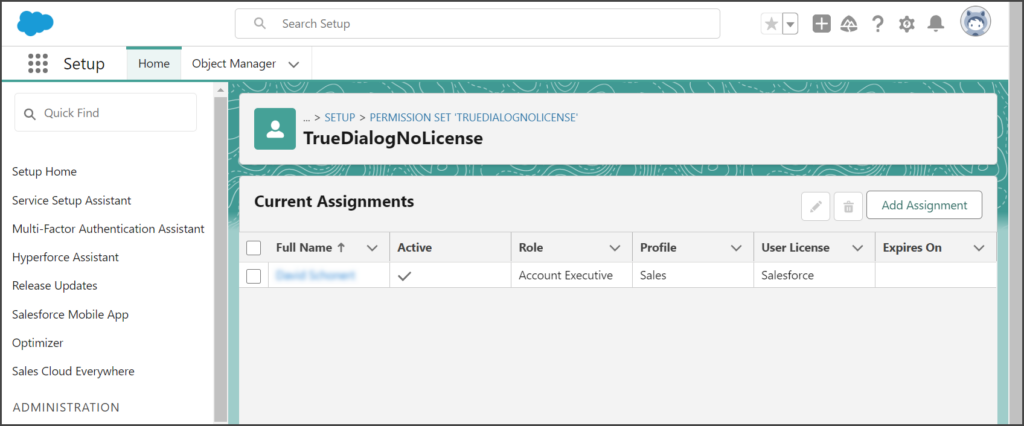
- The TrueDialogNoLicense permission set will now list all currently assigned users.
Step 4: Go to Authentication
- Click the Go to Authentication button at the bottom of the SMS User Authentication tab.
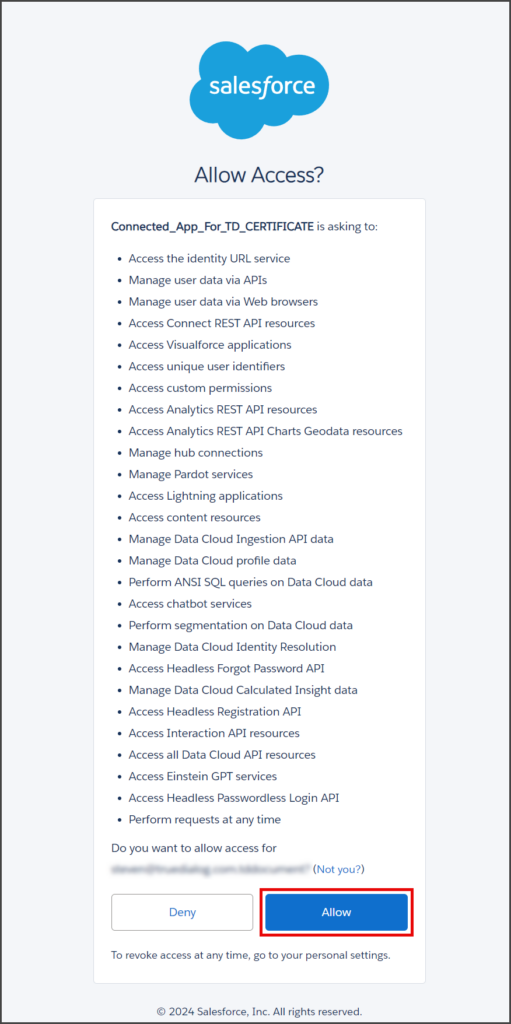
- Salesforce will ask you to allow access to your account for the Connected_App_For_TD_CERTIFICATE. The list of permissions given is necessary for the TrueDialog app to work.
- Click Allow.
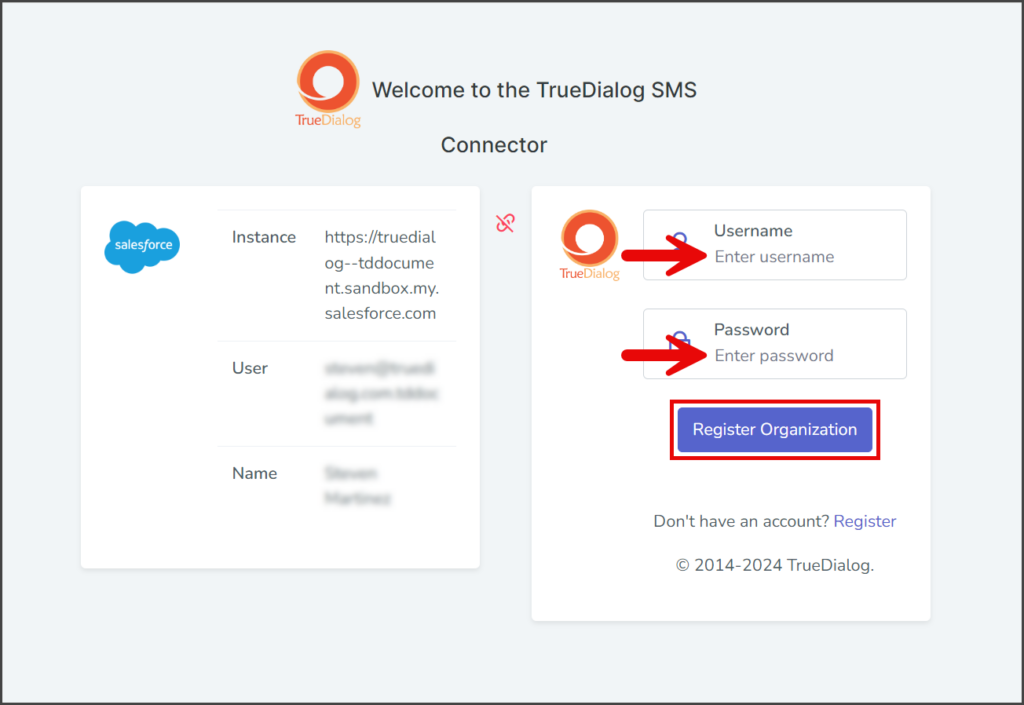
- Enter the Username and Password of the TrueDialog user associated with your root TrueDialog account.
- Click Register Organization.
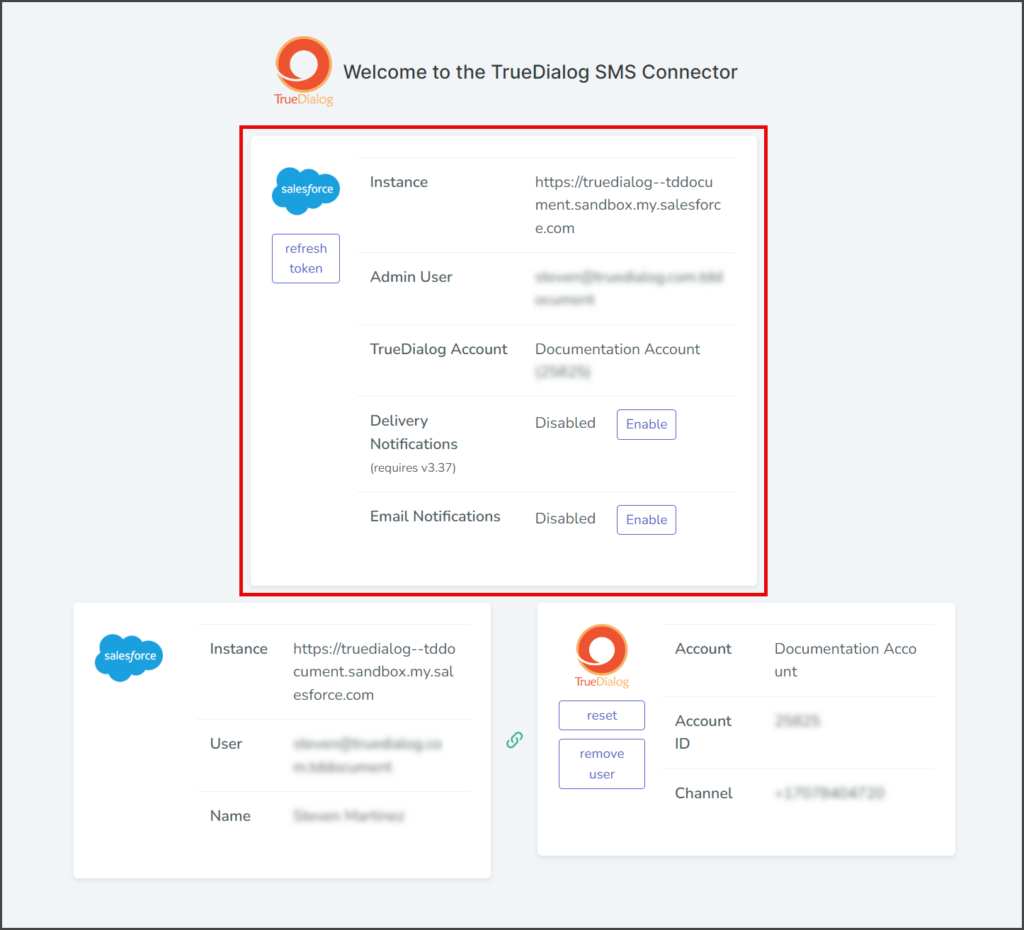
- After linking your Salesforce and TrueDialog accounts, the TrueDialog SMS Connector page will display your connected account and notification options.
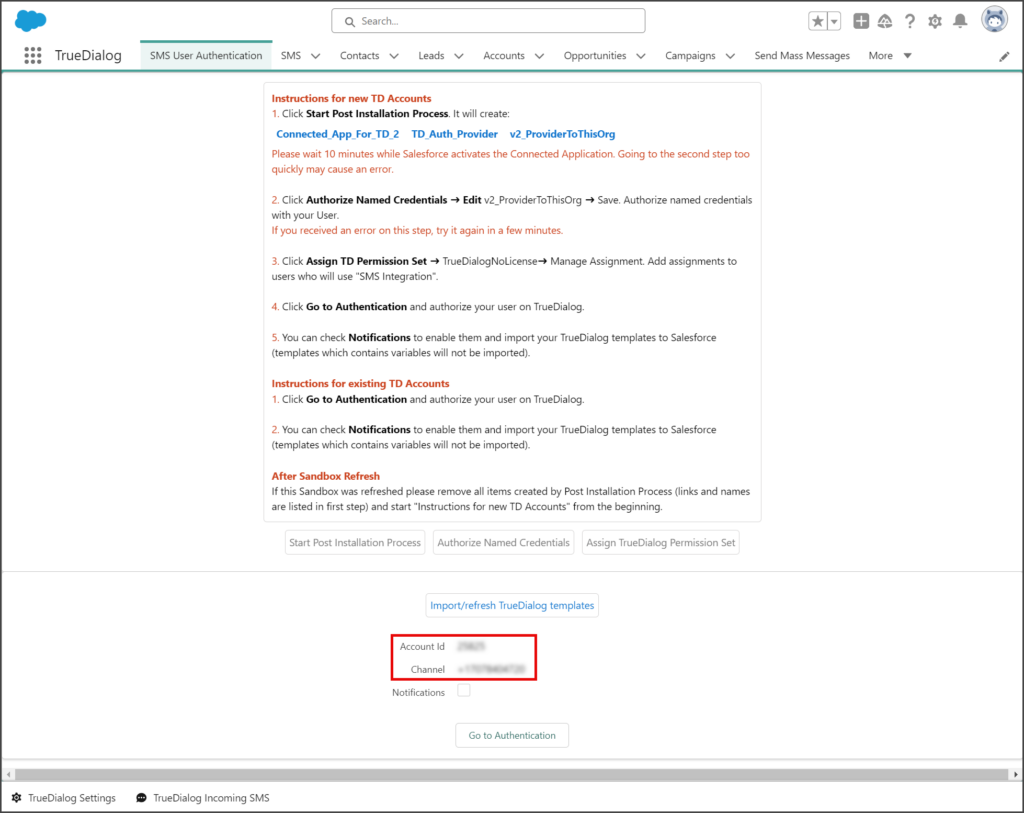
- Go back to the SMS User Authentication tab.
- Reload the page to update the Account Id and Channel fields at the bottom of the page.
Step 5: Notifications
- Check the Notifications checkbox to enable standard notifications from the TrueDialog app.
- New notifications will be displayed in the Salesforce notifications window.
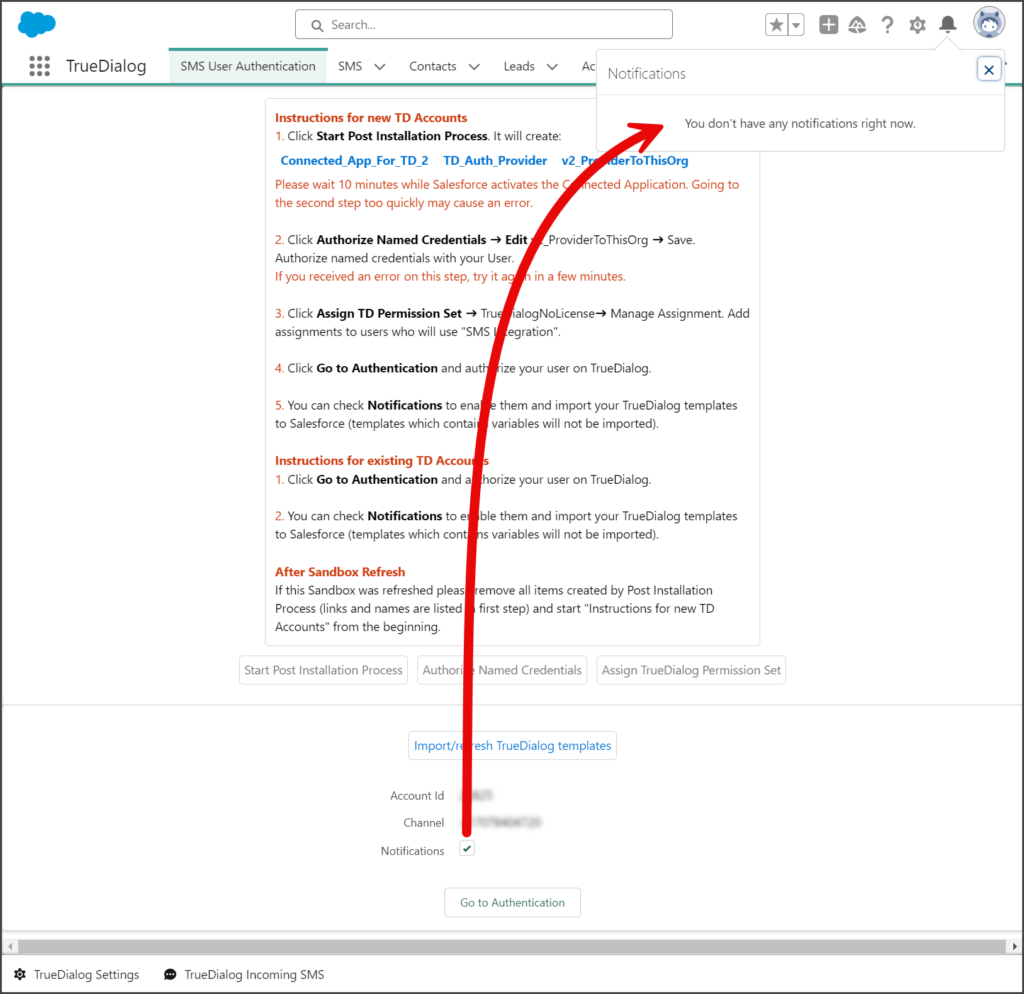
- This setting is user-specific and will not affect the notification another user sees.
Import Templates
The Import/refresh TrueDialog templates button allows you to import your templates from the TrueDialog Portal. For more details about this process, see the Salesforce – Creating a Message Template article.
