Salesforce
TrueDialog Integration
In this article, you will learn how to send a Mass SMS to your records using a flow. While there are many ways to create a flow using the TrueDialog Mass SMS From Flow, this example will show you how to send the message to a list of Contact records at a scheduled time.
Create Template
The SMS message sent by Mass SMS From Flow action is stored in a template. Before sending a Mass SMS with your flow, you must create a template with your message. Below are simplified instructions for creating a message template. If you are unfamiliar with creating a template, see the Salesforce – Creating a Message Template article for instructions.
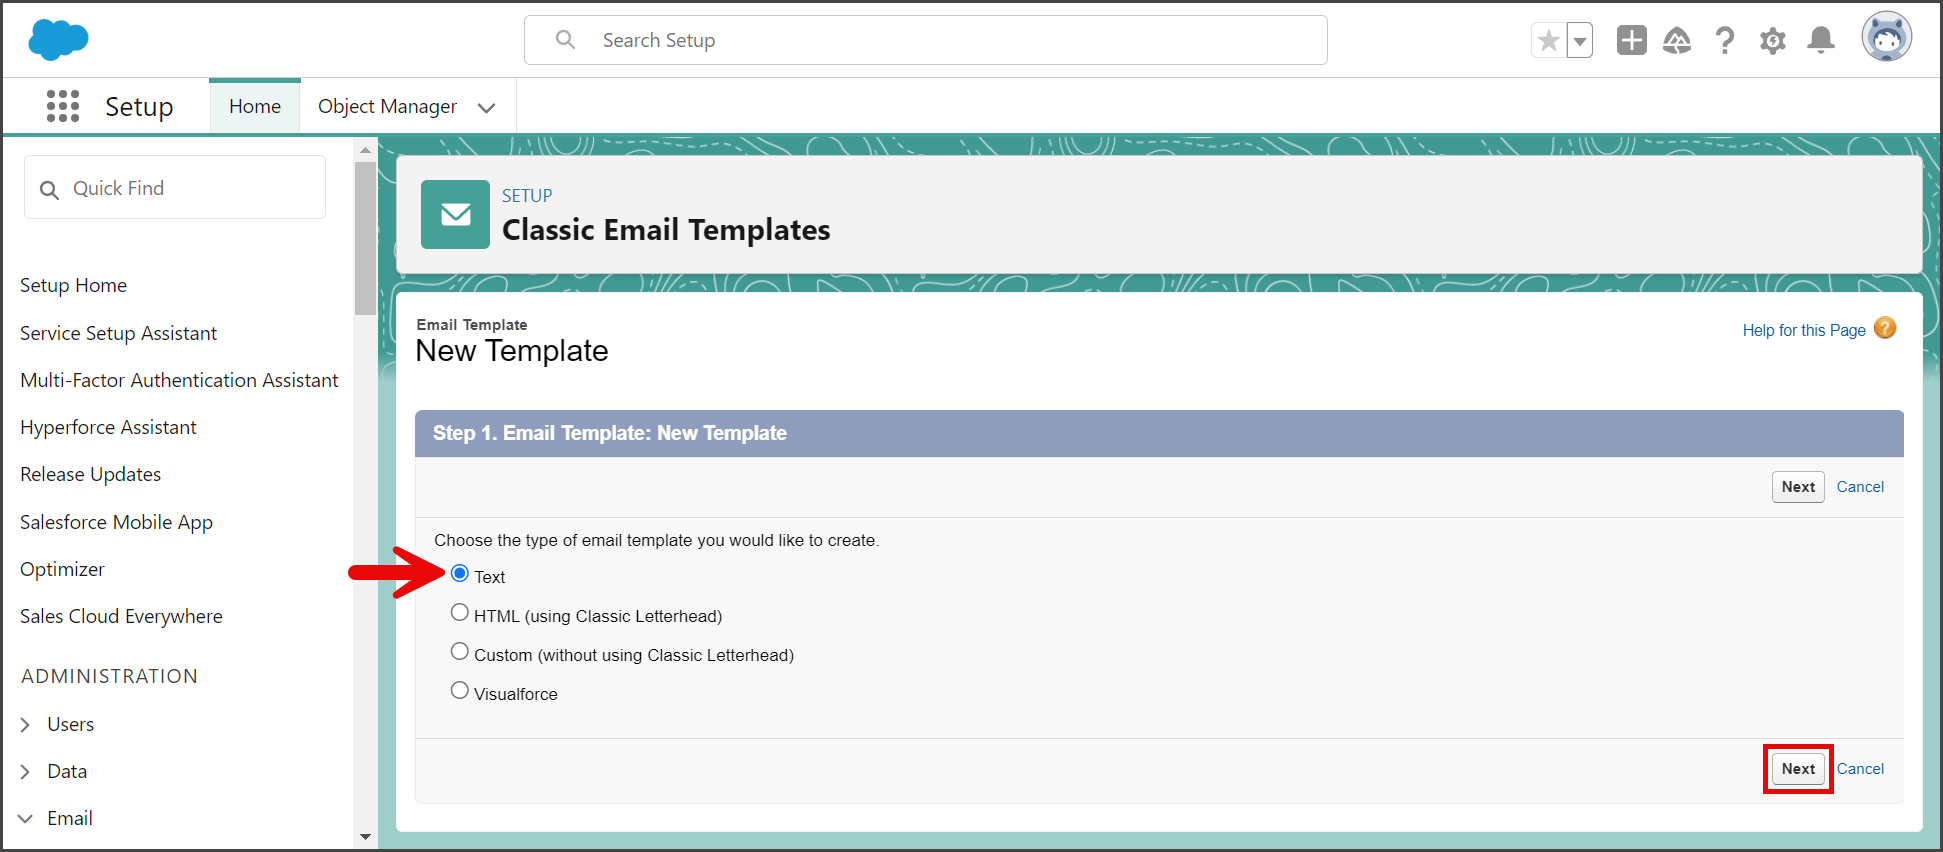
- From the New Template form.
- Select the Text template type.
- Click Next.

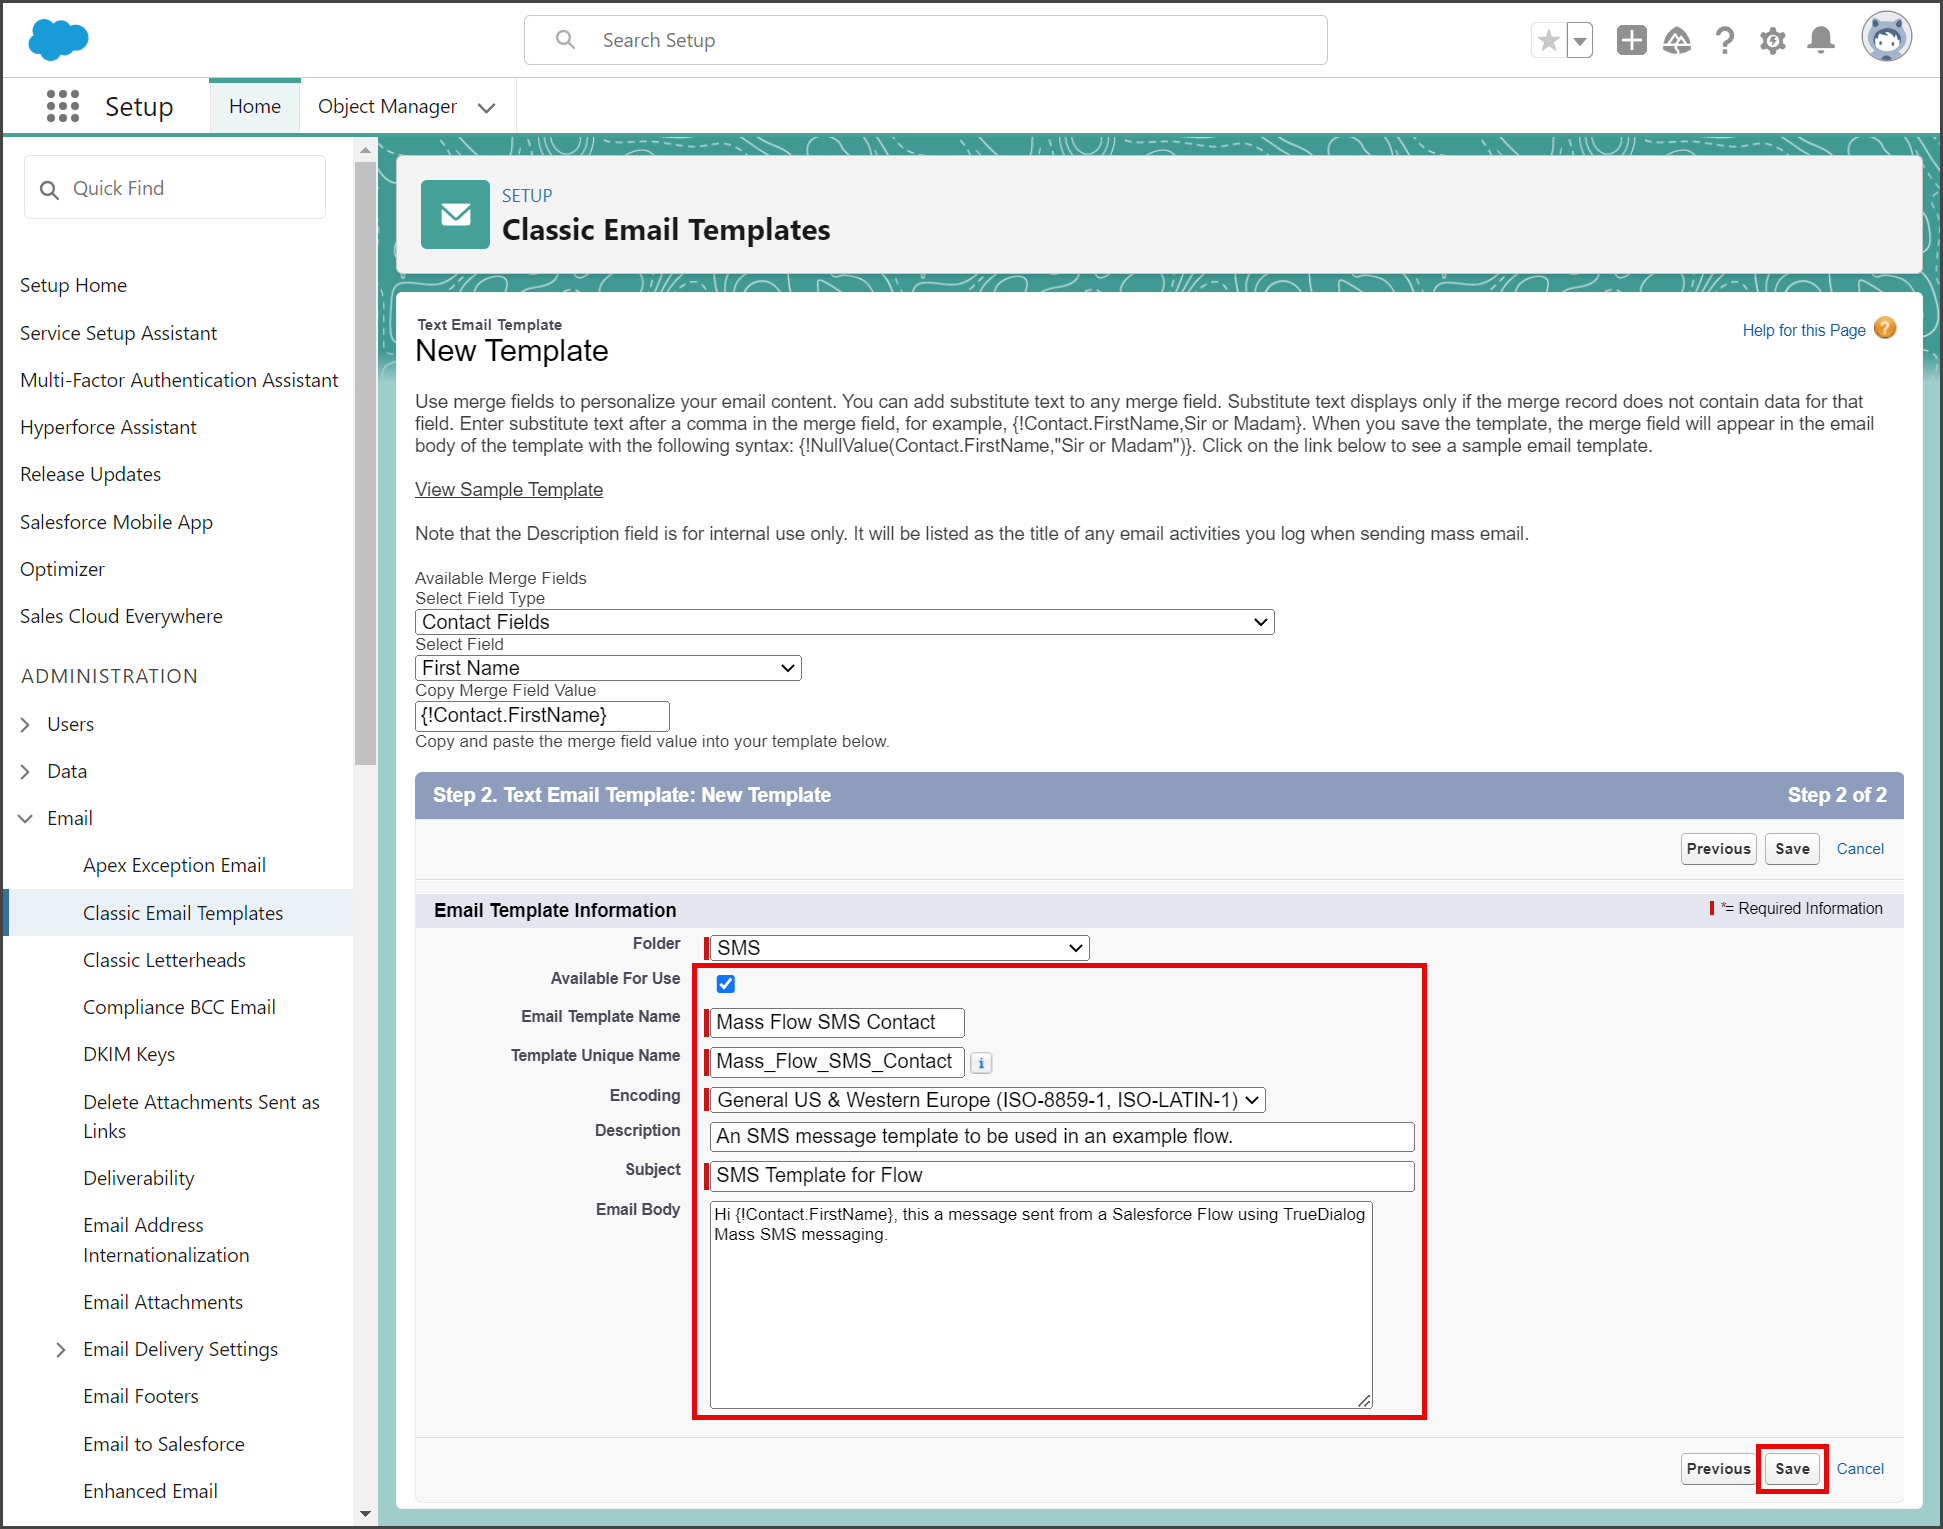
- Check Available For Use.
- Enter the template name in the Email Template Name textbox.
- Click the Template Unique Name textbox to auto-populate it with the Email Template Name with spaces replaced by underscores.
- (Optional) Enter a description of the template in the Description textbox.
- Enter any text in the Subject textbox.
- Enter your SMS message in the Email Body textbox.
- Click Save.

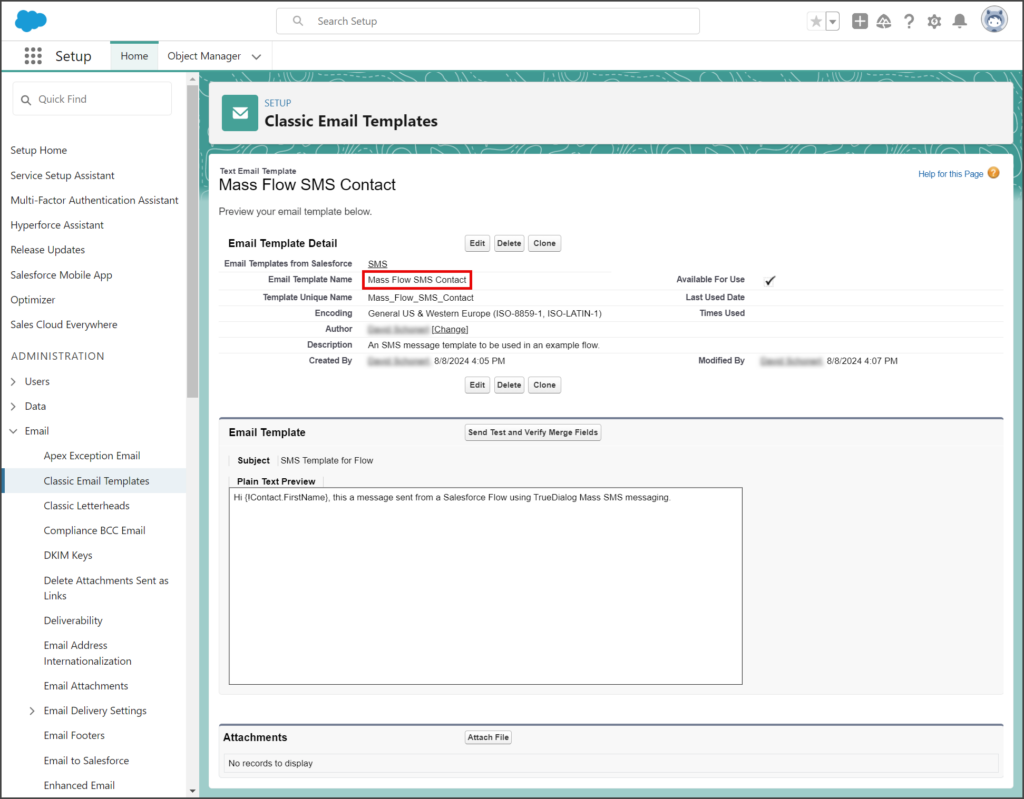
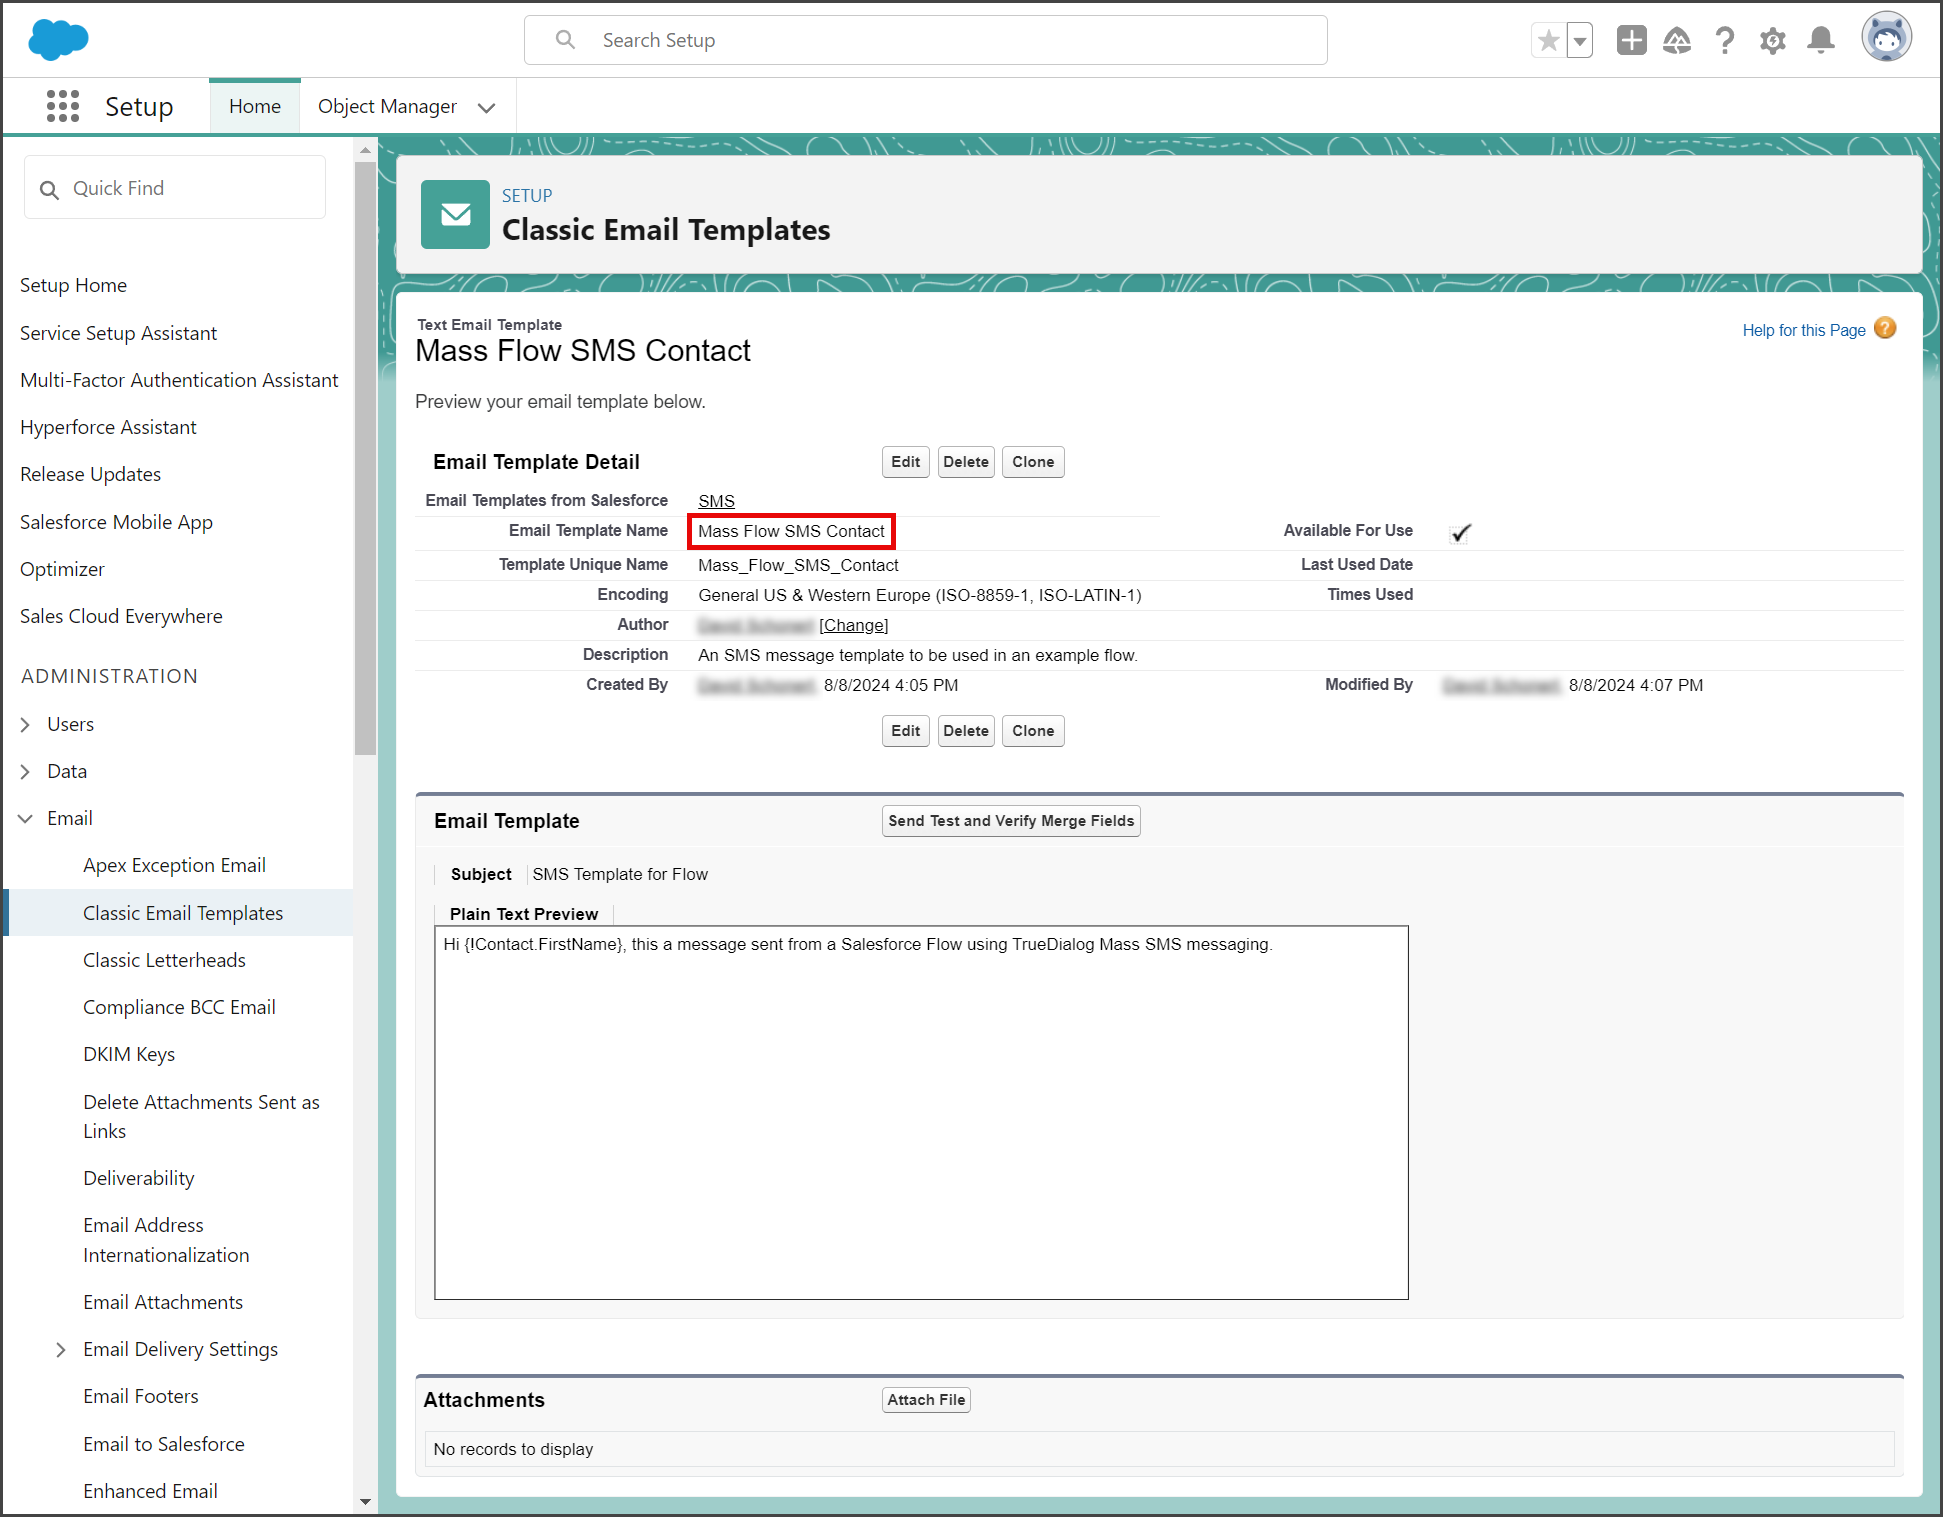
- Copy the Email Template Name; this name specifies which template to use in the Mass SMS From Flow action.
Create Flow
While there are many ways to create a flow using the TrueDialog Mass SMS From Flow action, this example will show you how to send the message to a list of records at a scheduled time.
New Flow
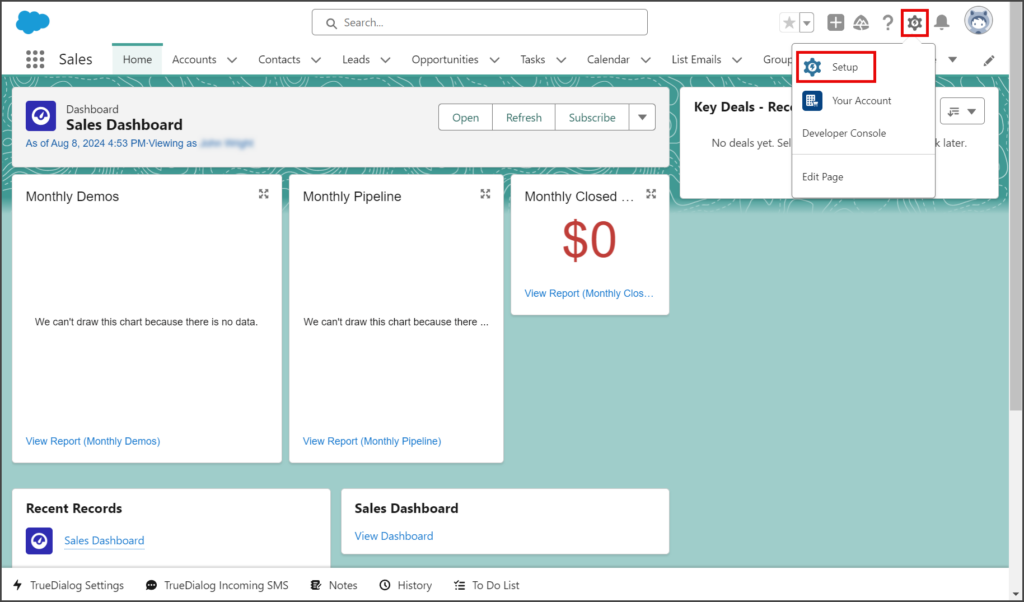
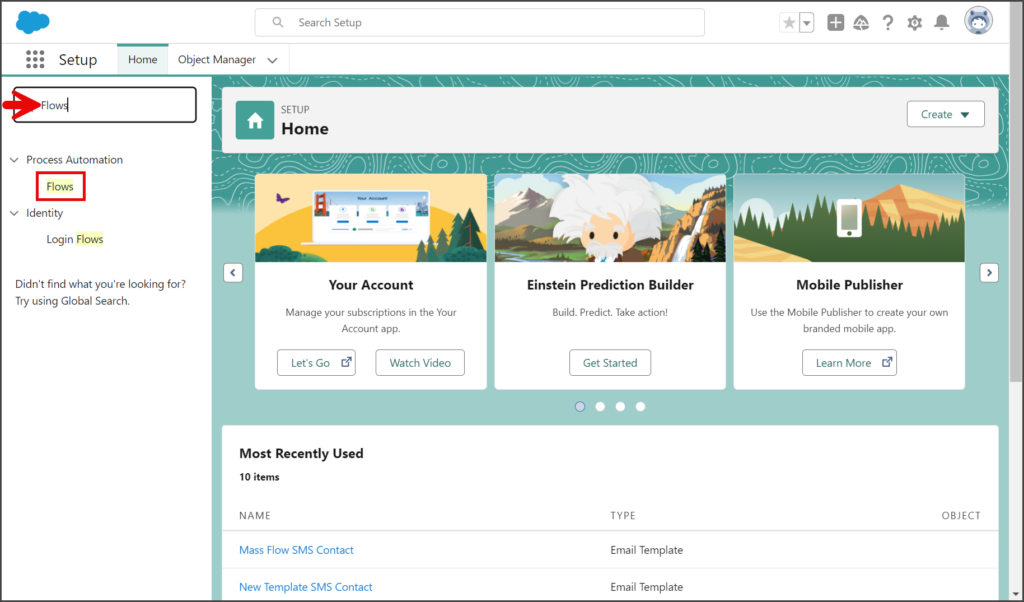
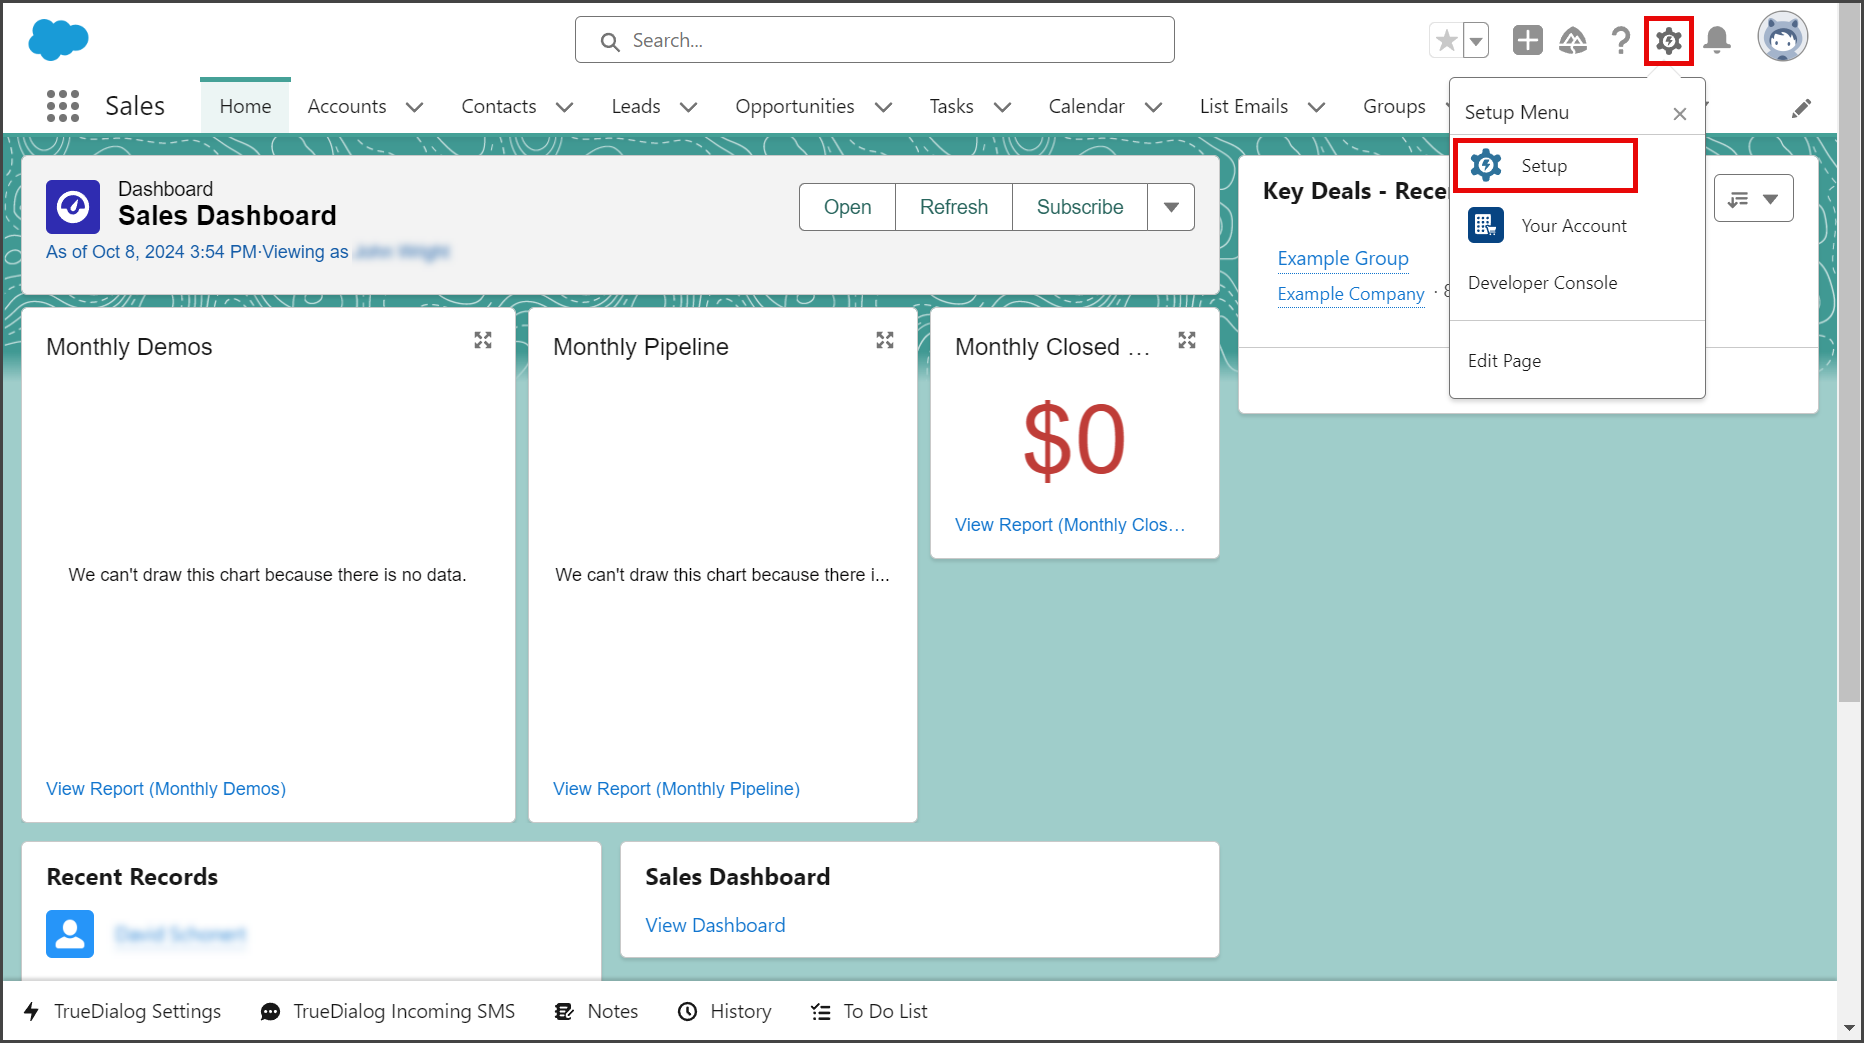
- Click the Settings Gear icon to open the settings menu.
- Click Setup.
- Enter flows in the search box.
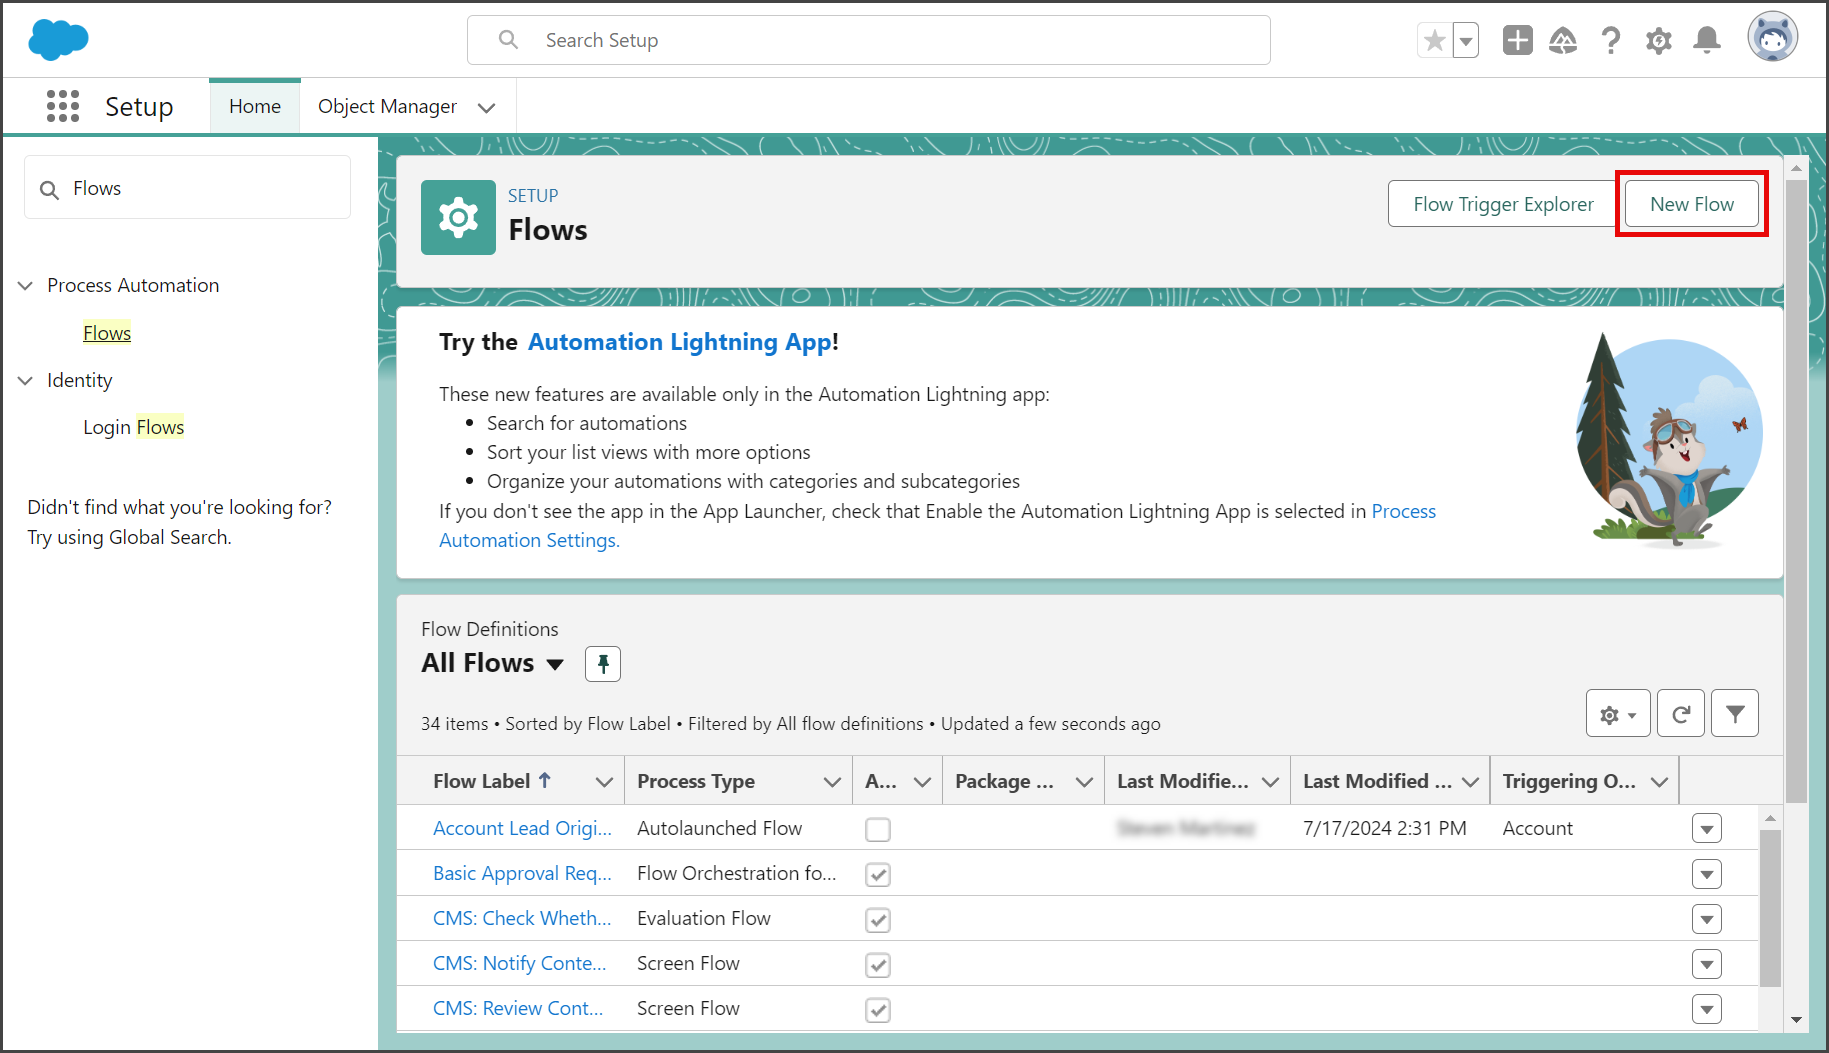
- Click Flows under the Process Automation section.
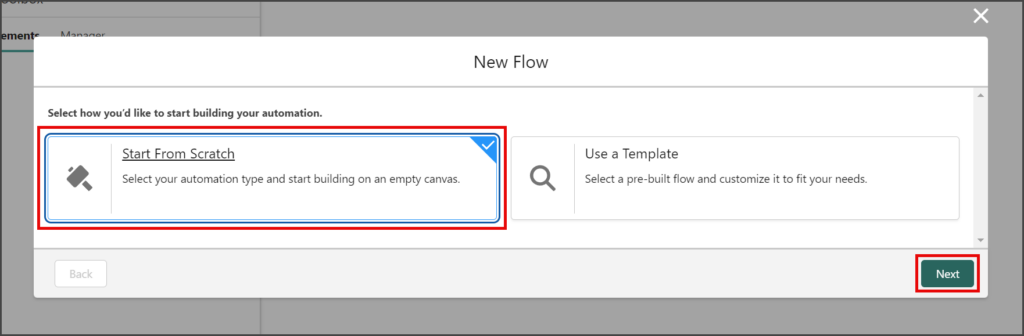
- Click New Flow.

- Select Start From Scratch.
- Click Next.
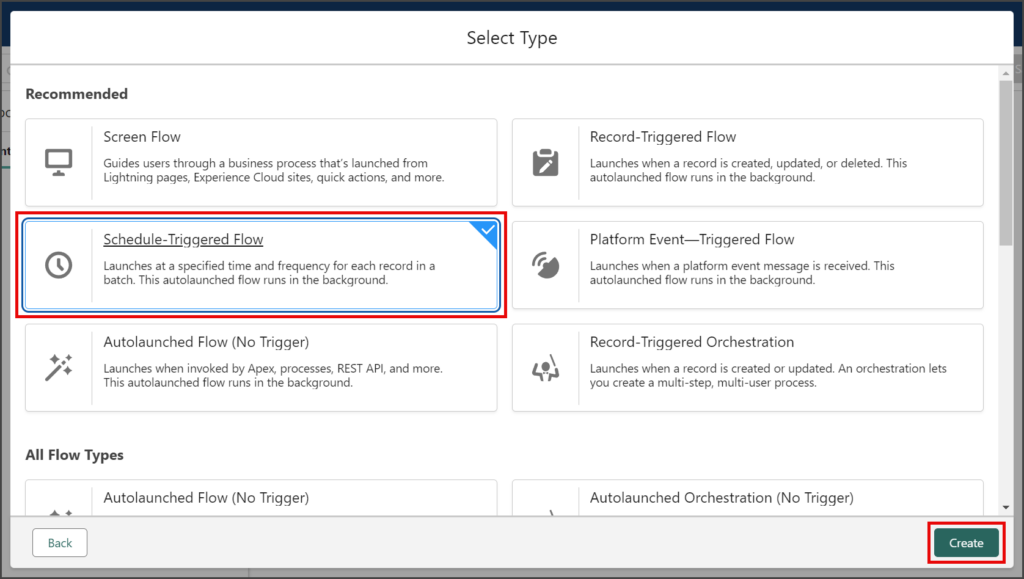
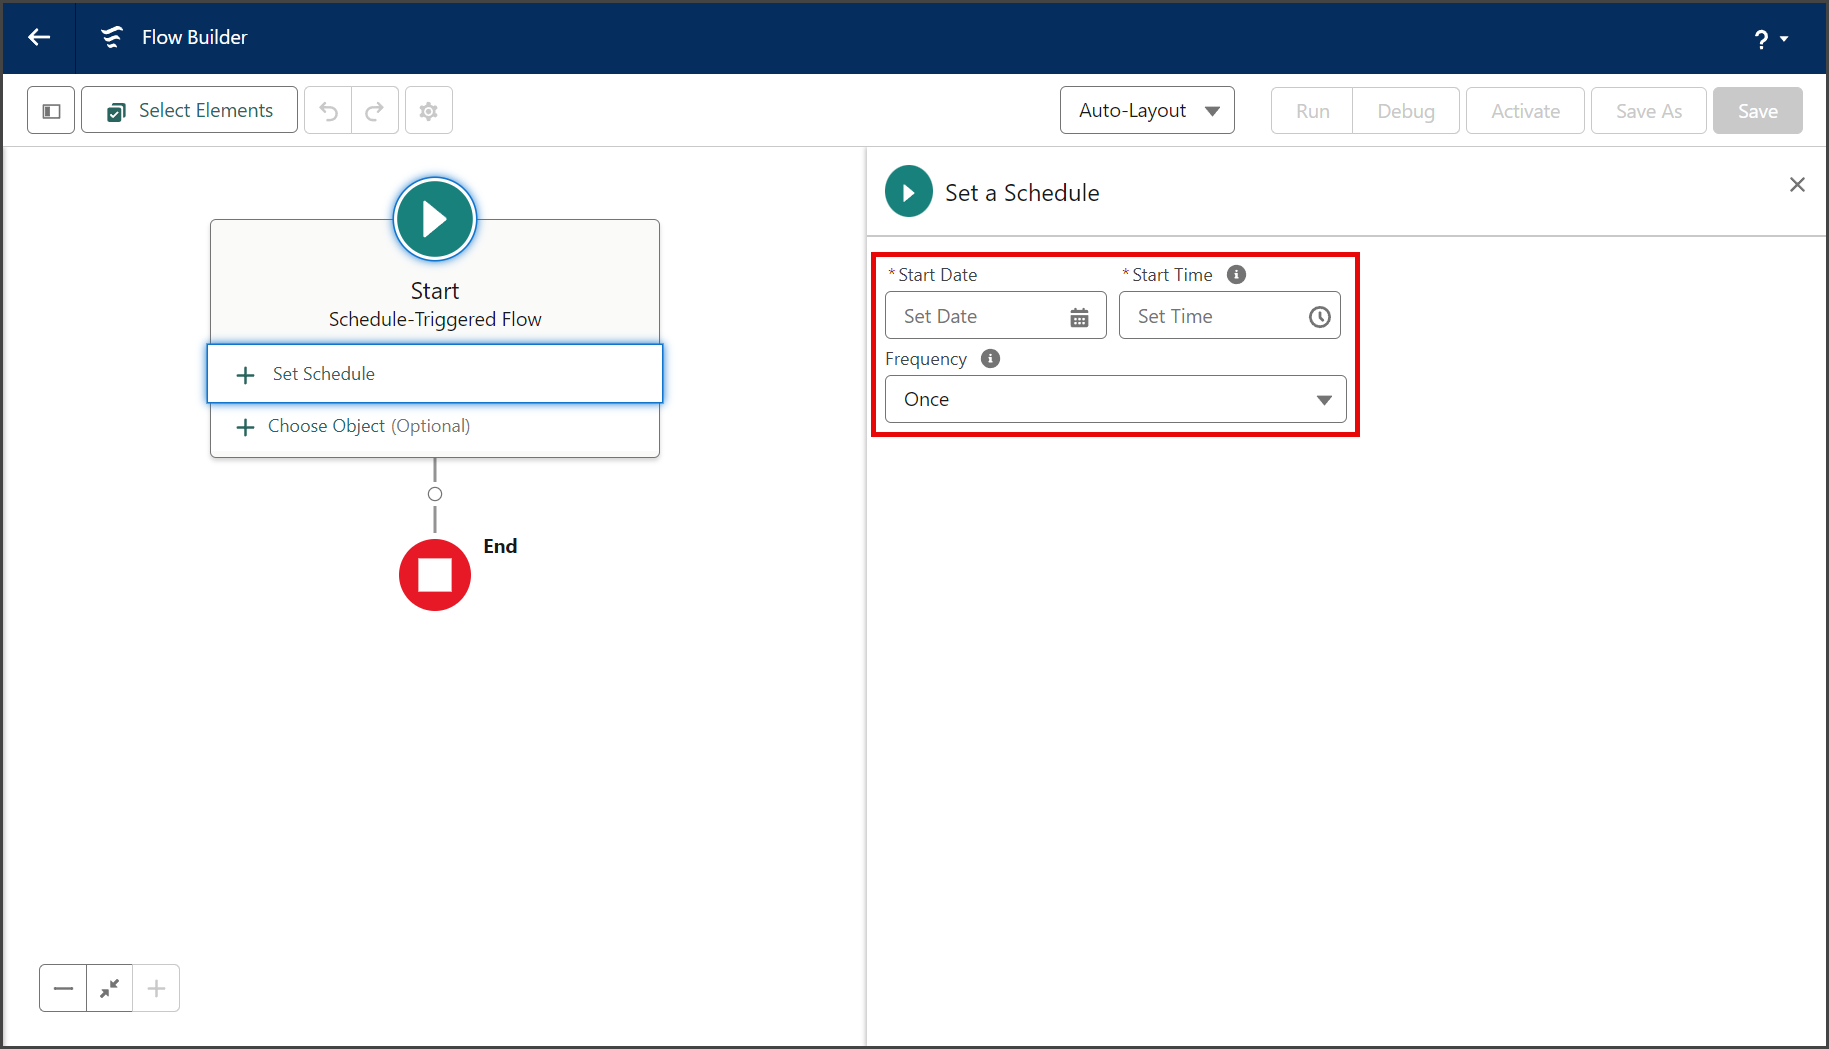
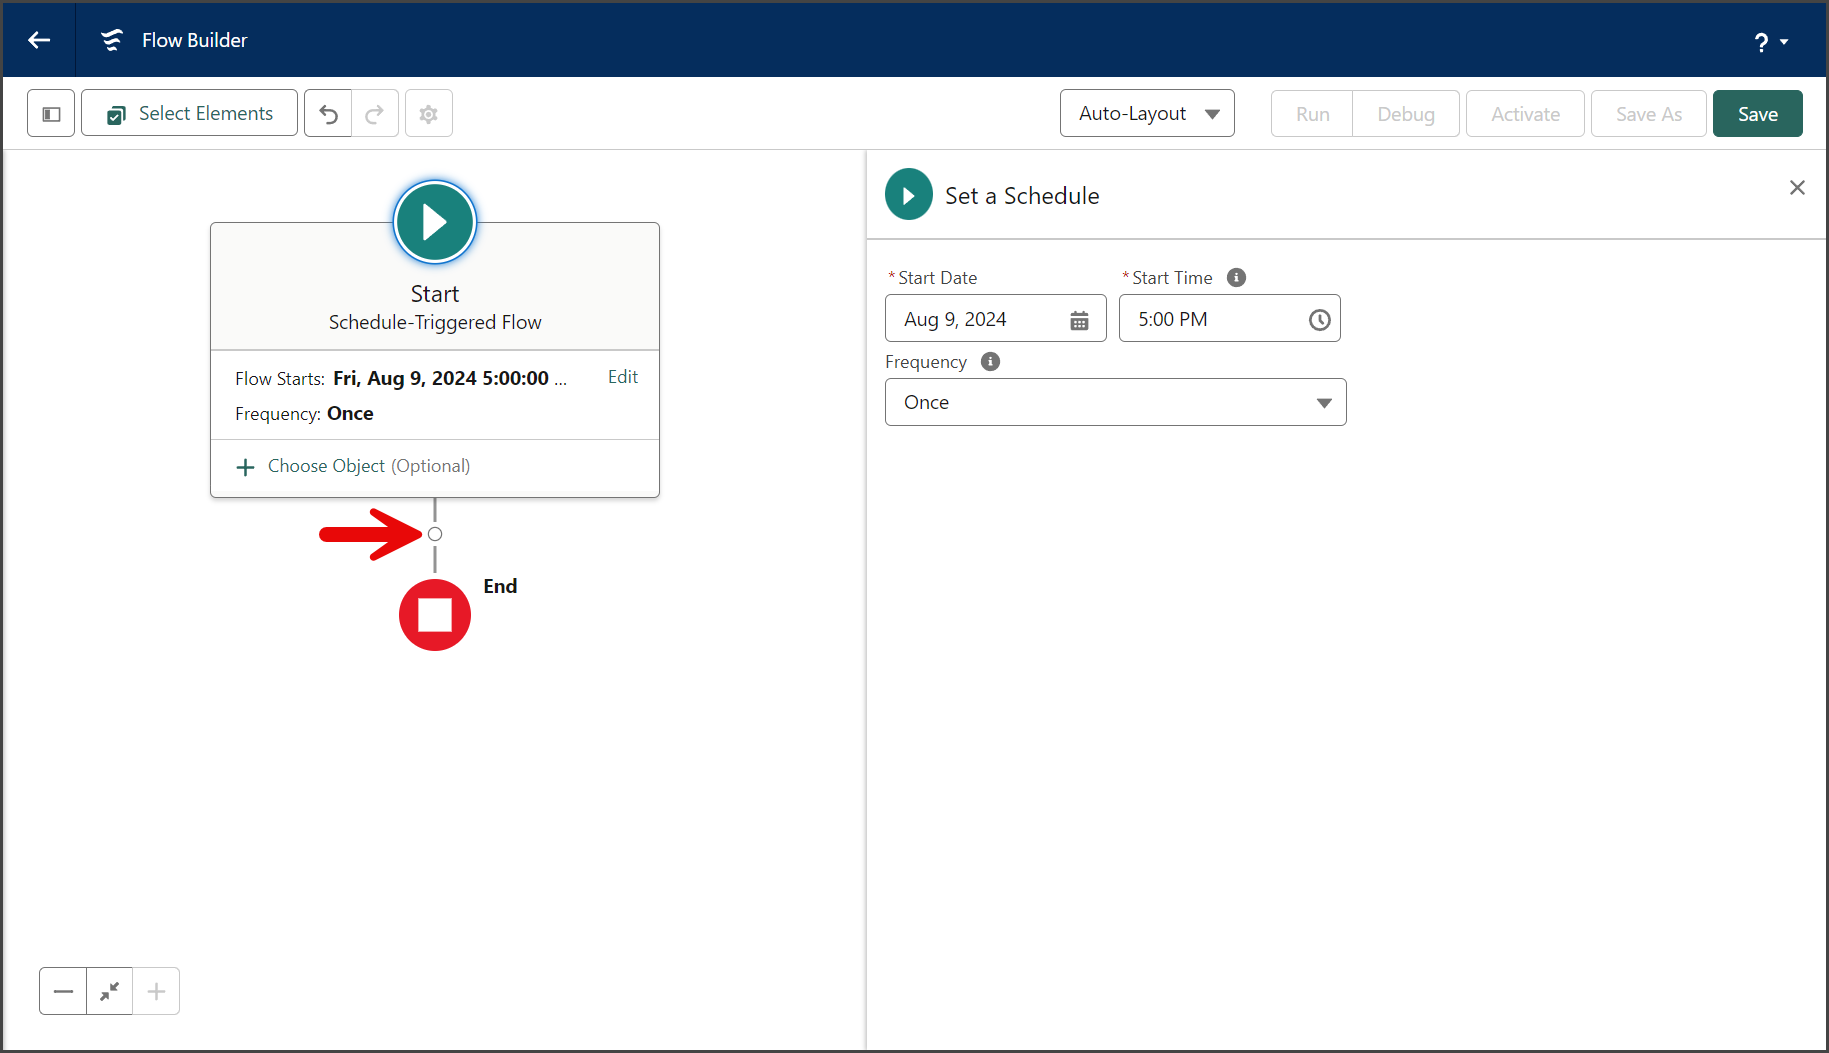
- Select Schedule-Triggered Flow.
- Click Create.
- Configure your schedule.


Build Contact List
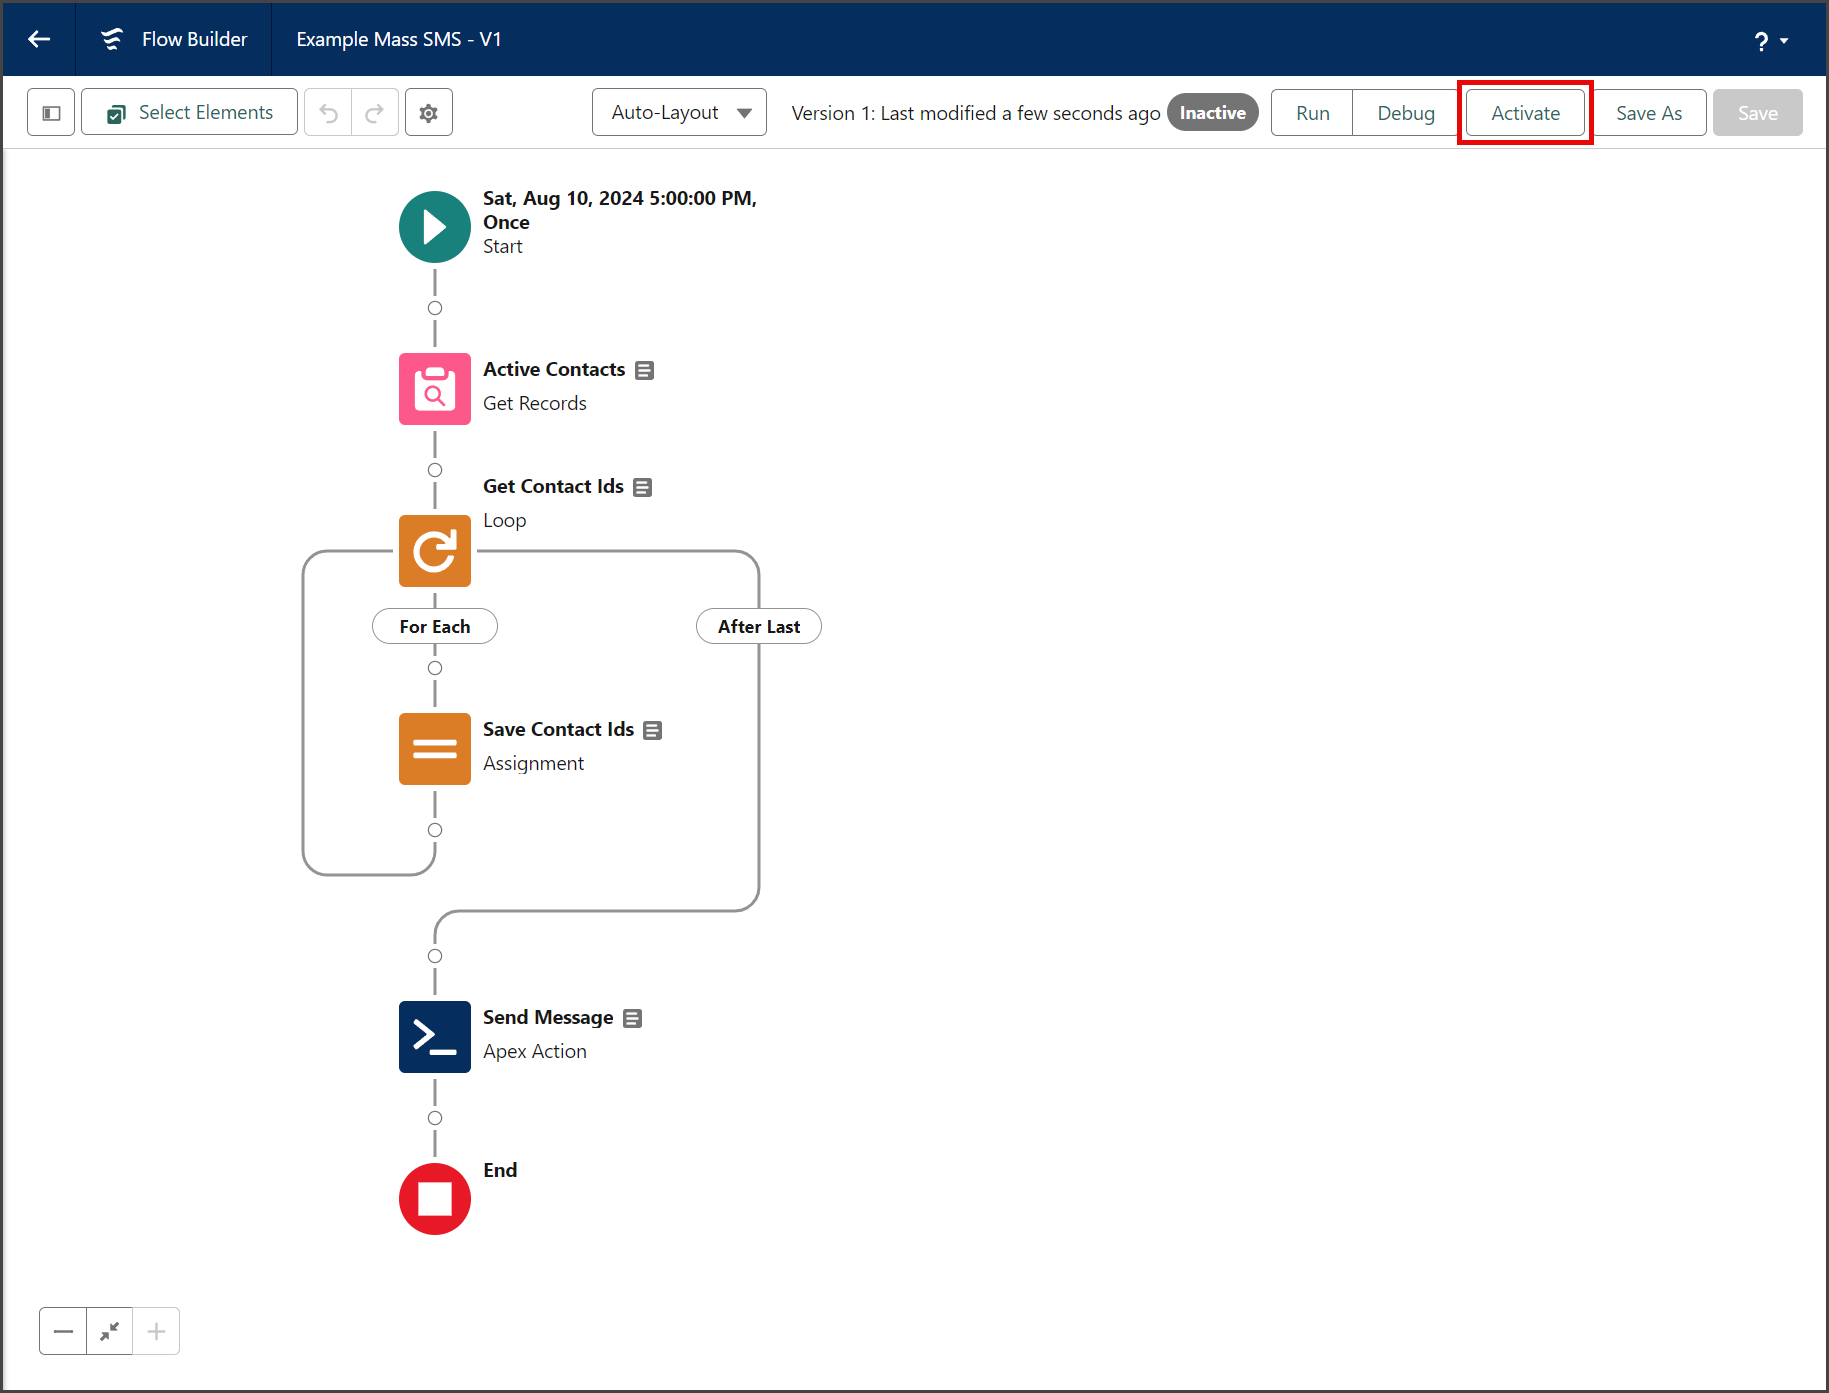
To use the Mass SMS From Flow Apex action, you must create a list of records to send the message. This list must be created using logic in your flow. The instructions below will help you create a basic record list that includes all Contact records not set to SMS Opt Out. You can customize the list further by adding other filters and logic, but that’s beyond the scope of this article. The following screenshot shows the completed logic you will create.

Get Records Element
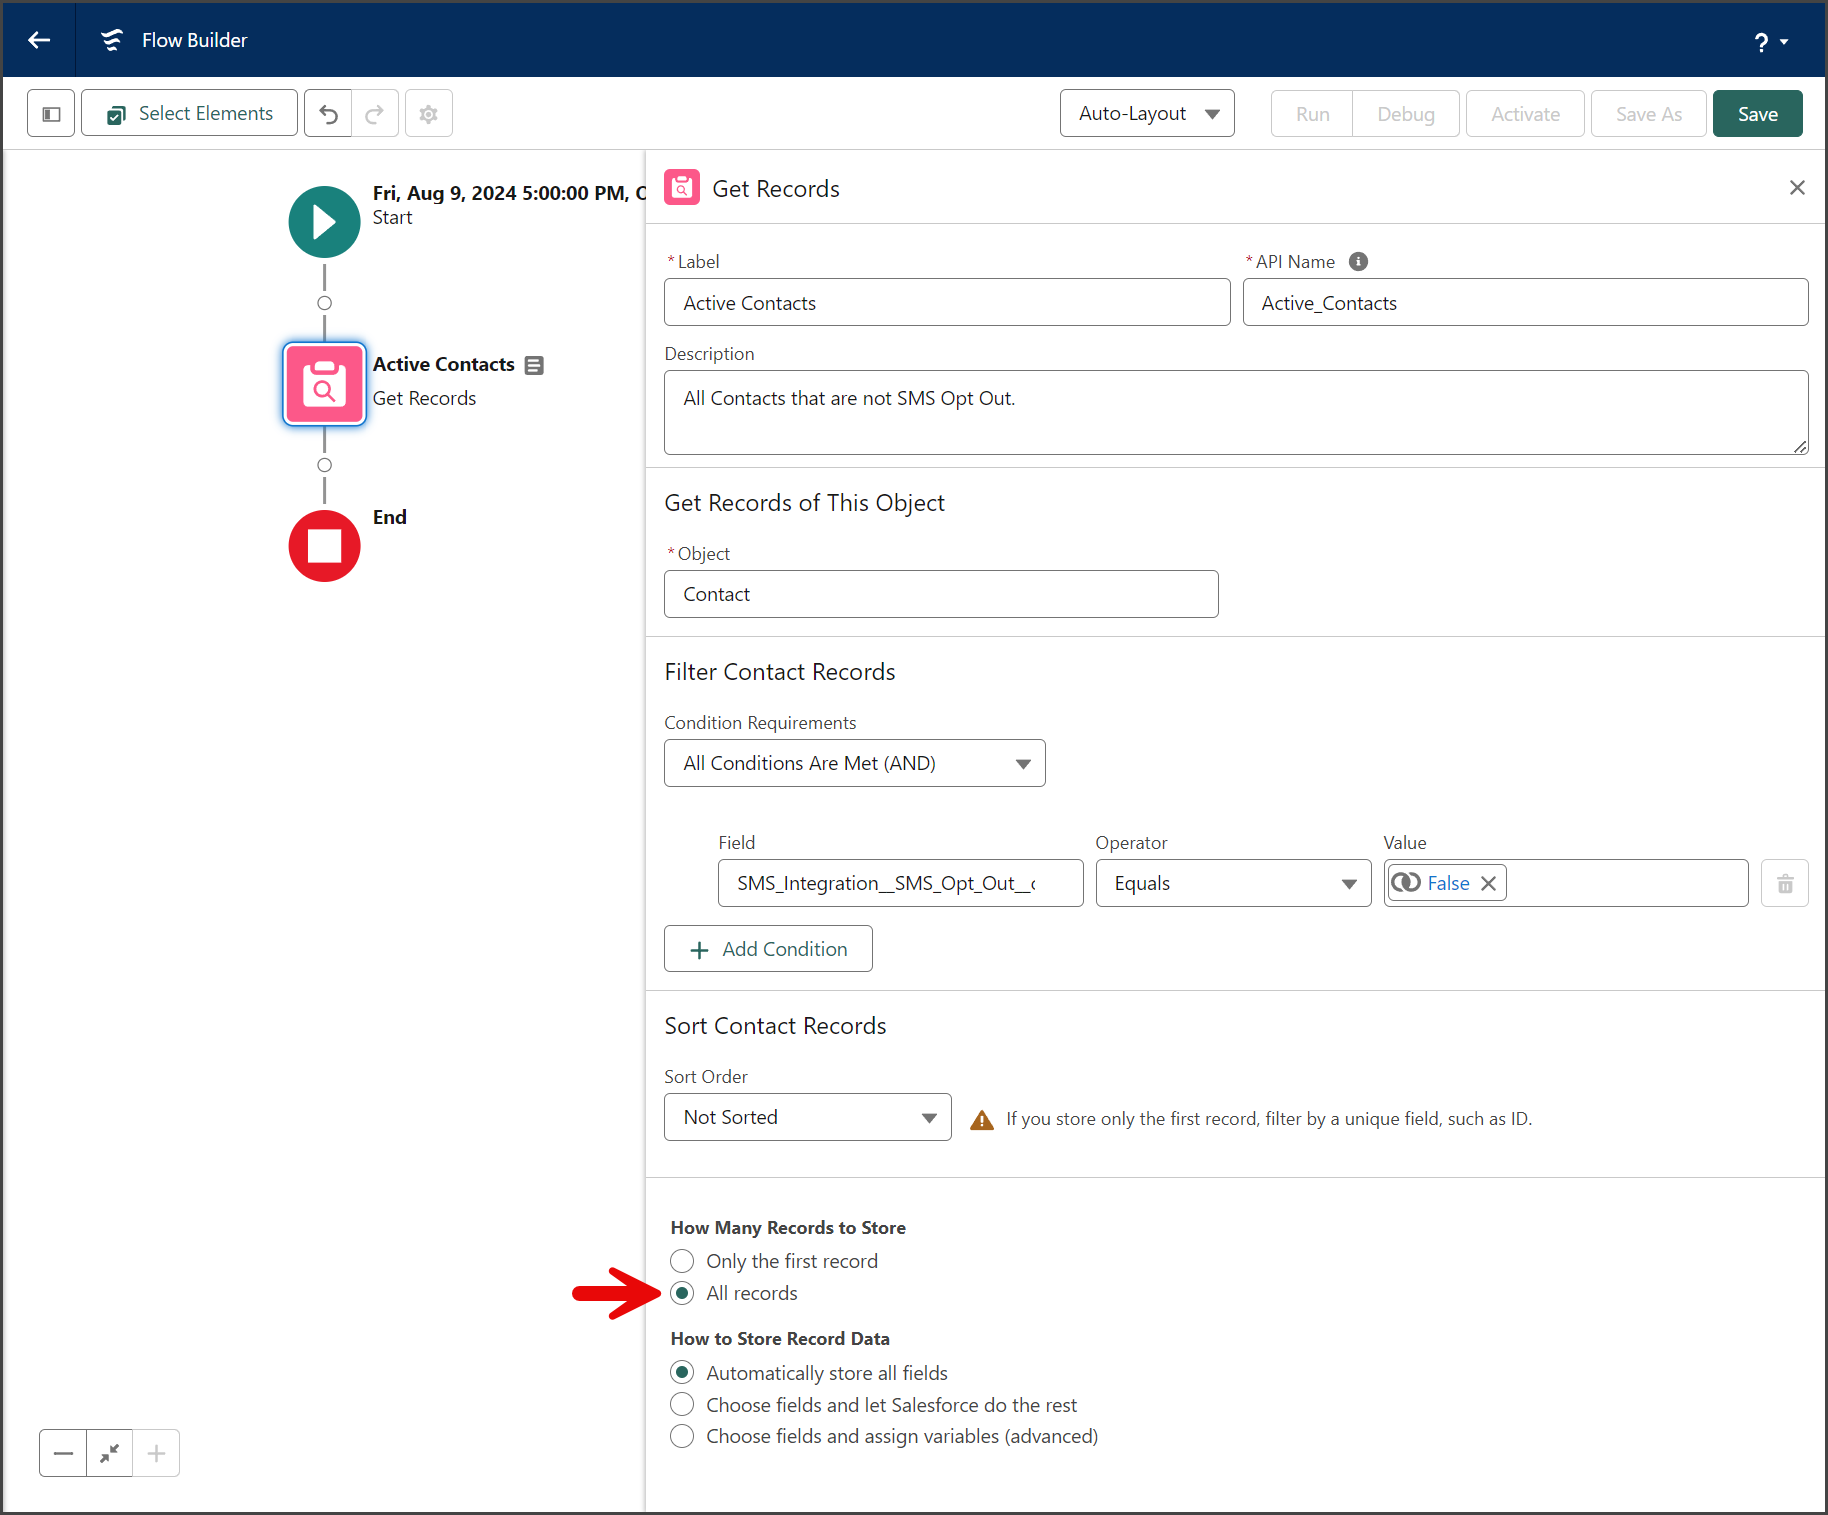
You will use the Get Records element to get a list of all Contact records and filter it to include only records with the SMS Opt Out field set to false.
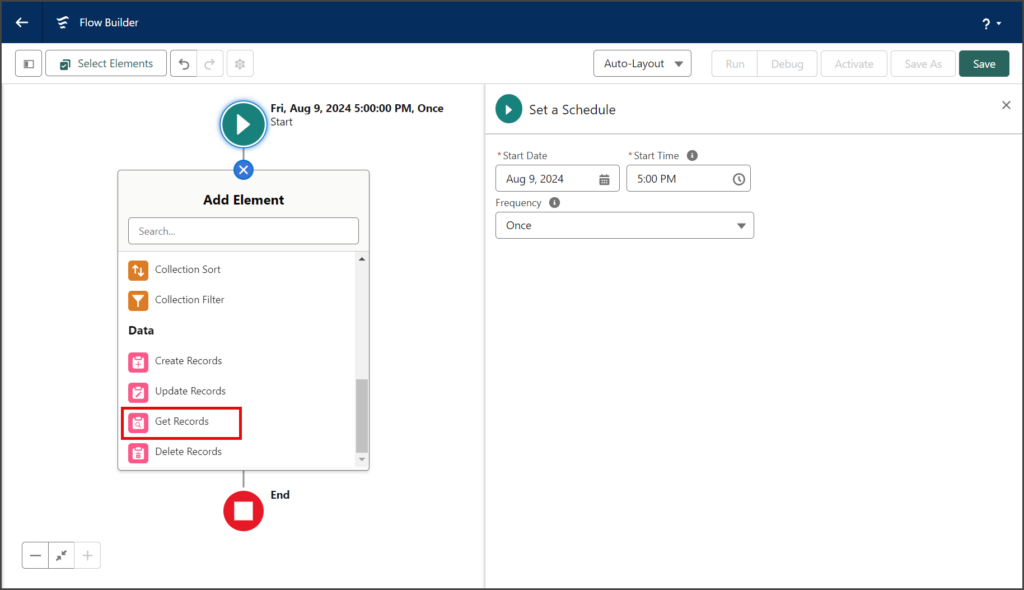
- Click the circle of the connector between the Start and End elements to add a new Element.

- Click the Get Records element in the Data section of the Add Element menu.
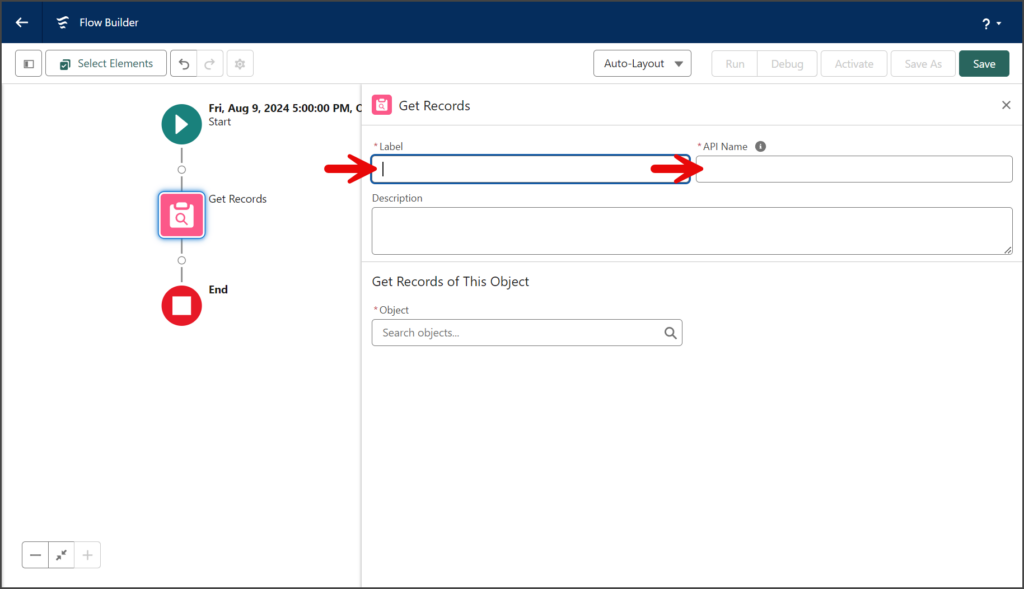
- Enter a name for the element in the Label textbox.
- Click the API Name textbox to auto-populate it with the Label with spaces replaced by underscores.
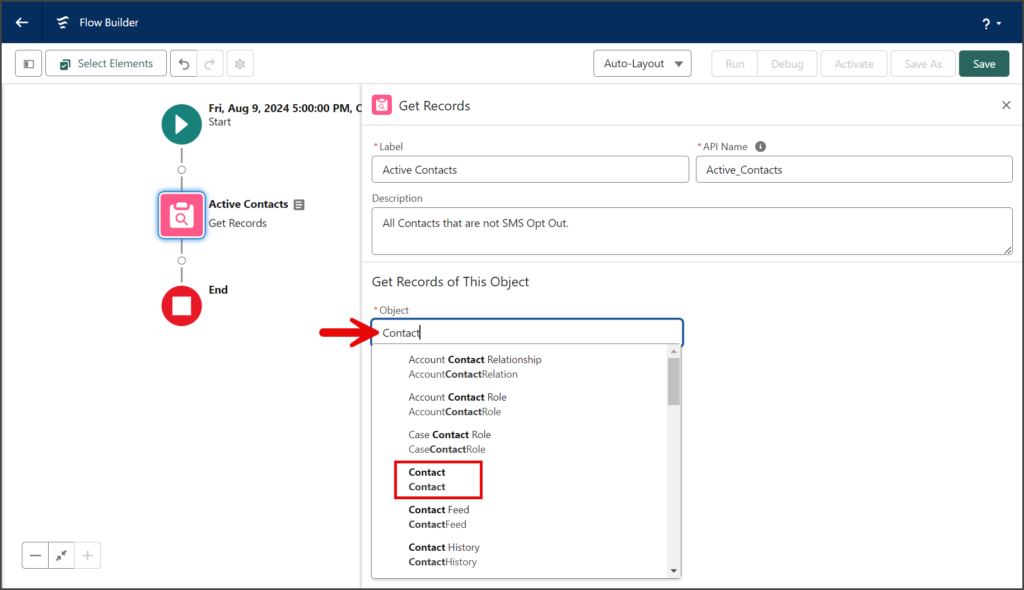
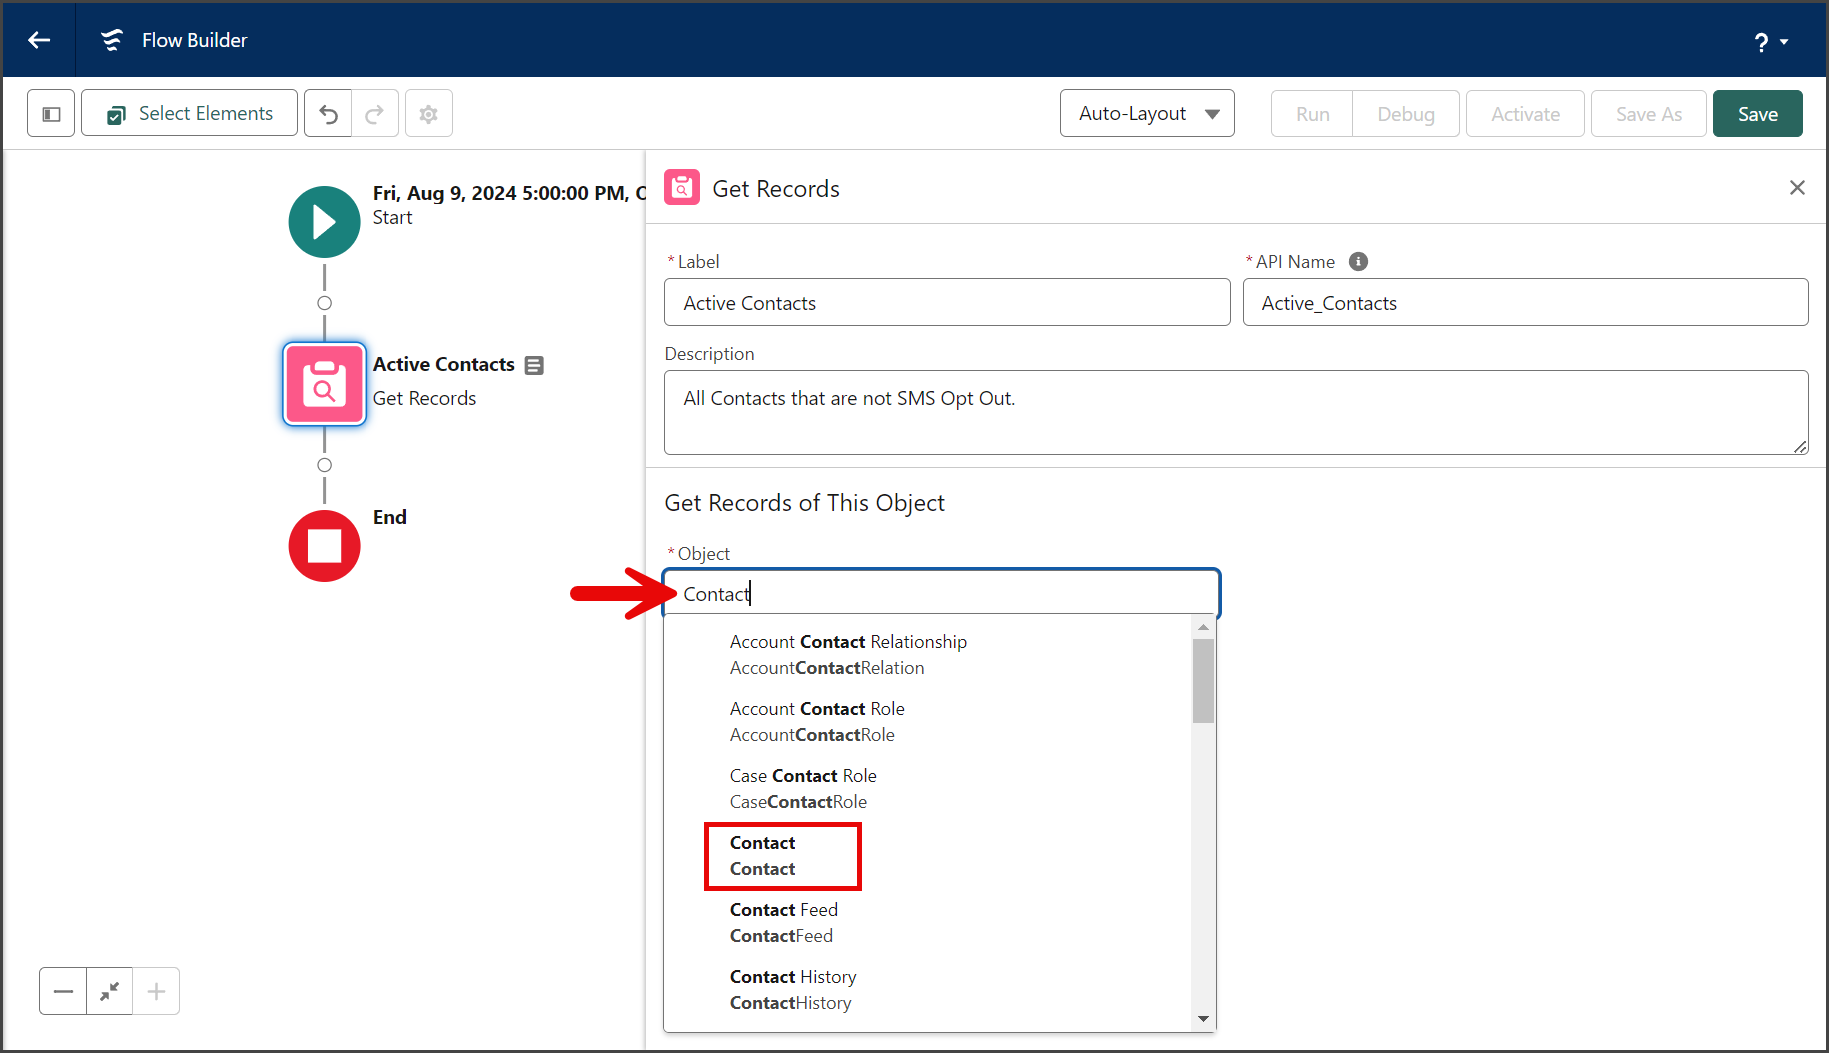
- Enter Contact in the Object textbox.
- Click Contact from the dropdown list.
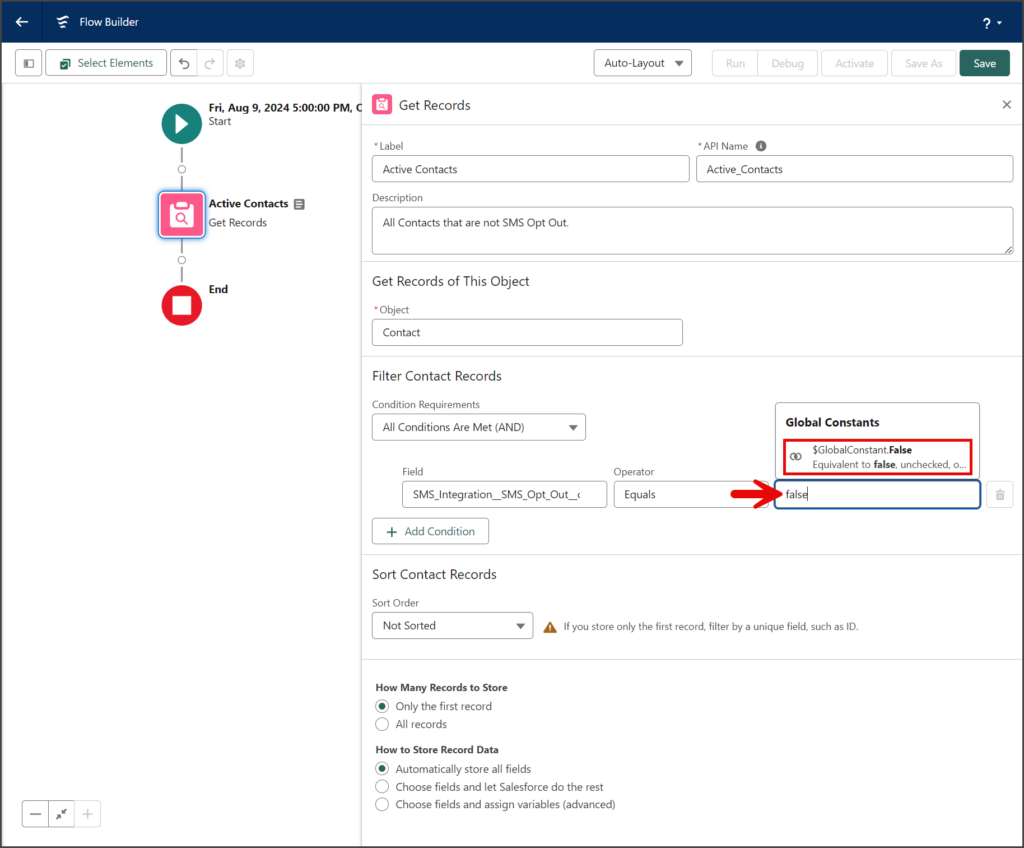
- Create a filter to only include contacts NOT Opted Out of receiving SMS messages.
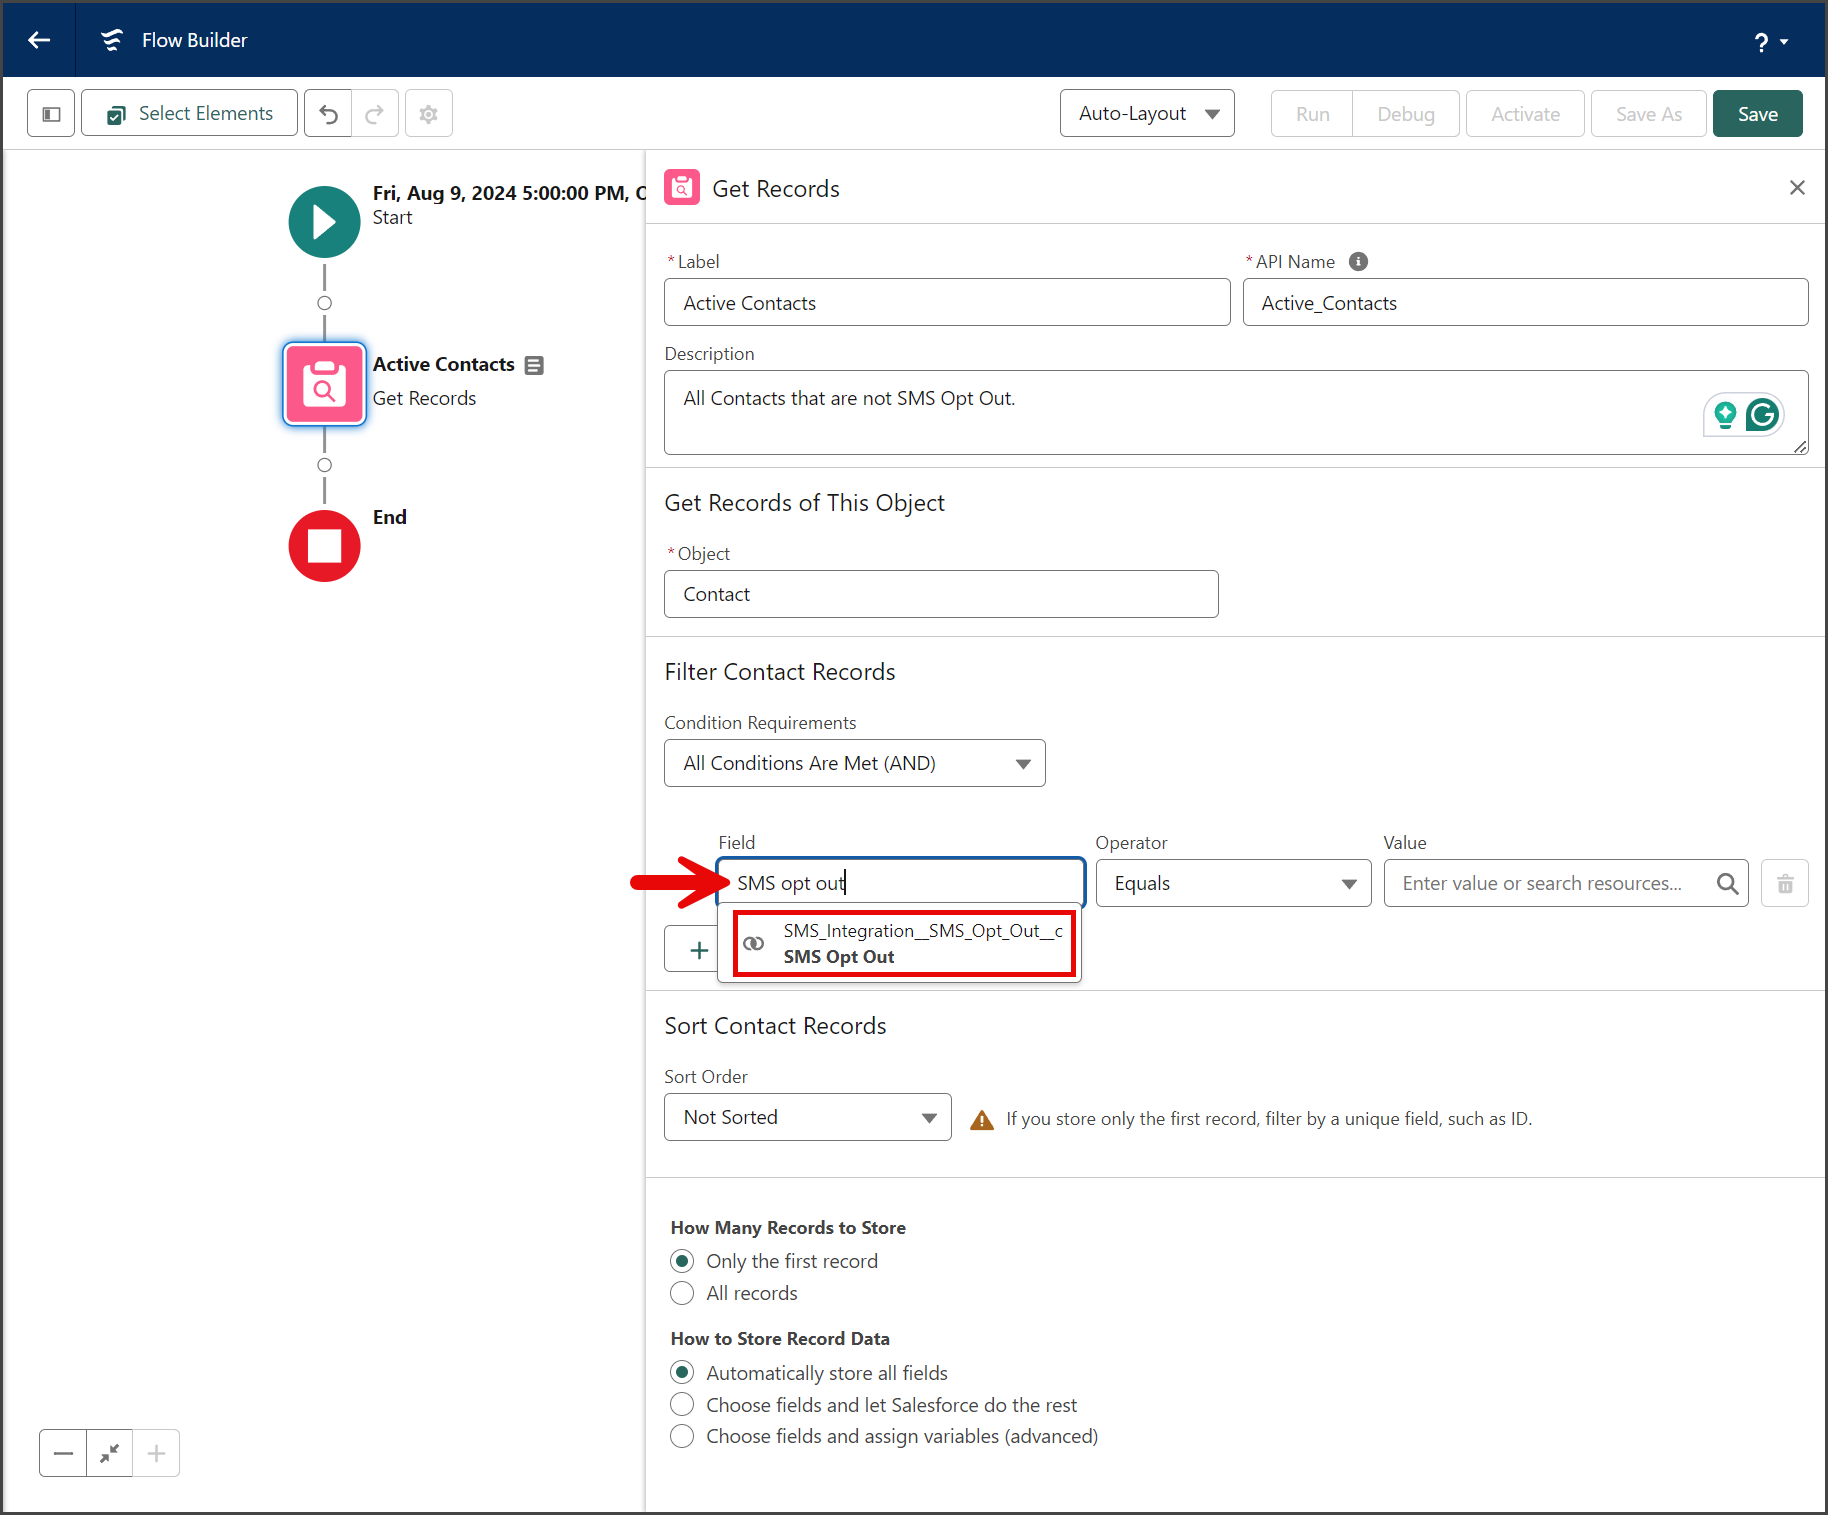
- Enter SMS Opt Out in the Field textbox of the Filter Contact Records section.
- Click the SMS Opt Out field from the list.

- Enter false in the Value textbox.
- Click $GlobalContstant.False from the dropdown list.
- Select All records for the How Many Records to Store question.


Loop Element
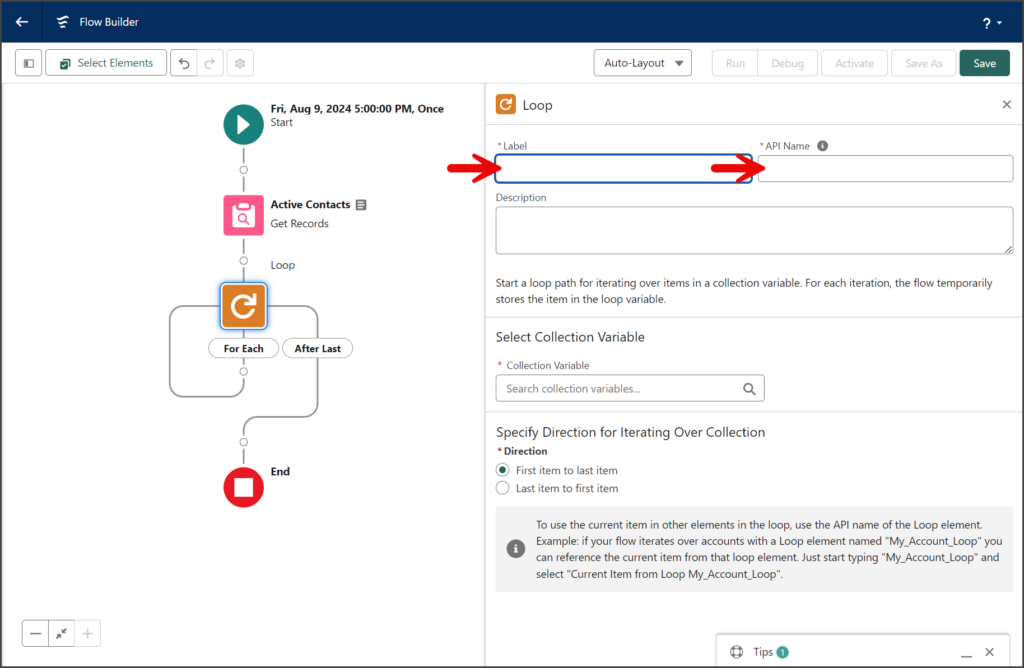
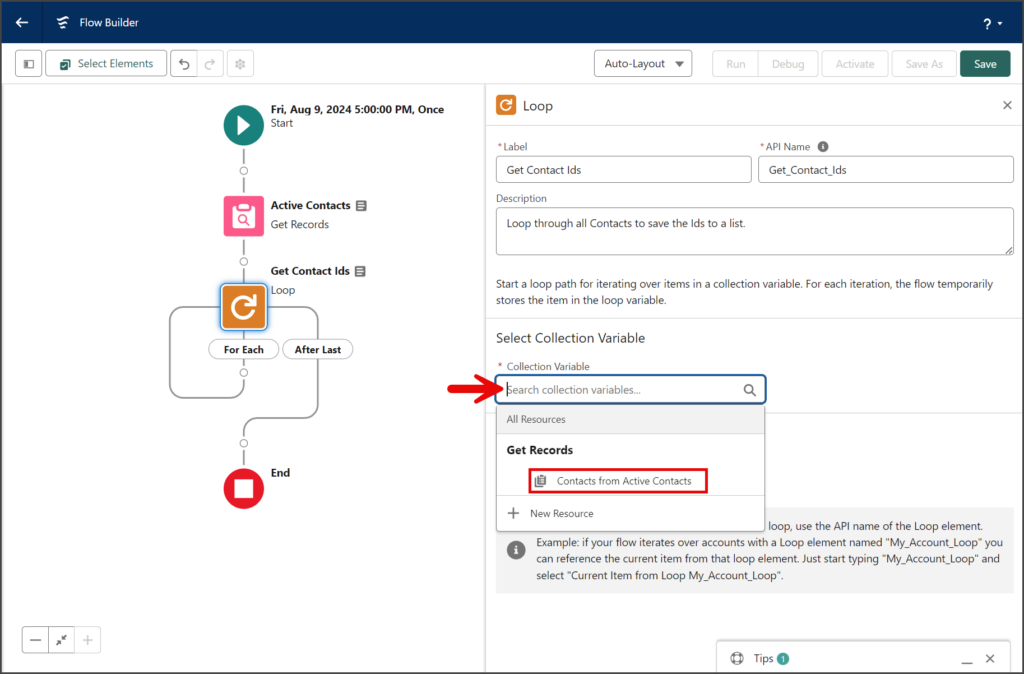
You will use the Loop element to access each record of the list created by the Get Records element above.
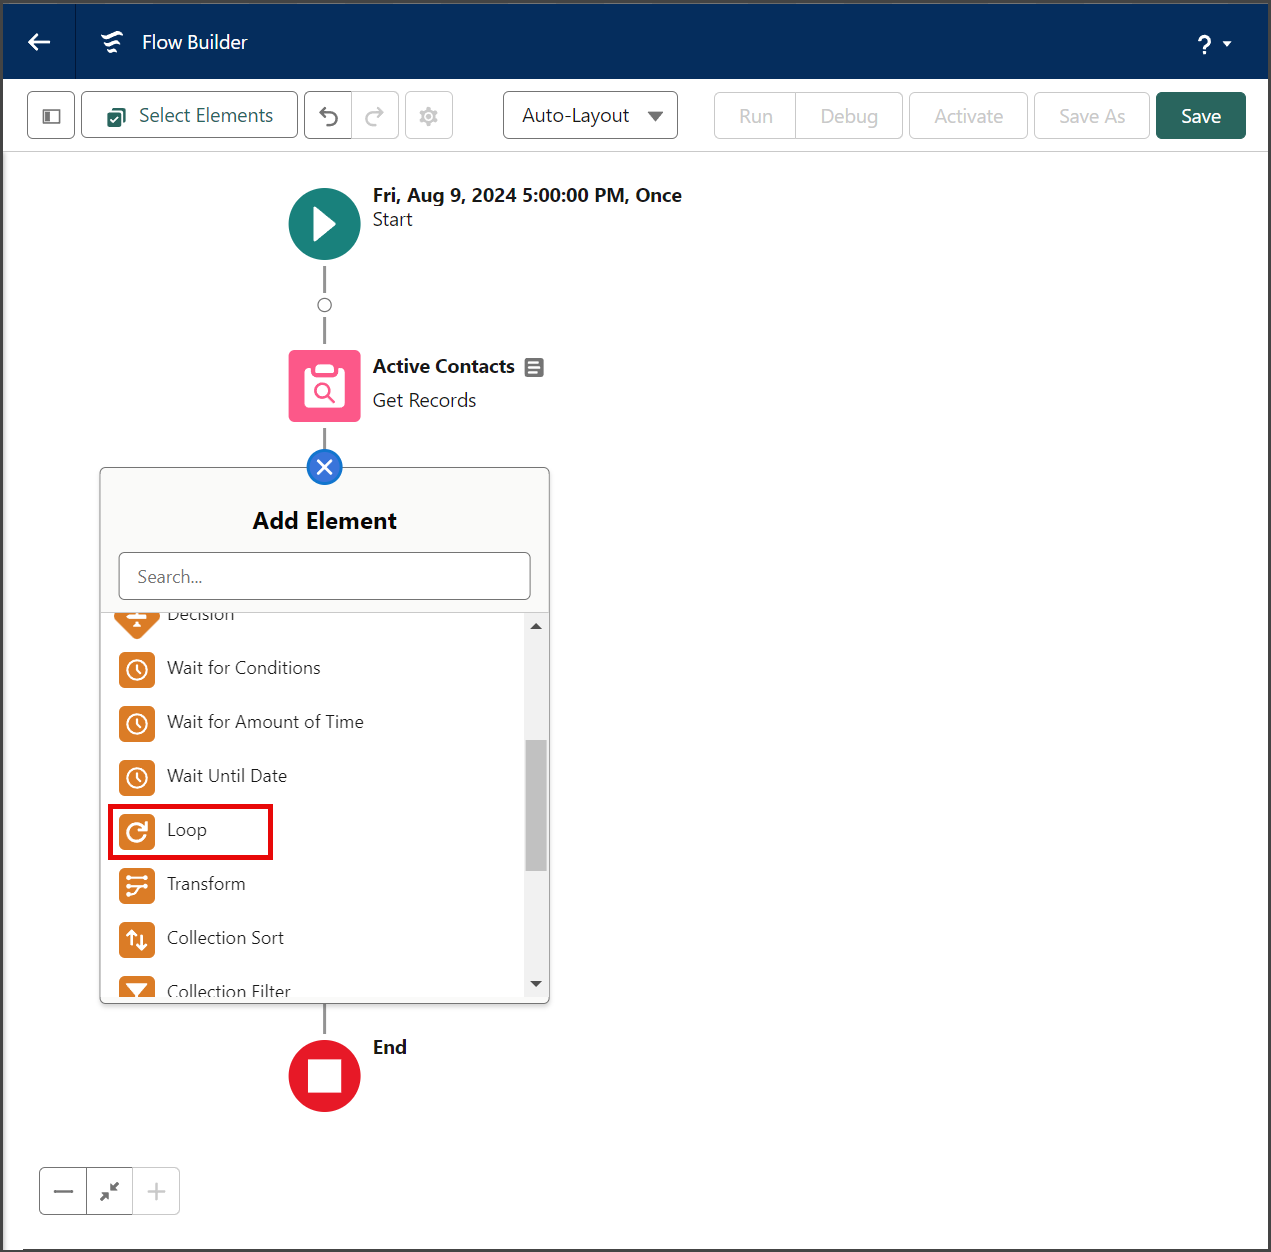
- Click the circle of the connector between the Get Records and End elements to add a new Element.

- Click the Loop element in the Logic section of the Add Element menu.

- Enter a name for the element in the Label textbox.
- Click the API Name textbox to auto-populate it with the Label with spaces replaced by underscores.
- Click the Collection Variable textbox.
- Select the record variable under the Get Records section. In this example, the variable is named Contacts from Active Contacts because the Get Records element gets Contact records and is named Active Contacts.


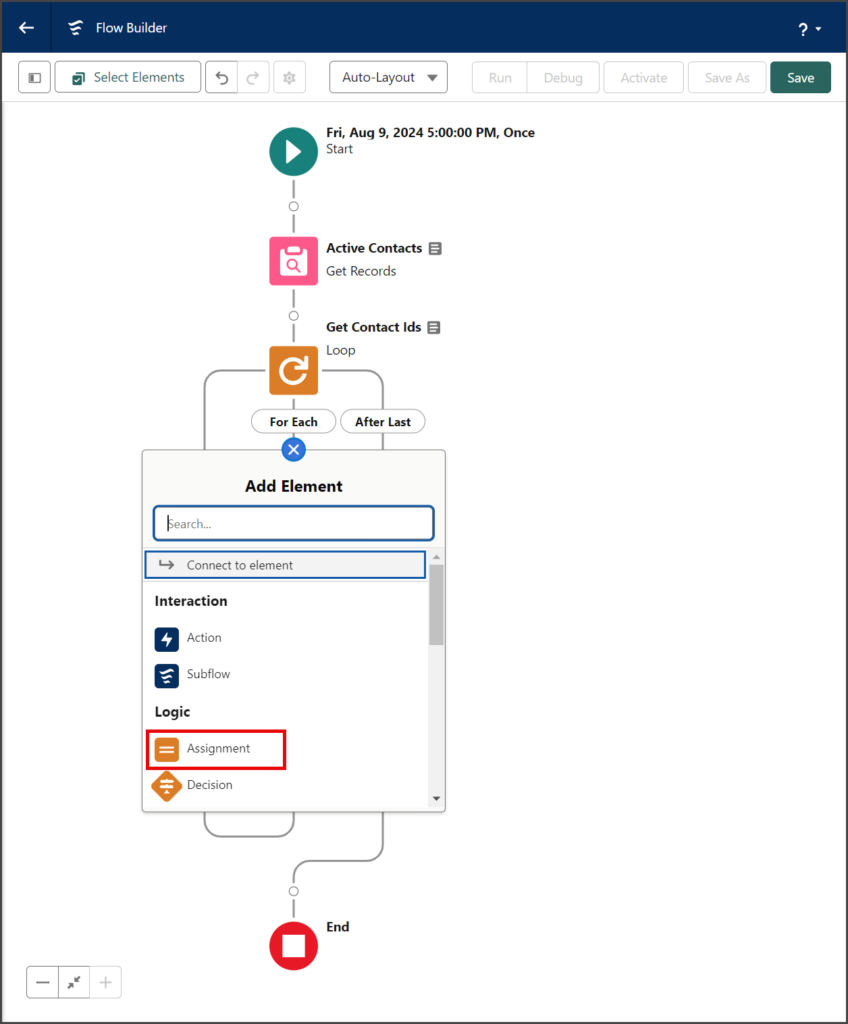
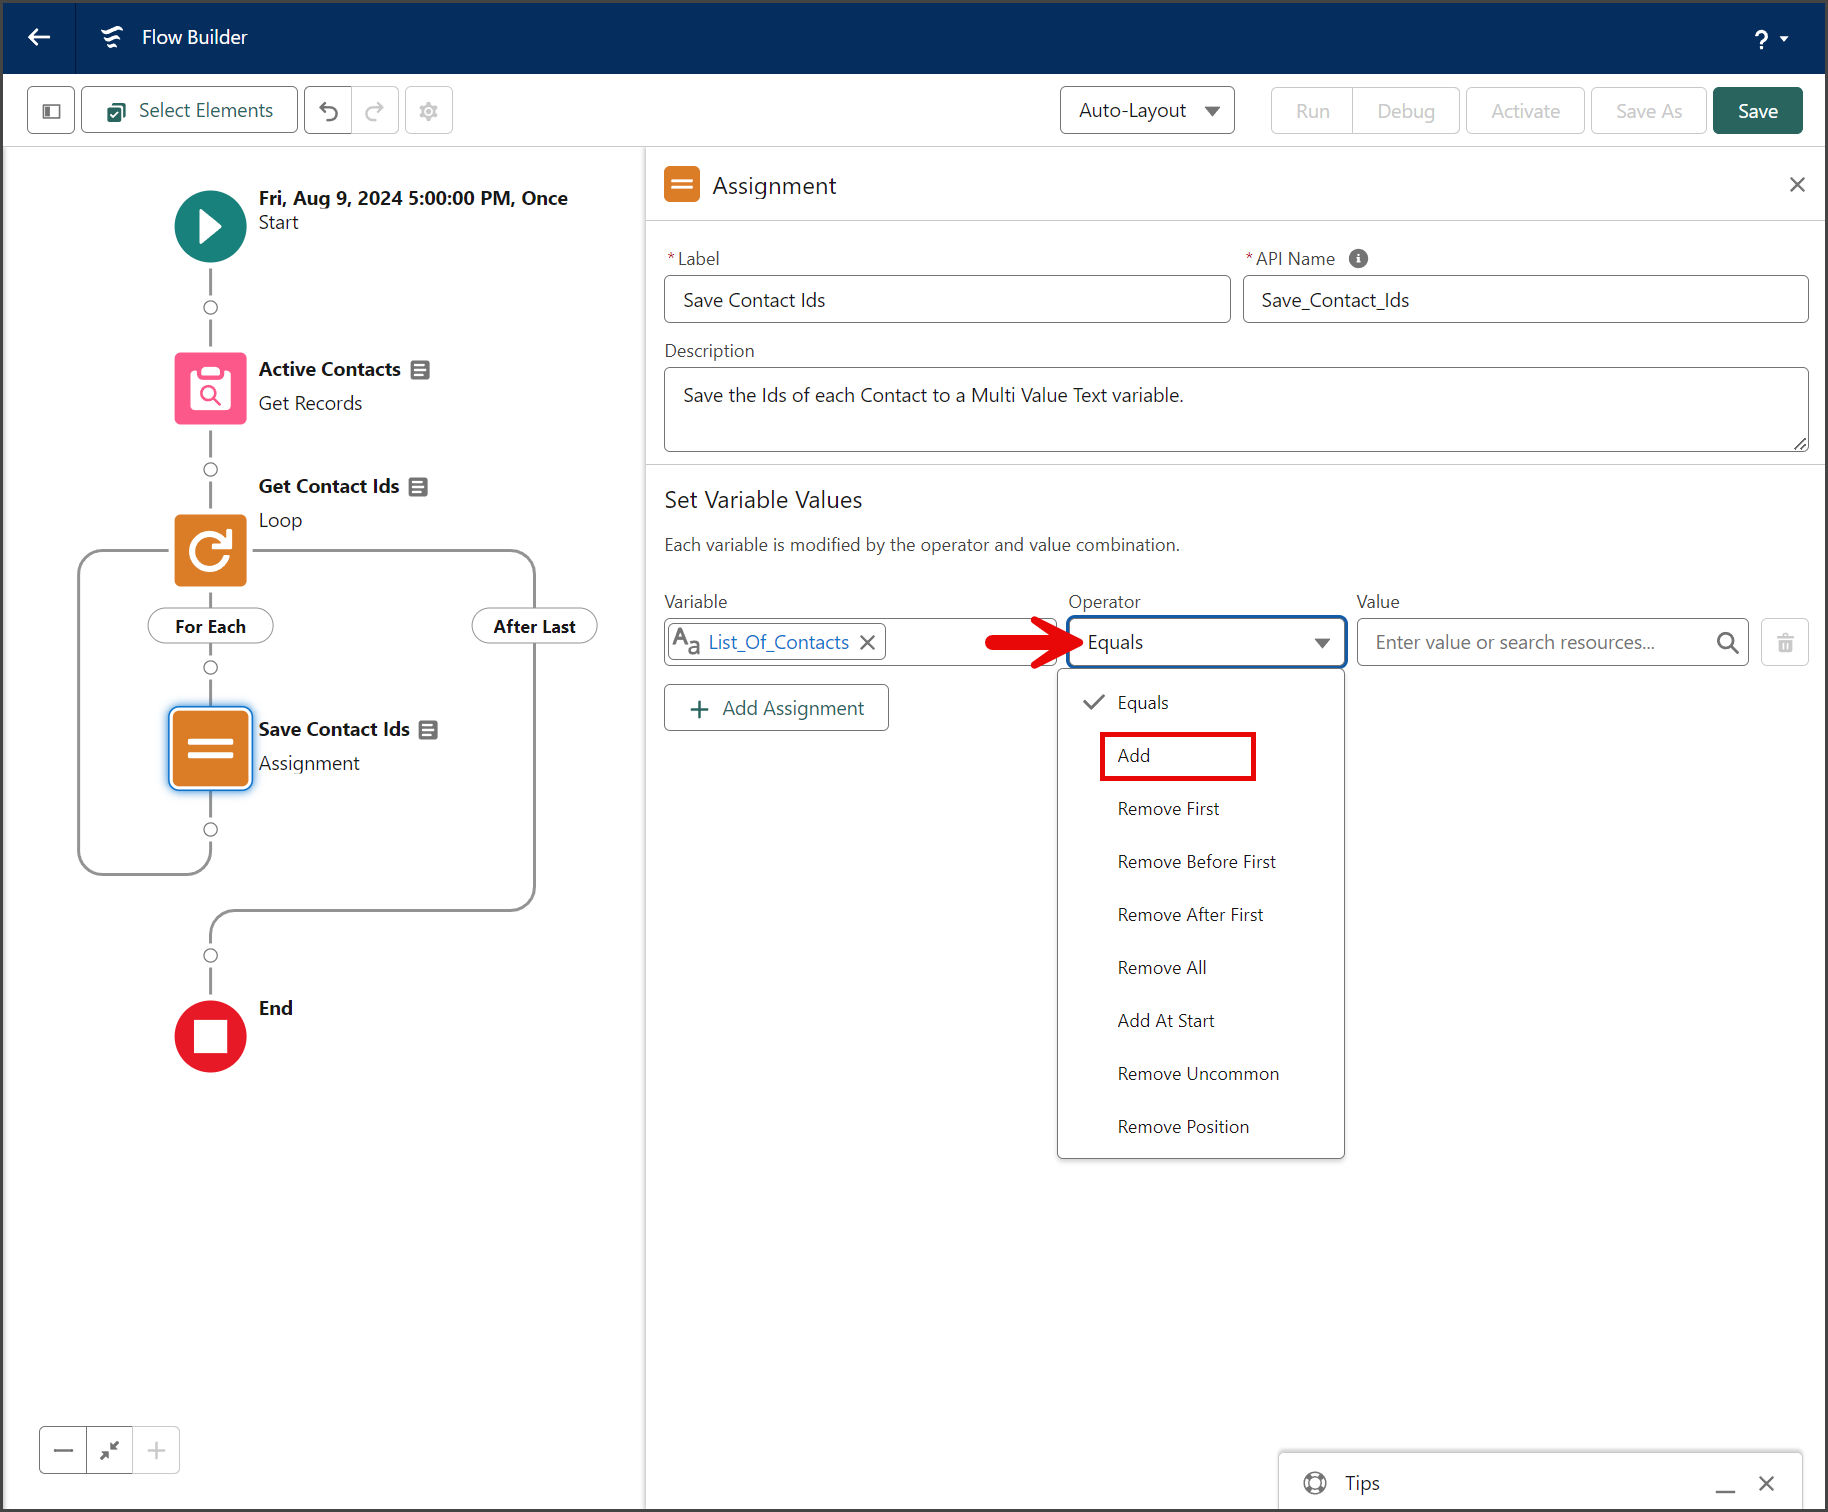
Assignment Element
You will use the Assignment element to save the Contact ID of the currently selected record of the Loop. Each Contact ID will be saved as a text value to a list to be used in the Mass SMS From Flow action.
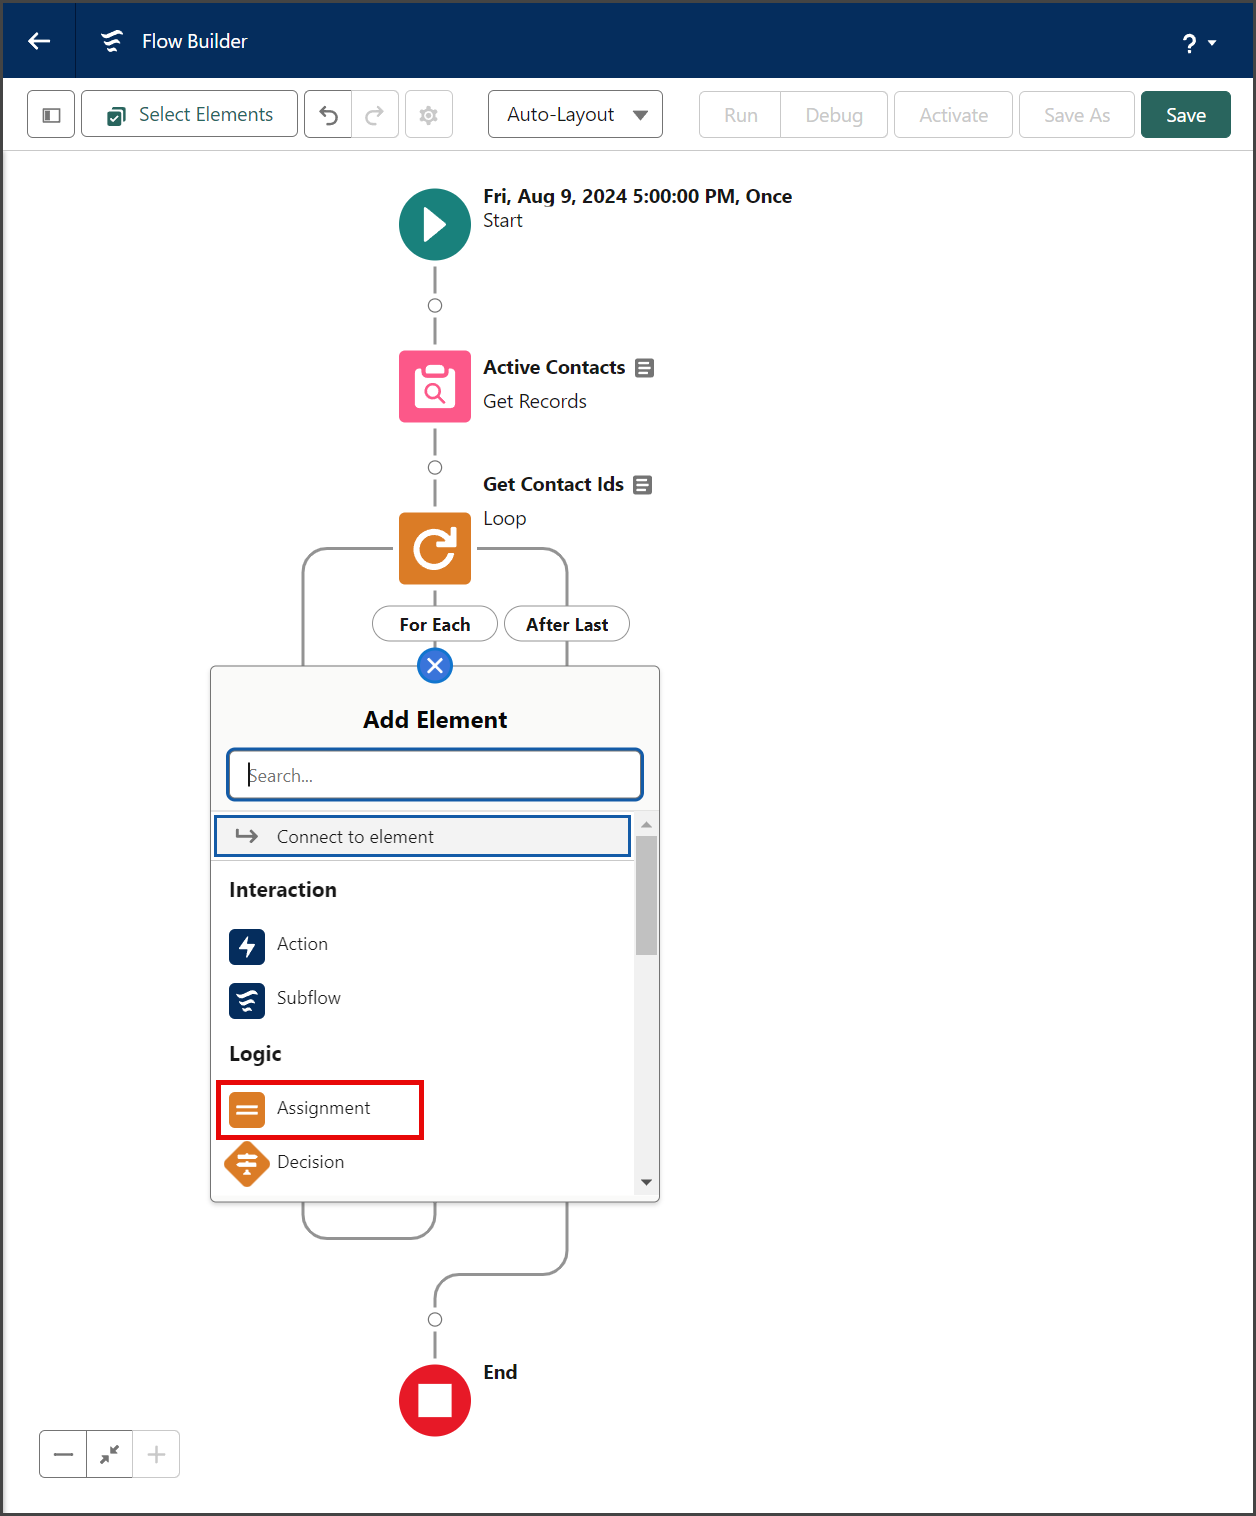
- Click the circle of the connector for the For Each section of the Loop to add a new Element.

- Click the Assignment element in the Logic section of the Add Element menu.
- Enter a name for the element in the Label textbox.
- Click the API Name textbox to auto-populate it with the Label with spaces replaced by underscores.
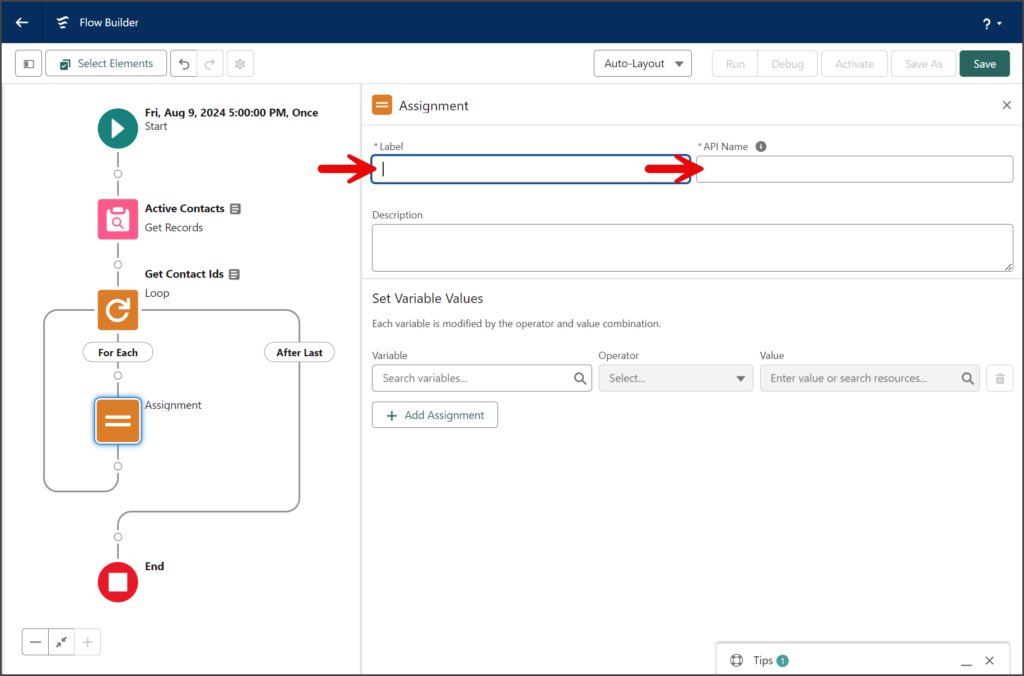
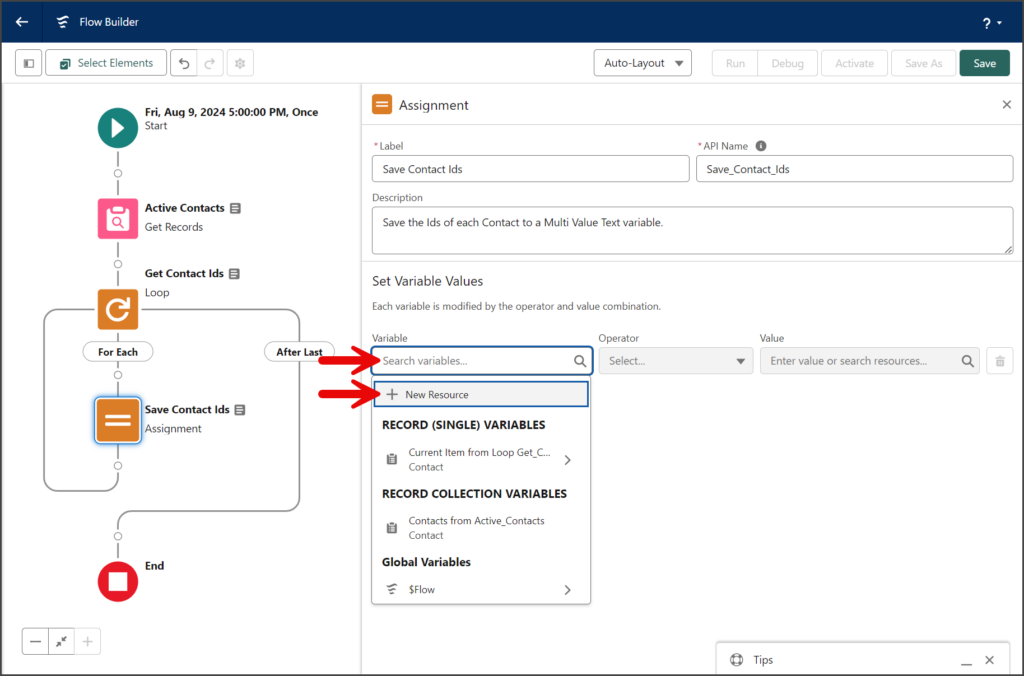
- Click the Variable textbox in the Set Variable Values section.
- Click New Resource.
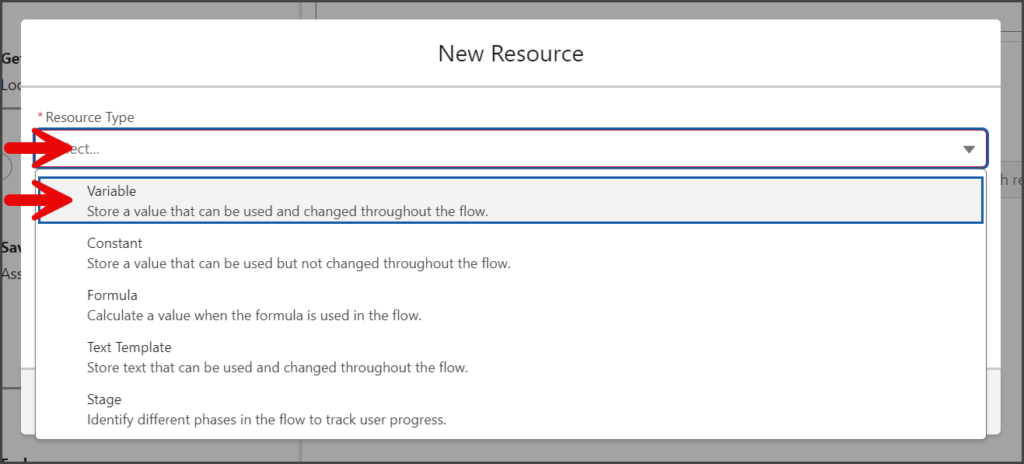
- Click the Resource Type dropdown.
- Select Variable.
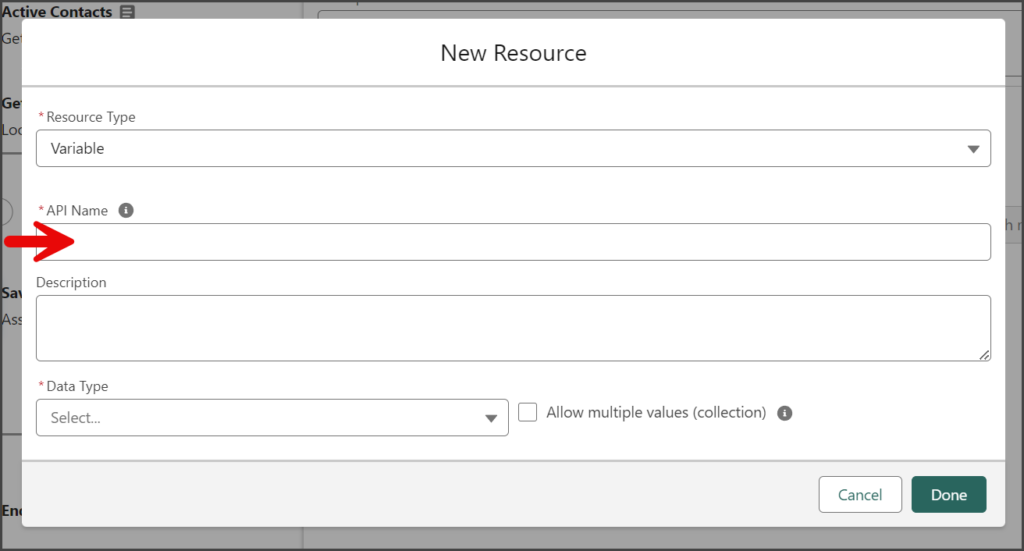
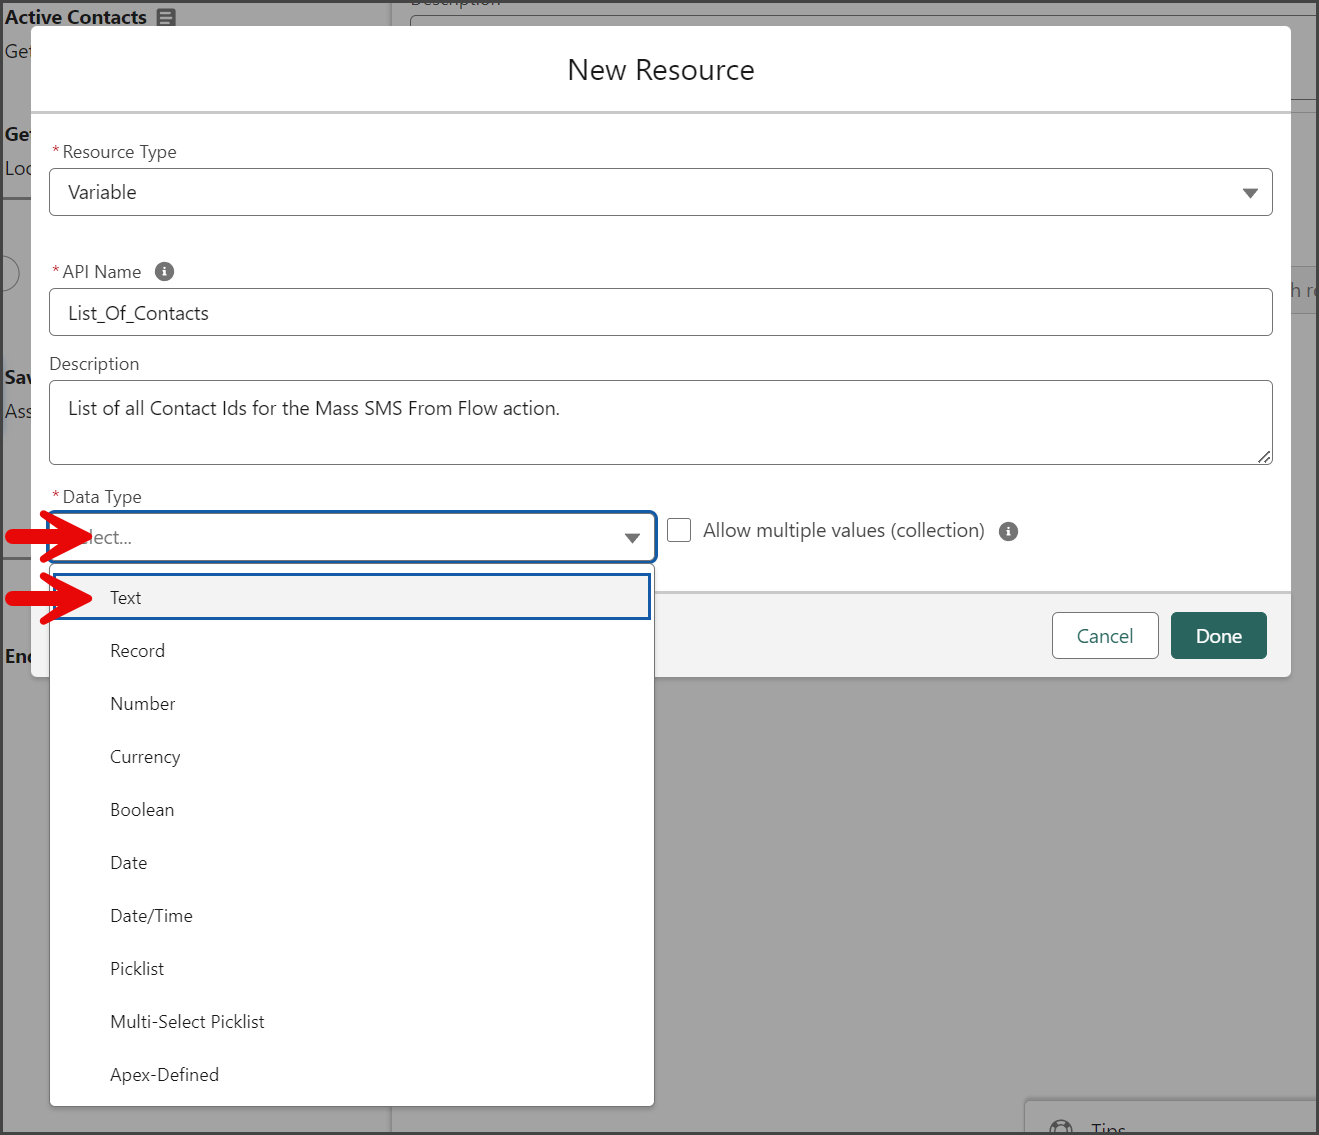
- Enter a name for the variable in the API Name. Don’t include spaces in the name.
- Click the Data Type dropdown.
- Select Text.

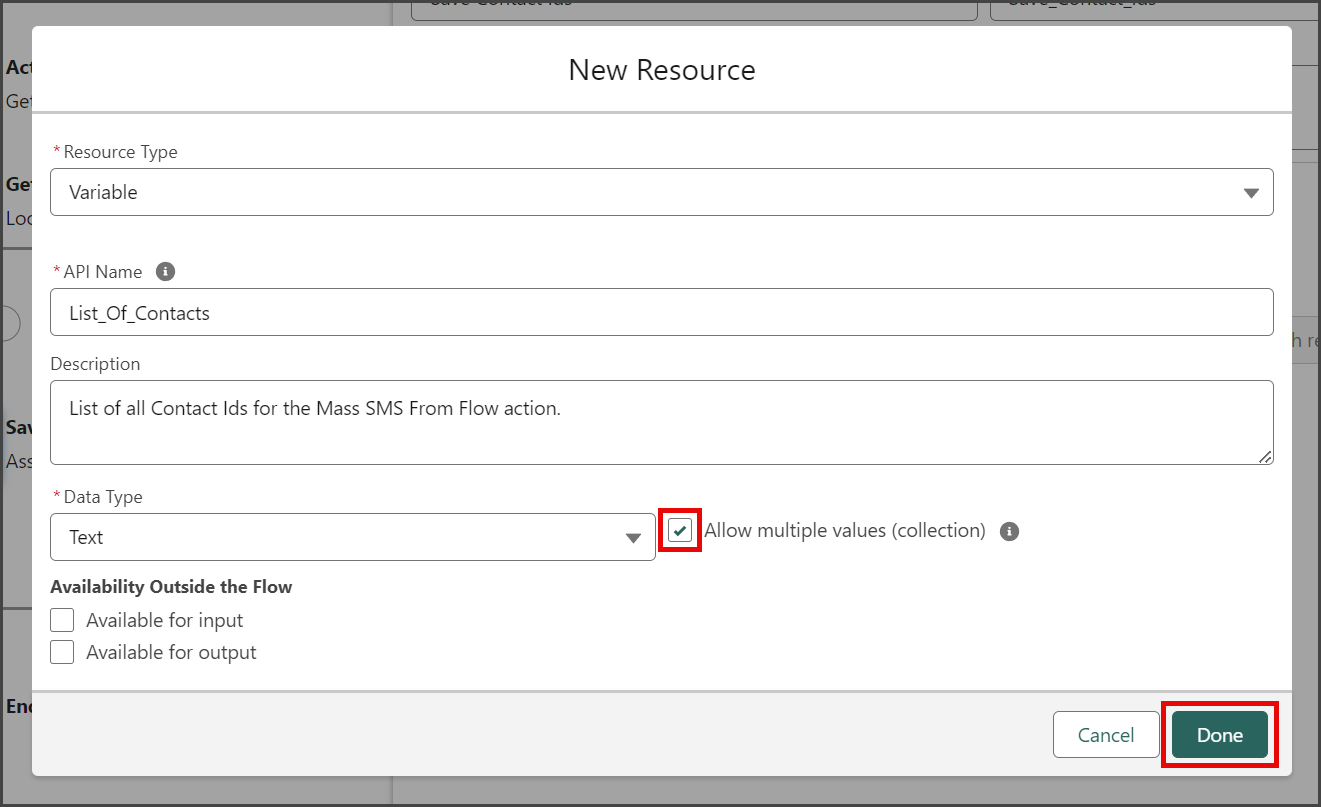
- Check the Allow multiple values (collection) checkbox.
- Click Done.

- Click the Operator dropdown in the Set Variable Values section.
- Select Add.

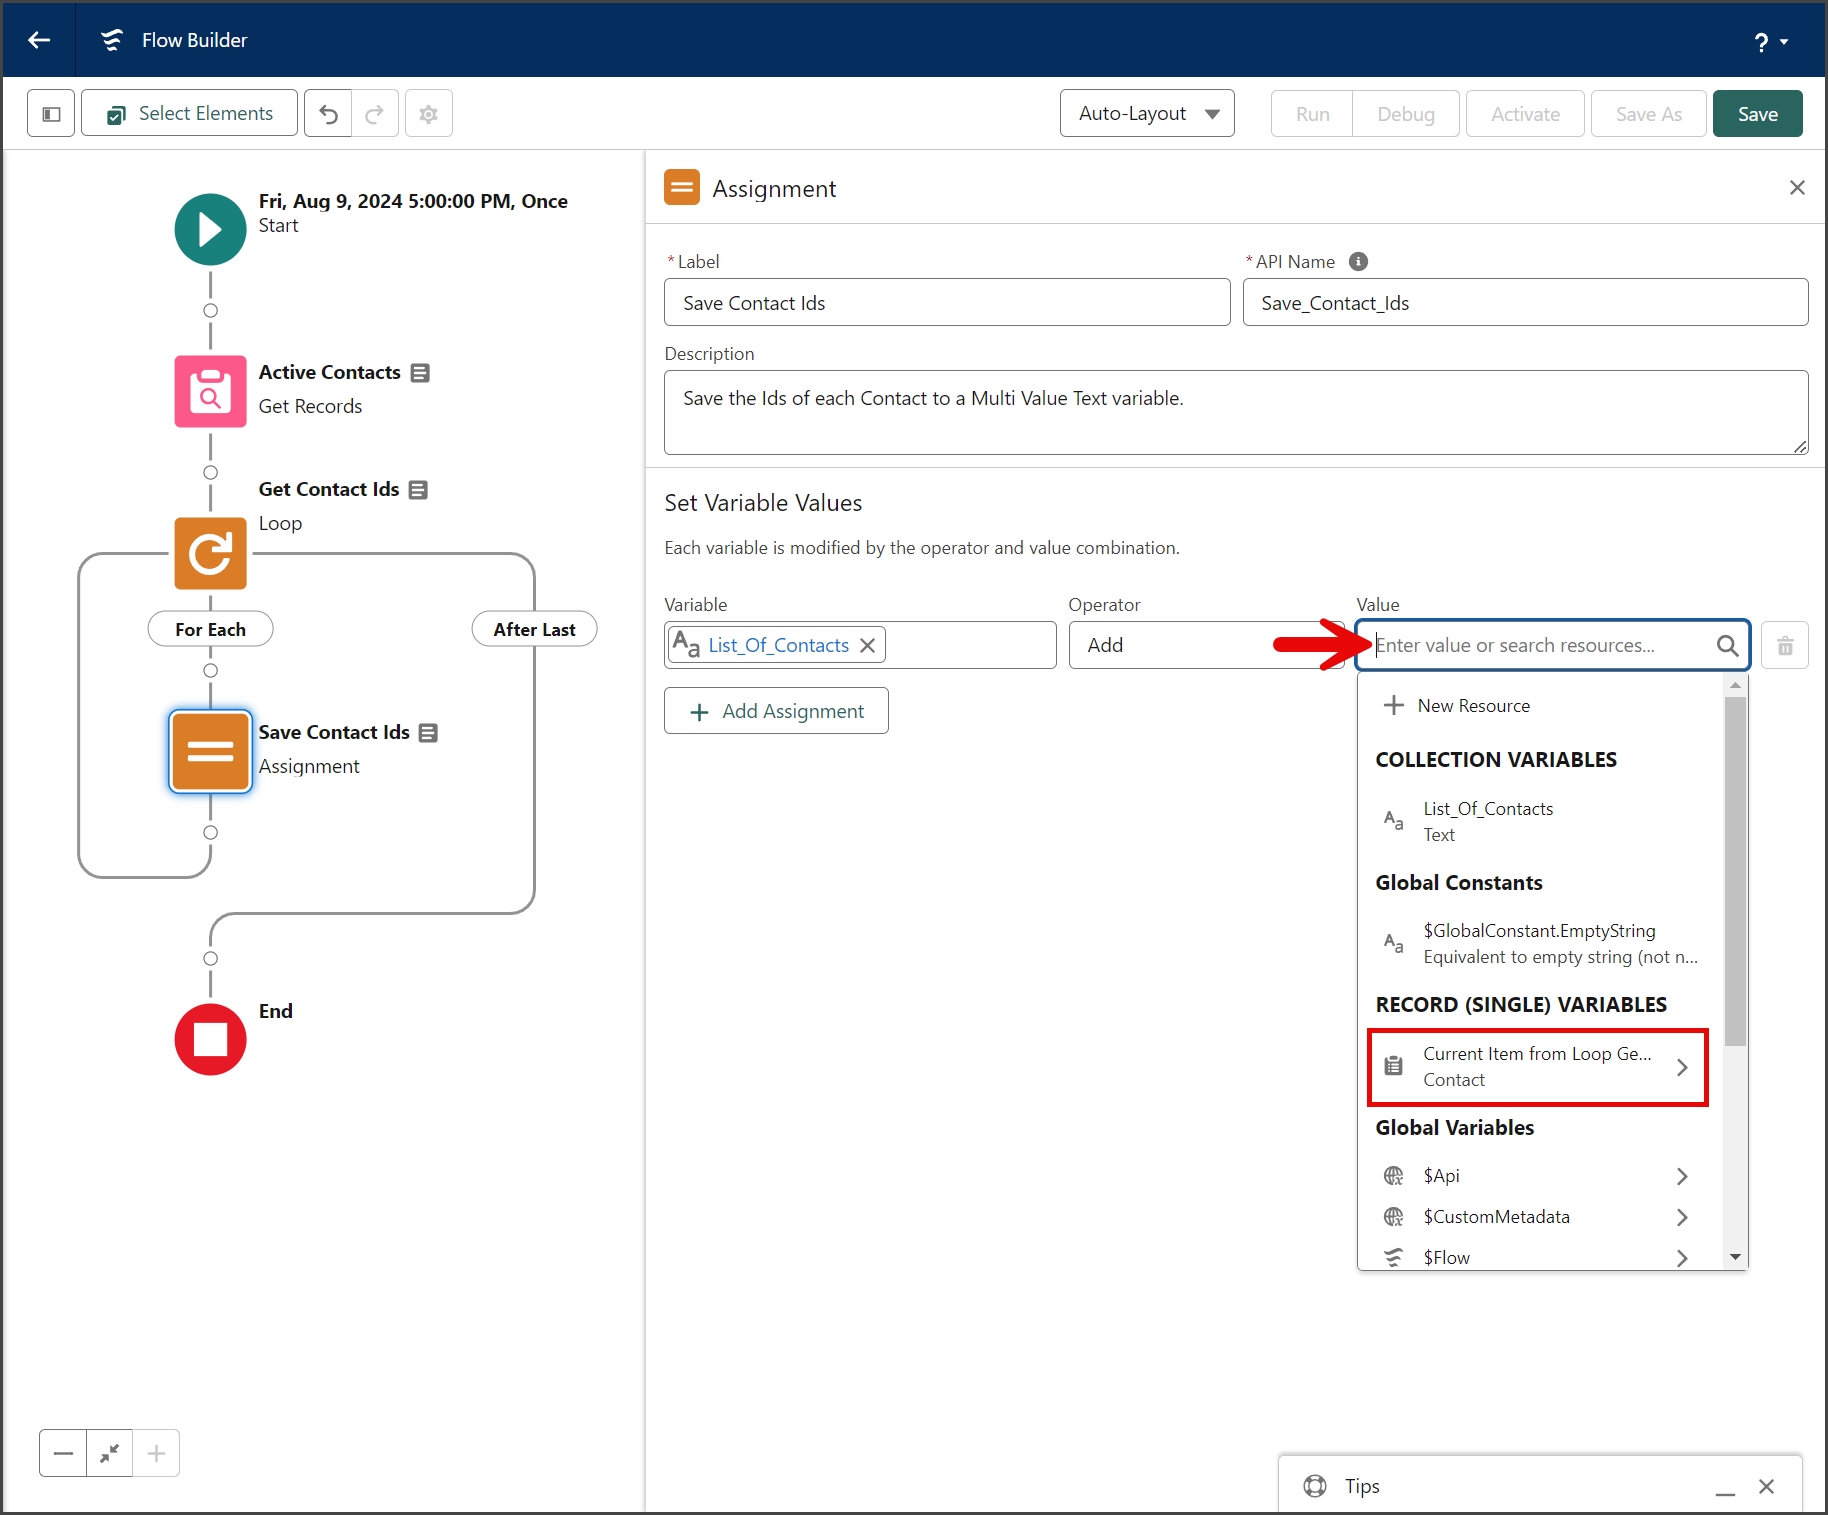
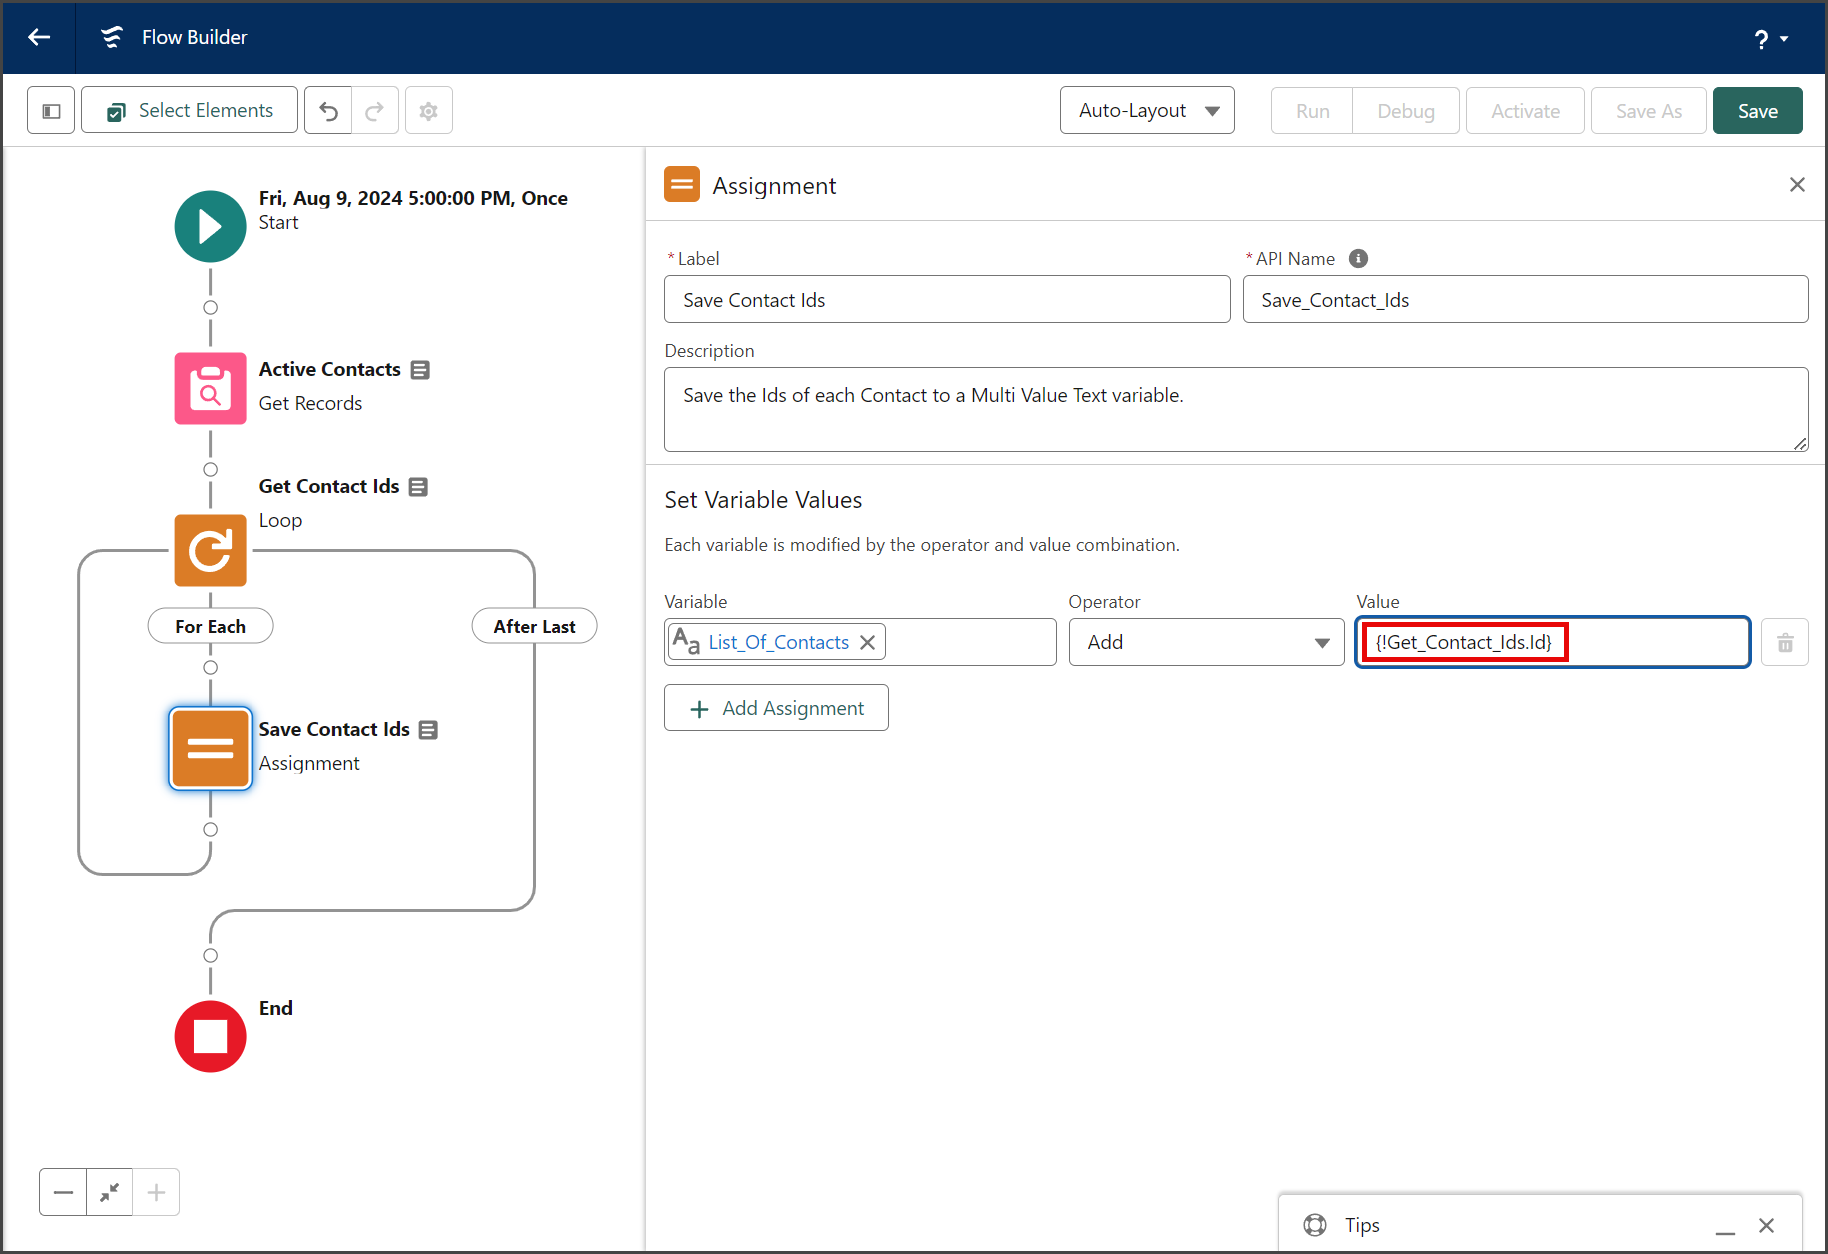
- Click the Value textbox.
- Select Current Item from Loop under the Record (Single) Variables section.


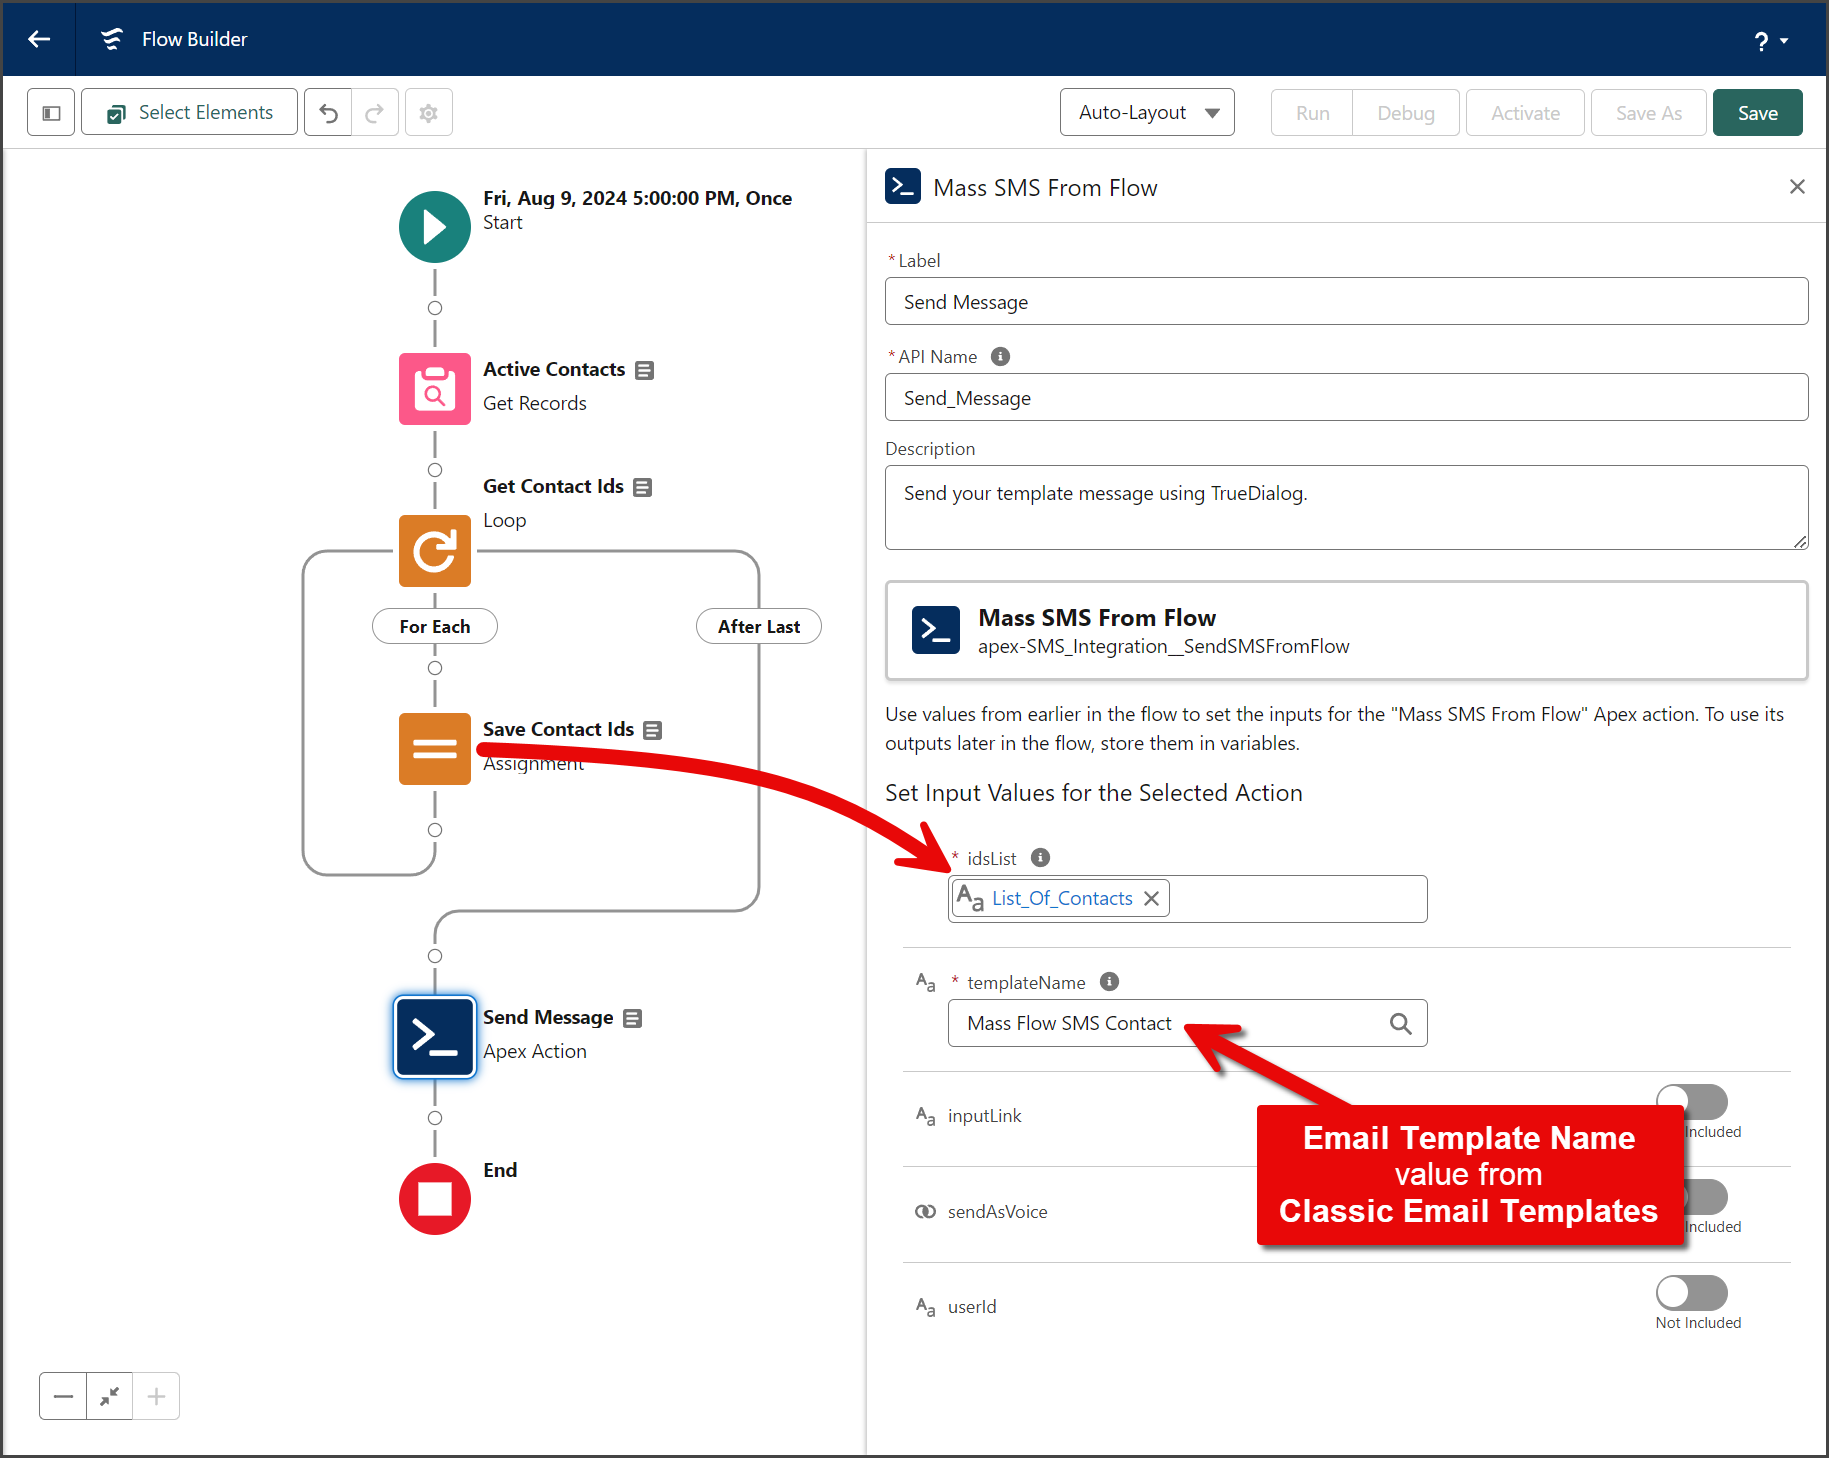
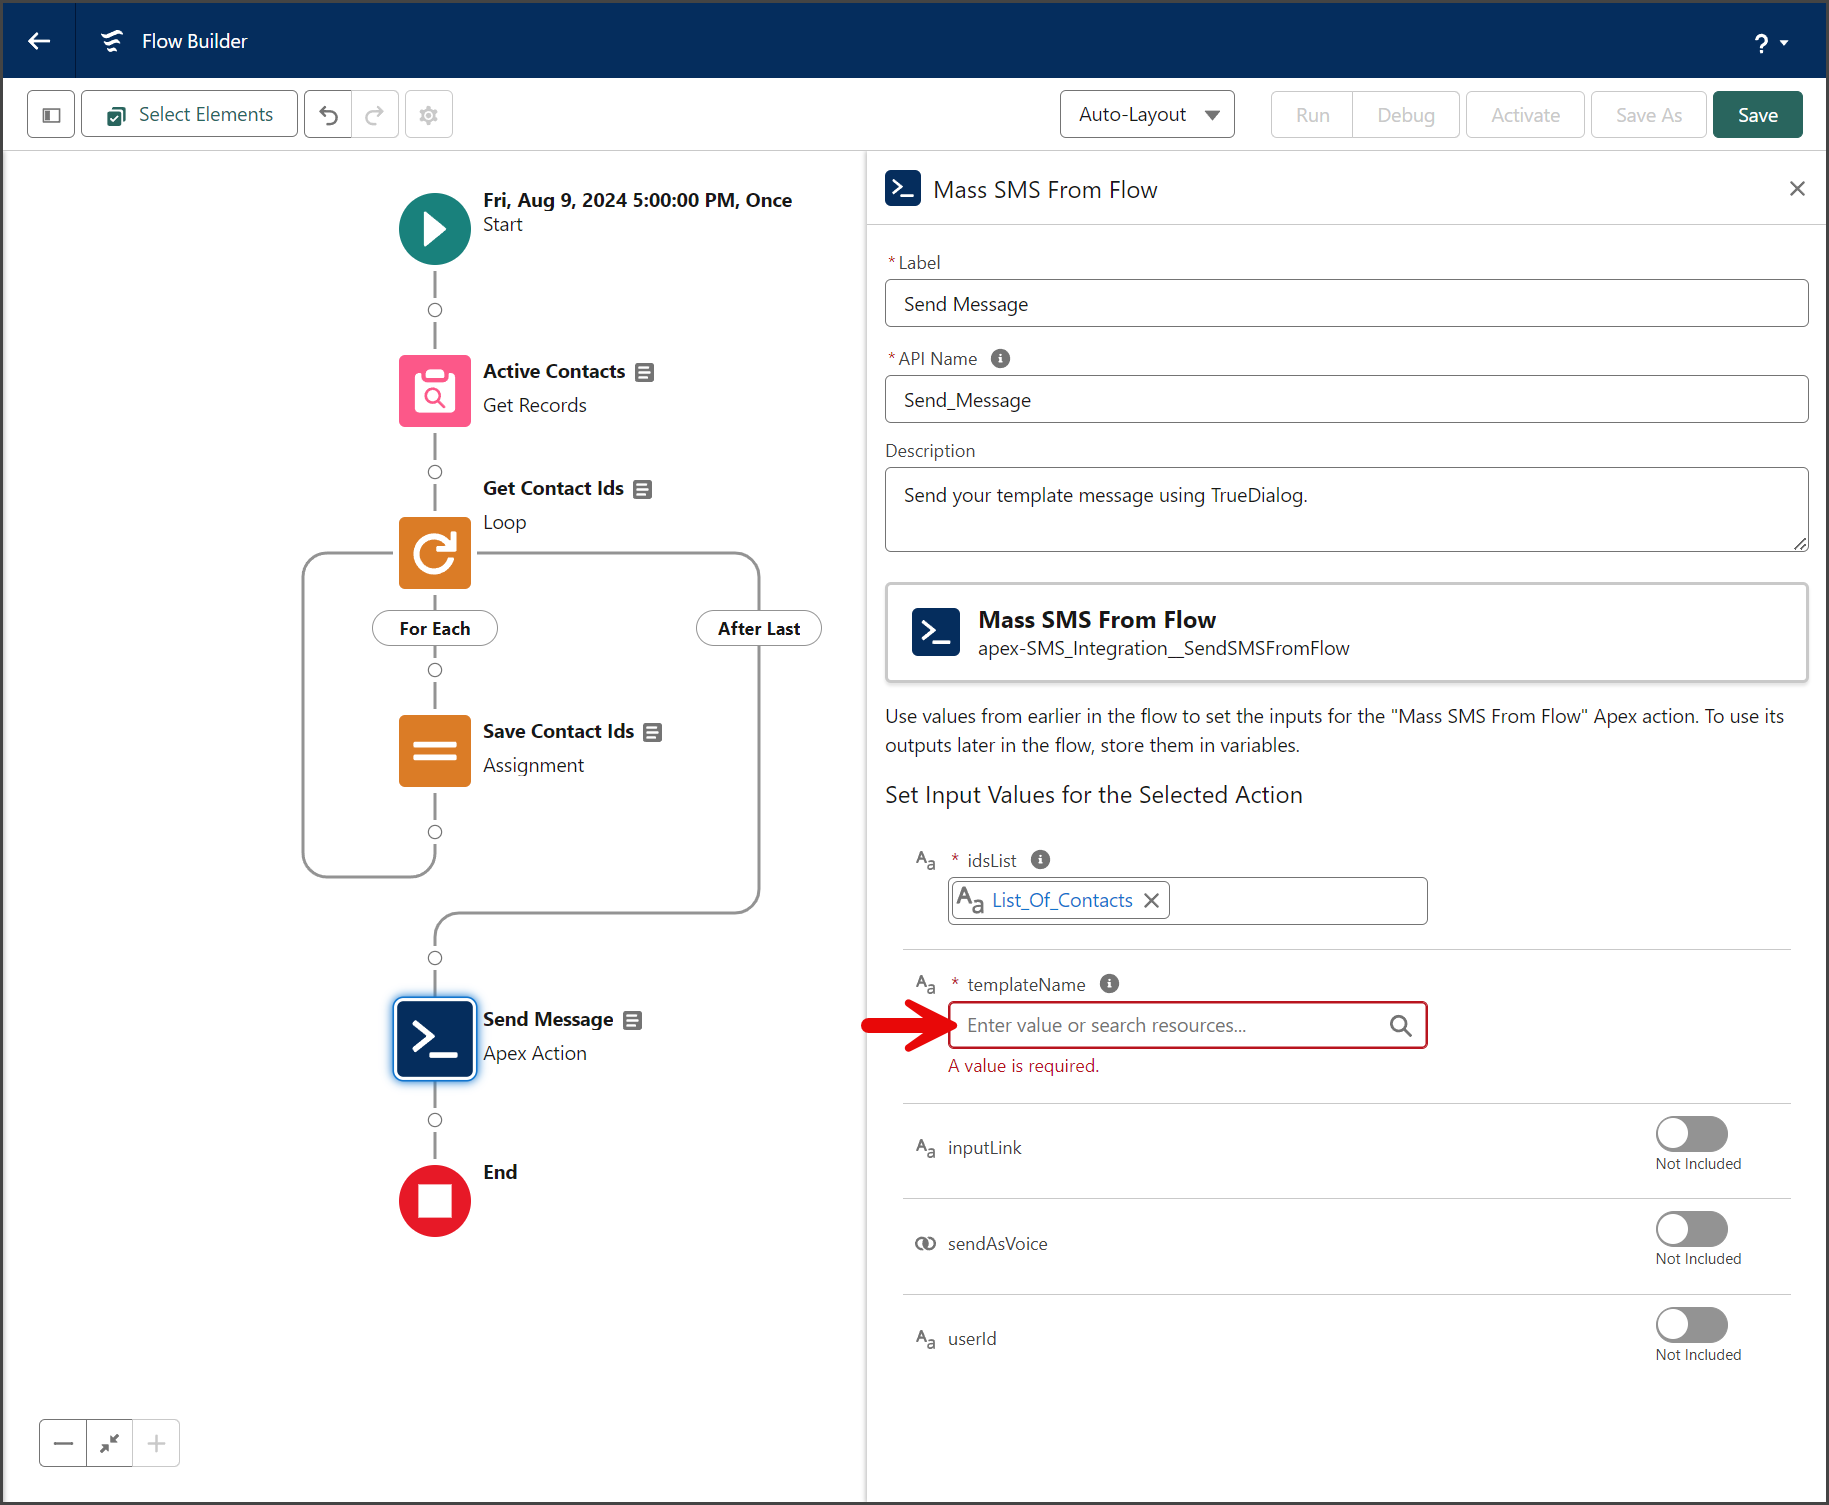
Add Mass SMS From Flow
After creating the list of Contact Ids, you can add the Mass SMS From Flow Apex action. This action will send a Mass SMS message to your list of records.
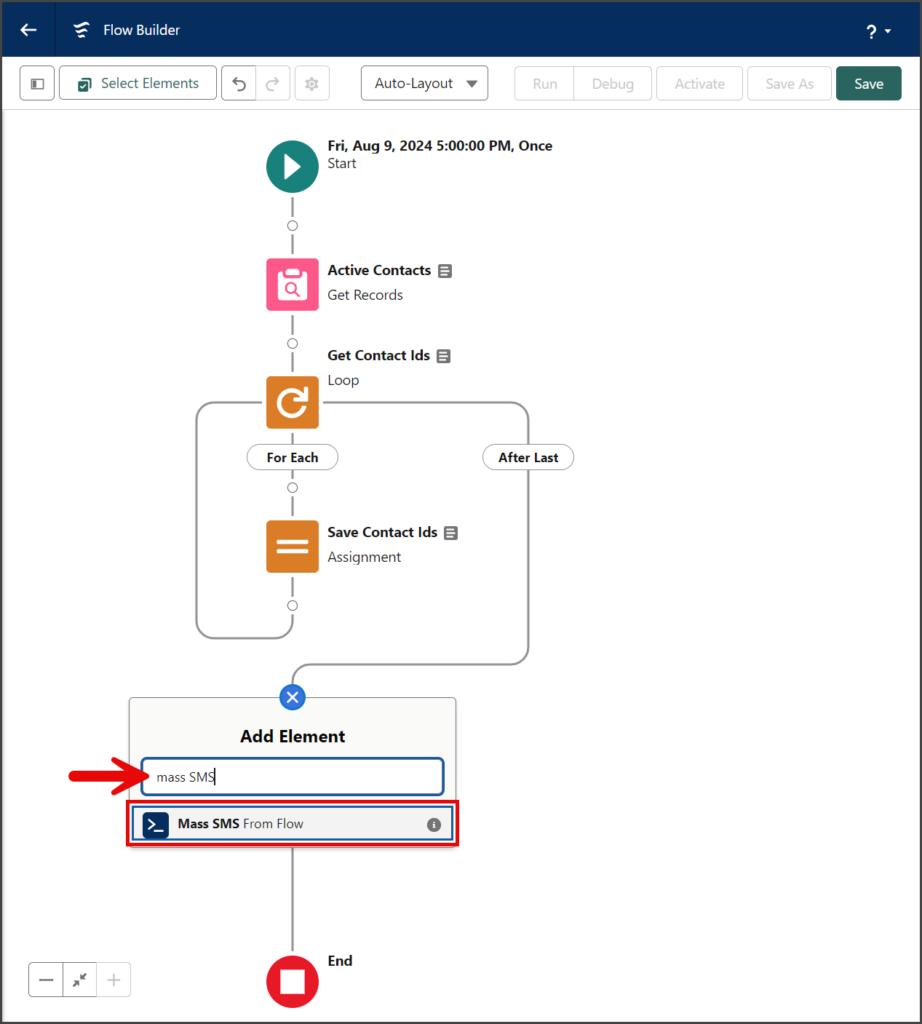
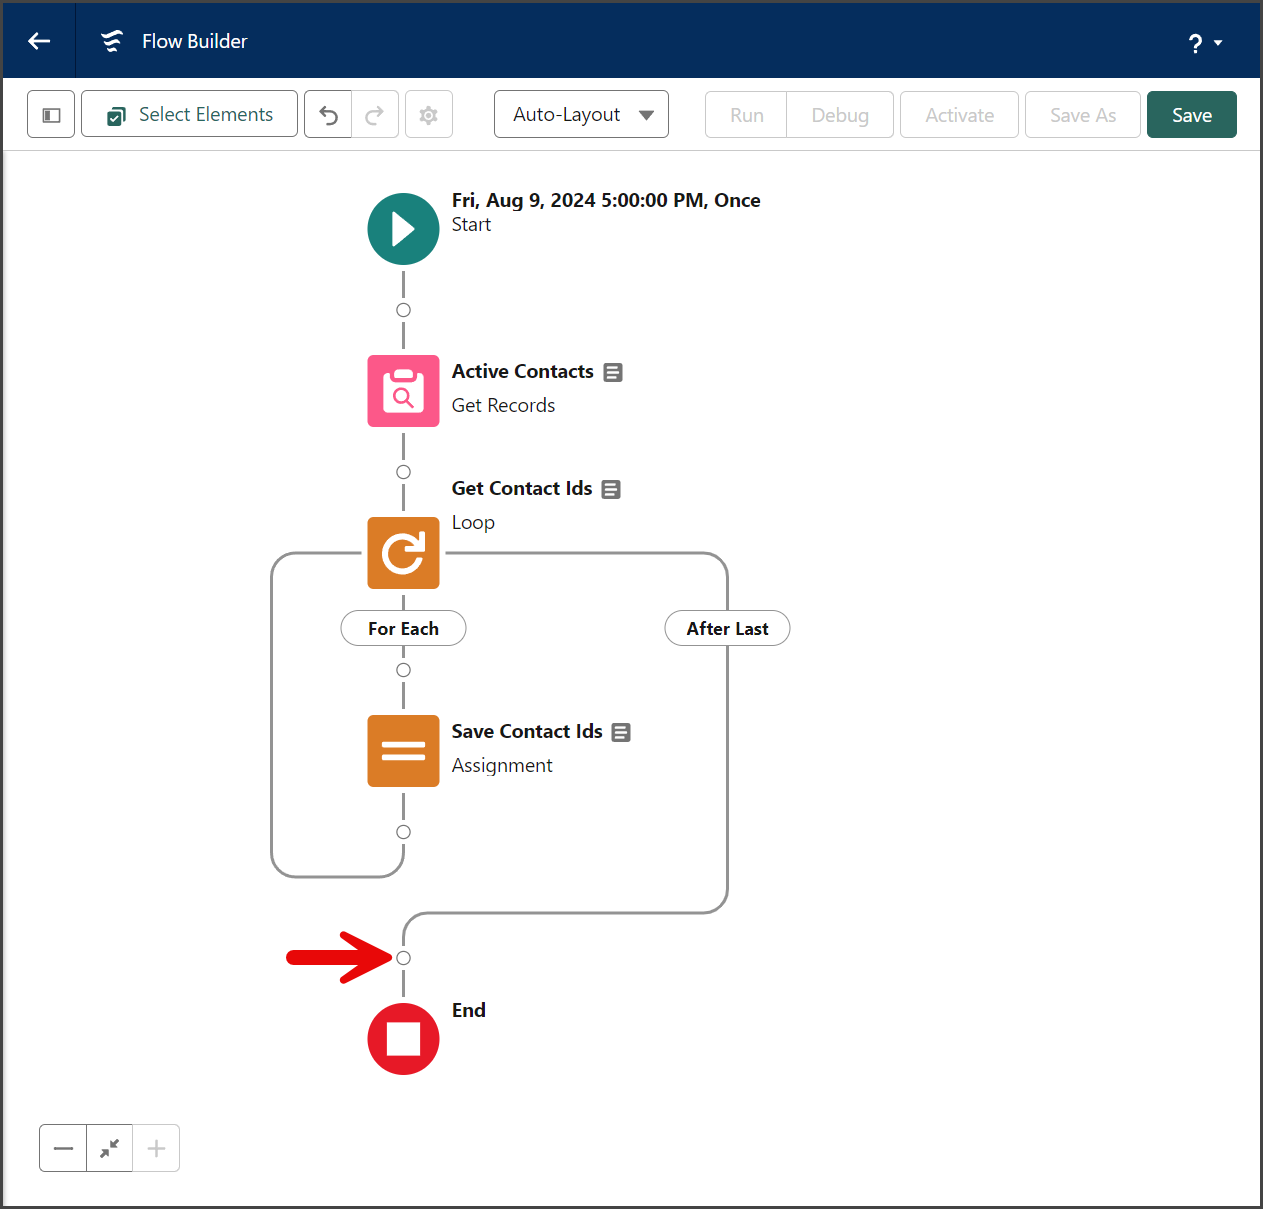
- Click the circle of the connector between the After Last of the Loop and the End element to add a new Element.

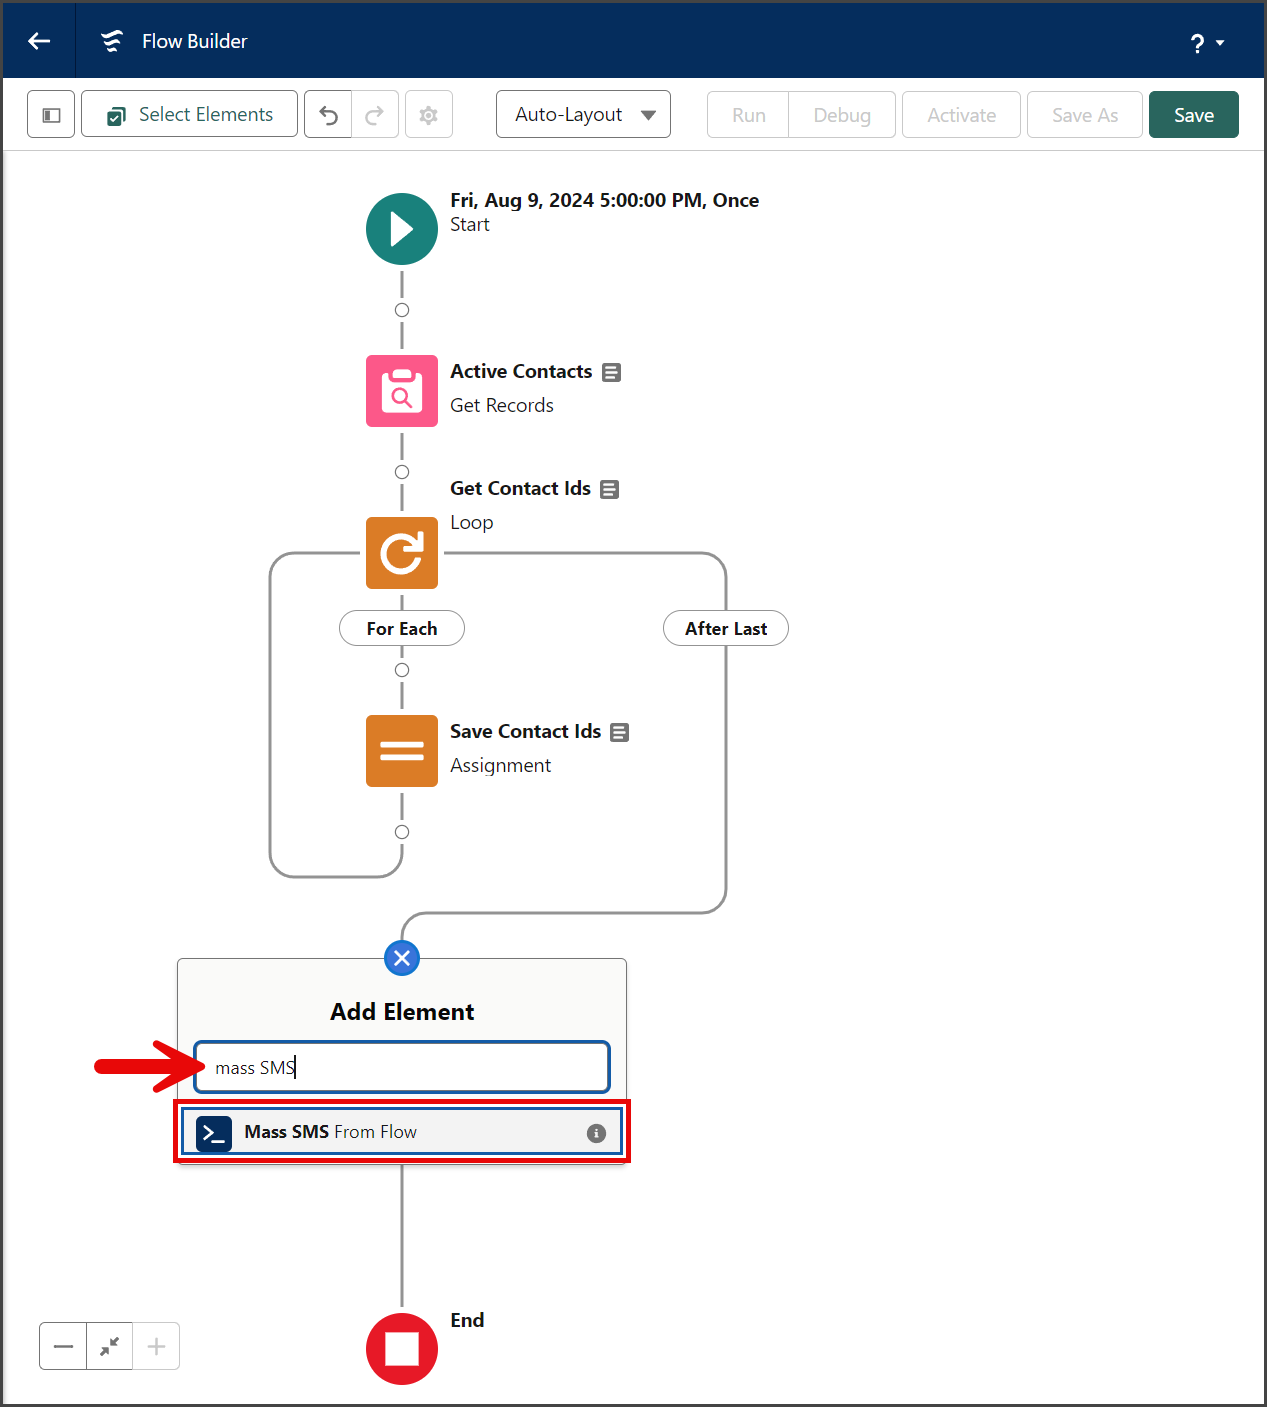
- Enter mass SMS in the search box for the Add Element menu.
- Click the Mass SMS From Flow Apex action.
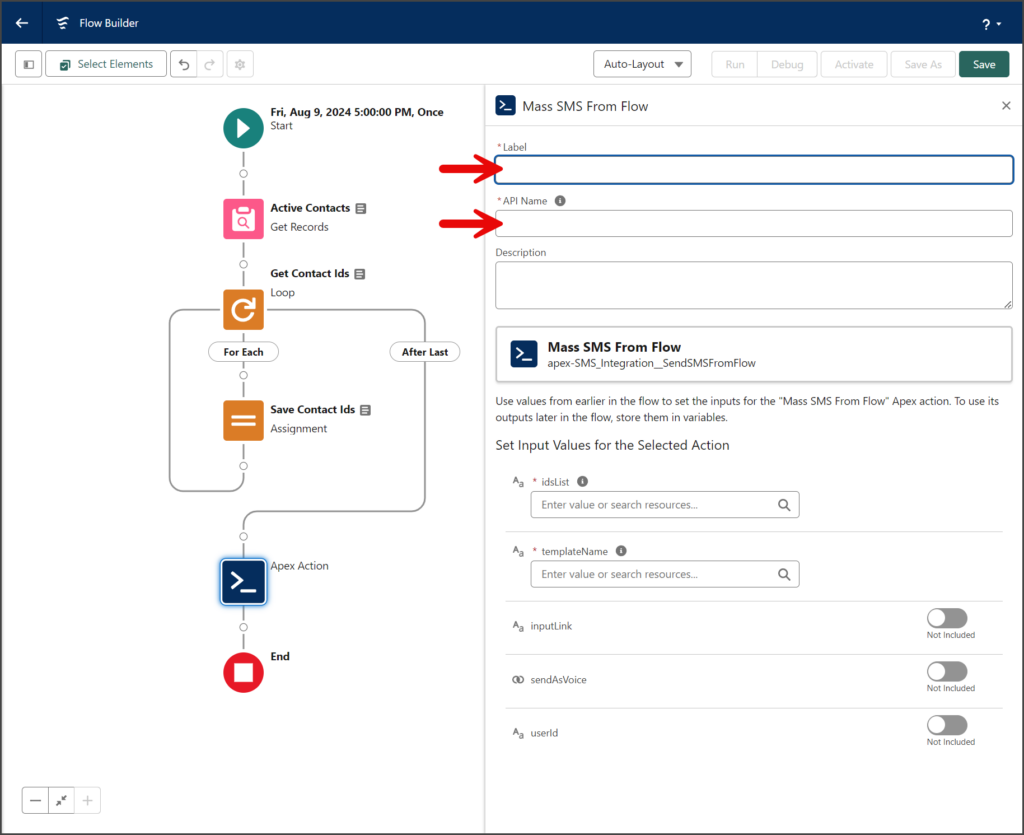
- Enter a name for the element in the Label textbox.
- Click the API Name textbox to auto-populate it with the Label with spaces replaced by underscores.
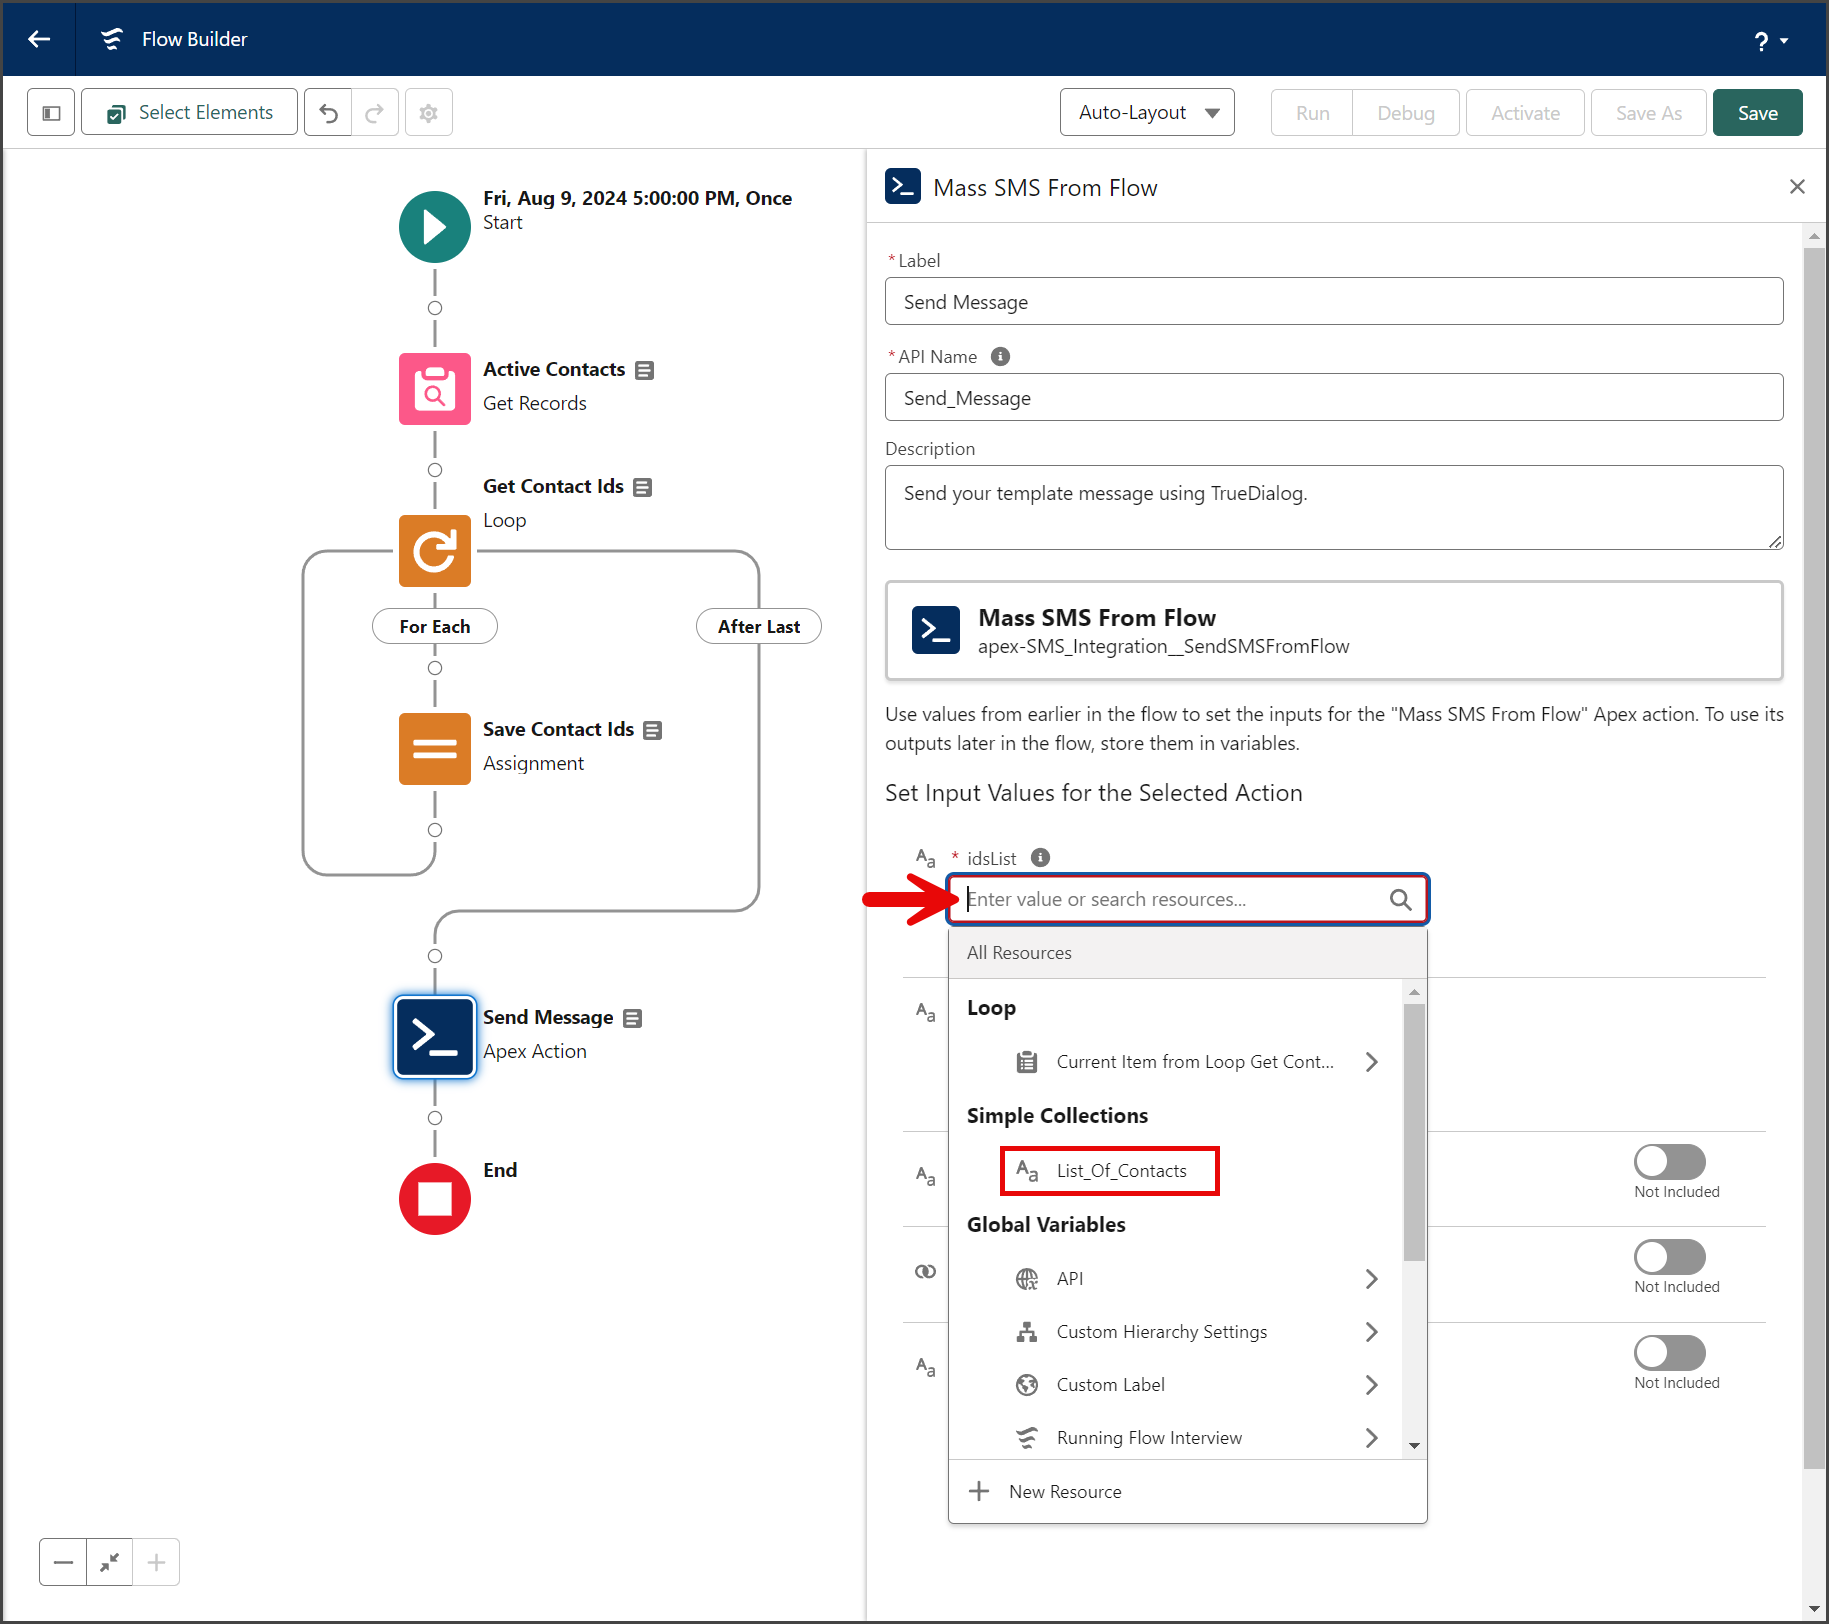
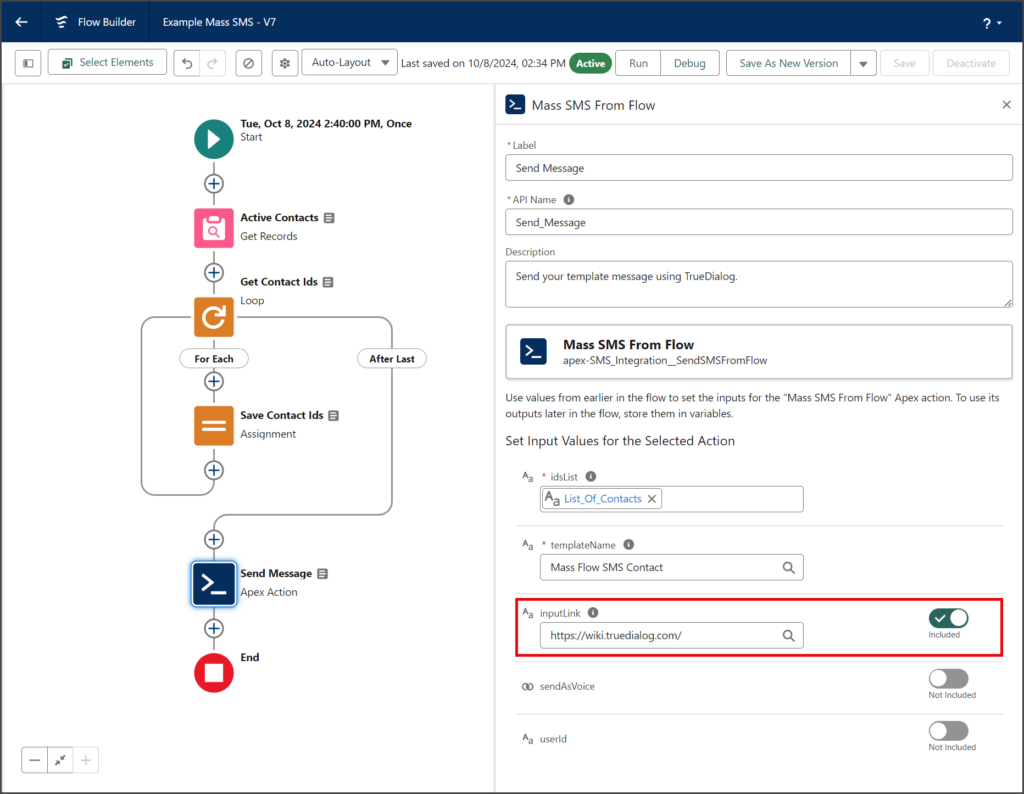
- Click the idsList textbox.
- In the Simple Collections section, select the variable with the list of contact Ids. This example uses the variable List_Of_Contacts created in the Assignment Element section above.

- Enter the name of the template with the message you want to send. The template name is found in the Email Template Name field for the Classic Email Templates. See the end of the Create Template section above for details on finding the template name.
- The inputLink, sendAsVoice, and userId variables are all optional. For instructions on using these parameters, see the corresponding sections below.

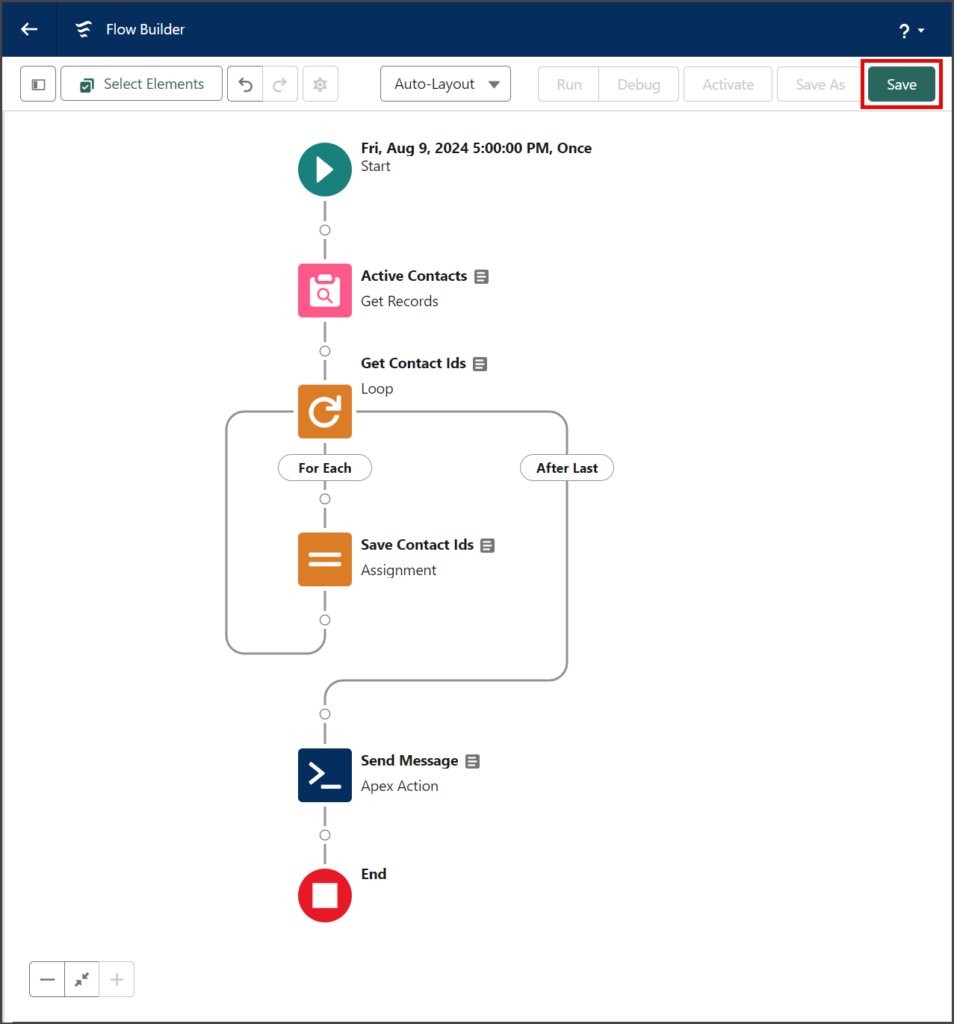
Save and Activate
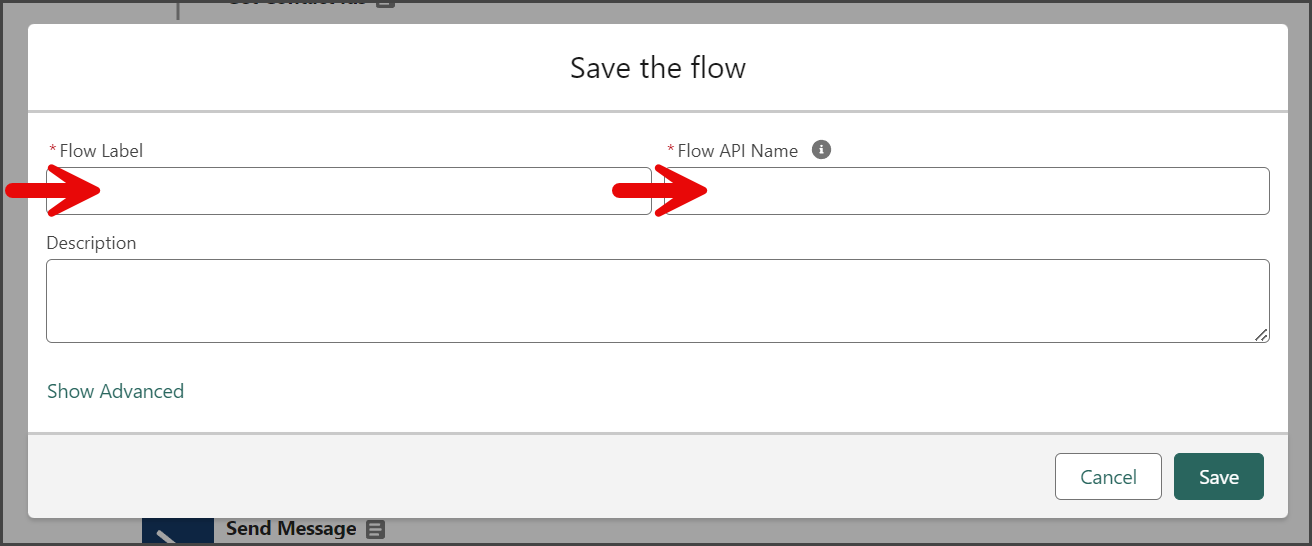
- Click the Save button from the button bar at the top of the page.
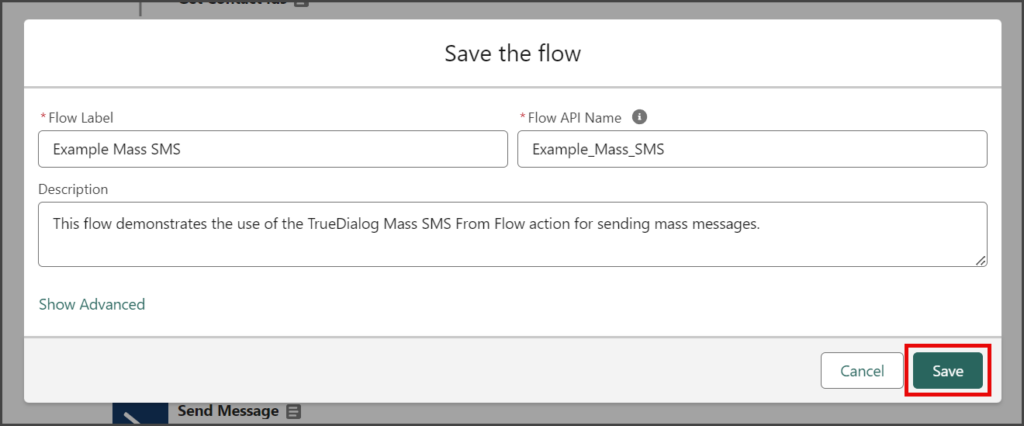
- Enter a name for the flow in the Flow Label textbox.
- Click the Flow API Name textbox to auto-populate it with the Flow Label with spaces replaced by underscores.

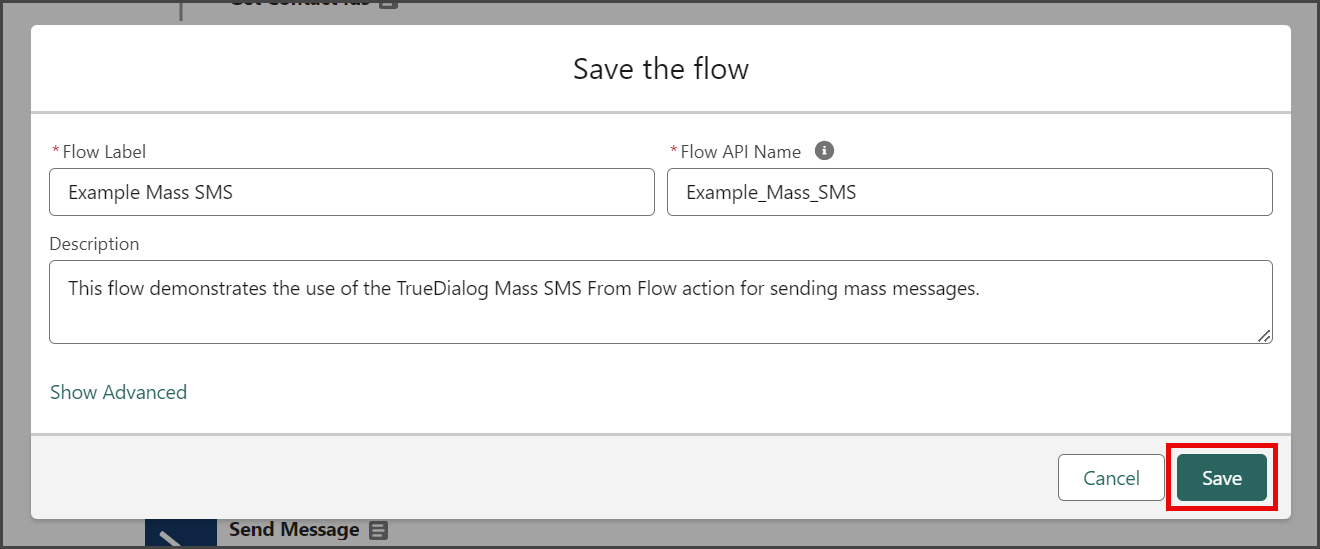
- Click Save.
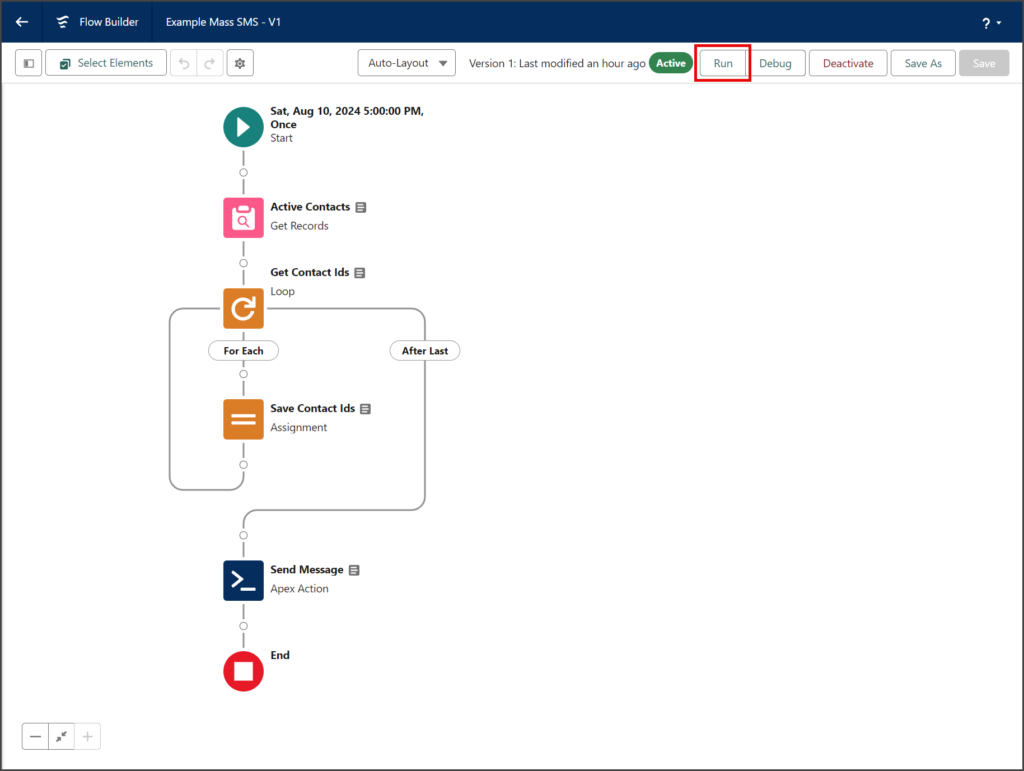
- Click Activate.

- Once activated, the flow will send your message to your records at the scheduled time.
- (Optional) To send your message immediately, click Run.


Options
Input Link
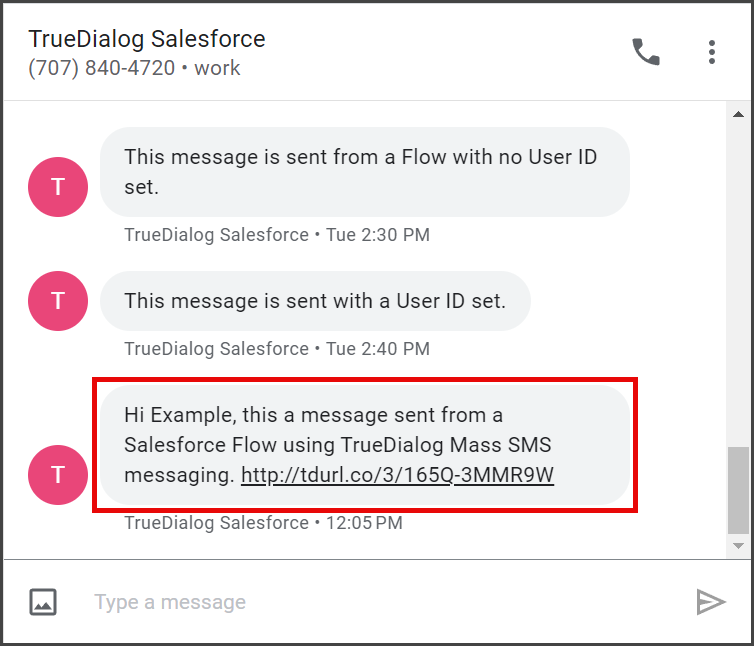
TrueDialog provided link shortening and link tracking for SMS messages. The instructions below show you how to add a link to the Mass SMS From Flow Apex action in a Flow. The TrueDialog Portal reports the number of clicks for your shortened links. See the Accessing The Portal and Viewing Clicks Report articles for details on accessing the Portal and viewing the Click Report.
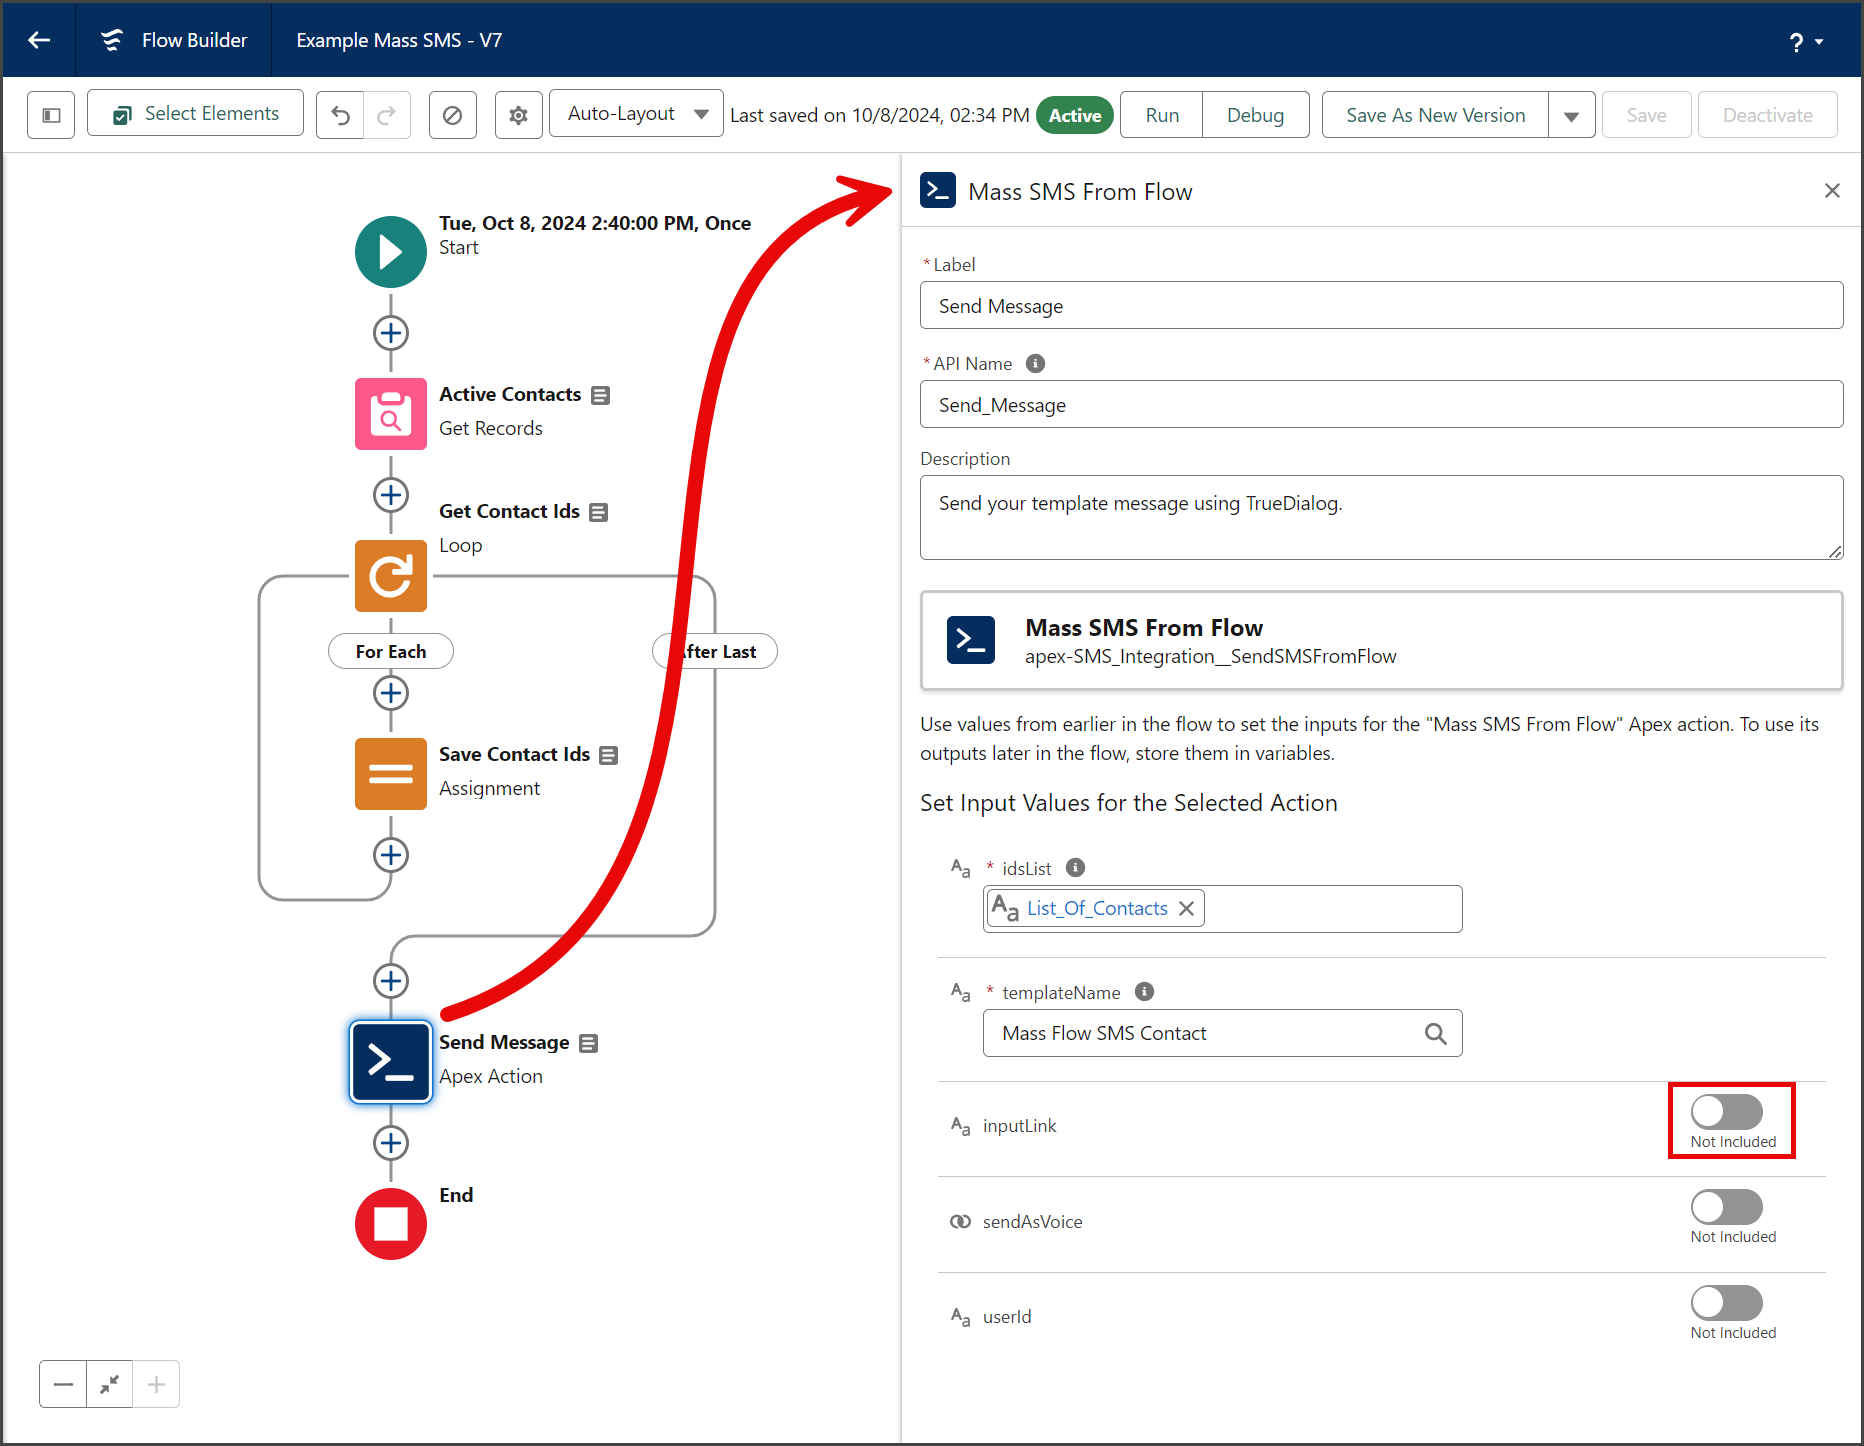
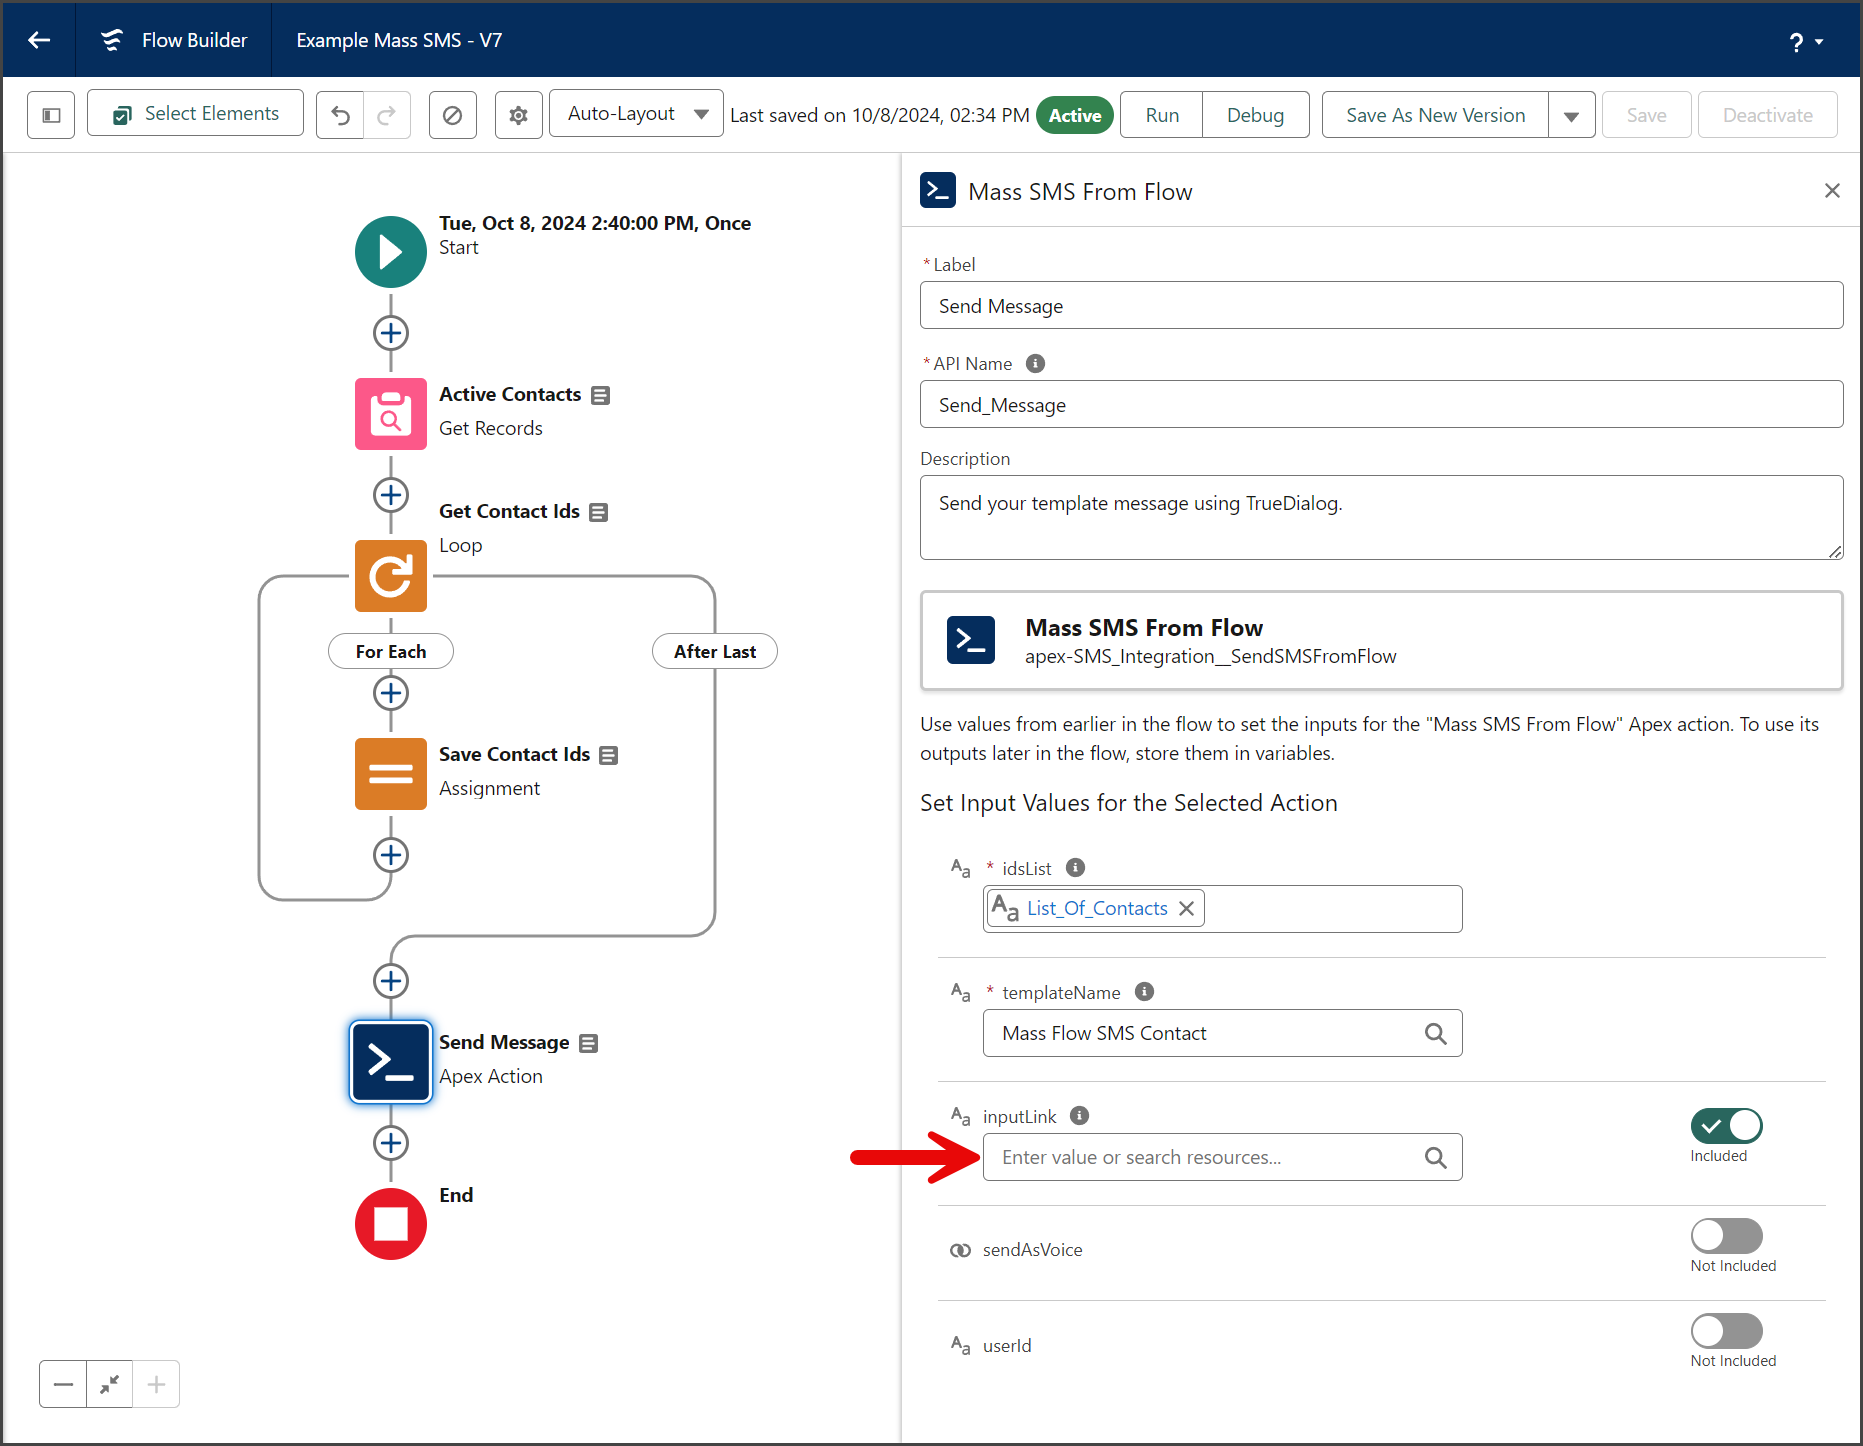
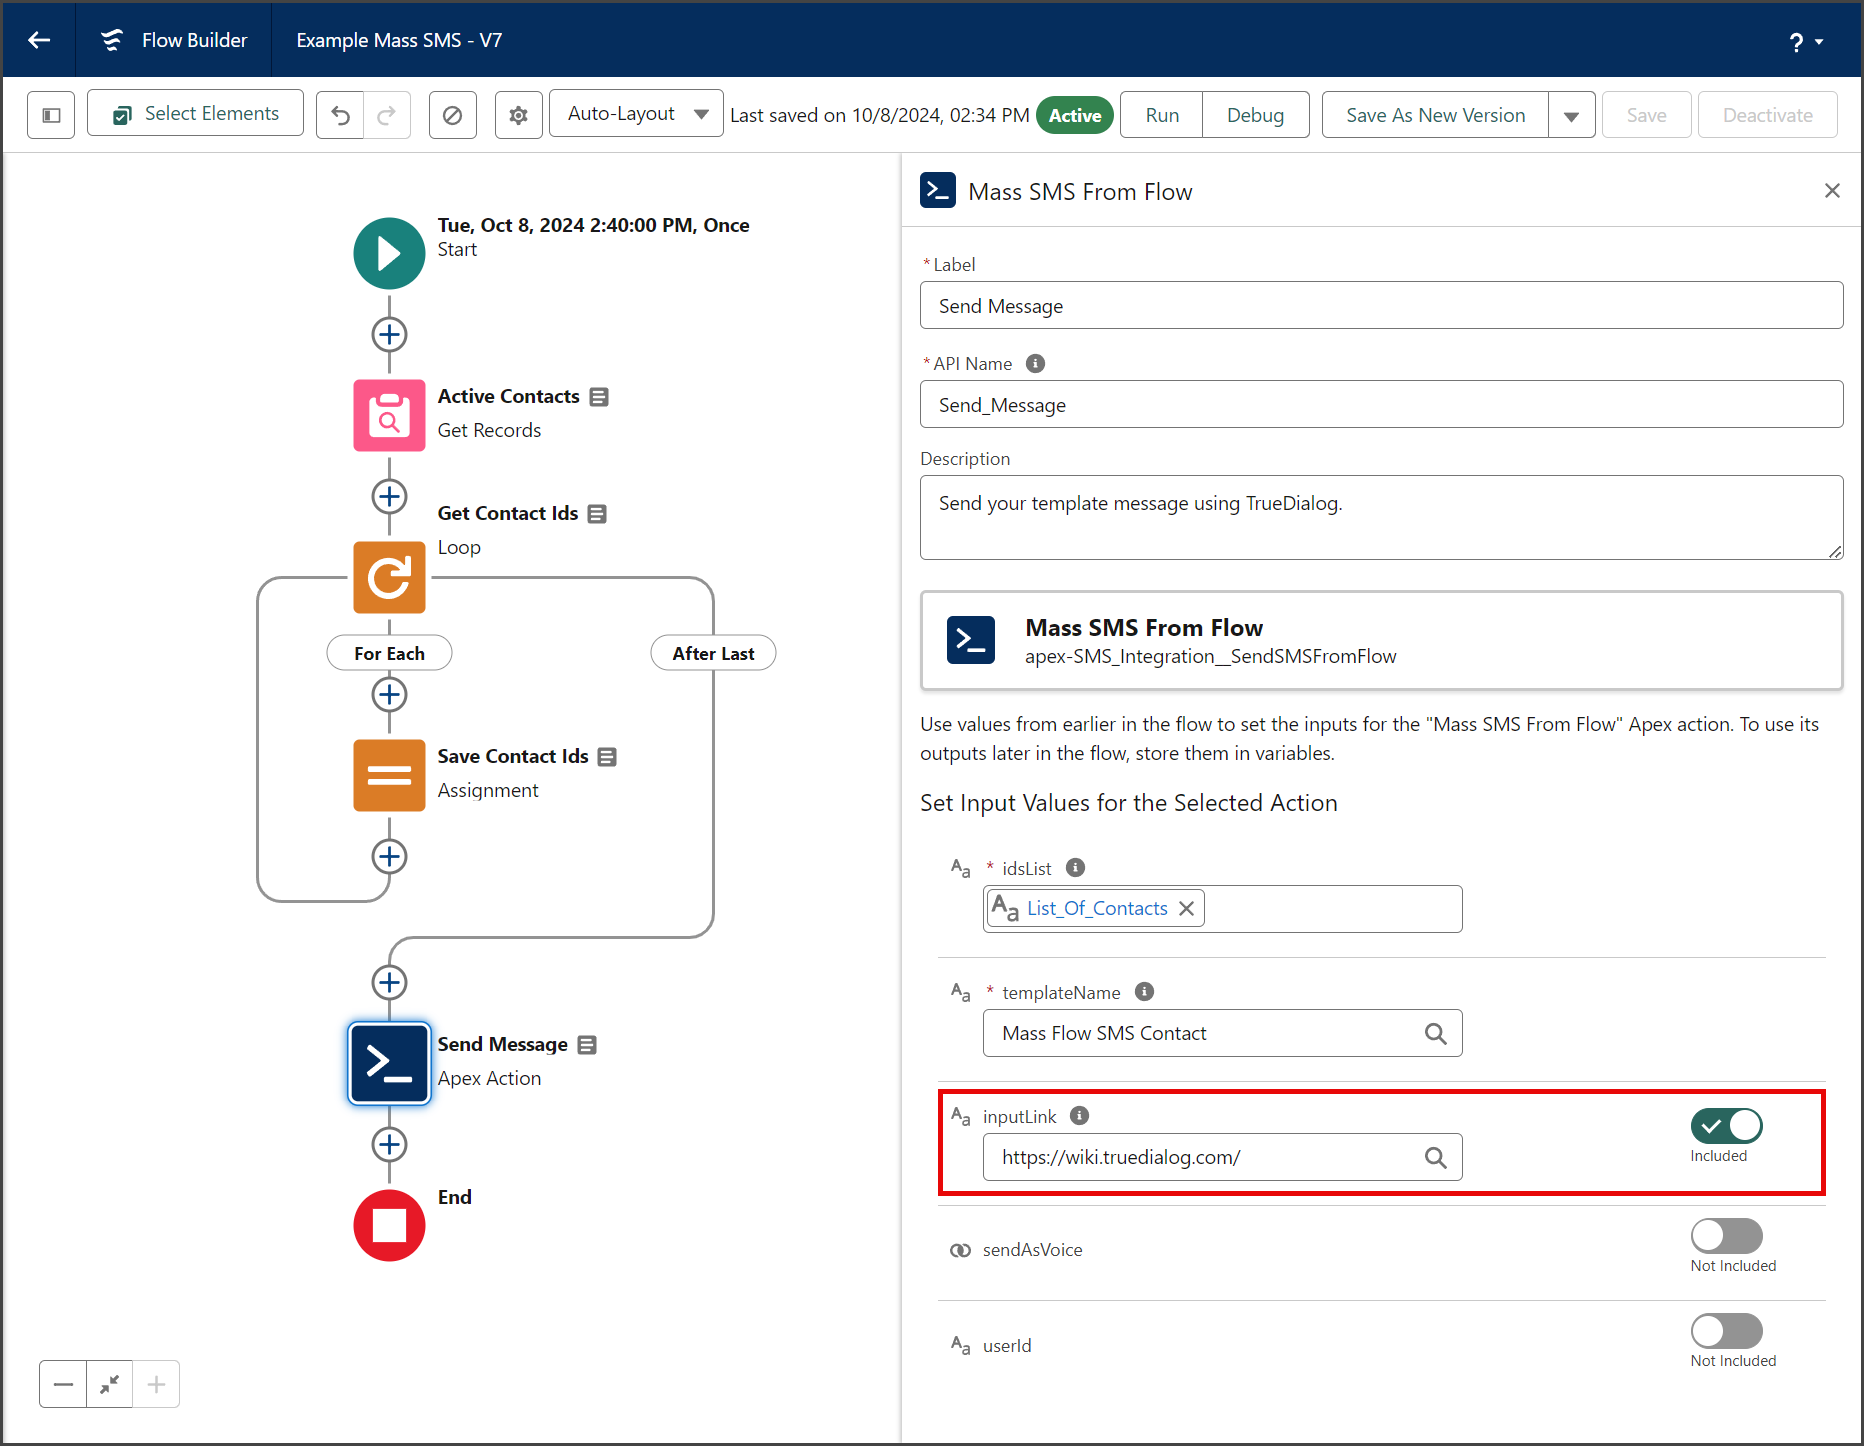
- Edit the Send Message Apex Action.
- Click the inputLink toggle.

- Enter your link to be shortened in the inputLink textbox.

- The inputLink option should look like the screenshot below.
- The screenshot below shows how a message with a shortened link looks when received by the contact.
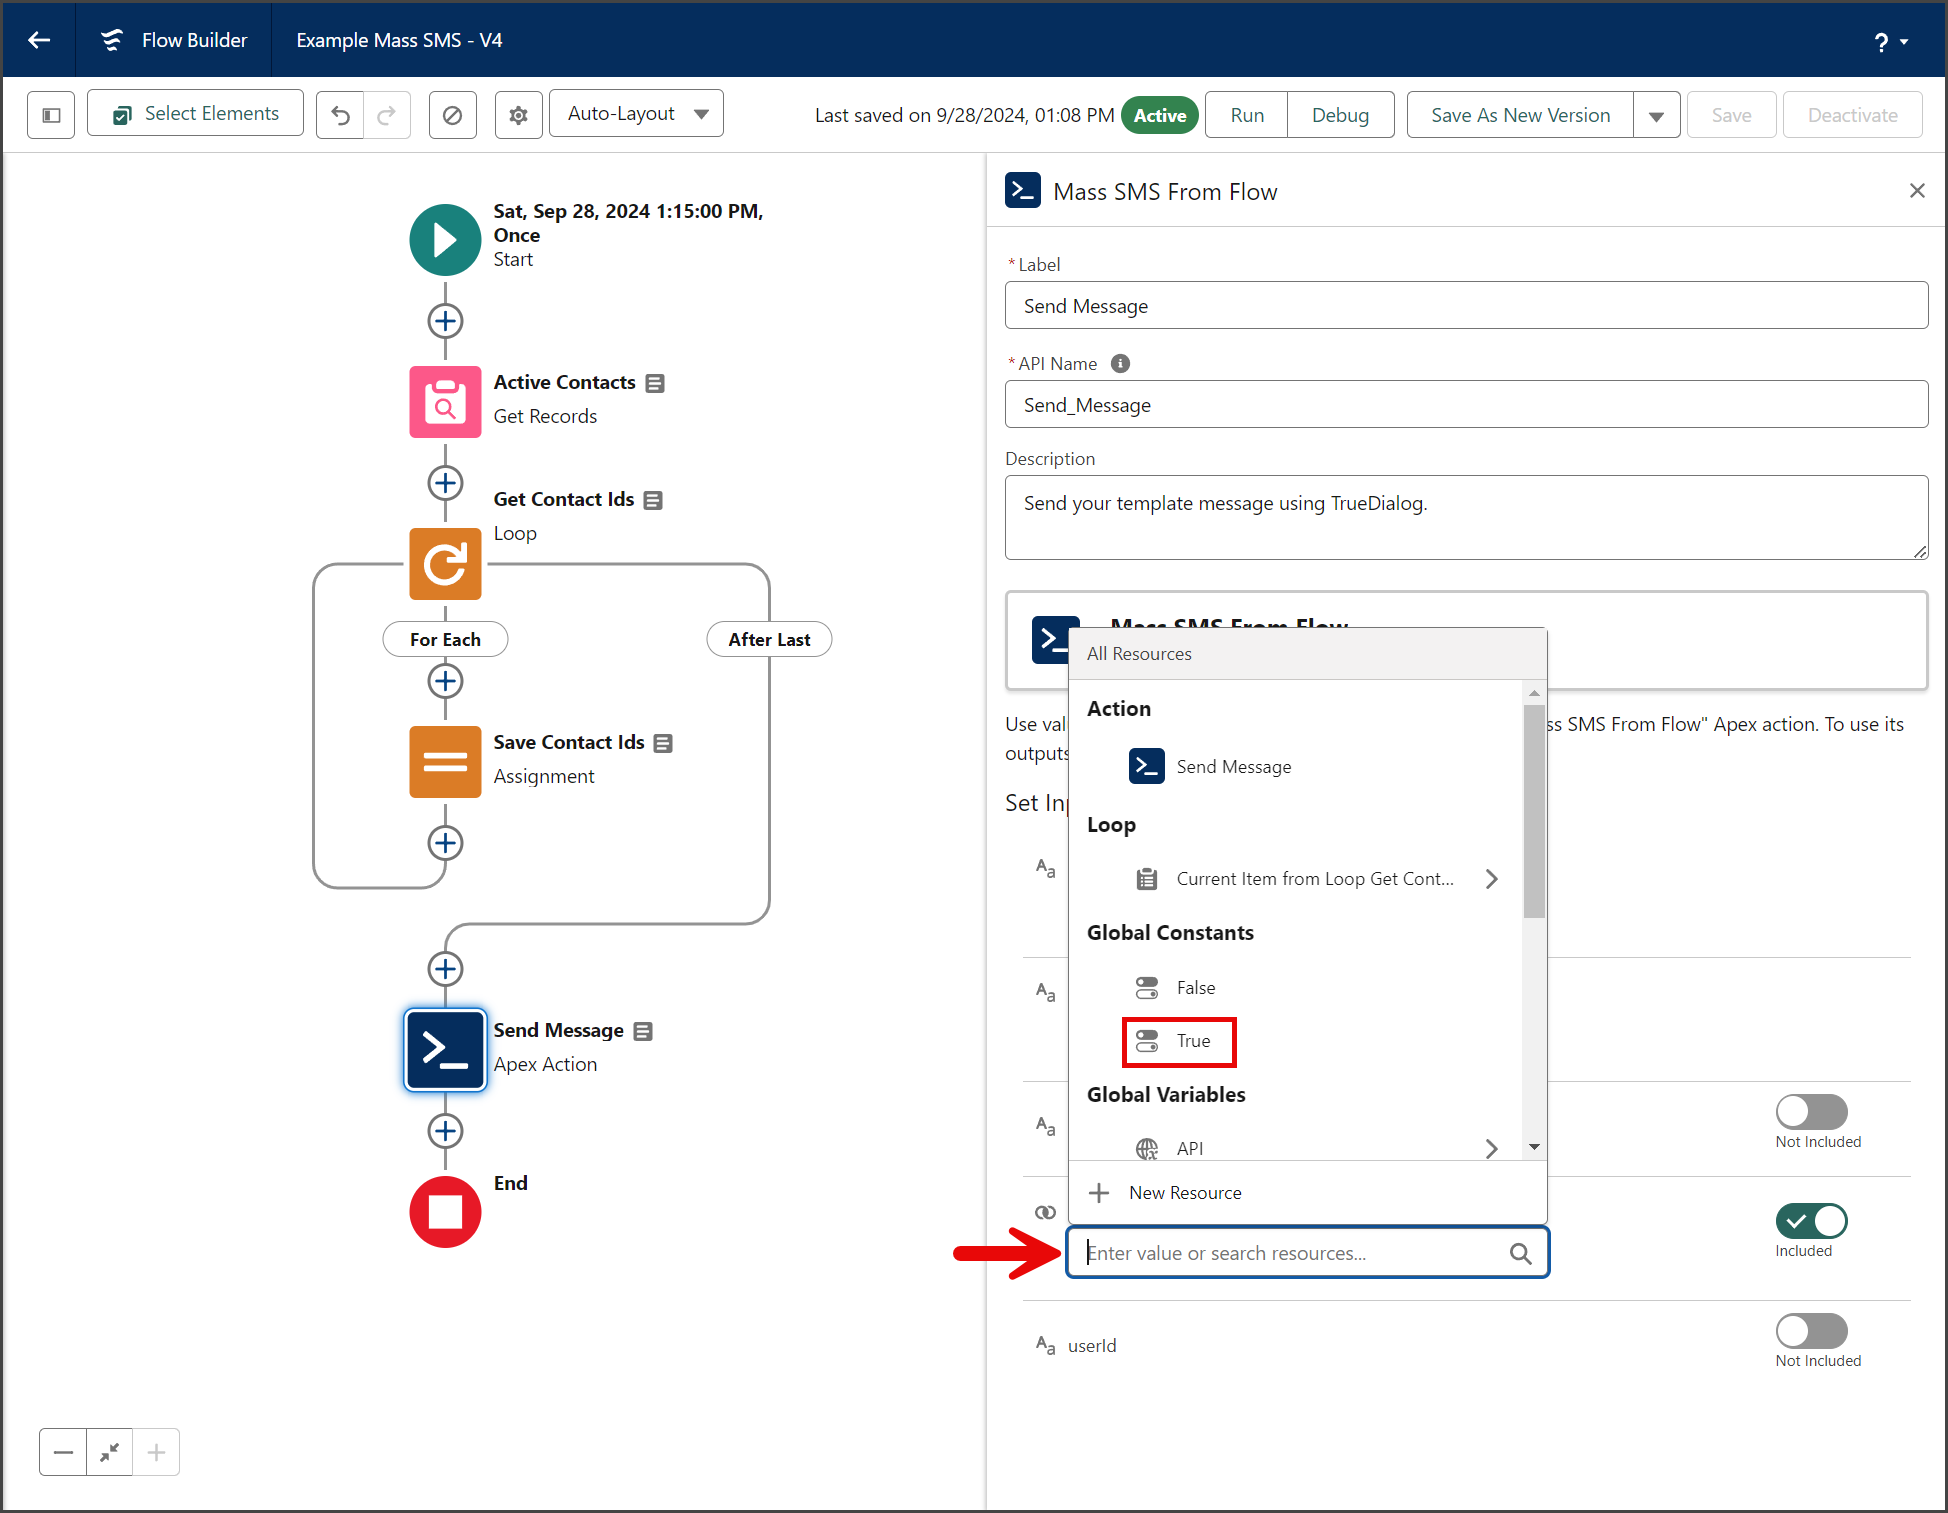
Send As Voice
TrueDialog enables sending mass messages using automated text-to-speech software to deliver your message to your contacts via a voice call. Follow the instructions below to use this feature.
- Edit the Send Message Apex Action.
- Click the sendAsVoice toggle to enable voice for this message.

- Click the sendAsVoice textbox.
- Select True under Global Constants.

- The sendAsVoice option should look like the screenshot below.


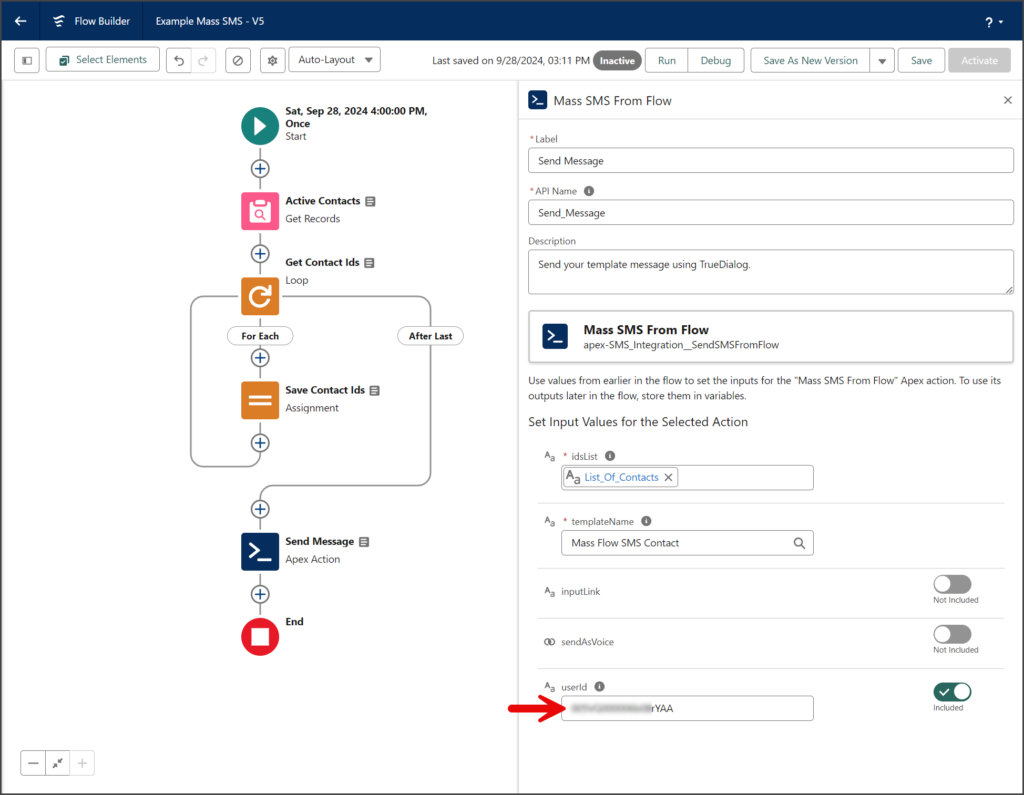
User Id
The userId option enables you to select a Salesforce user from whom the mass SMS will be sent. The messages will be sent from the chosen user’s TrueDialog channel, and that user will also be designated as the Owner of the SMS records. Follow the instructions below to select a User.
Find User ID
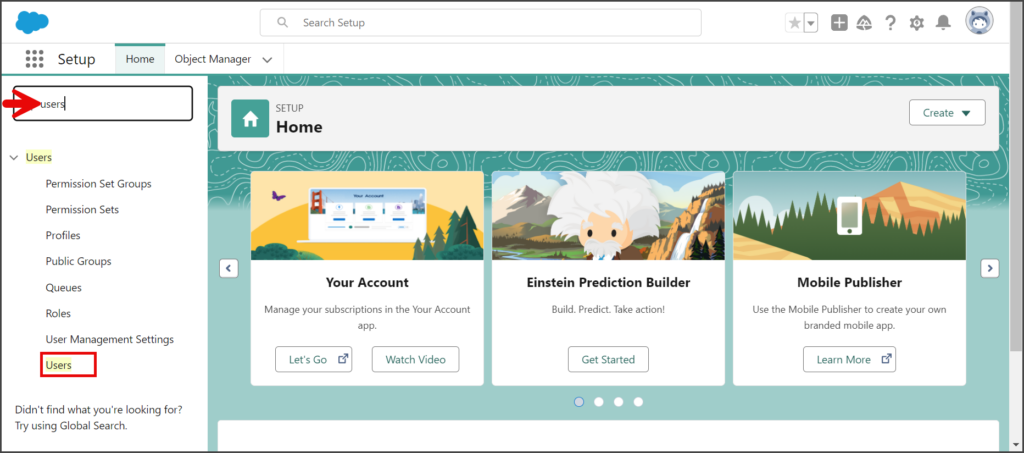
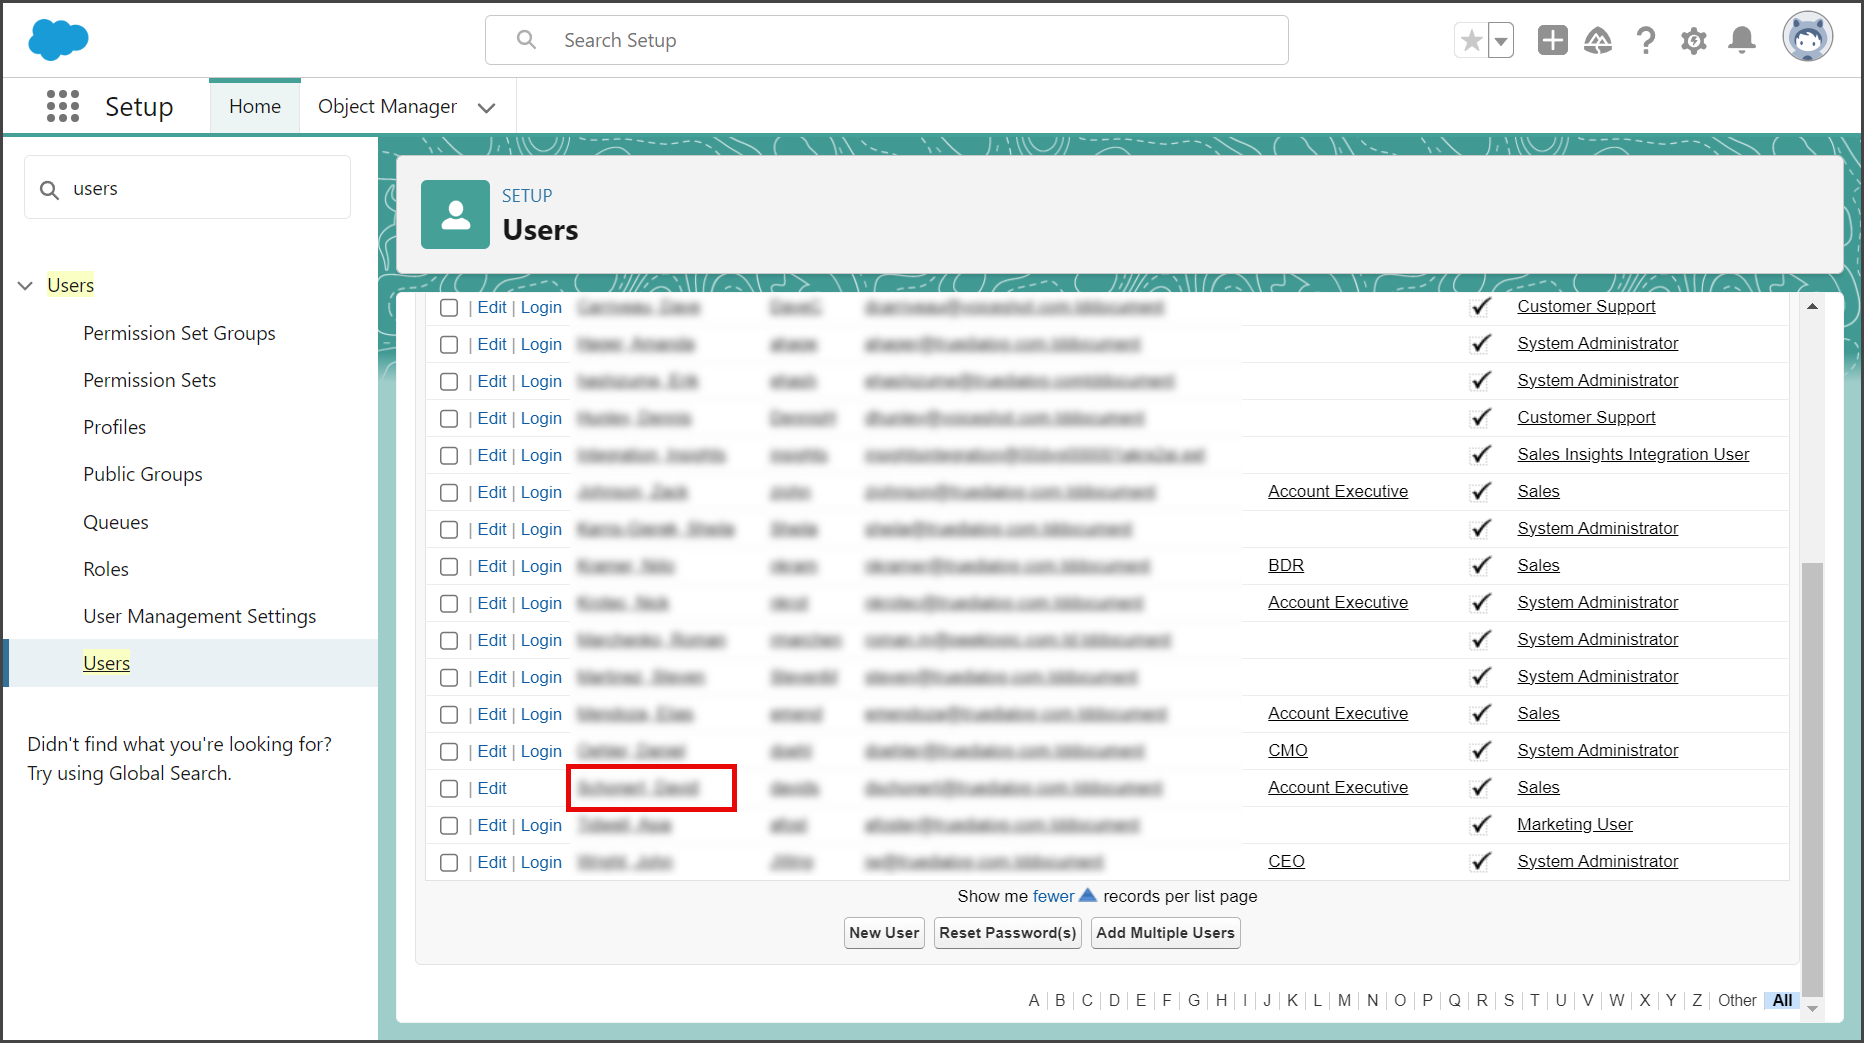
- Click the Settings Gear icon to open the settings menu.
- Click Setup.

- Enter users in the search box.
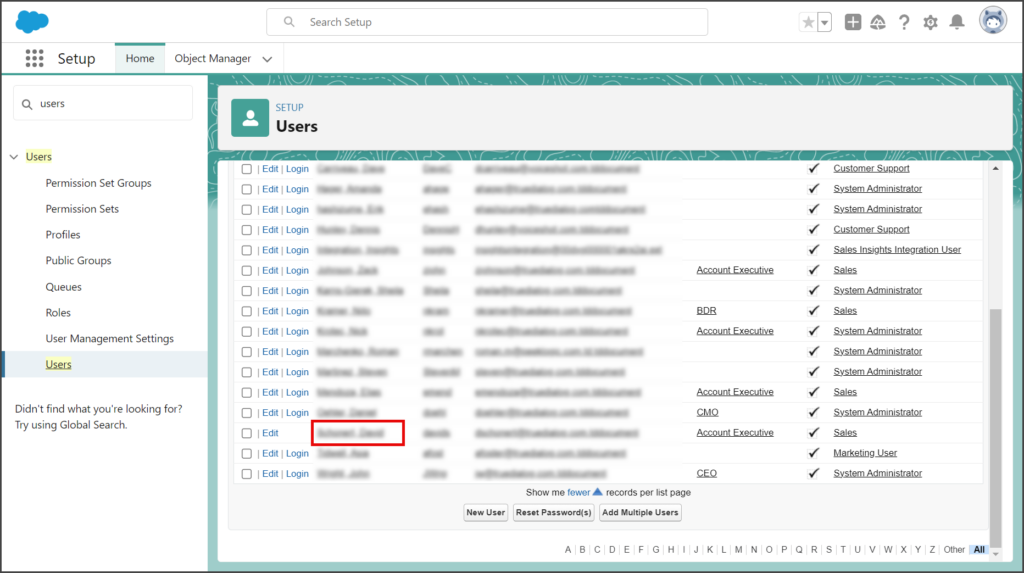
- Click Users under the Users section.
- Click the Name of the user to get the ID.
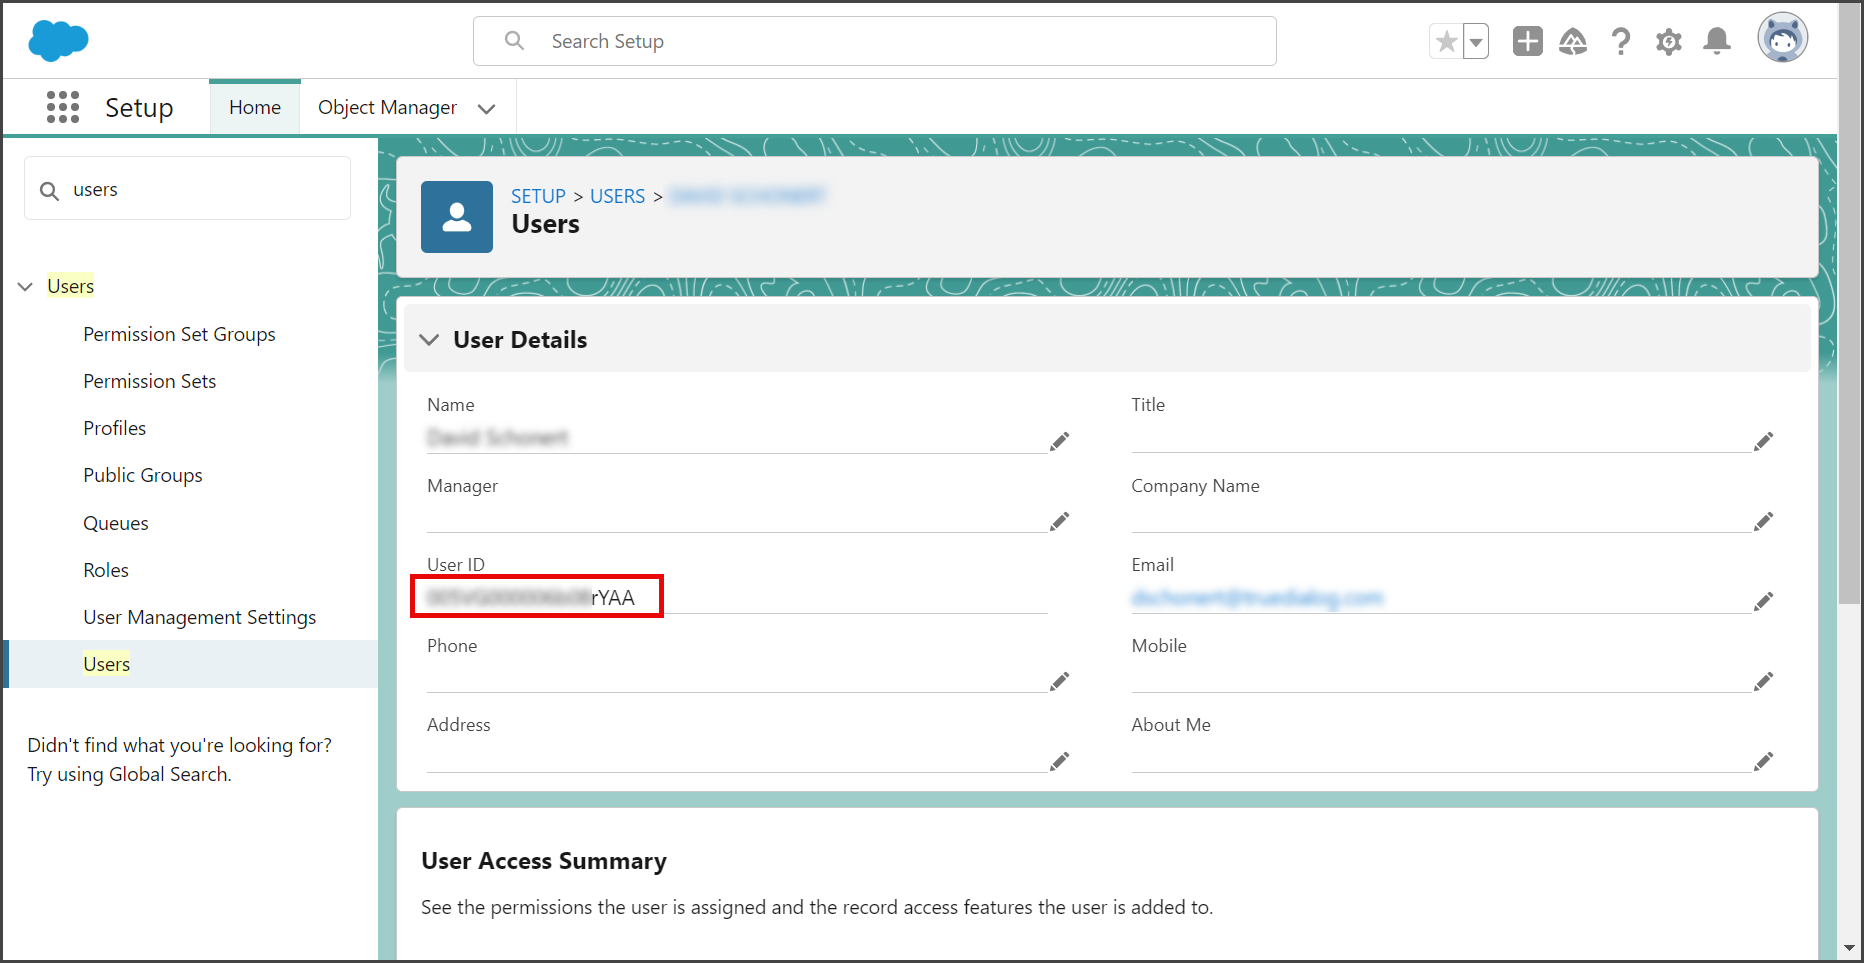
- Click View Summary.
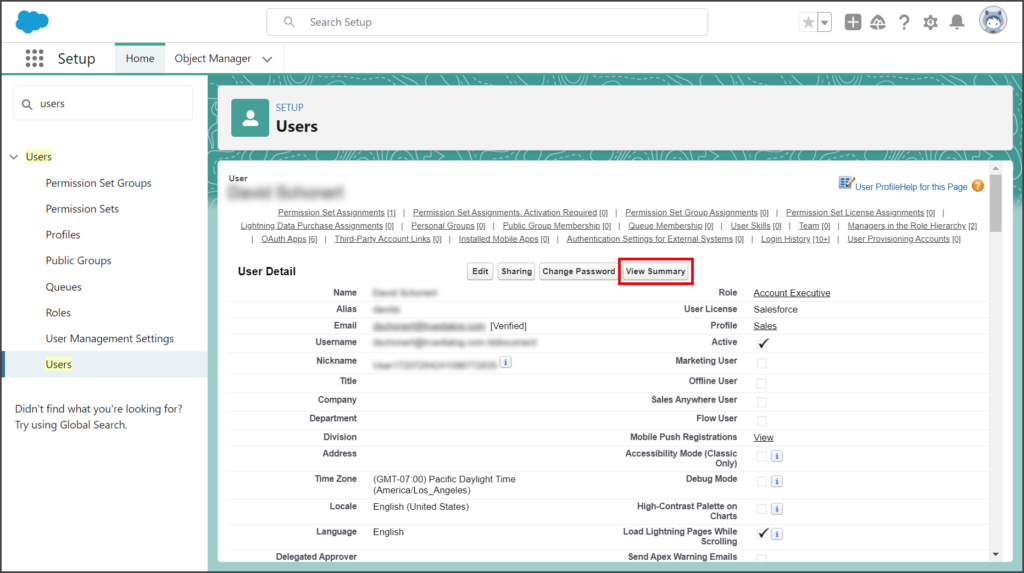
- Copy the User ID value to enter in the userId of the Mass SMS From Flow Apex Action.


Enter userId
- Edit the Send Message Apex Action.
- Click the userId toggle.
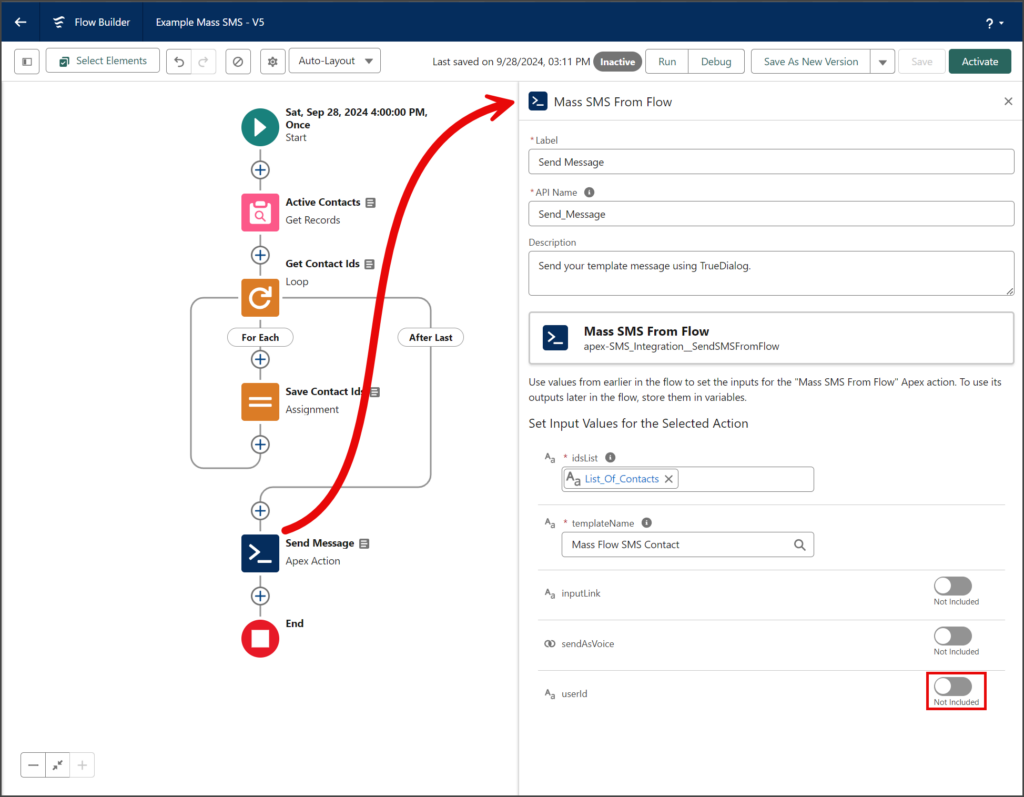
- Enter in the userId textbox the User ID the Mass SMS will be sent from. See the Find User ID section above to find the User ID value.