Salesforce Marketing Cloud
TrueDialog Integration
A Journey can be scheduled to run at a future time or on a recurring basis. This article will show you how to create both a scheduled and recurring run.
Before you can configure the schedule, you must create your Journey. The following instructions assume you are familiar with creating a Journey using TrueDialog’s Send SMS integration. If you need help creating a Journey, see the SFMC – Creating an SMS Journey article.
Configure a Future Scheduled Send
The following instructions will show you how to create a schedule that runs once at a future time.
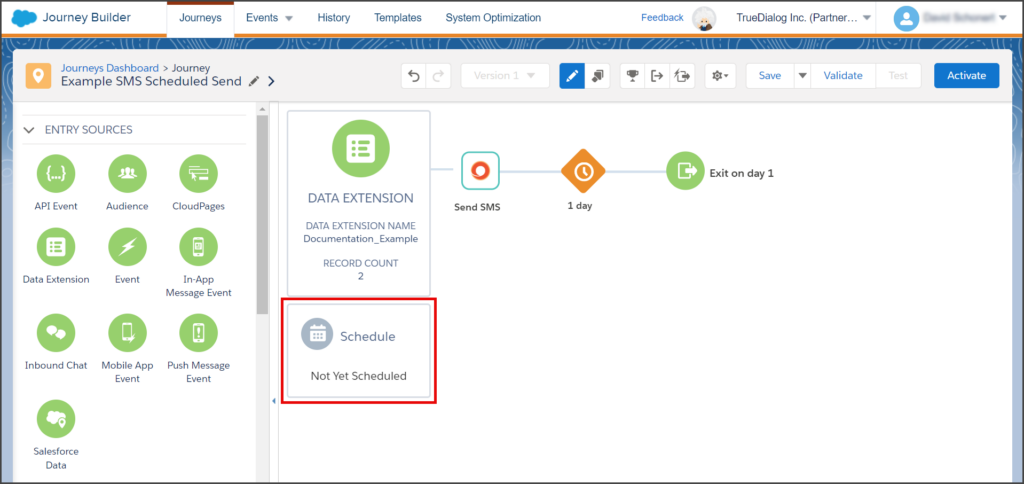
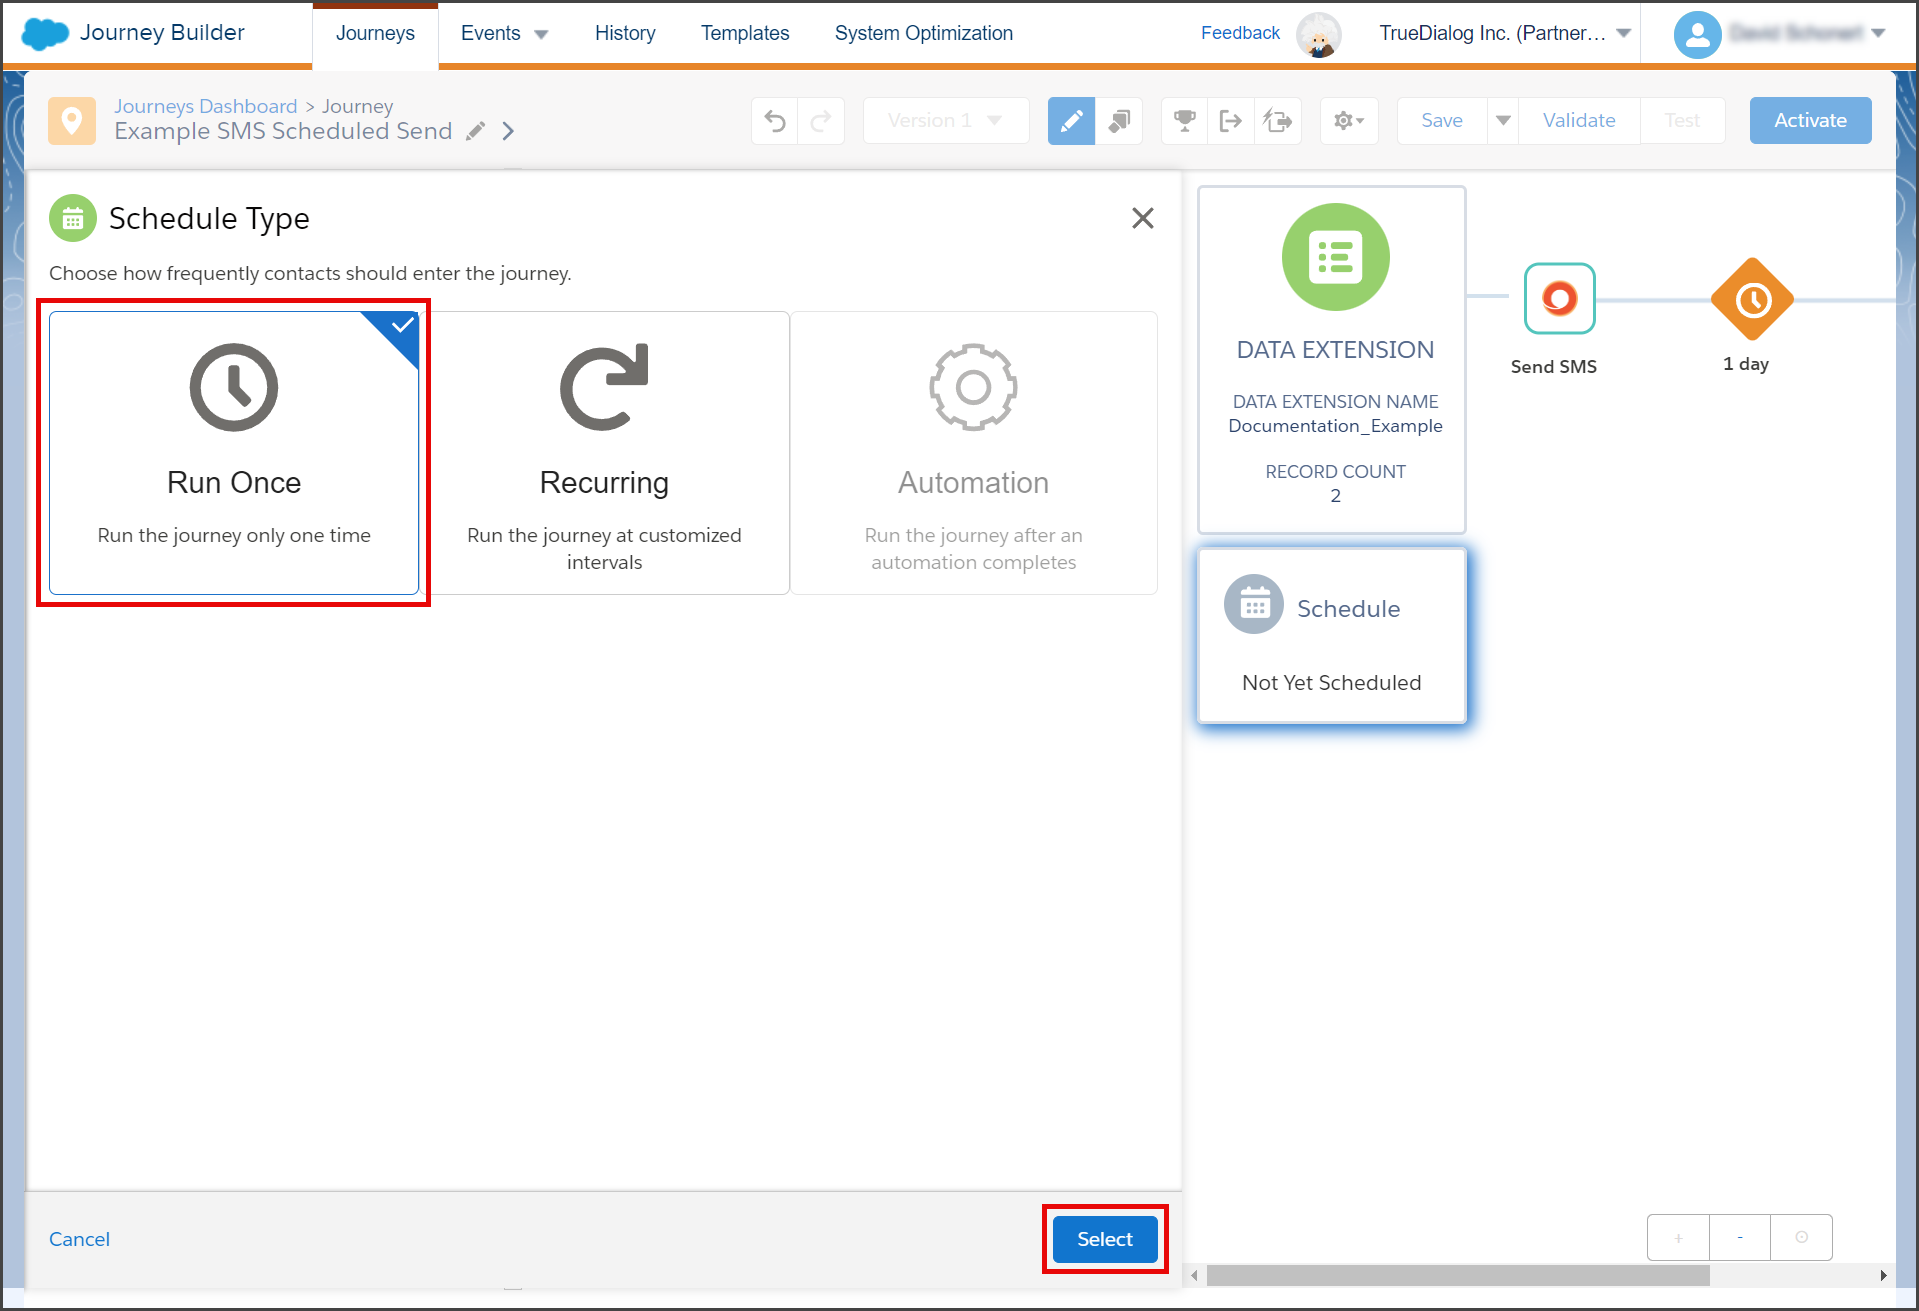
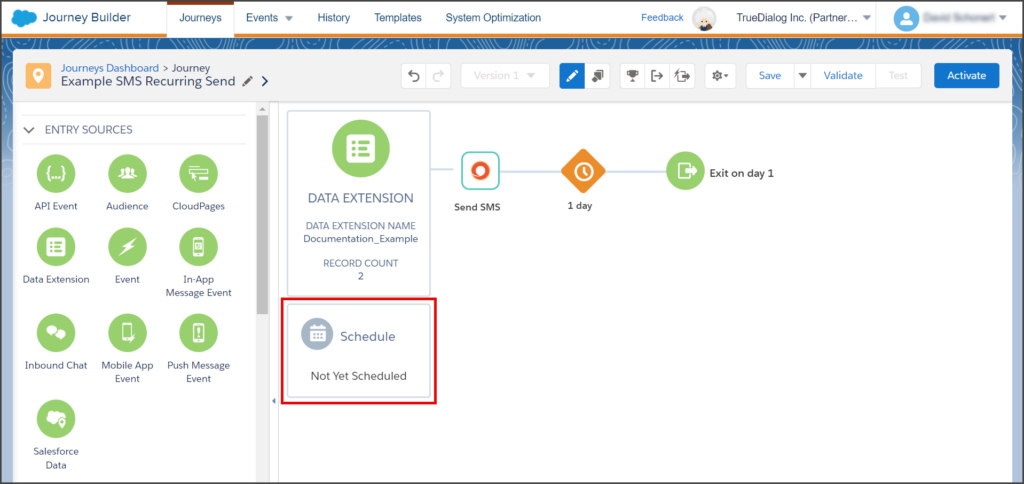
- Click the Schedule box on the canvas.
- Click the Run Once box.
- Click Select.

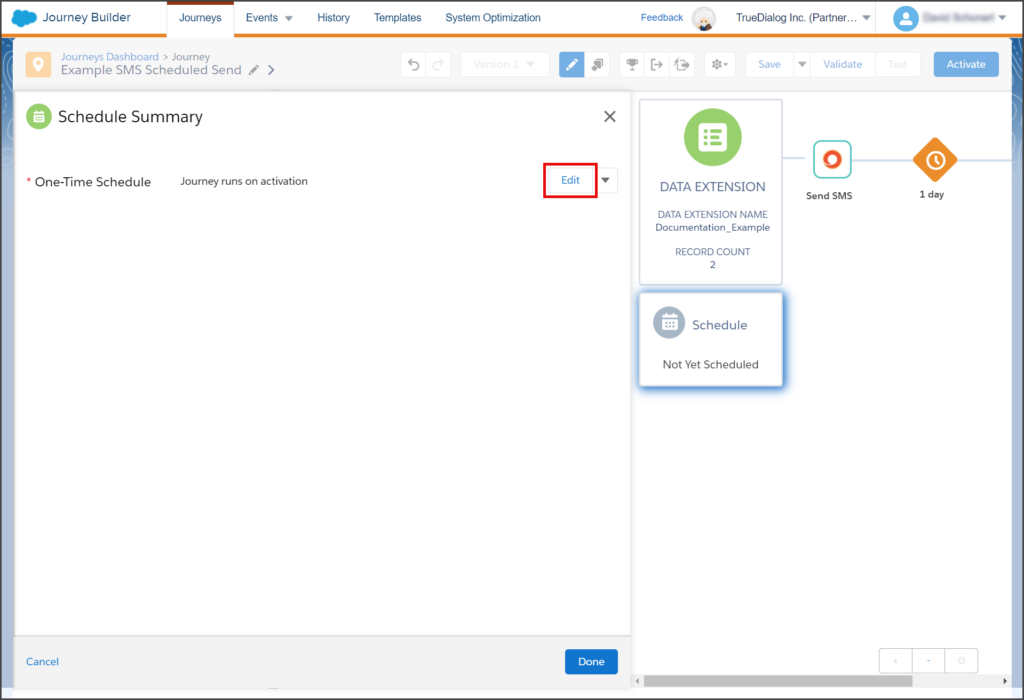
- Click Edit.
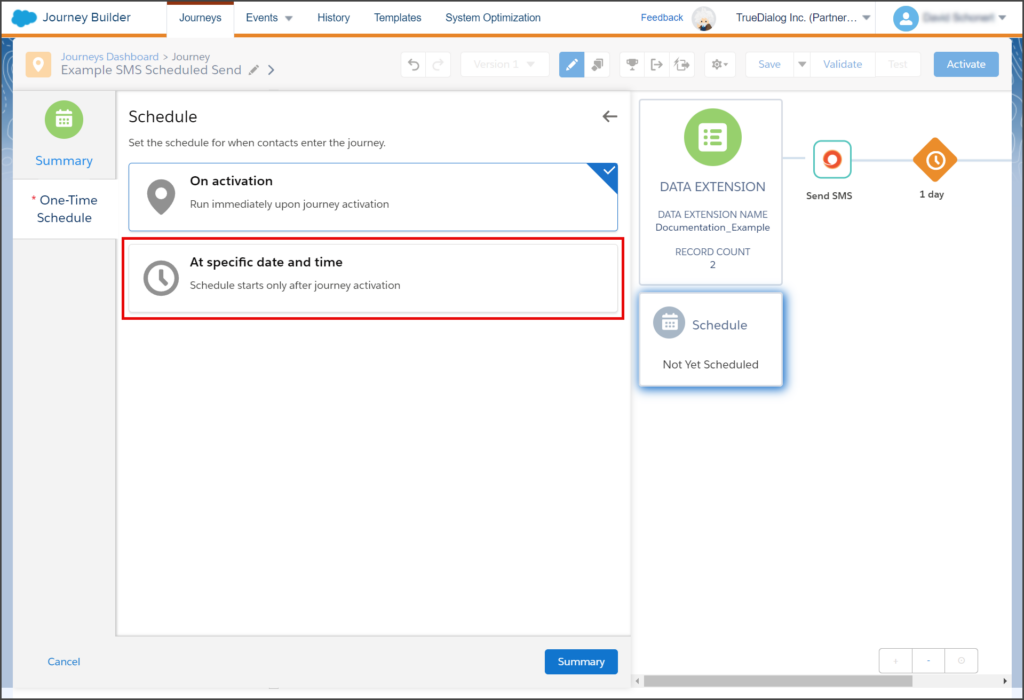
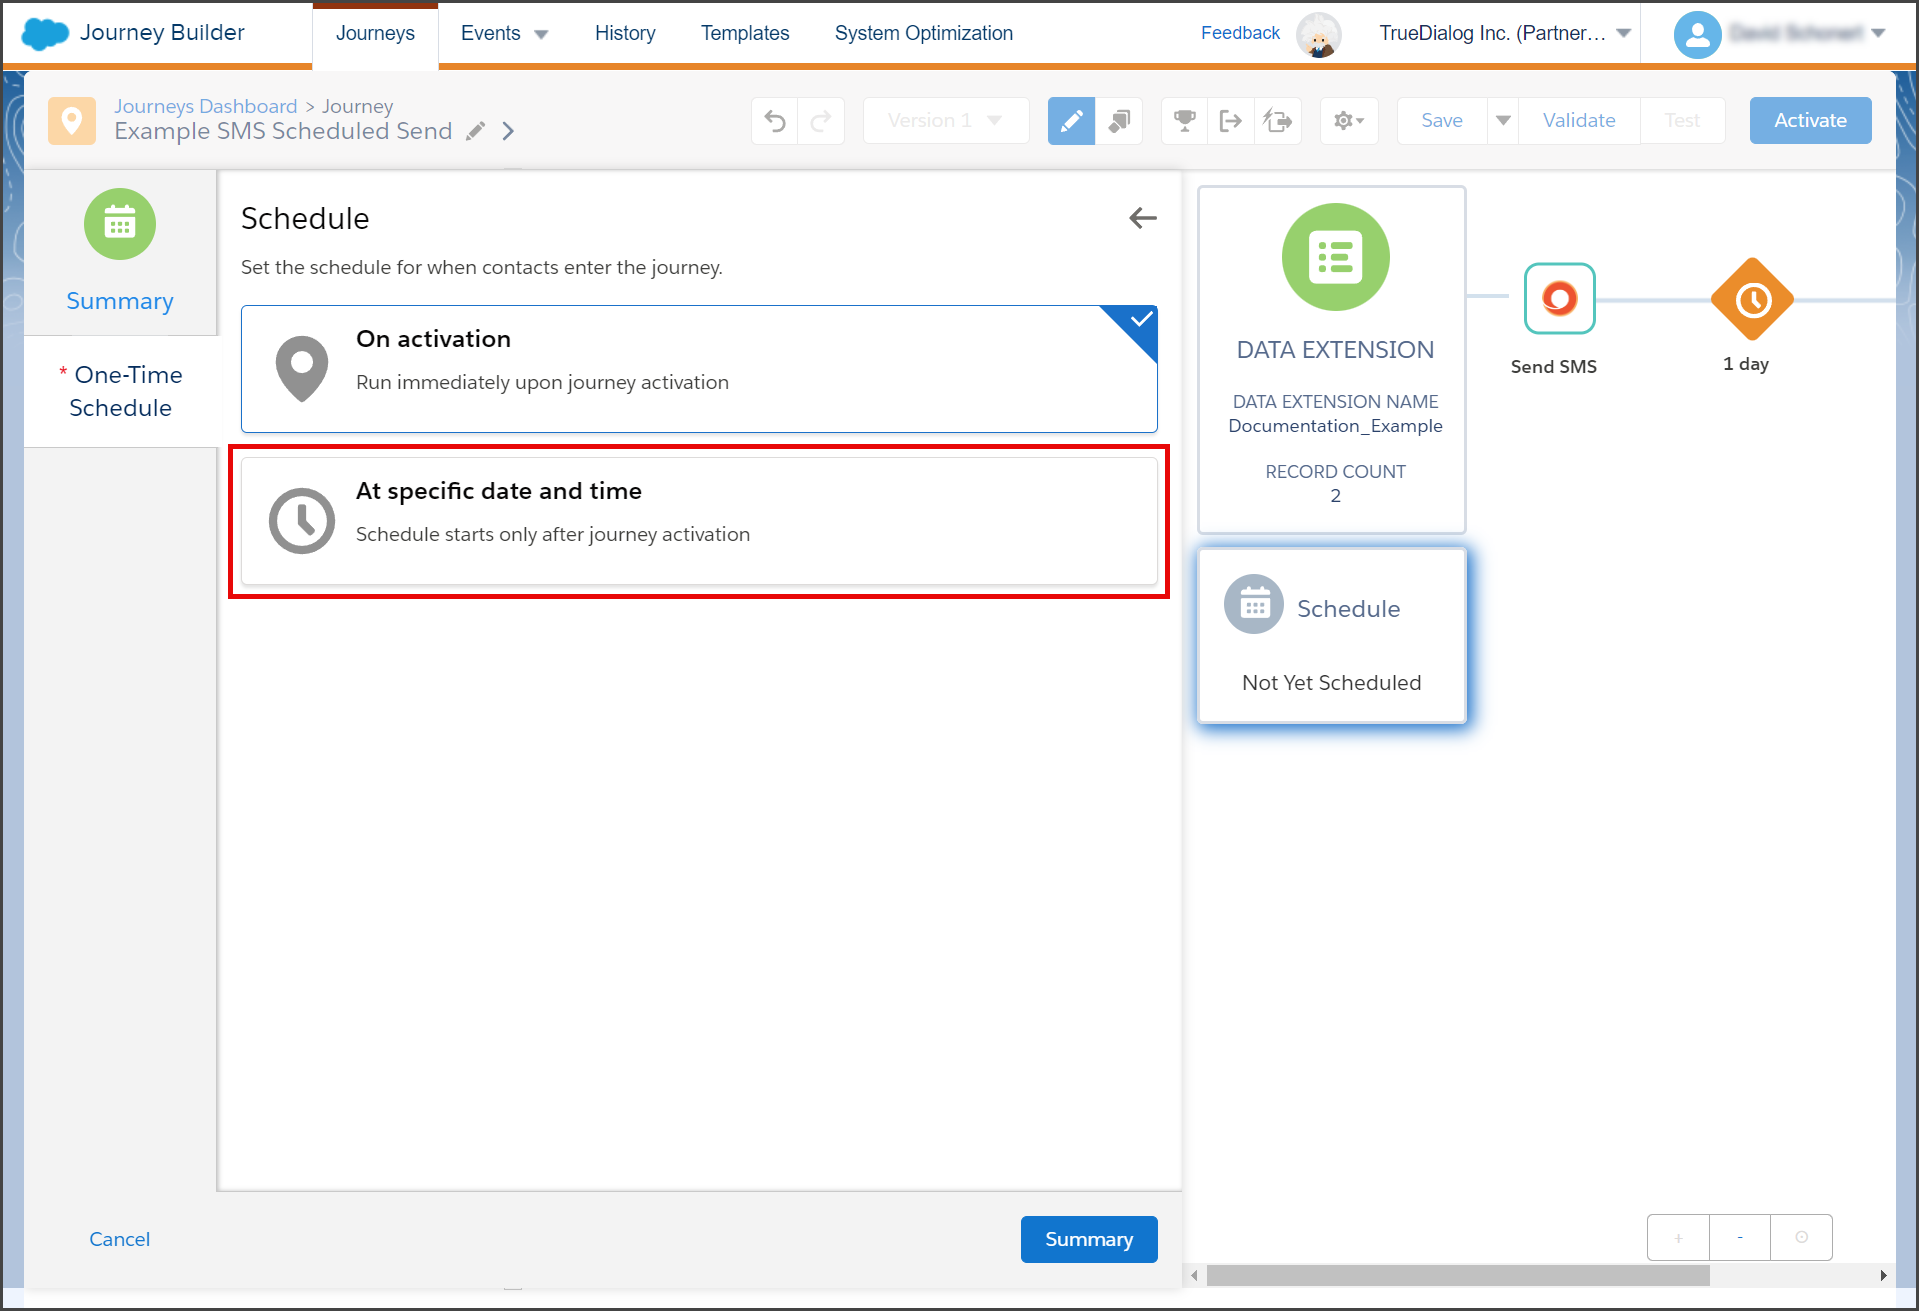
- Click At specific date and time.
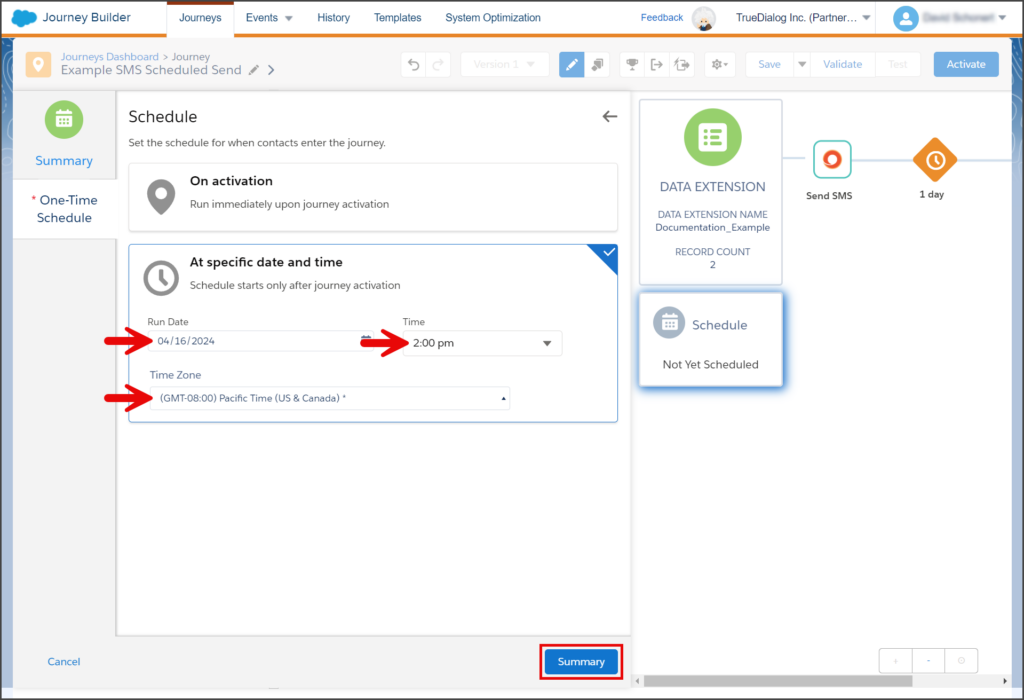
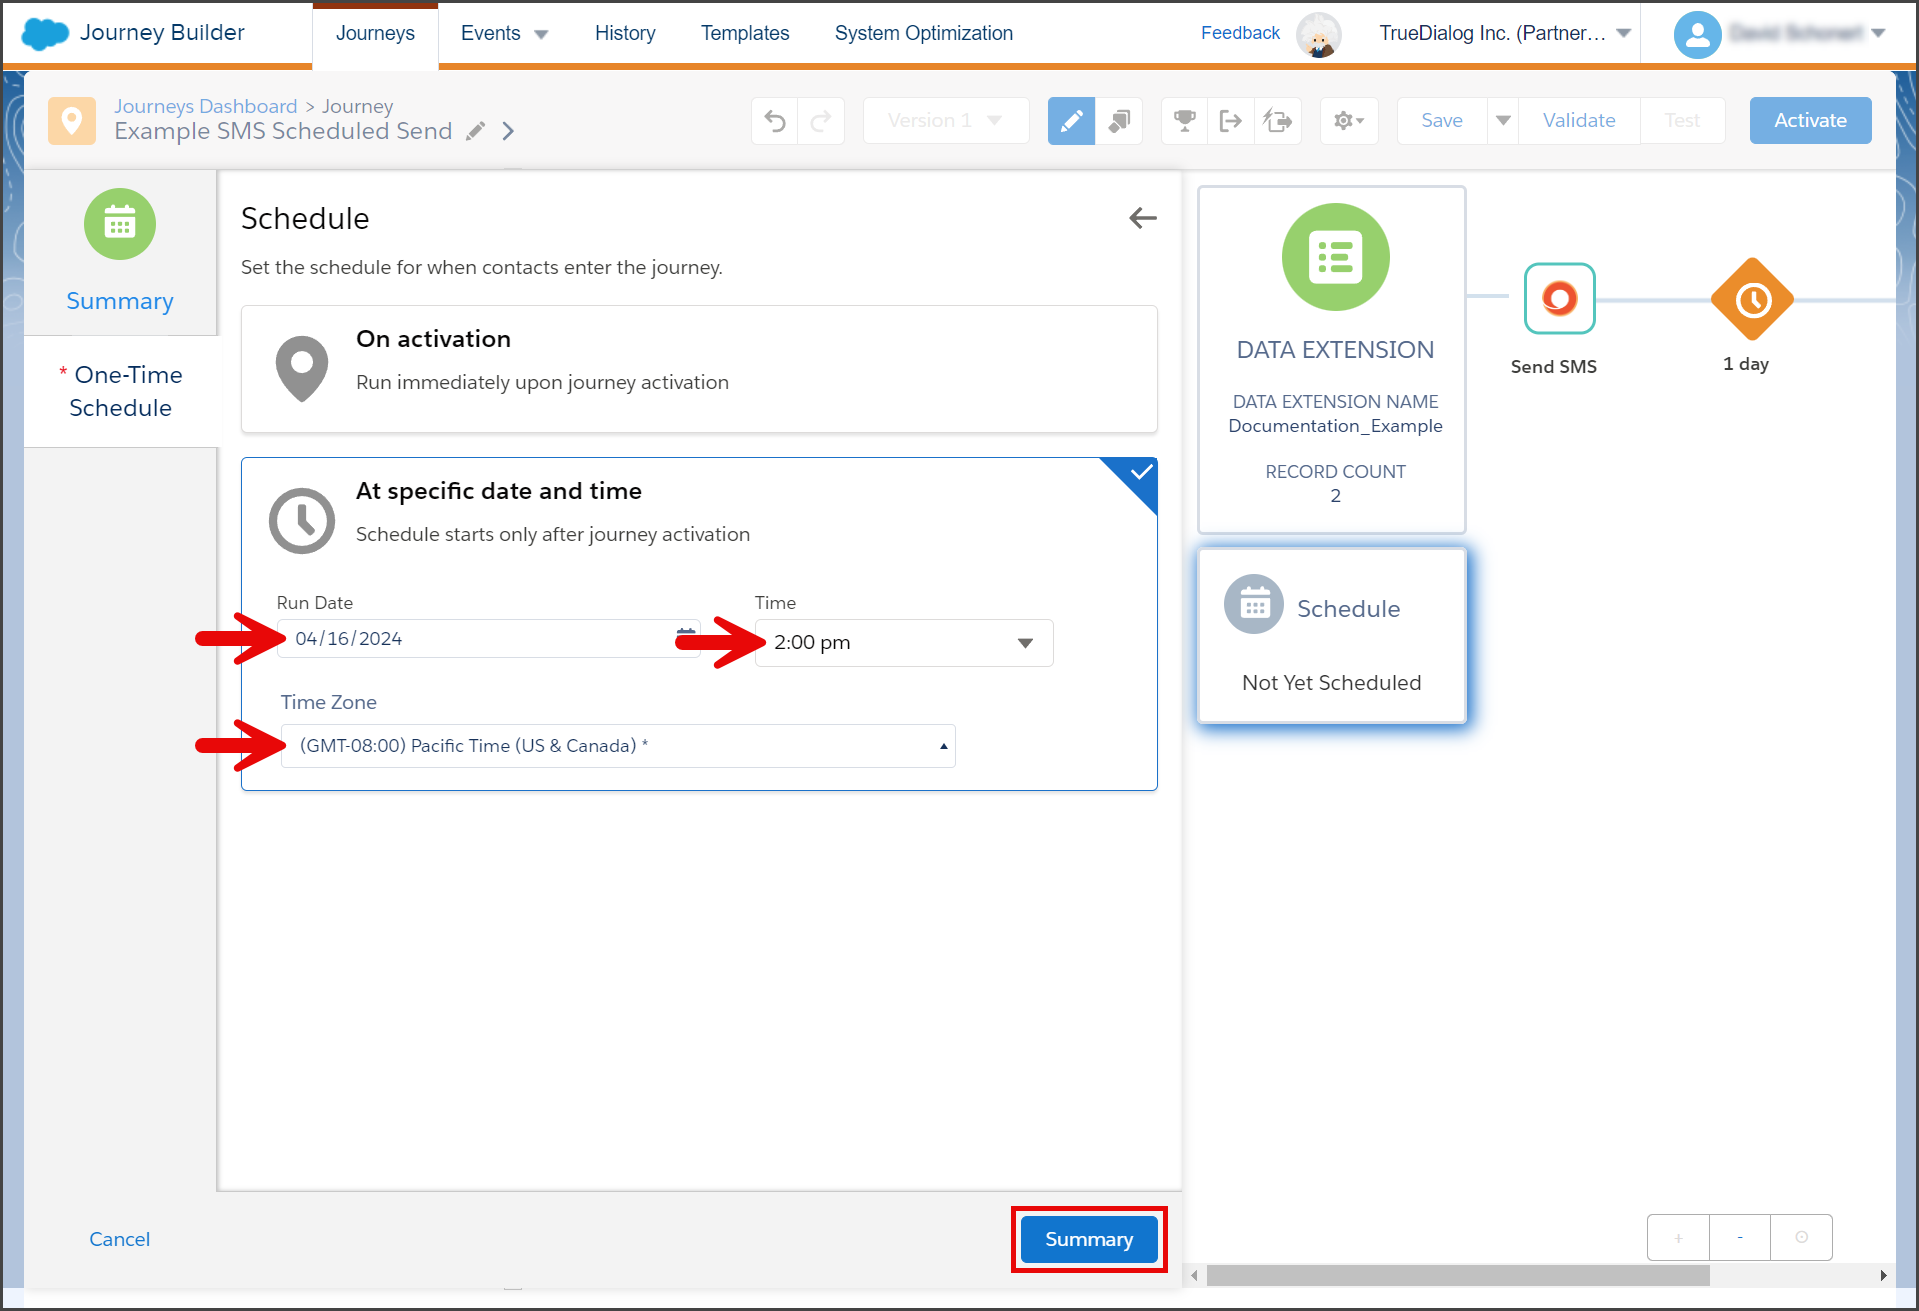
- Set the Run Date, Time, and Time Zone for the schedule. Once activated, the Journey will send its message at this date and time.
- Click Summary.
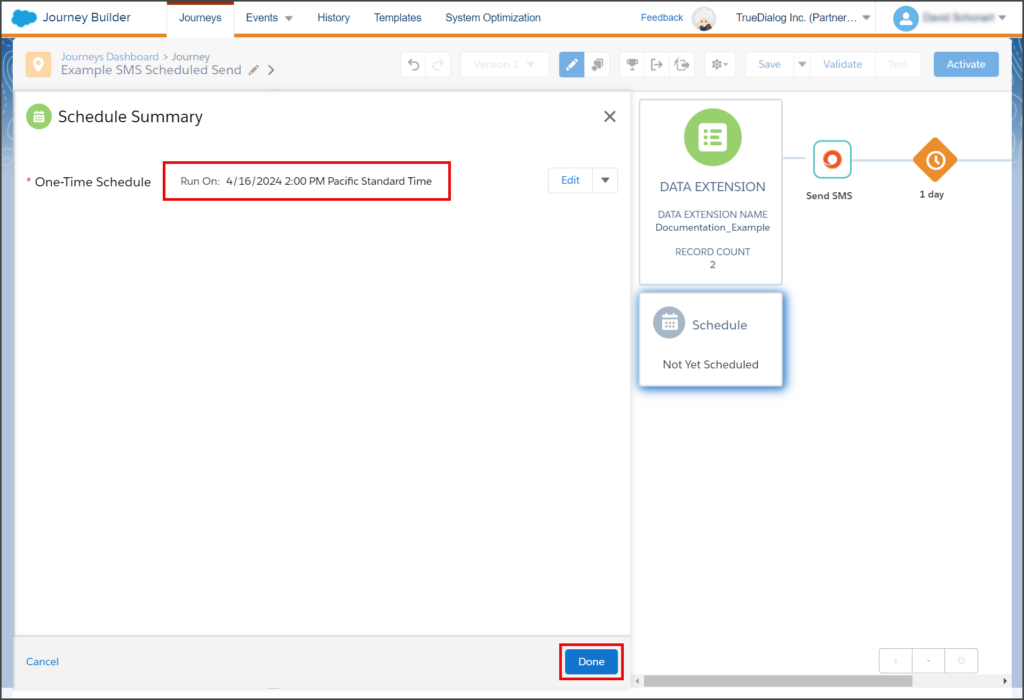
- Review the schedule to ensure that all the details are correct.
- Click Done.
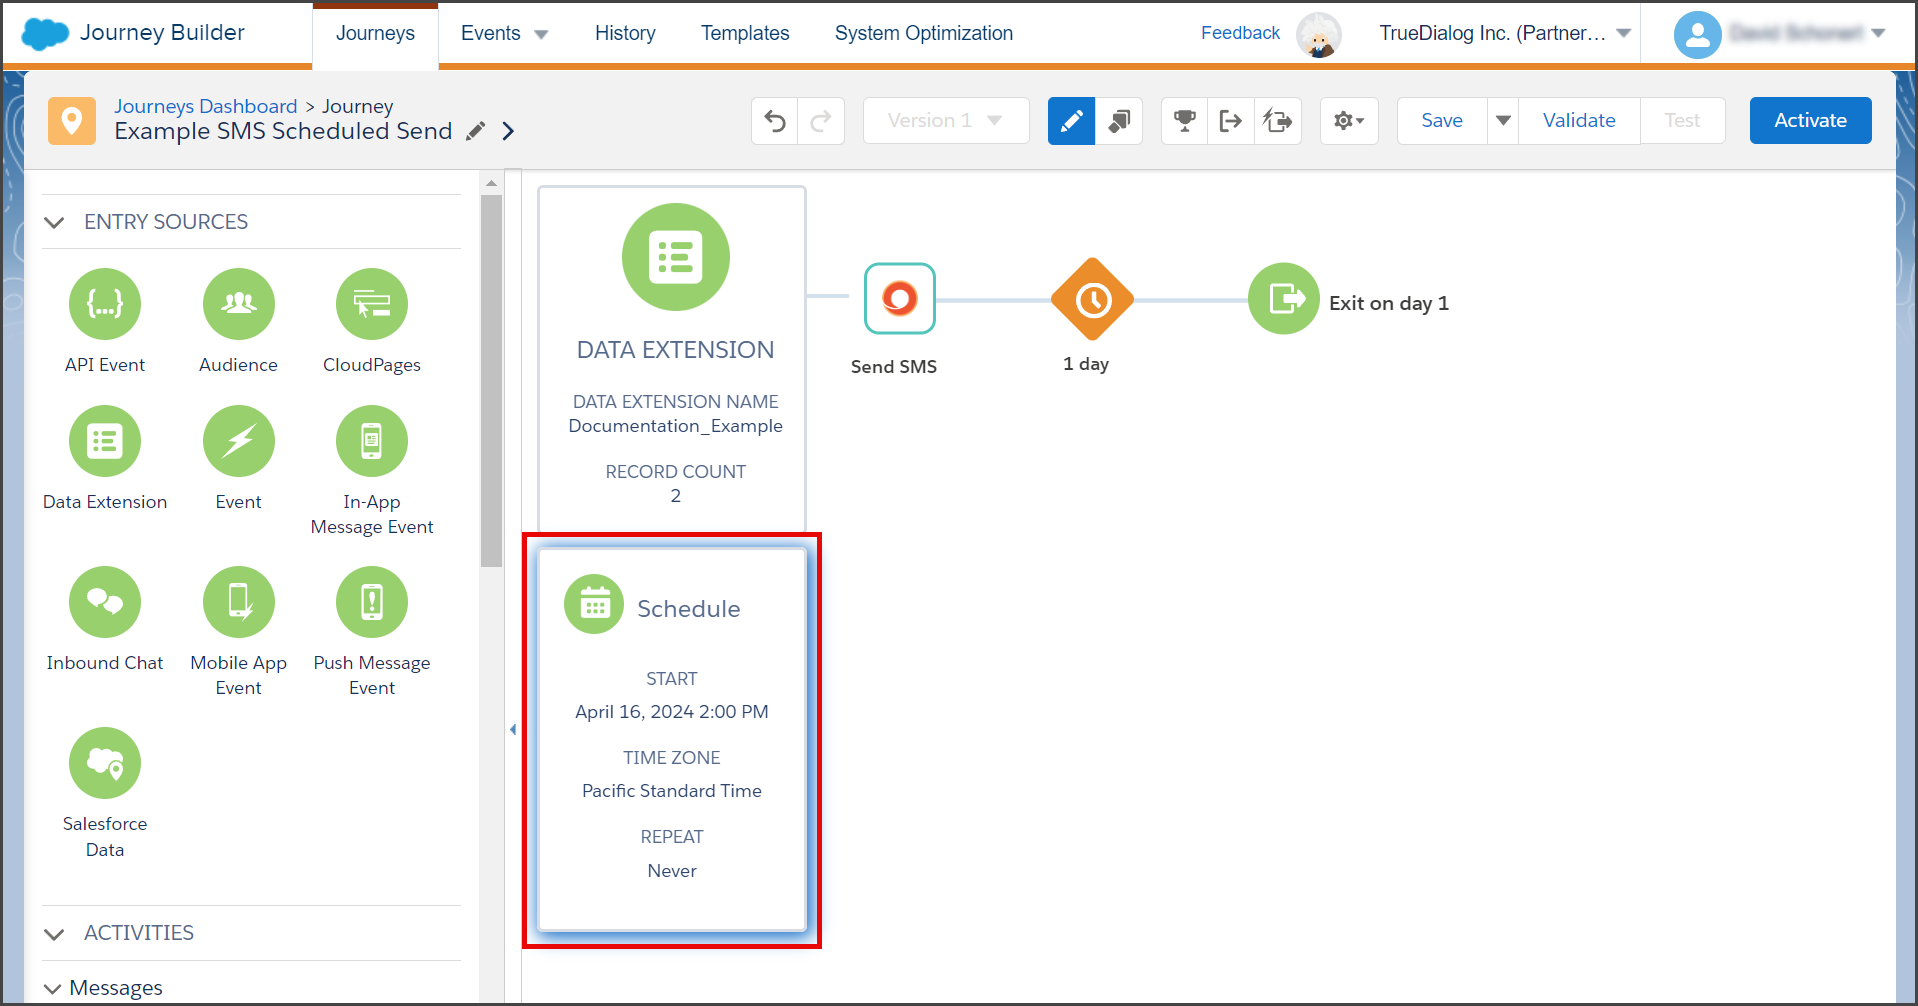
- Your canvas will now have a Schedule with all of its details.


Configure a Recurring Scheduled Send
The following instructions will show you how to create a recurring schedule. Extensive options are available to help you create a schedule that best suits your needs.
- Click the Schedule box on the canvas.
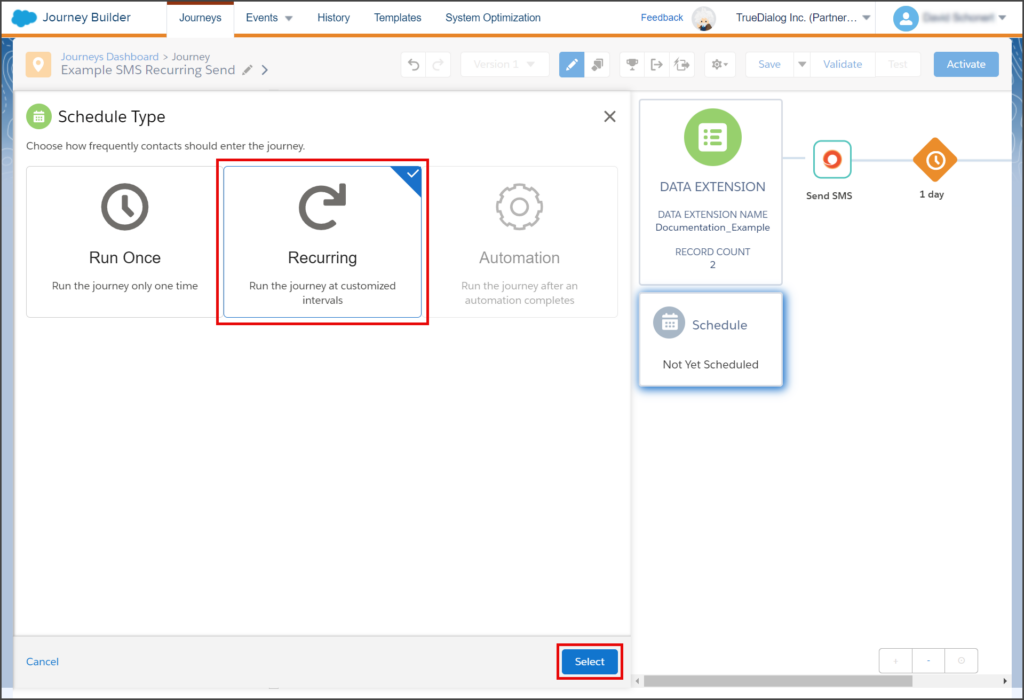
- Click the Recurring box.
- Click Select.
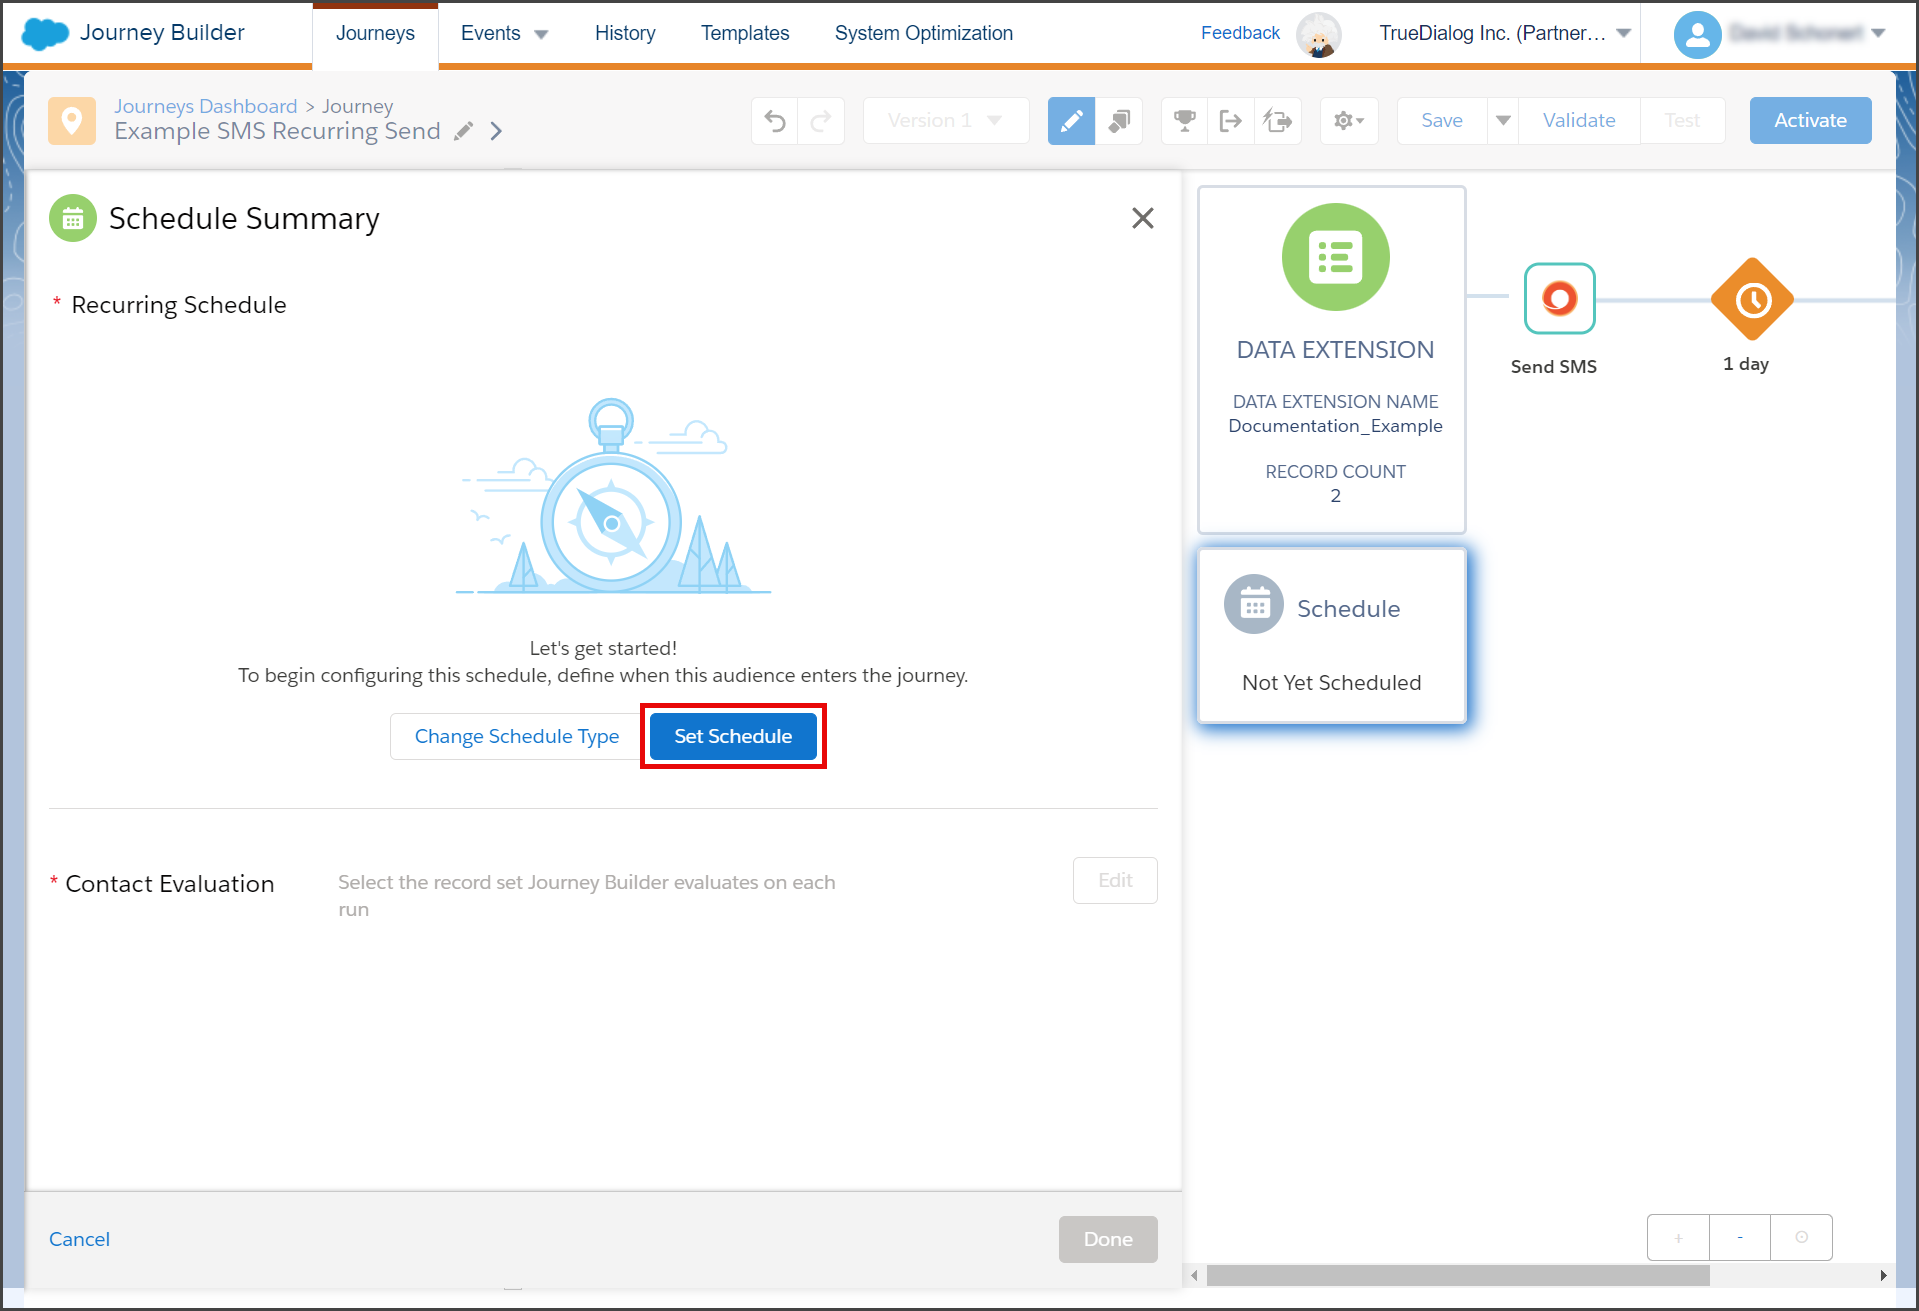
- Click Set Schedule.

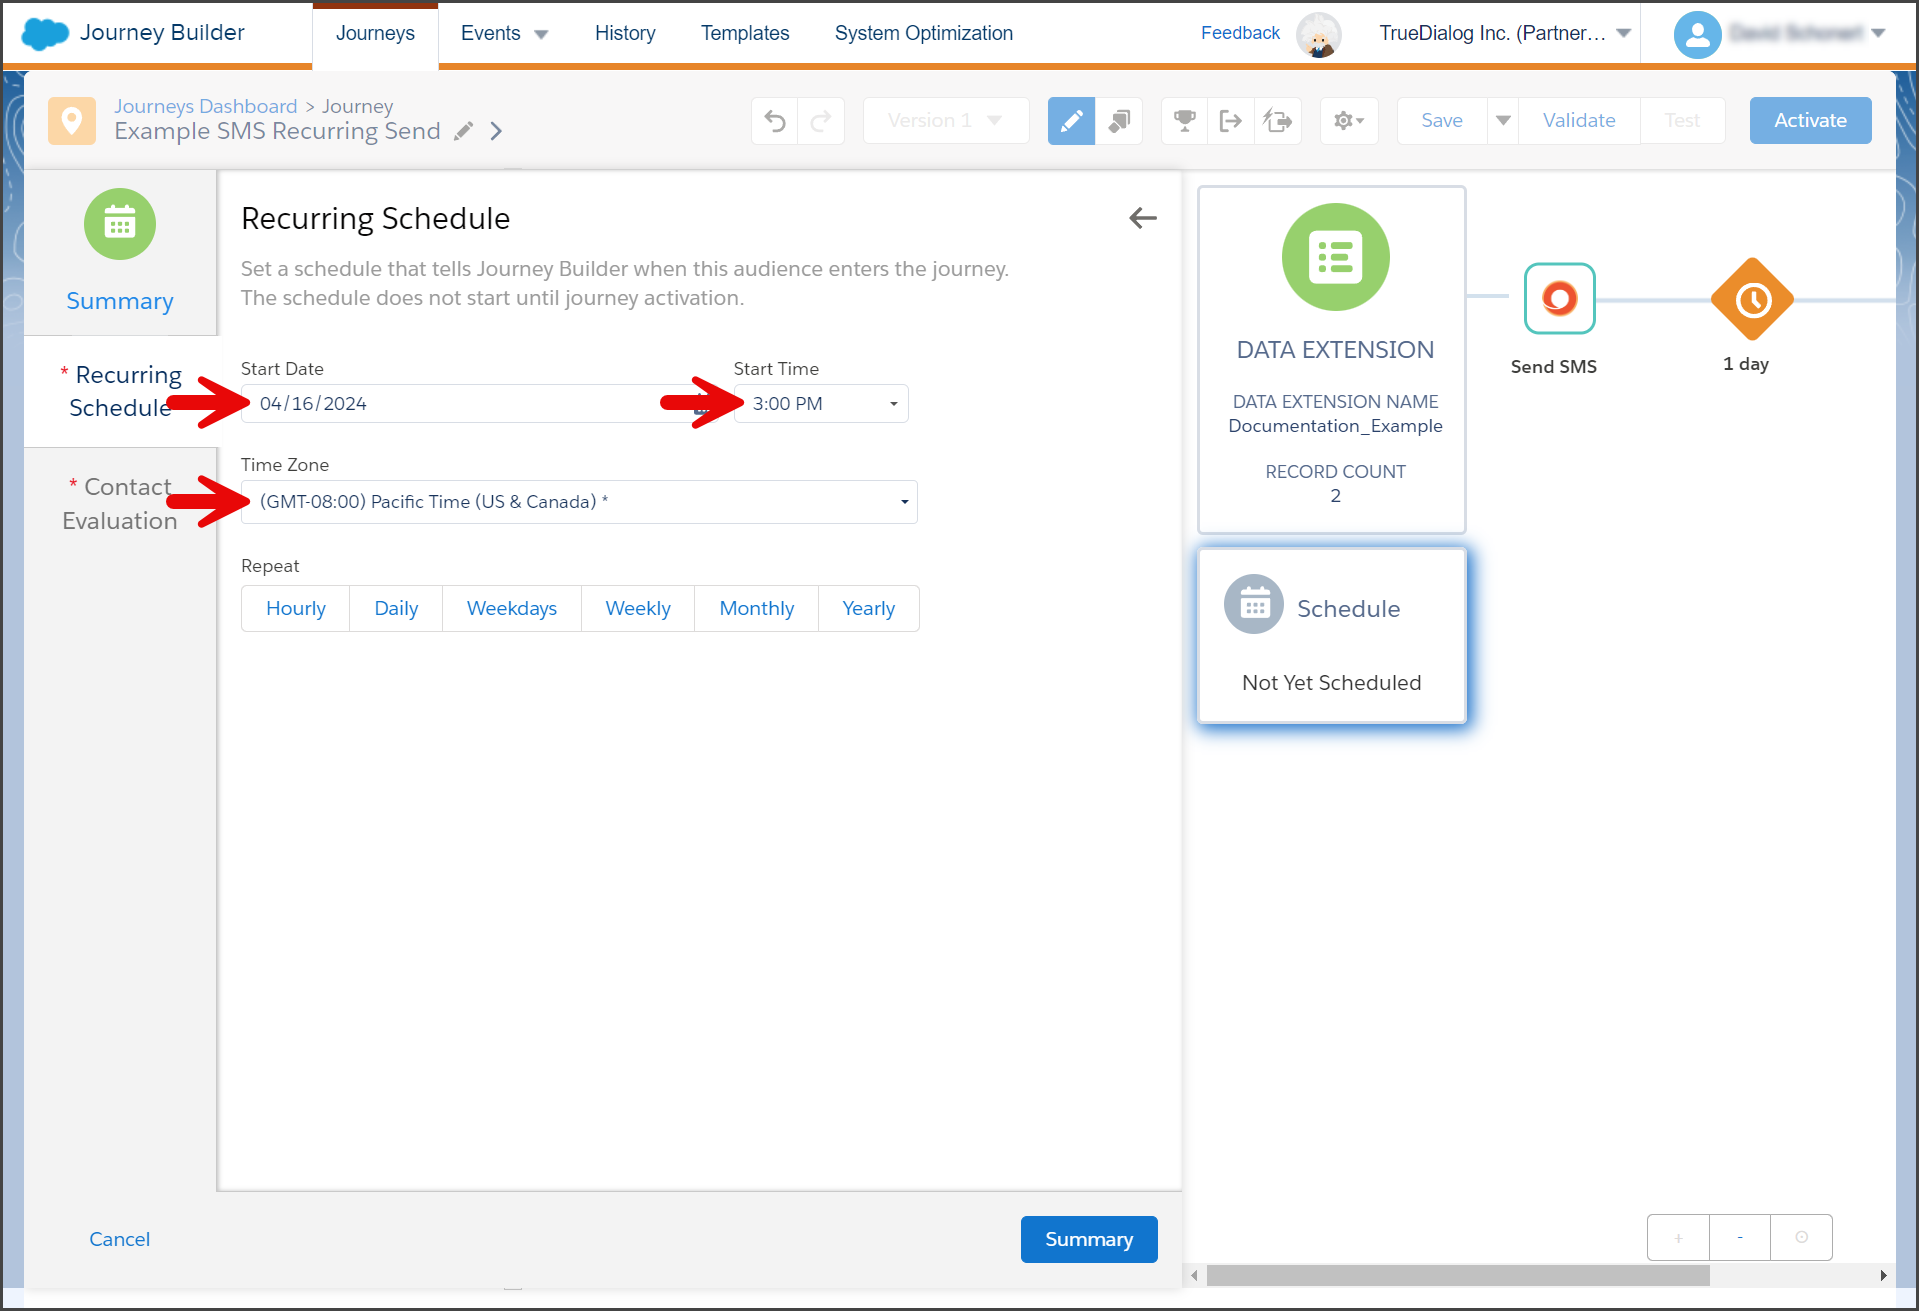
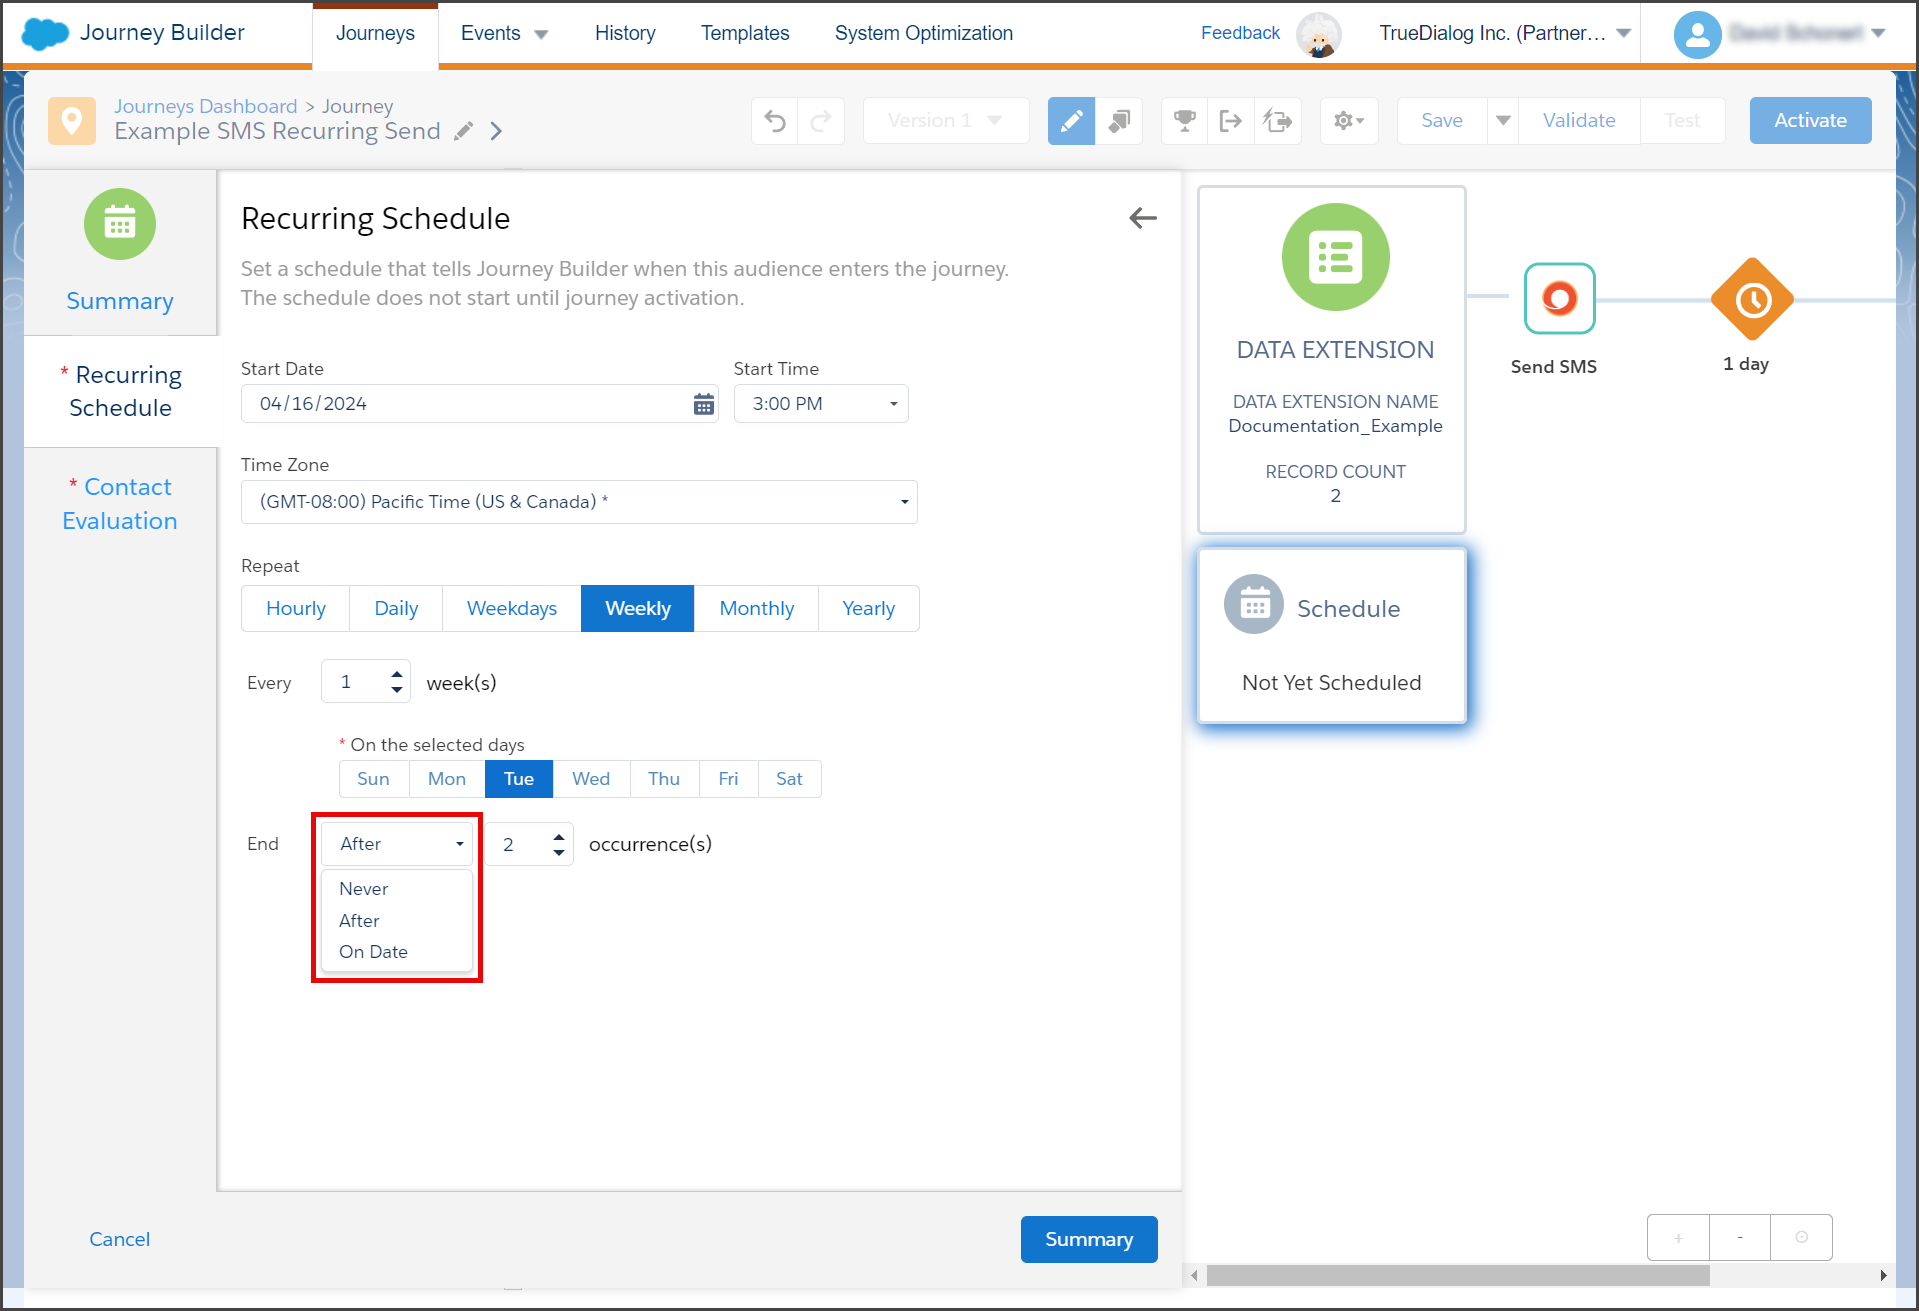
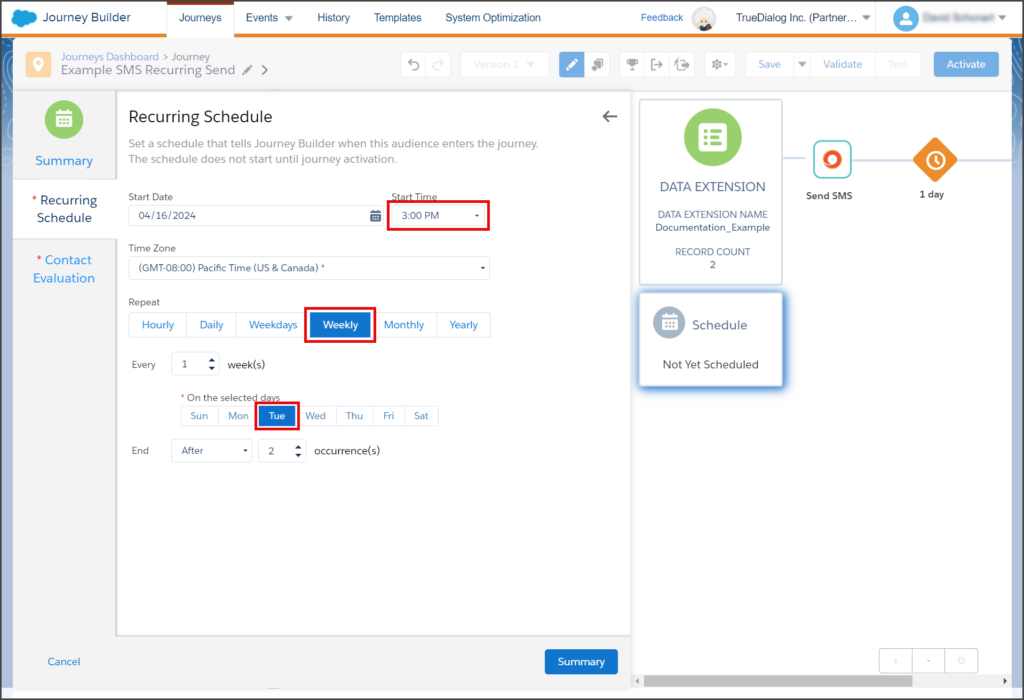
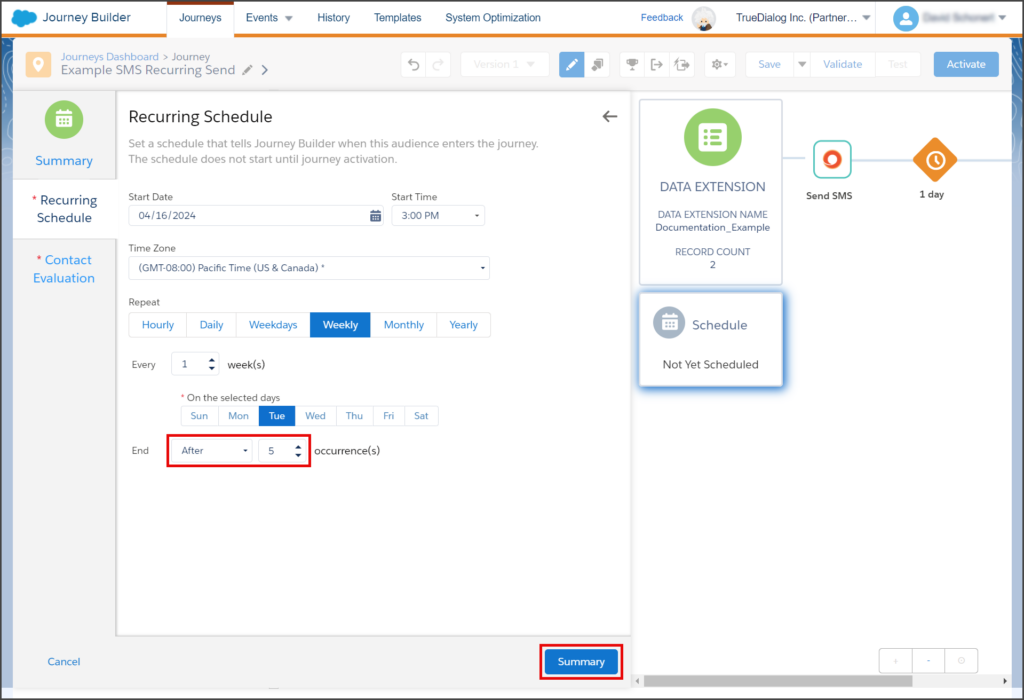
- Set the Start Date, Start Time, and Time Zone for the recurring schedule.

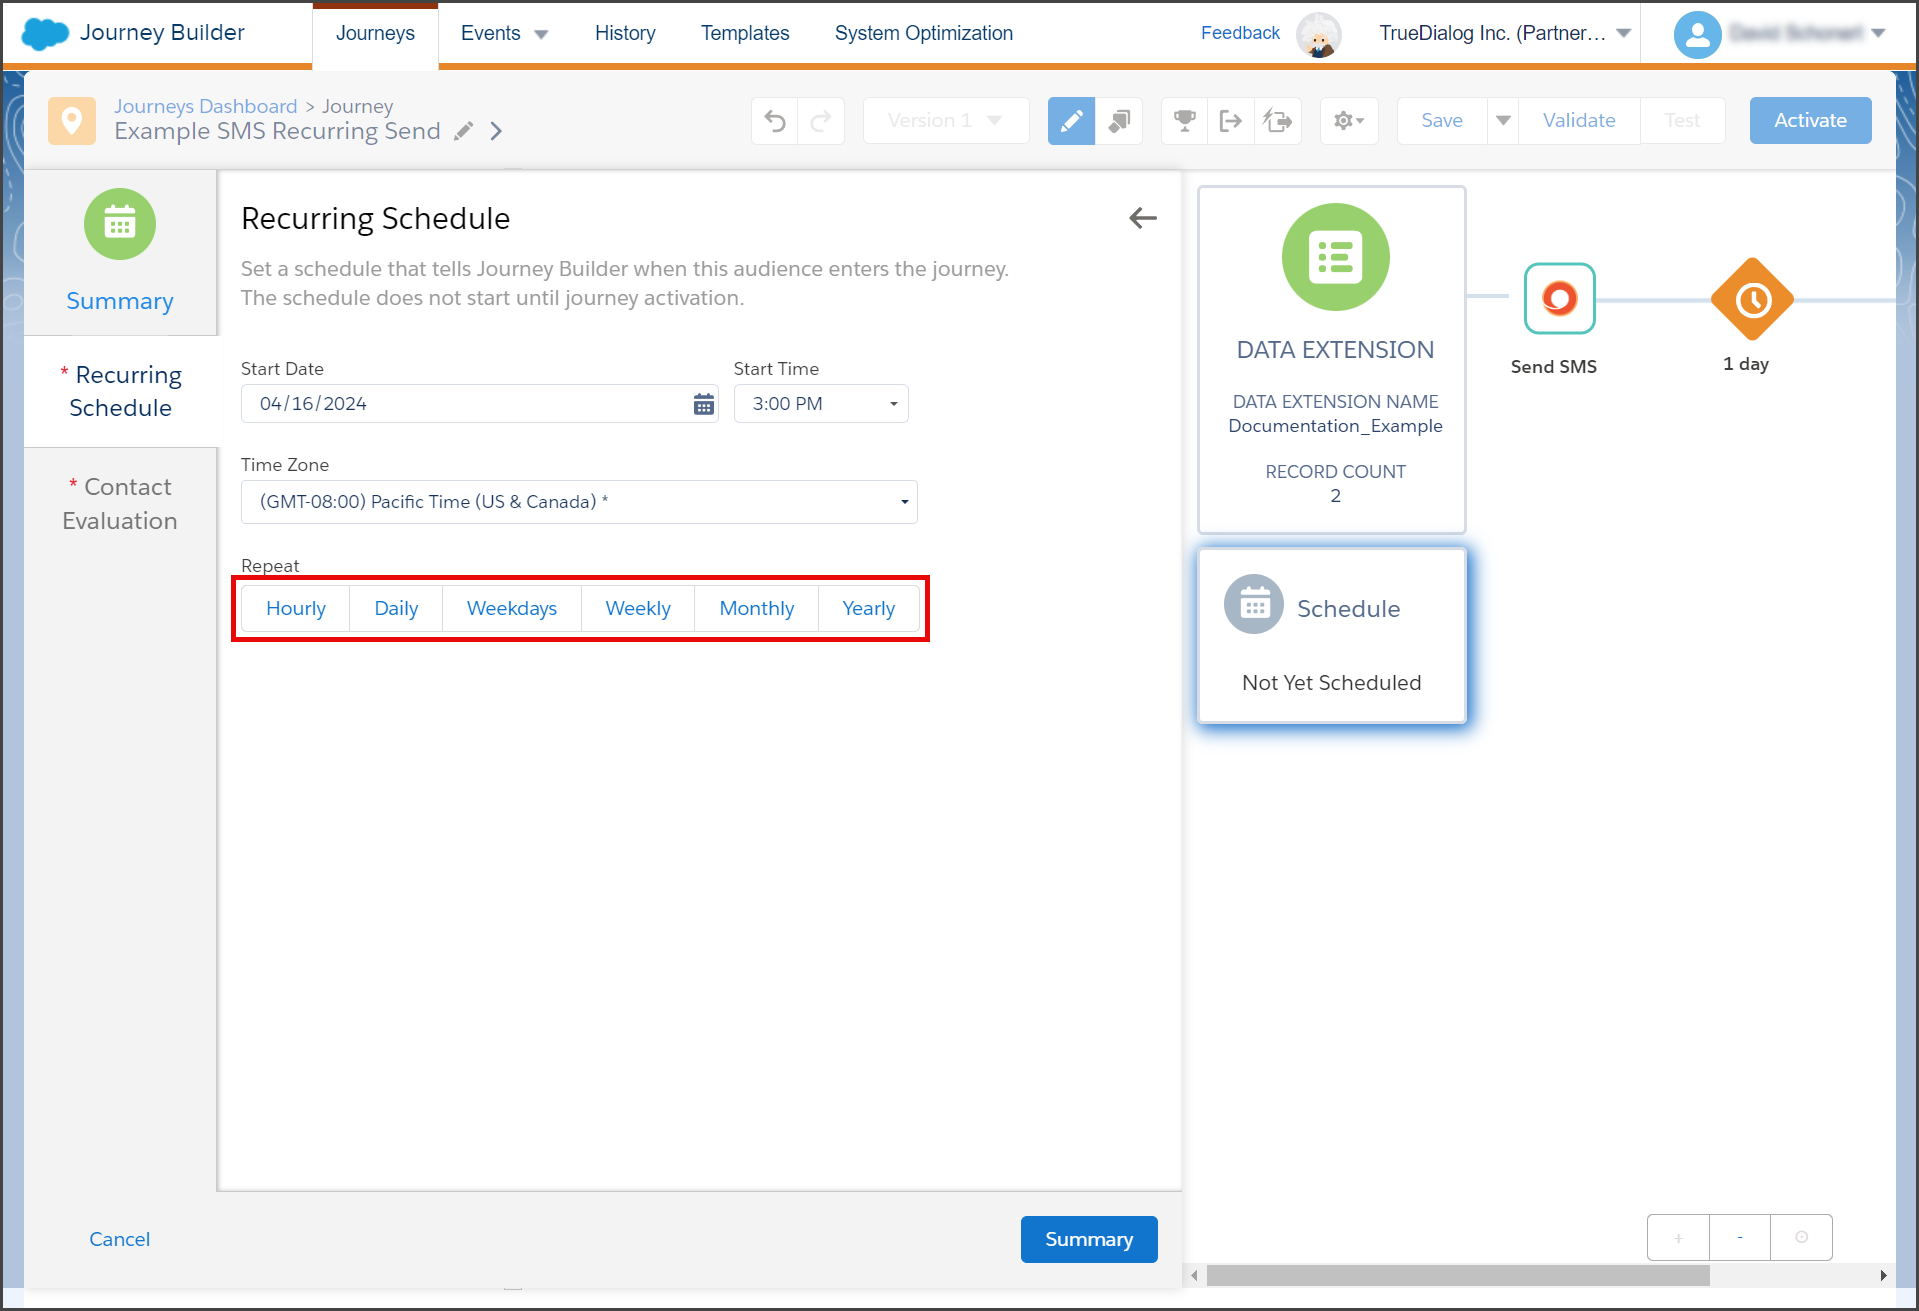
- Select the Repeat schedule to use. The repeat type indicates the interval at which the Journey’s message is sent.

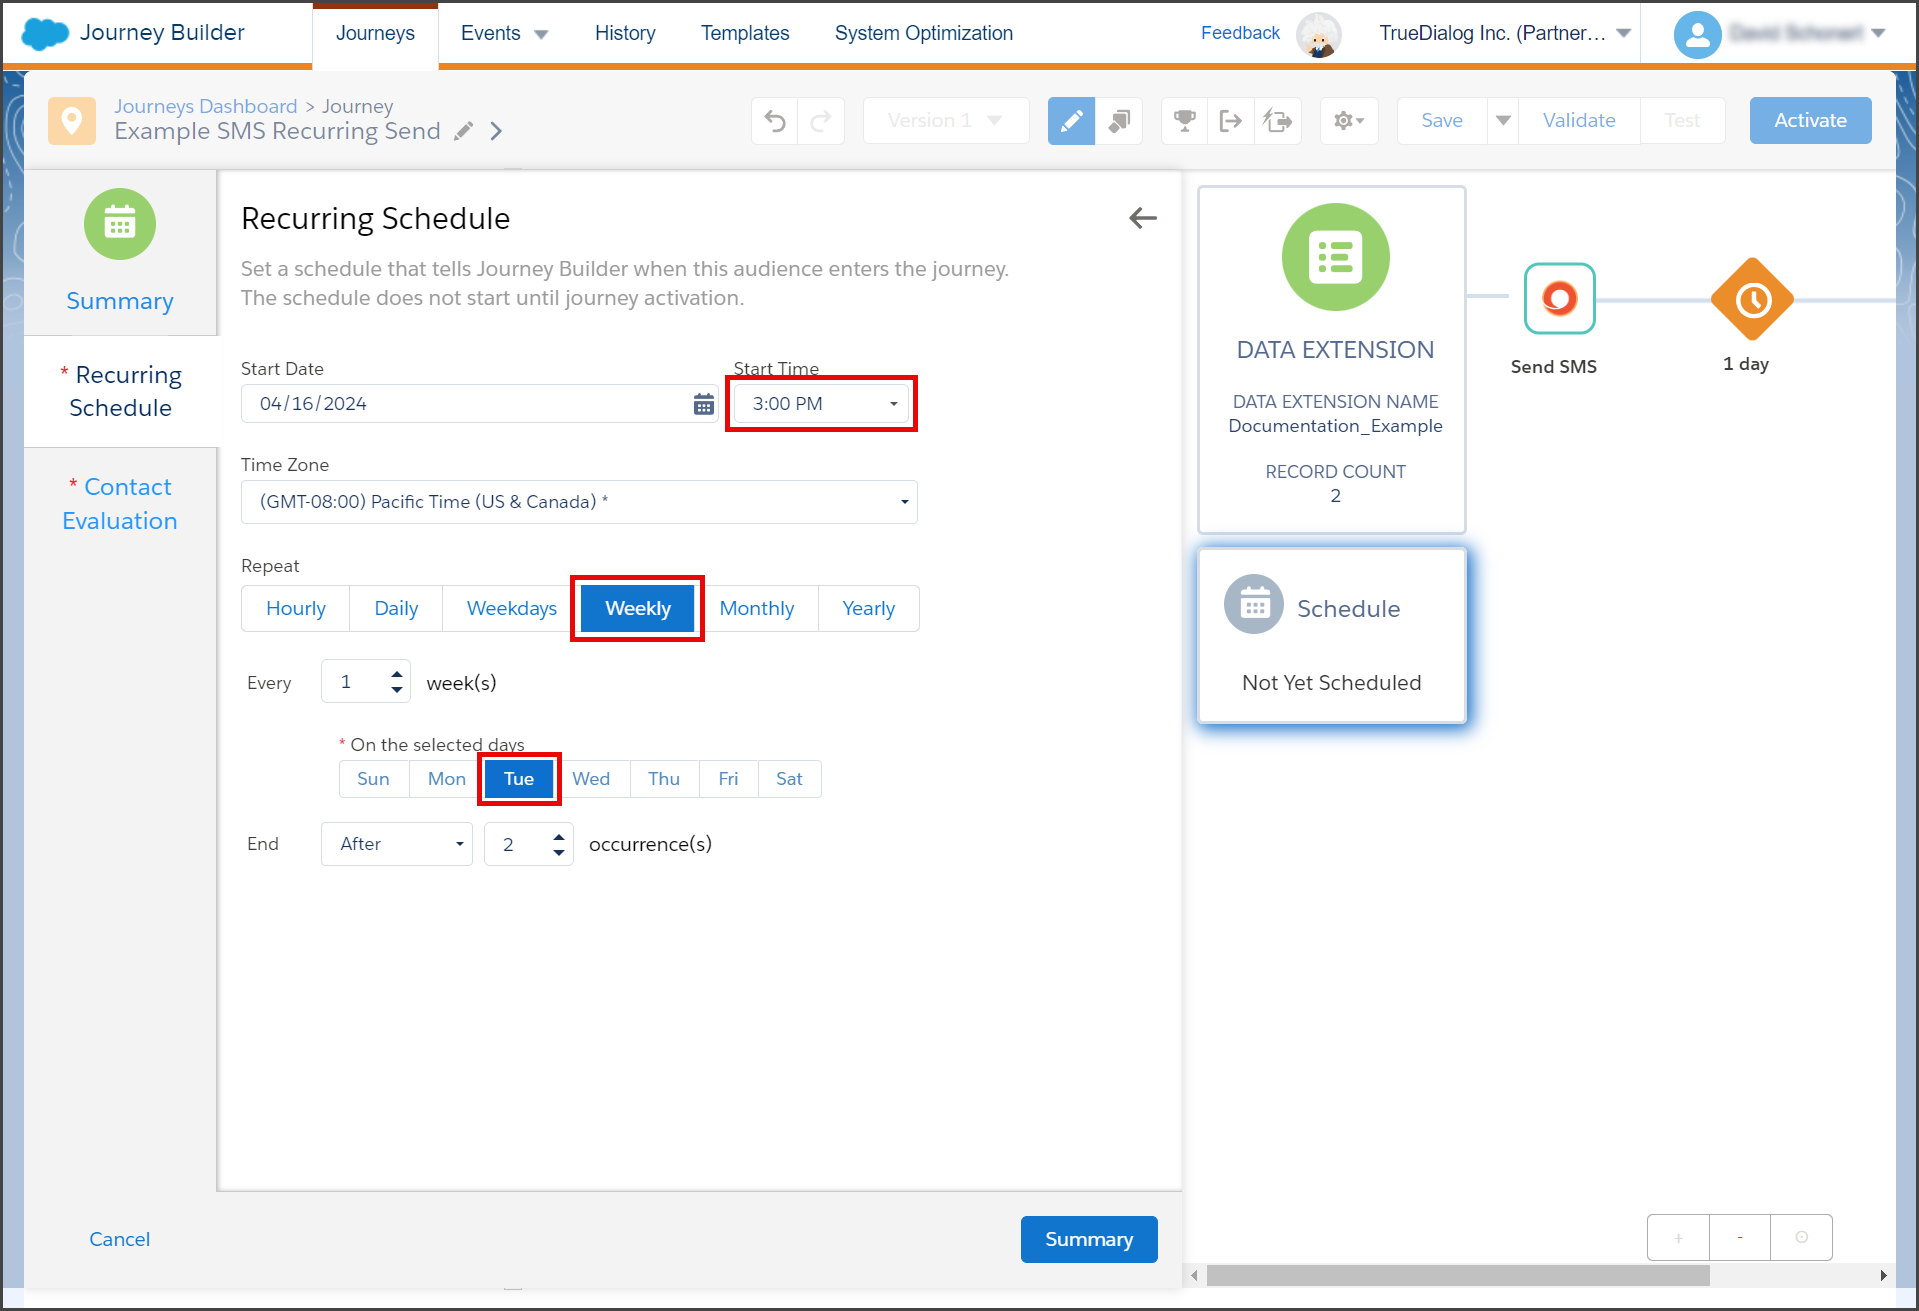
- Configure the Repeat schedule you selected. Each schedule has different options. The screenshot shows setting a Weekly schedule to run every Tuesday at 3:00 PM Pacific Time.
- Click the End dropdown and select the condition on which the Journey will end: Never, After, or On Date.
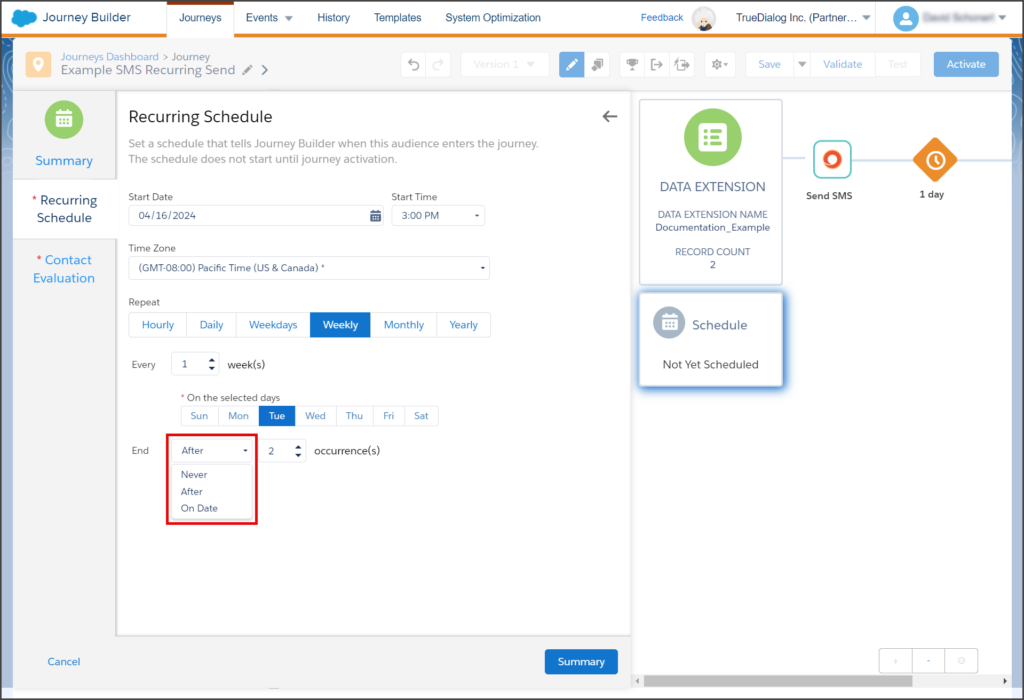
- The schedule in the screenshot will run 5 times before ending.
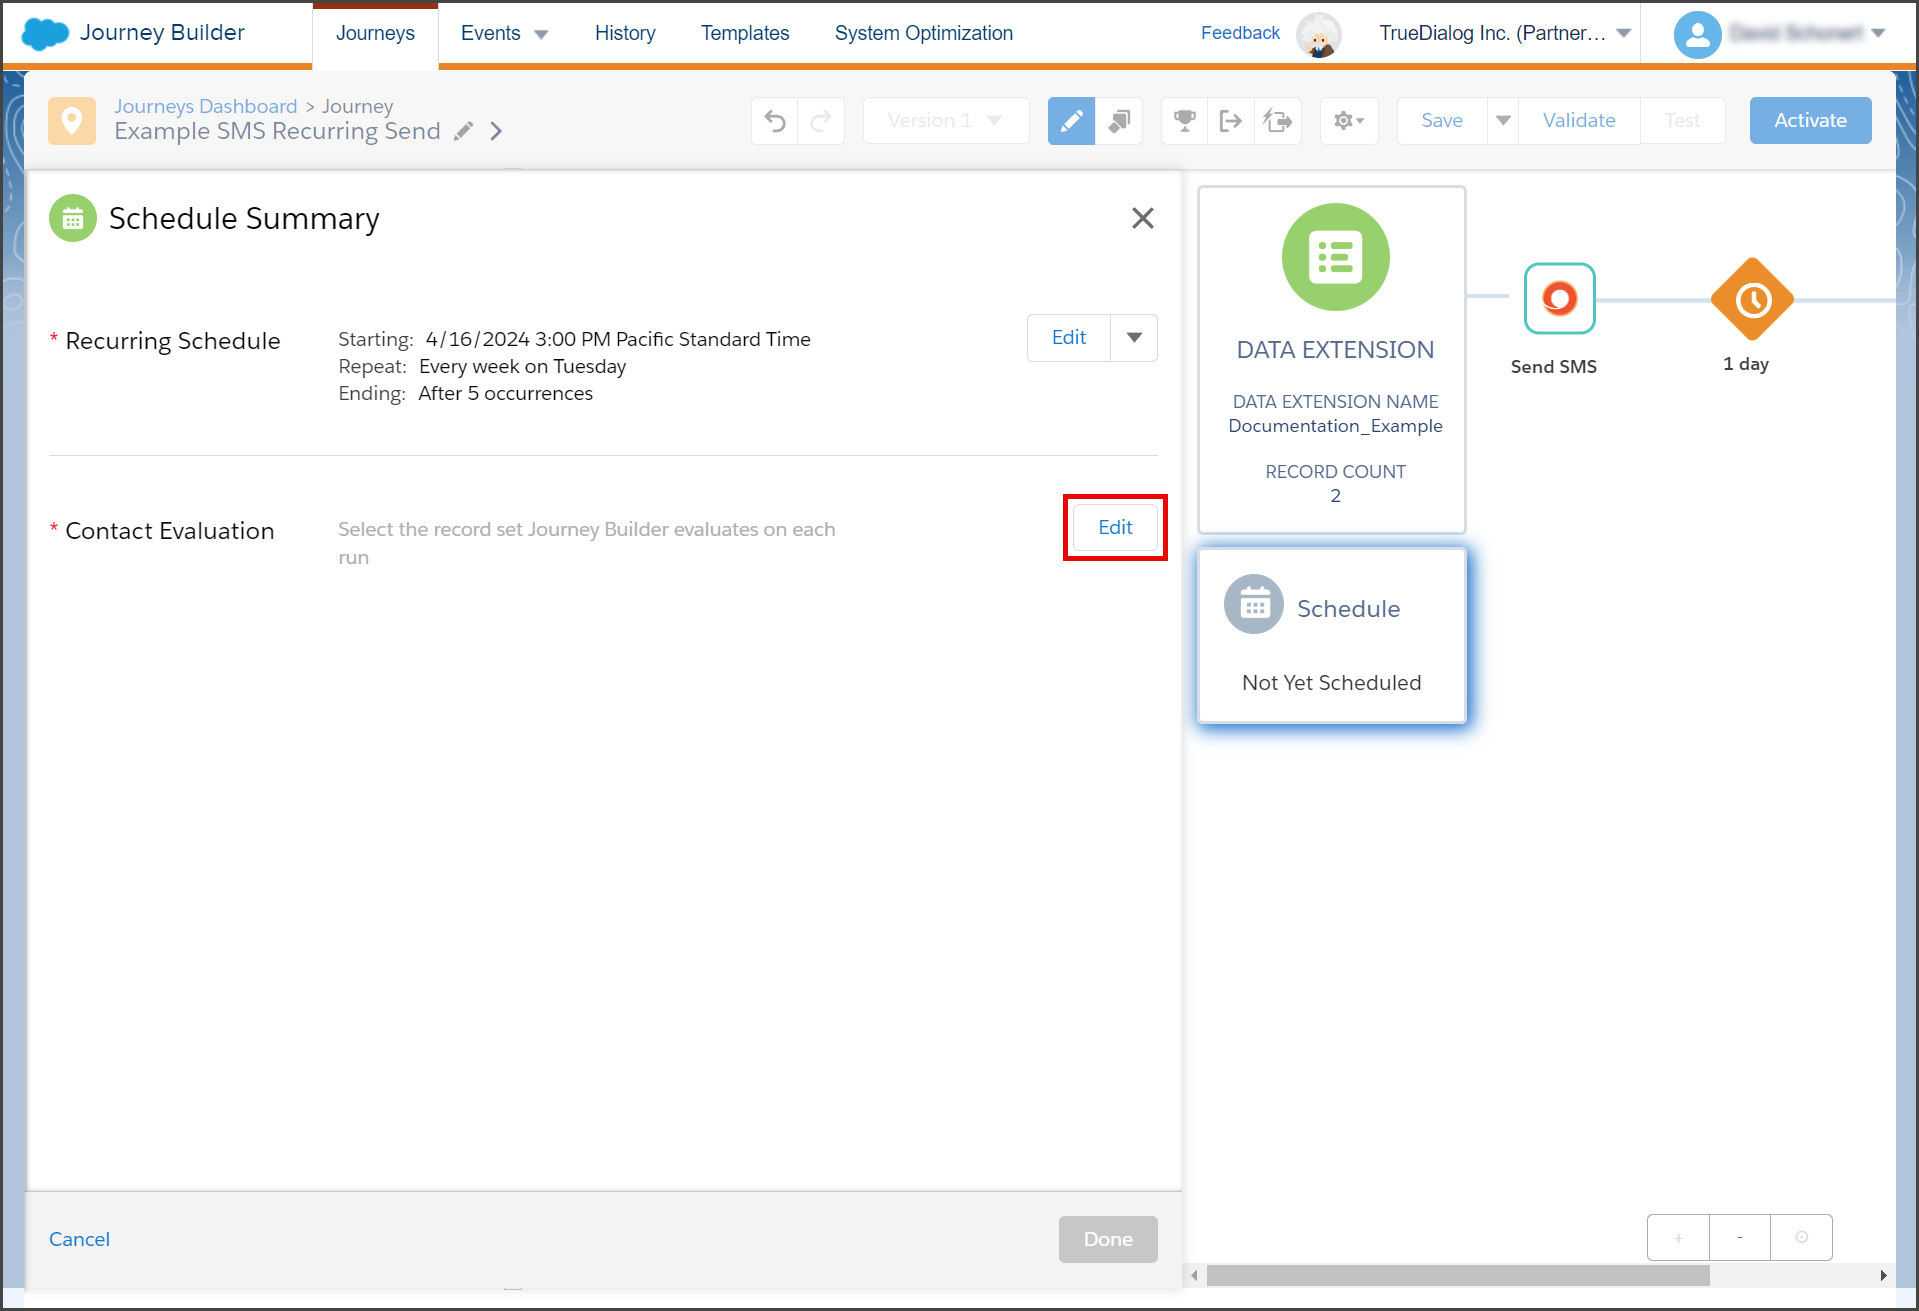
- Click Summary.
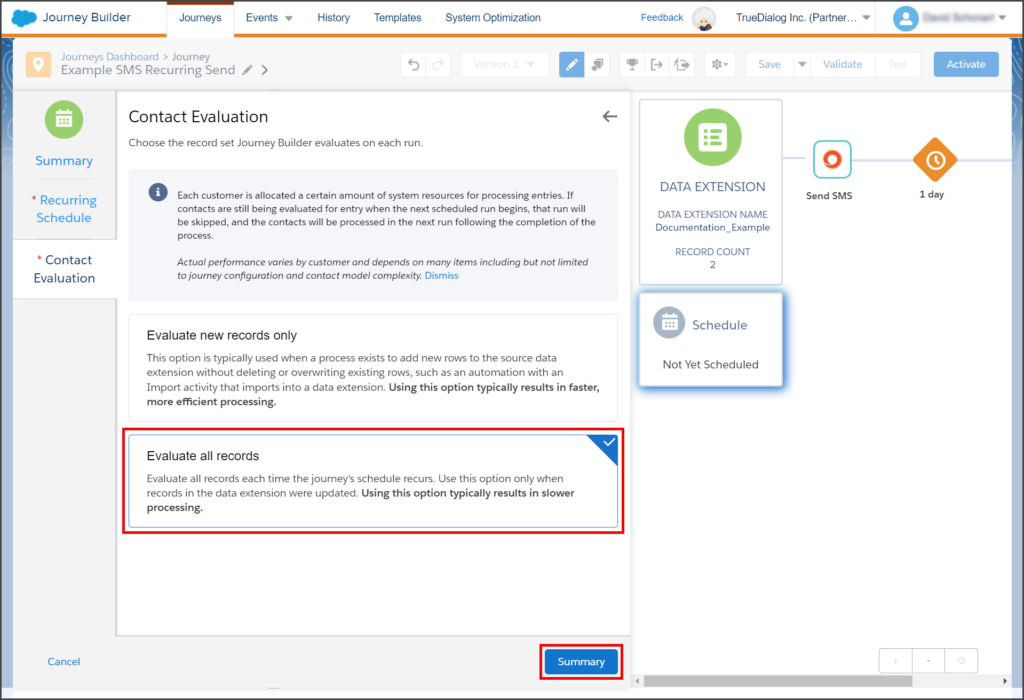
- Click Edit for Contact Evaluation.

- Select Evaluate new records only or Evaluate all records. Note: This decision depends on how you want your Journey to be processed. Read the description of each option to determine the best choice for your Journey. This example uses Evaluate all records.
- Click Summary.
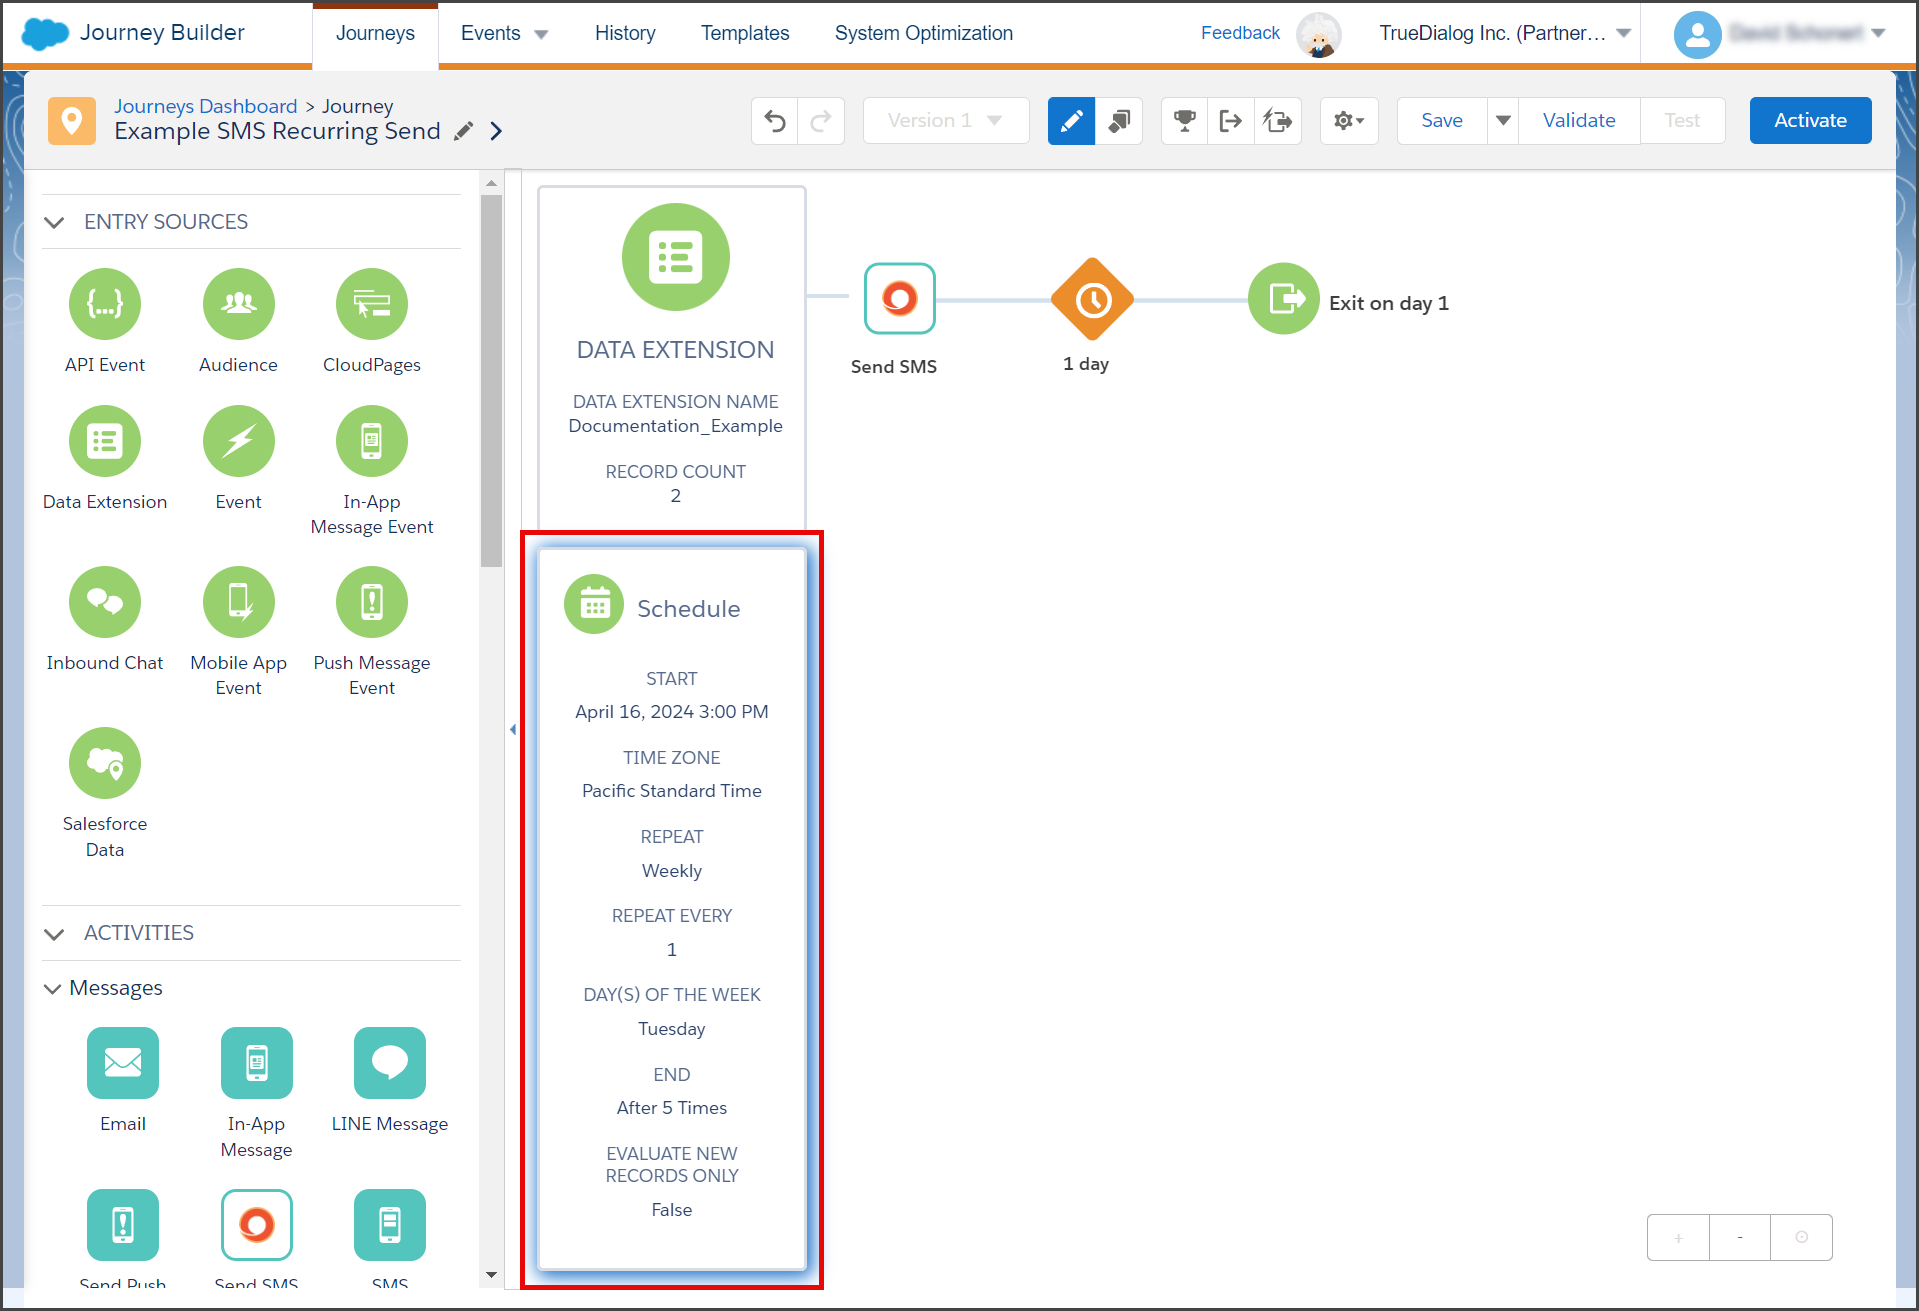
- Review the schedule to ensure that all the details are correct.
- Click Done.
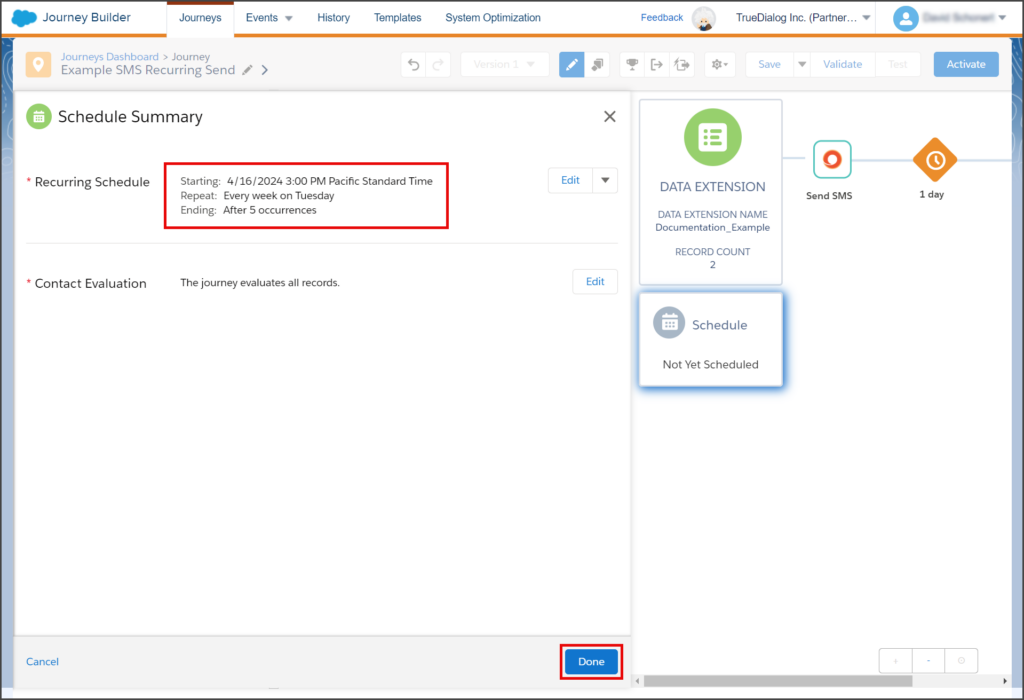
- Your canvas will now have a Recurring Schedule with all of its details.