Salesforce Marketing Cloud
TrueDialog Integration
This guide will show you how to create a Journey using the Data Extension you created in the SFMC – Creating a Data Extension For Contacts article and TrueDialog’s Send SMS Activity. The Journey contains the message to send to your contacts and the schedule for when the message will be sent. This guide will show you how to use the Run Once On Activation schedule. See the SFMC – Creating a Journey Schedule article for other types of schedules.
These instructions are specific to creating a Journey with TrueDialog’s Send SMS Activity. For general instructions on using the Journey Builder, see the Salesforce’s Journey Builder Basics article.
Start the Journey
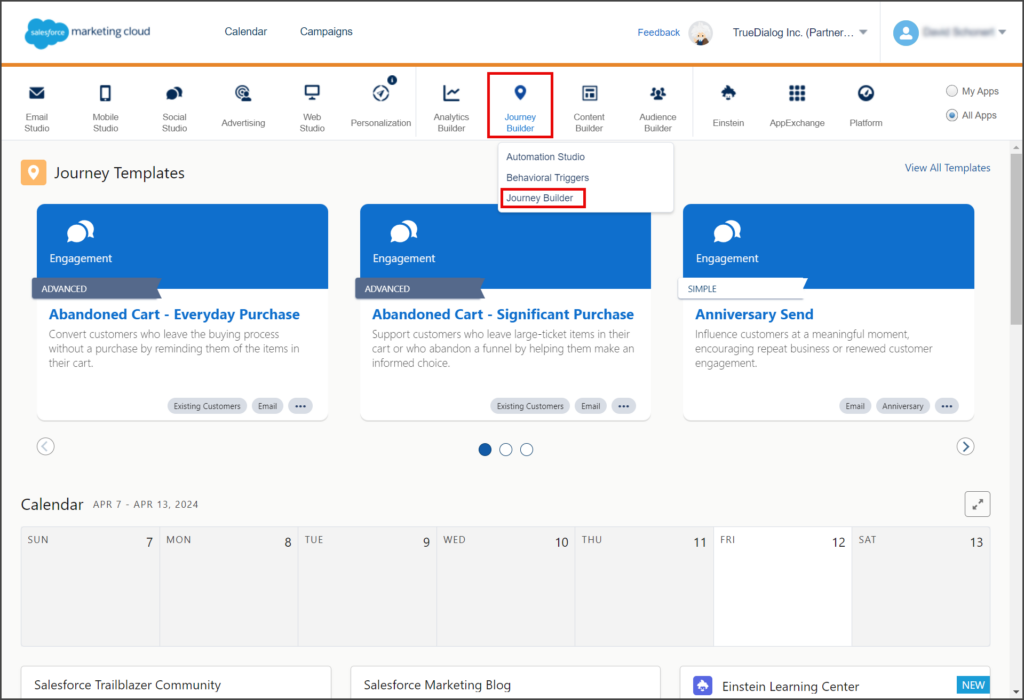
- From the Salesforce Marketing Cloud Home Page.
- Click Journey Builder, and in the dropdown menu, click Journey Builder.
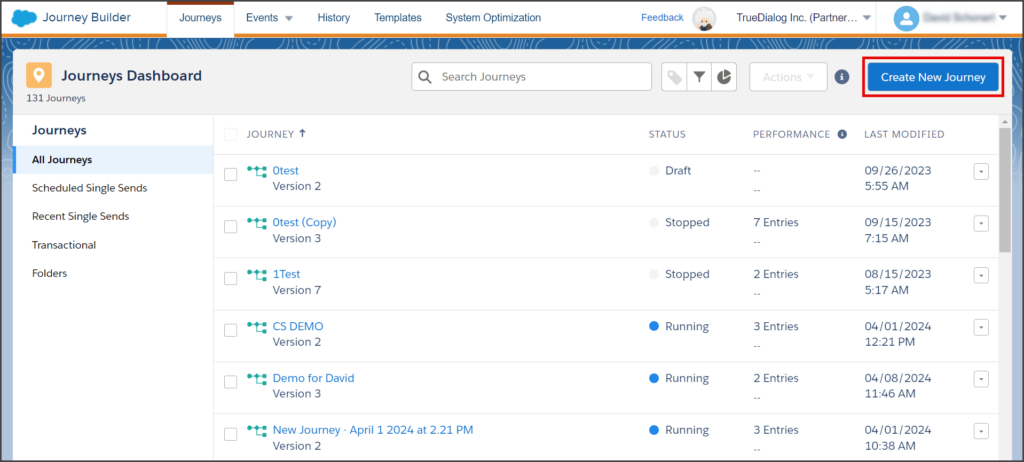
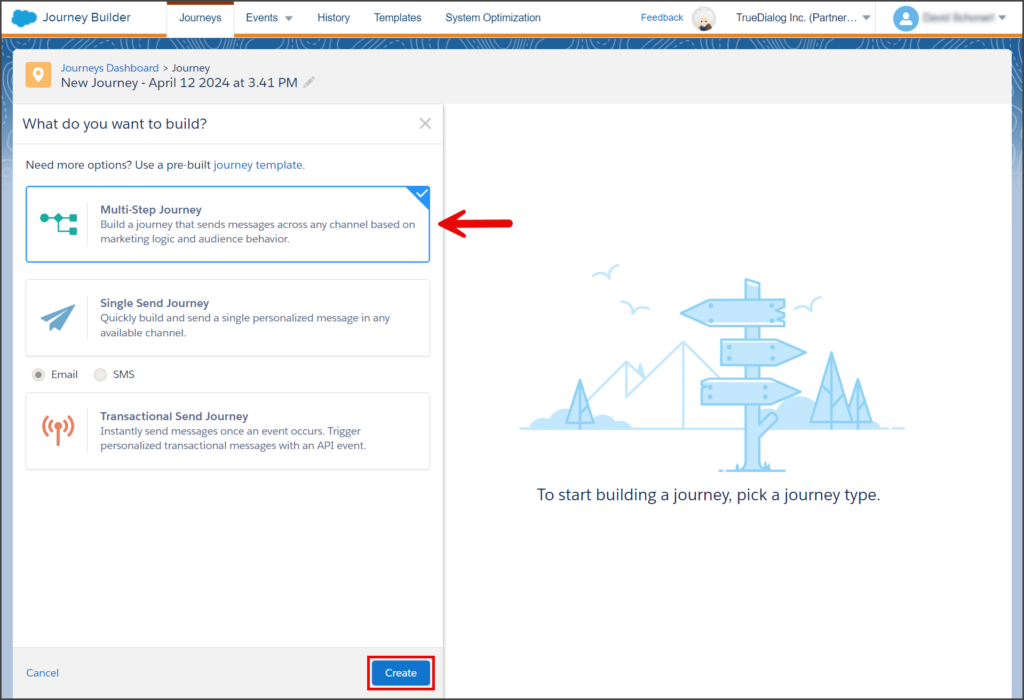
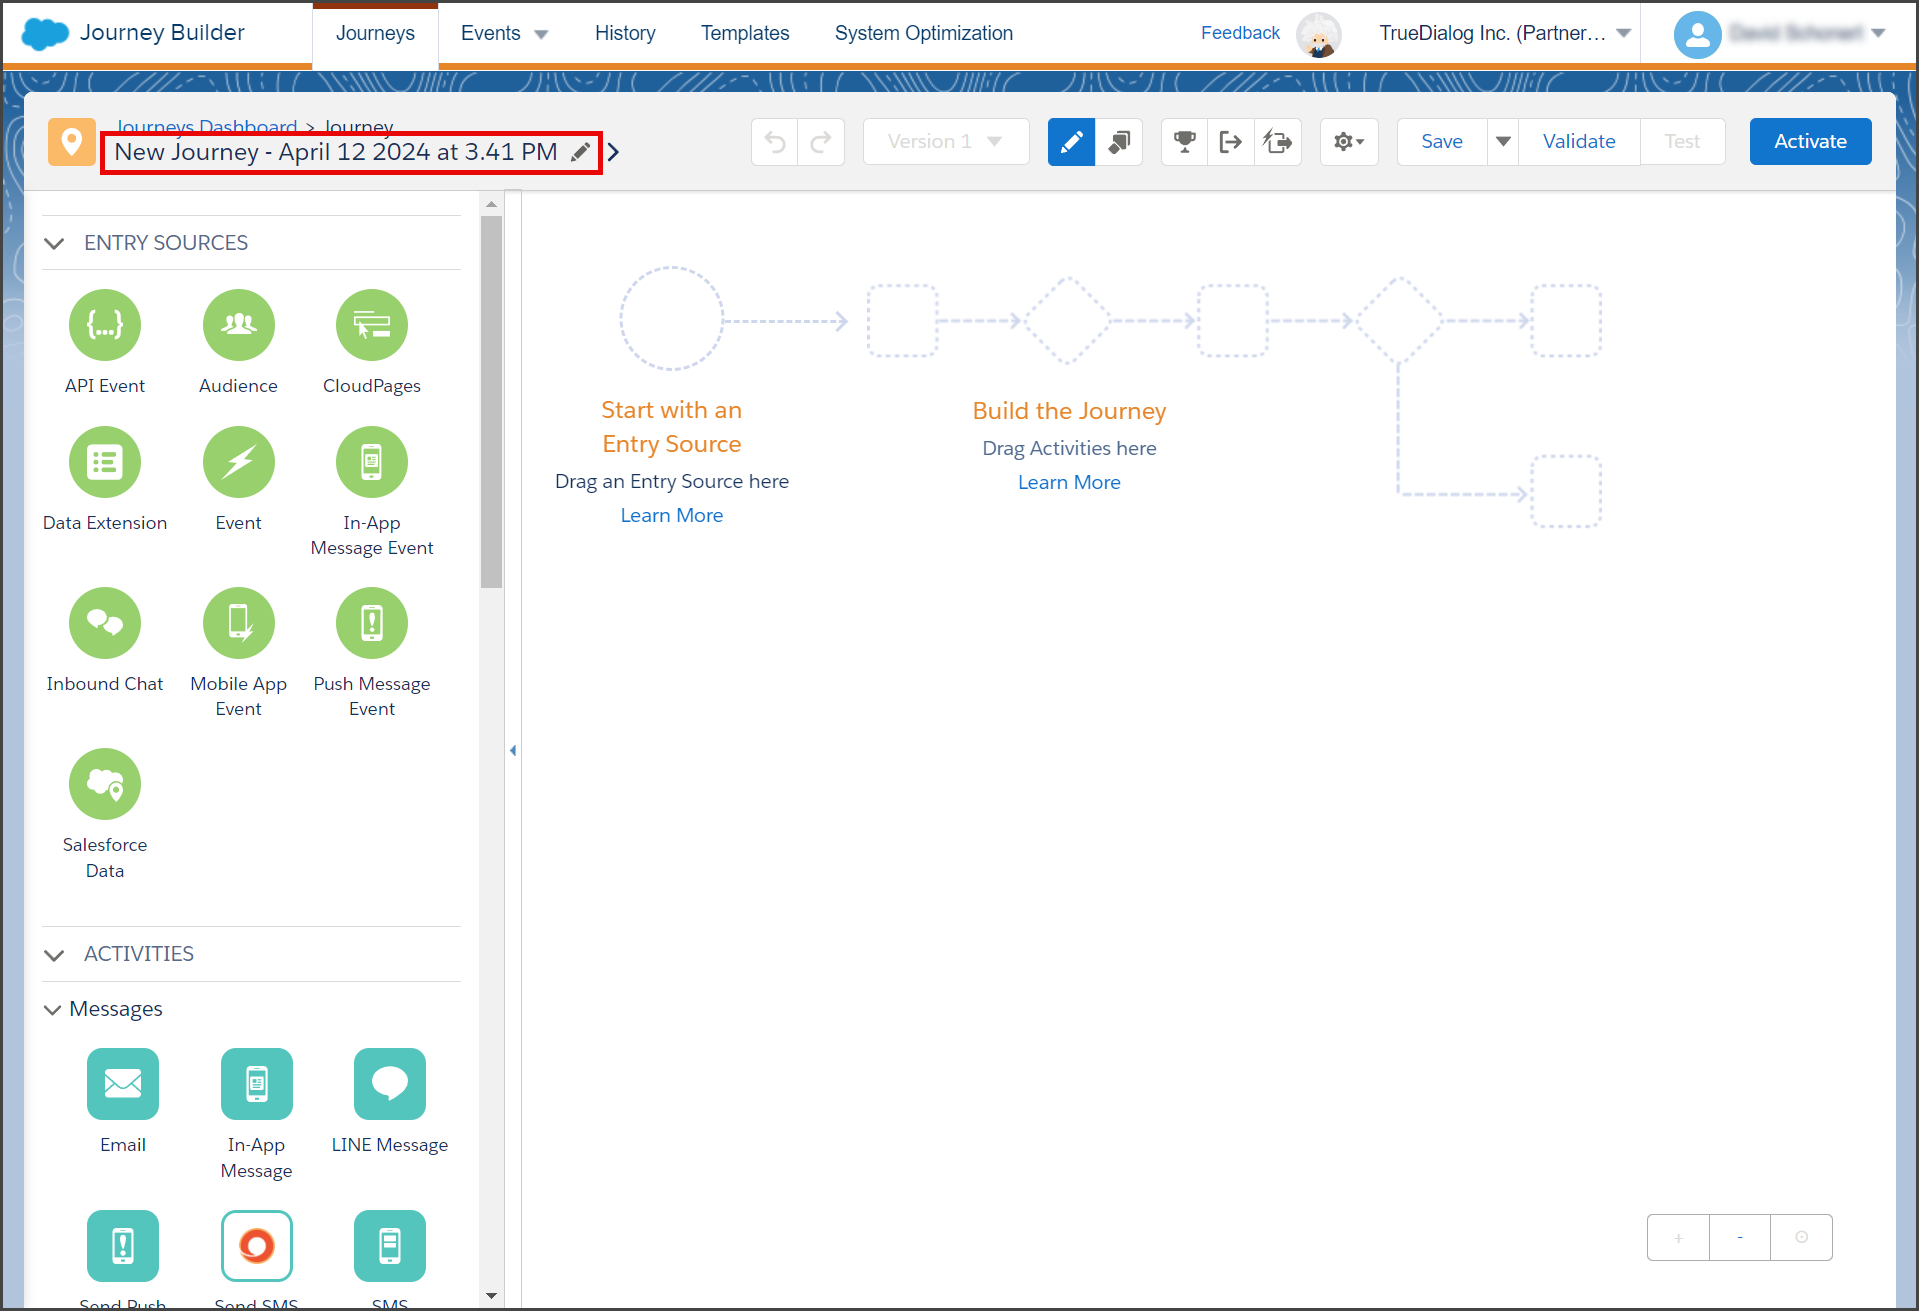
- Click Create New Journey on the Journeys Dashboard.
- Select Multi-Step Journey.
- Click Create.
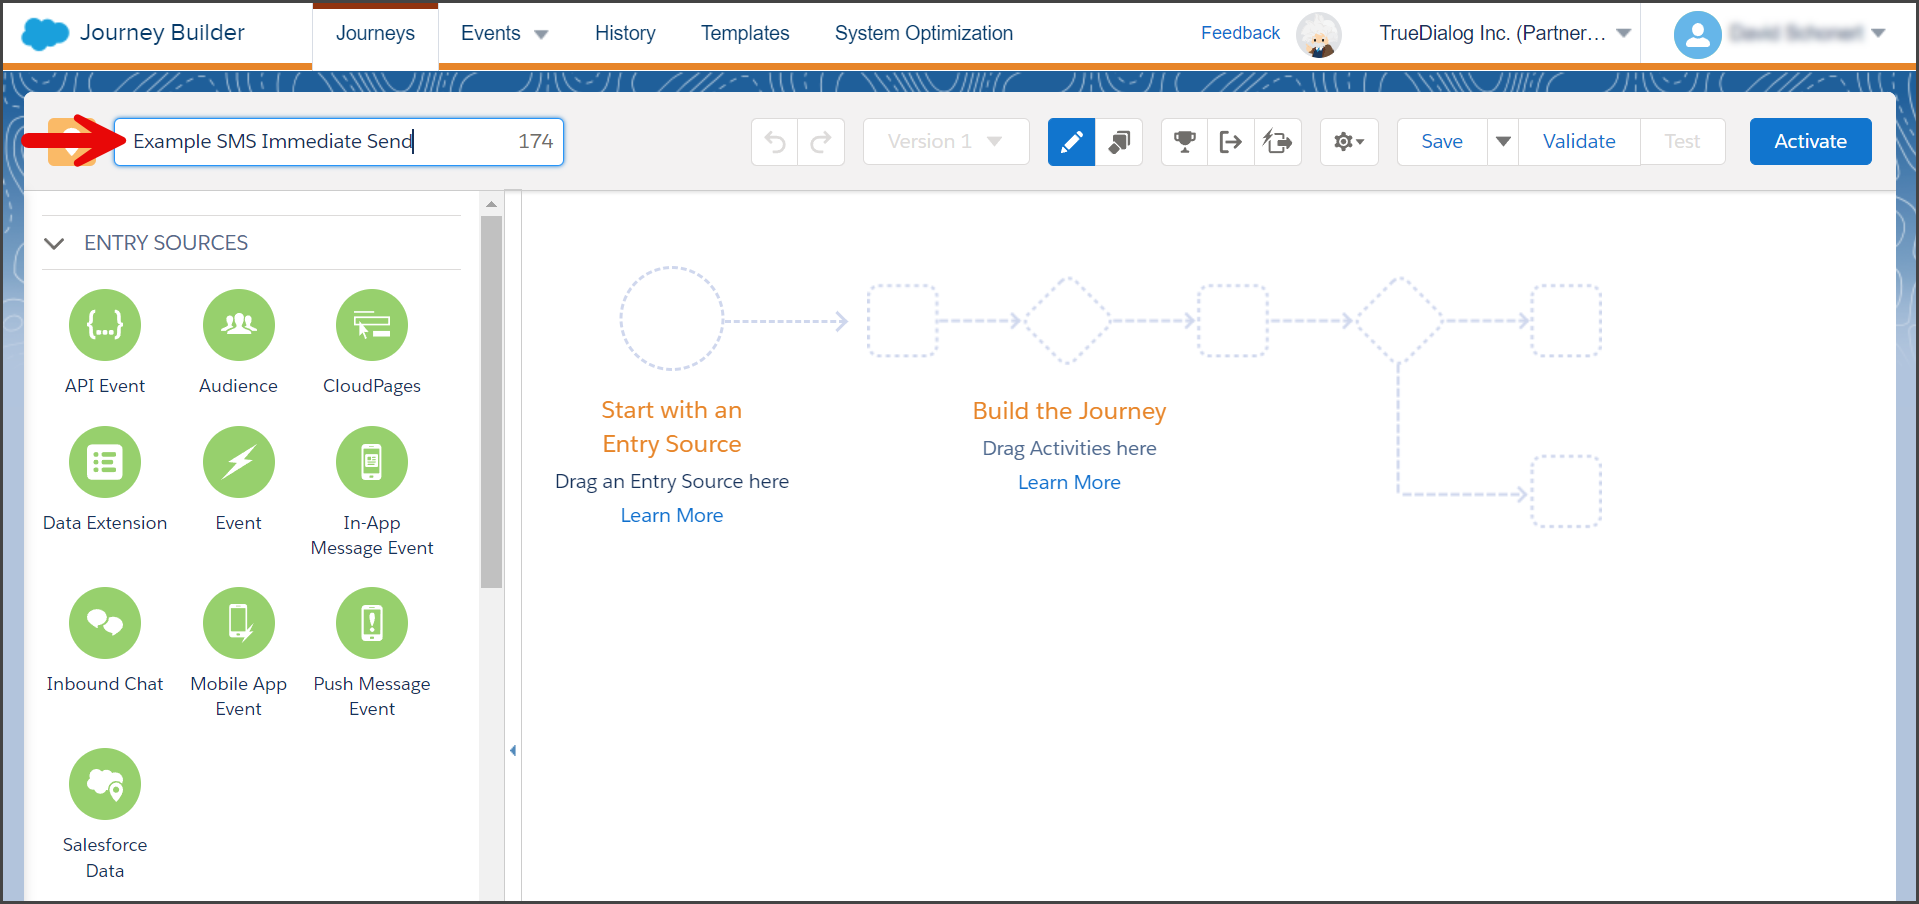
- Click your Journey name in the upper left corner to edit the Journey name.

- Enter your Journey name and press Enter.
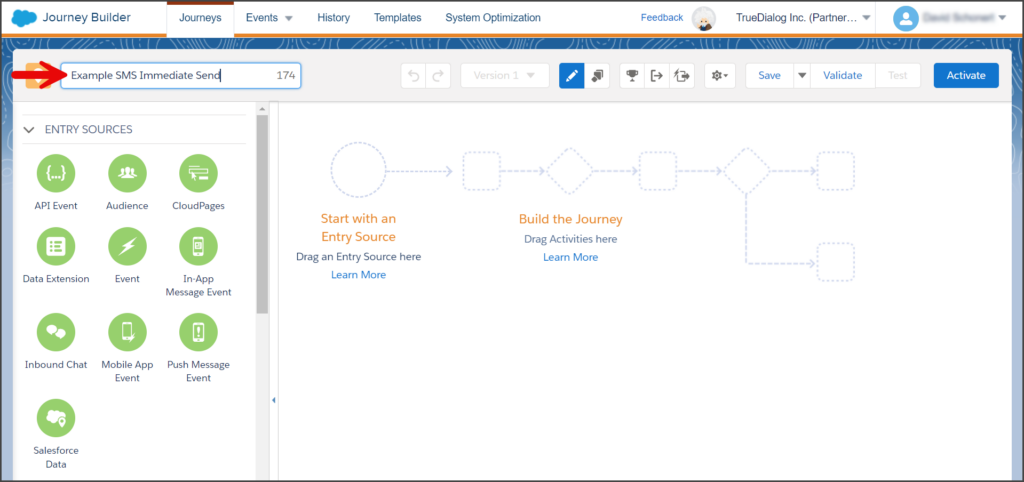
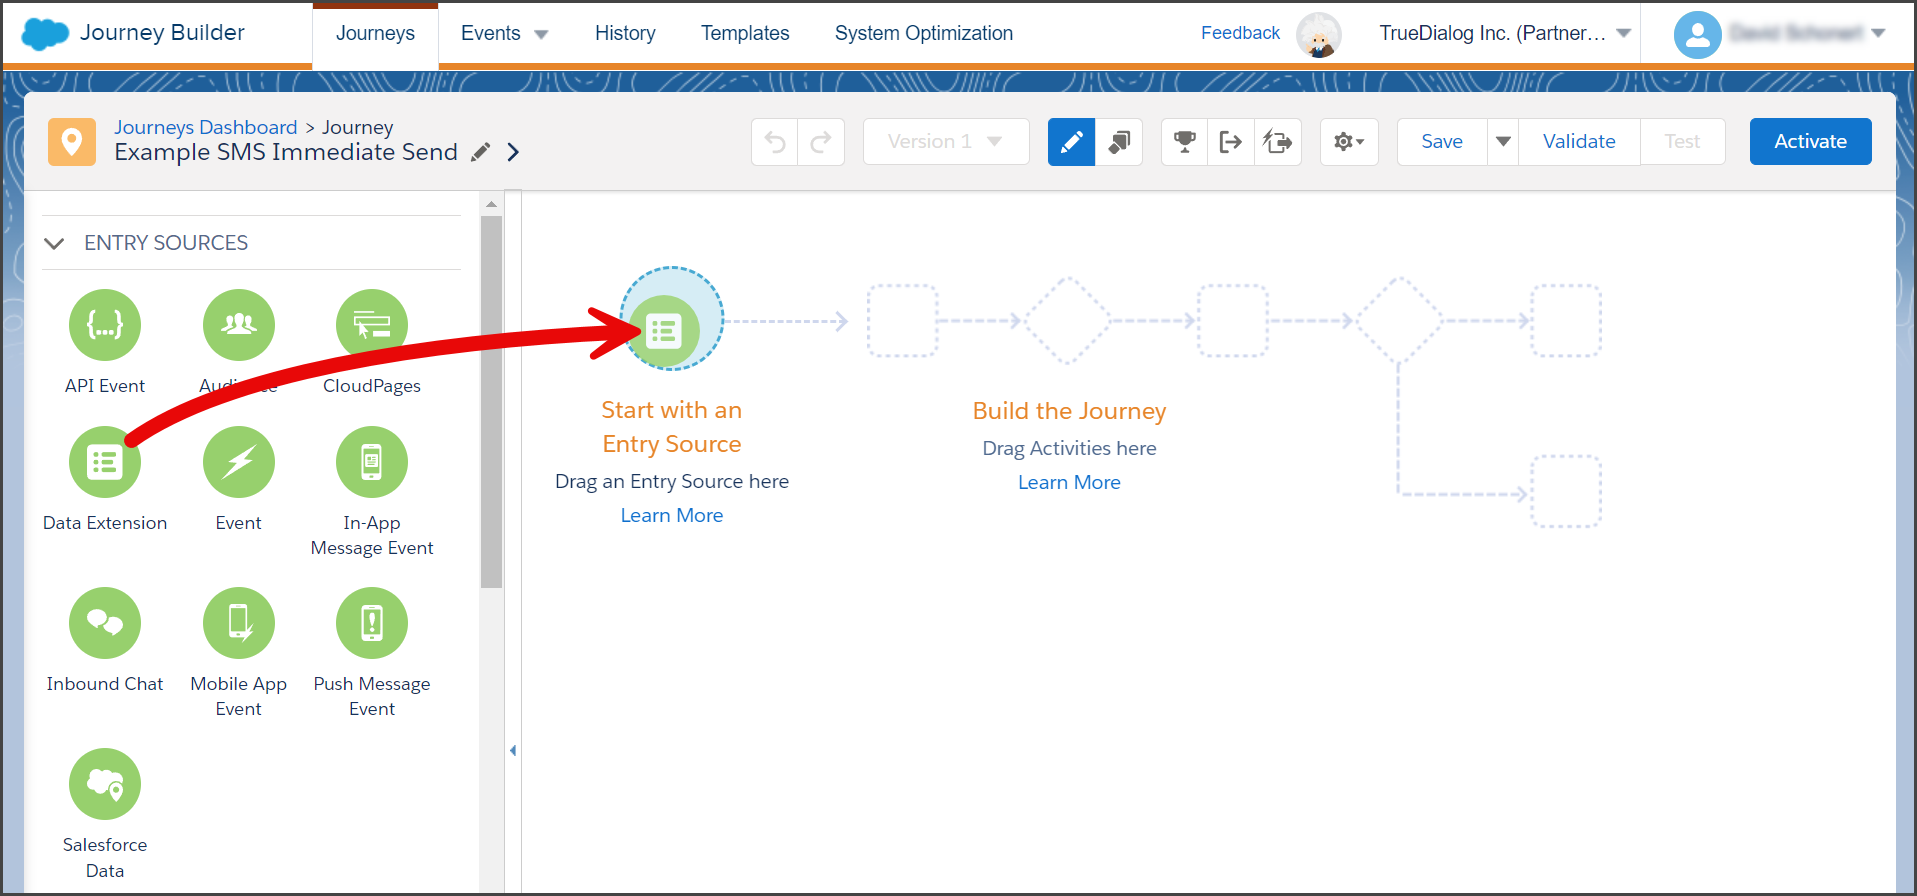
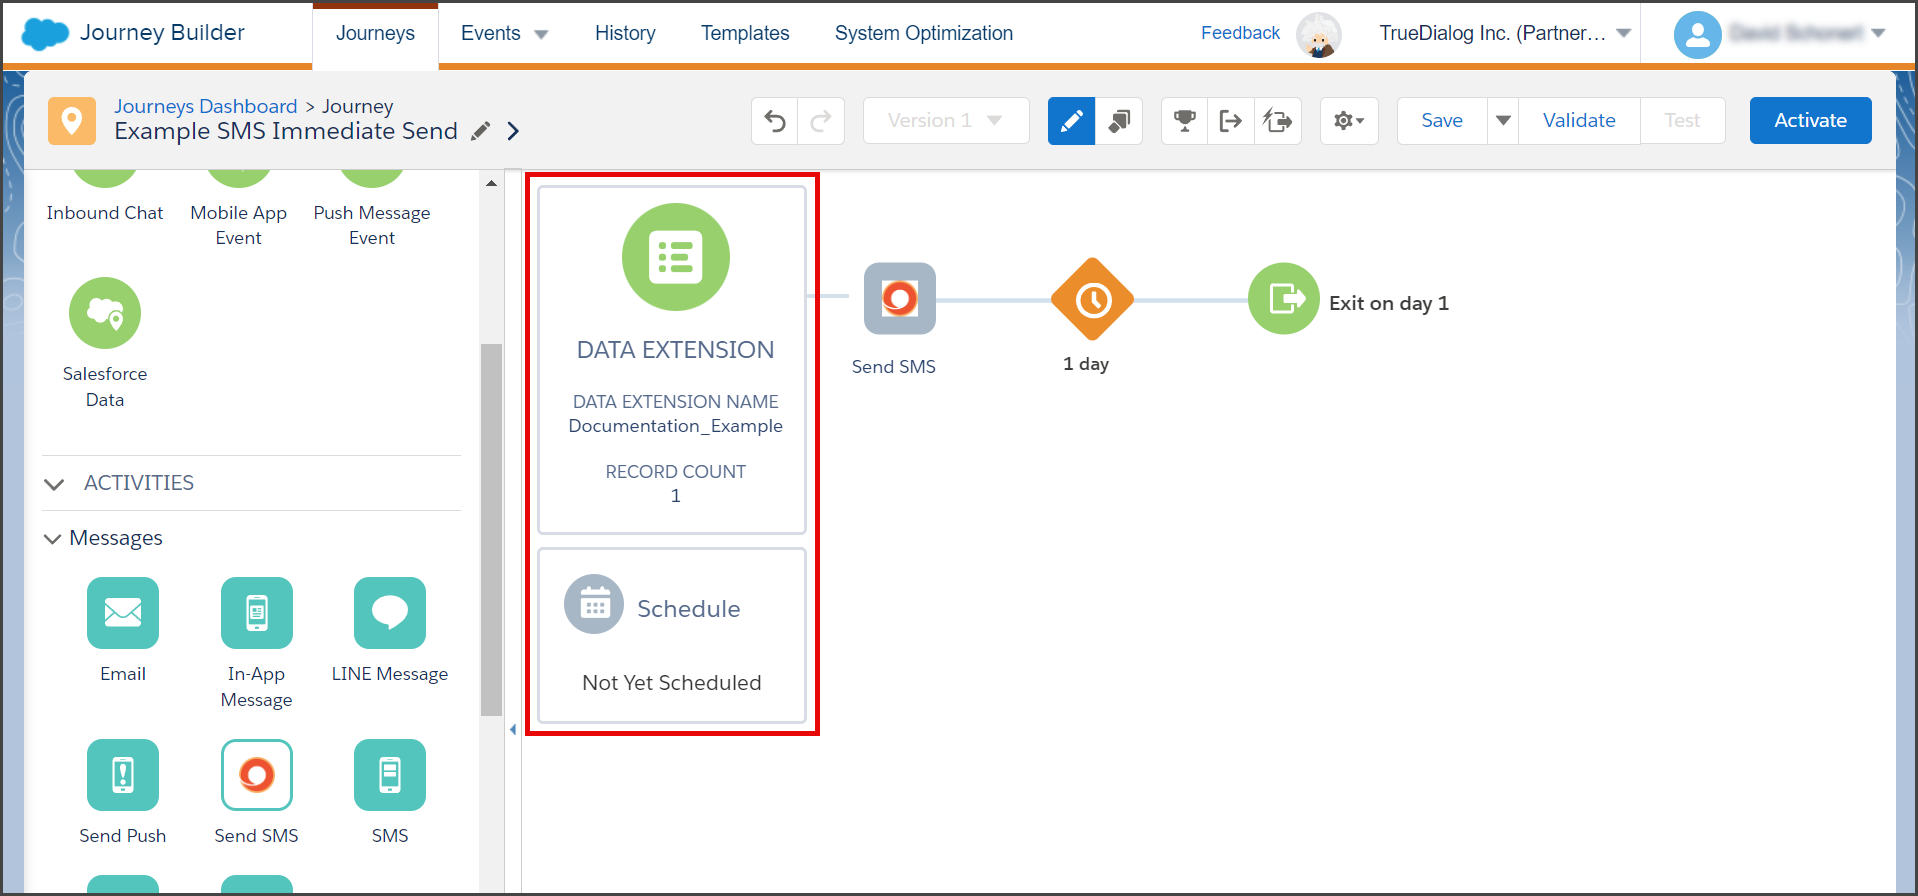
- Drag the Data Extension Entry Source to the Entry Source circle outline on your canvas.

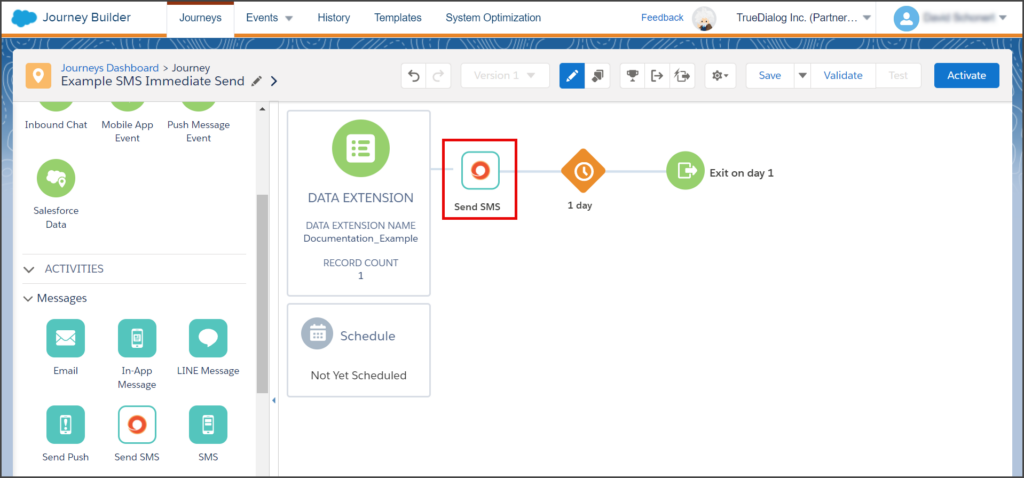
- Drag the Send SMS Activity to the square outline in front of the Data Extension Entry Source.
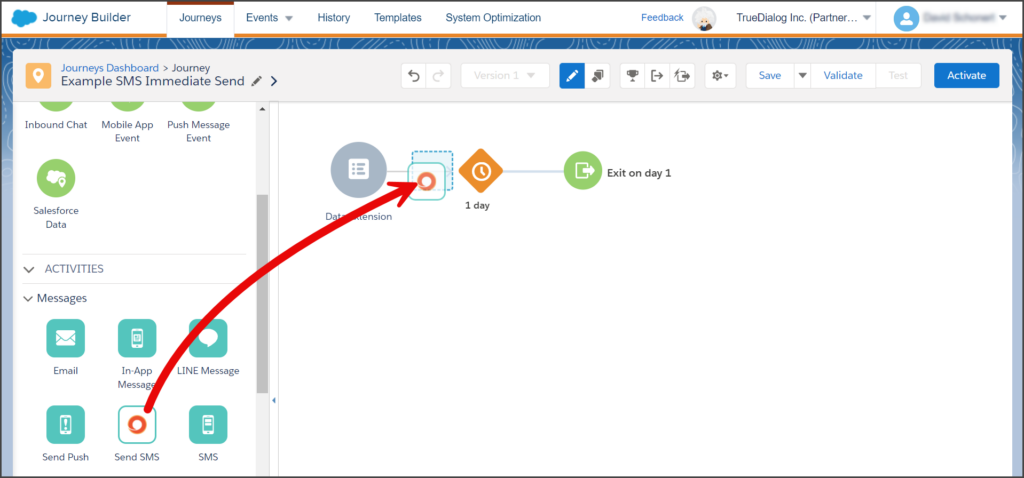
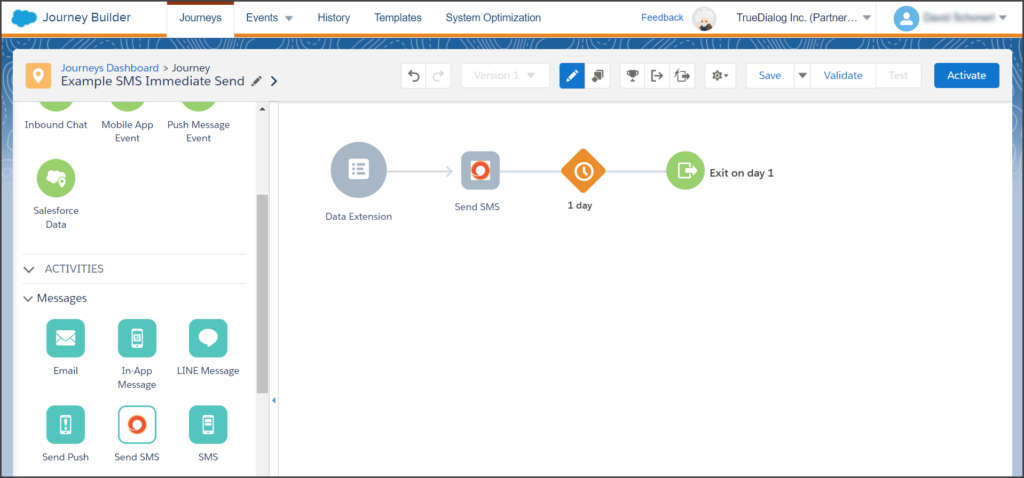
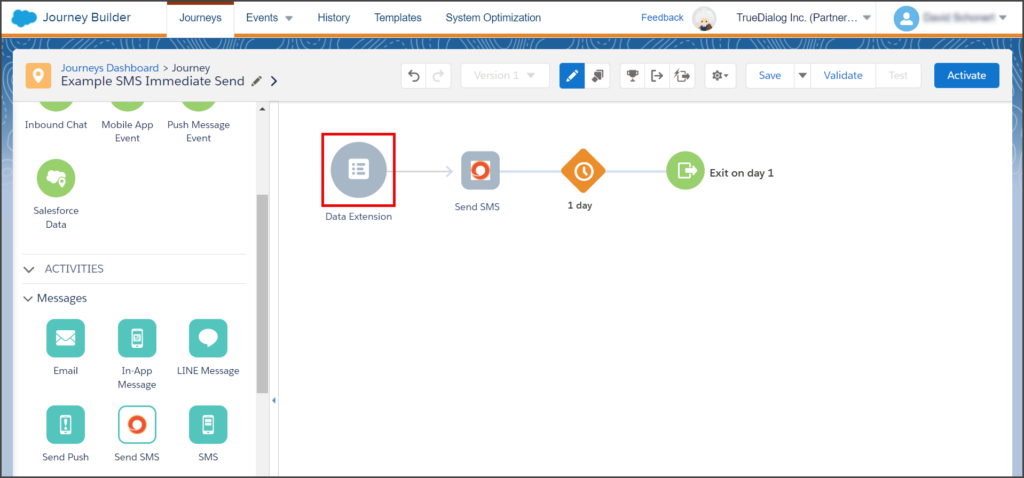
- Once complete, your canvas will look like the screenshot below.


Configure Data Extension
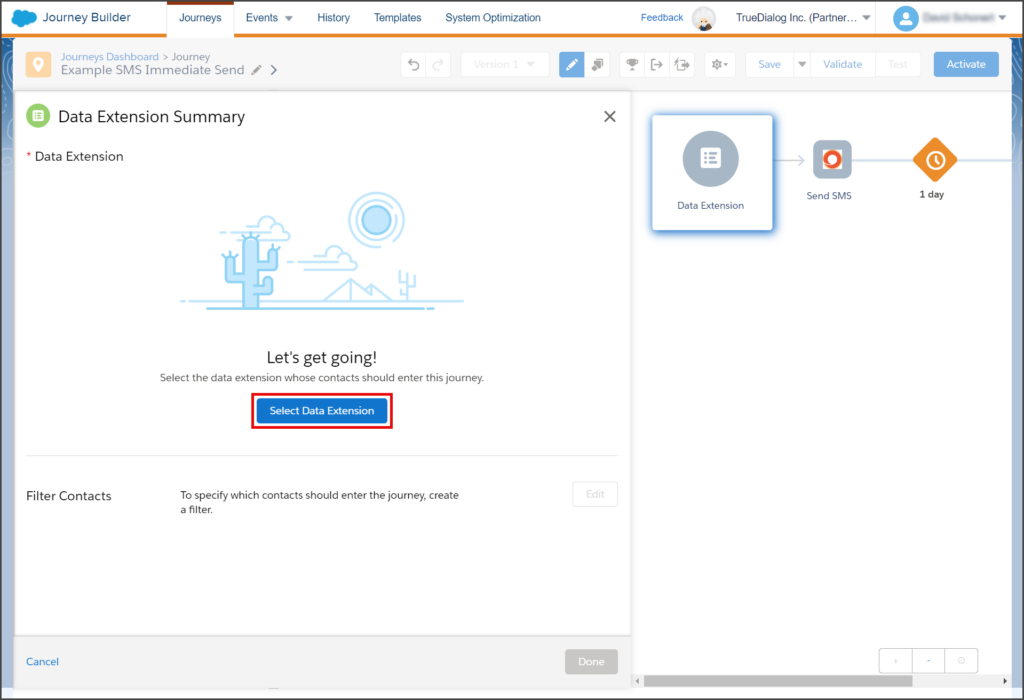
- Click the Data Extension Entry Source on the canvas.
- Click Select Data Extension on the Data Extension Summary page.
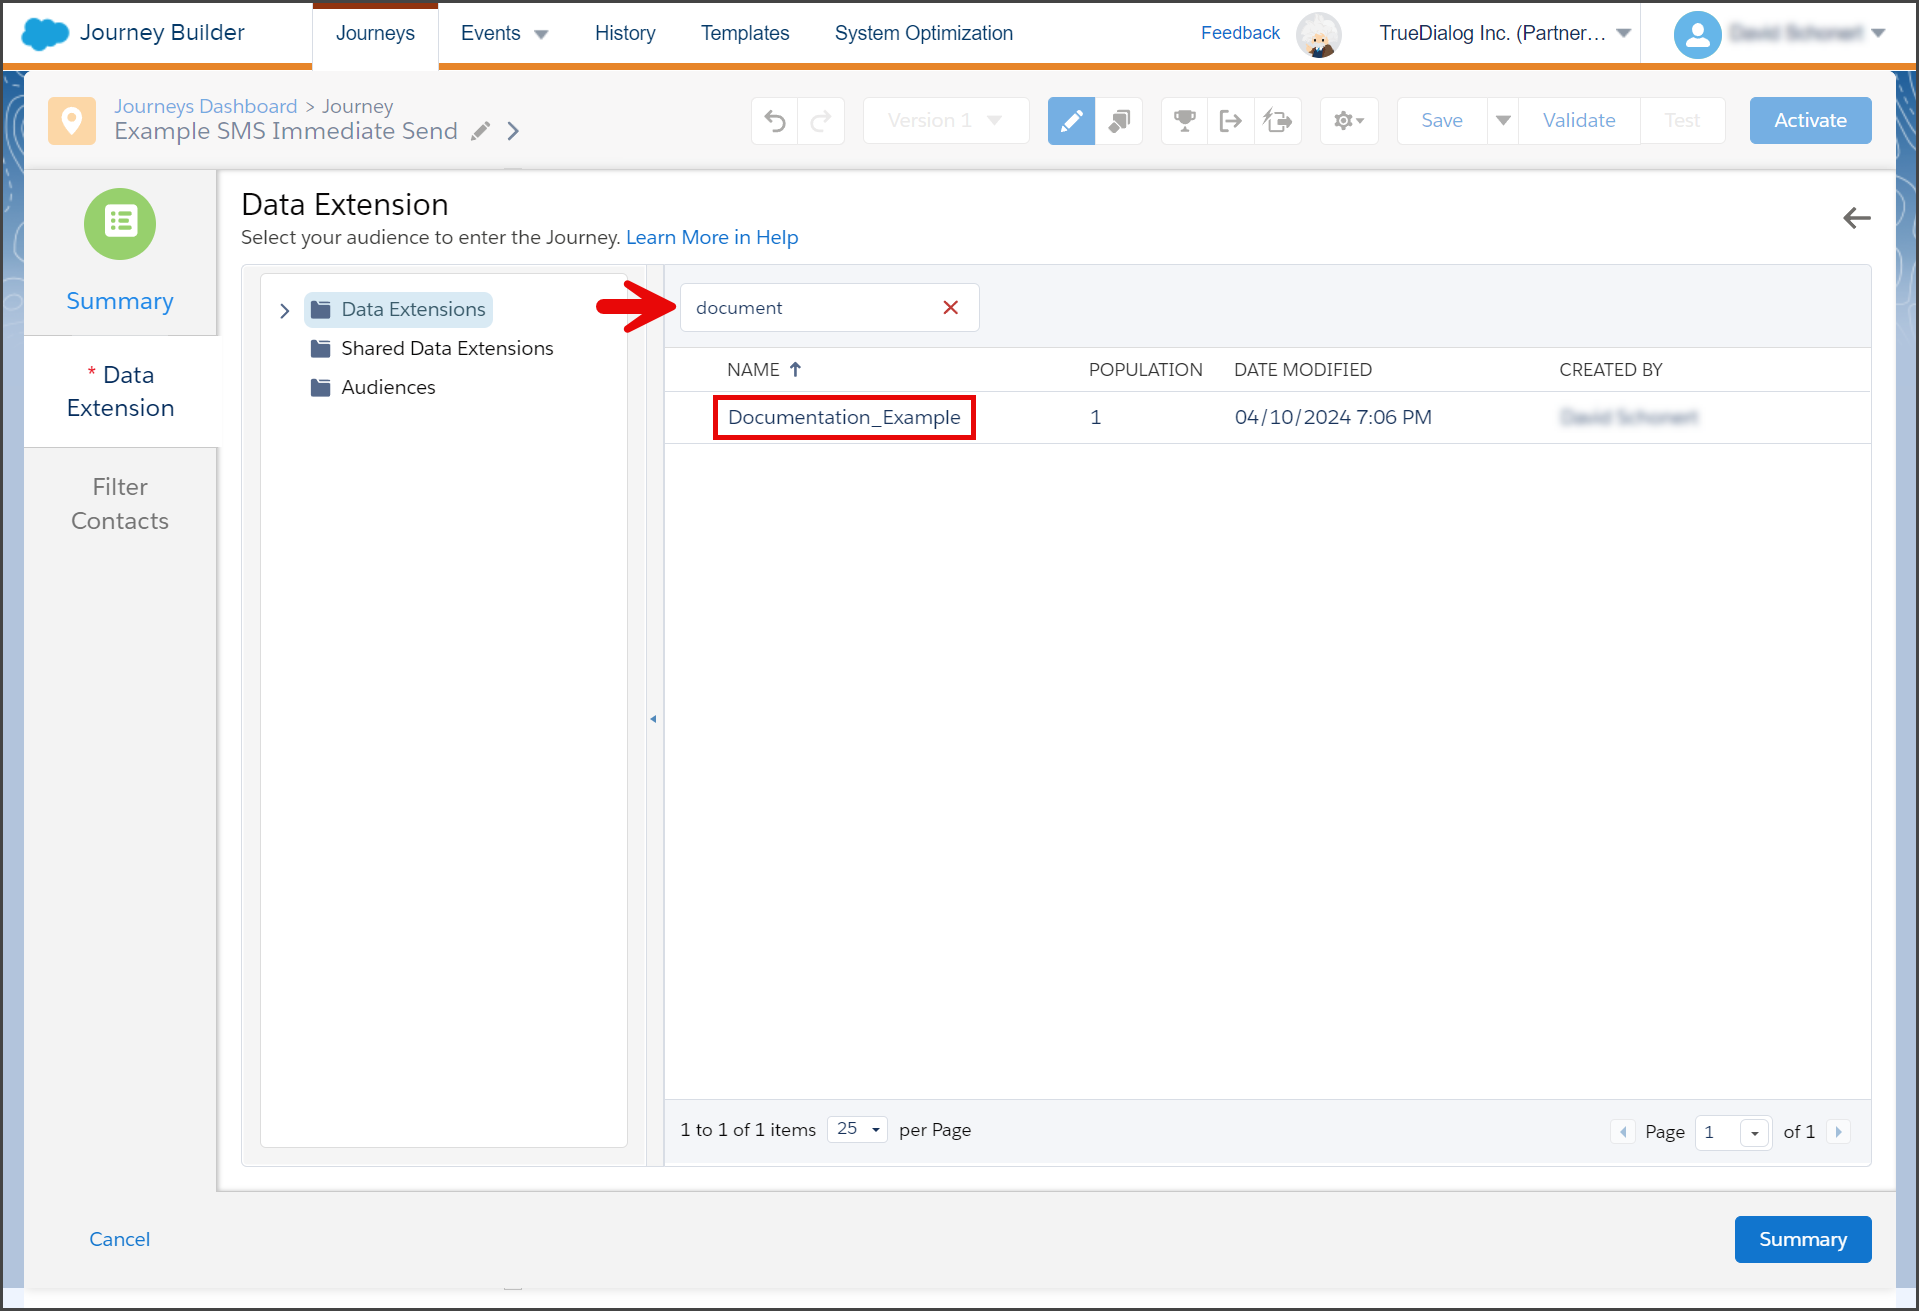
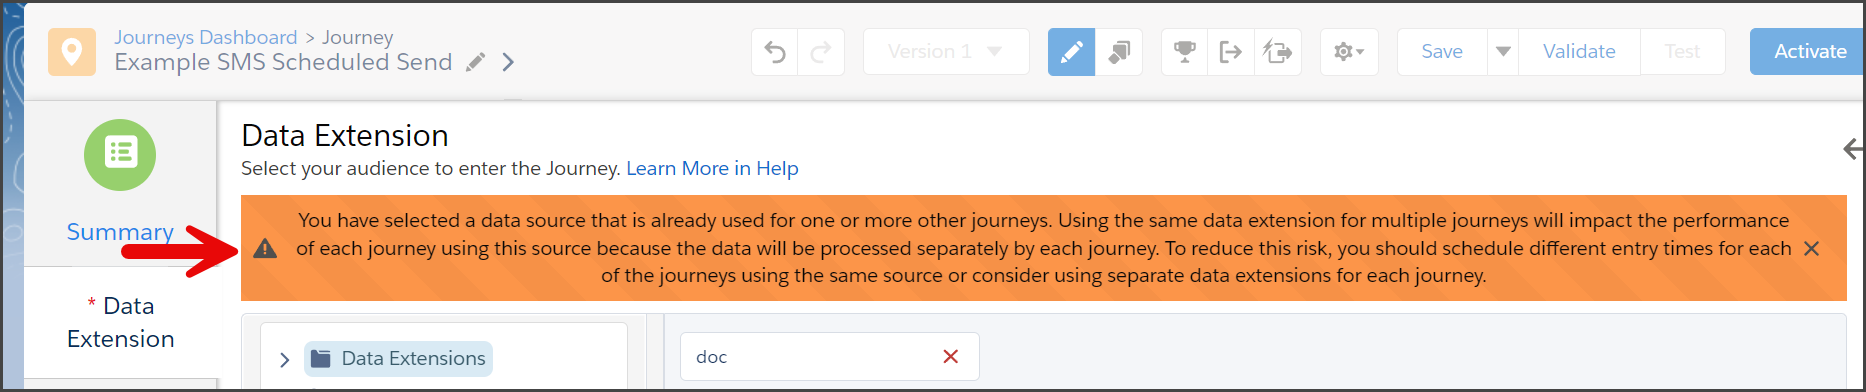
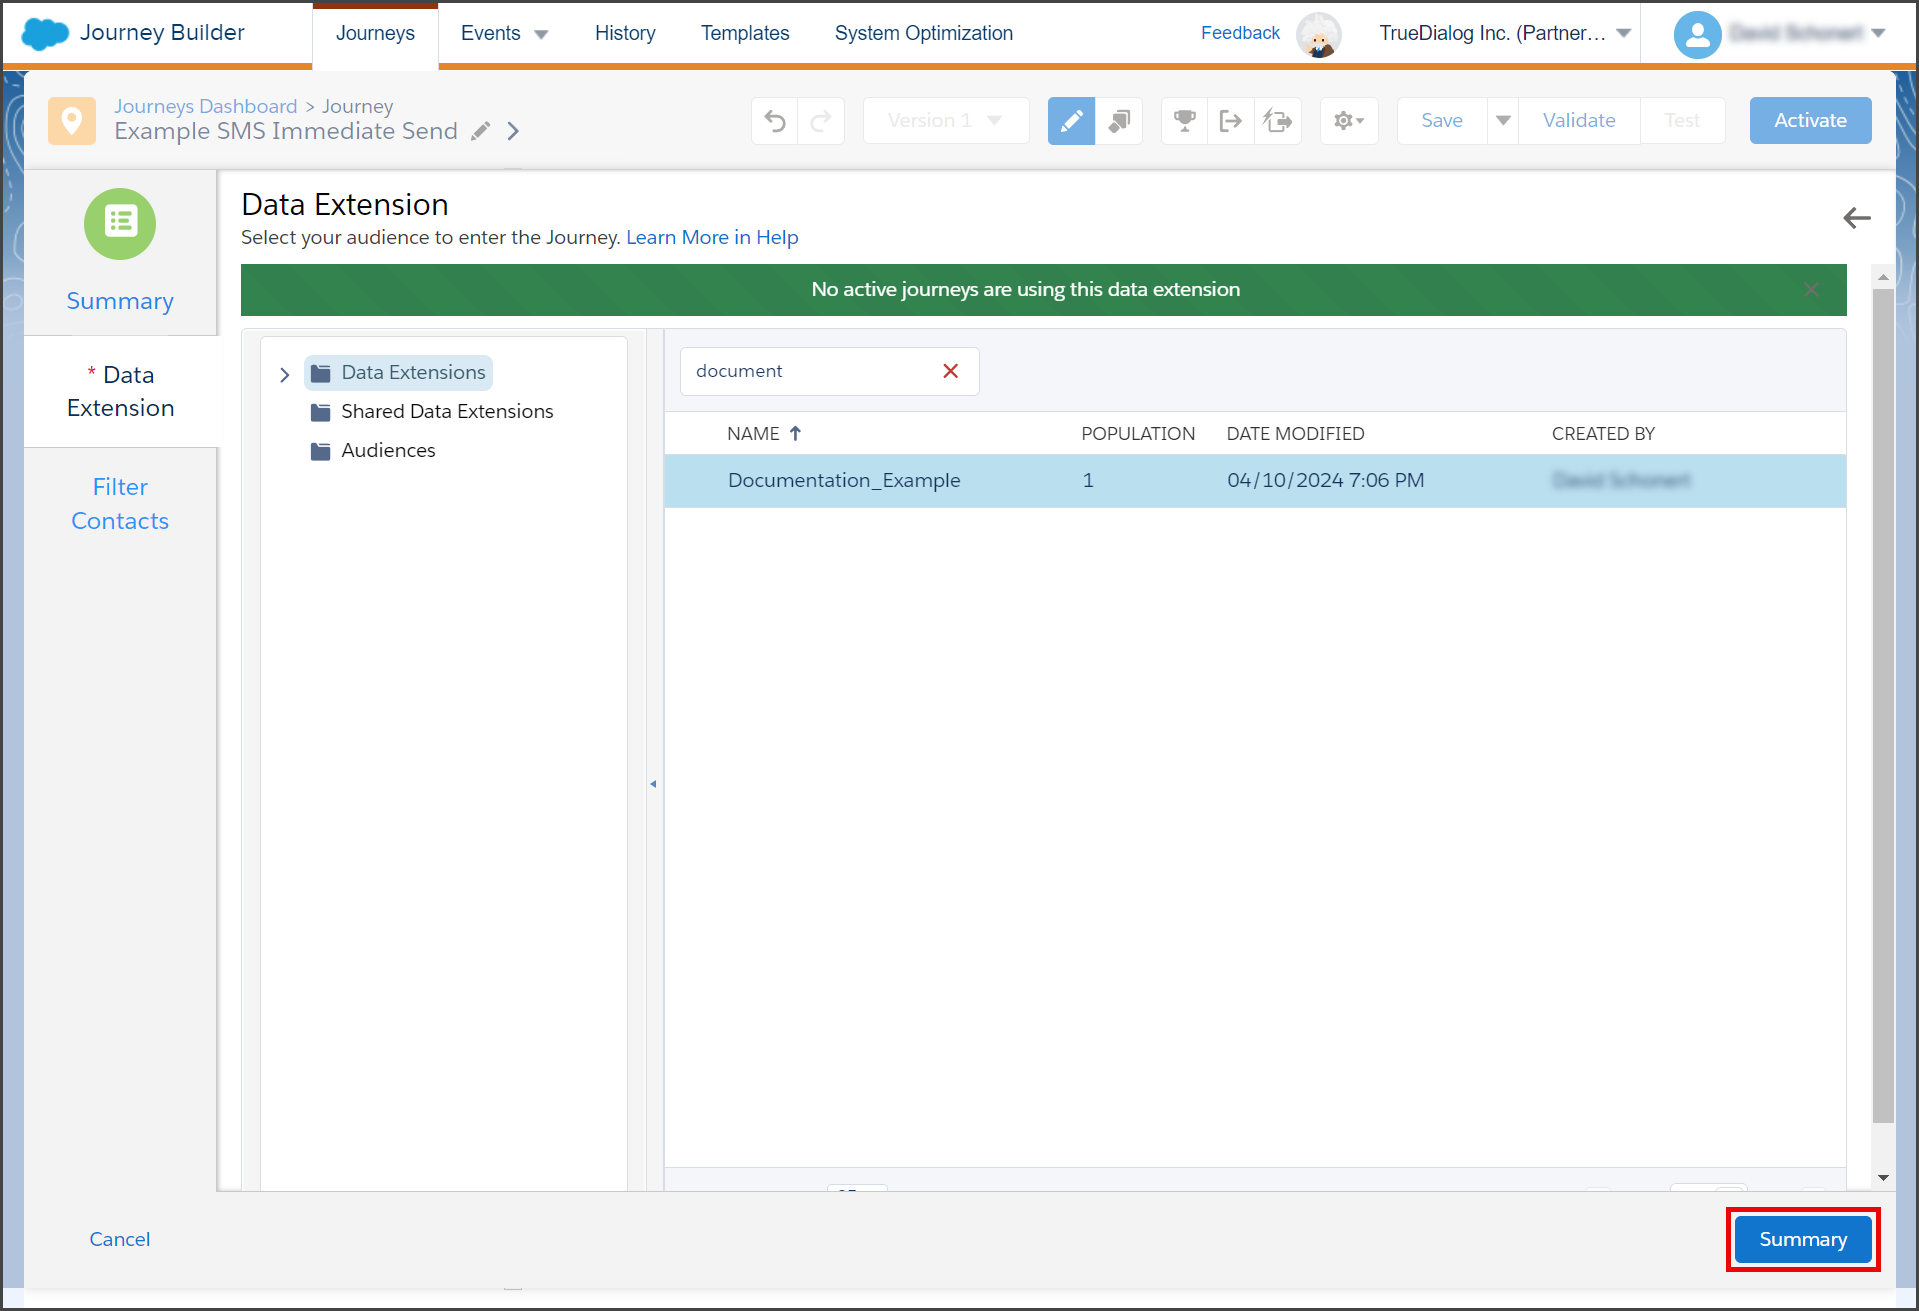
- Select your Data Extension from the table. If necessary, search for your extension by entering its name in the Search textbox.
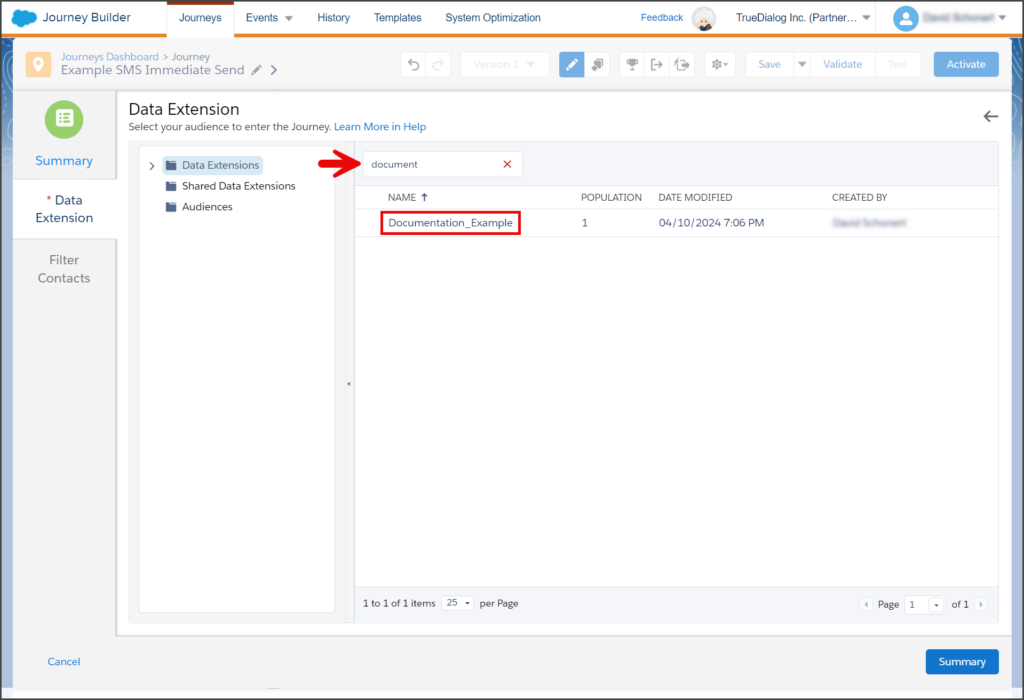
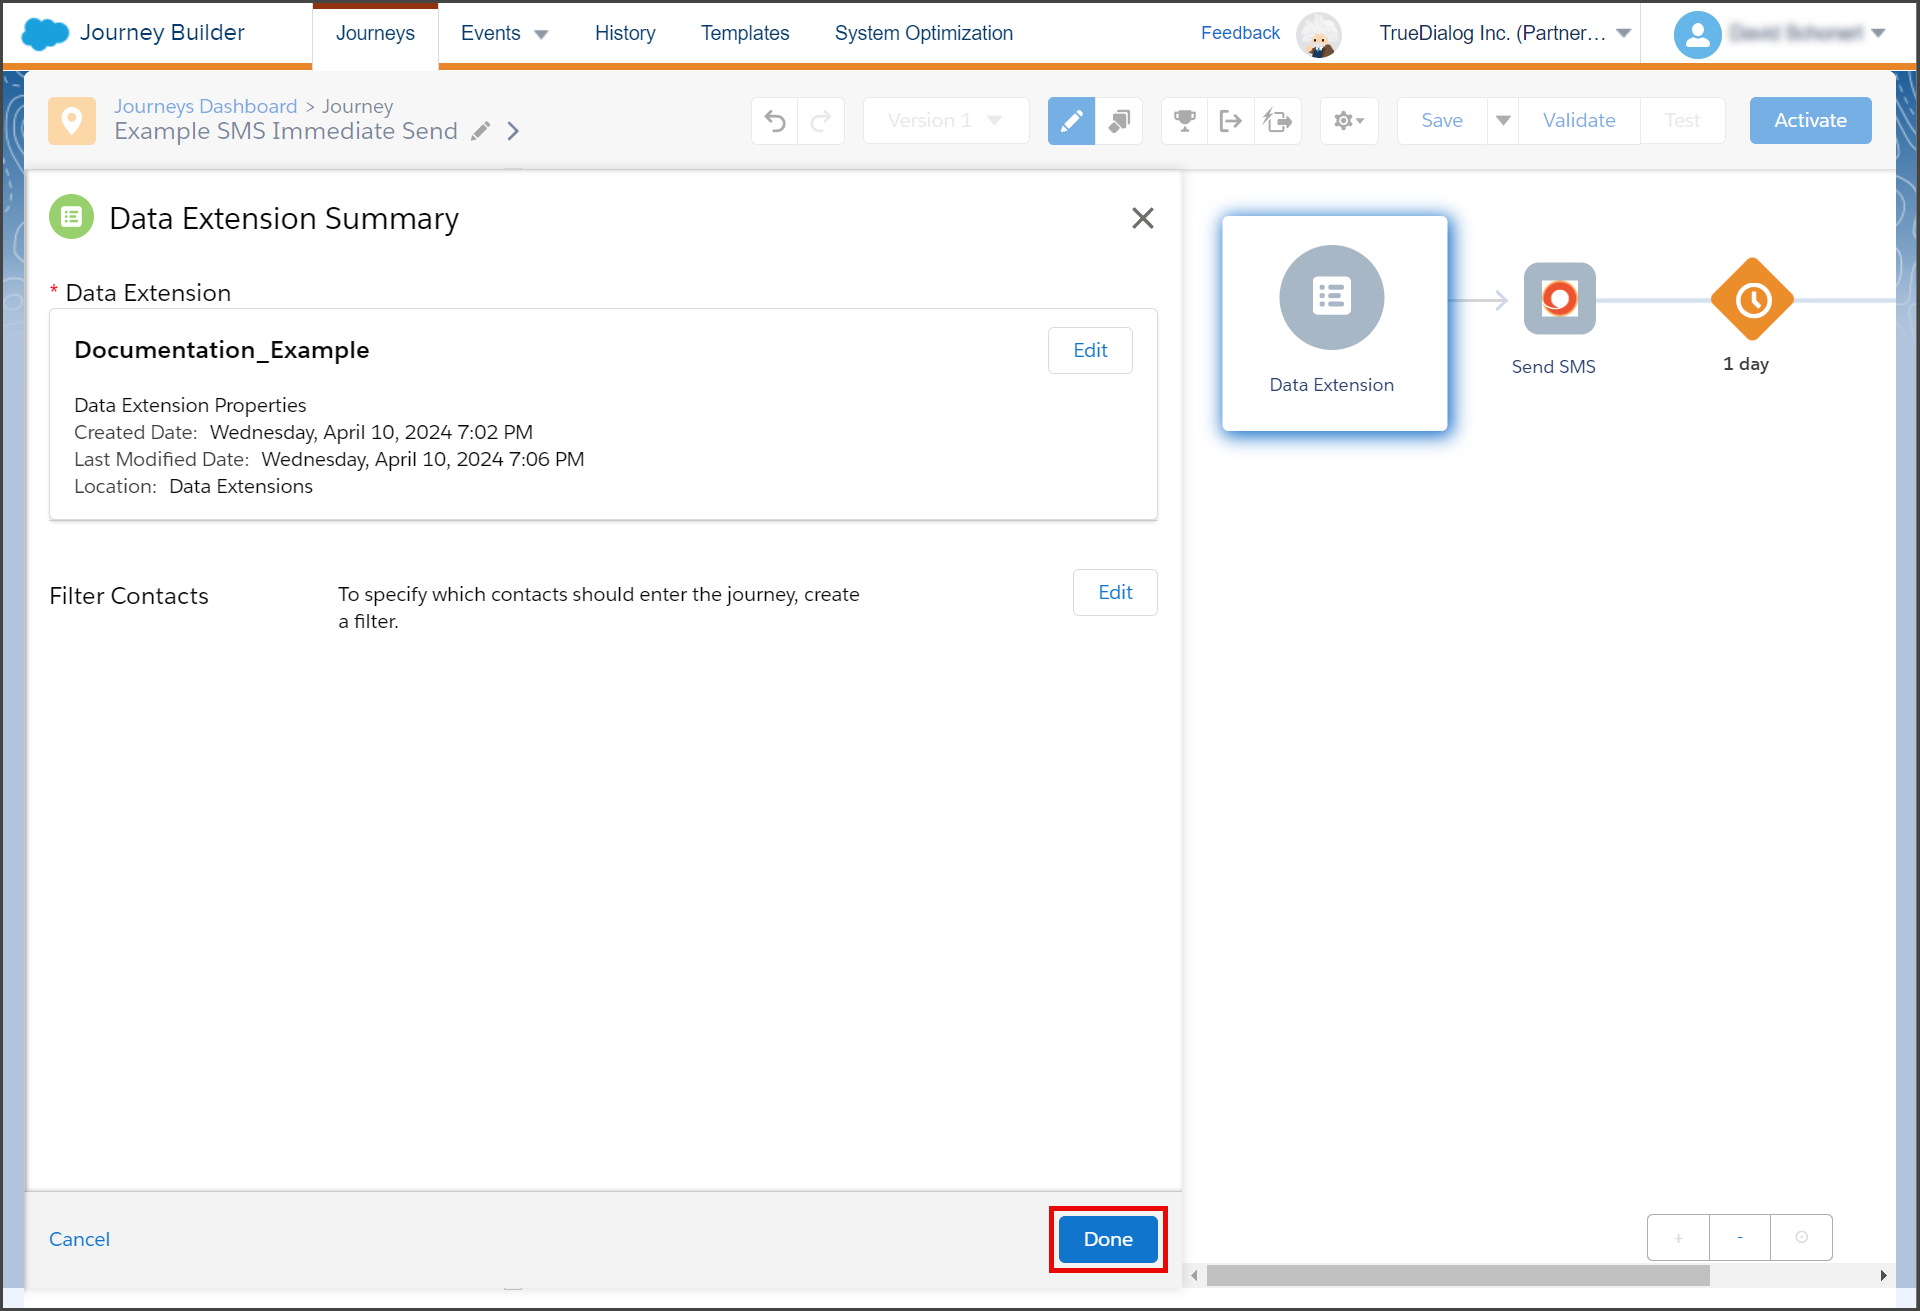
- Once your Data Extension is selected, click Summary.

- Click Done.
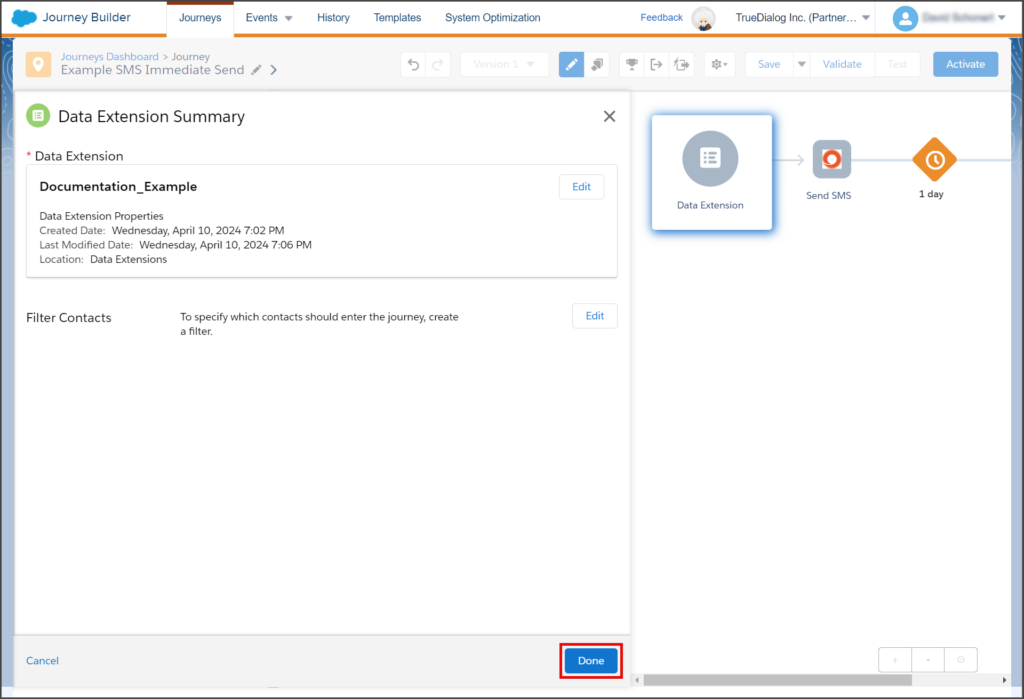
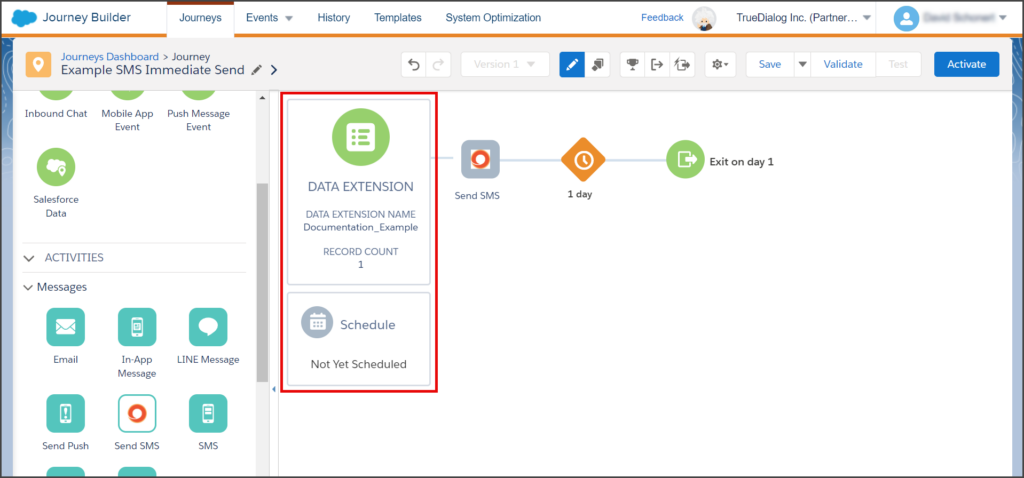
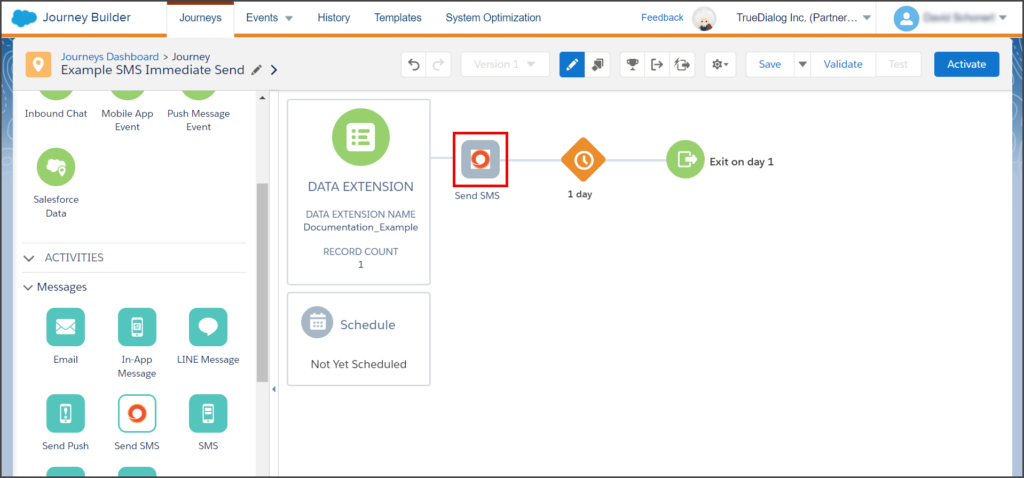
- Your canvas will now have a Data Extension with the name of your Data Extension and a Schedule box below it.


Configure Send SMS
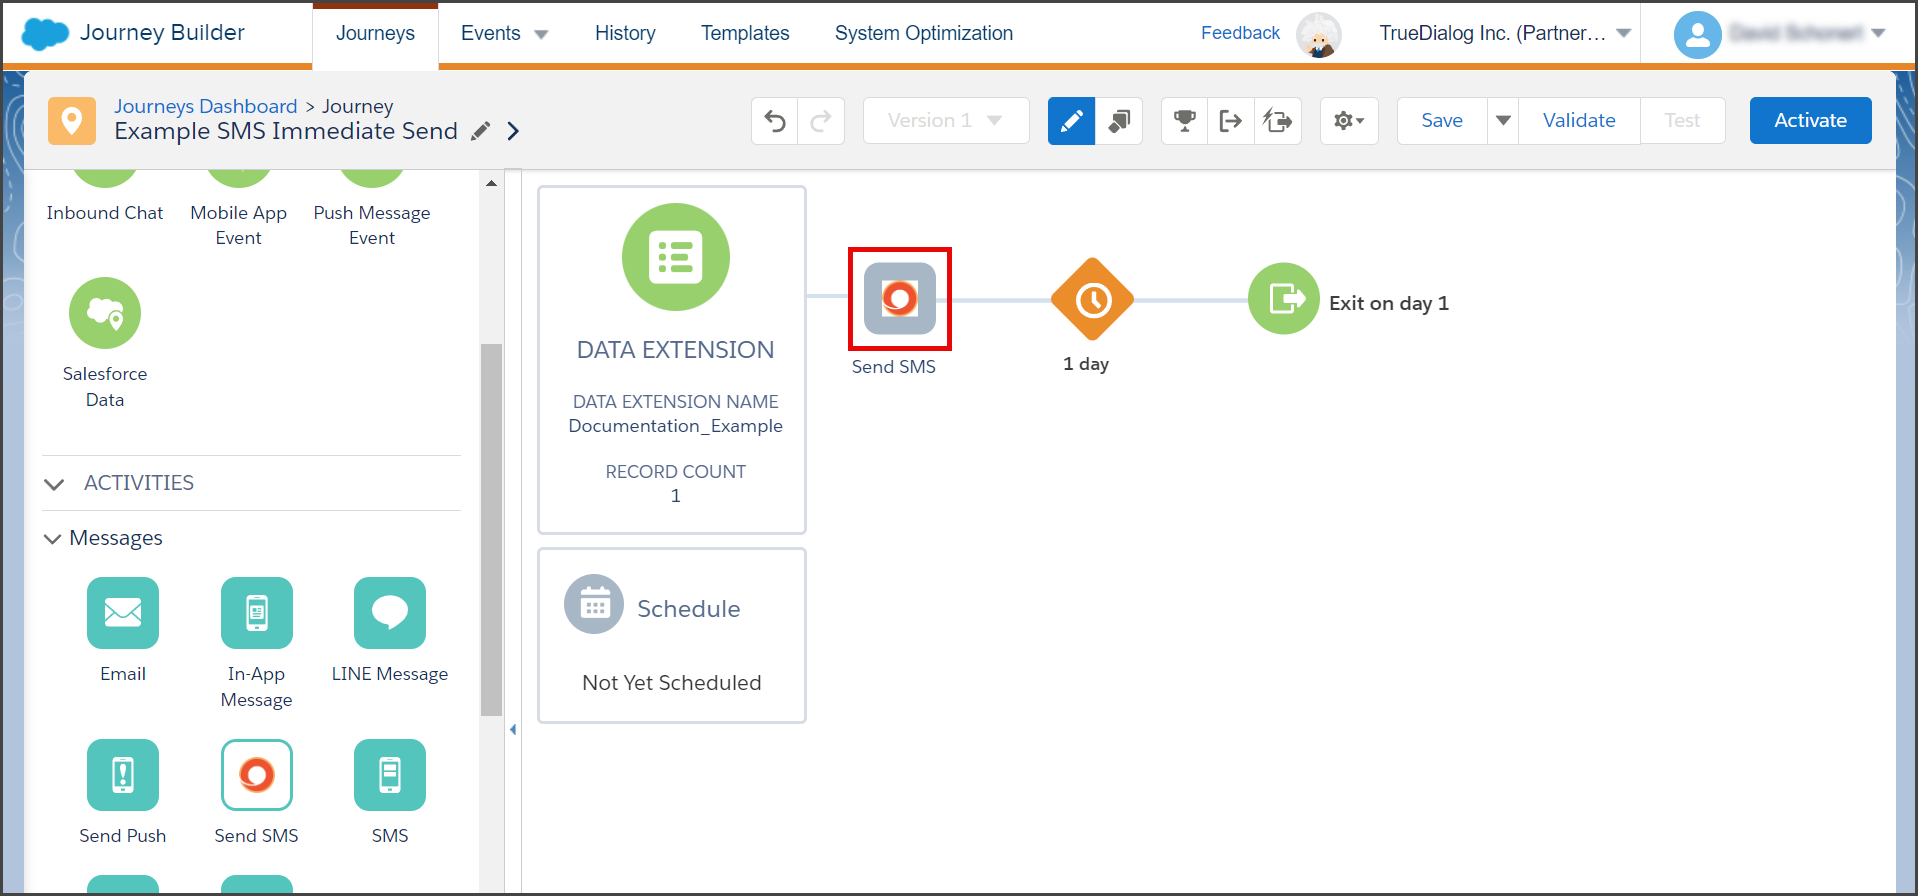
- Click the Send SMS Activity on the canvas.
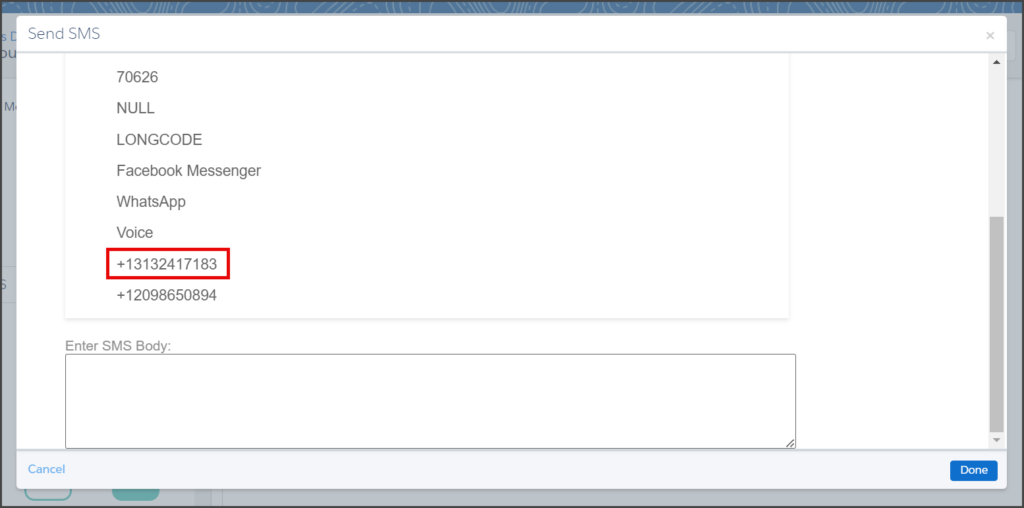
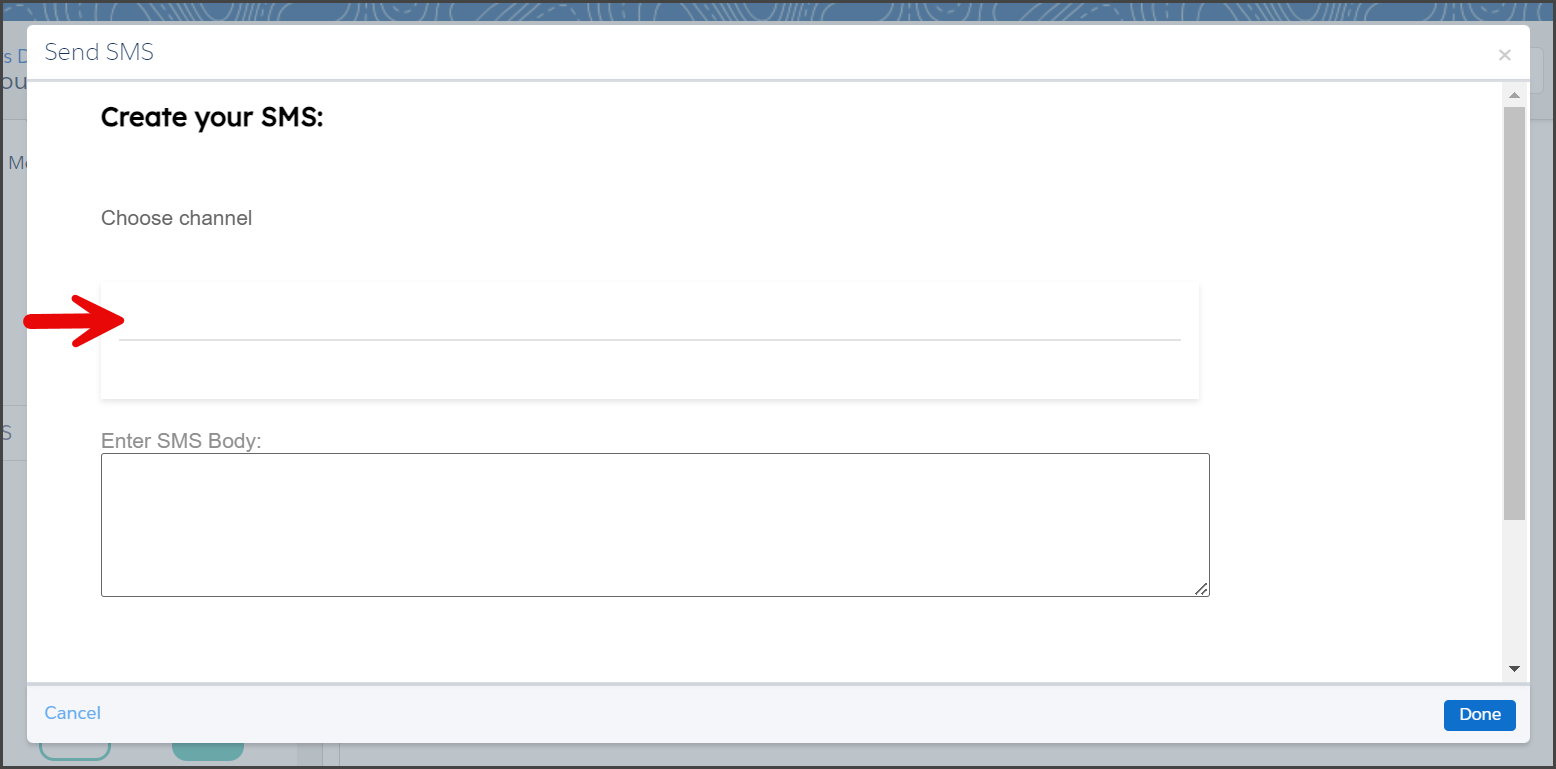
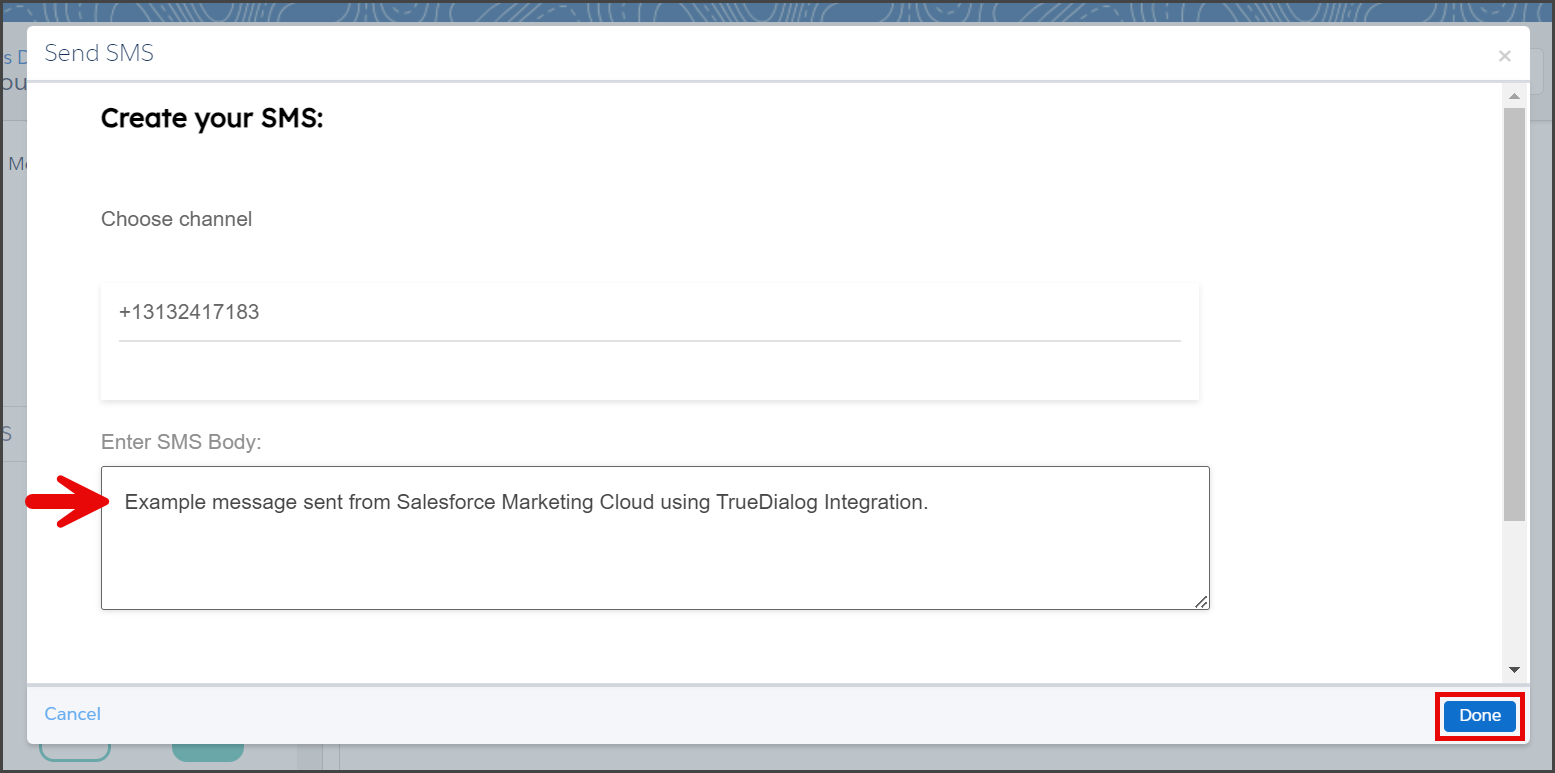
- Click the Choose channel dropdown.

- Select the channel from which your SMS messages will be sent.
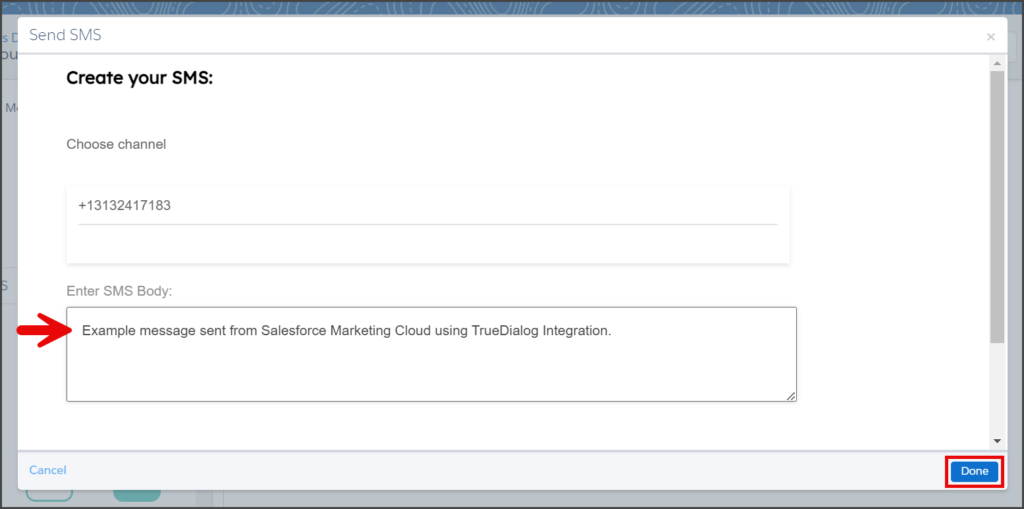
- Enter the message to send to your contacts in the Enter SMS Body textbox.
- Click Done.
- The background of the Send SMS Activity changes from grey to white once configured. Your canvas should now look like the screenshot below.


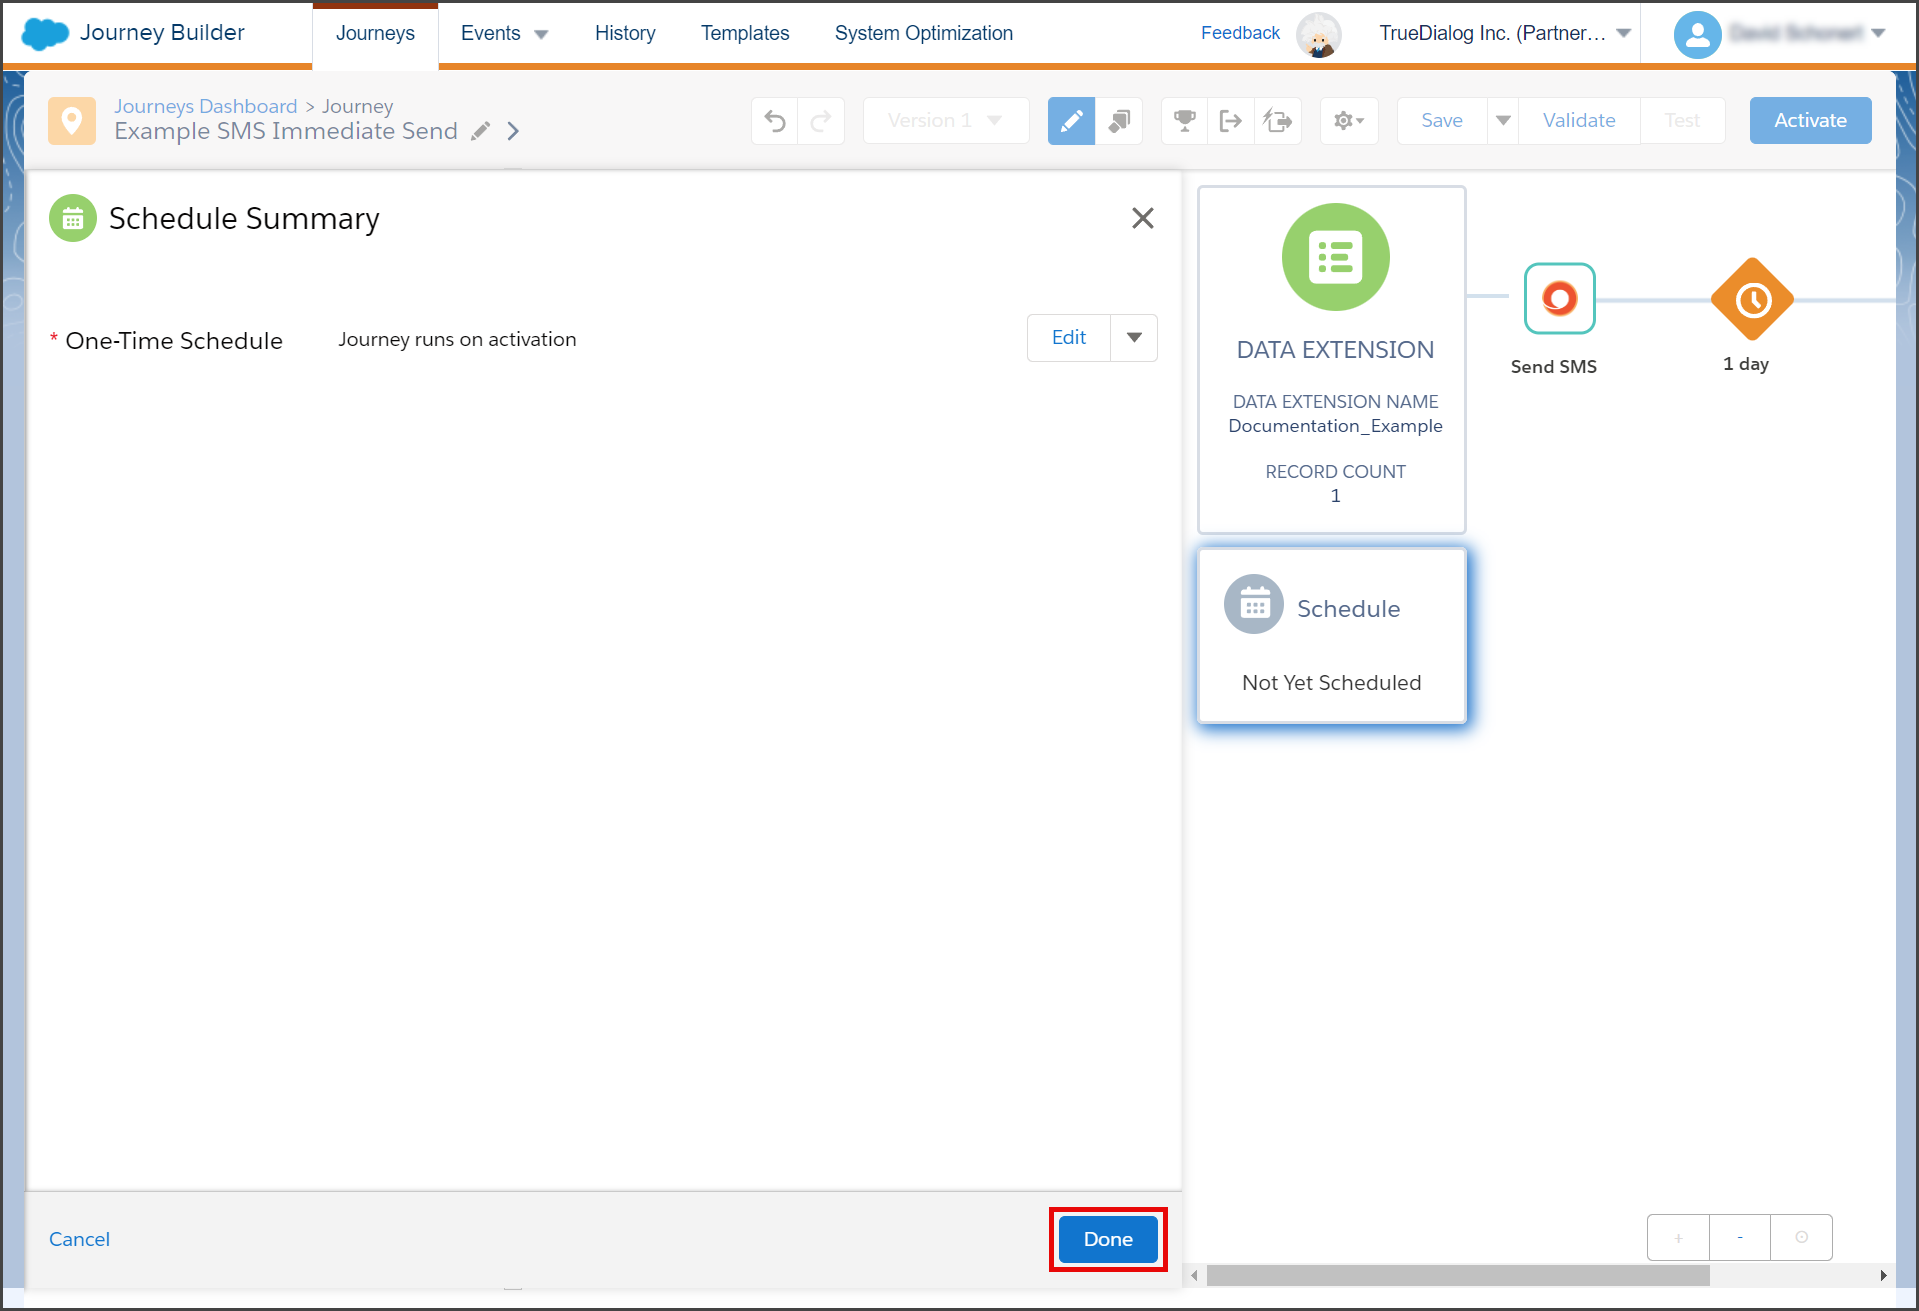
Configure Schedule
This guide will only cover creating a Run Once On Activation schedule. See the SFMC – Creating a Journey Schedule article for instructions on creating other schedule types.
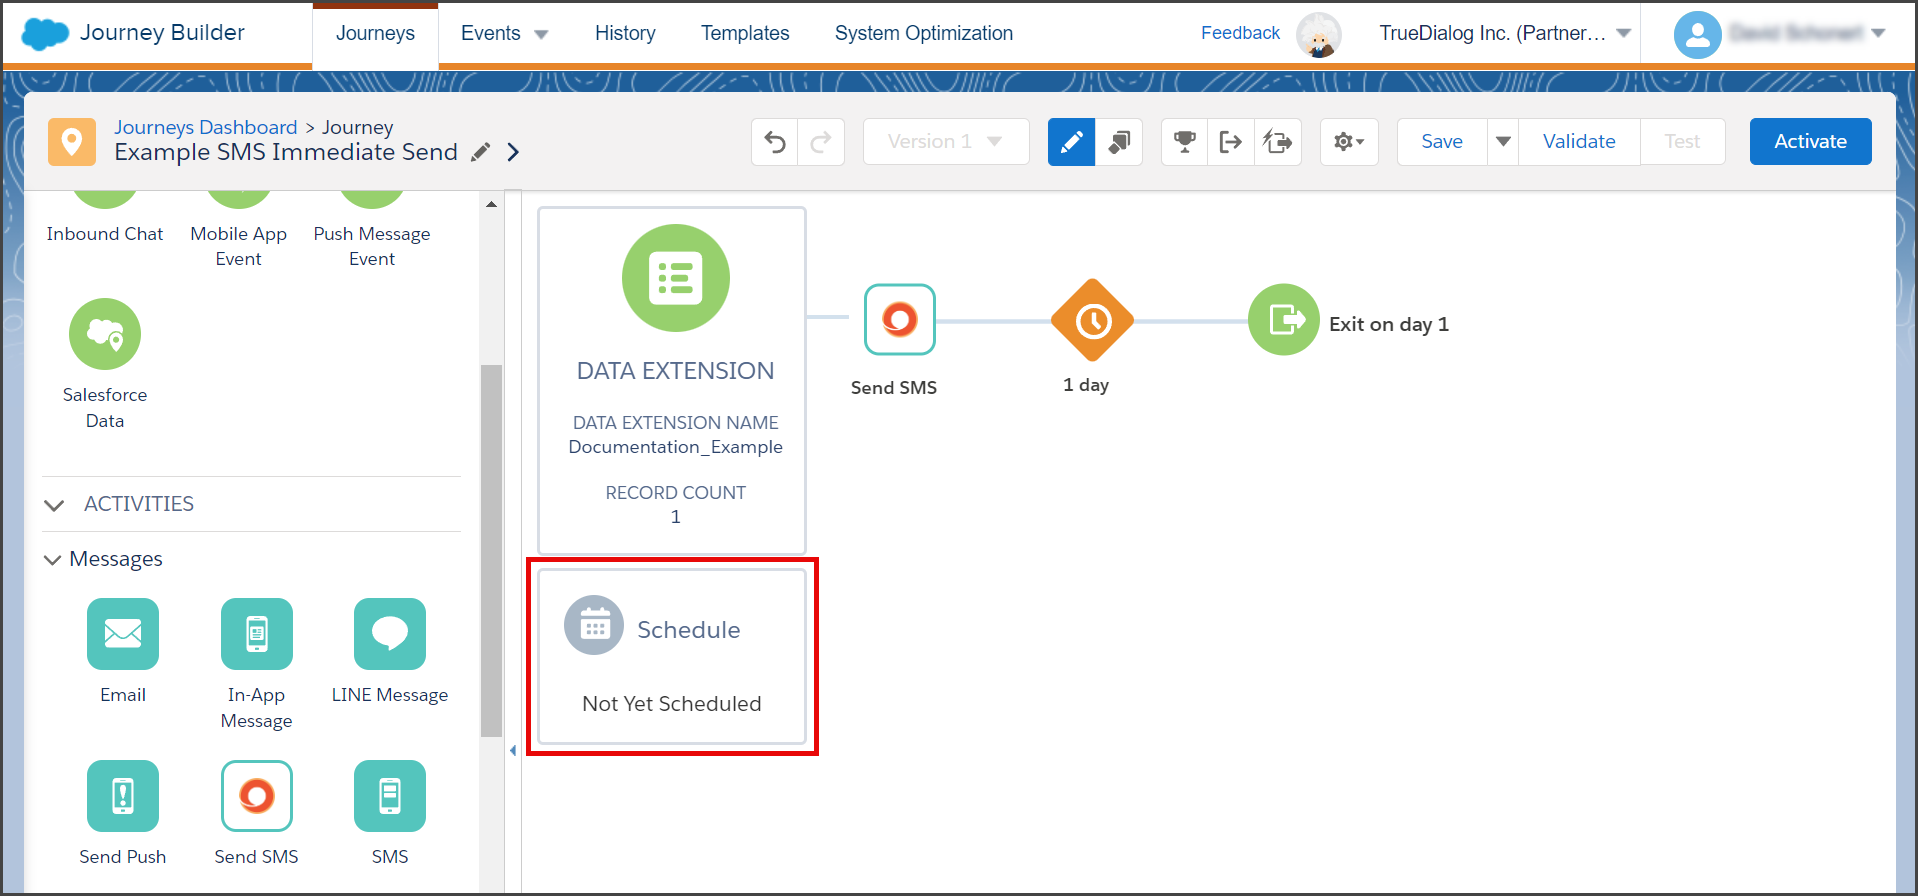
- Click the Schedule box on the canvas.

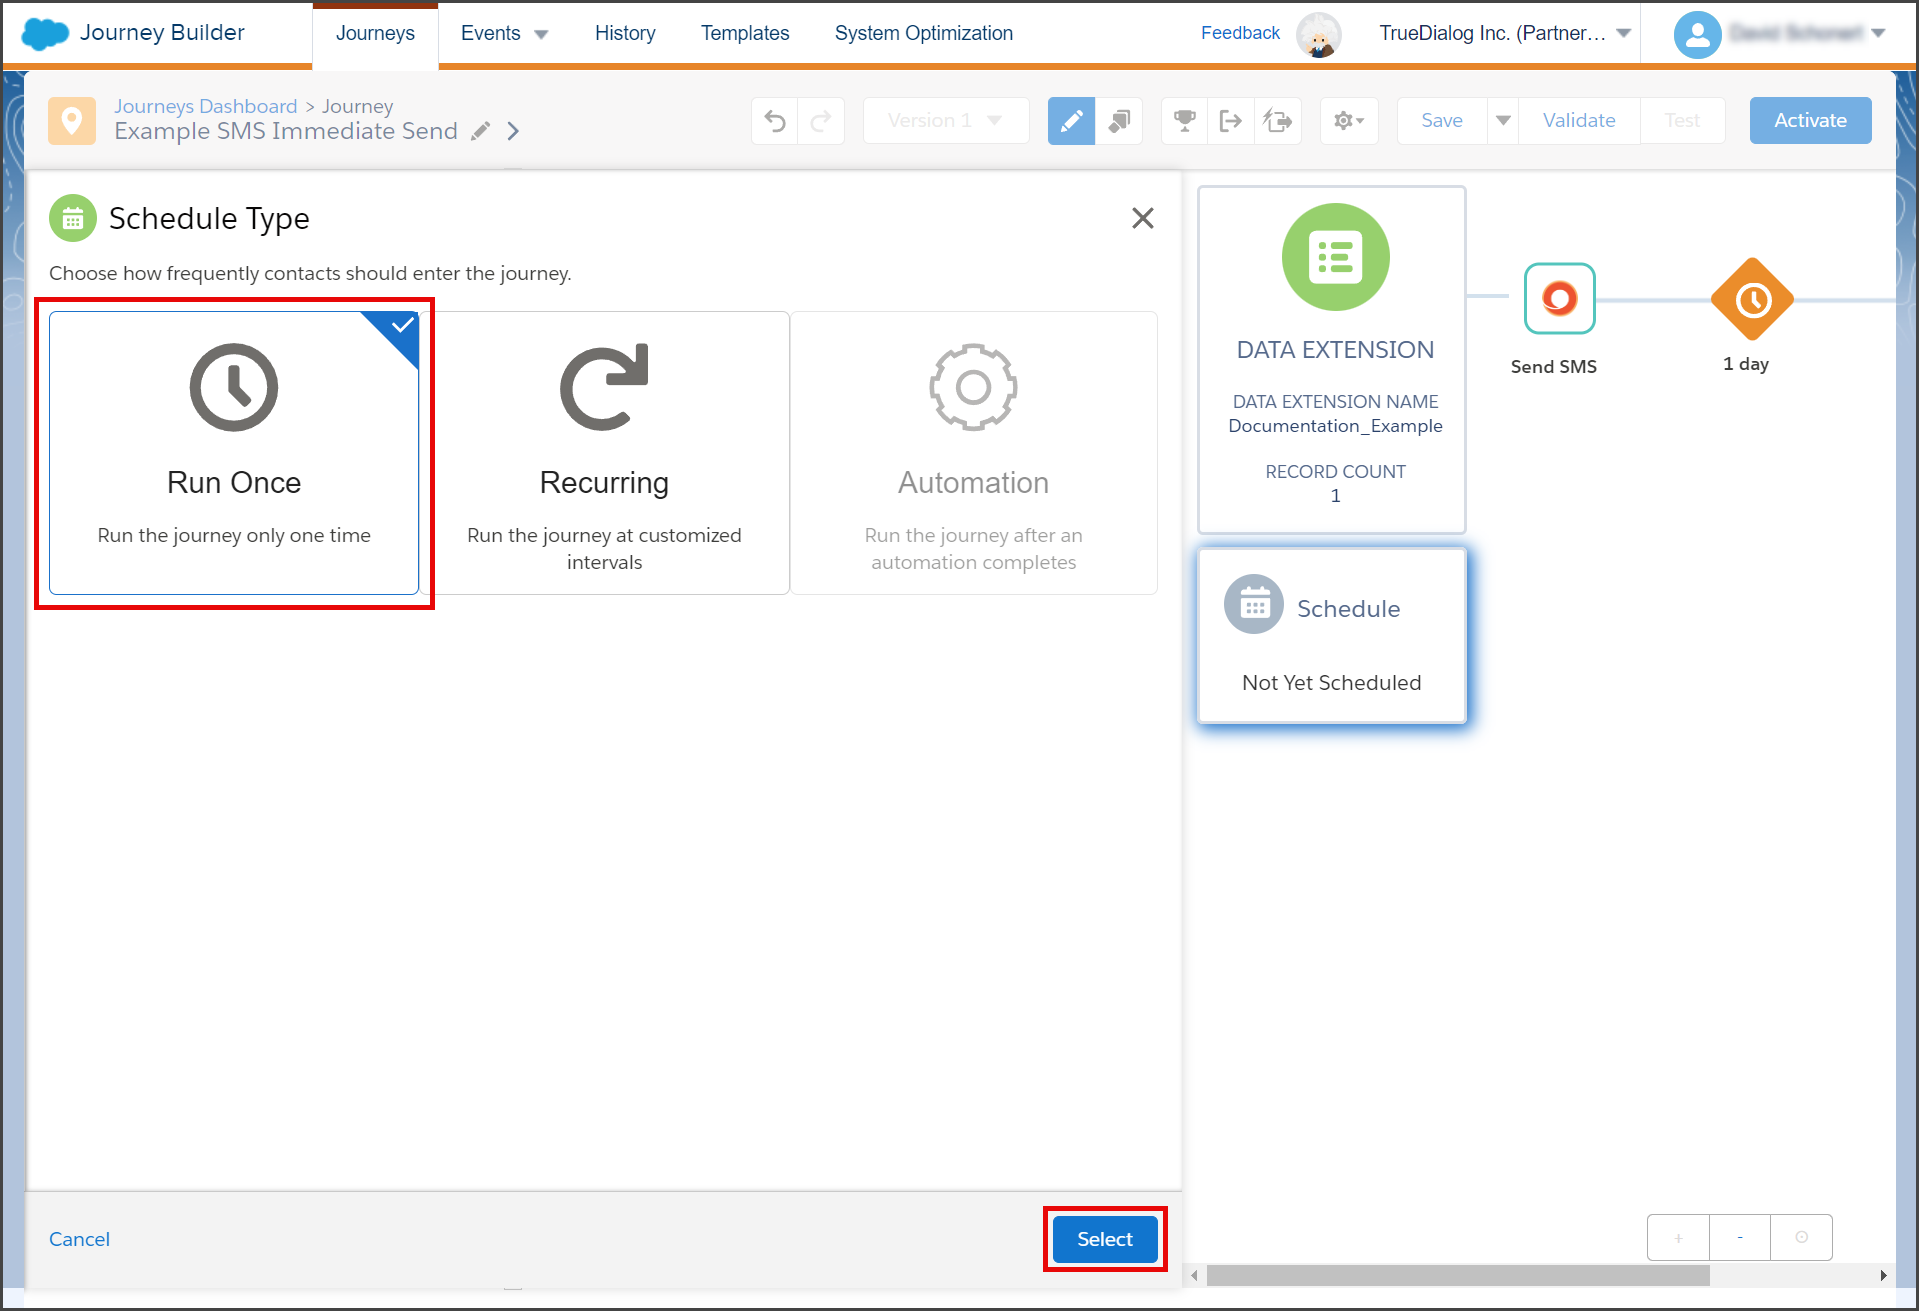
- Click the Run Once box.
- Click Select.

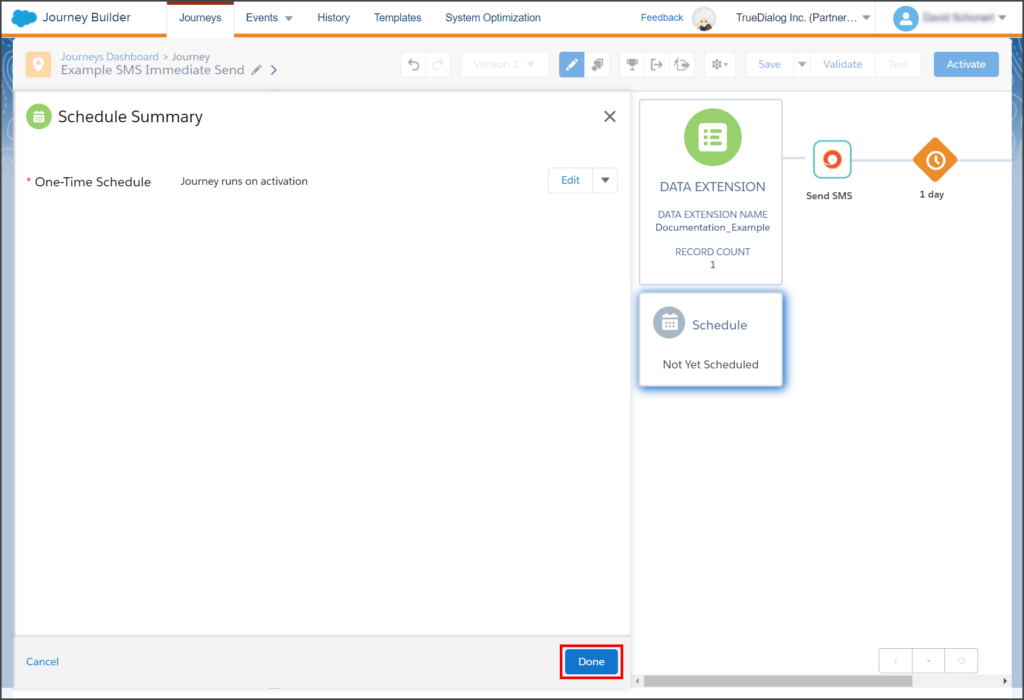
- Click Done on the Schedule Summary page.
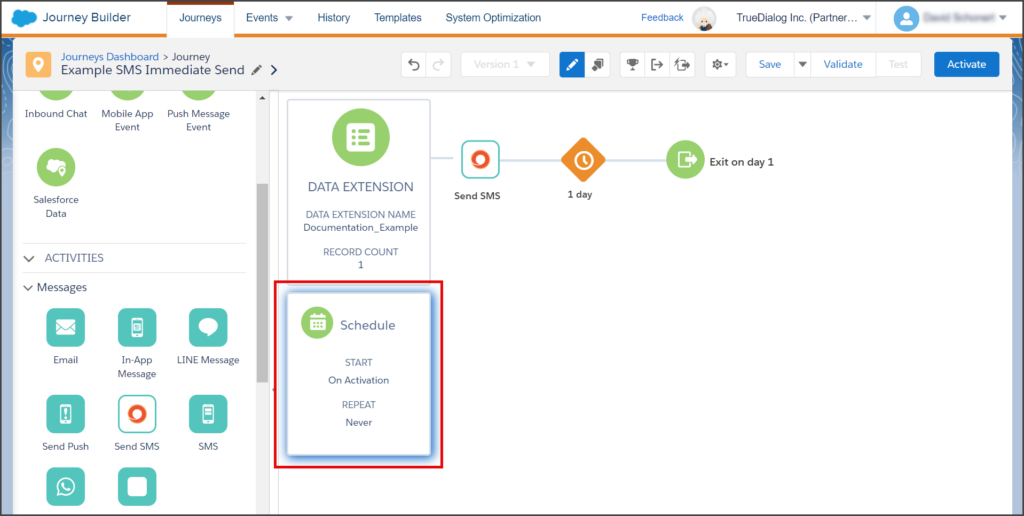
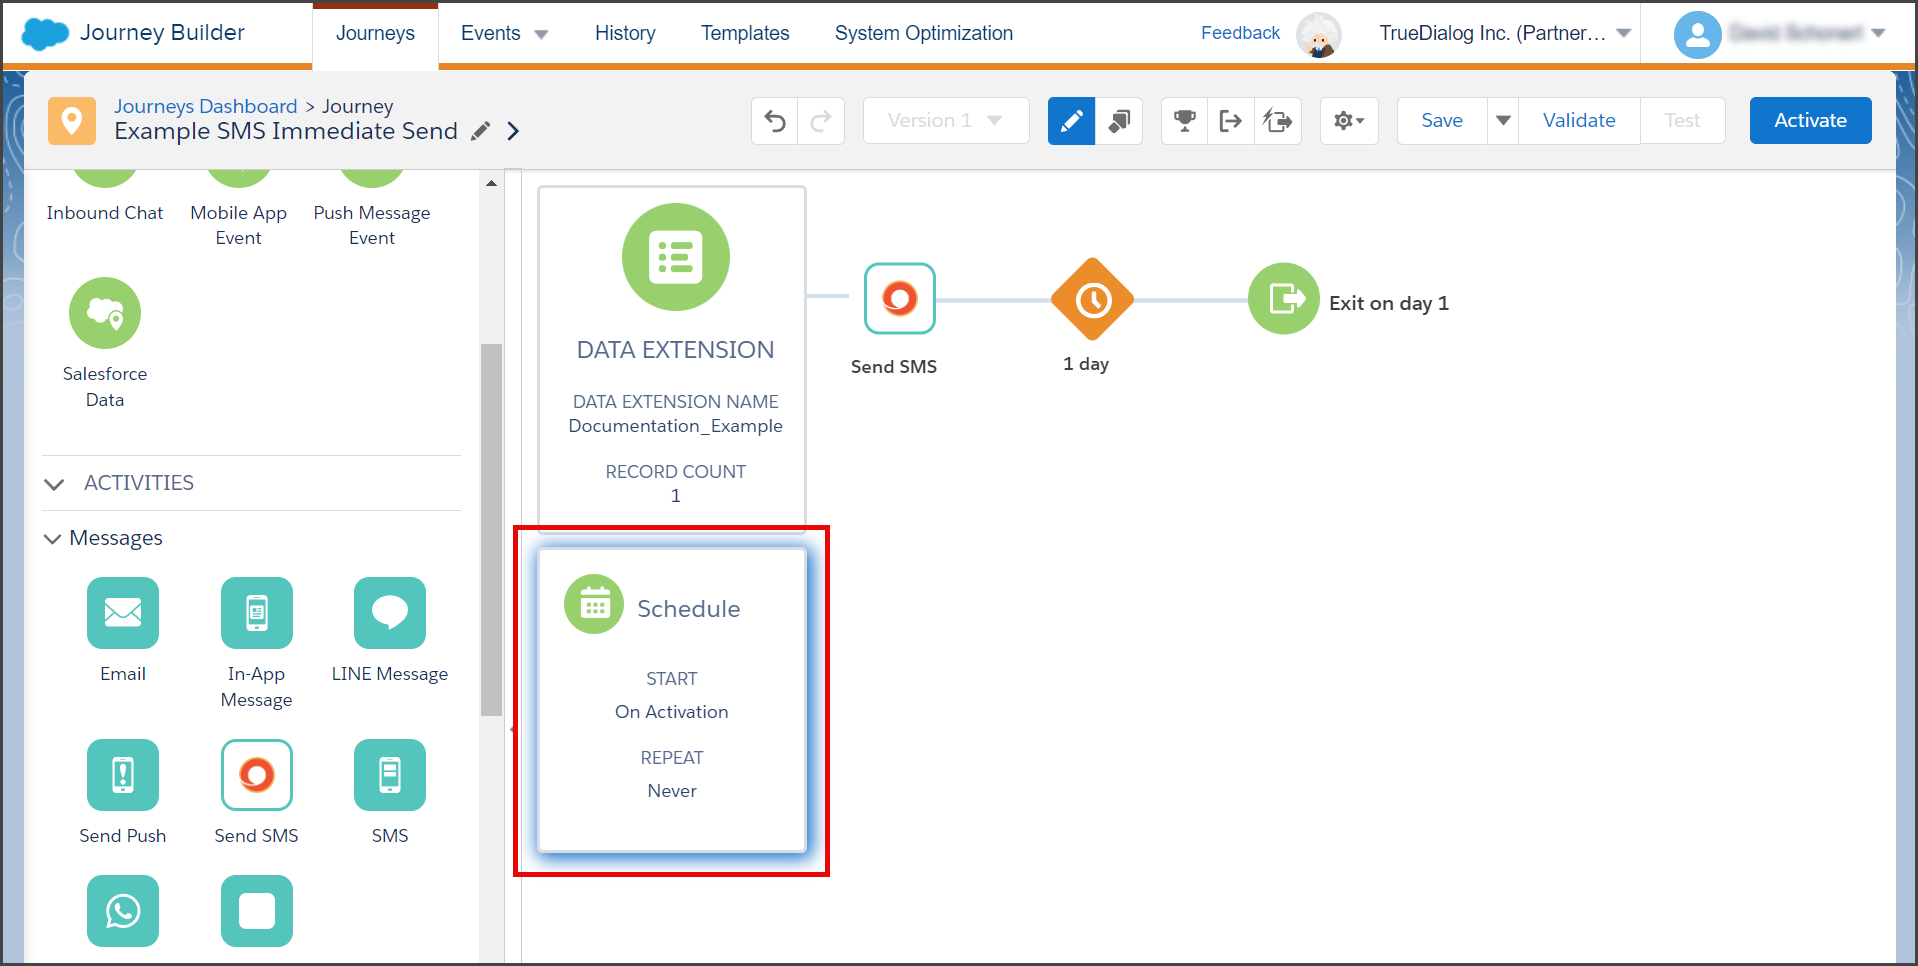
- Your canvas will now have a Schedule with START and REPEAT values.
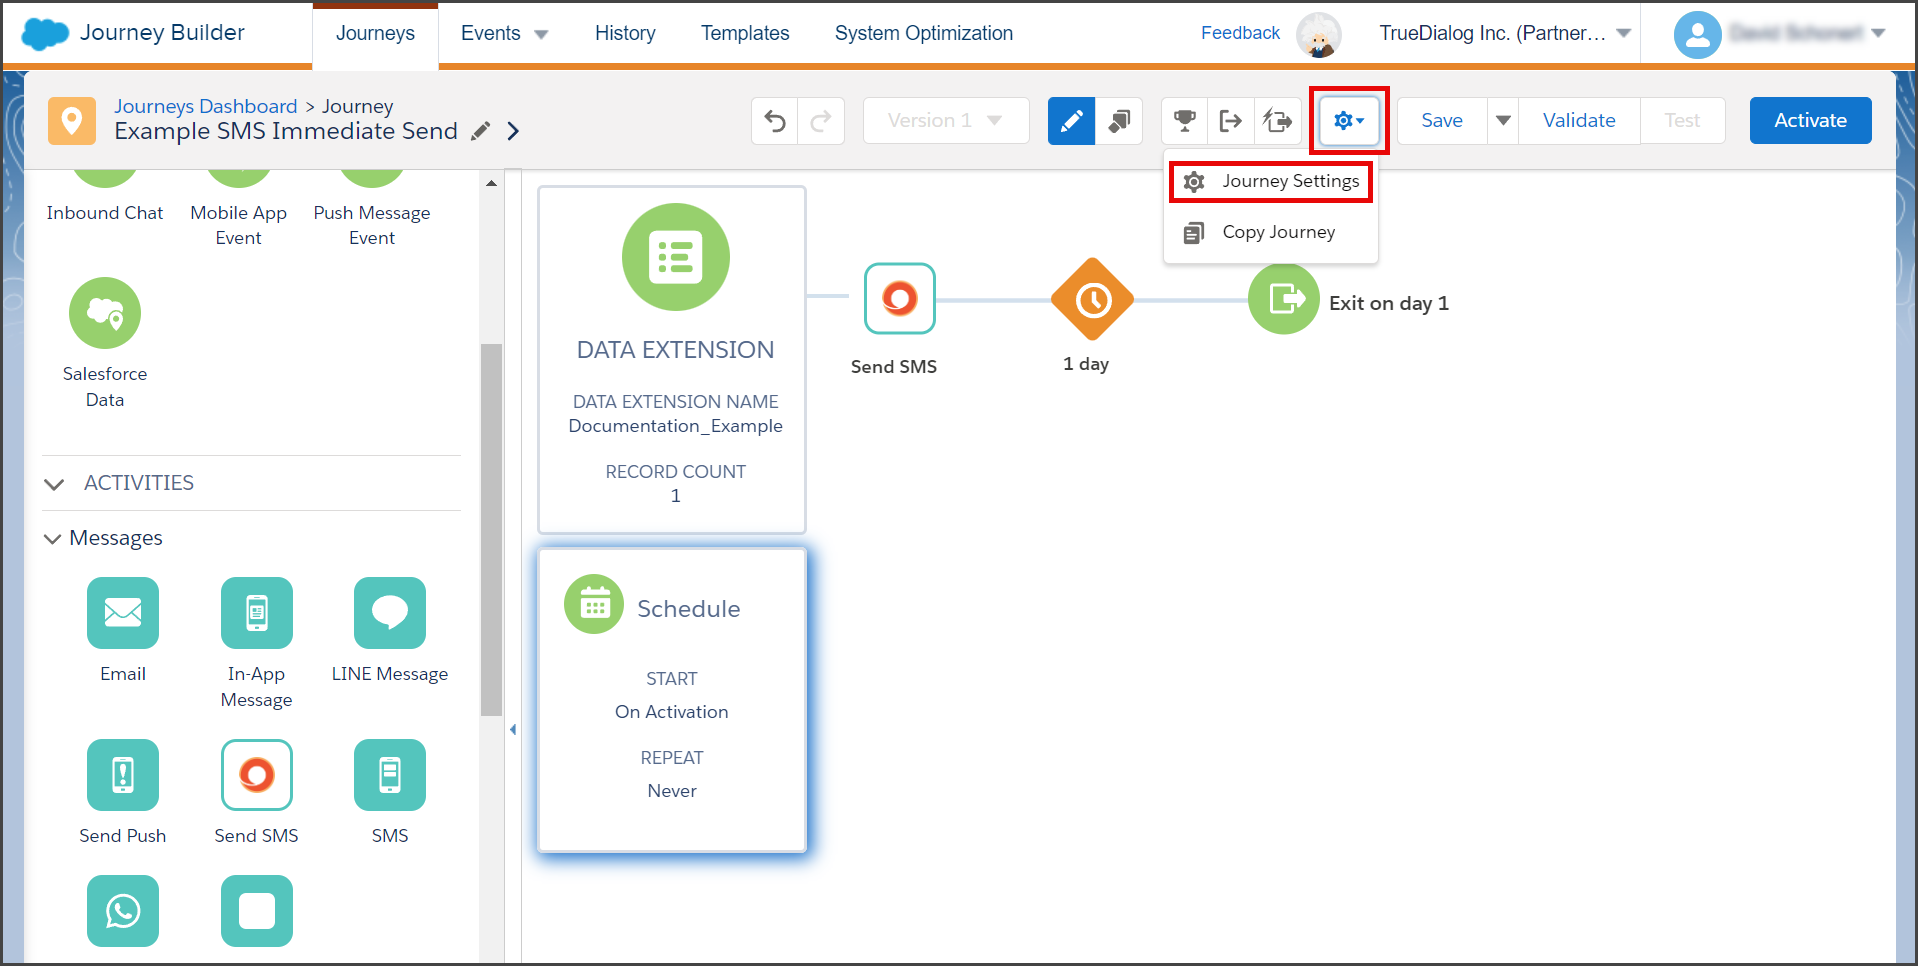
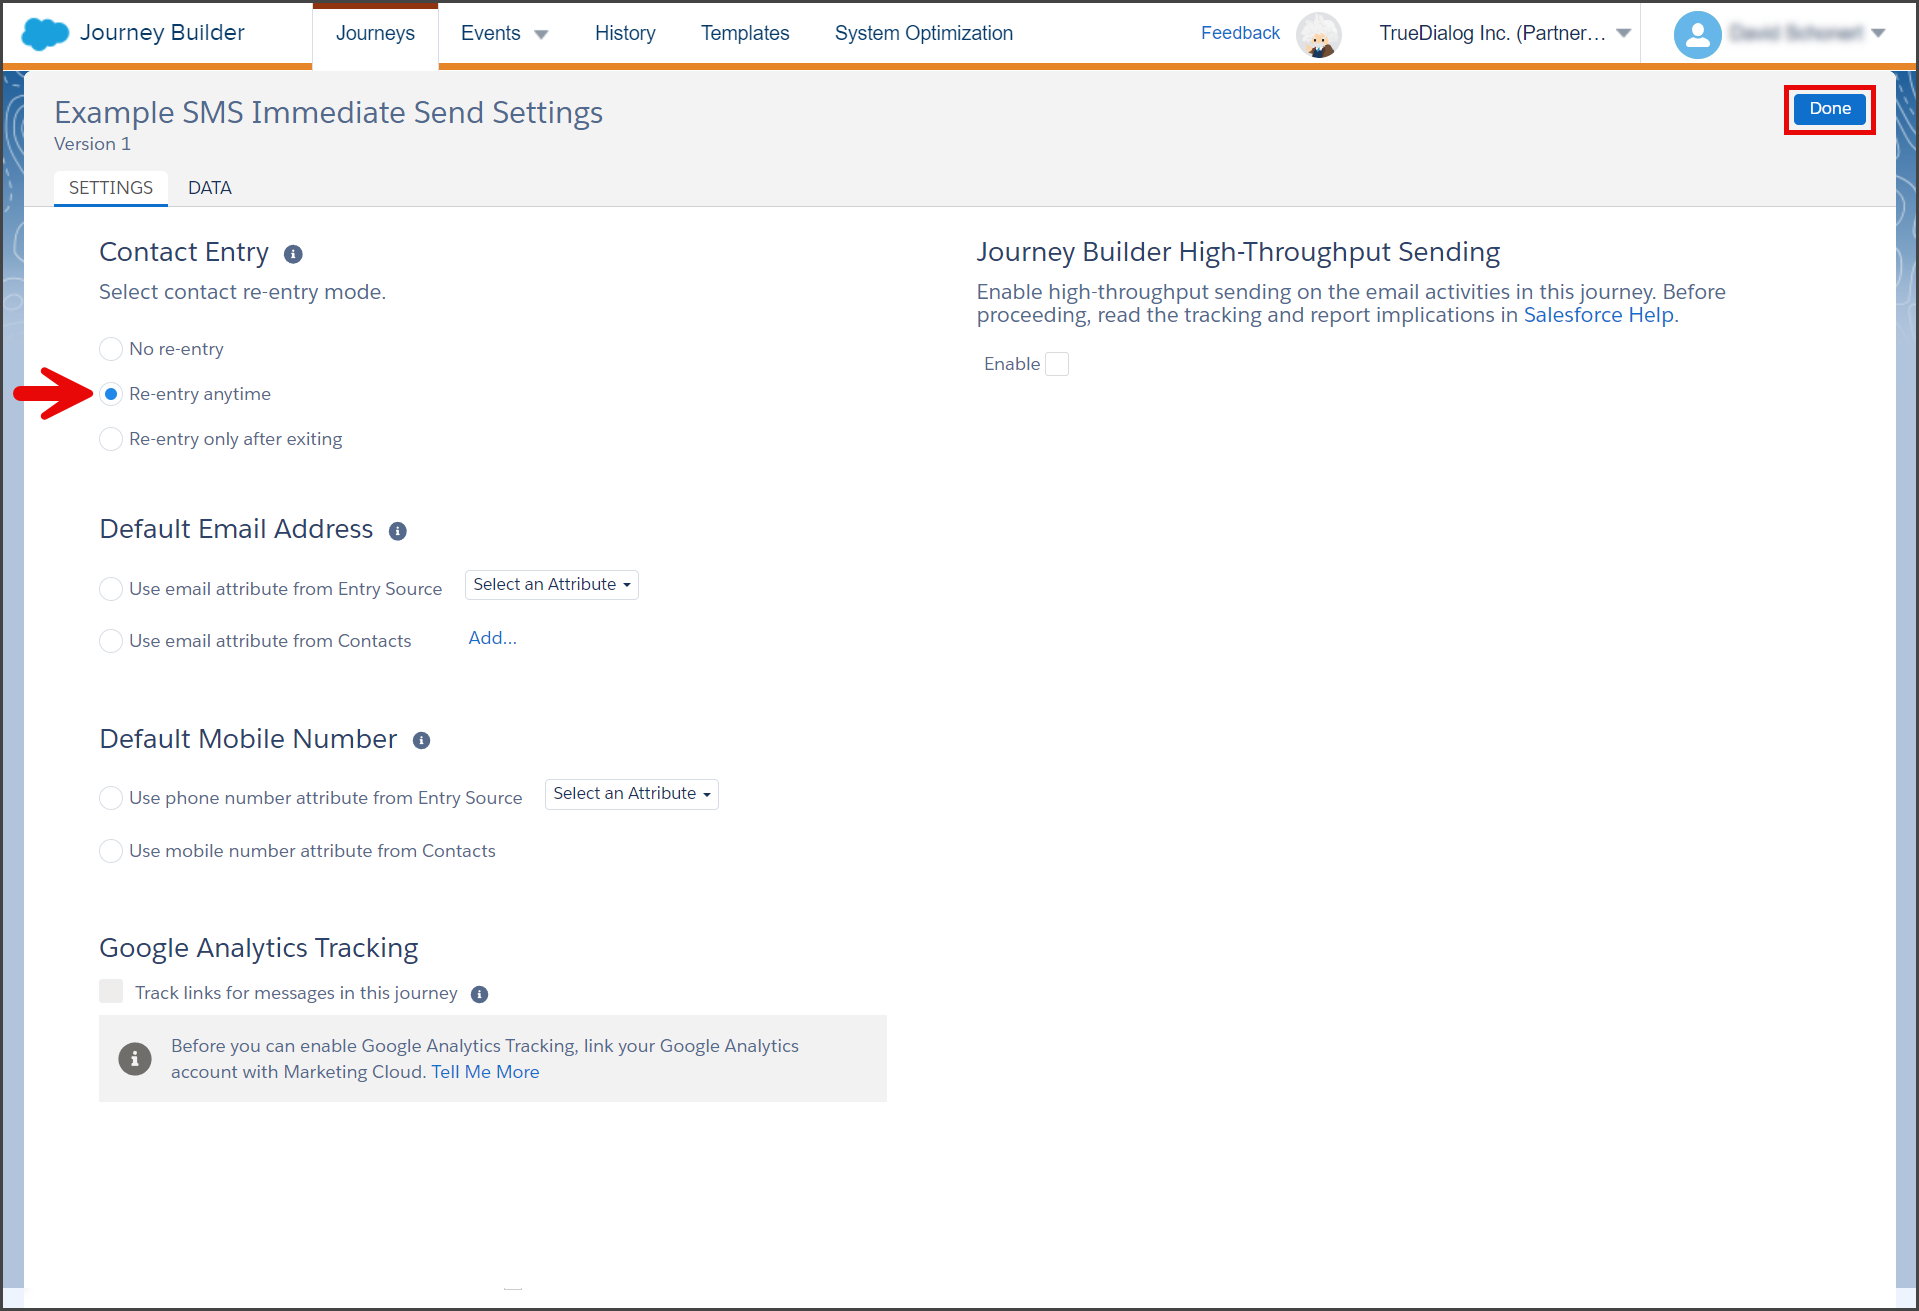
Contact Entry Settings
- Click the Gear icon in the toolbar, and in the dropdown menu, click Journey Settings.

- On the Settings page, click the Re-entry anytime option for Contact Entry.
- Click Done.

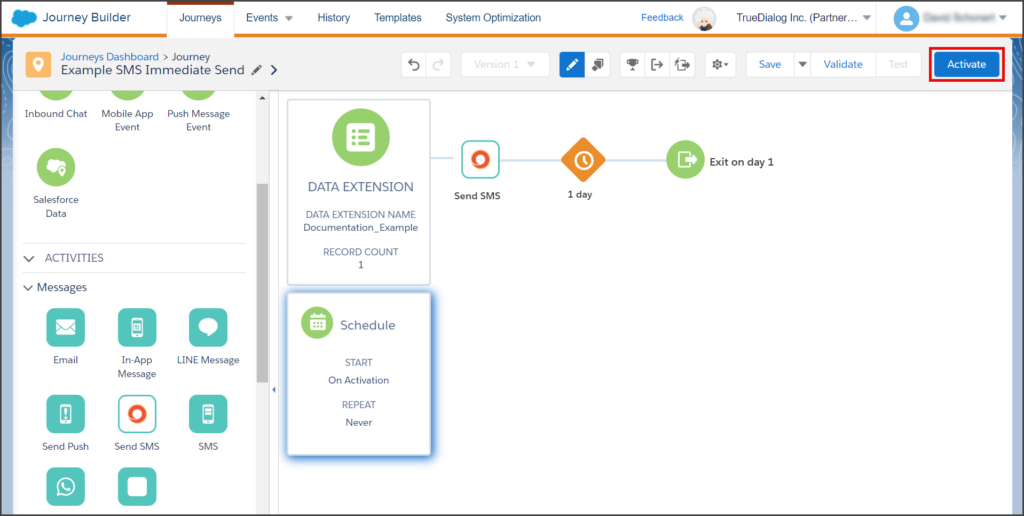
Activate Journey
- Click Activate.
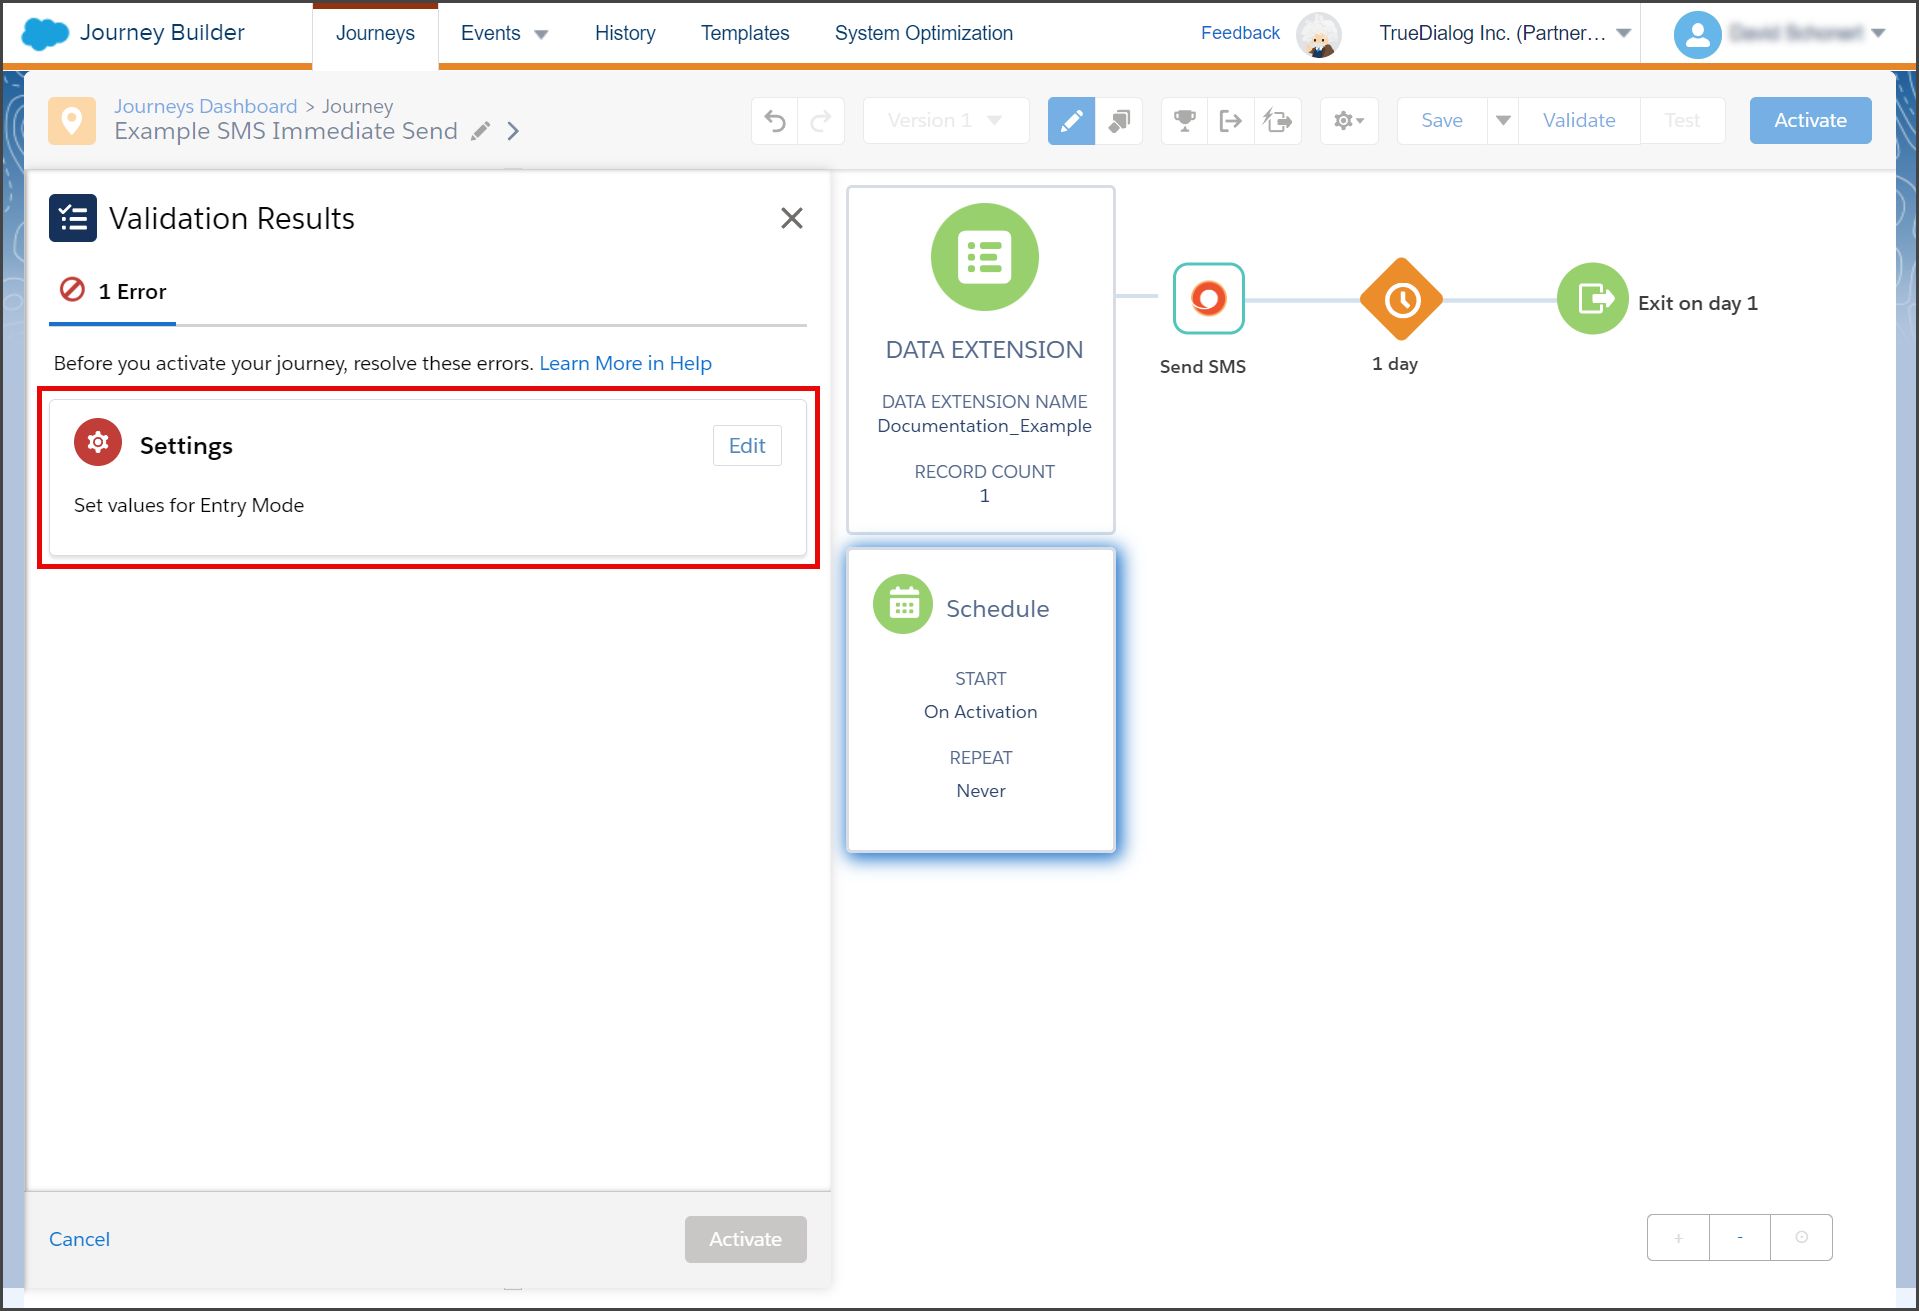
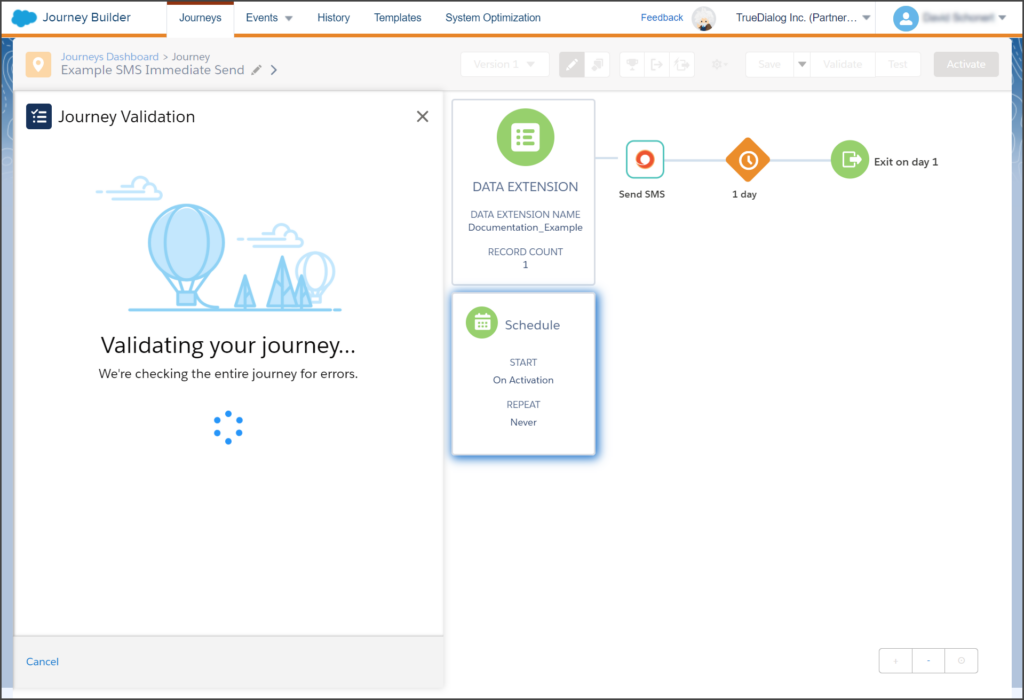
- Wait for the Journey Validation to complete.
- If you receive the Error message, Settings – Set values for Entry Mode, this indicates the Contact Entry setting is not set. Click Edit and follow the instructions in the Contact Entry Settings section above.

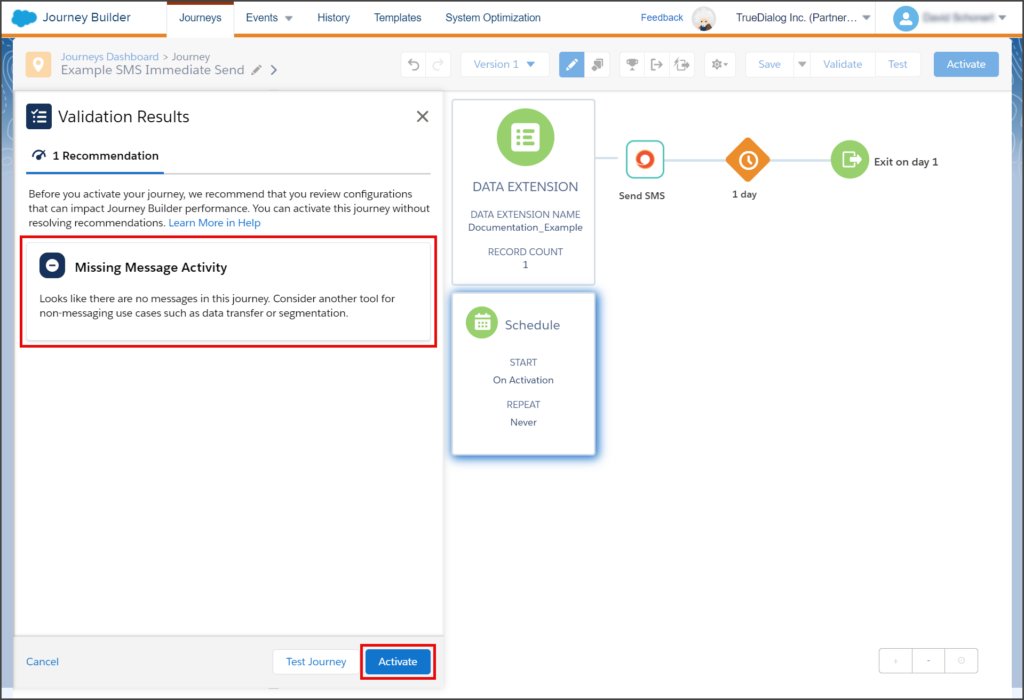
- If you receive a Recommendation for Missing Message Activity, you can ignore this message. No action is required.
- Click Activate.
- Click Activate on the Activate Journey window.

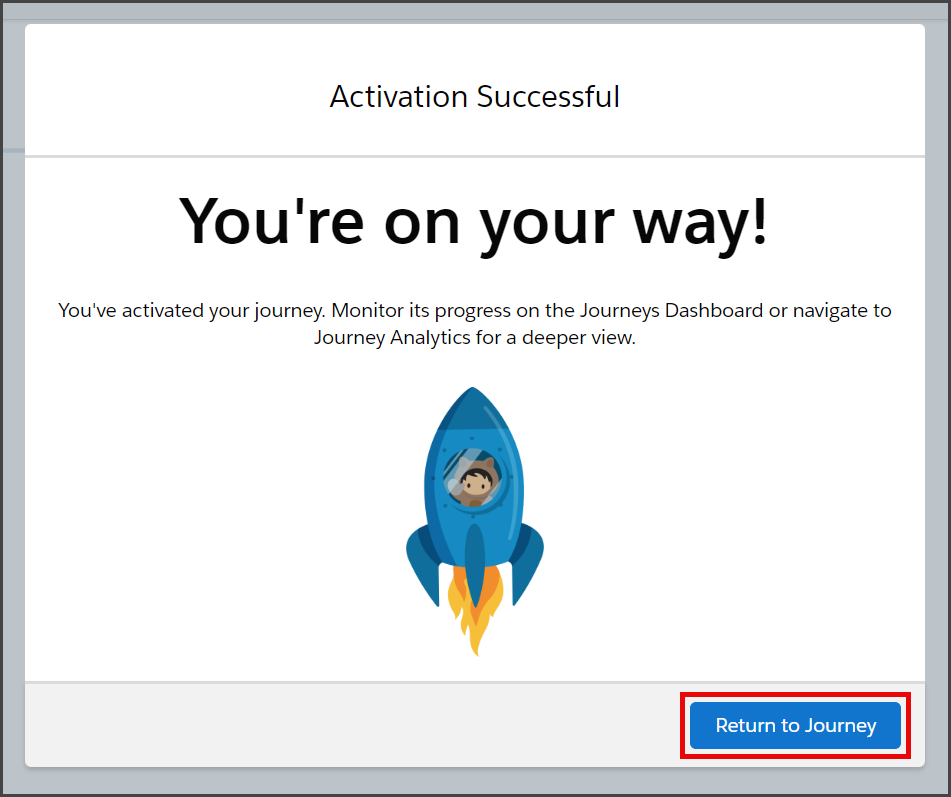
- When you see the Activation Successful window, your Journey is activated, and your SMS message will be sent to your contacts in the next few minutes.
- Click Return to Journey to close this window.