Salesforce Marketing Cloud
TrueDialog Integration
Once a Journey is Activated in Salesforce, you cannot make any changes to it. However, you can create a new version of the Journey, which allows you to keep multiple versions of your Journey running simultaneously or stop any Active version. To change the Journey’s message, schedule, or channel, you must Stop the Active Journey, create a new Version, and then Activate the new version. This guide will show you how to complete this process using an example of changing a Recurring Schedule and updating the SMS Message.
For more information about Journey versions, see the Salesforce article Journey Versions.
Stop an Active Journey Version
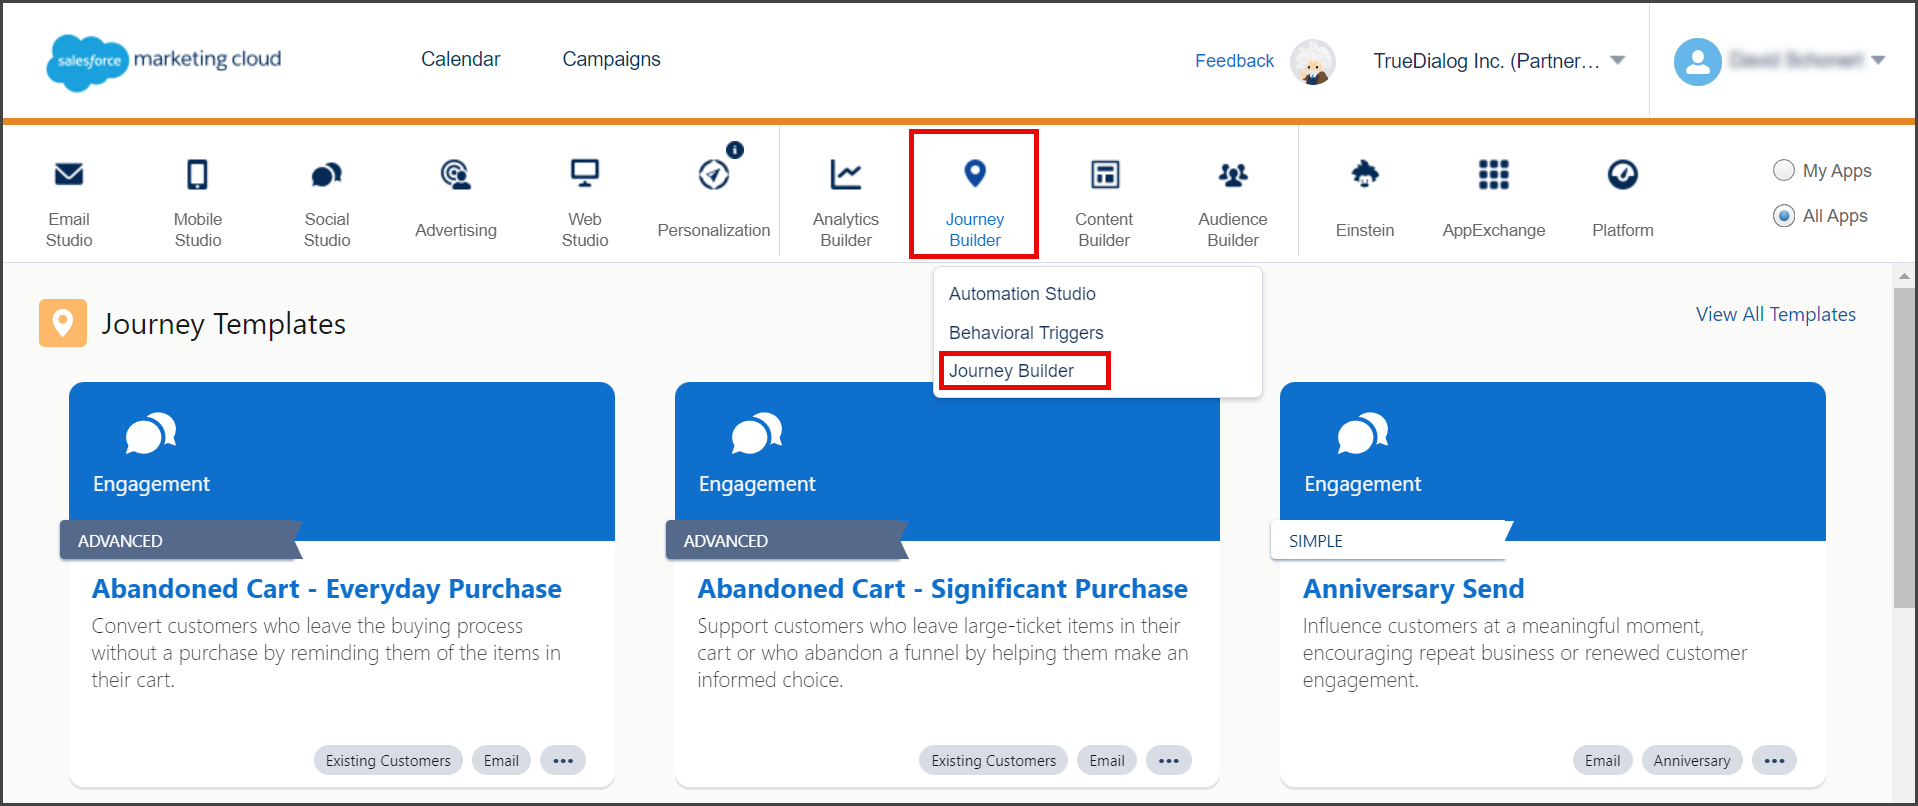
- From the Salesforce Marketing Cloud Home Page.
- Click Journey Builder, and in the dropdown menu, click Journey Builder.

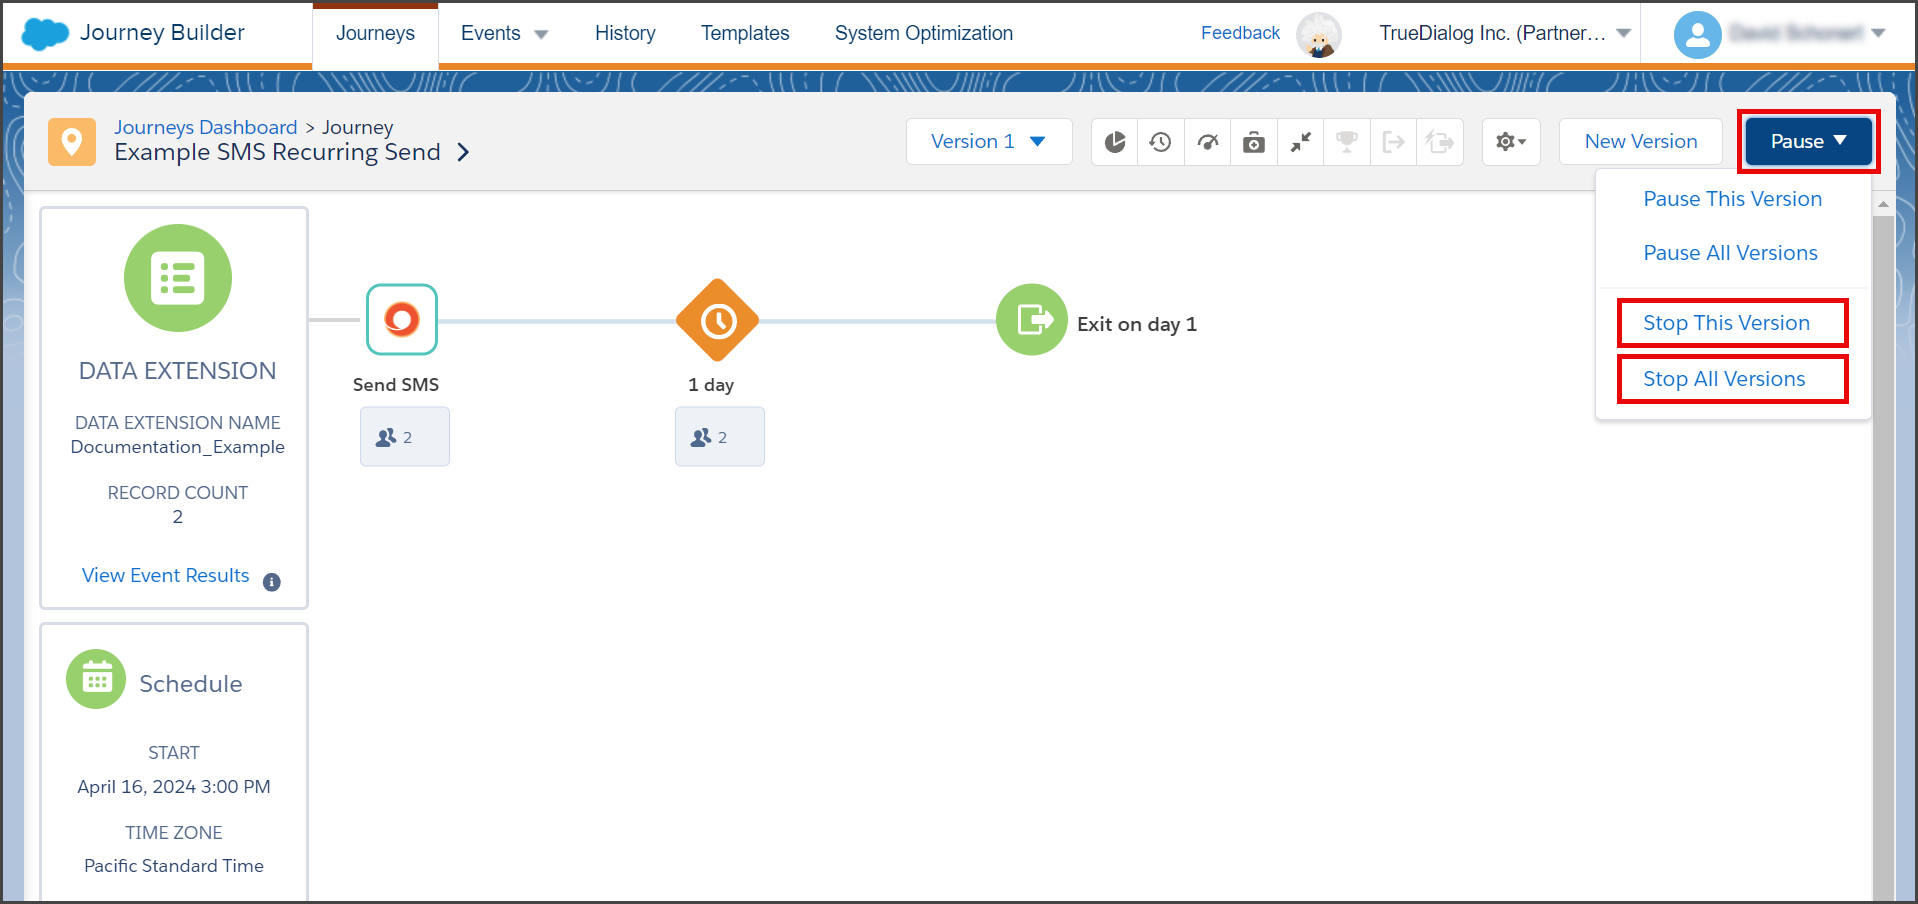
- Click the Journey to edit.
- Click the Pause dropdown.
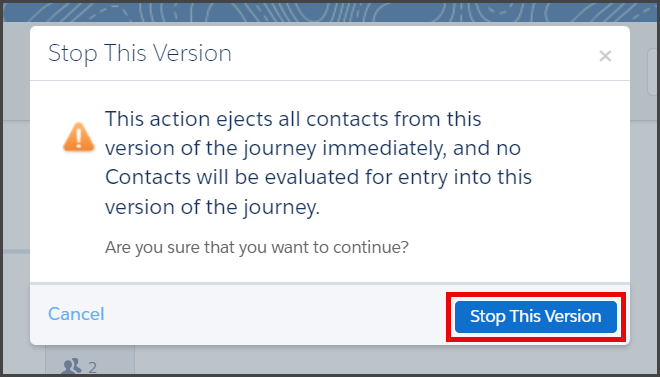
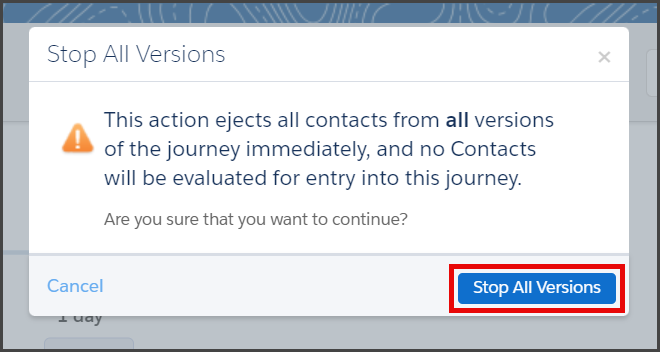
- Choose Stop This Version or Stop All Versions.

- Click Stop This Version – This option stops only the version selected on the canvas. Any other running versions of this Journey will stay running.
- Click Stop All Versions – This option stops all versions of the Journey.
- Click Stop This Version – This option stops only the version selected on the canvas. Any other running versions of this Journey will stay running.
- Wait for Salesforce to stop the Journey.

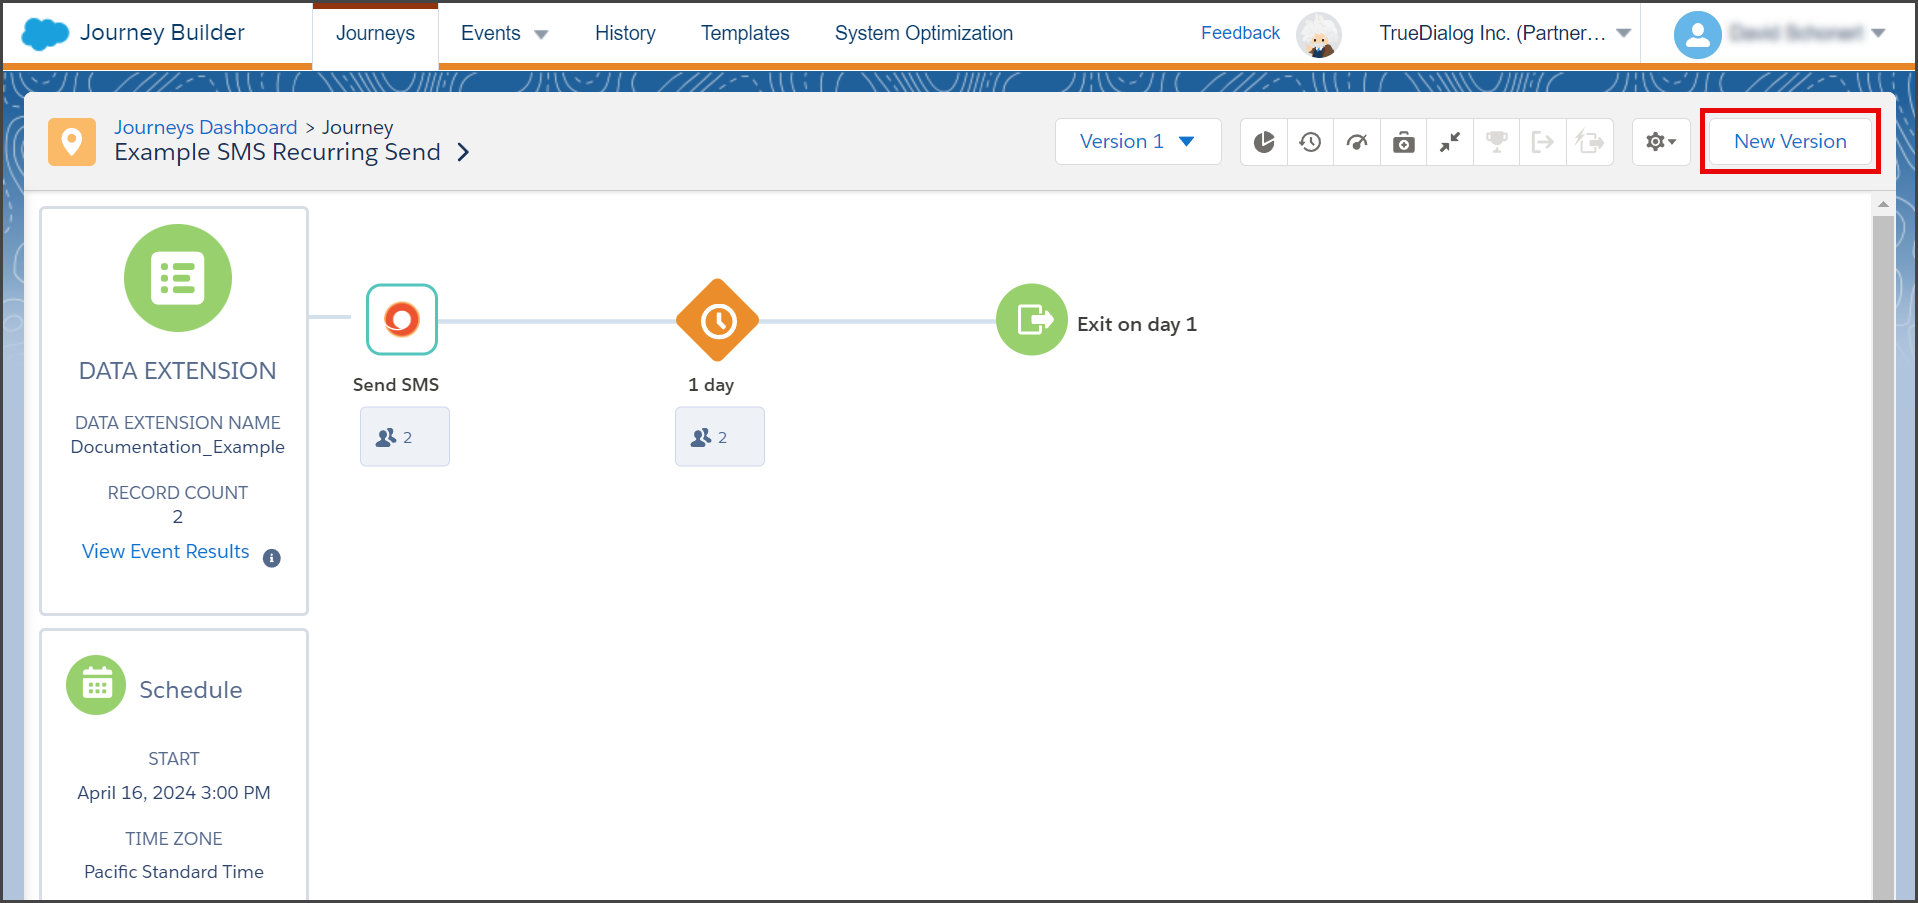
Create and Edit a New Version
- From the Journey canvas.
- Click New Version.

- Wait for the new version to be created on the canvas.
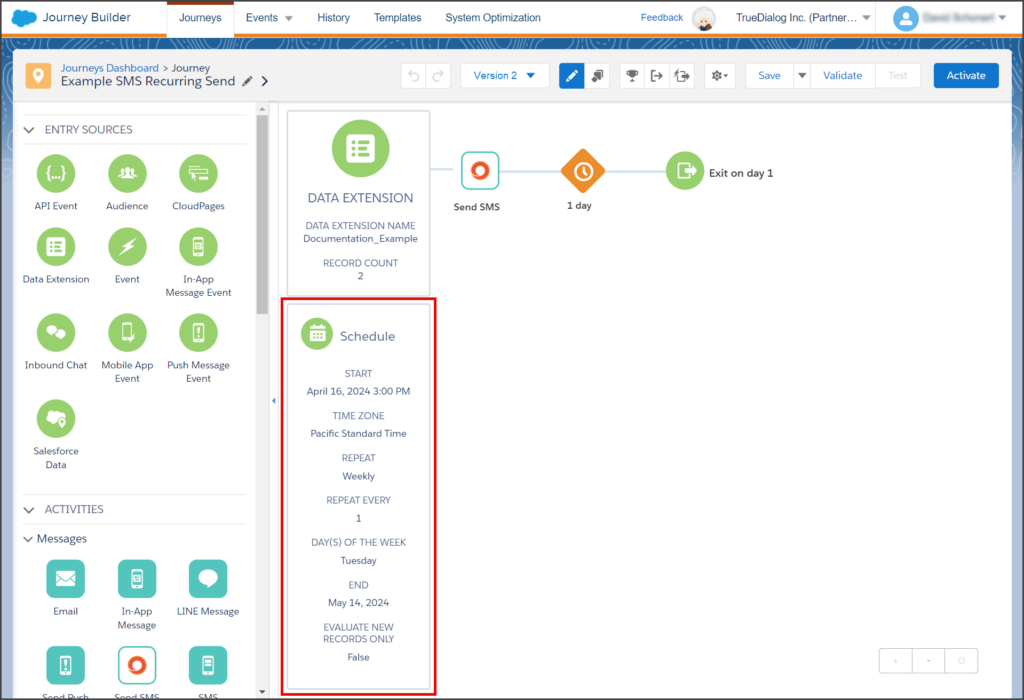
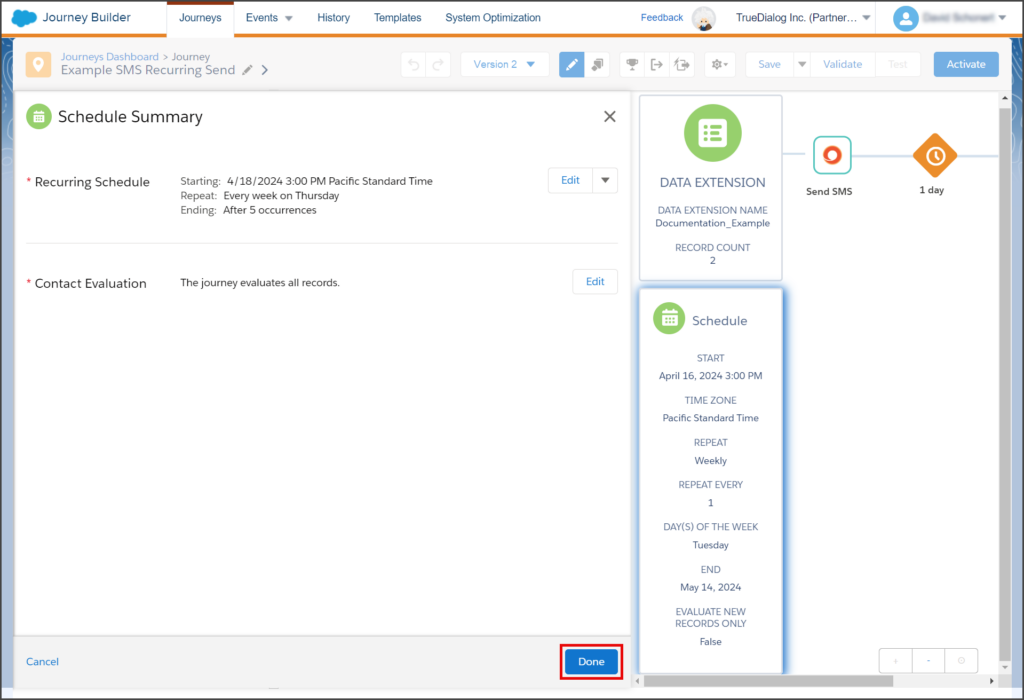
- Usually, the Schedule must be updated with a new Start time.
- Click the Schedule box.
- To fix the Error in the Recurring Schedule, click Edit.
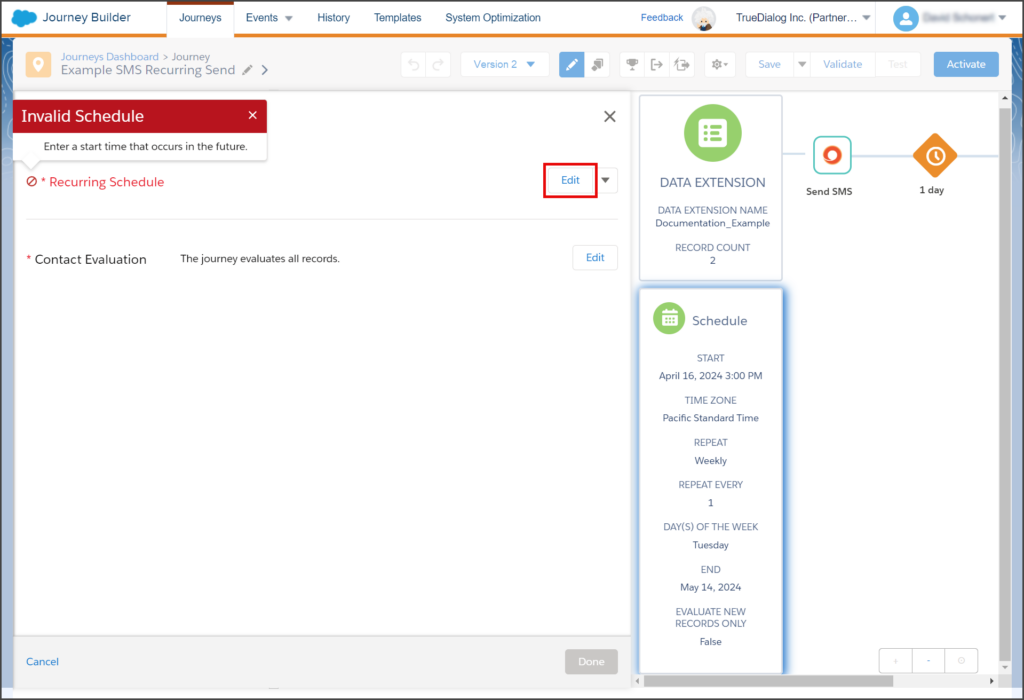
- Since this example’s Start Date has passed, it must be updated to a future date.
- Click Start Date and select a new date.
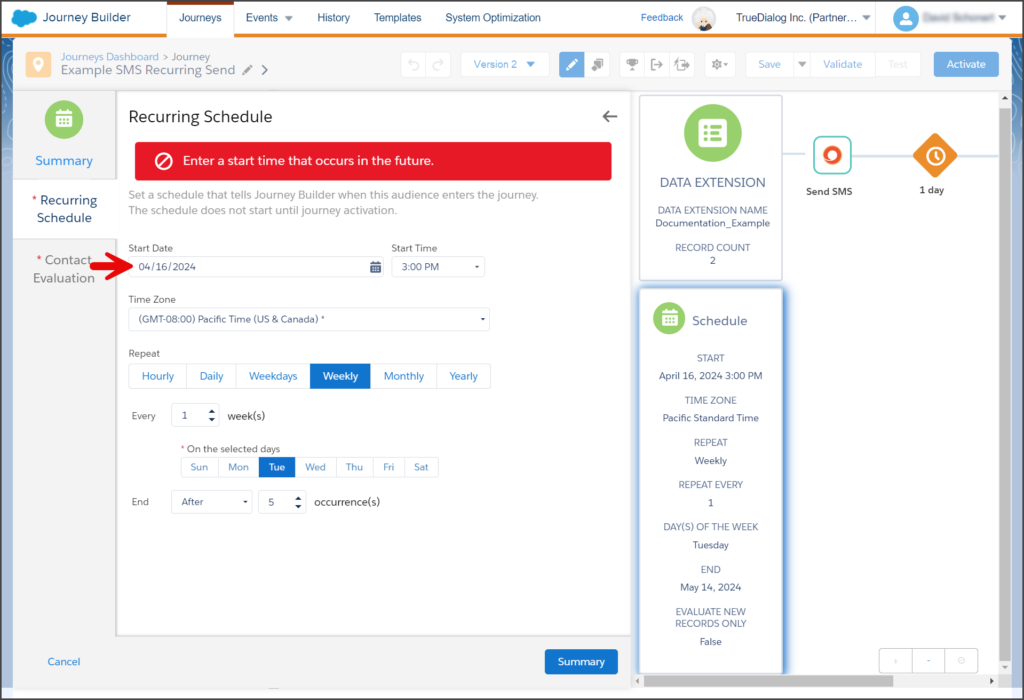
- Any changes to the Recurring Schedule must be made before this version is Activated.
- Click Summary.
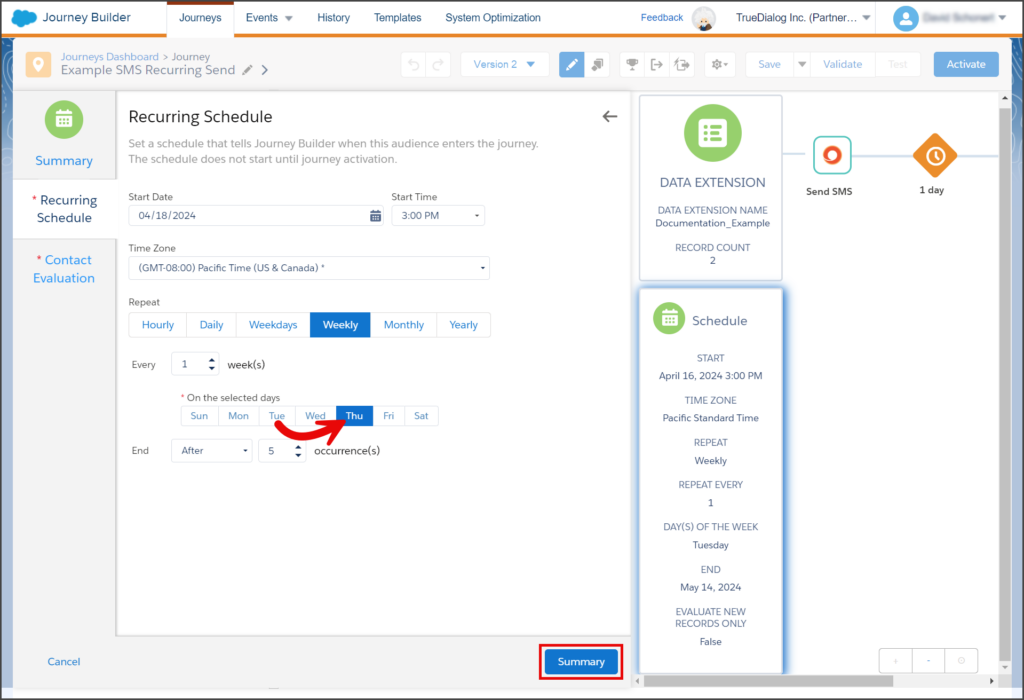
- Click Done.
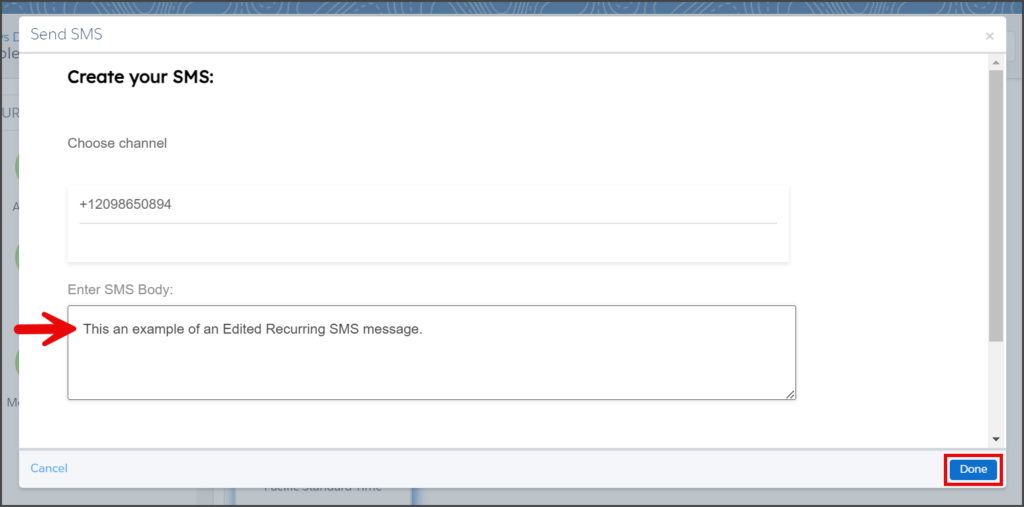
- Click the Send SMS box.
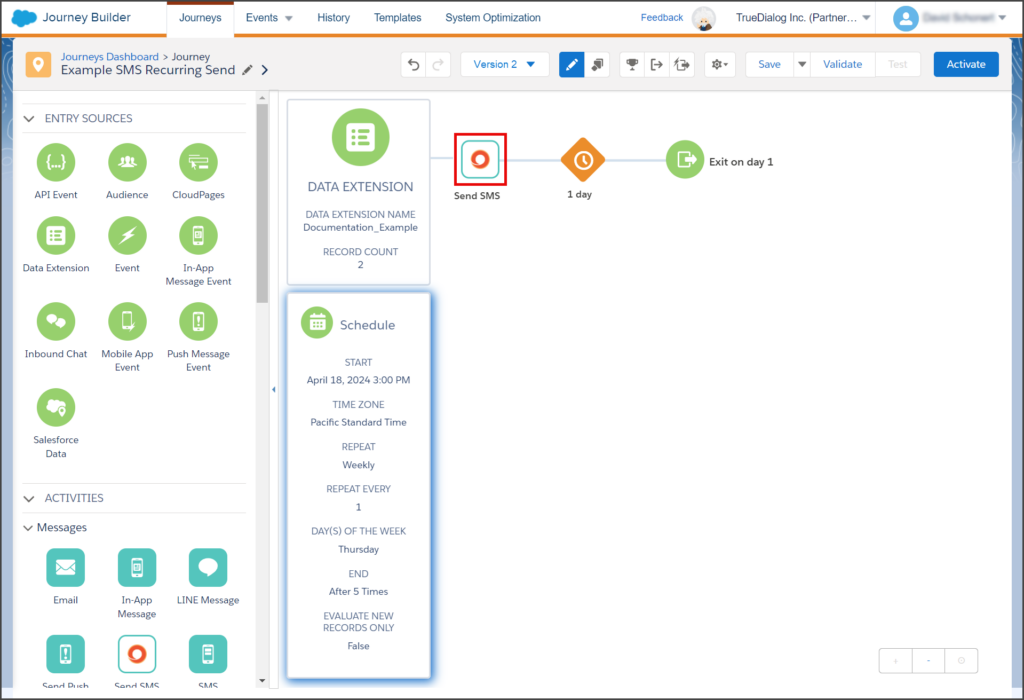
- Any changes to the Send SMS activity must be made before this version is Activated.
- Click Done.


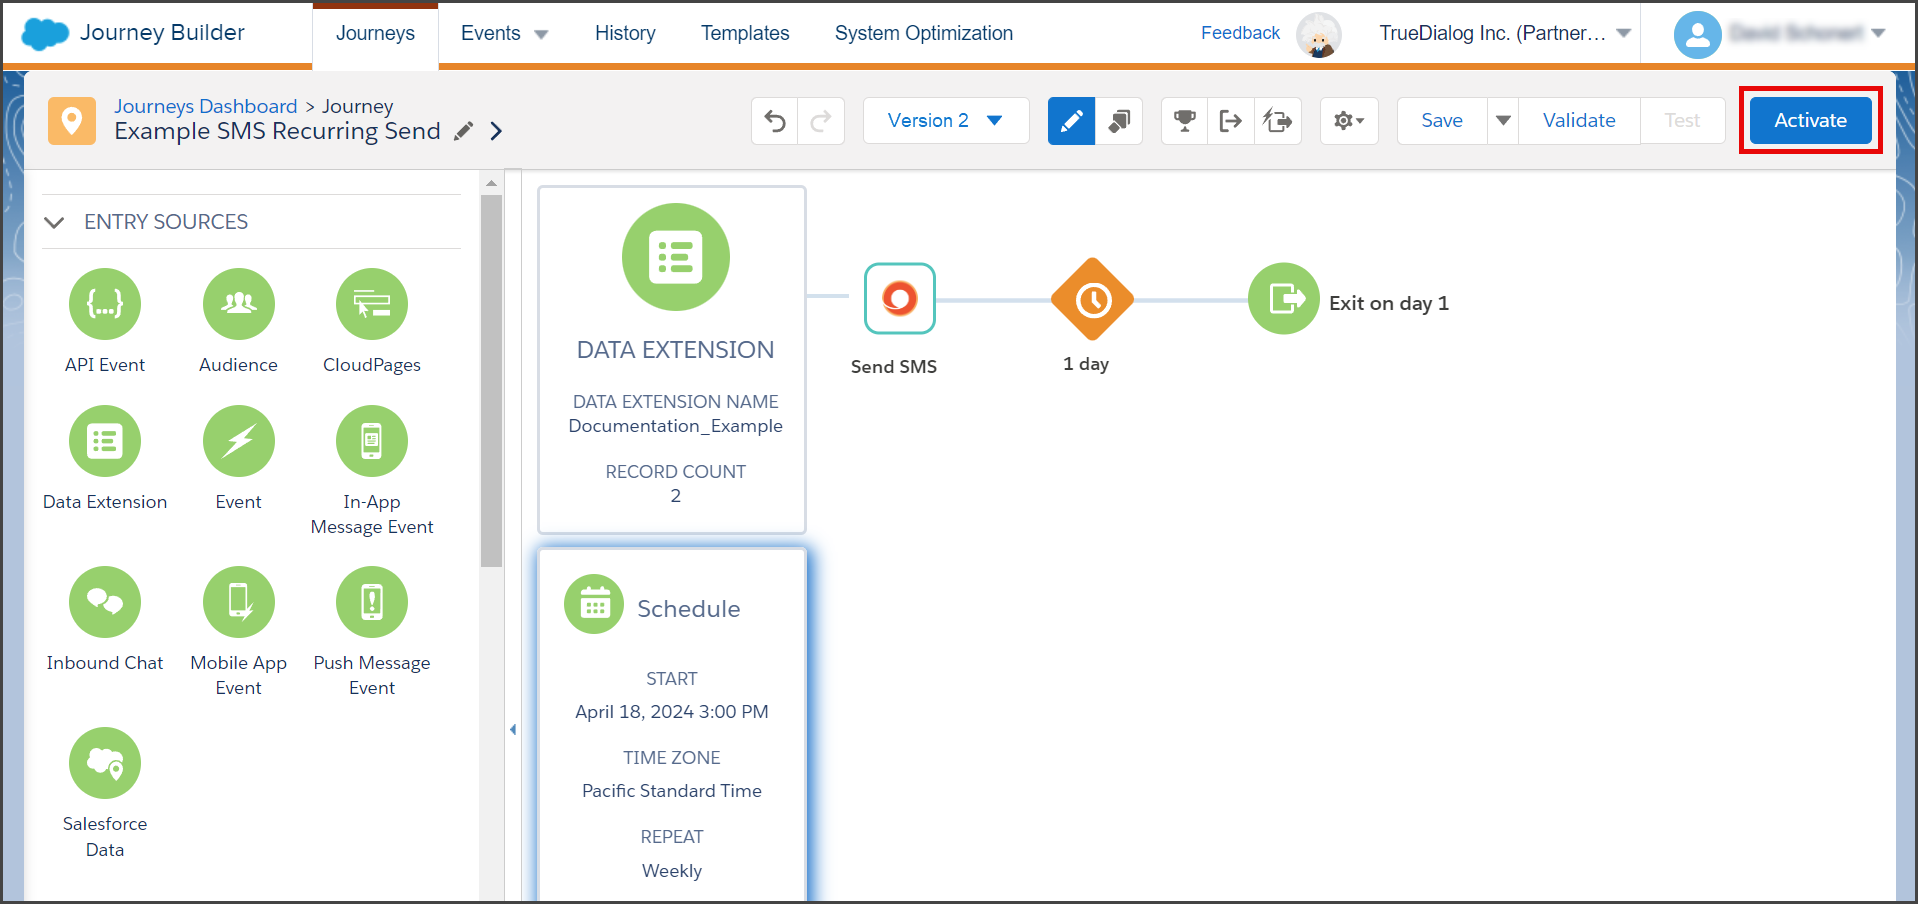
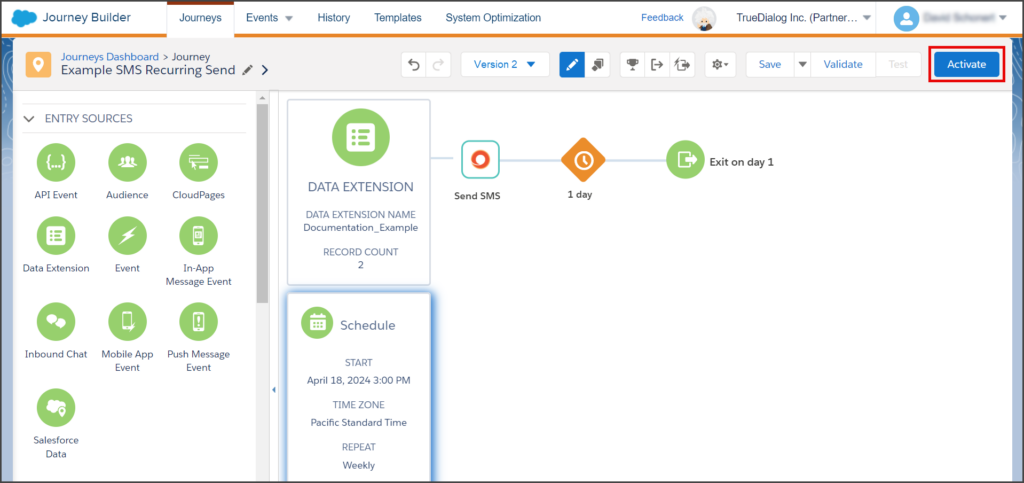
Activate the New Version
Once you have completed all of your updates to the Journey, you must Activate this version.
- From the Journey canvas.
- Click Activate.
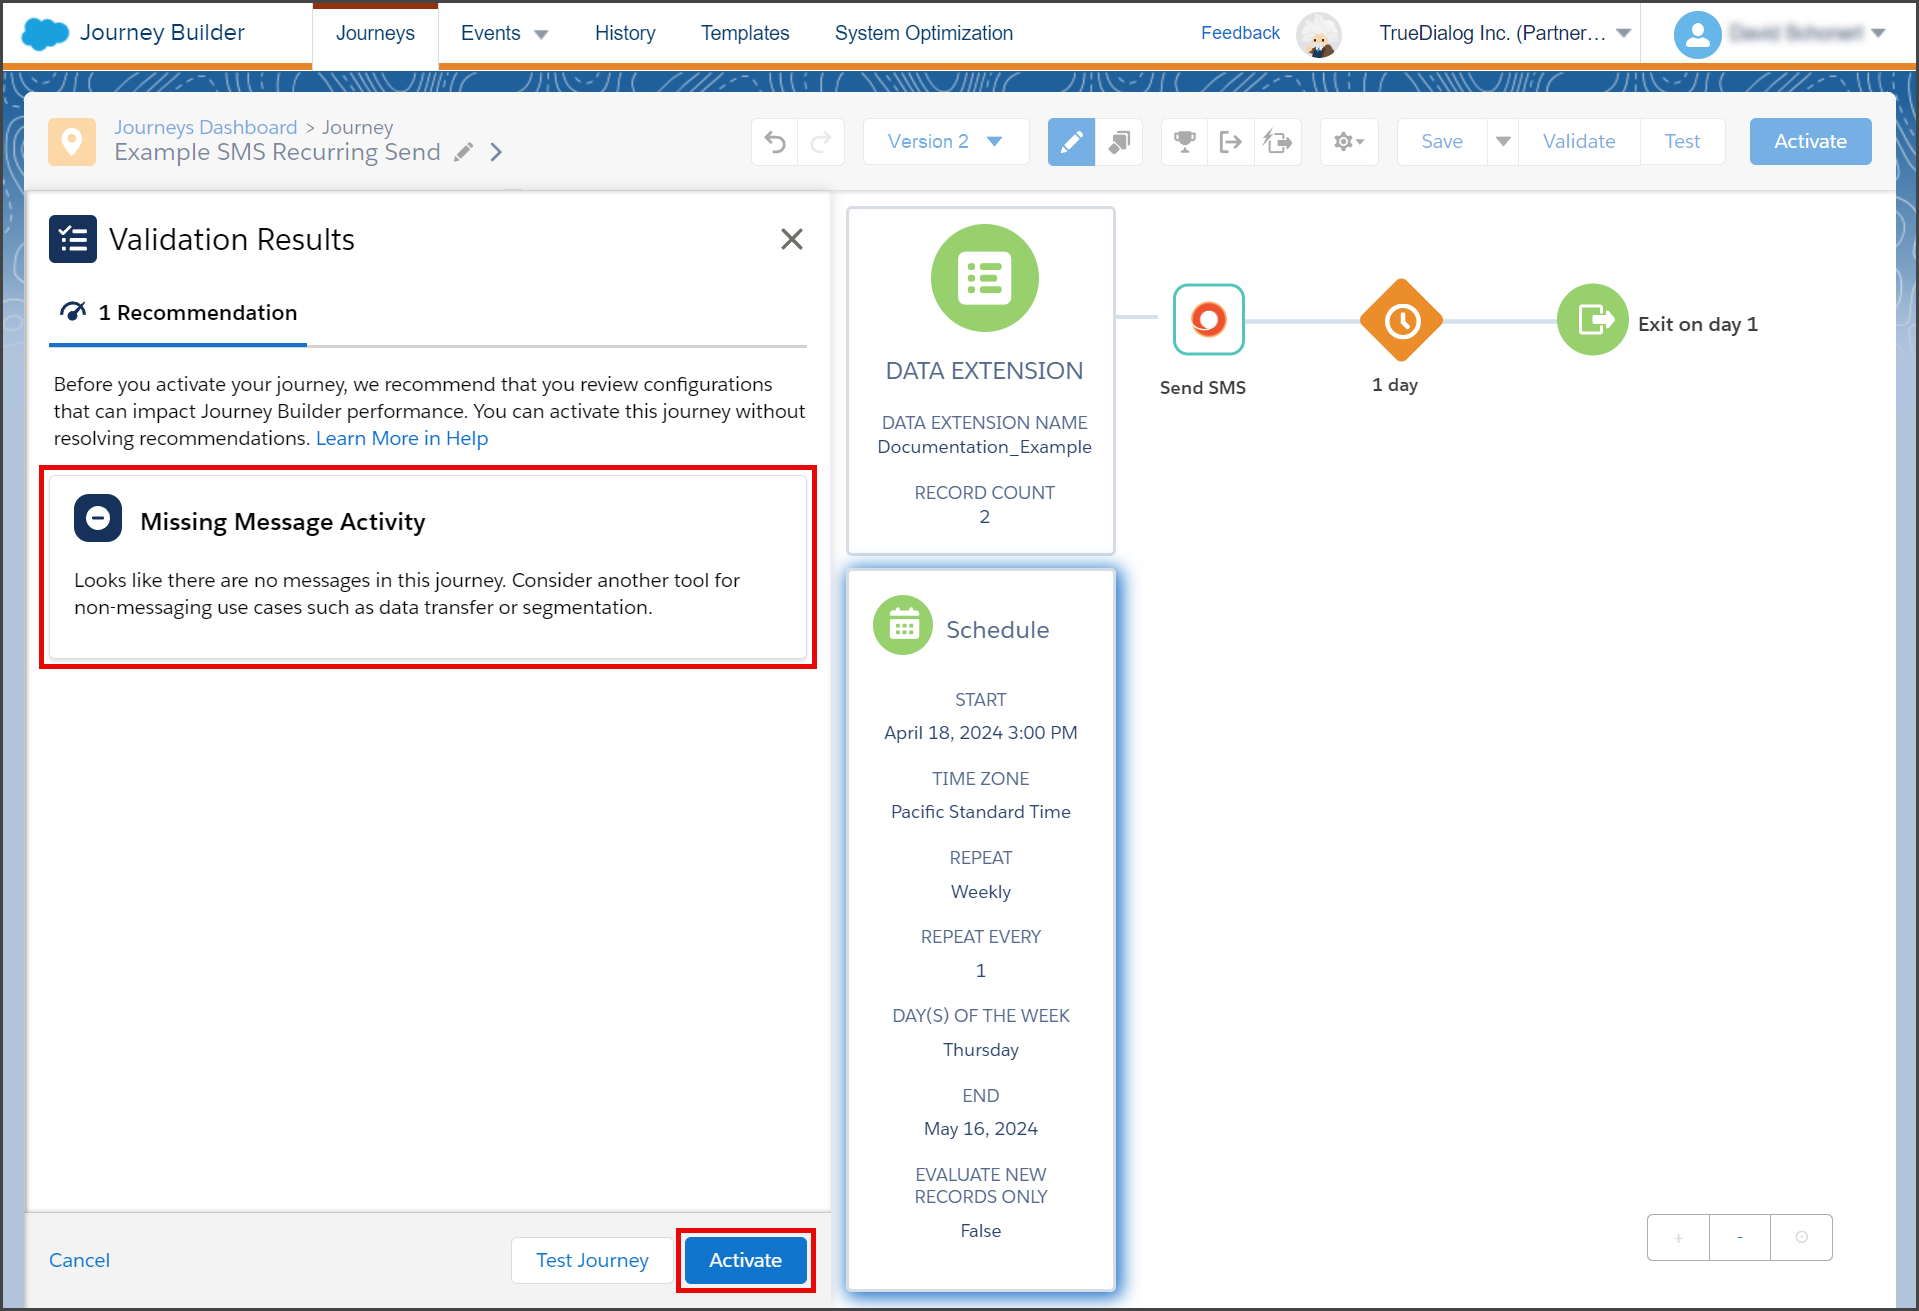
- If you receive a Recommendation for Missing Message Activity, you can ignore this message. No action is required.
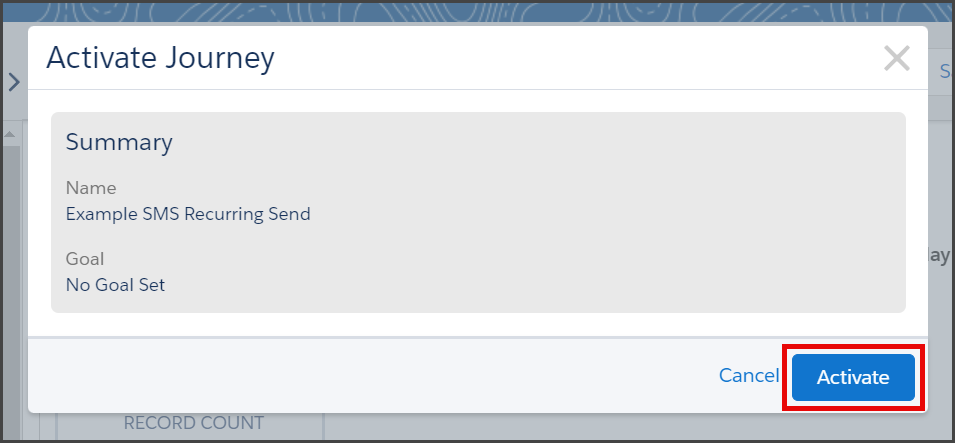
- Click Activate.

- Click Activate on the Activate Journey window.
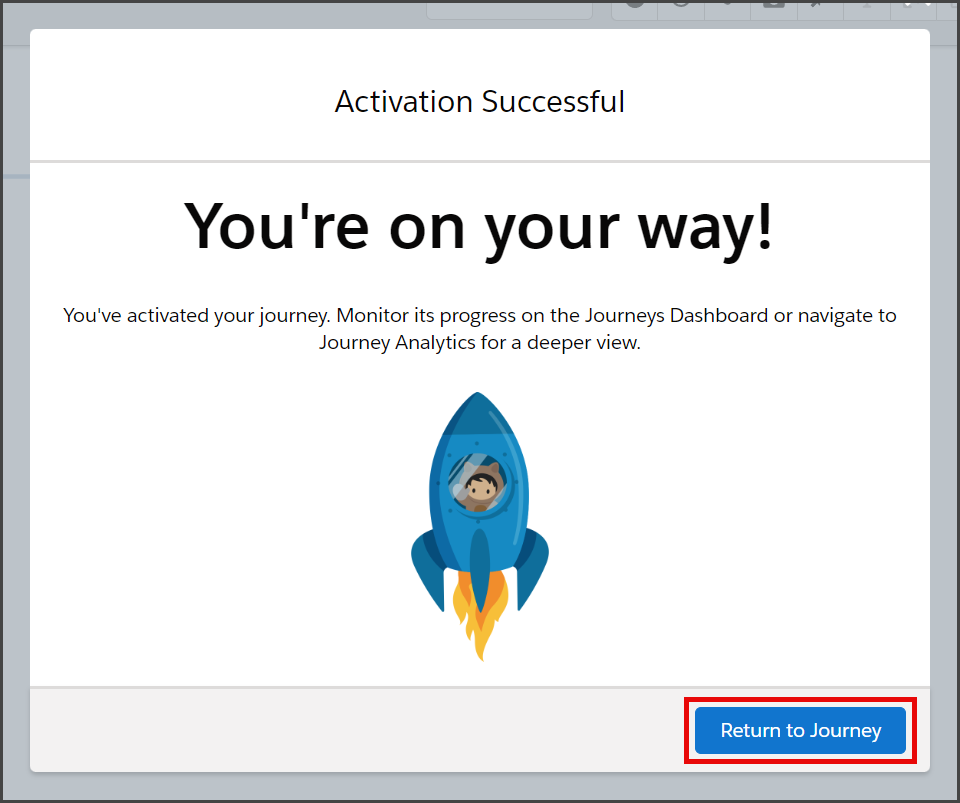
- When you see the Activation Successful window, your Journey is activated, and your SMS message will be sent to your contacts at the scheduled time.
- Click Return to Journey to close this window.