TrueDialog Portal
Comms Hub > External Chat
The Comms Hub is a web messaging application that offers various communication tools. This article will show you how to use the External Chat features of the Comms Hub. You can easily navigate to a specific feature using the outline on the side or read through the entire guide to familiarize yourself with all the features. For an overview of what the Comms Hub can be used for, see the Comms Hub Overview article.
The External Chat is used along with the Chat Widget to provide online chat support for your website users. When a user starts a chat with the Chat Widget, it is routed to your Comms Hub for your support team to respond. See the Creating a Comms Hub Chat Widget article for instructions on creating a Chat Widget.
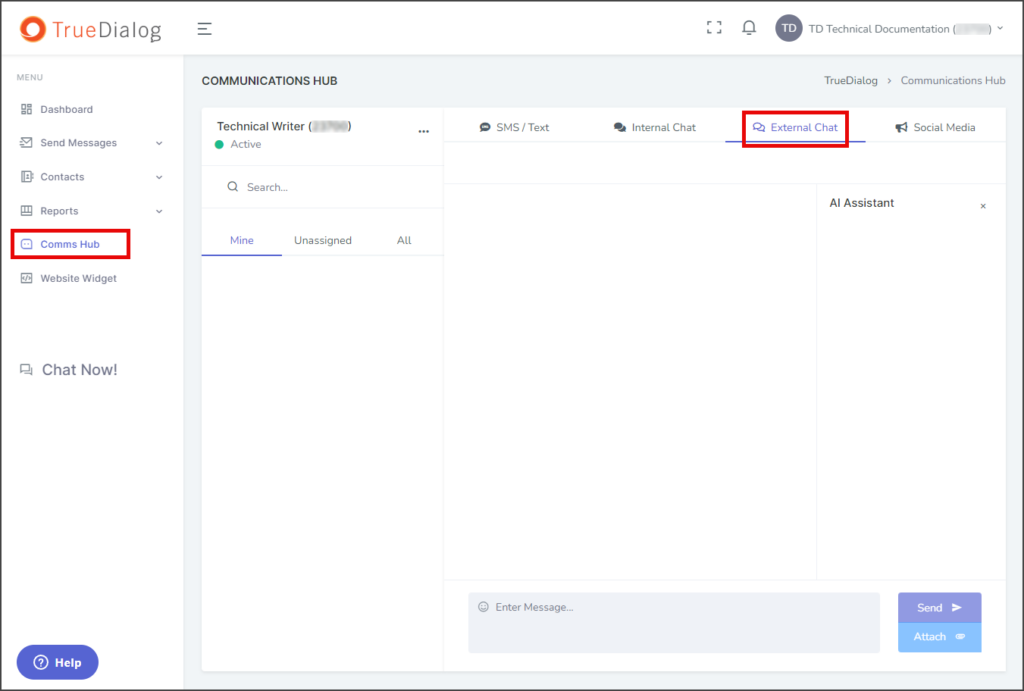
- Access the Communication Hub page by clicking Comms Hub in the left sidebar.
- Click the External Chat tab to switch to External Chat Messaging.

Assign Incoming Chat
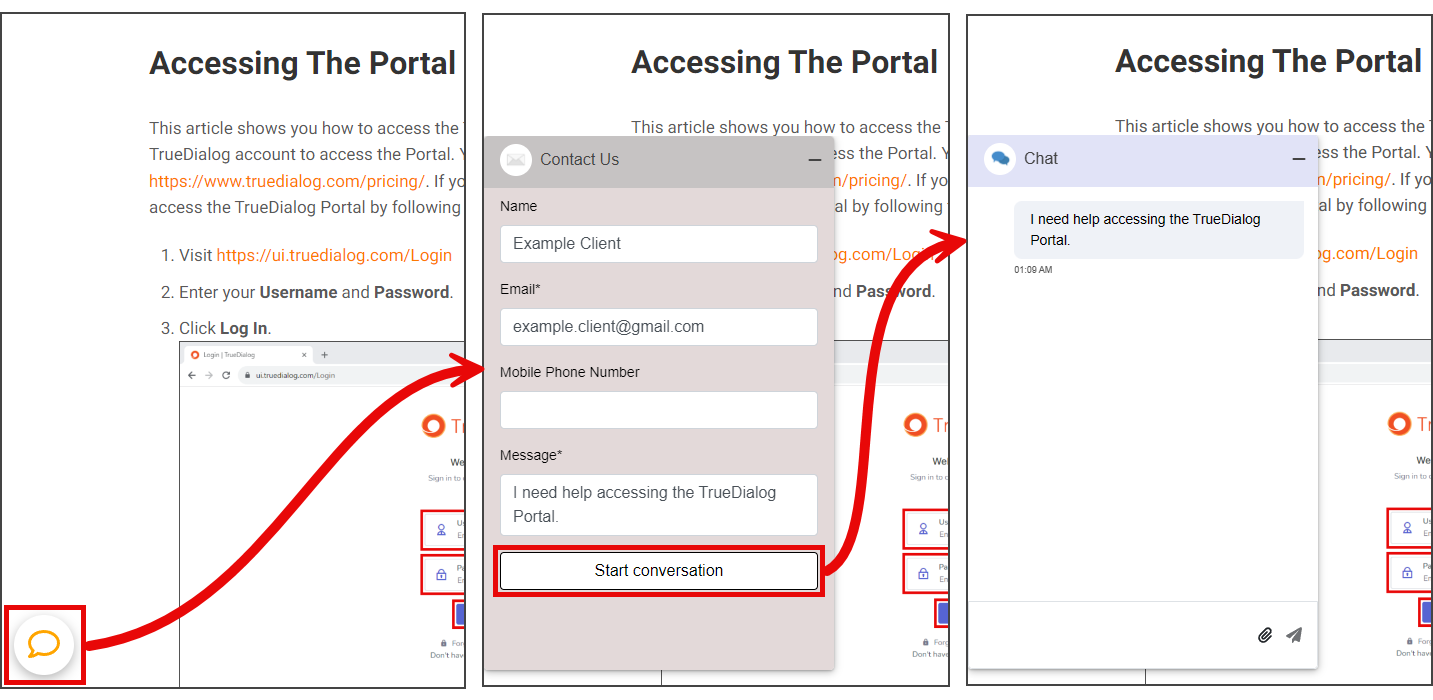
When users click the chat widget at the bottom of your website, they are greeted with the Start Conversation window. After they fill out the information and click Start Conversation, their messages will be sent to your Comms Hub – External Chat. Follow the instructions below to assign the new chat message to one of your support team.
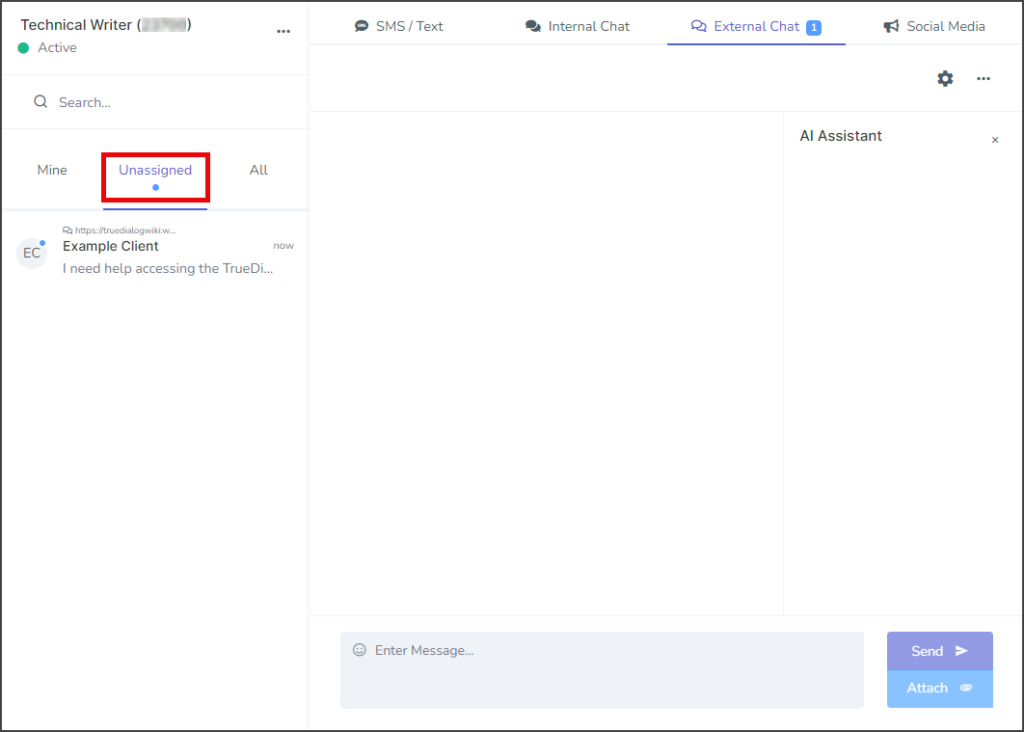
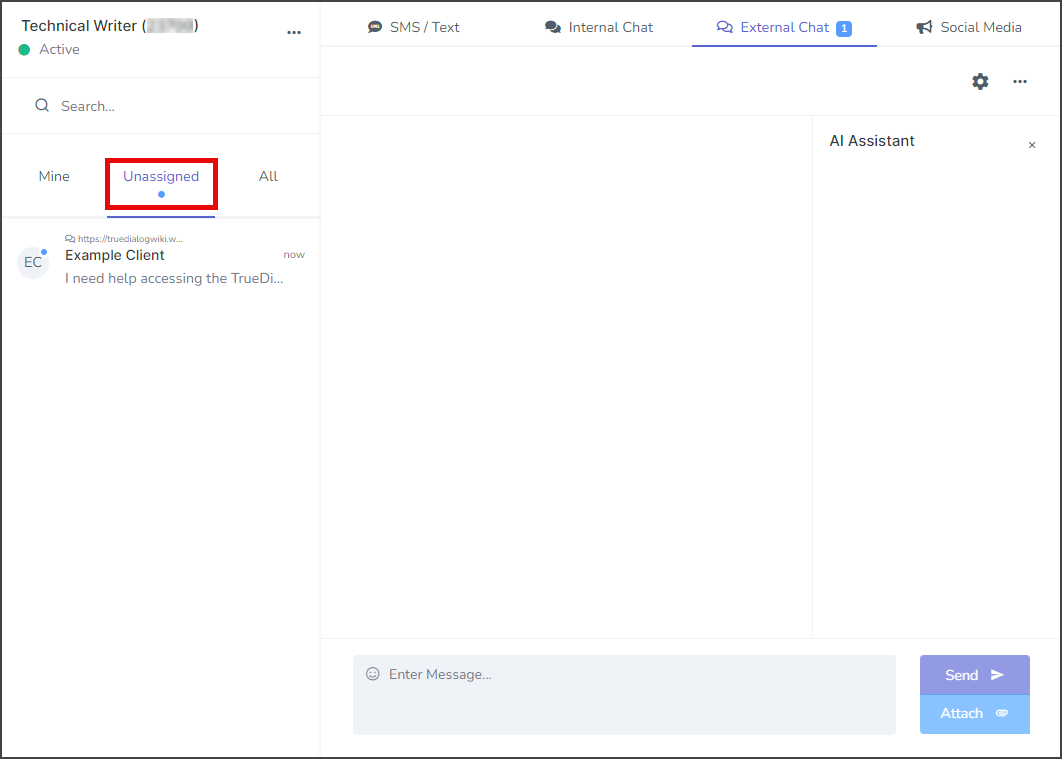
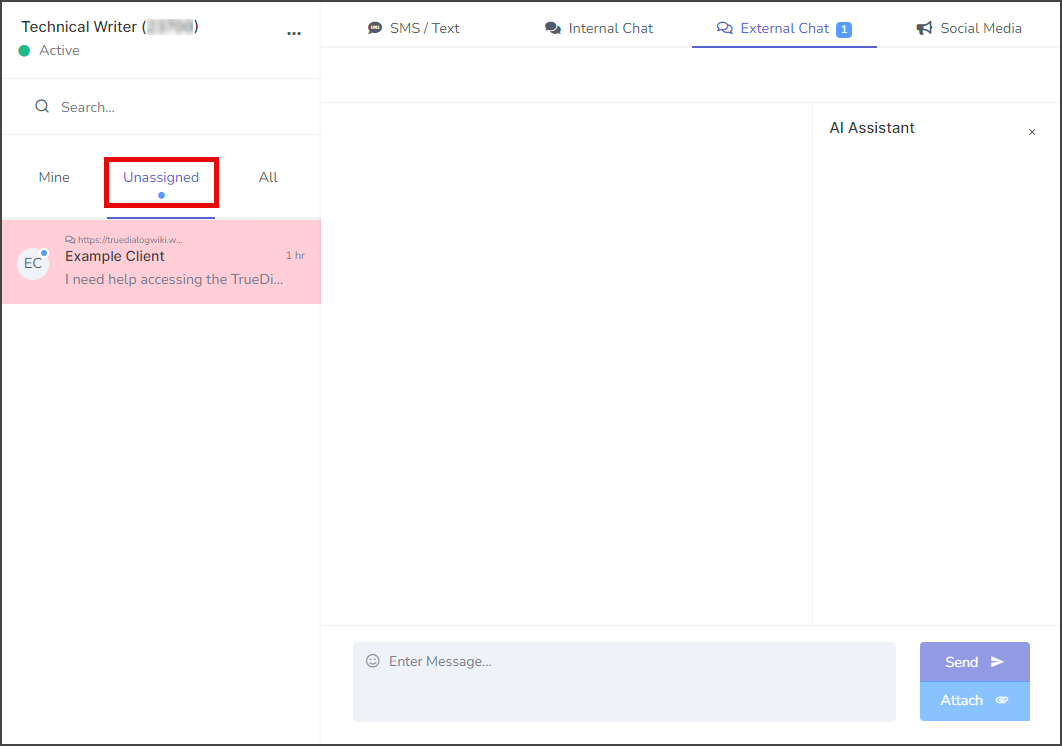
- Check for a new unread message on the External Chat tab. The External Chat tab will have a blue square with the number of unread messages inside. The Unassigned tab will have a blue dot.
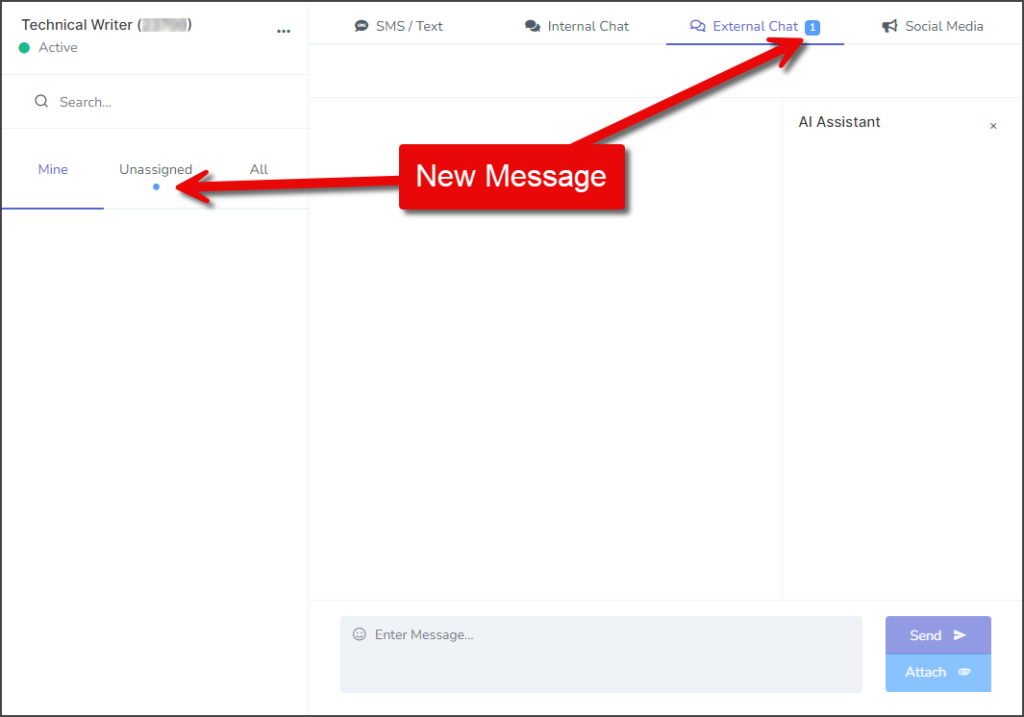
- Click the Unassigned tab to find the new message.
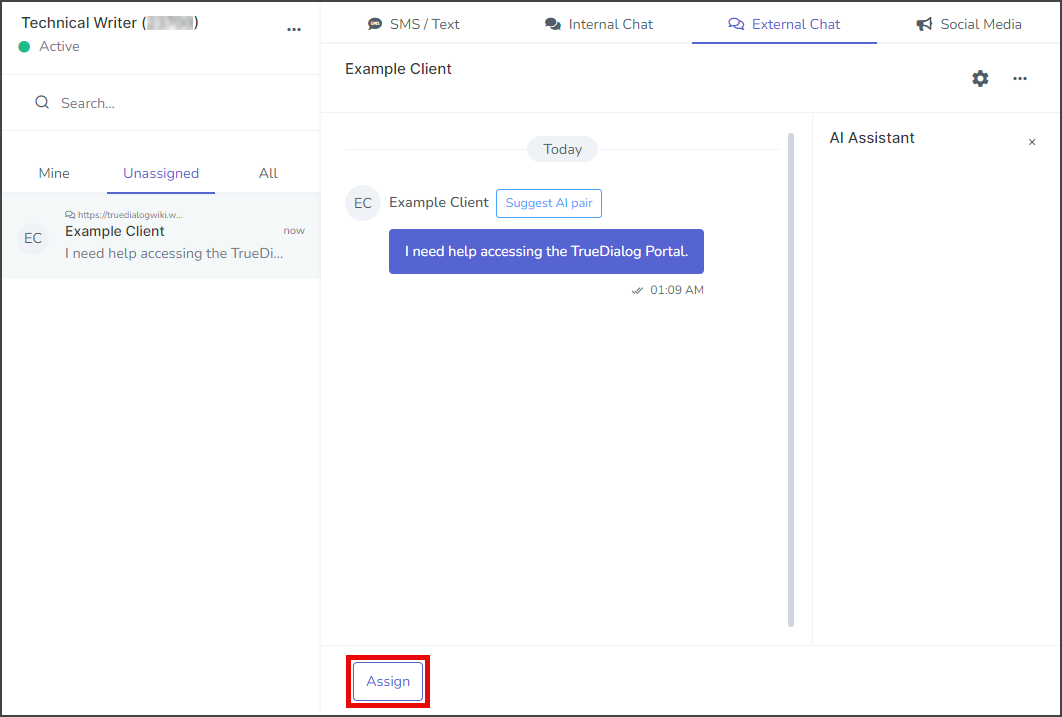
- Click the new message to show the Conversation thread.
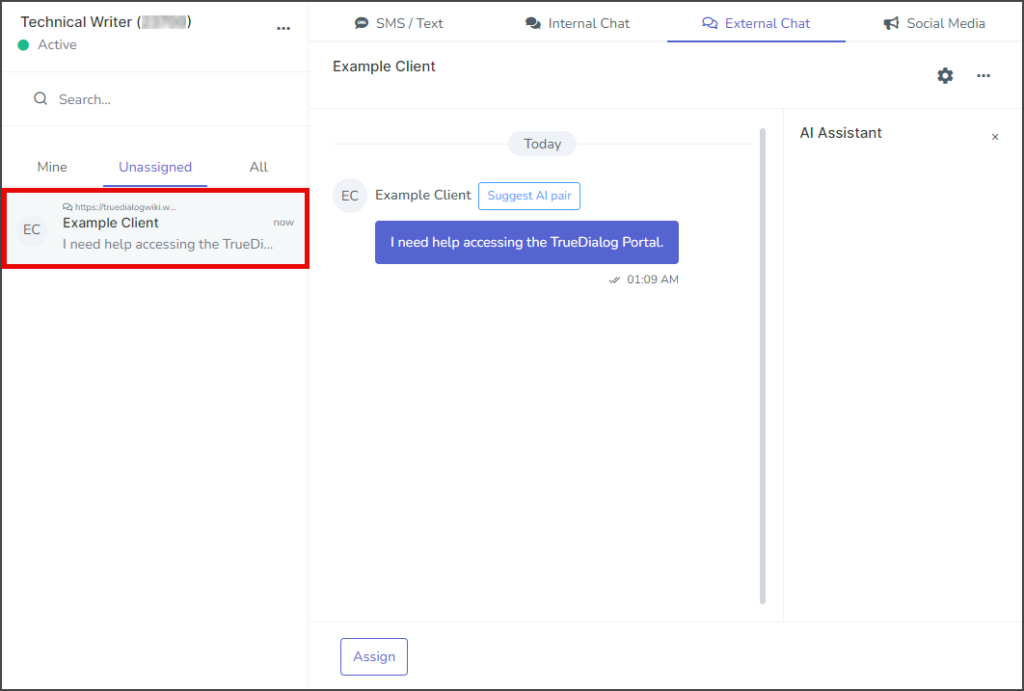
- Before you can reply to the user, you must assign the chat message to one of your support team by clicking Assign.

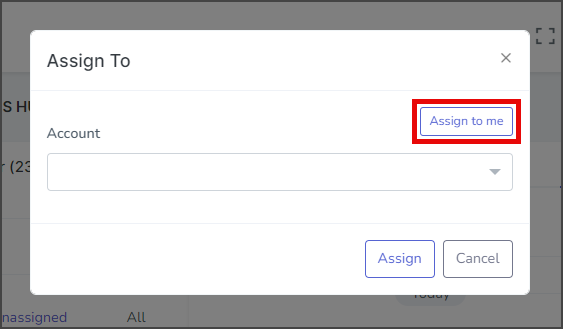
- Pick an account to assign the chat message to:
- Click Assign to me.
- Or click the Account dropdown and select the account to assign the chat message to.
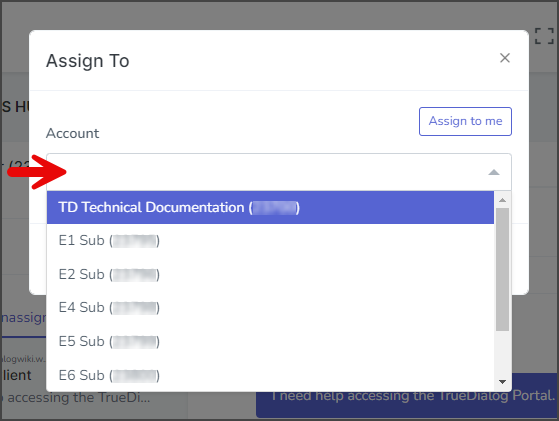
- If selecting an account, click Assign.
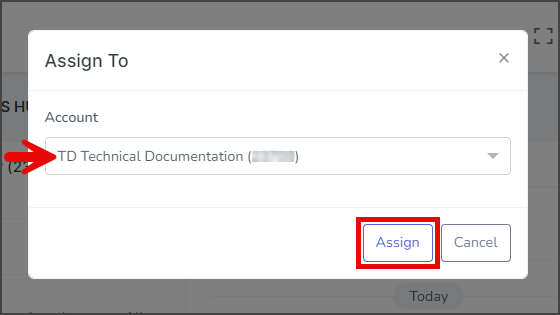
- Click Assign to me.
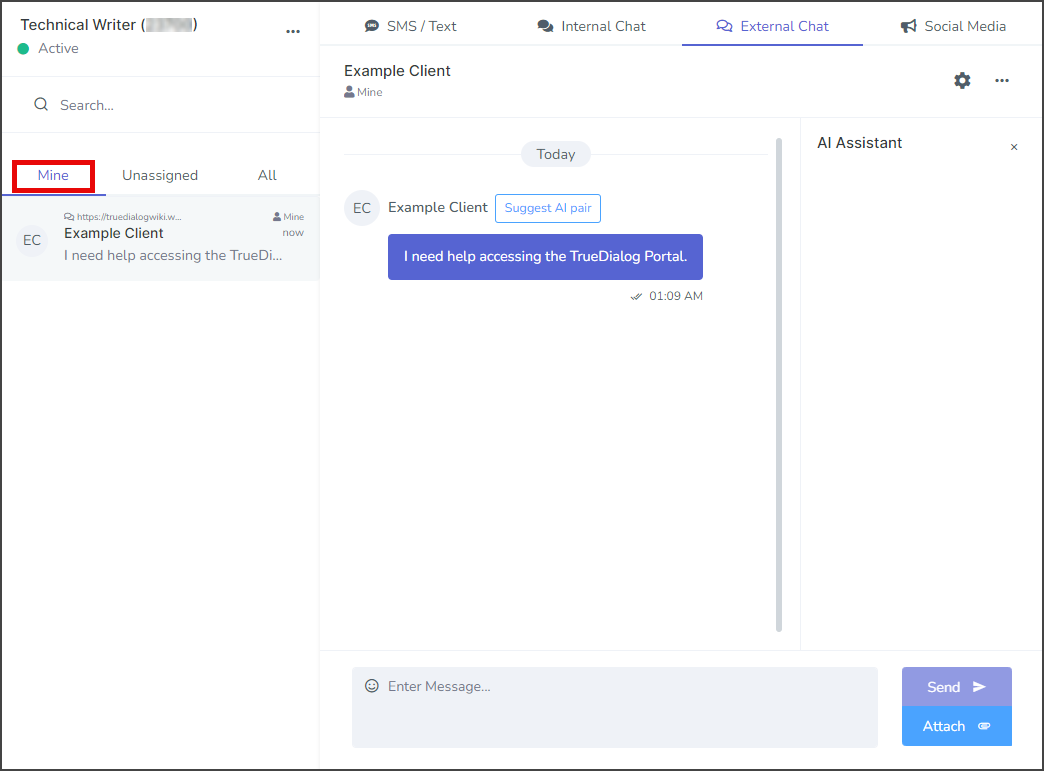
- If the chat message is assigned to you, it will now be found under the Mine tab.


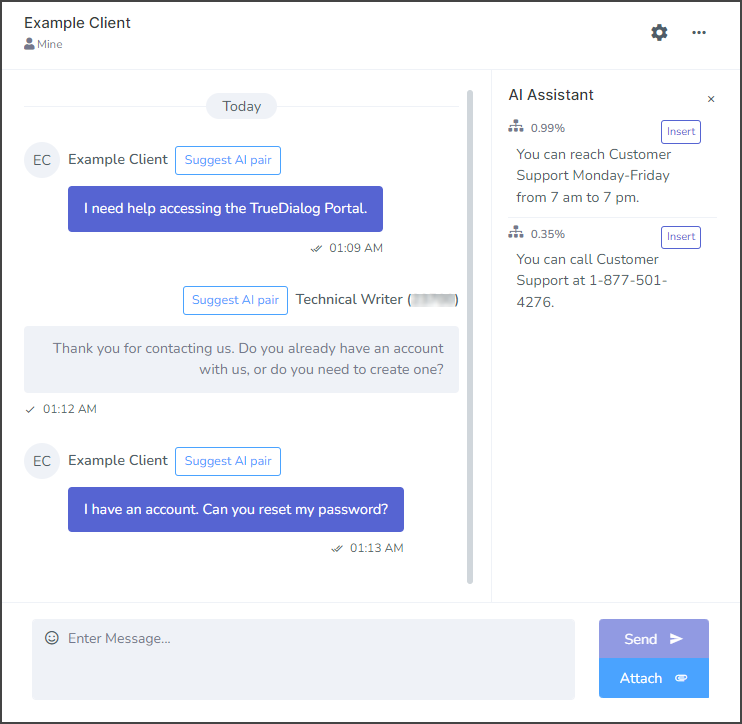
Conversation Section
The conversation section allows you to communicate with contacts who contact you through the Chat Widget.
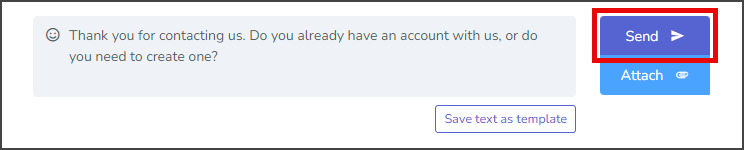
Send Message
- Enter the message in the message box at the bottom of the conversation section.
- (Optional) Click the smiley face icon to display a menu of emojis to insert into the message.
- Click Send.
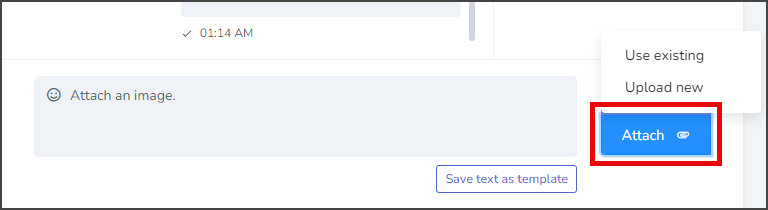
Attach Image to Message
| File Type | Supported Extensions |
|---|---|
| Image | .jpg | .jpeg | .jfif | .png |
| GIF | .gif |
| vCard | .vcf |
| Video | .mpeg | .mpg | .mpe | .m1v | .m2v | .mp4 | mp4v |
| Document | .doc | .docx |
| Text | .txt | .text |
| Audio | .wav | .mp2 | .mp3 |
- Click Attach and select Upload new. (Alternately) Select Use existing if you want to attach a file you have already uploaded.
- Drag and drop a file into the window or click Browse to select a file.
- Wait for the file to upload, and then click Ok.
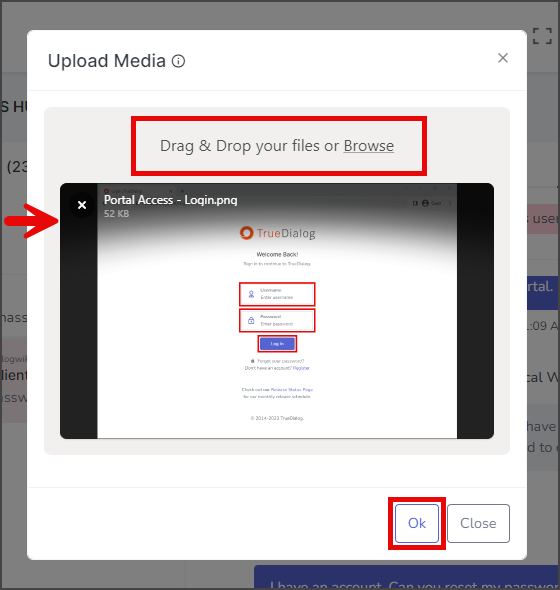
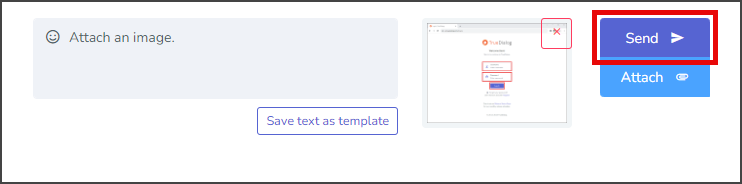
- The attached file will be displayed next to the message.
- (Optional) Write a message to send along with the file.
- Click Send.
User Left Chat
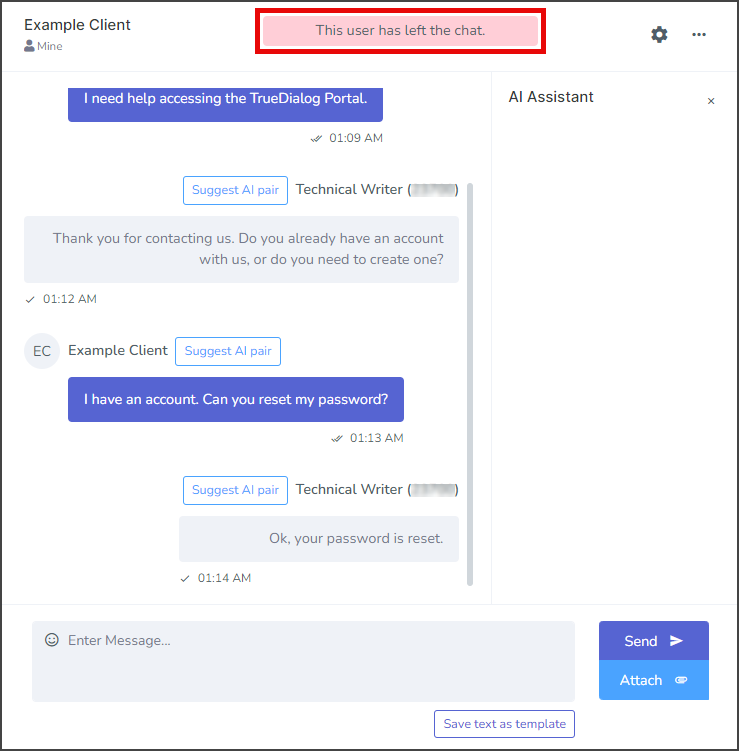
When the user closes the chat conversation or loses internet connection, you will receive a notification at the top of the conversation section for the user. The screenshot below shows this notification.
Contact Options Menu
The Contact Options menu provides options for managing the user whom the conversation is with. The options are explained below.

Set Tag
A tag can be used to manage users in various ways, such as assigning clients to team members or displaying short notes about a client. Tags are searchable and are displayed next to the user’s name.

- Click the gear icon to open the Contact Options menu.
- Click Set Tag.
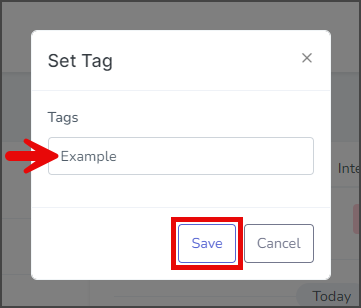
- Enter the tag for this user in the Tags textbox. Note: A user can only have one tag.
- Click Save.
Assign
Specific accounts can be assigned as the primary point of communication for the user. When a user is assigned to your account, it will appear in the Mine list of the Chat tab.
- Click the gear icon to open the Contact Options menu.
- Click Assign.
- Click the Account dropdown and select the account to assign the user to.
- Click Assign.
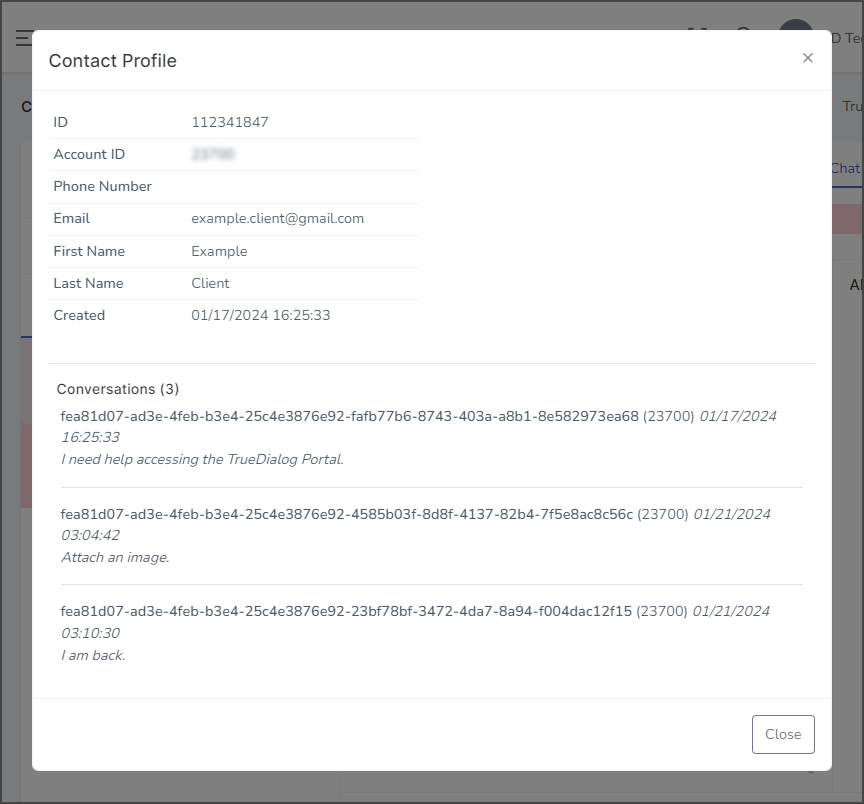
View Profile
- Click the gear icon to open the Contact Options menu.
- Click View Profile.
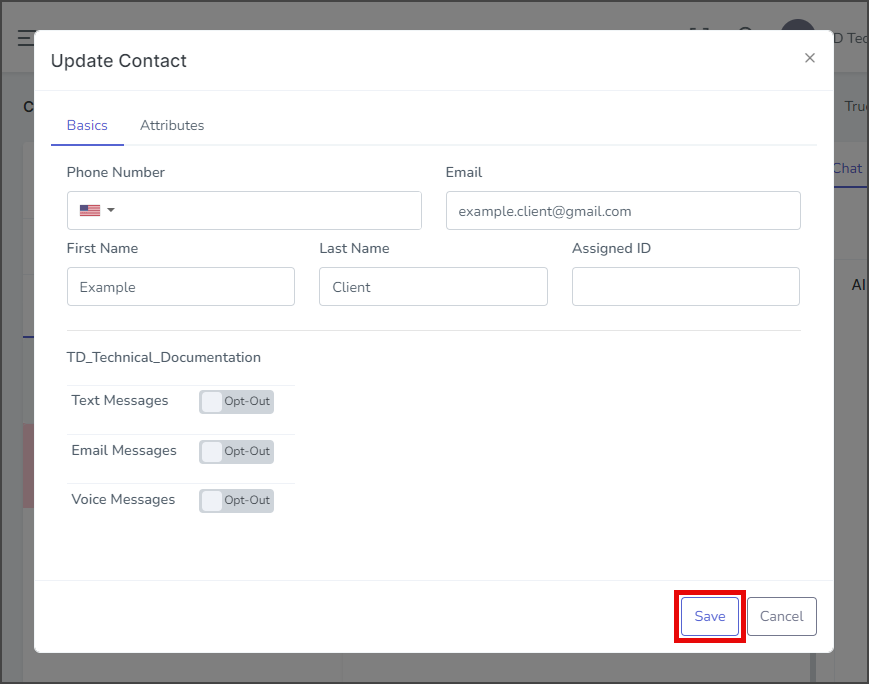
Update Contact
- Click the gear icon to open the Contact Options menu.
- Click Update Contact.
- Update the desired information.
- Click Save.
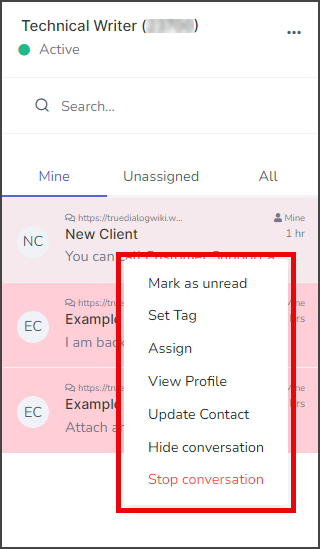
Conversation Options Menu
The Conversation Options menu provides control of the conversation.
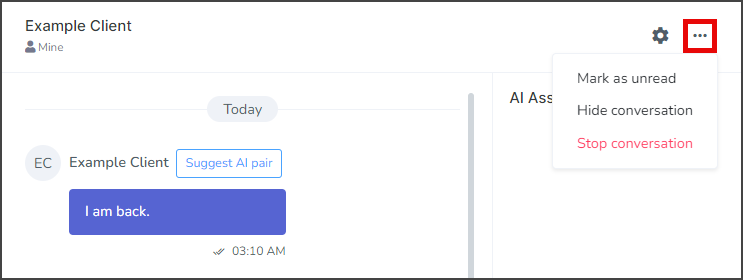
- Mark as unread – This option turns on the unread message indicator for the conversation.
- Hide conversation – This option hides the conversation from the Chat Tab. Note: To unhide the conversation, search for the user and assign it to your account.
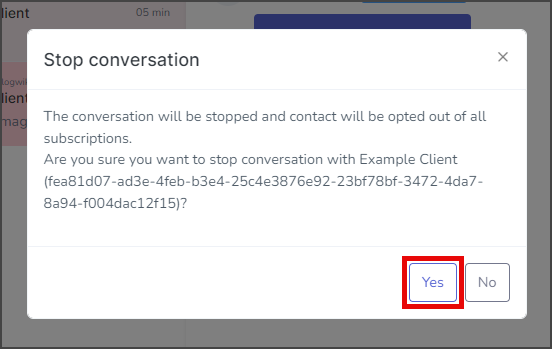
- Stop conversation – This option hides the conversation with the user from the sidebar and removes the user from all subscriptions. A confirmation window will appear to confirm your selection. Note: The messages for this user have not been deleted and can still be accessed by searching for the user.
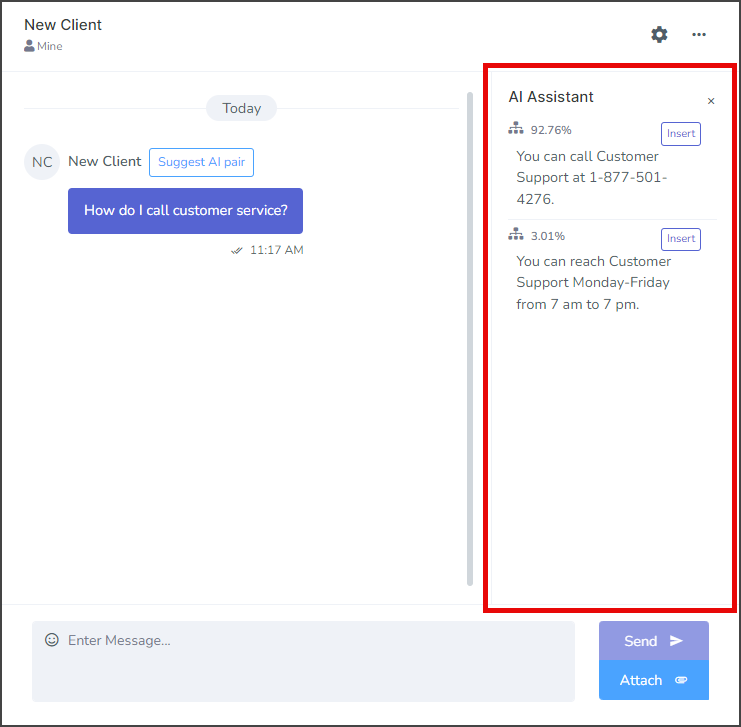
AI Assistant
The AI Assistant is an advanced tool that reads messages received in the Comms Hub and suggests replies. It enables your agents to respond to various client queries quickly. For more information about the capabilities of the AI Assistant and how to get started using it, see the Using The Comms Hub – AI Assistant article.
Follow Up on an Unanswered Message
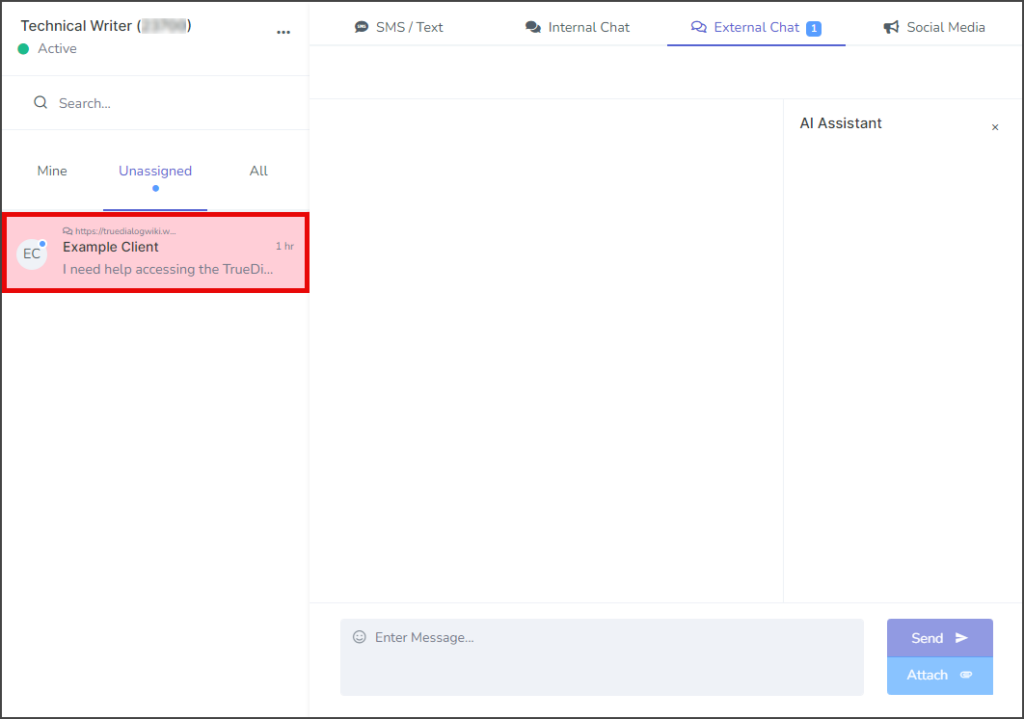
If a user leaves the chat before their message is assigned to your support team, the chat will be highlighted in red. However, since the user is required to enter an email address and has the option to enter a phone number when they send a message, you can still contact them using either of these pieces of information. Here are the instructions to do so:
- Click the Unassigned tab.

- Click on the message thread highlighted in red to open the user’s message.
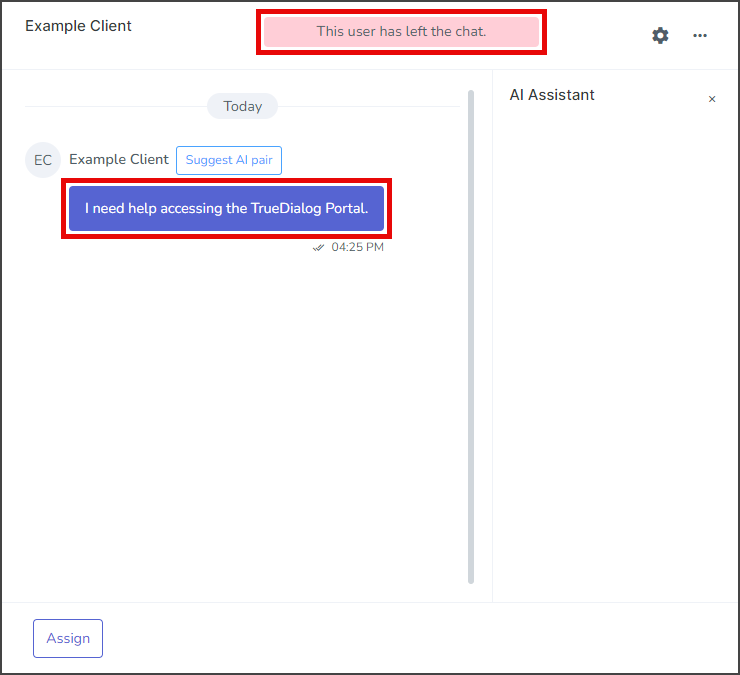
- In the Conversation thread, you can view the message the user sent.
- Above the Conversation thread is a red notification stating, This user has left the chat.
- Click the Gear icon and select View Profile.
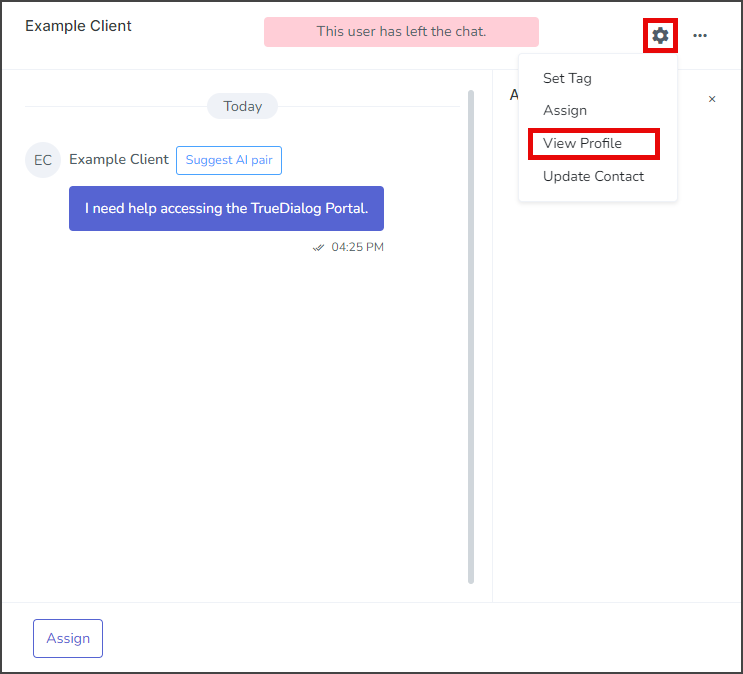
- This will display a window with information about the user, including Email and Phone Number.
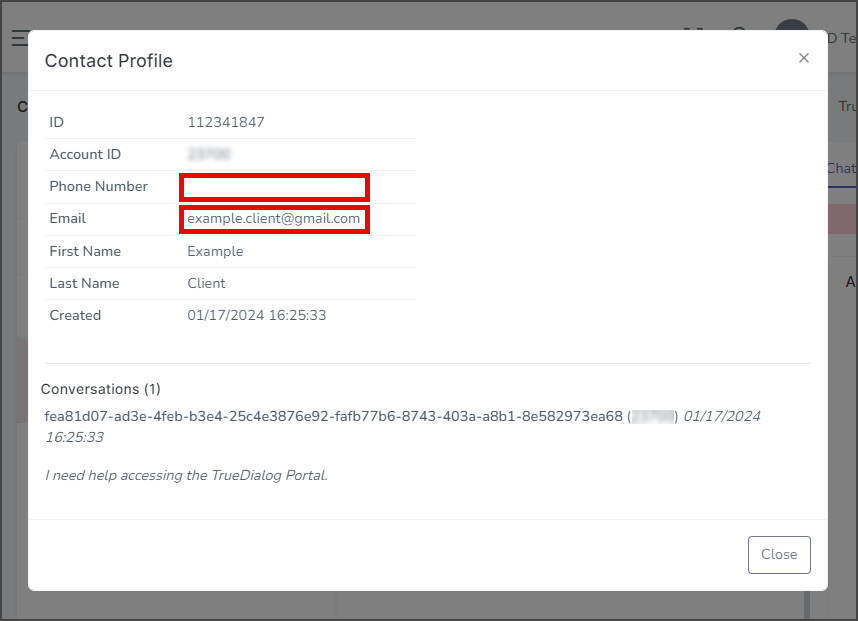
- Follow up with the user through Email or Phone.

Sidebar
The Comms Hub sidebar allows you to select the conversation to display in the Conversation Section as well as manage the users. The features of the External Chat sidebar are explained below.
Assignment Tabs
The users are grouped based on who they are assigned to.
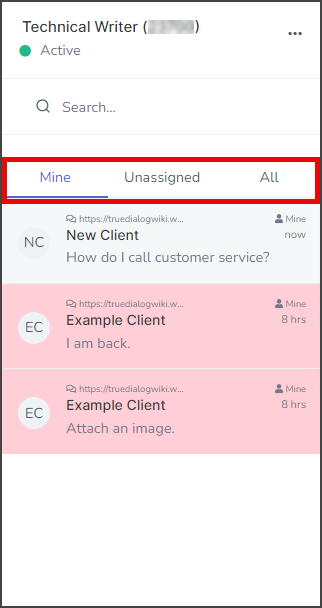
Mine
Any users with active conversations assigned to your account.
Unassigned
Any users with active conversations that have yet to be assigned to anyone.
All
All users with conversation activity, no matter who they are assigned to.
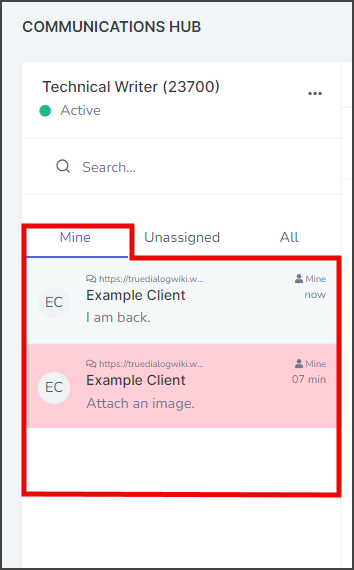
User Status
A background color indicates the connection status of a user. Grey is for users who are connected to an active Chat Widget. Red is for users who have left the Chat Widget for any reason. See the following screenshot for an example of the different user statuses.

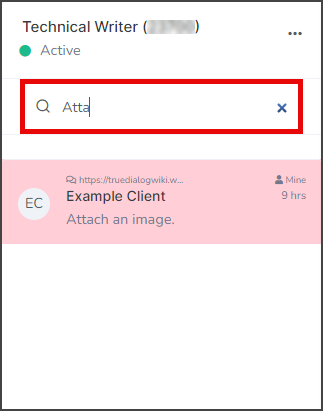
Search
You can search through all the active users and display the results in real time as you type. The search results are displayed below the search bar. The search will look for the search string in multiple fields, including first name, phone number, and contents of the last message.
Contact Menu
Right-click a user to bring up an options menu for the user.
- Mark as unread – This option turns on the unread message indicator for the user.
- Set Tag – This option allows you to set a Tag for the user. See the Set Tag section in the Contact Options Menu above.
- Assign – This option allows you to assign the user to a different account. See the Assign section in the Contact Options Menu above.
- View Profile – This option brings up a window with information about the user.
- Update Contact – This option allows you to change details about the user.
- Hide conversation – This option hides the user and conversation. Note: to unhide the conversation, search for the user and assign it to your account.
- Stop conversation – This option hides the conversation with the user from the sidebar and removes the user from all subscriptions. A confirmation window will appear to confirm your selection. Note: The messages for this user have not been deleted and can still be accessed by searching for the user.