Microsoft 365
TrueDialog Integration
After creating a campaign, the next step is to send it to your contacts. The following instructions will show you how to send the campaign immediately or at a scheduled date and time, as well as how to select the contacts to receive it.
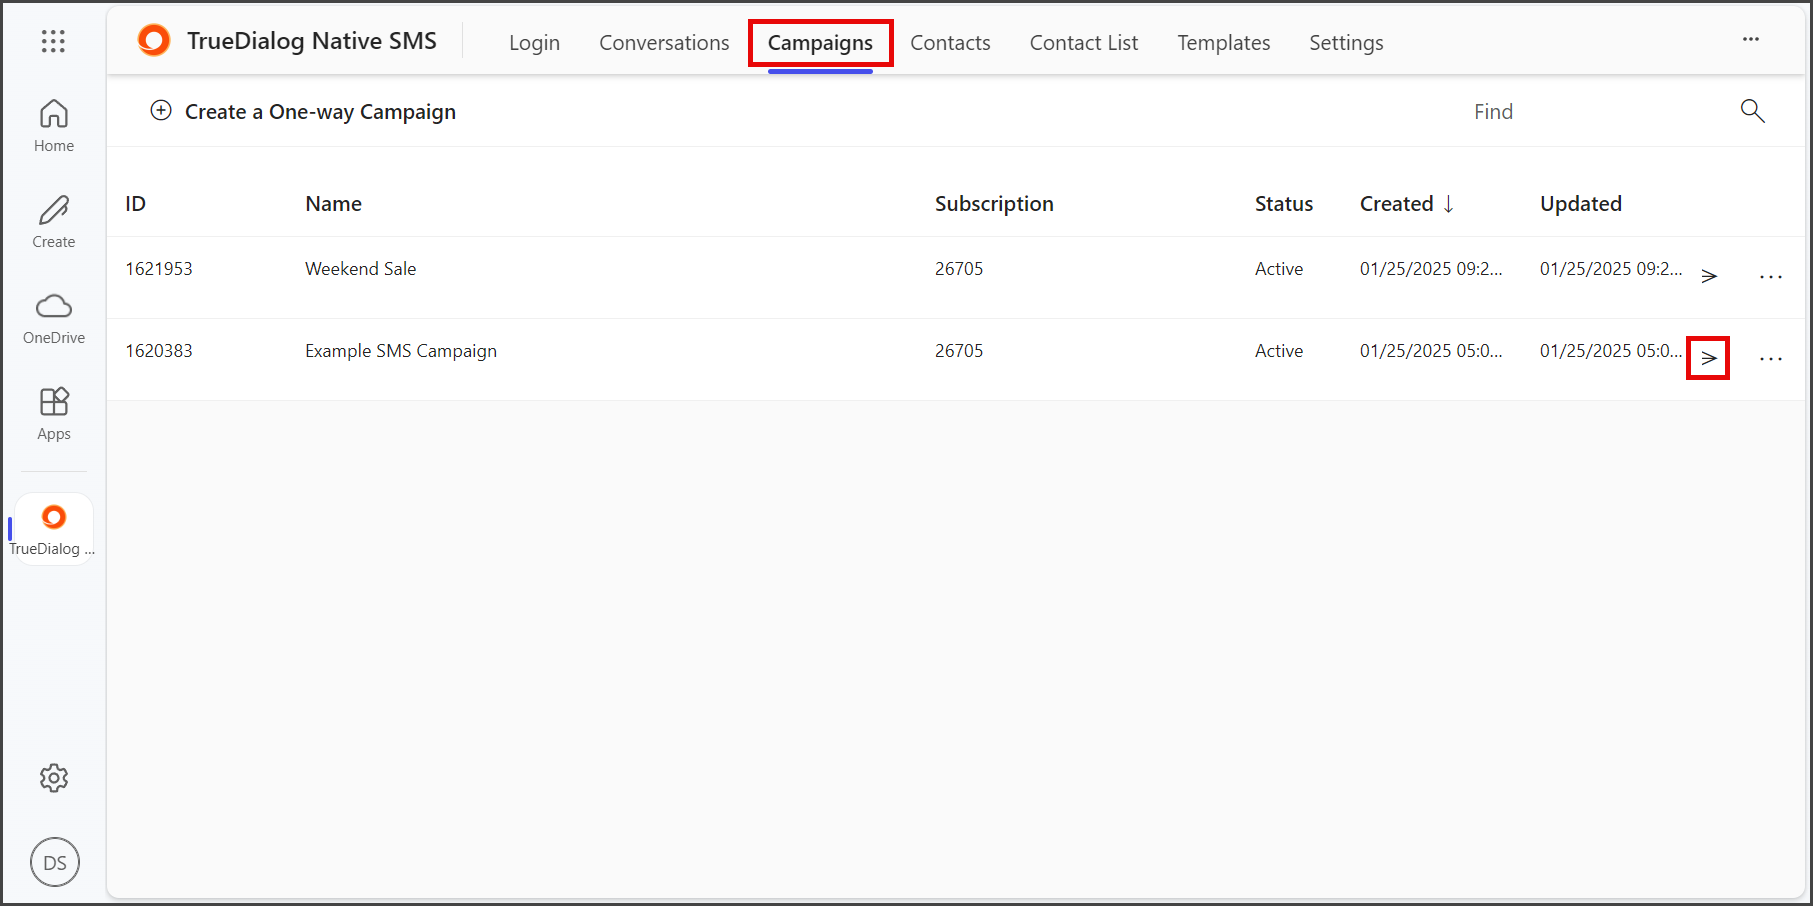
- Click the Campaigns tab.
- Click the Send icon to the right of the Status column for the campaign you want to send.

Immediate
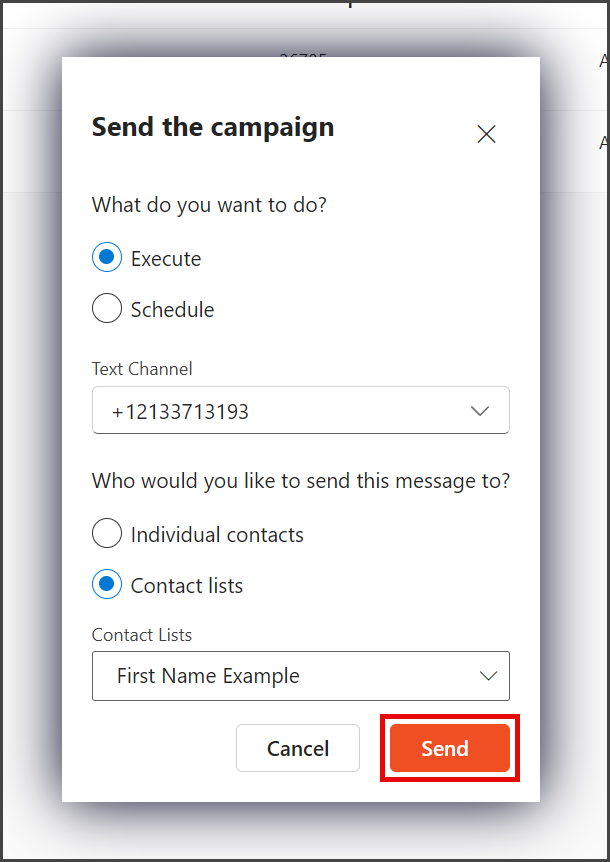
- Select Execute to send the campaign immediately after clicking Send.
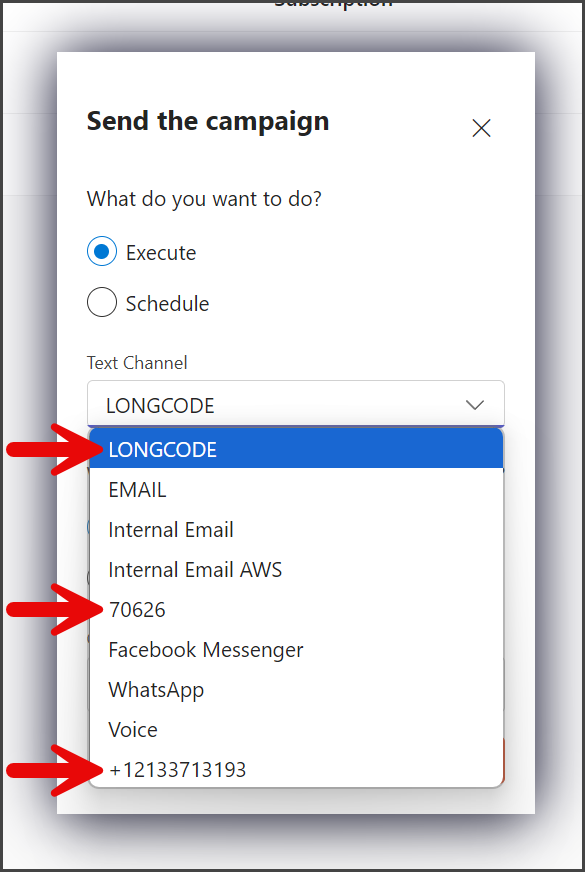
- Click the Text Channel dropdown.
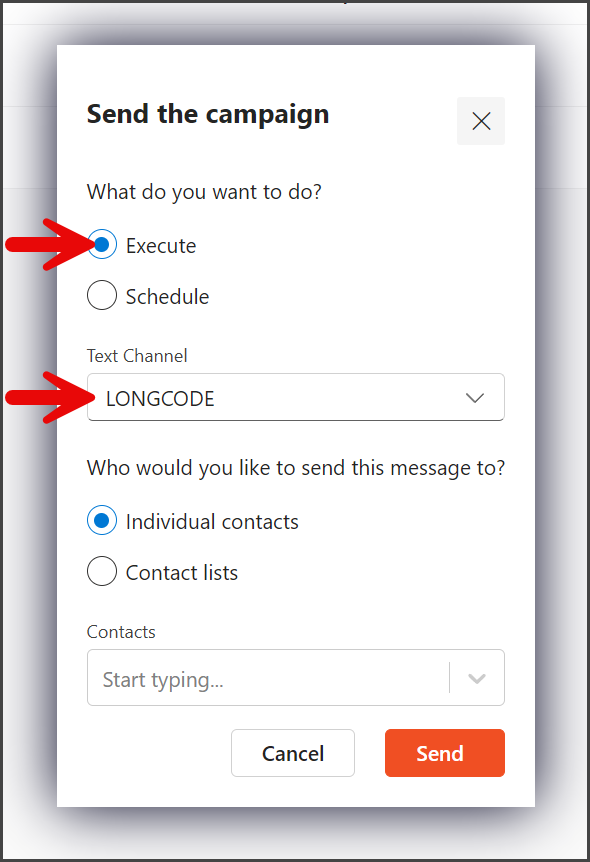
- Select the phone number from which to send the campaign.
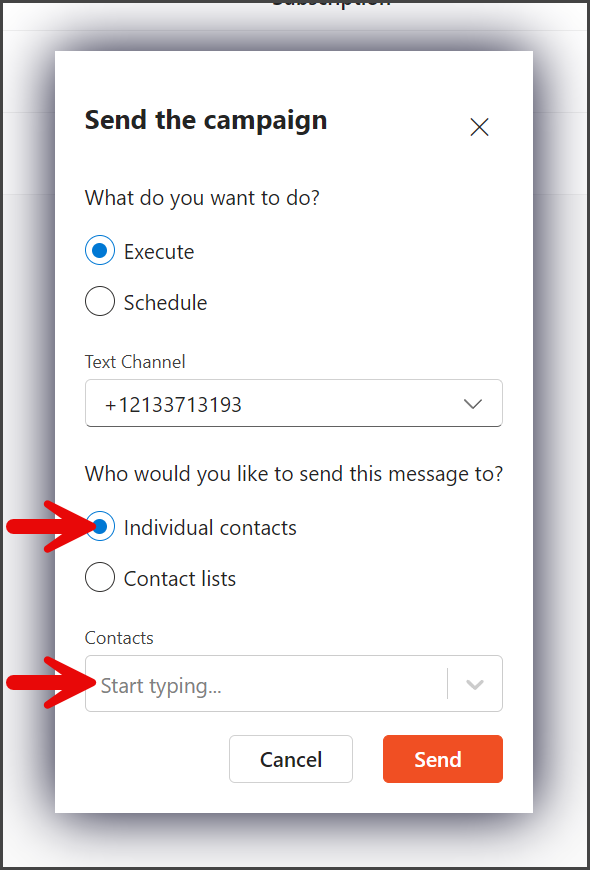
- Select the way to specify the contacts to receive the campaign.
Individual contacts:
With this option, you can add any contact to receive the campaign.
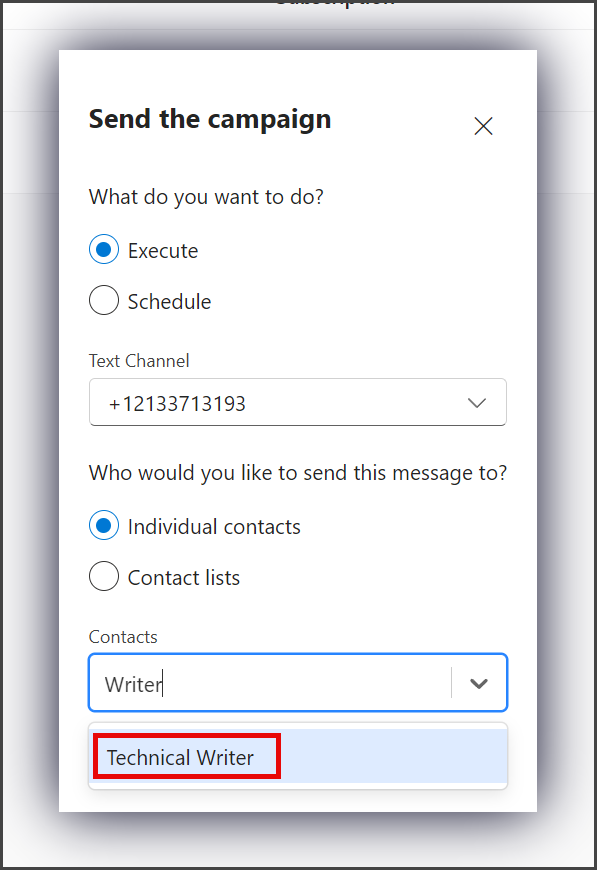
- Select Individual contacts.
- Start typing the name of the contact in the Contacts textbox. A list of contacts matching the name will appear as you type.
- Select the contact to add.
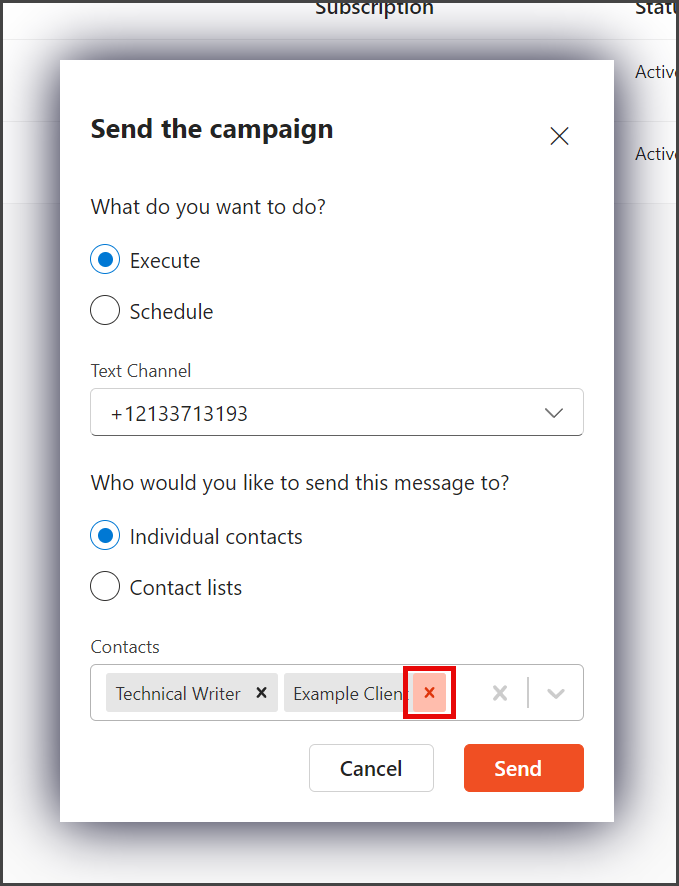
- More contacts can be added by repeating the process of typing the contact’s name and selecting the contact.
- (Optional) You can remove a contact from the list by clicking the X to the right of the contact’s name.
Contact lists:
With this option, you can select any contact list to receive the campaign.
- Select Contact lists.
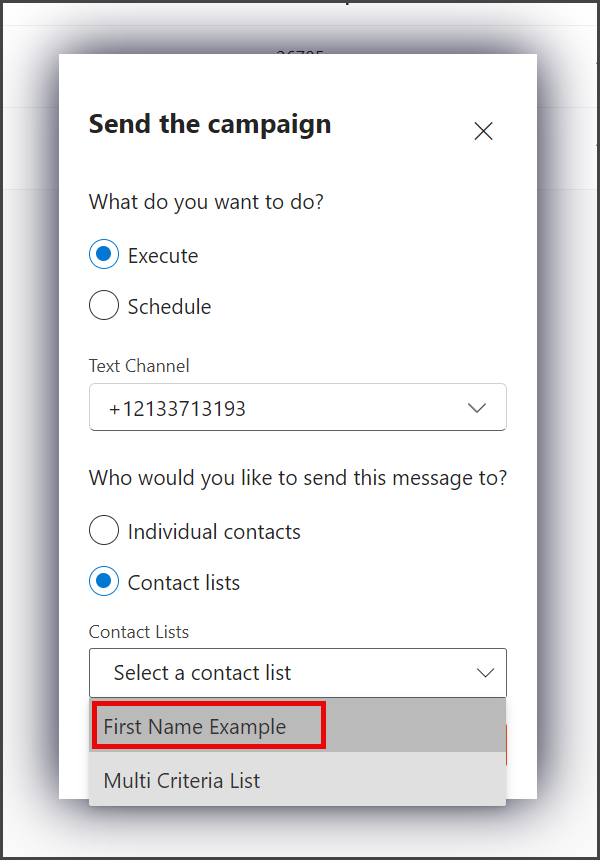
- Click the Contact Lists dropdown.
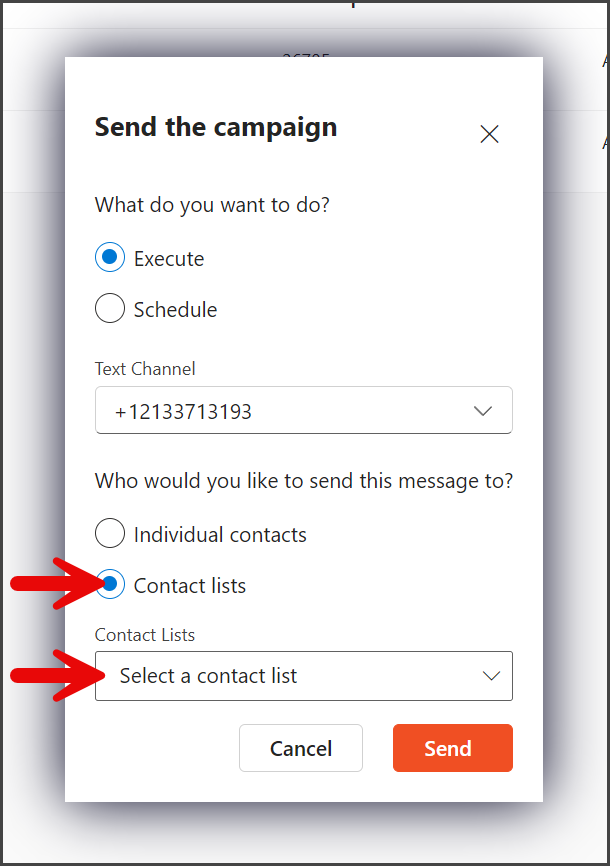
- Select the contact list to receive the campaign.
- Click Send.
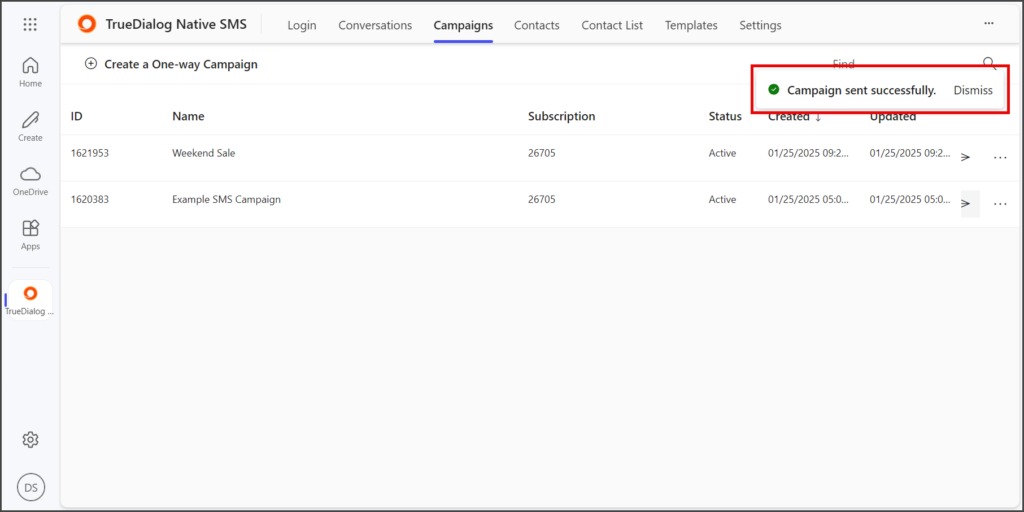
- After sending the campaign, a success message will appear in the upper right corner.

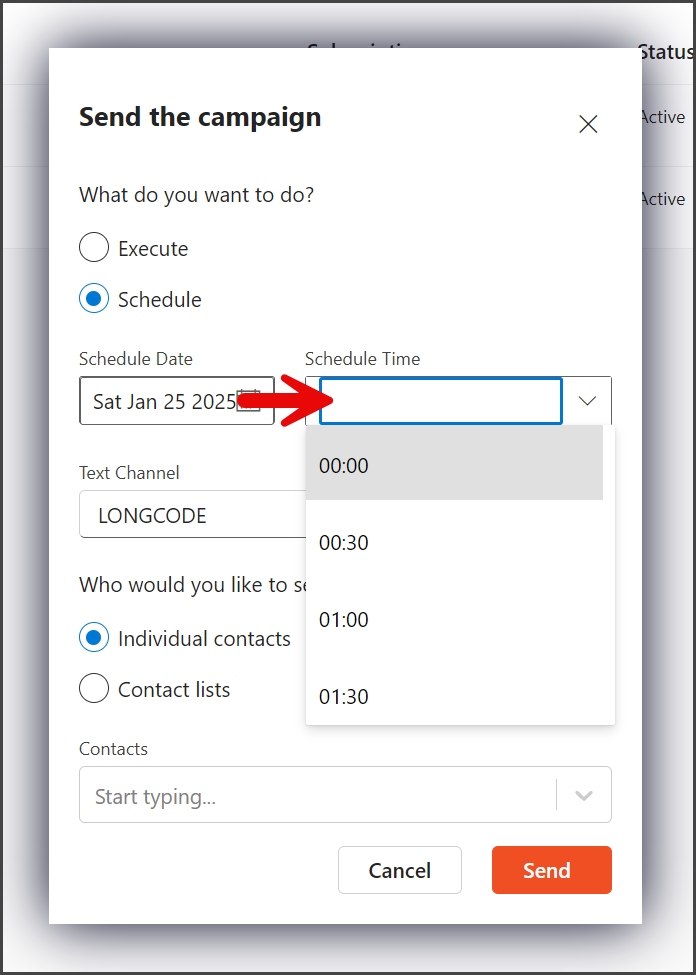
Scheduled
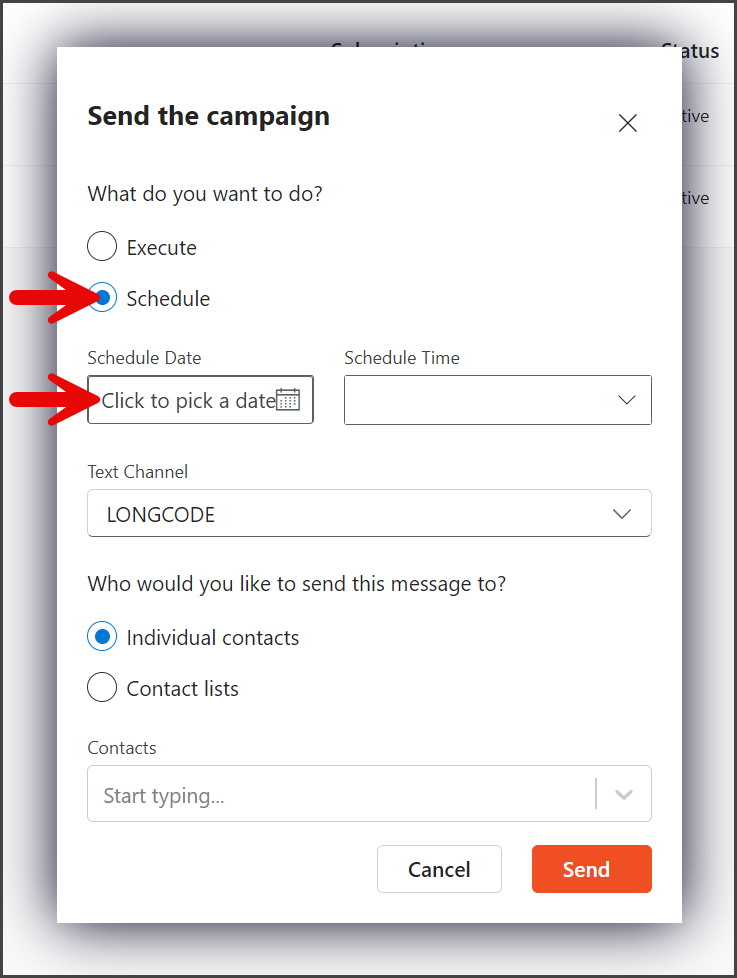
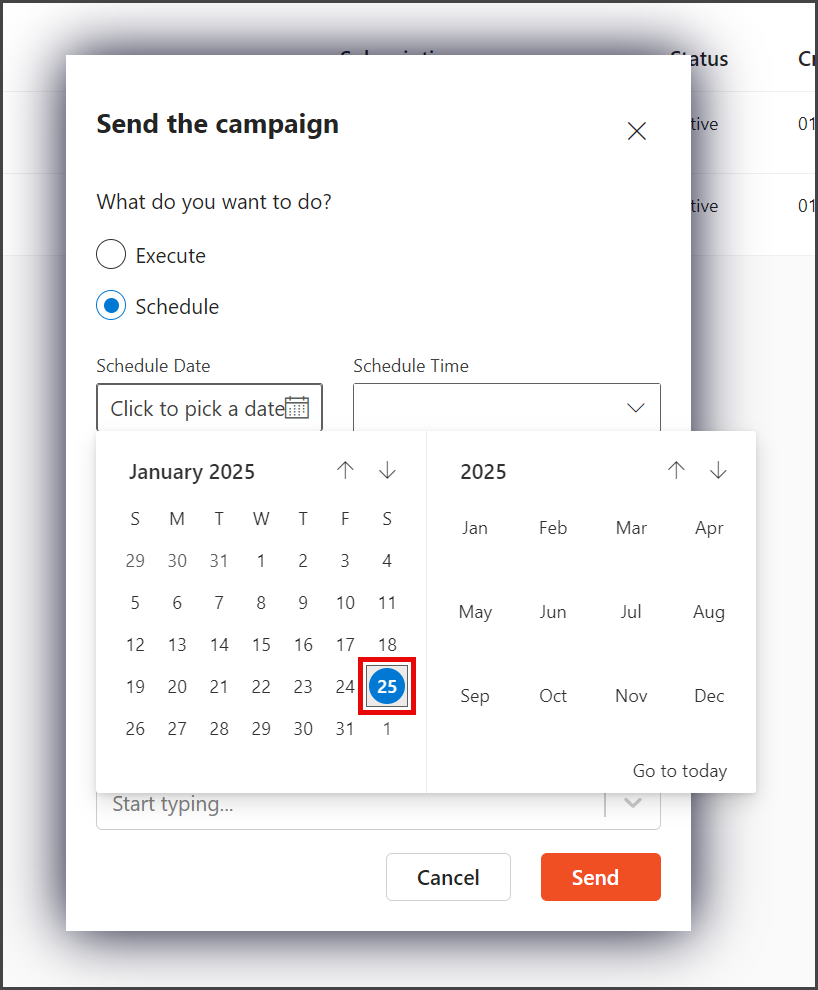
- Select Schedule to send the campaign at a scheduled date and time.
- Click Schedule Date to open the date picker widget.
- Use the date picker widget to select the date to send your campaign.
- Click the Schedule Time dropdown.
- Select or enter the time to send the campaign.
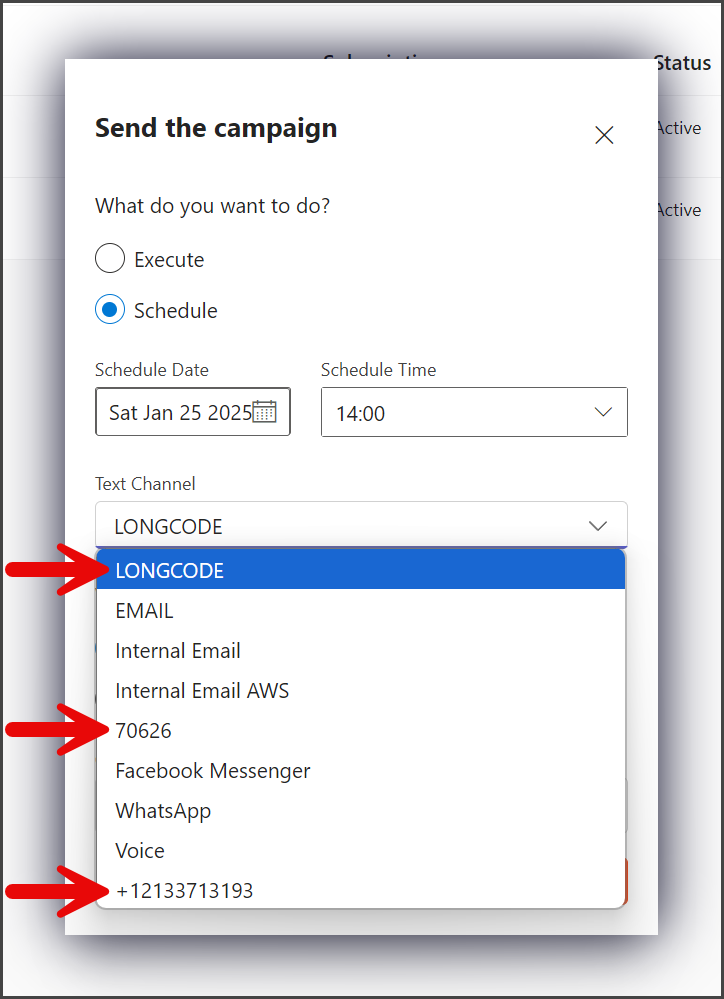
- Click the Text Channel dropdown.
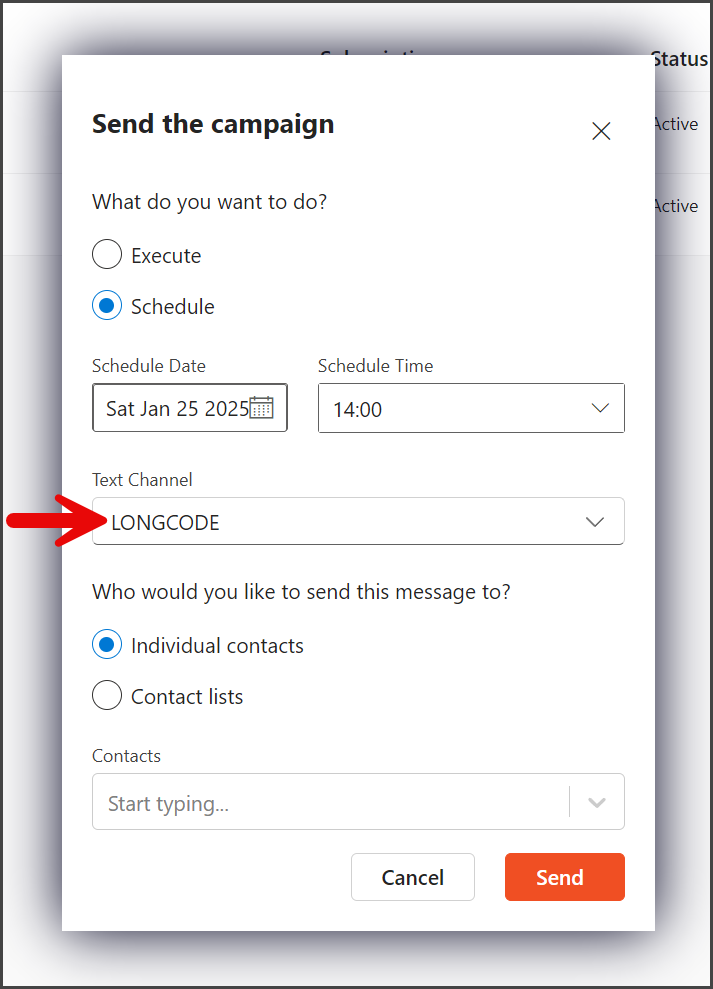
- Select the phone number from which to send the campaign.
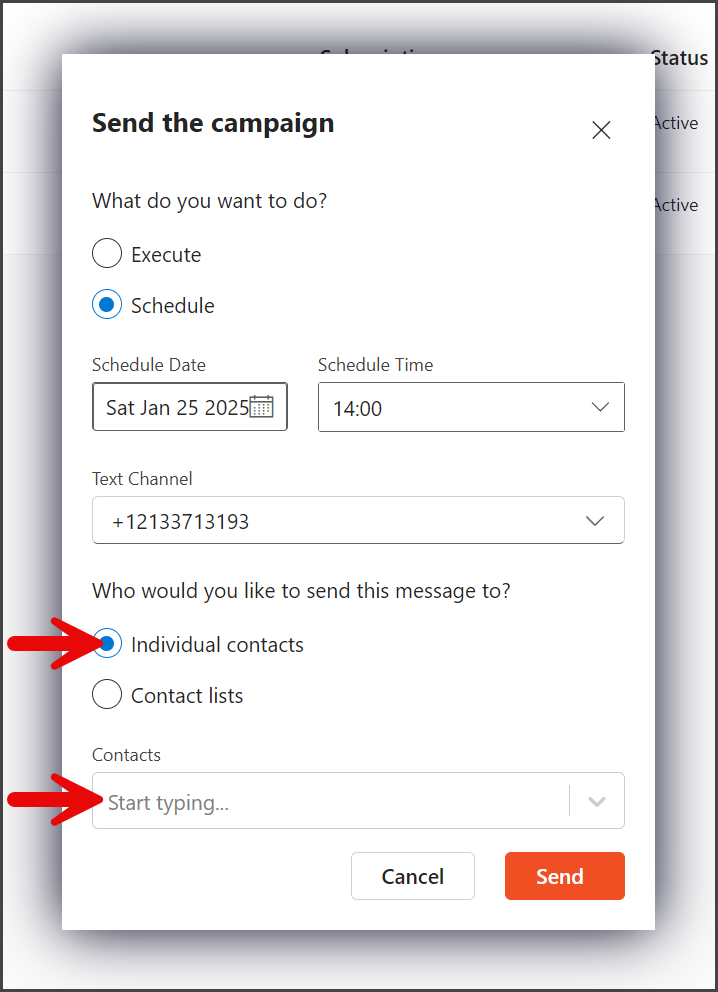
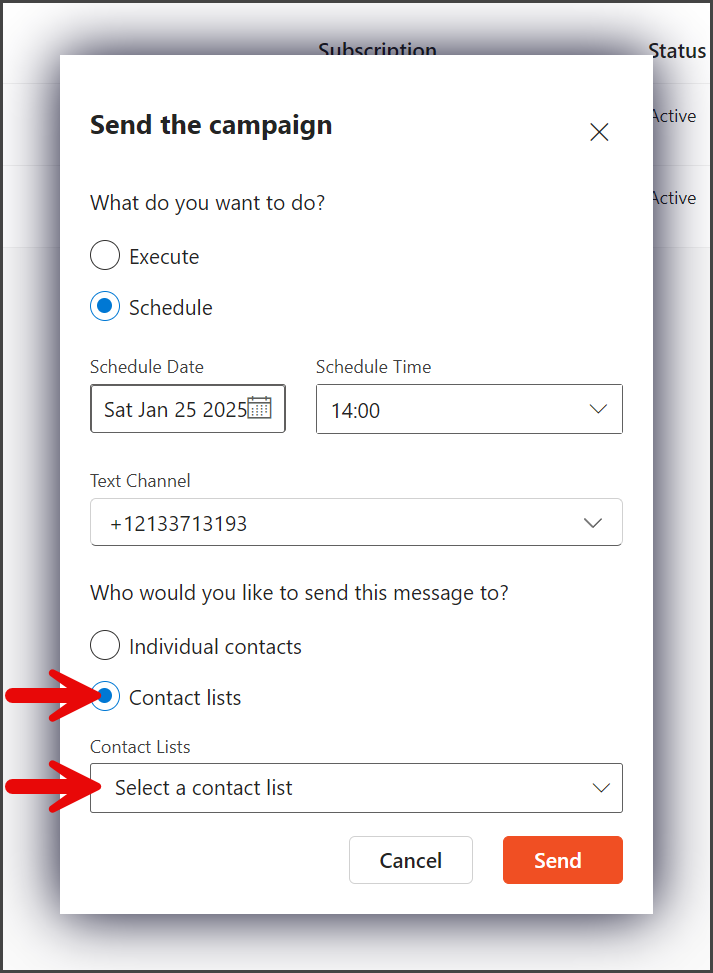
- Select the way to specify the contacts to receive the campaign.
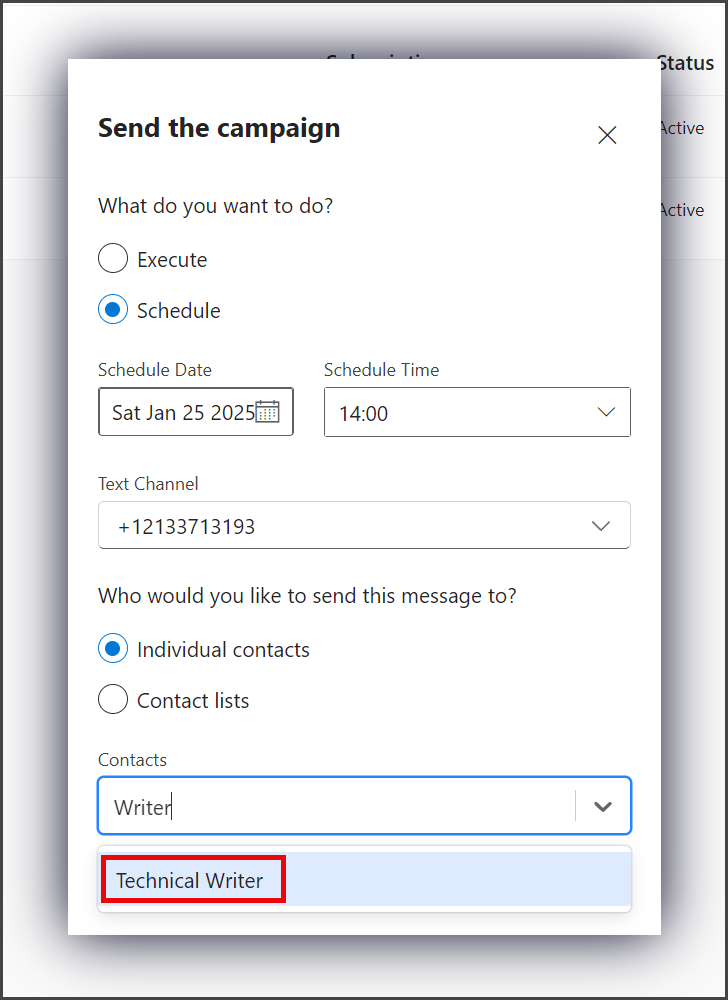
Individual contacts
With this option, you can add any contact to receive the campaign.
- Select Individual contacts.
- Start typing the name of the contact in the Contacts textbox. A list of contacts matching the name will appear as you type.
- Select the contact to add.
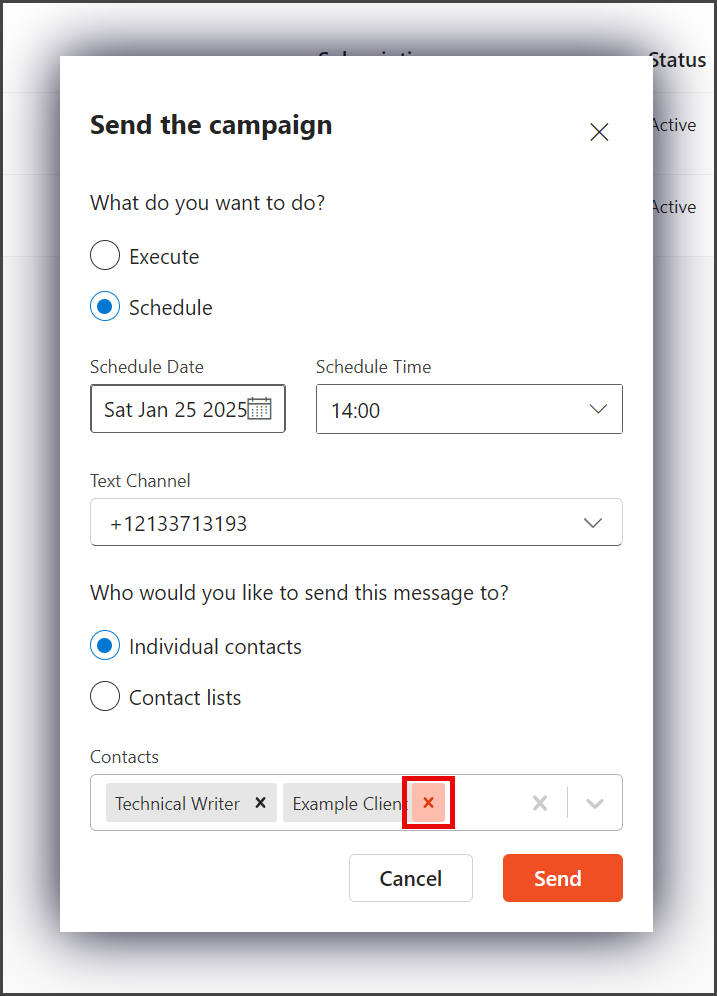
- More contacts can be added by repeating the process of typing the contact’s name and selecting the contact.
- (Optional) A contact can be removed from the list by clicking the X to the right of the contact’s name.
Contacts lists:
With this option, you can select any contact list to receive the campaign.
- Select Contact lists.
- Click the Contact Lists dropdown.
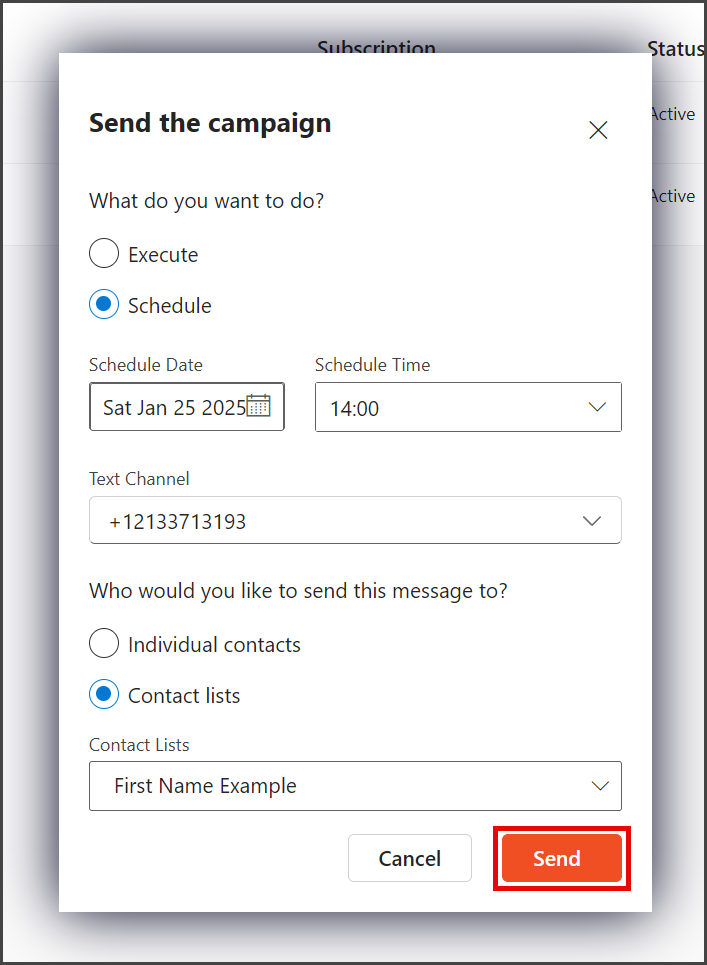
- Select the contact list to receive the campaign.

- Click Send.
- After sending the campaign, a success message will appear in the upper right corner.