Microsoft 365
TrueDialog Integration
This article will teach you how to create, edit, and utilize templates in your Conversations. A template comprises pre-written text that you can easily insert into your message. It is important to note that templates are only available in Conversations messaging.
Creating a Template
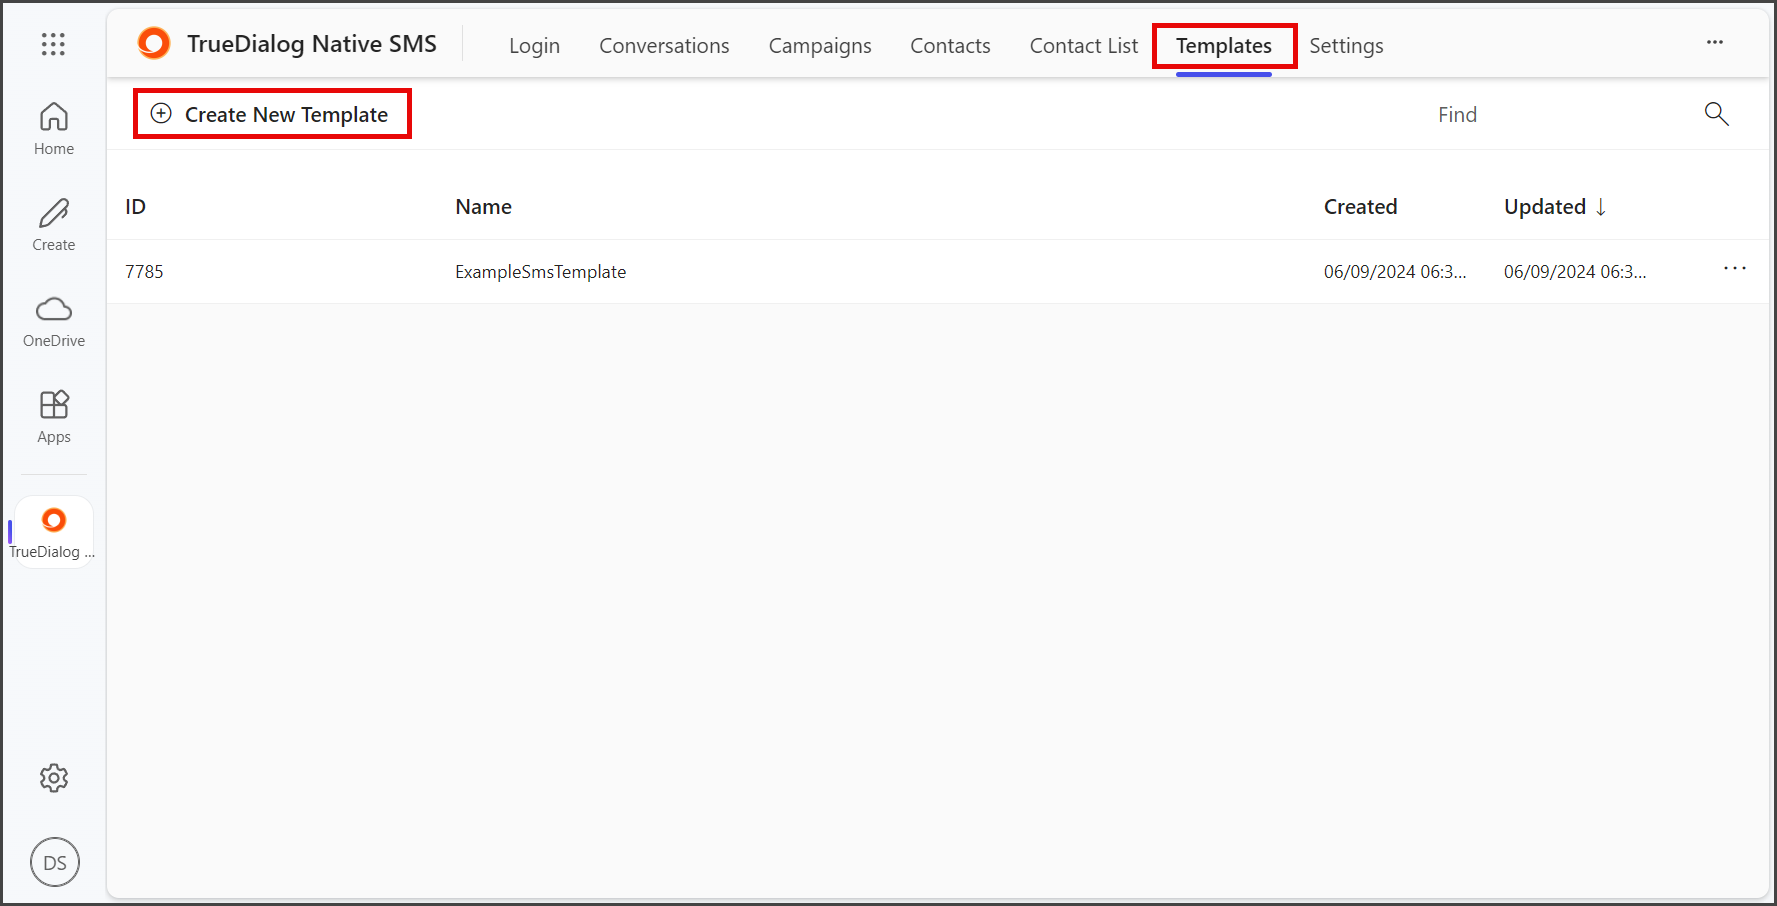
- Click the Templates tab.
- Click Create New Template.

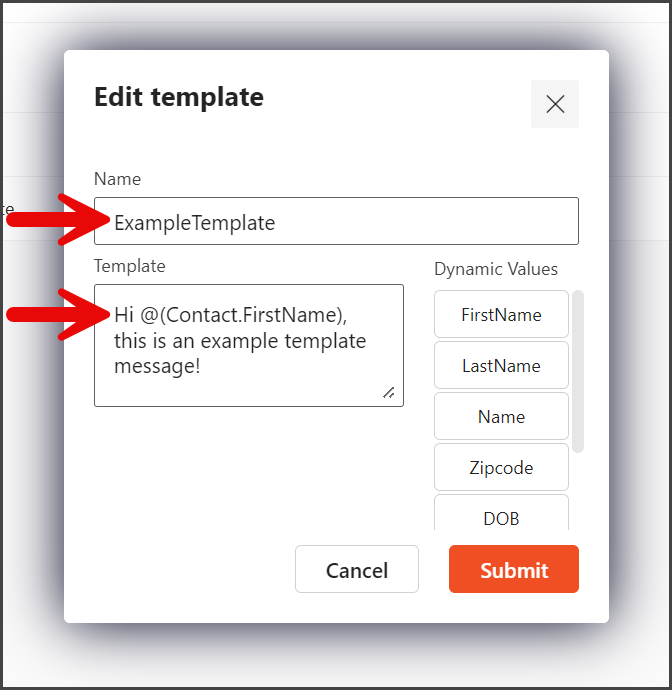
- In the Name textbox, enter a template name. Note: The template name must not contain spaces.
- Enter the template message in the Template textbox.
- (Optional) The Template textbox can be resized by clicking and dragging the resize icon in the box’s bottom right corner.
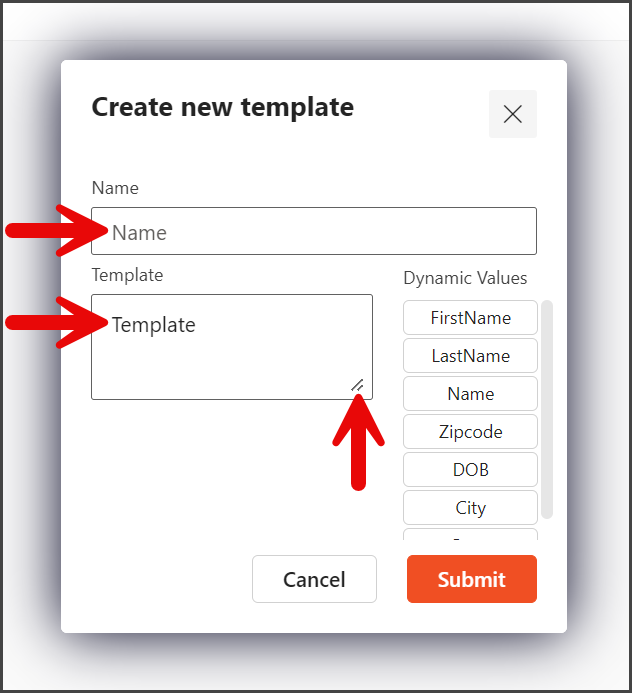
- (Optional) Click a Dynamic Value to append it to the end of the text in the Template textbox. When a message containing Dynamic Values is sent, the corresponding attribute value for the contact will be inserted into the message. If the selected attribute for the contact is blank, [Empty] will be added to the message instead.
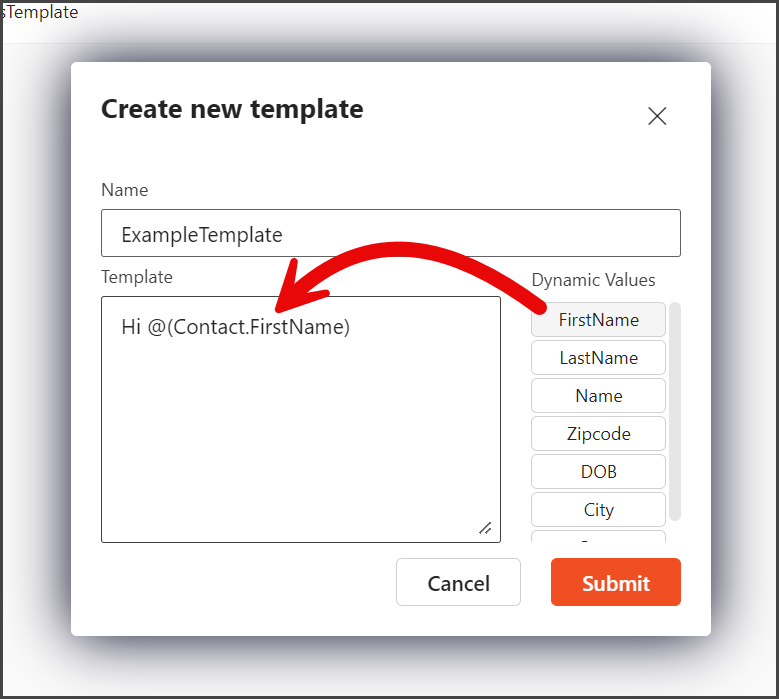
- Click Submit.

Editing a Template
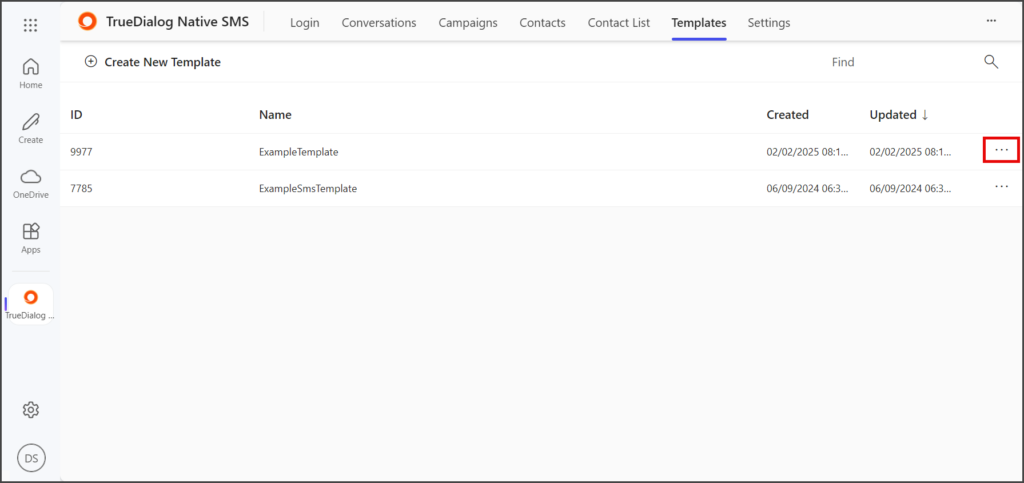
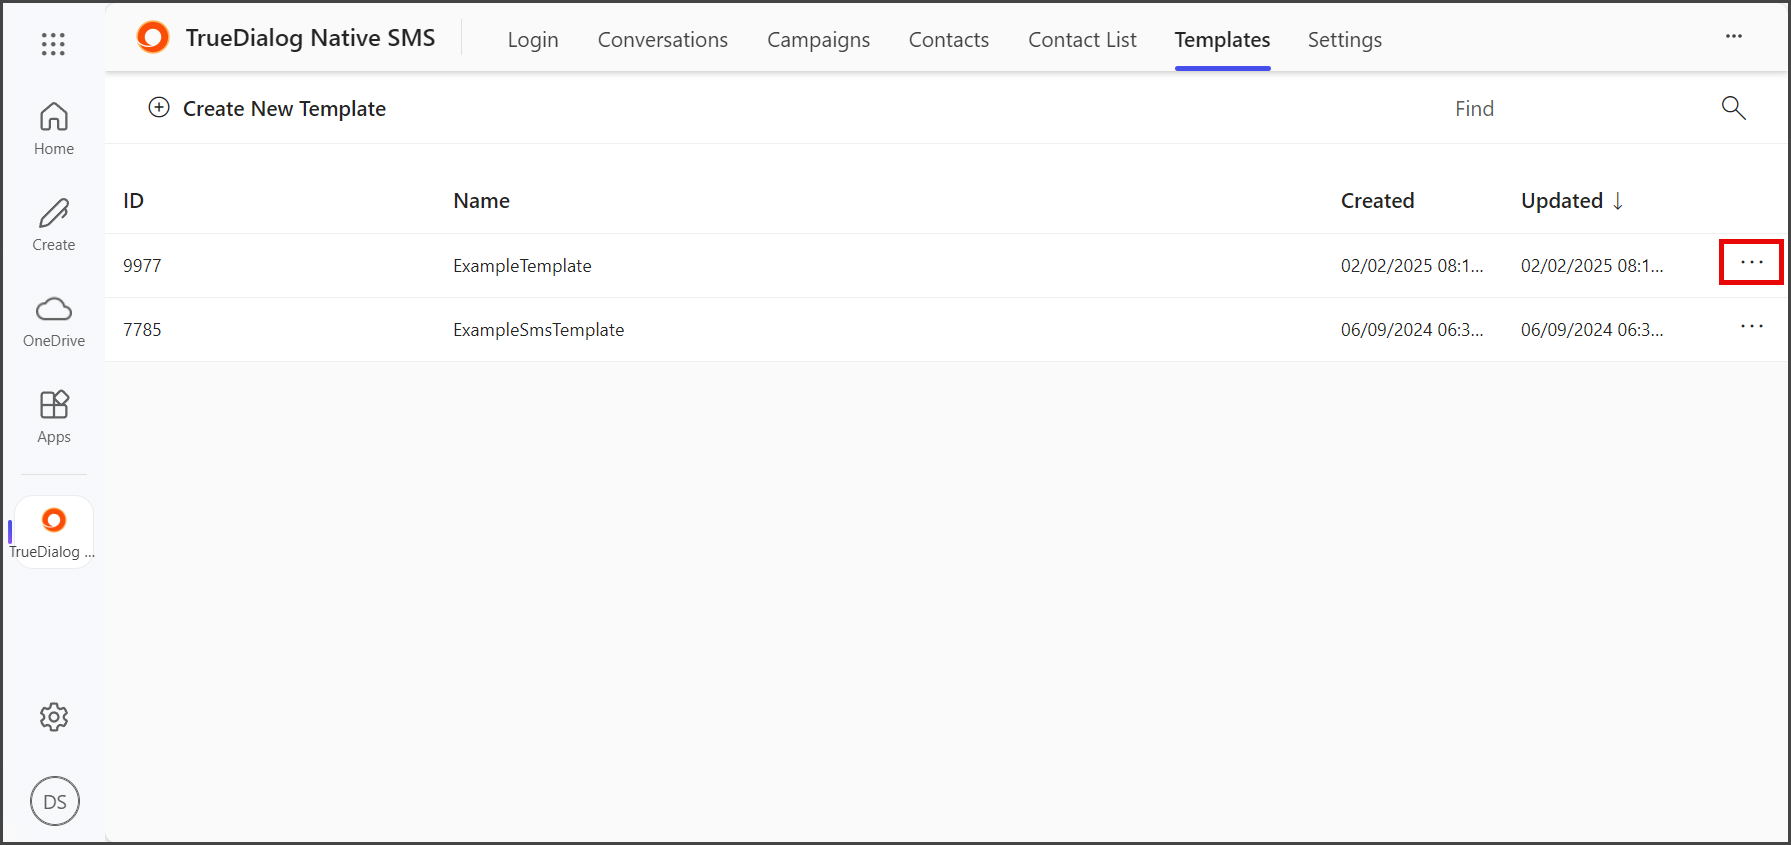
- Click on the Three Horizontal Dots at the end of the row for the template you want to edit.
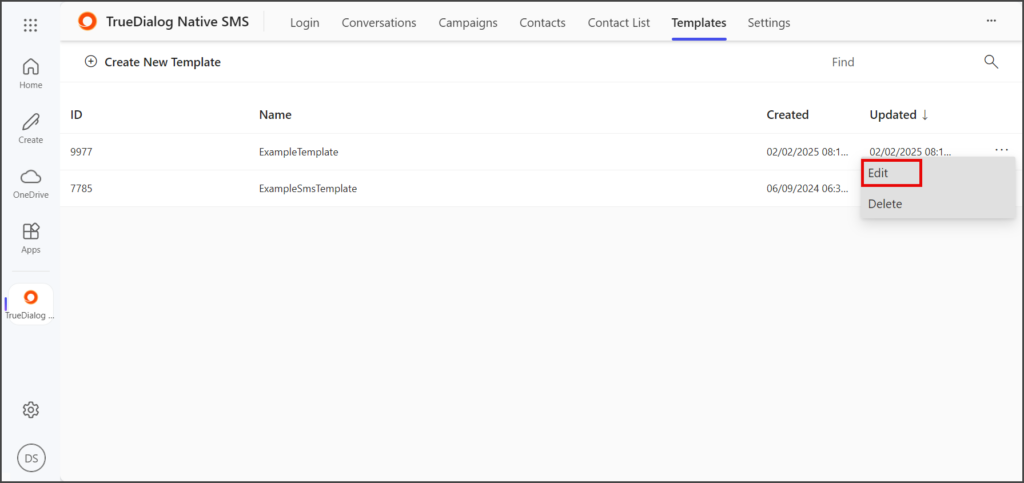
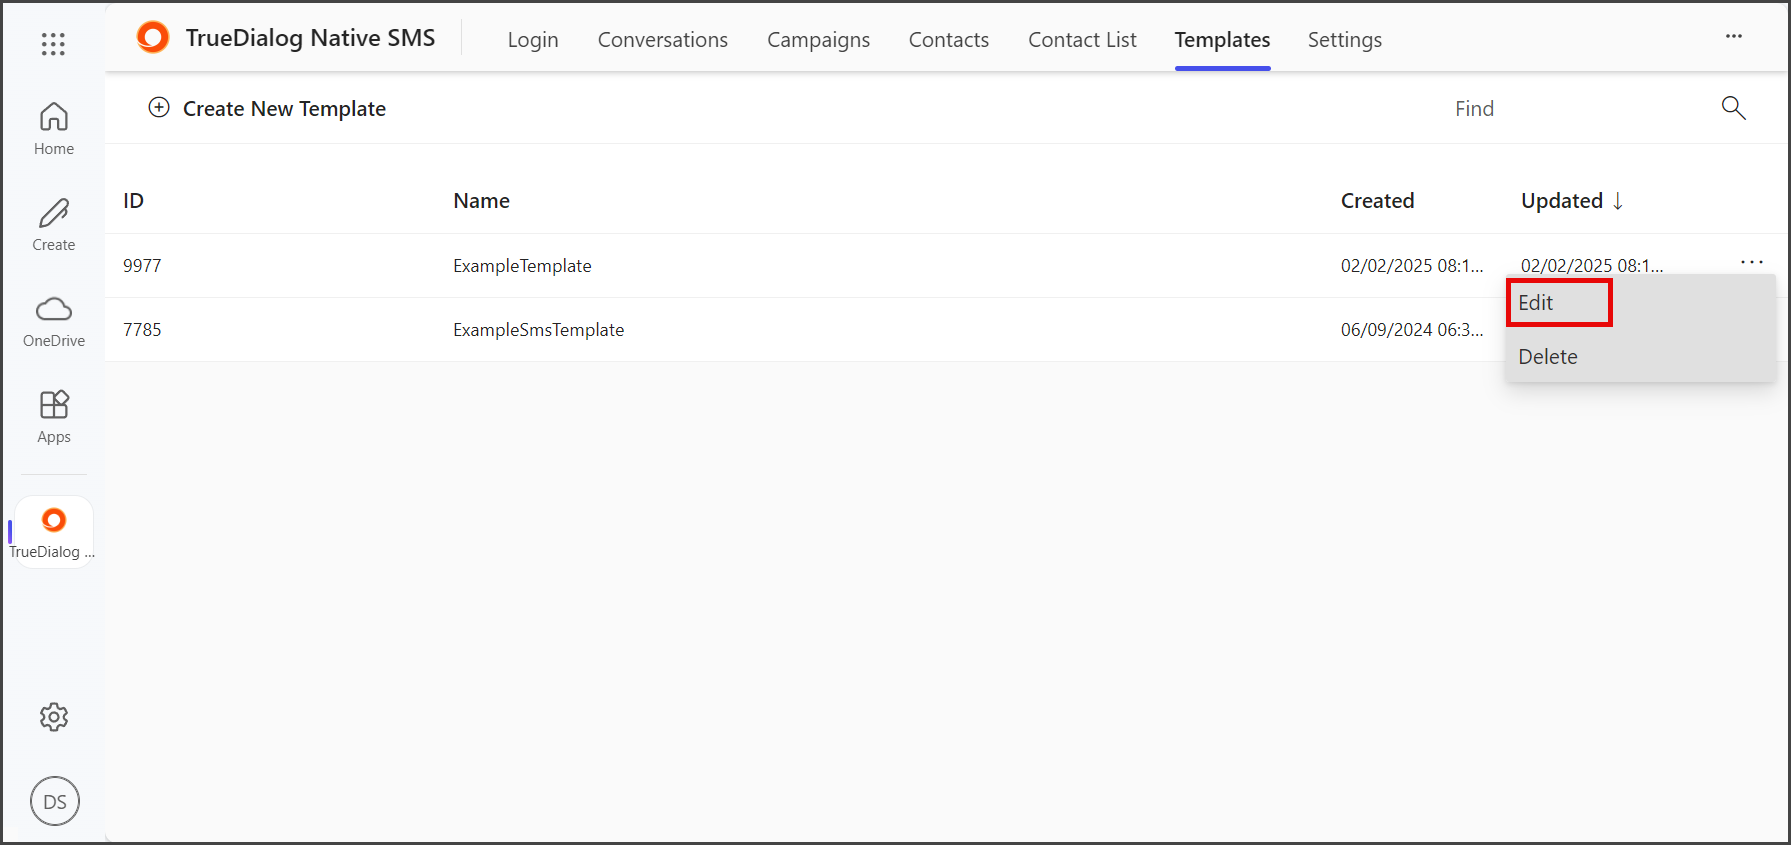
- Click Edit.
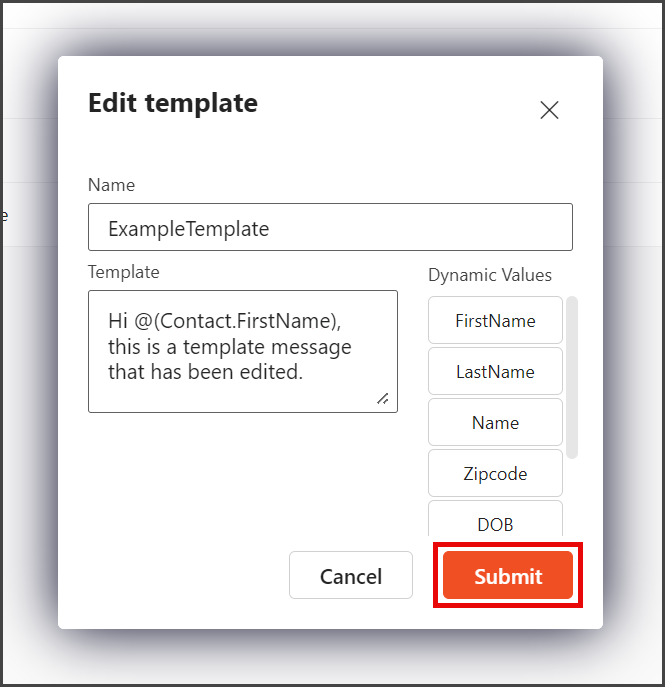
- (Optional) Edit the Name textbox.
- (Optional) Edit the Template textbox. The Creating a Template section above provides instructions for adding dynamic content.
- Click Submit to save the changes.
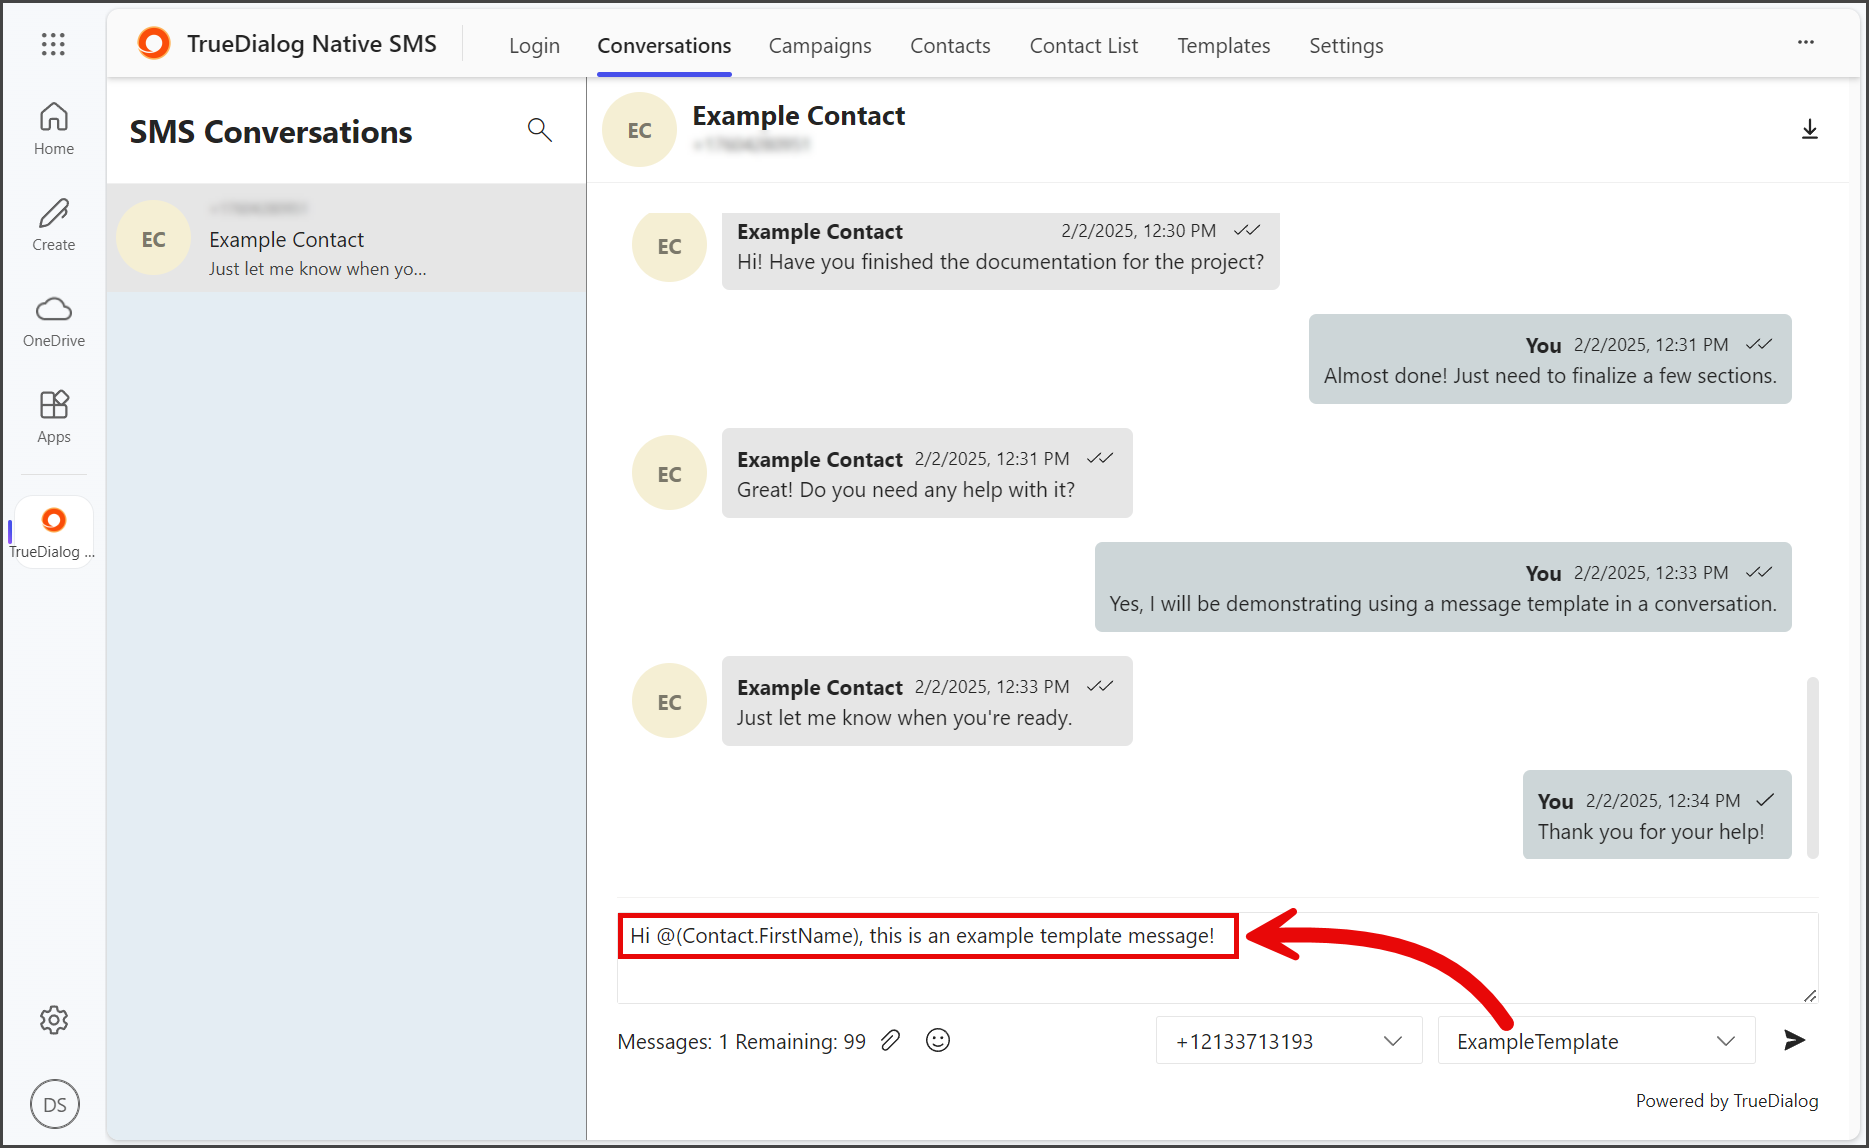
Using a Template
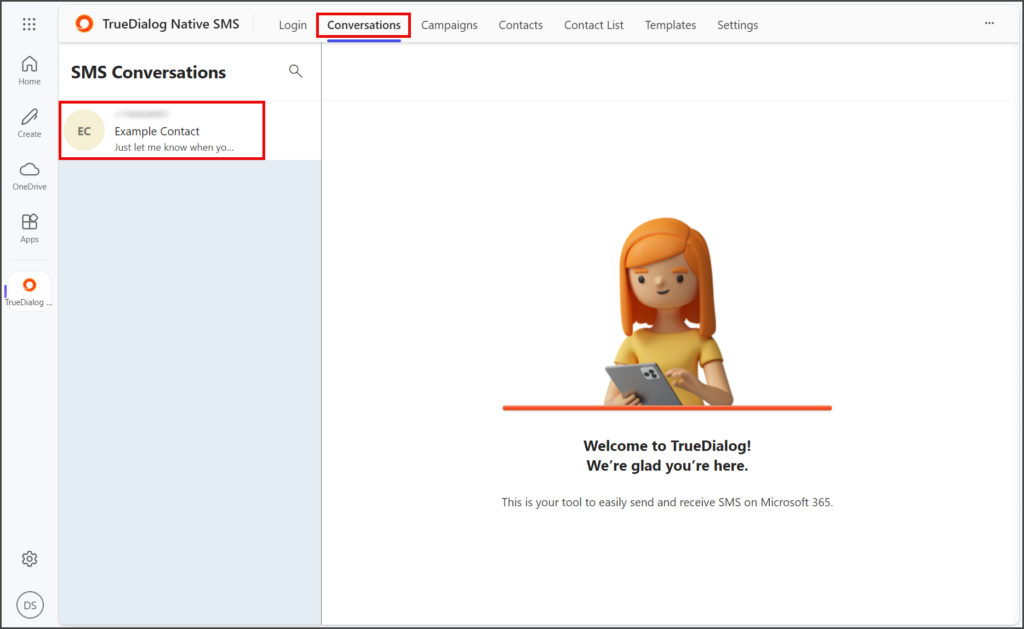
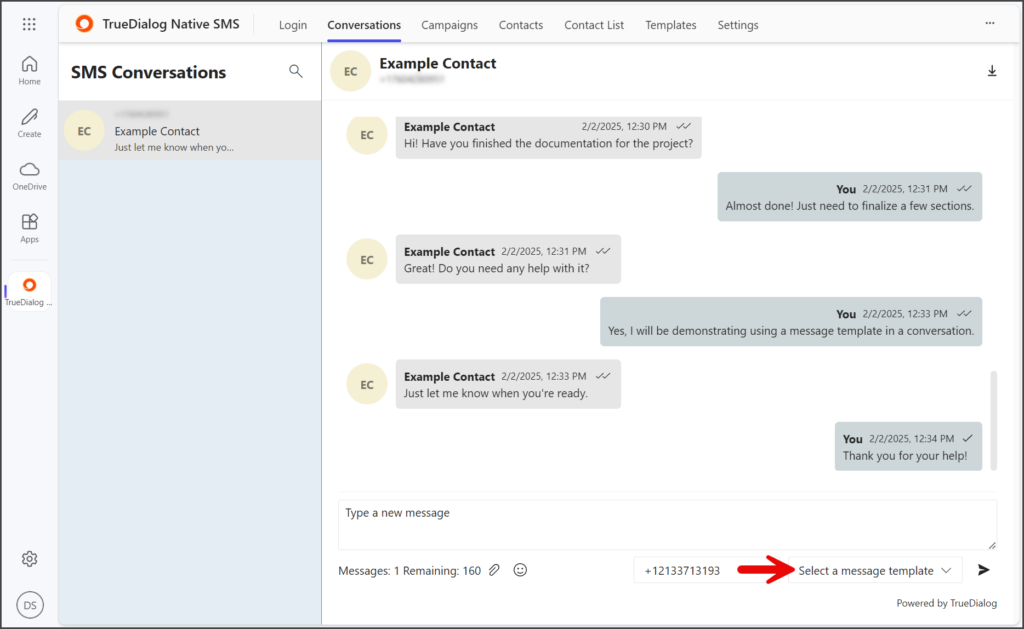
- Click the Conversations tab.
- From the left sidebar, click the contact to send the template.
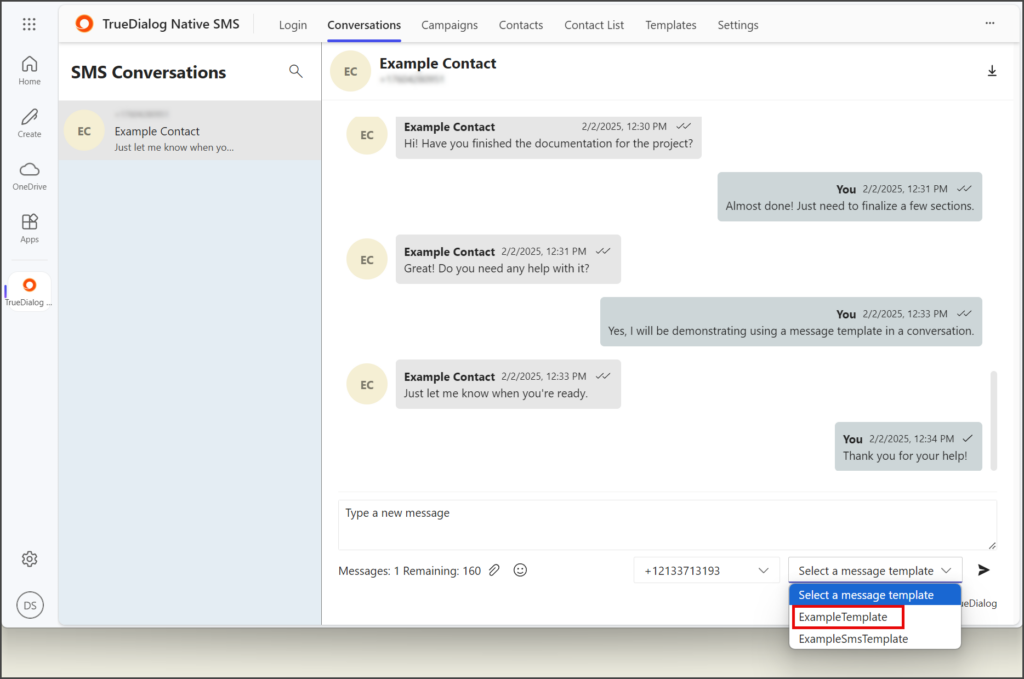
- Click the Select a message template dropdown.
- Select the template to use.
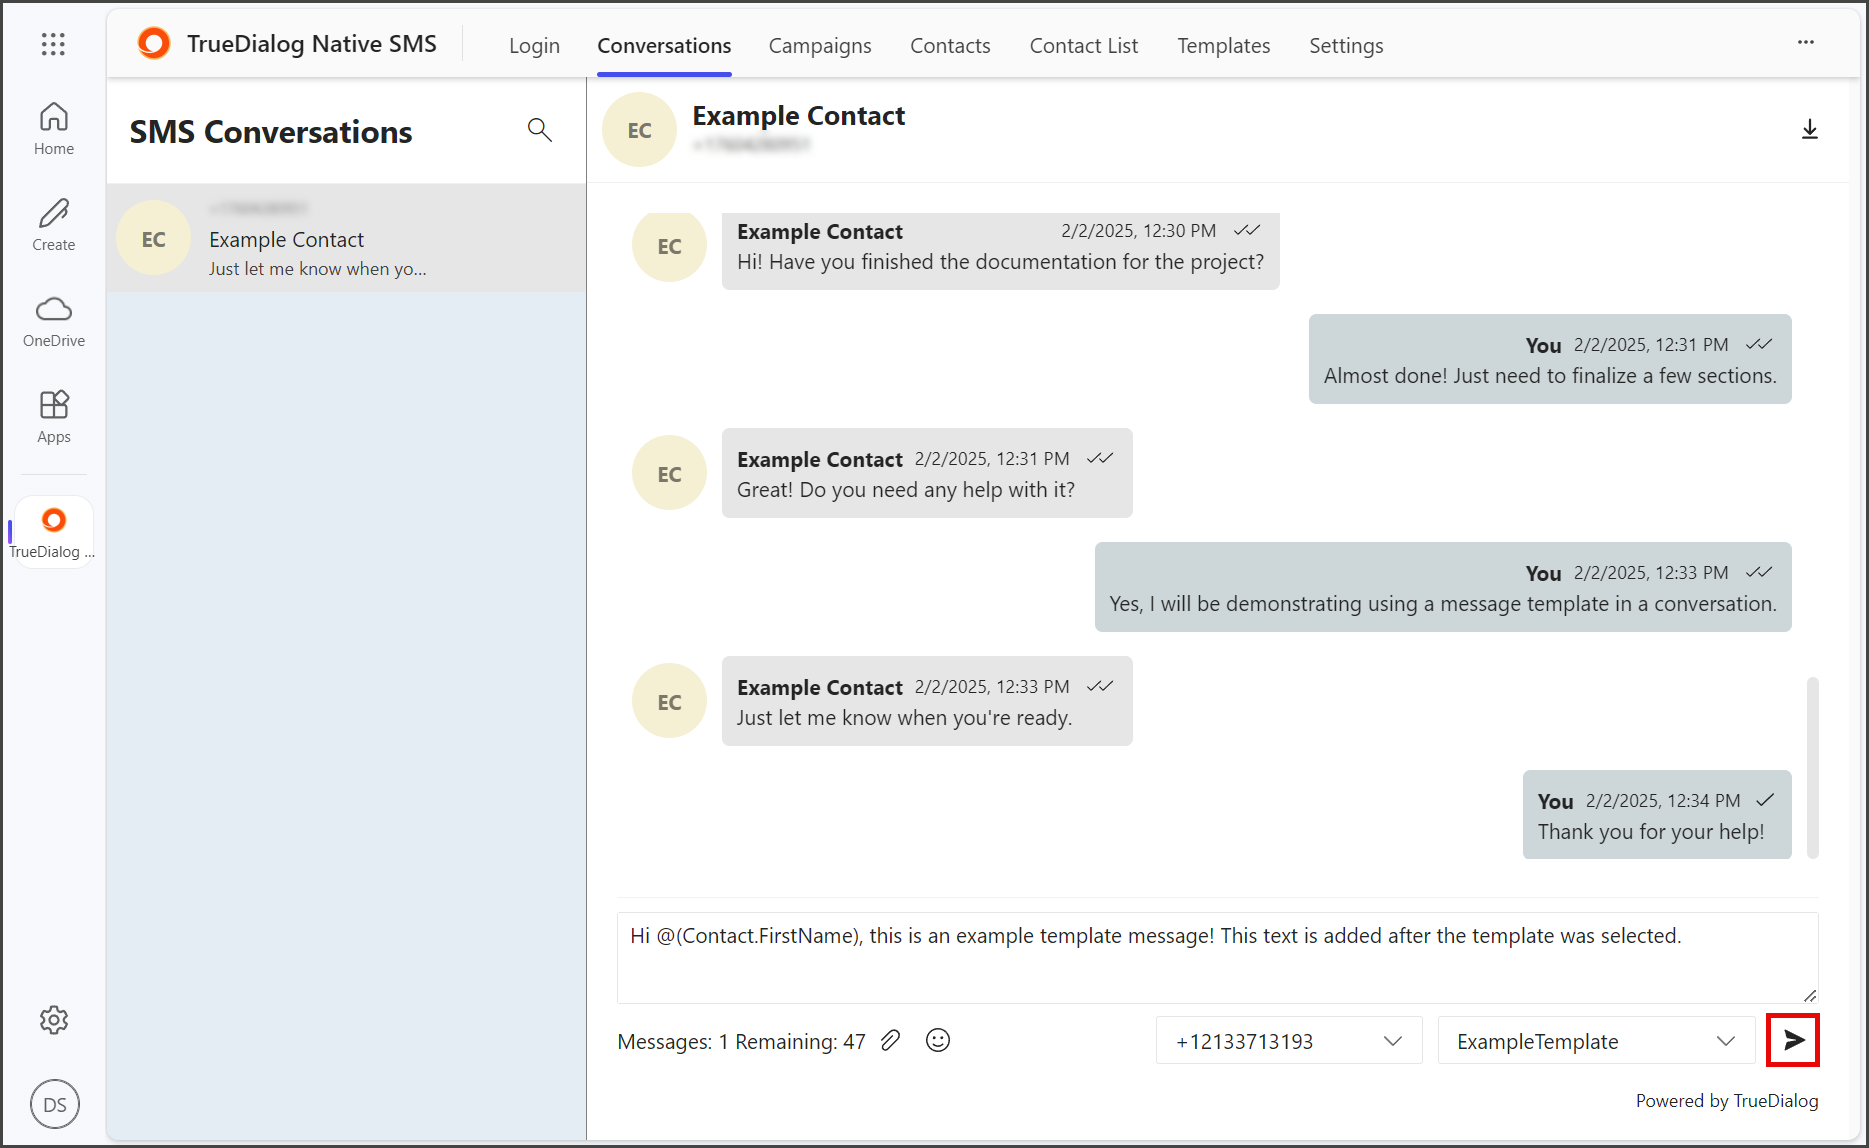
- Once selected, the template’s message will appear in the Message textbox.
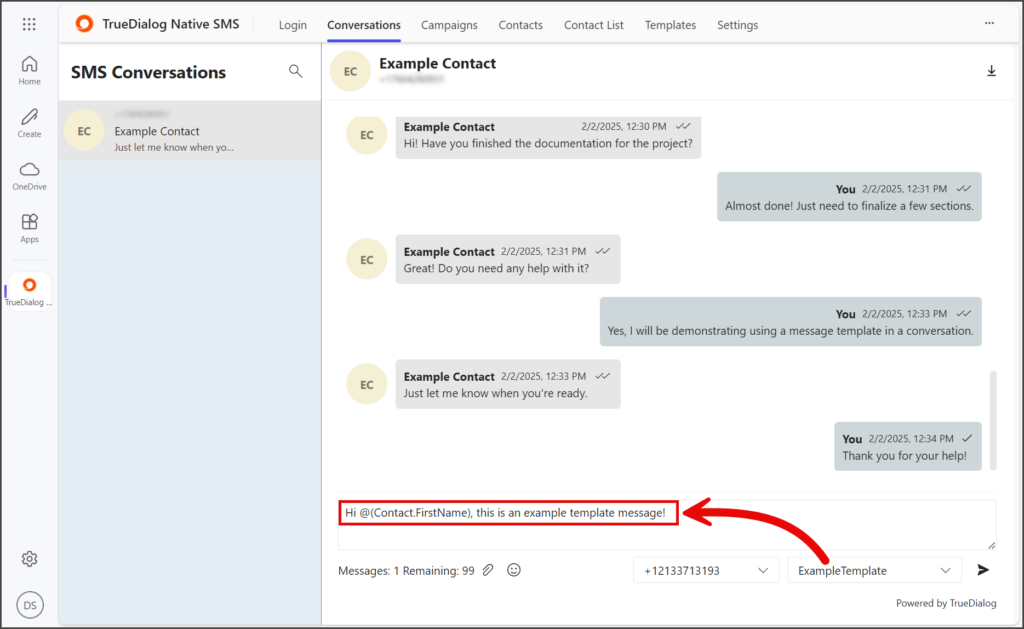
- (Optional) Edit the Message textbox to change or add to it.
- Click the Paper airplane icon to send your message.

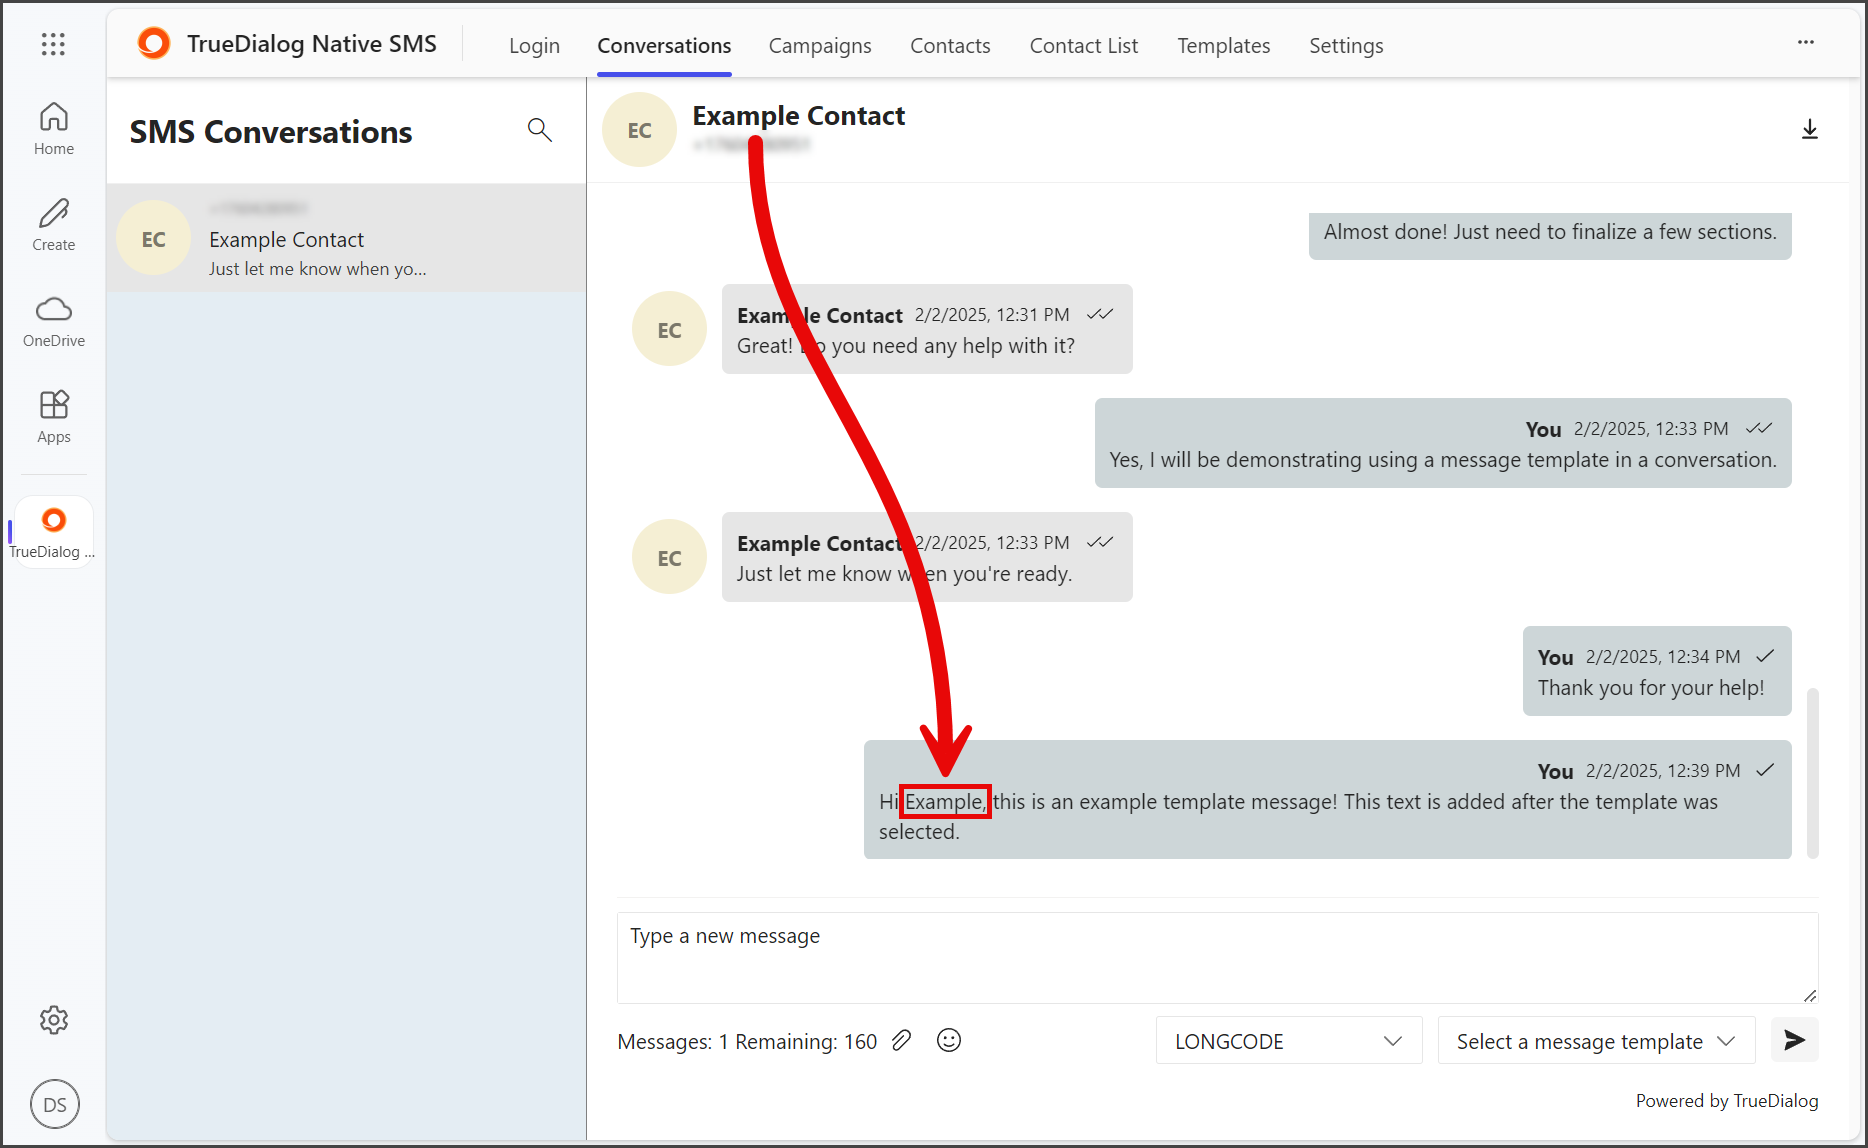
- If your template included Dynamic Values, you will see the actual values sent to the contact in the message thread.